- Home
- Steps to Setup On-Premise PAM
Privileged Access Management Configuration Guide | PAM Solution Installation
The miniOrange privilege access management (PAM) is a service that allows administrators to manage the privilege accounts and the management of the resources they have access of. In today's digital landscape, ensuring the security of privileged accounts is crucial for organizations of all sizes. Privileged accounts, such as administrator or root accounts, hold extensive access rights and control over critical systems and sensitive data. Therefore, it becomes imperative to implement a robust Privileged Access Management solution that helps mitigate the risks associated with unauthorized access and potential security breaches.
miniOrange PAM offers a comprehensive set of features and capabilities to secure and manage privileged accounts effectively. By centralizing authentication and access control, miniOrange PAM enables organizations to enforce strict security policies, reduce the attack surface, and monitor privileged activities, ensuring compliance with industry regulations.
In this guide, we will take you through the step-by-step process of setting up miniOrange PAM, including the installation and configuration of its core components, integration with existing systems, and best practices for optimizing the solution's performance and security. Whether you are an IT administrator, a security professional, or an organization looking to bolster its privileged account security, this guide will provide you with the necessary knowledge and instructions to get started with miniOrange PAM.
System Requirements
miniOrange On-Premise server has the following system requirements. This section lists recommended versions and requirements.
- Operating System: Any operating system that runs minimum Java 8
- CPU Core: 4 Core
- RAM: 8GB or above
- HDD: 80GB or above
- Python: 3.8 or above
- JAVA Environment: JDK 1.8.0_251 and above
- Server Access Policies: Port 80 (HTTP Port) 443 (HTTPS Port), RDP Port(Windows Server)- For login, SSH Port(Linux Server)- For login
- Database: MySQL.
Install On-Premise Server
You can install miniOrange On-Premise server in following ways:
Follow the steps to deploy miniOrange On-Premise server on your operating system:
- Go to home directory of user and make sure you are not logged in as root user.
cd ~
- Download the zip distribution and put it on the sever where you want to install miniOrange PAM.
wget https://miniorange-pam.s3.us-east-2.amazonaws.com/miniorange-pam-1-0.zip
- If wget is not installed in the system and the above command through any error install it with the below command.
sudo apt install wget
- SSH into that server or open the terminal and unzip the file with the below command.
unzip pam_release_1-0.zip
- If unzip is not installed in the system and the above command through any error install it with the below command
sudo apt install unzip
- Once it is unzipped, type “ ls “ to list all the directories available in the current directory. It should show your the below files.
- Once the unzip is complete, run the below command to provide execute access to the installation script.
sudo chmod u+x pam_build.sh
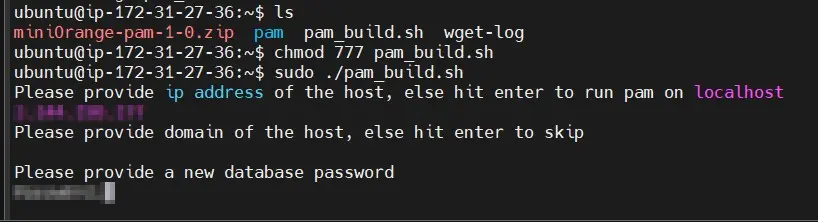
- Run the following command to execute the installation script. It will ask you to provide IP address, host name and a password for database.
sudo ./pam_build.sh
- Enter IP address if you do not want to run it on only localhost.
- If you do not have a host name then you can skip it for now otherwise enter the domain on which you want to run the PAM server.
- Enter the password of the database ( this will be used by the pam server to store information).
- It will ask you for some permissions, click on yes and continue till the script run is successful.
- Once the script is done, you can visit the pam server on your browser by entering the IP/host on the browser. By default it will be running on http.
- It should show you the registration/Sign up page. Provide all the details and click on Create an account button.
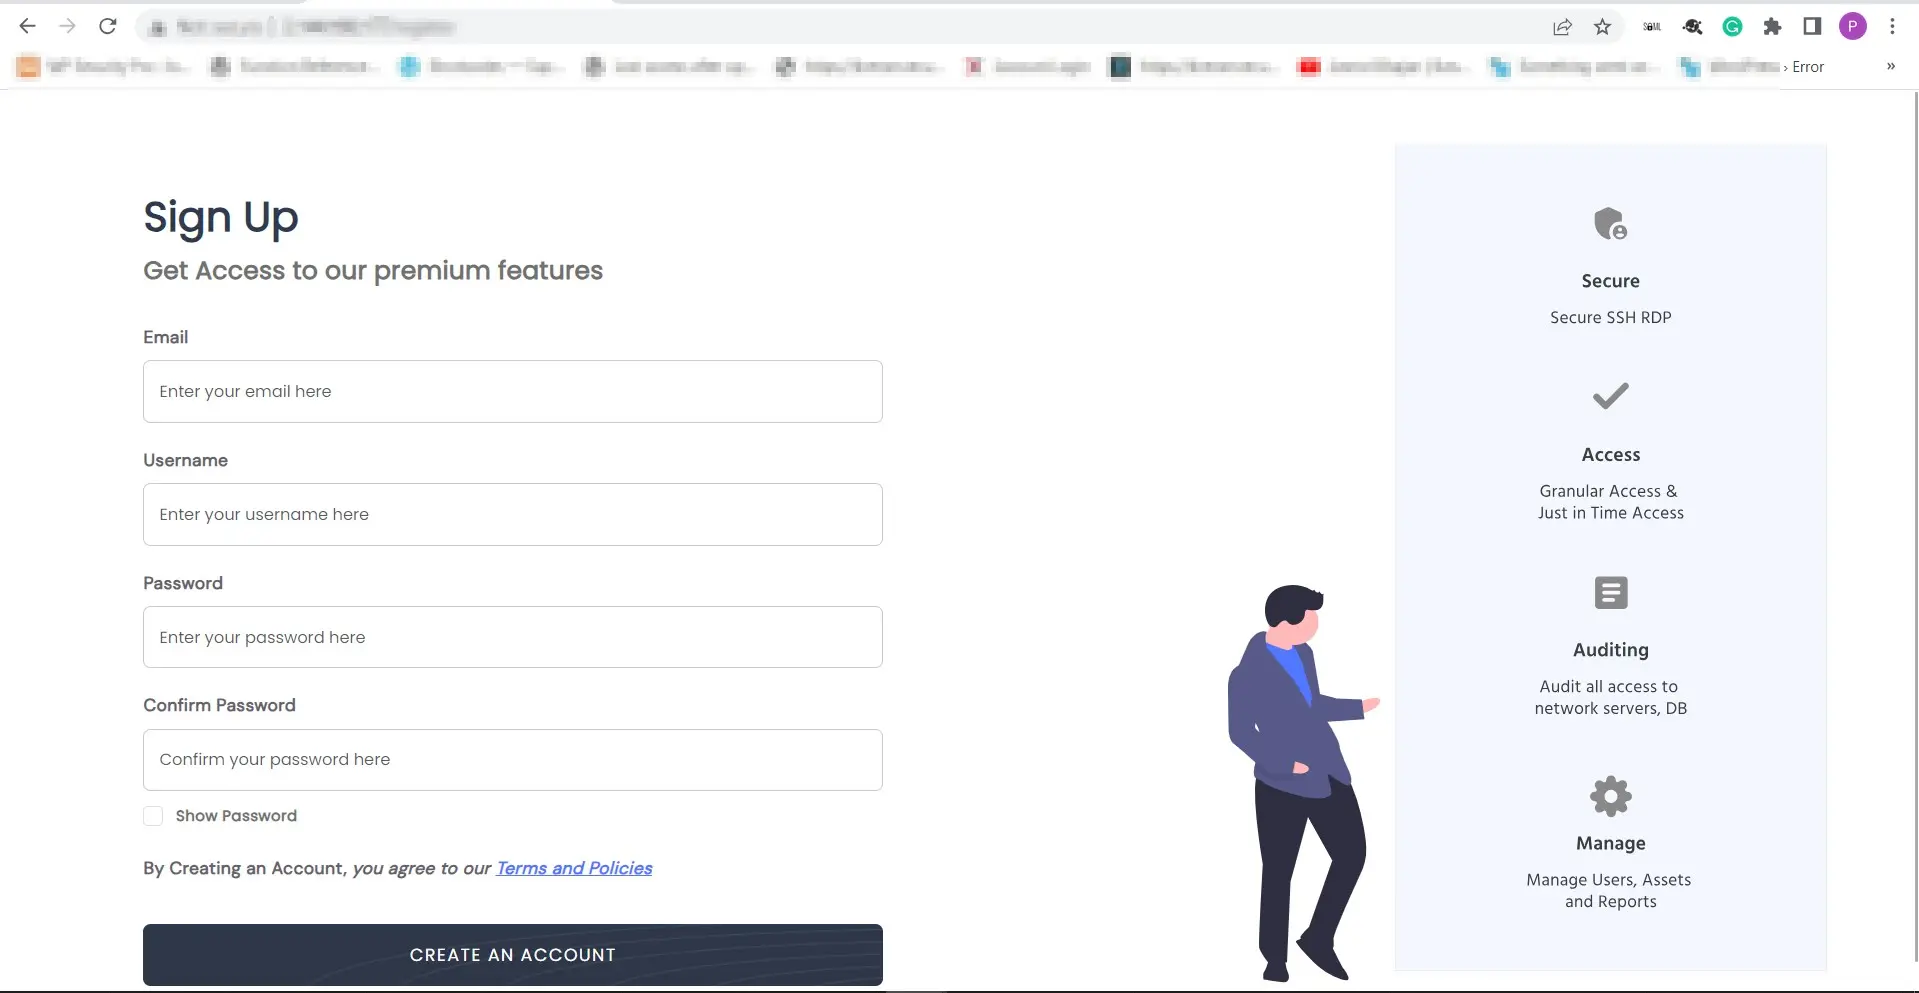
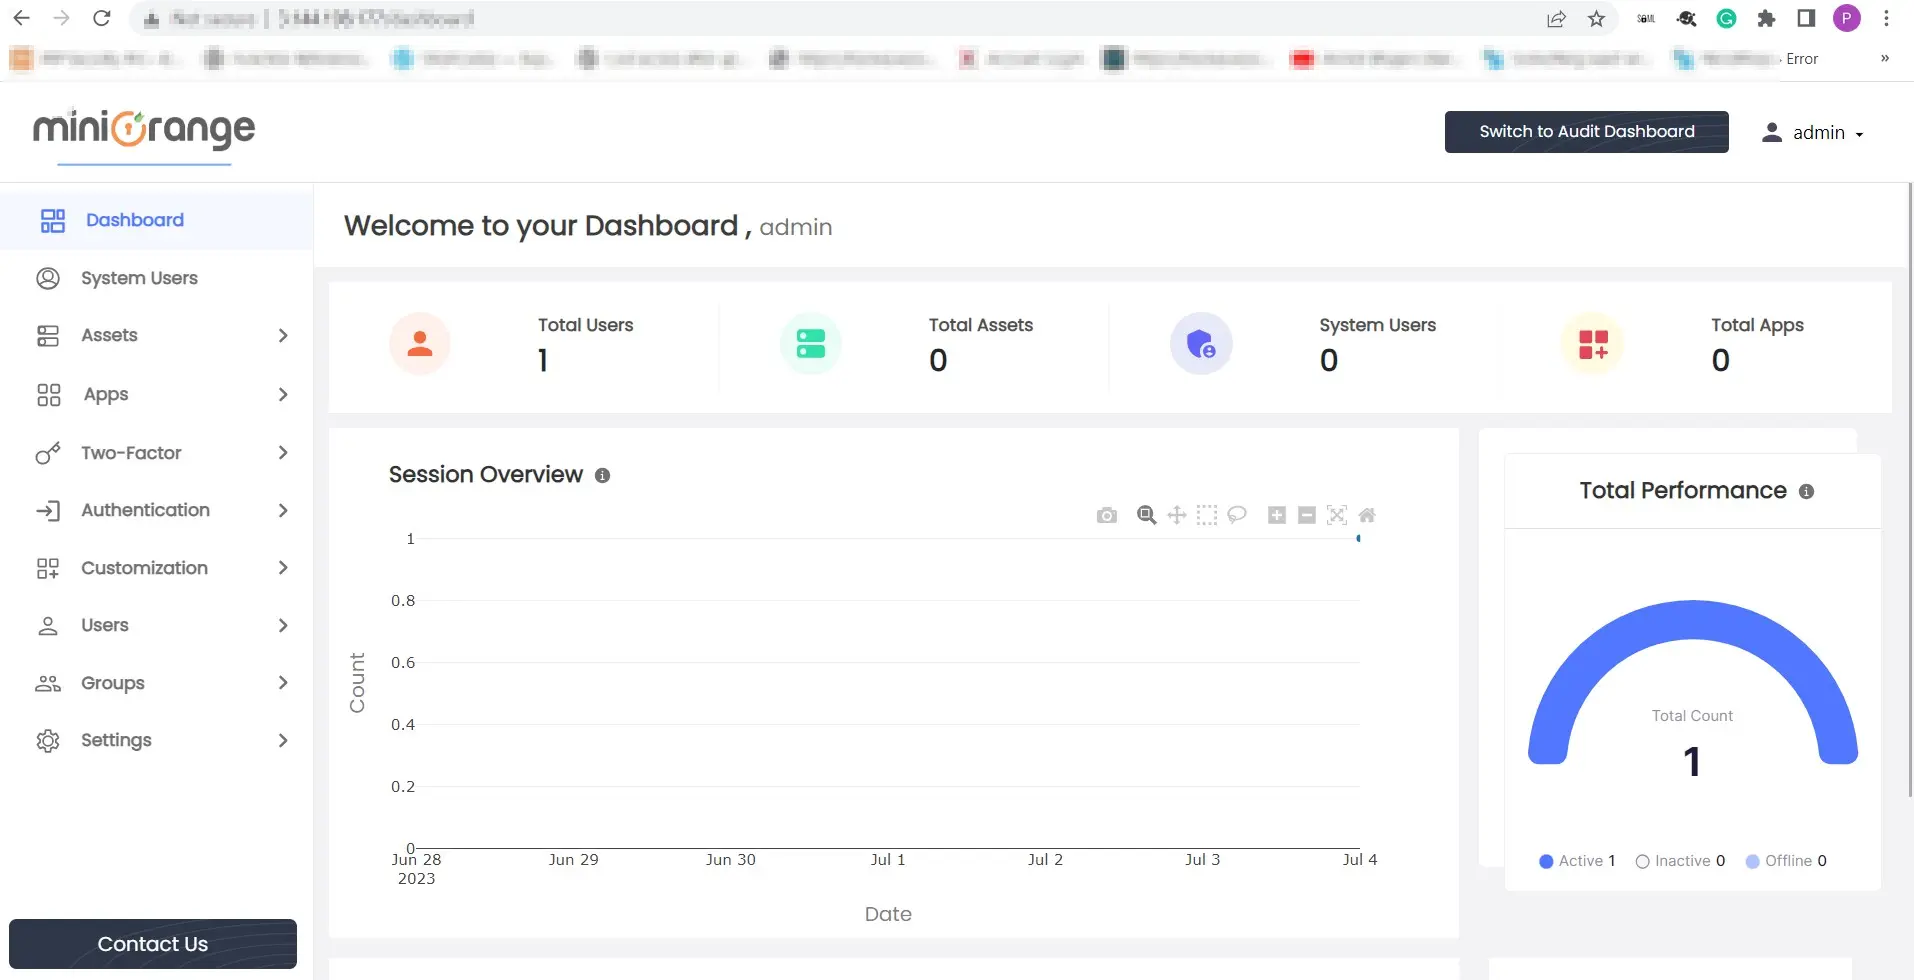
- Once you click on the create an account button and if all the information is correct, it will redirect you on the admin dashboard where you can manage all your privilege accounts.
- Download the zip distribution and put it on the sever where you want to install miniOrange PAM.
wget https://miniorange-pam.s3.us-east-2.amazonaws.com/miniorange-pam-1-0.zip
- If wget is not installed in the system and the above command through any error install it with the below command.
sudo yum install wget
- SSH into that server or open the terminal and unzip the file with the below command.
unzip pam_release_1-0.zip
- If unzip is not installed in the system and the above command through any error install it with the below command.
sudo yum install unzip
- Once it is unzipped, type “ ls “ to list all the directories available in the current directory. It should show your the below files.
- Once the unzip is complete you need to run the following command to execute the installation script. It will ask you to provide IP address, host name and a password for database.
sudo ./pam_build.sh
- Enter IP address if you do not want to run it on only localhost.
- If you do not have a host name then you can skip it for now otherwise enter the domain on which you want to run the PAM server.
- Enter the password of the database ( this will be used by the pam server to store informations).
- It will ask you for some permissions, click on yes and continue till the script run is successful.
- Once the script is done, you can visit the pam server on your browser by entering the IP/host on the browser. By default it will be running on http.
- It should show you the registration/Sign up page. Provide all the details and click on Create an account button.
- Once you click on the create an account button and if all the information is correct, it will redirect you on the admin dashboard where you can manage all your privilege accounts.
