React Single Sign-On SSO
React JWT Single Sign-On (SSO) solution by miniOrange provides secure Single Sign-On access into React application using a single set of login credentials. This is done using JSON Web Token (JWT) tokens and it can be easily integrated with React built in any framework or language. You can enable social login for your users to get secure access to applications using any of their existing social providers such as Facebook, Twitter, Google, or LinkedIn.
With miniOrange React SSO, you get:
- Seamless user login experience.
- Endless customizations to your login forms and pages.
- Simplified customer or user on-boarding.
Connect with External Source of Users
miniOrange provides user authentication from various external sources, which can be Directories (like ADFS, Microsoft Active Directory, Azure AD, OpenLDAP, Google, AWS Cognito etc), Identity Providers (like Shibboleth, Ping, Okta, OneLogin, KeyCloak), Databases (like MySQL, Maria DB, PostgreSQL) and many more.
Follow the step-by-step guide given below for React Single Sign-On (SSO)
1. Configure React in miniOrange
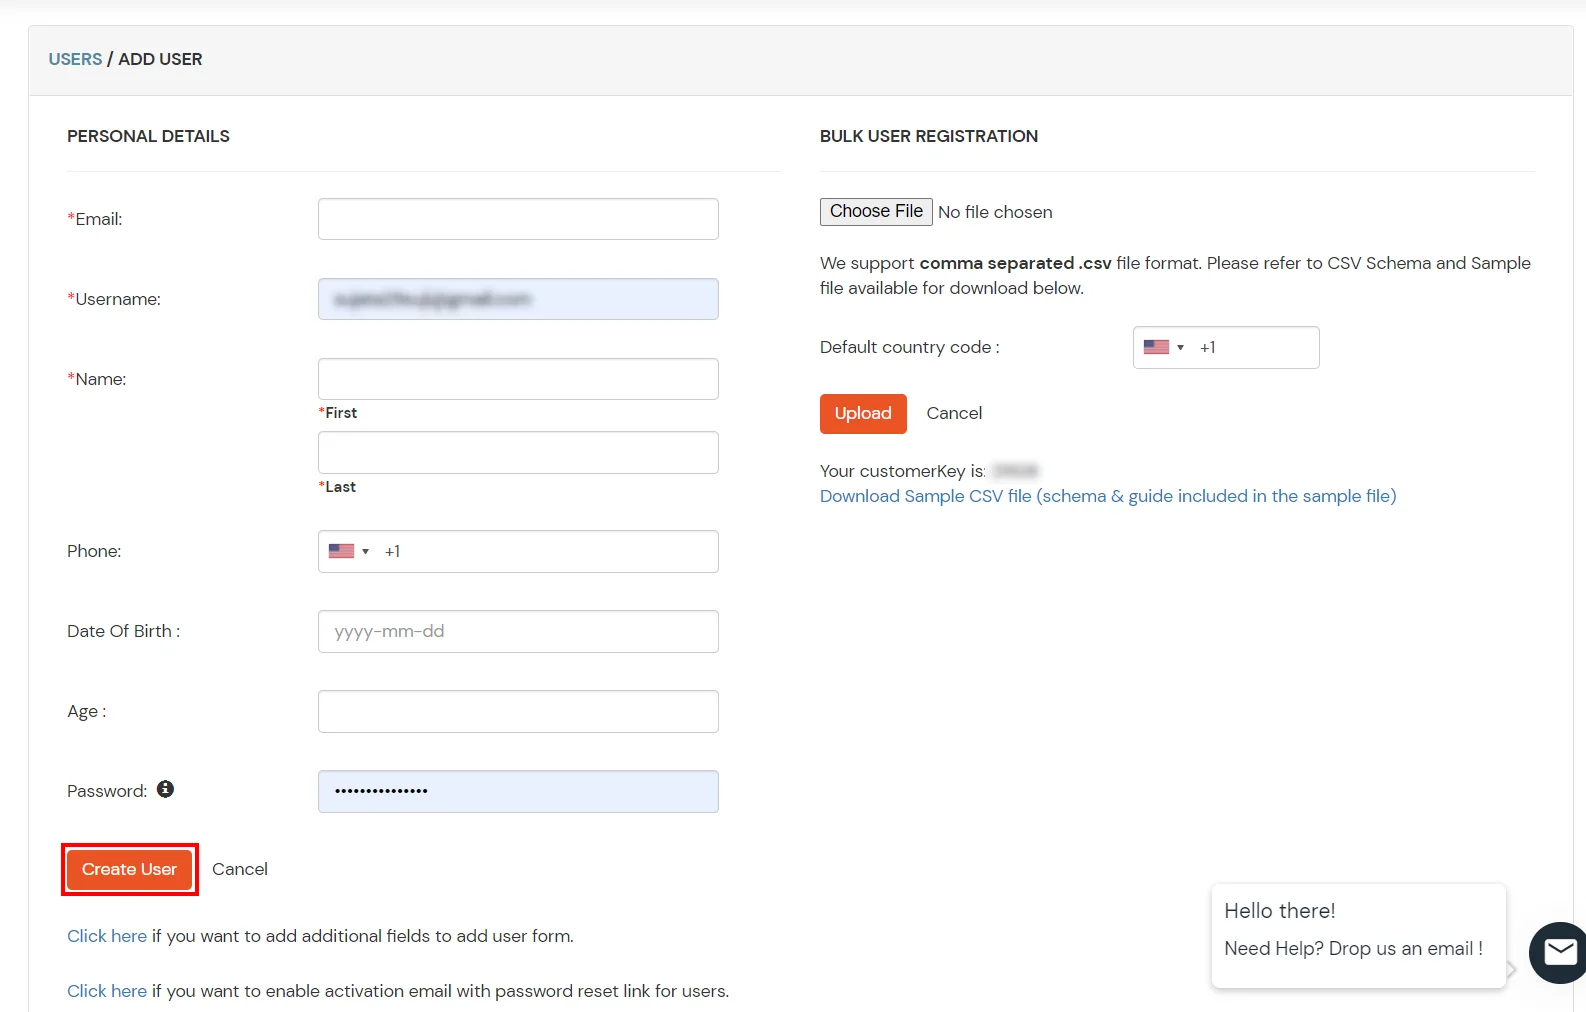
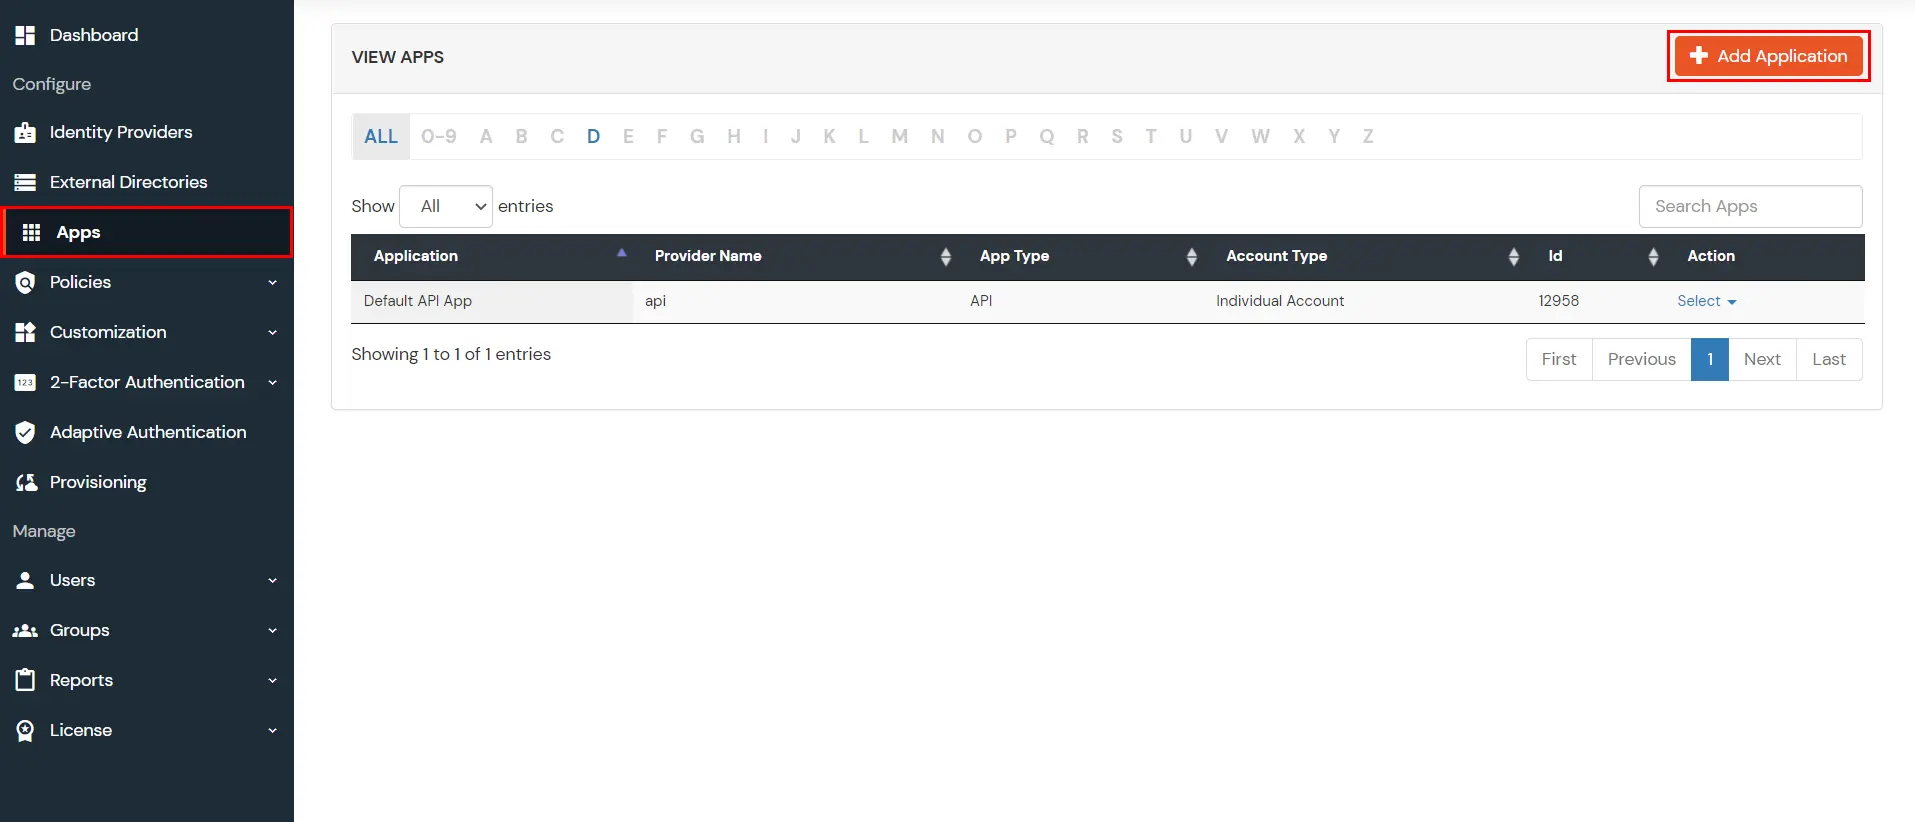
- Go to Apps >> Add Application from the side menu.
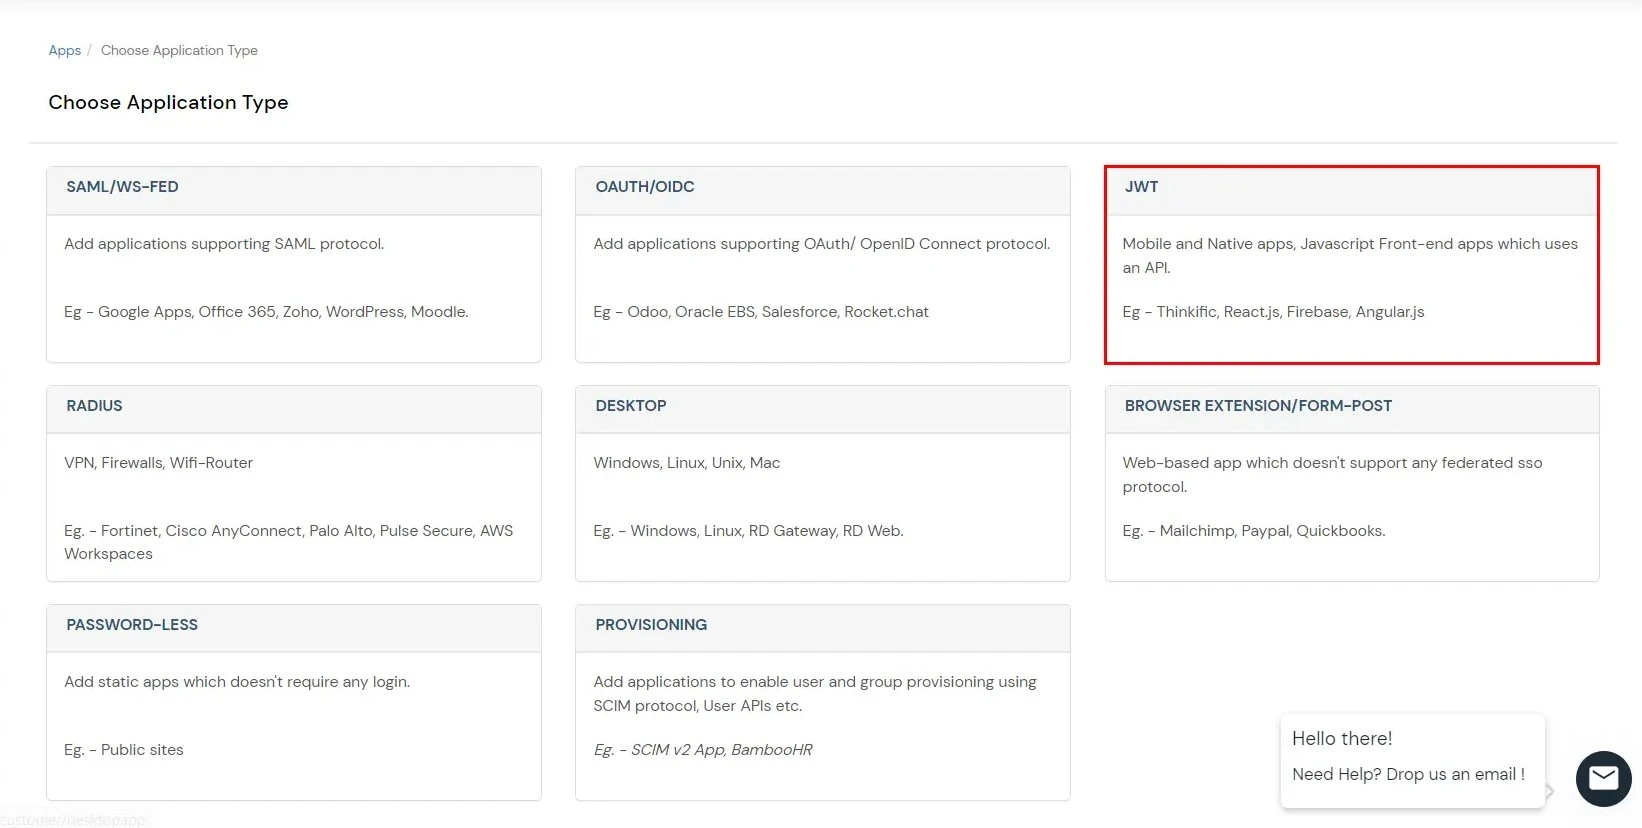
- Click on the JWT under Choose Application Type.
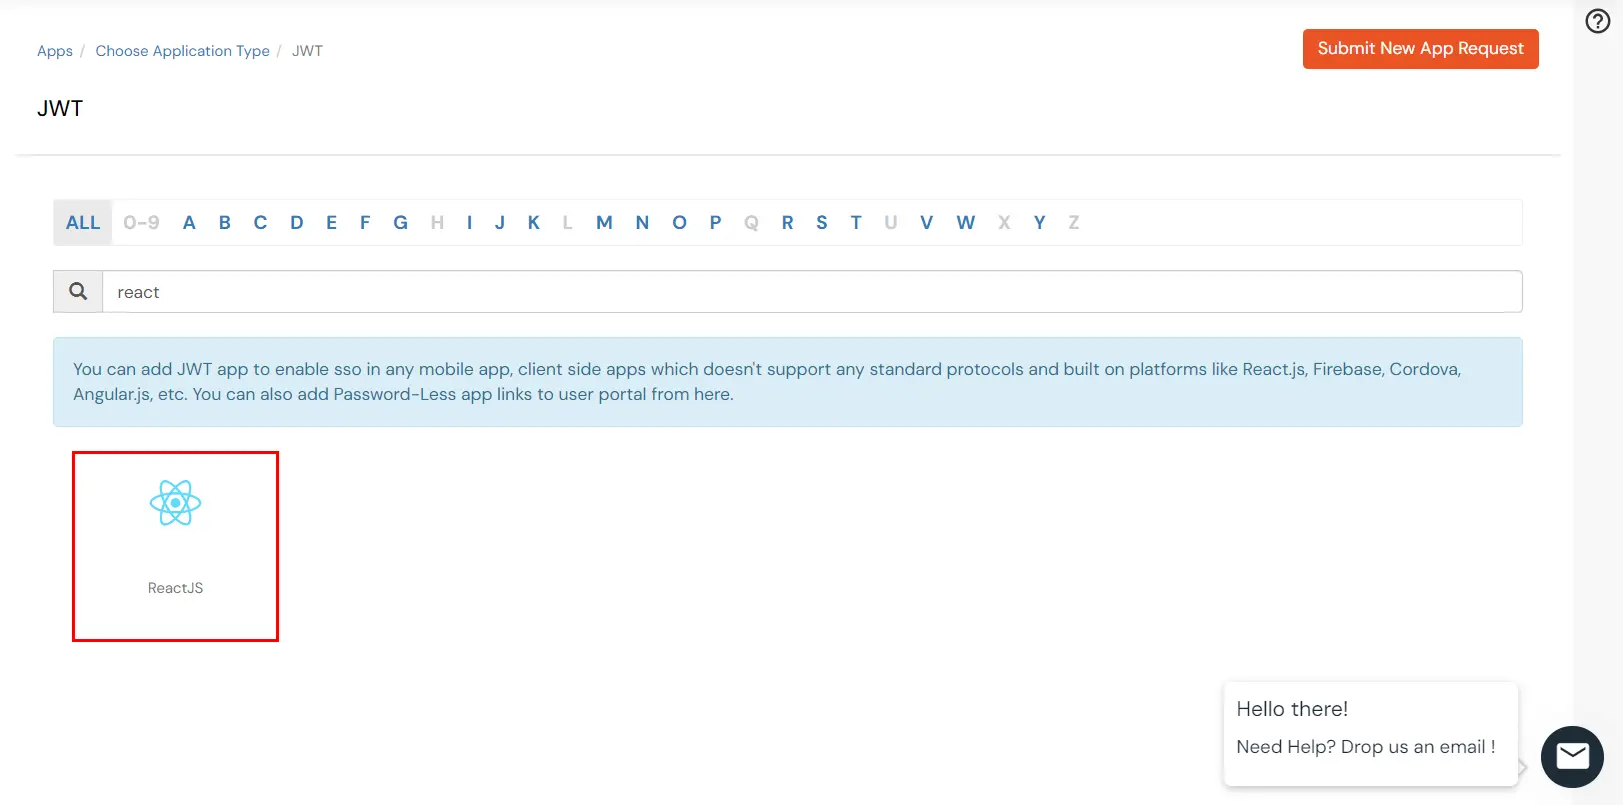
- In the next step, search for React application from the list. If your application is not found, search for External / JWT App and you can set up your Application.
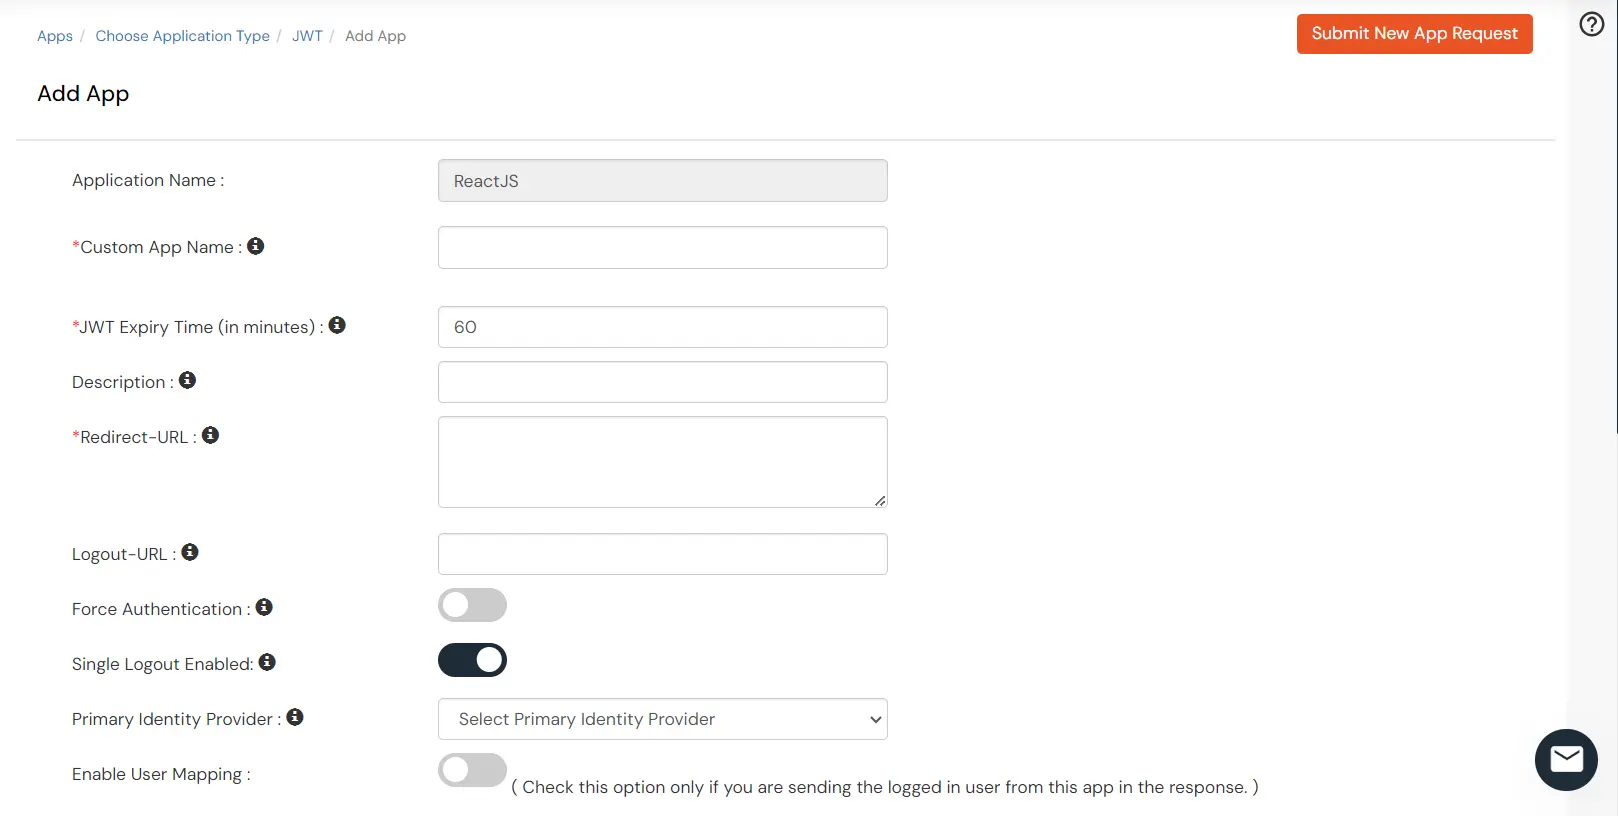
- You can configure the following details in the application:
| Custom App Name |
Enter the Application Name of your choice, and add a description if required. |
| Redirect-URL |
Enter the Redirect-URL (i.e. the endpoint where you want to send/post your JWT token).
You can add multiple redirect URLs by separating them with a ‘;’. E.g. abc.com;xyz.com |
| Primary Identity Provider (optional) |
Select your Identity Source from the dropdown. You can select miniOrange here as default IDP. |
- Click on Save to complete the configuration.
- Click on Edit in the select menu against your app.
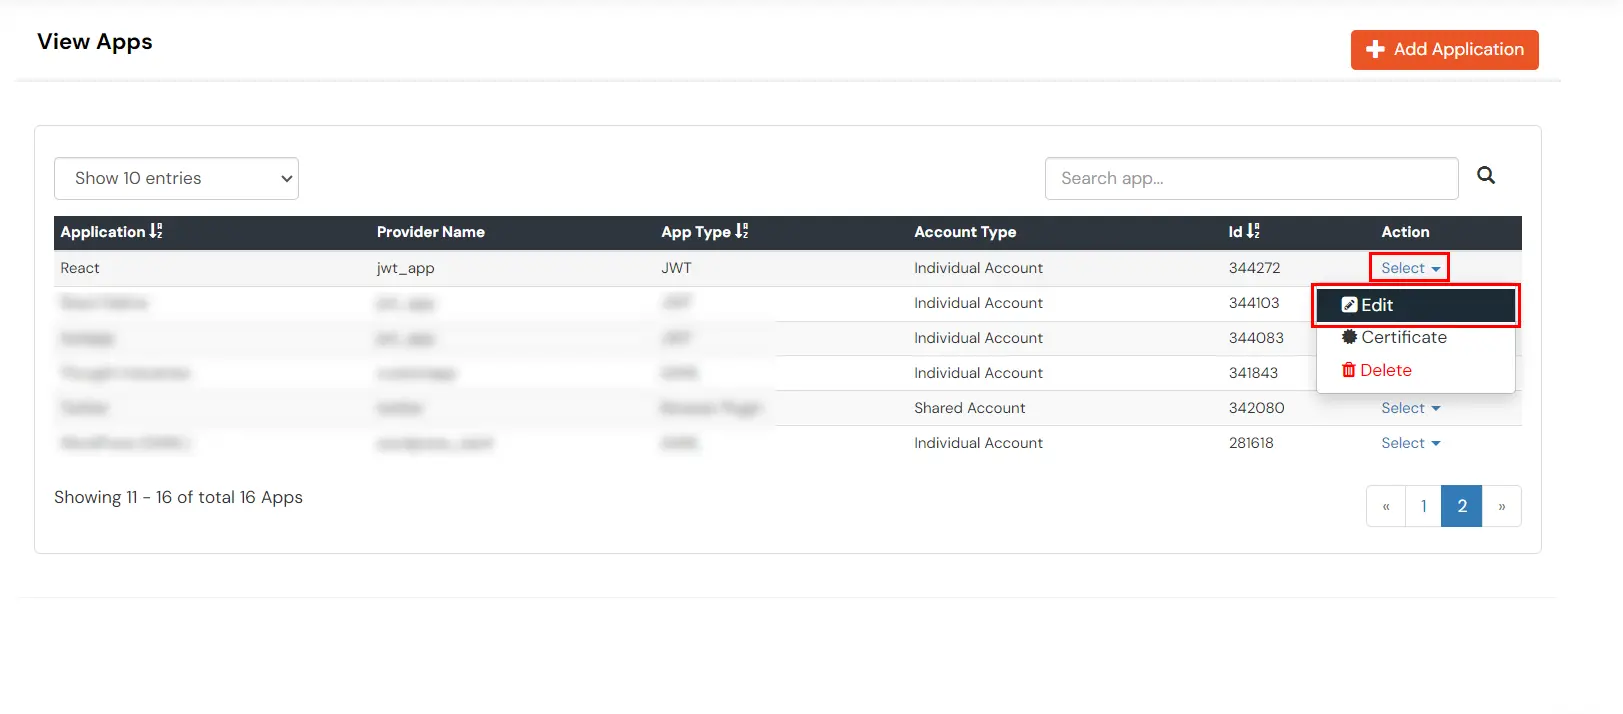
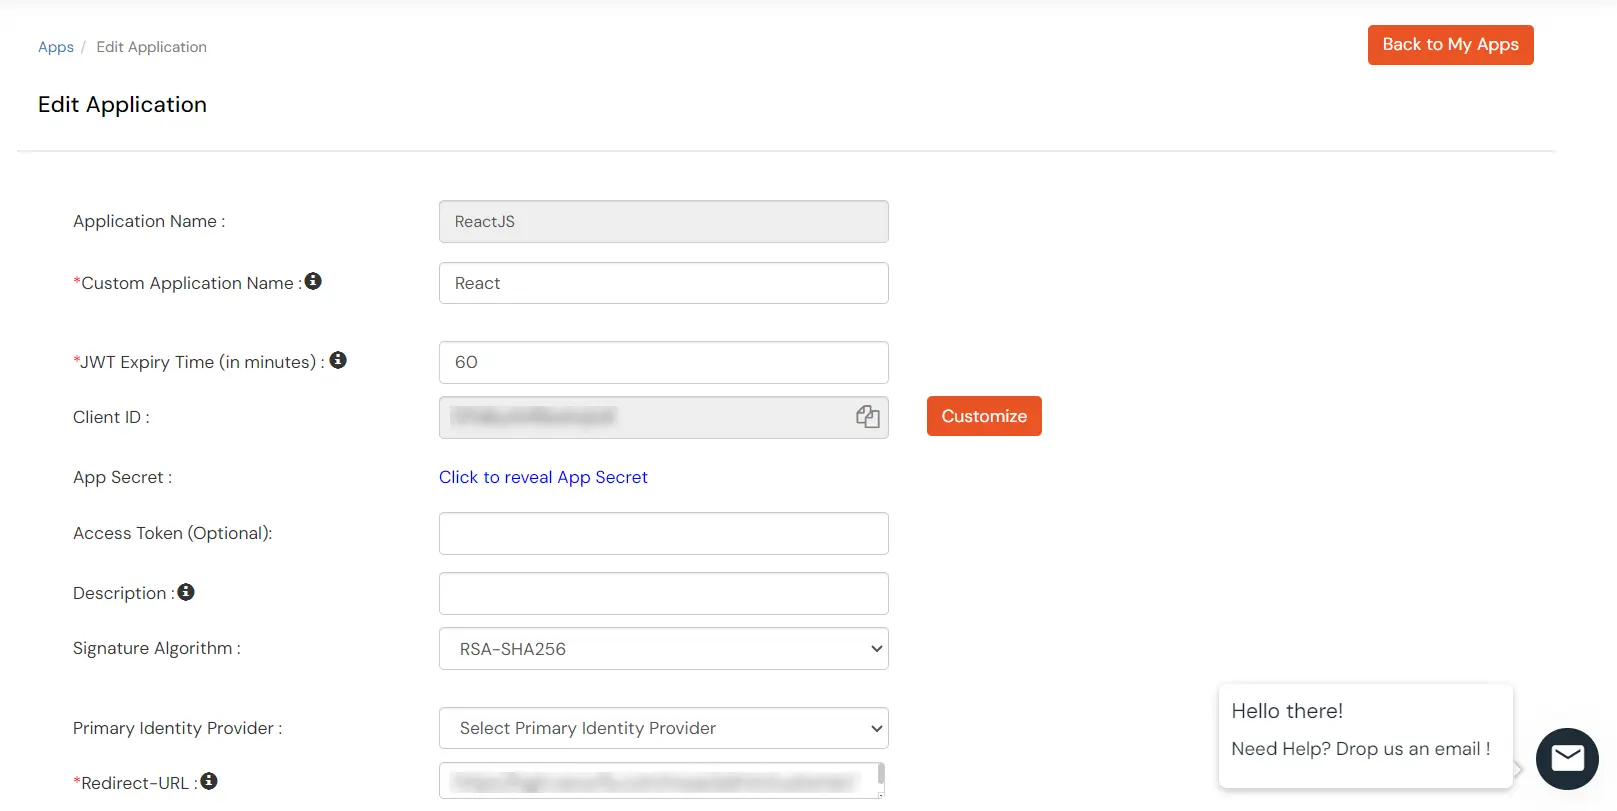
- You can get further details about your recently added JWT application:
| Client ID |
If your application provides its own client ID, you can configure it by clicking on the Customize button. |
| App Secret |
You can find App Secret by clicking on the copy icon. This is used in the HS265 Signature
algorithm for generating the signature. |
| Signature Algorithm |
Select your signature algorithm from the dropdown. |
| Primary Identity Provider |
Select the default Identity Provider from the dropdown for the application. If not selected, users will see the default
login screen and can choose their own IDP. [Choose miniOrange in this case.] |
| Redirect URL |
Given below is your app URL where you will receive your token.
RSA 256 : <your_app-login-url> (Here token will be added by the system)
HS256 : <app-login-url/?id_token=> |
- Scroll down to Endpoints >> Single Sign-On URL. Save this URL as you will need this in the following configuration.

- click on Save to save the configuration.
2. Configure SSO in React
- Select a component that will be responsible for verifying the JWT token most preferably the login component.
- Import the JWTBuilder class from the jwt-connector. From the path to which it was moved in step 1 of Prerequisites.
import { JWTBuilder } from './path/to/jwt-connector';
- You can add a button on your login screen to redirect to the SSO URL. You can get this SSO URL from step 1 of Configure your application in miniOrange.
<button> onClick={sso}>Single Sign On</button>
	function sso() {
	window.location.href = window.location.href = ‘<YOUR SSO URL<’; //
  example:https://login.xecurify.com/moas/broker/login/jwt/277898?client_id=AbIVW8A
	MNTBzg2o7&redirect_uri=http://localhost:3000/login;
	}
- On Clicking the SSO button the user will be redirected to the miniOrange portal for authentication.
- Then the JWT token is returned to your application to the redirect URL you have set while adding your application in miniOrange. In the following steps, we will be verifying this token and
retrieving the user details.
- You need to add the x509 certificate that you can get in step 1 ‘configure your application in miniOrange ’.
- Now if the token is verified, the payload which consists of the User details can be saved in local storage or serialized into a User Class and the user now verified can be redirected to the home screen of your application.
3. Test SSO Configuration
Test SSO login to your React account with miniOrange IdP:
Using IDP Initiated Login
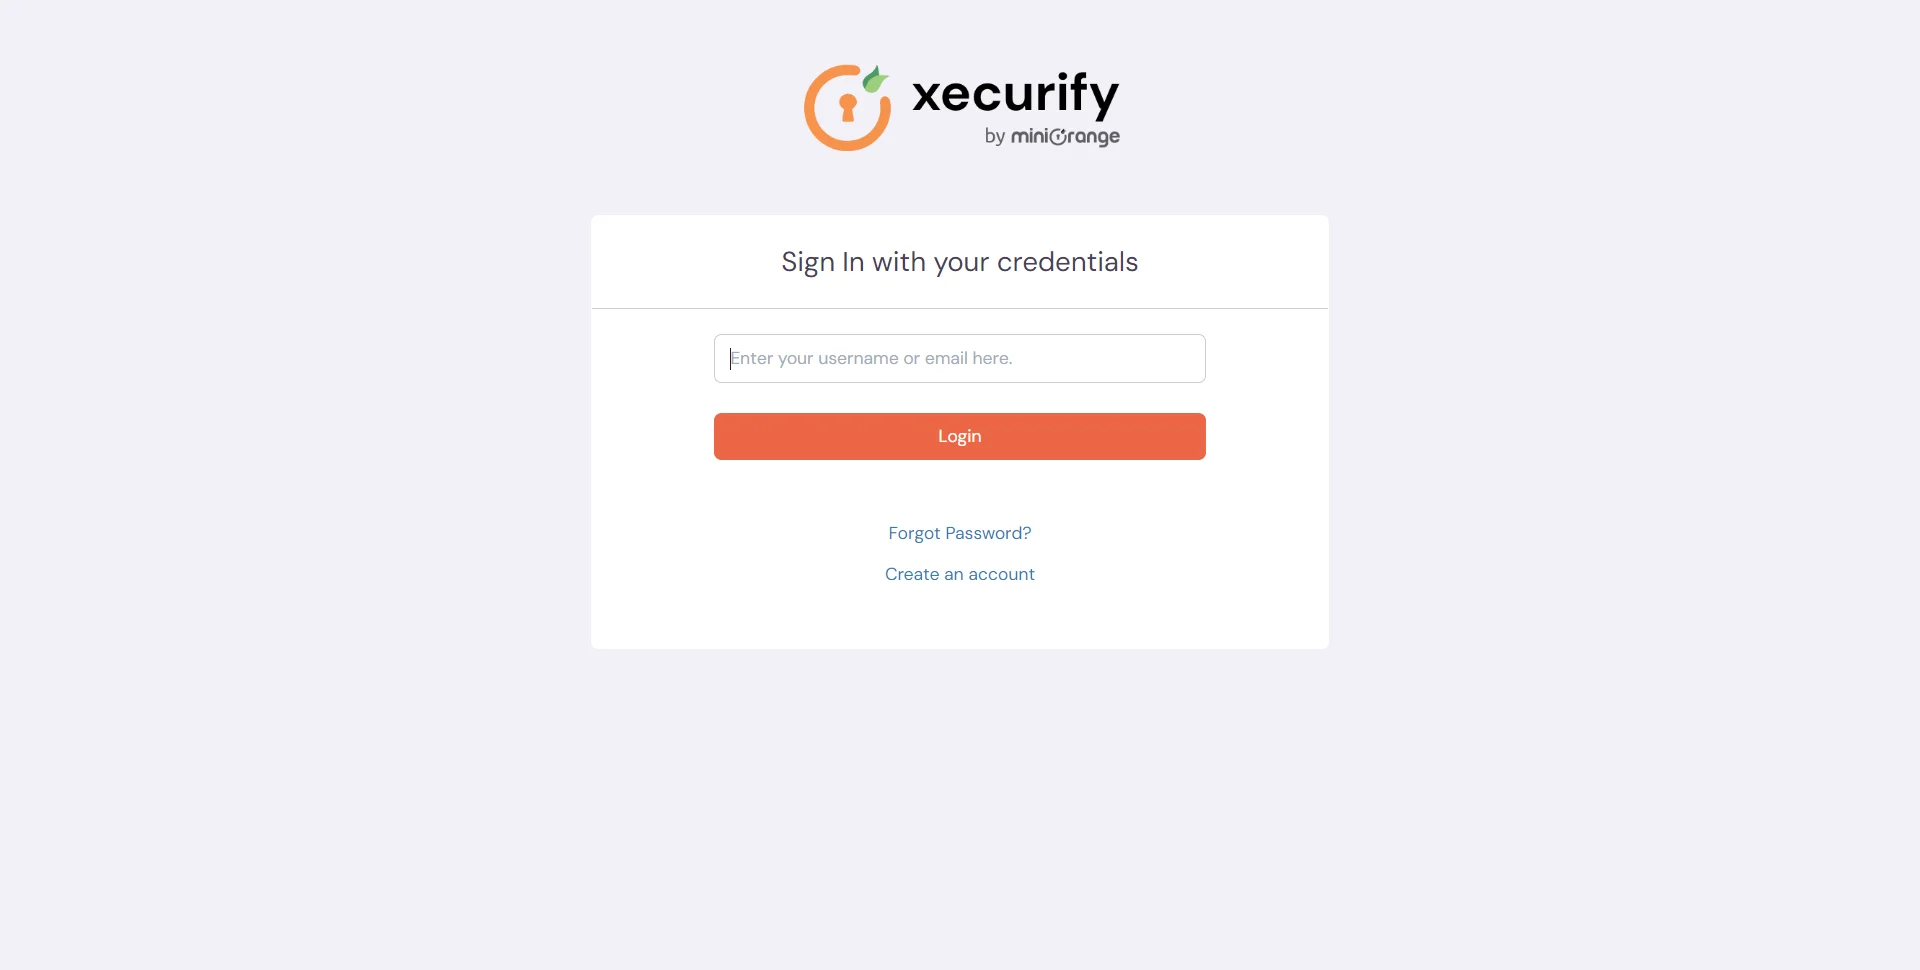
- Login to miniOrange IdP using your credentials.
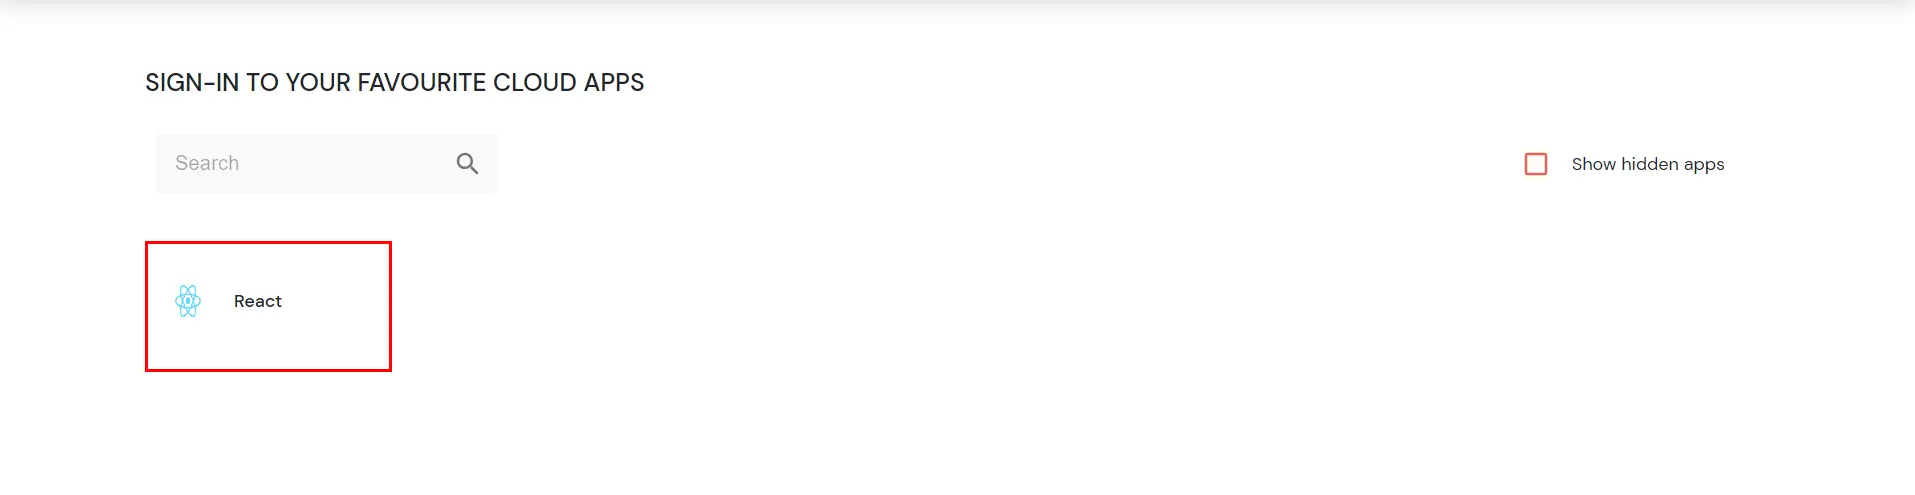
- On the Dashboard, click on React application which you have added, to verify SSO configuration.
4. Configure Your User Directory (Optional)
miniOrange provides user authentication from various external sources, which can be Directories (like ADFS, Microsoft Active Directory, Microsoft Entra ID, OpenLDAP, Google, AWS Cognito etc), Identity Providers (like Okta, Shibboleth, Ping, OneLogin, KeyCloak), Databases (like MySQL, Maria DB, PostgreSQL) and many more. You can configure your existing directory/user store or add users in miniOrange.
- Click on External Directories >> Add Directory in the left menu of the dashboard.
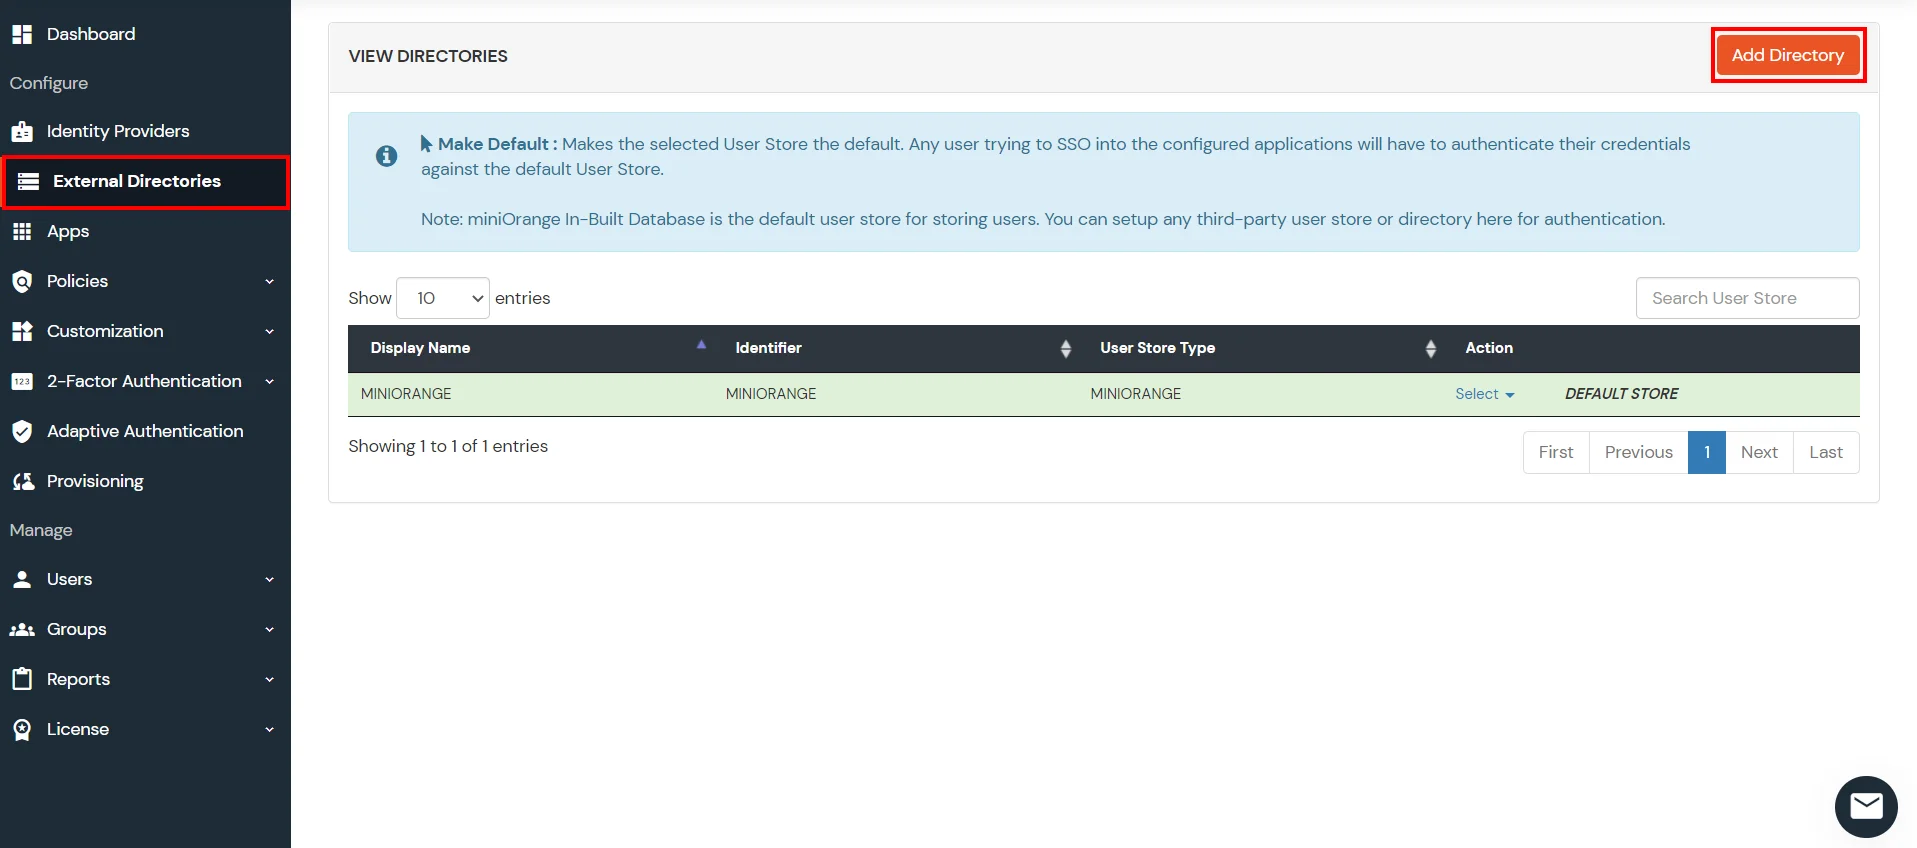
- Select Directory type as AD/LDAP.
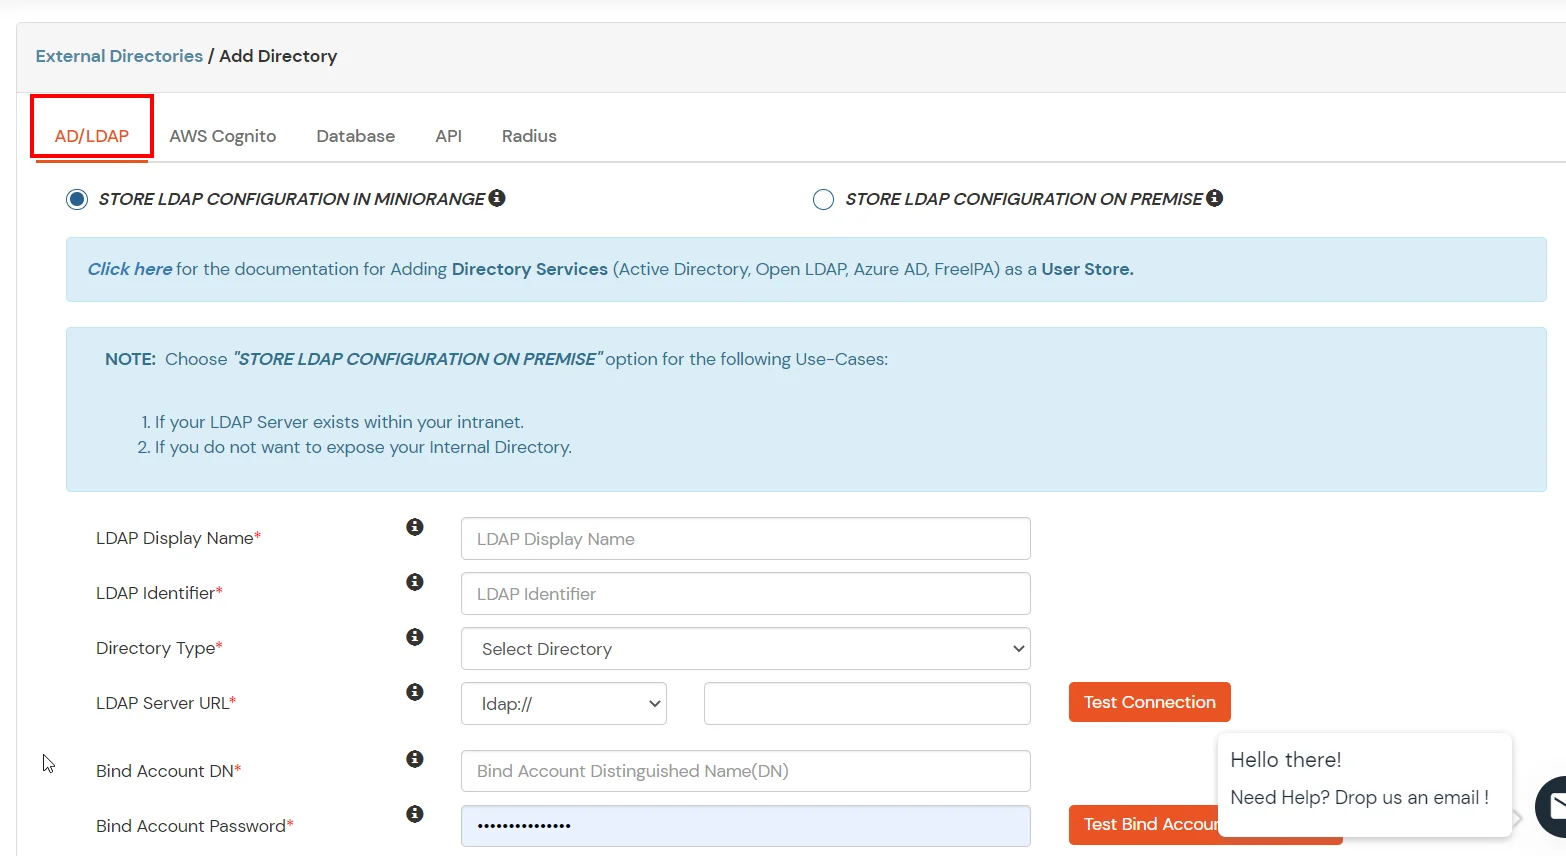
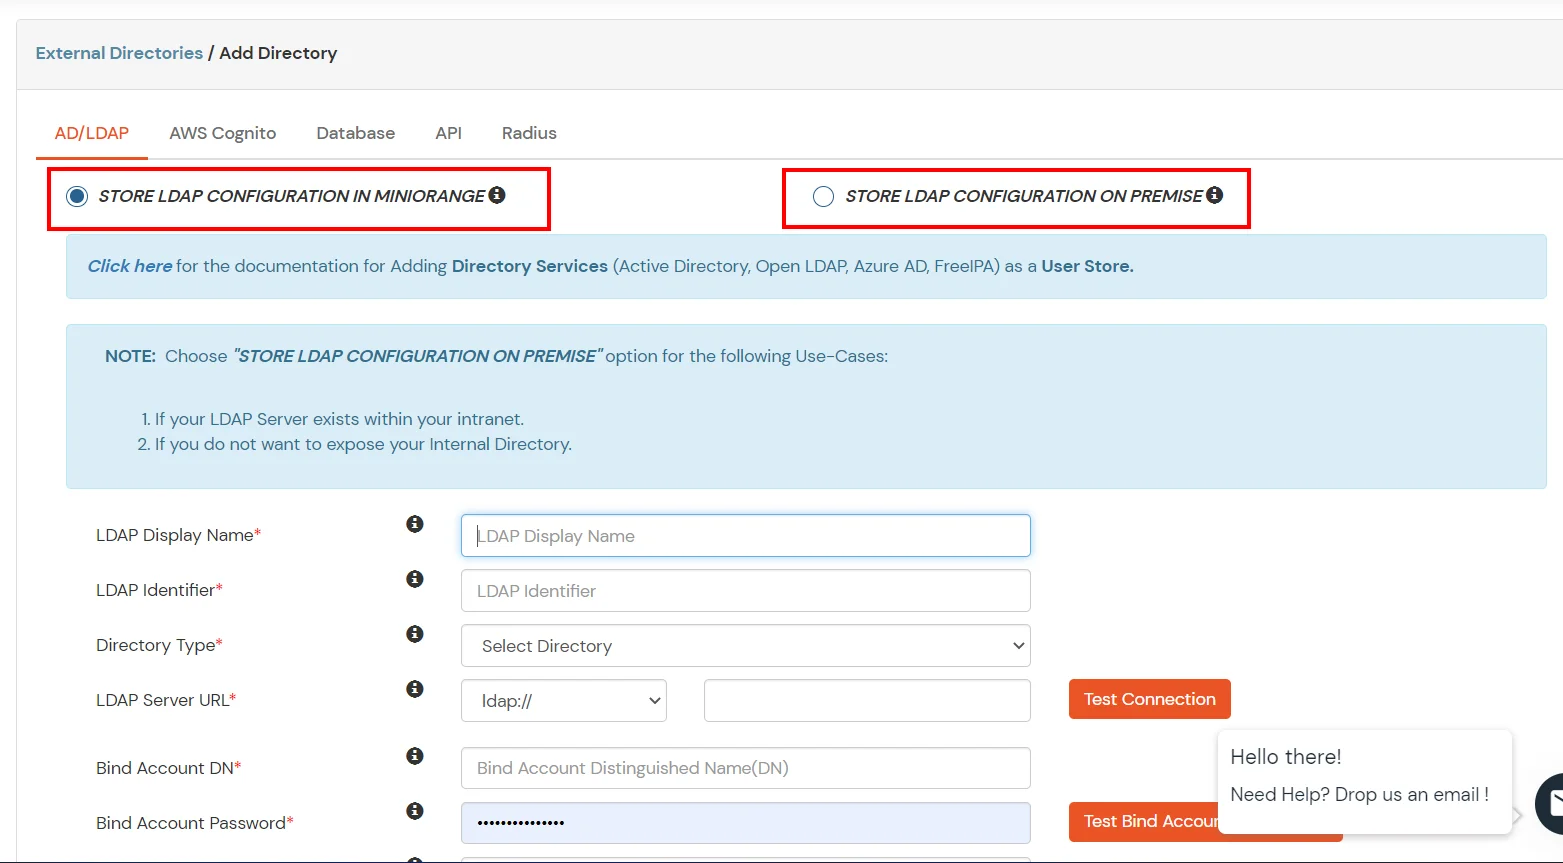
- STORE LDAP CONFIGURATION IN MINIORANGE: Choose this option if you want to keep your configuration in miniOrange. If active directory is behind a firewall, you will need to open the firewall to allow incoming requests to your AD.
- STORE LDAP CONFIGURATION ON PREMISE: Choose this option if you want to keep your configuration in your premise and only allow access to AD inside premises. You will have to download and install miniOrange gateway in your premise.
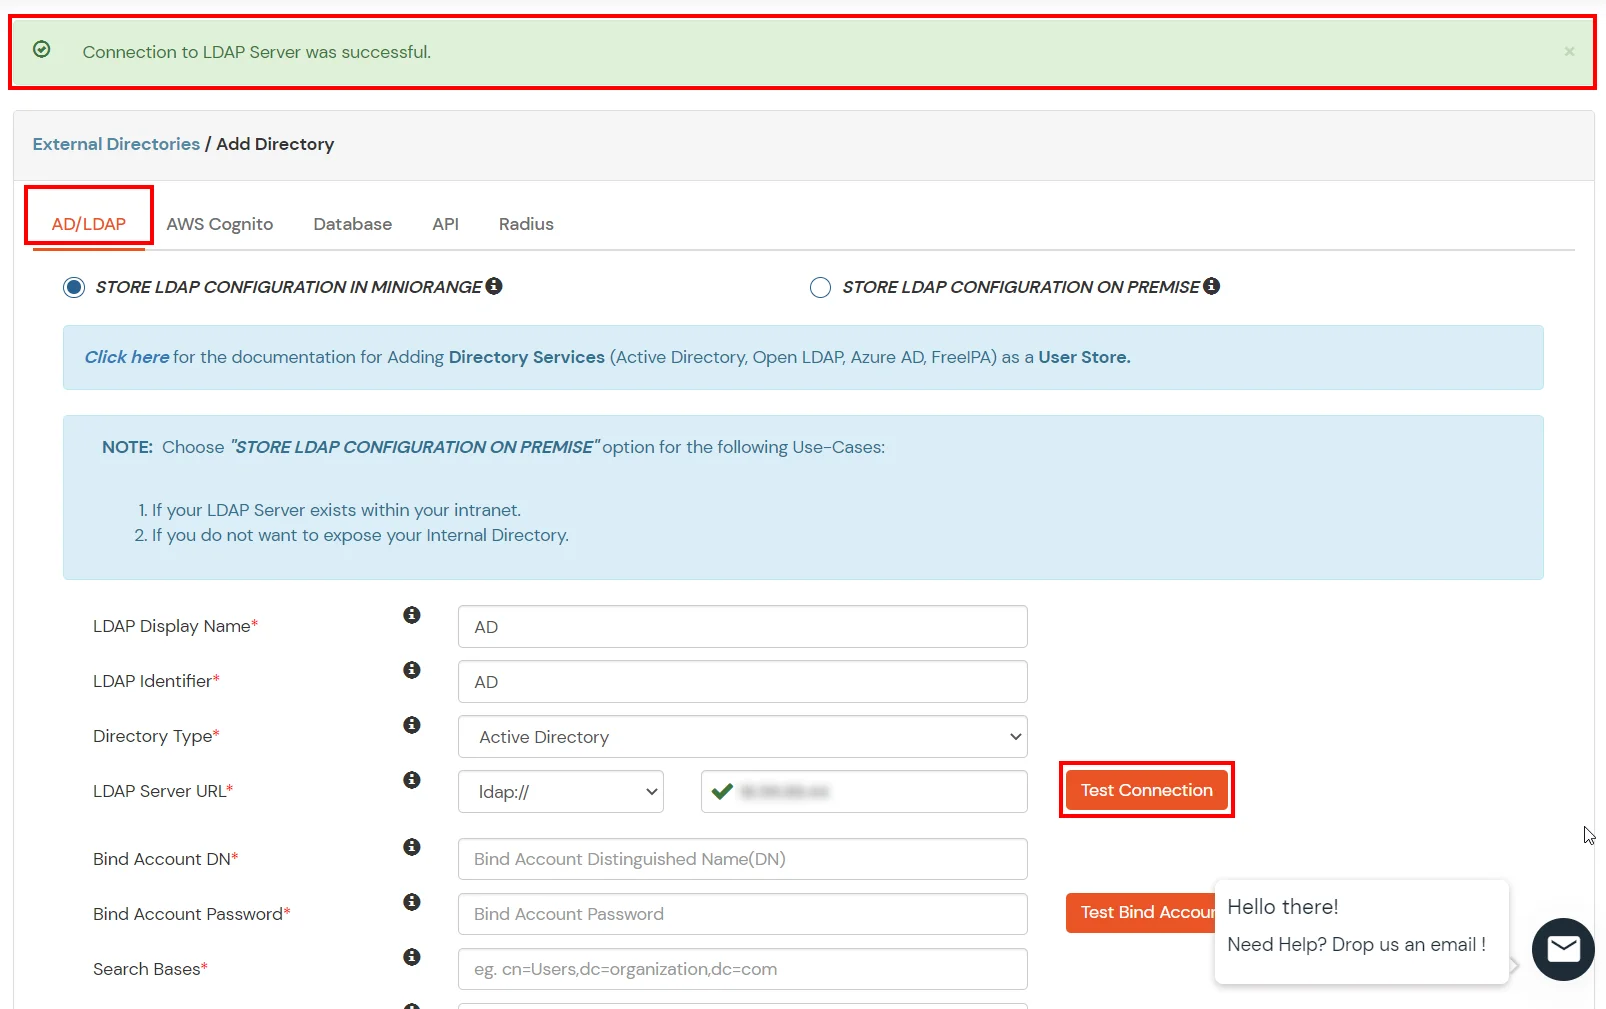
- Enter LDAP Display Name and LDAP Identifier name.
- Select Directory Type as Active Directory.
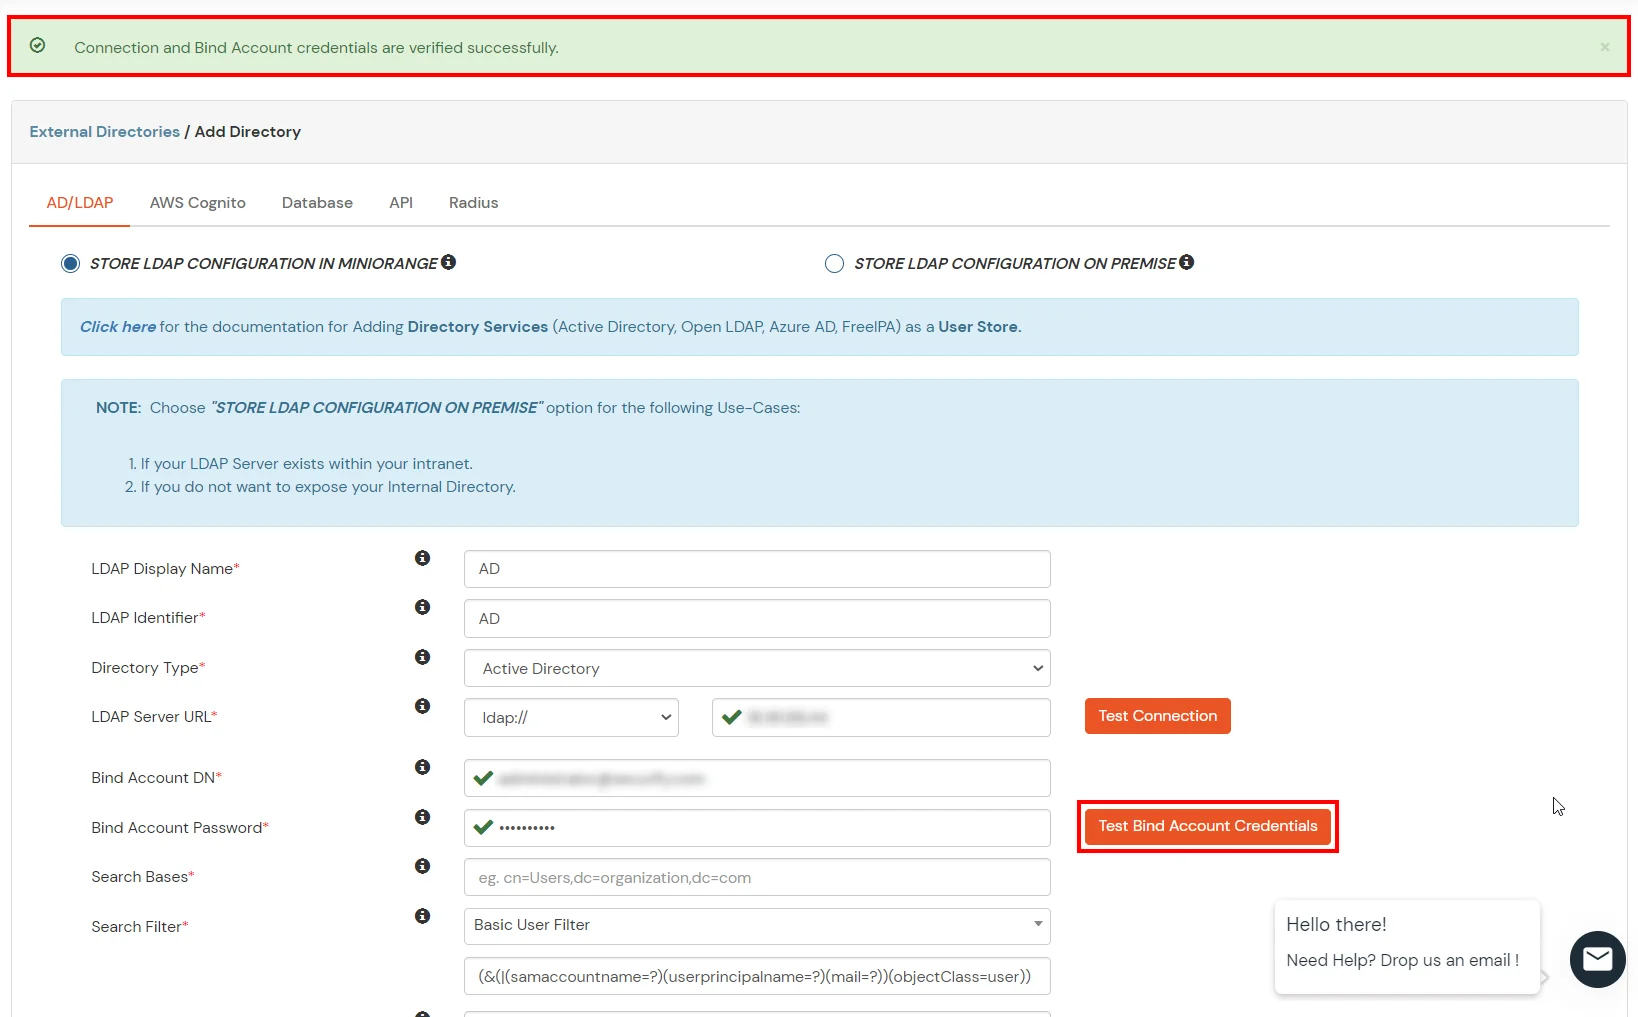
- Enter the LDAP Server URL or IP Address against LDAP Server URL field.
- Click on Test Connection button to verify if you have made a successful connection with your LDAP server.
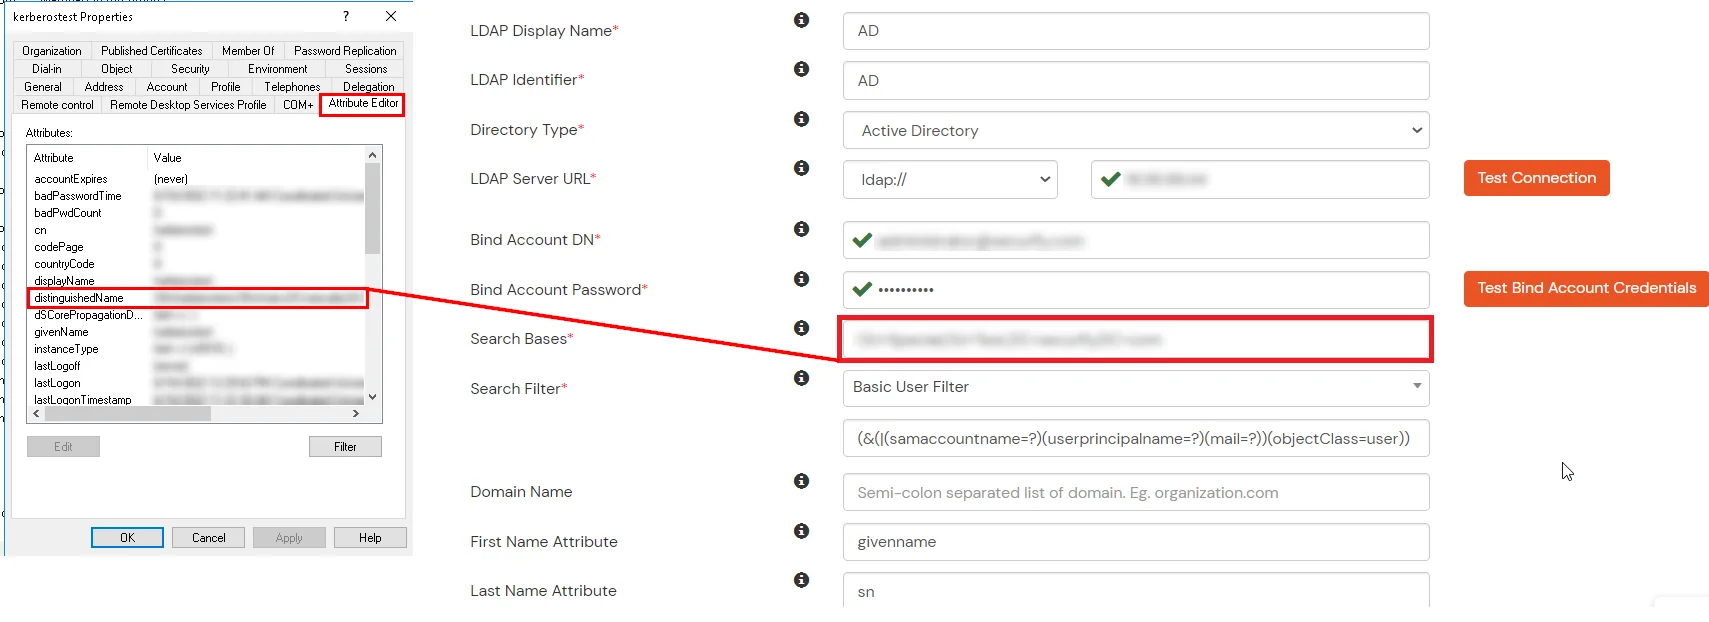
- In Active Directory, go to the properties of user containers/OU's and search for Distinguished Name attribute.

- Enter the valid Bind account Password.
- Click on Test Bind Account Credentials button to verify your LDAP Bind credentials for LDAP connection.
- Search Base is the location in the directory where the search for a user begins. You will get this from the same place you got your Distinguished name.
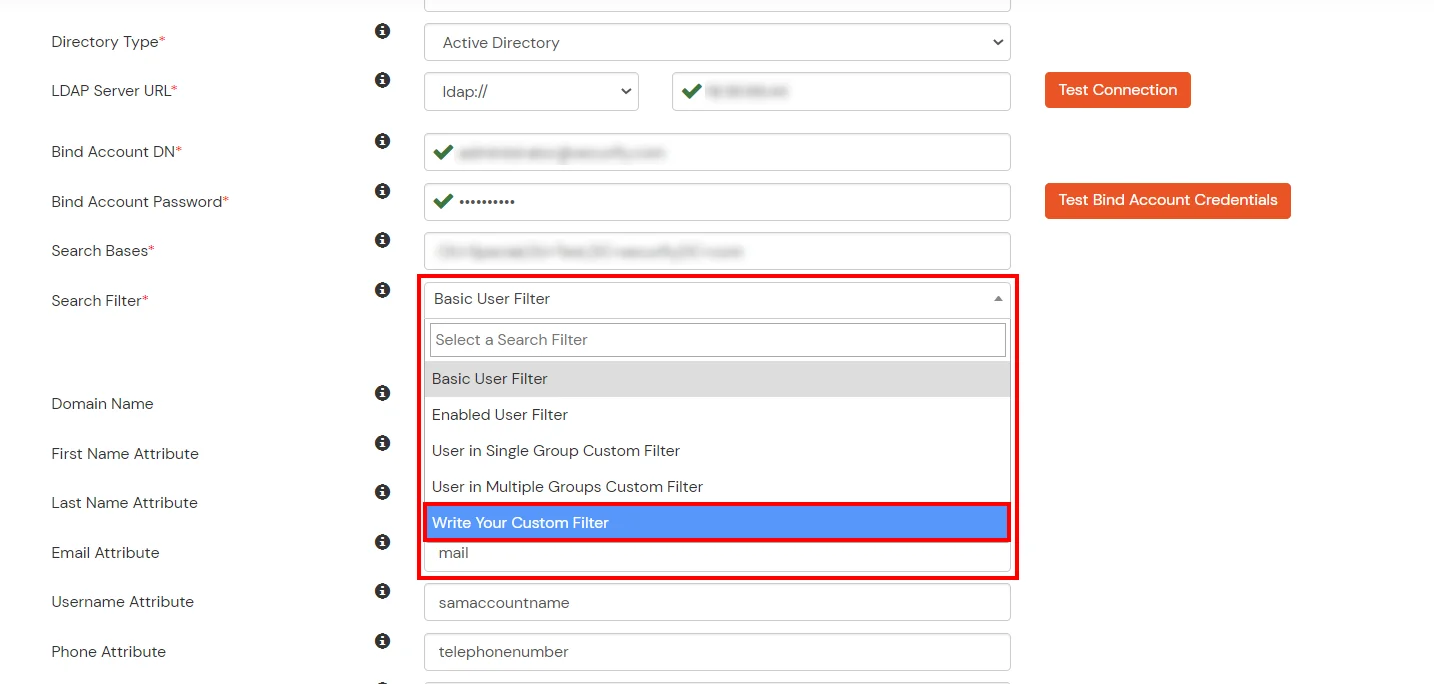
- Select a suitable Search filter from the drop-down menu. If you use User in Single Group Filter or User in Multiple Group Filter, replace the <group-dn> in the search filter with the distinguished name of the group in which your users are present. To use custom Search Filter select "Write your Custom Filter" option and customize it accordingly.
- You can also configure following options while setting up AD. Enable Activate LDAP in order to authenticate users from AD/LDAP. Click on the Save button to add user store.
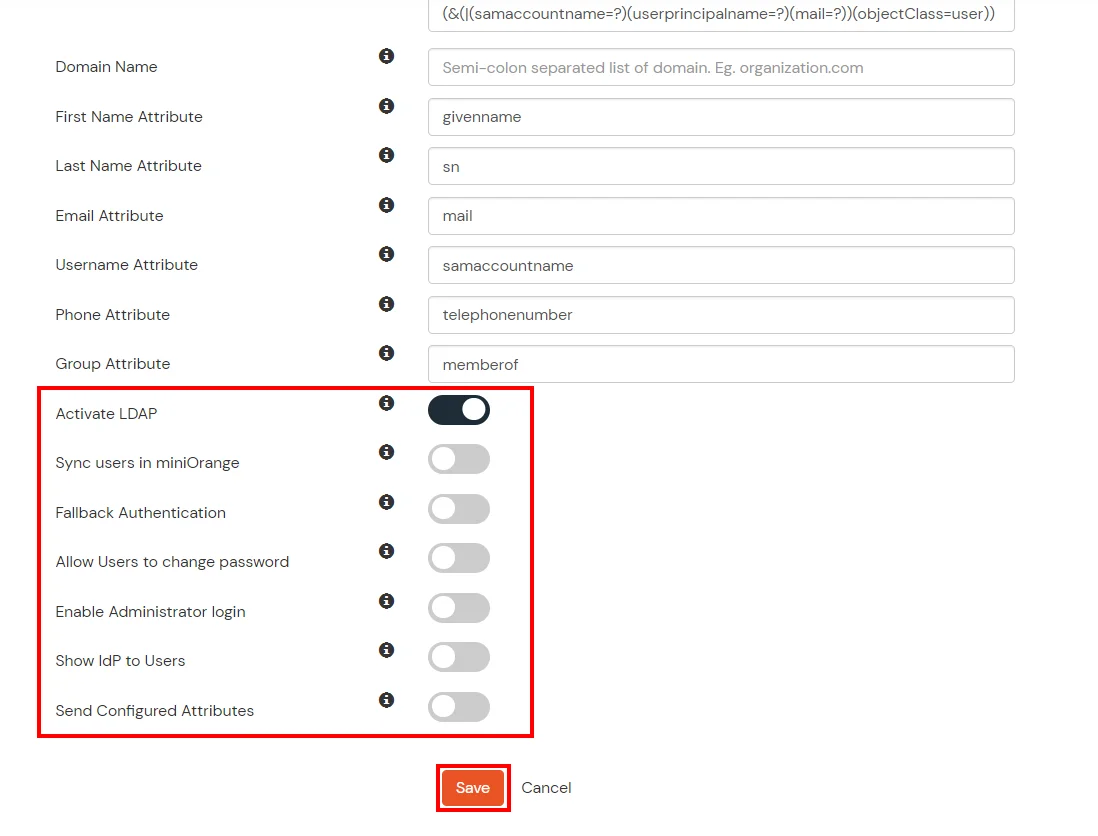
Here's the list of the attributes and what it does when we enable it. You can enable/disable accordingly.
| Attribute |
Description |
| Activate LDAP |
All user authentications will be done with LDAP credentials if you Activate it |
| Sync users in miniOrange |
Users will be created in miniOrange after authentication with LDAP |
| Fallback Authentication |
If LDAP credentials fail then user will be authenticated through miniOrange |
| Allow users to change password |
This allows your users to change their password. It updates the new credentials in your LDAP server |
| Enable administrator login |
On enabling this, your miniOrange Administrator login authenticates using your LDAP server |
| Show IdP to users |
If you enable this option, this IdP will be visible to users |
| Send Configured Attributes |
If you enable this option, then only the attributes configured below will be sent in attributes at the time of login |
- Click on Save. After this, it will show you the list of User stores. Click on Test Connection to check whether you have enter valid details. For that, it will ask for username and password.
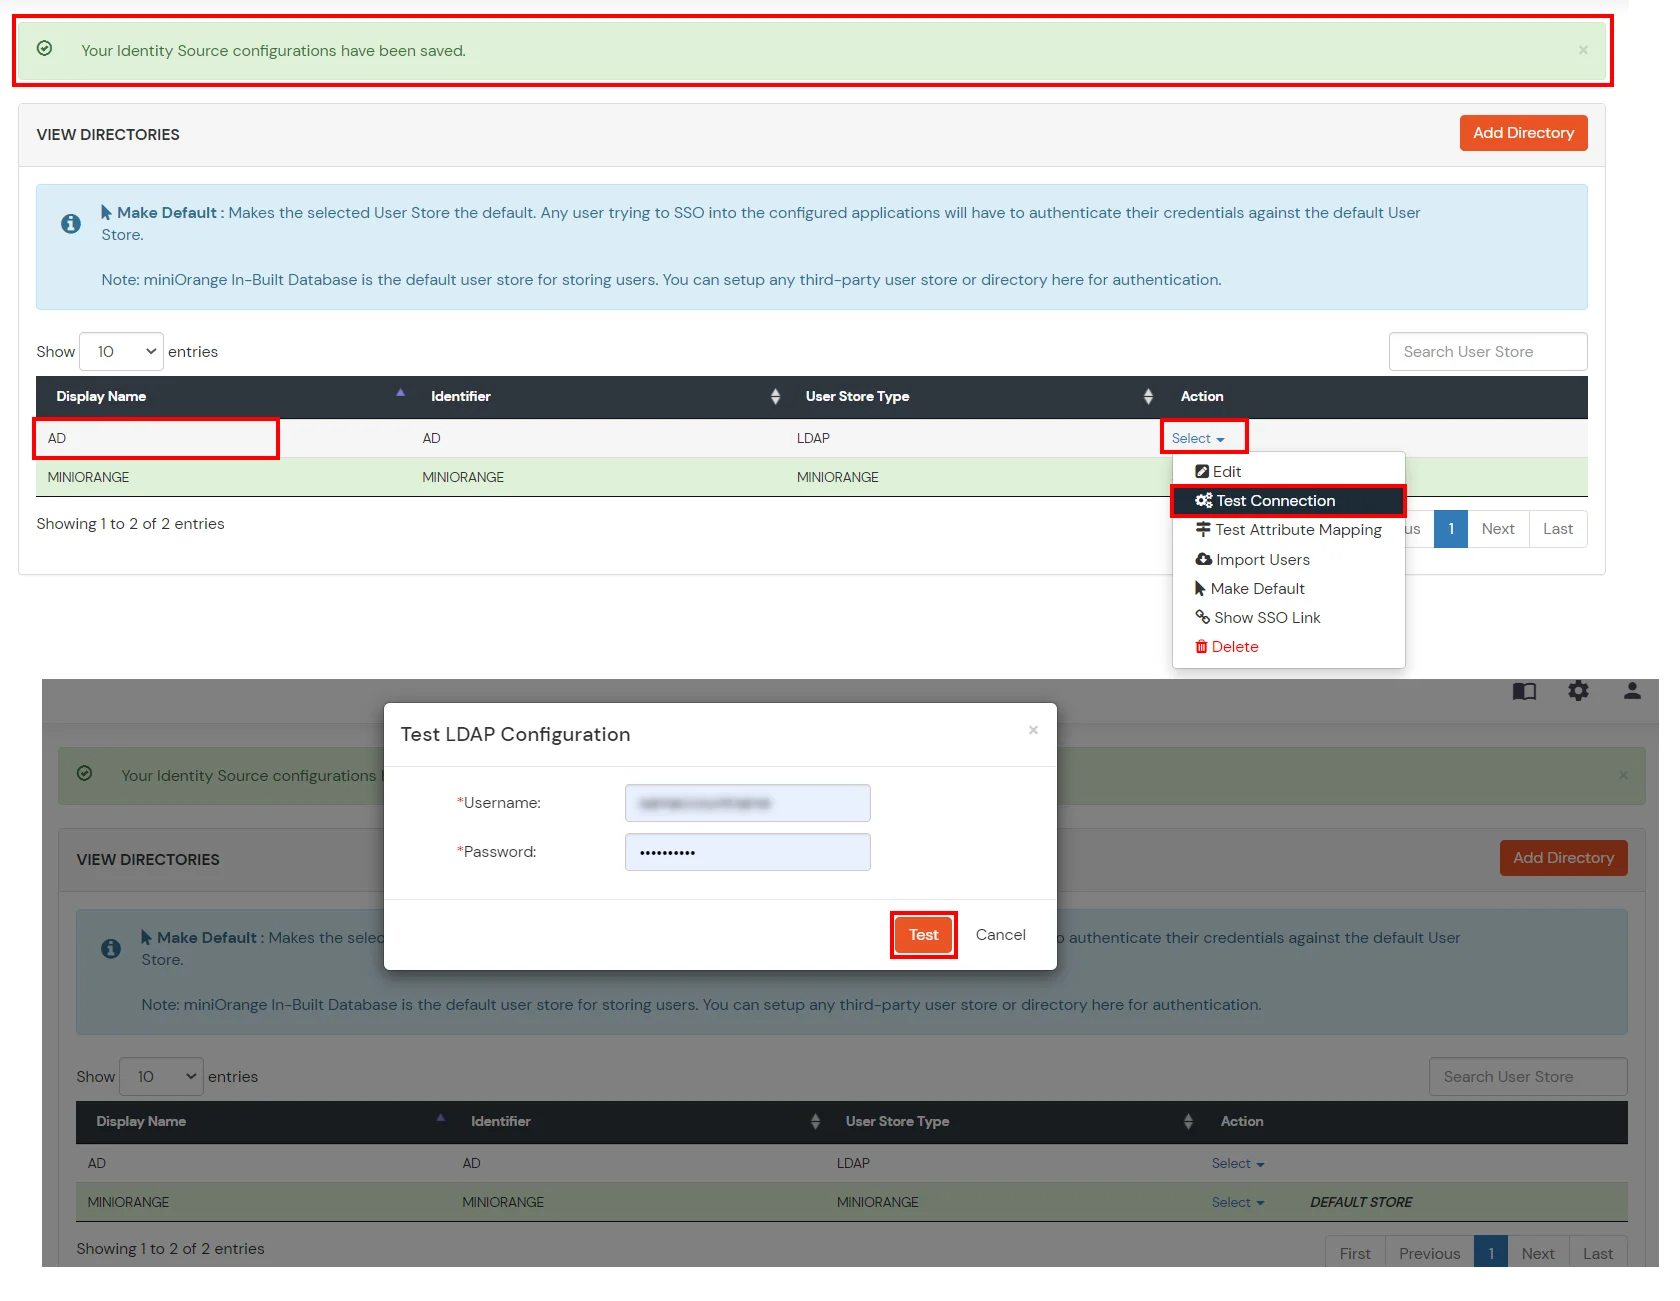
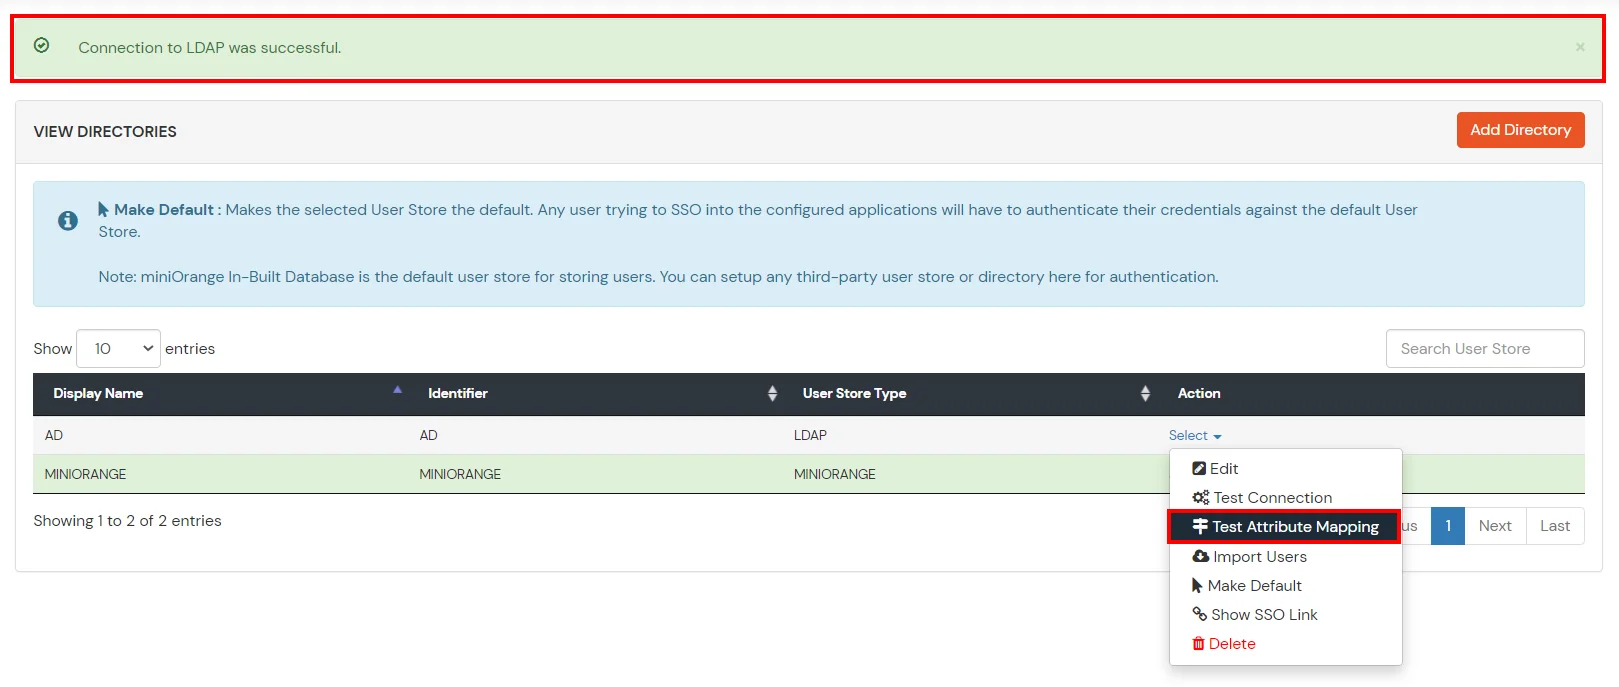
- On Successful connection with LDAP Server, a success message is shown.
- Click on Test Attribute Mapping.
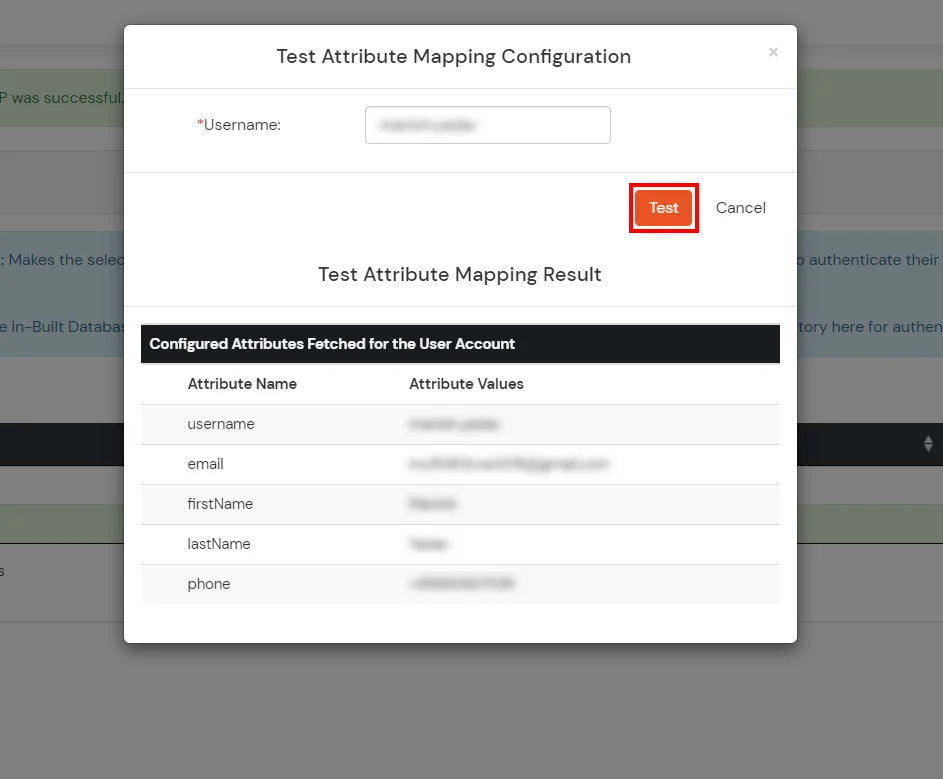
- Enter a valid Username. Then, click on Test. Mapped Attributes corresponding to the user are fetched.
- After successful Attribute Mapping Configuration, go back to the ldap configuration and enable Activate LDAP in order to authenticate users from AD/LDAP.
Refer our guide to setup LDAPS on windows server.
User Import and Provisioning from AD
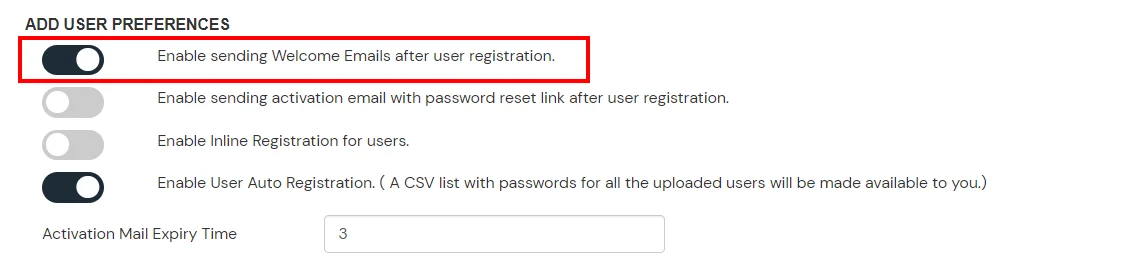
- Go to Settings >> Product Settings in the Customer Admin Account.
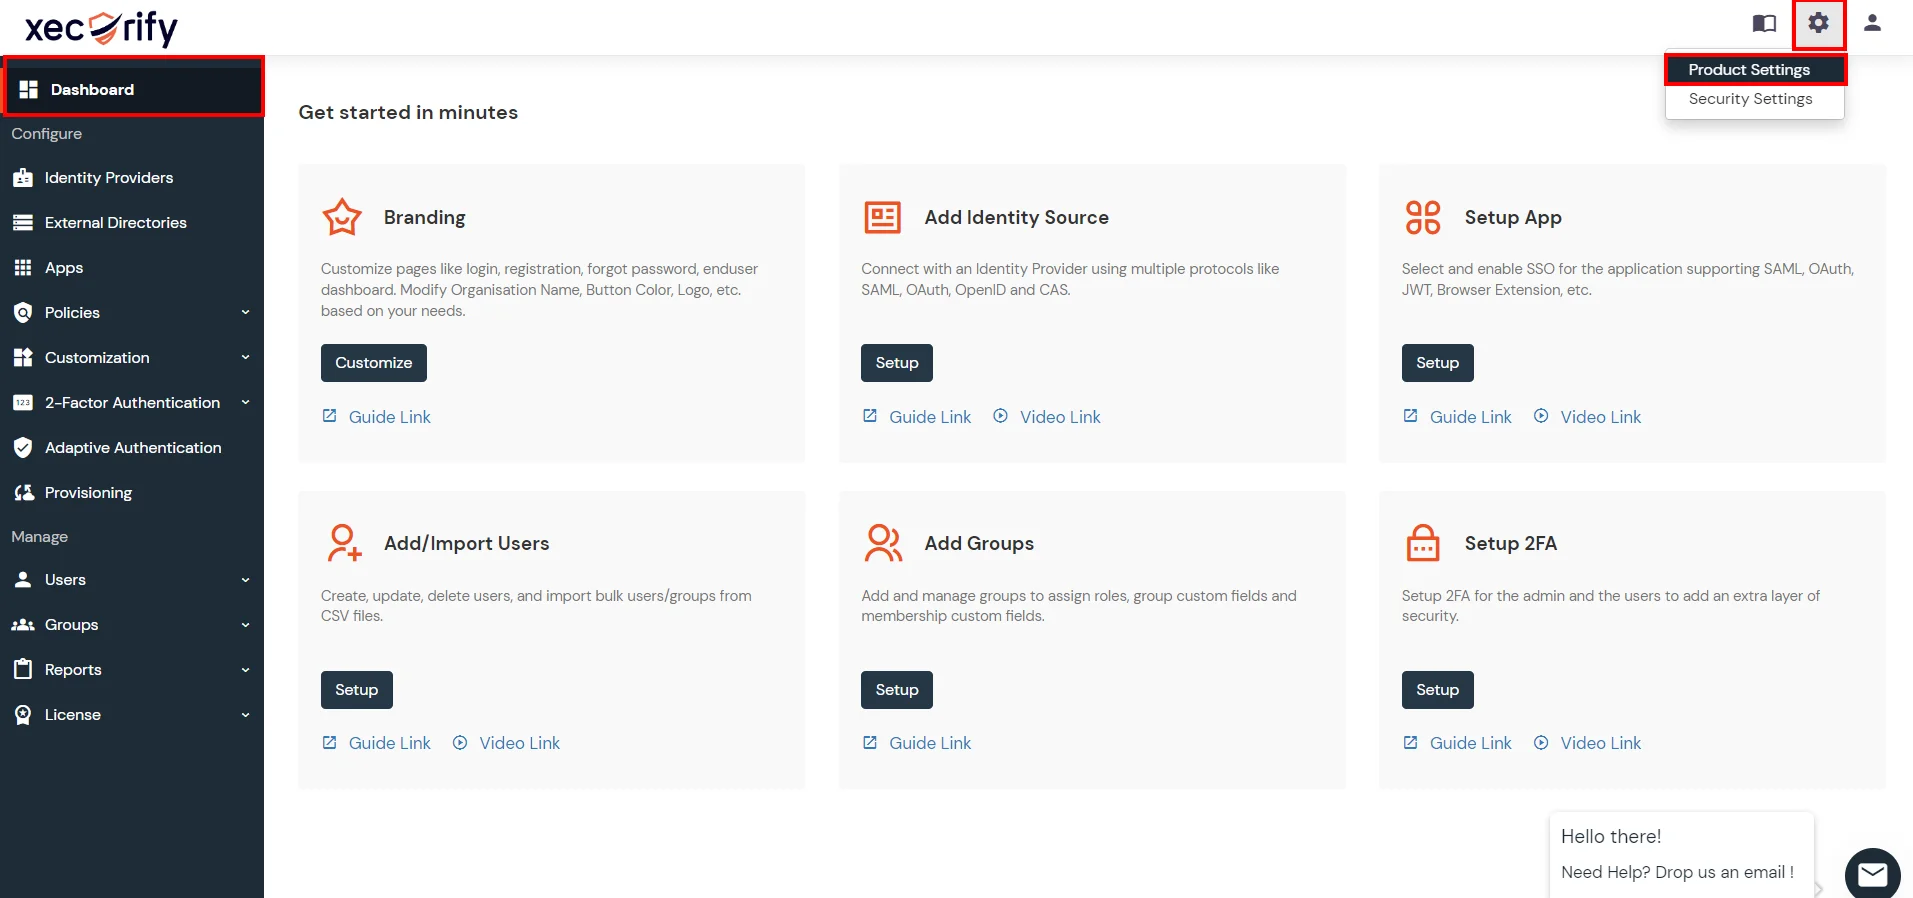
- Enable the "Enable User Auto Registration" option and click Save.

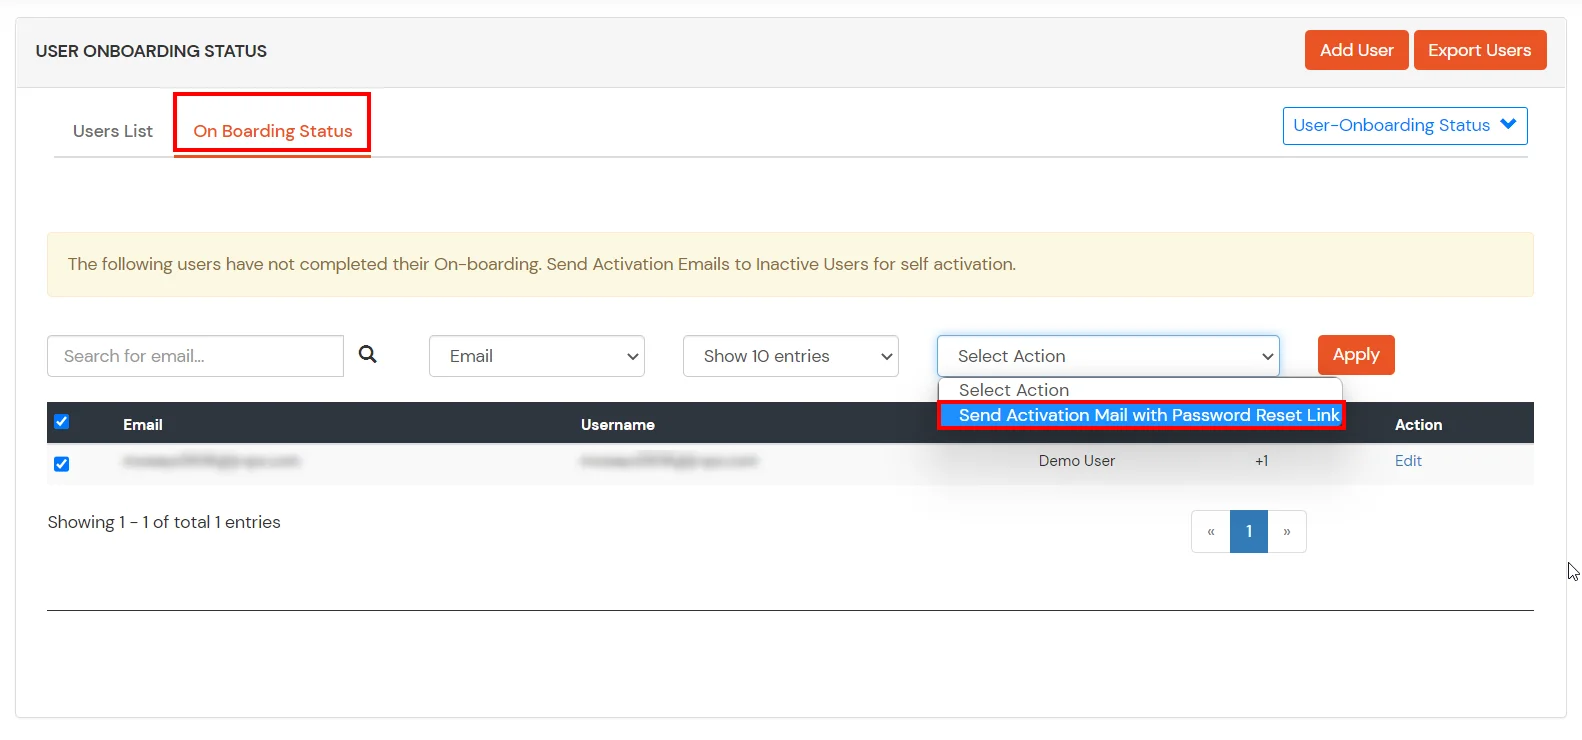
- (Optional) To send a welcome email to all the end users that will be imported, enable the "Enable sending Welcome Emails after user registration" option and click Save.
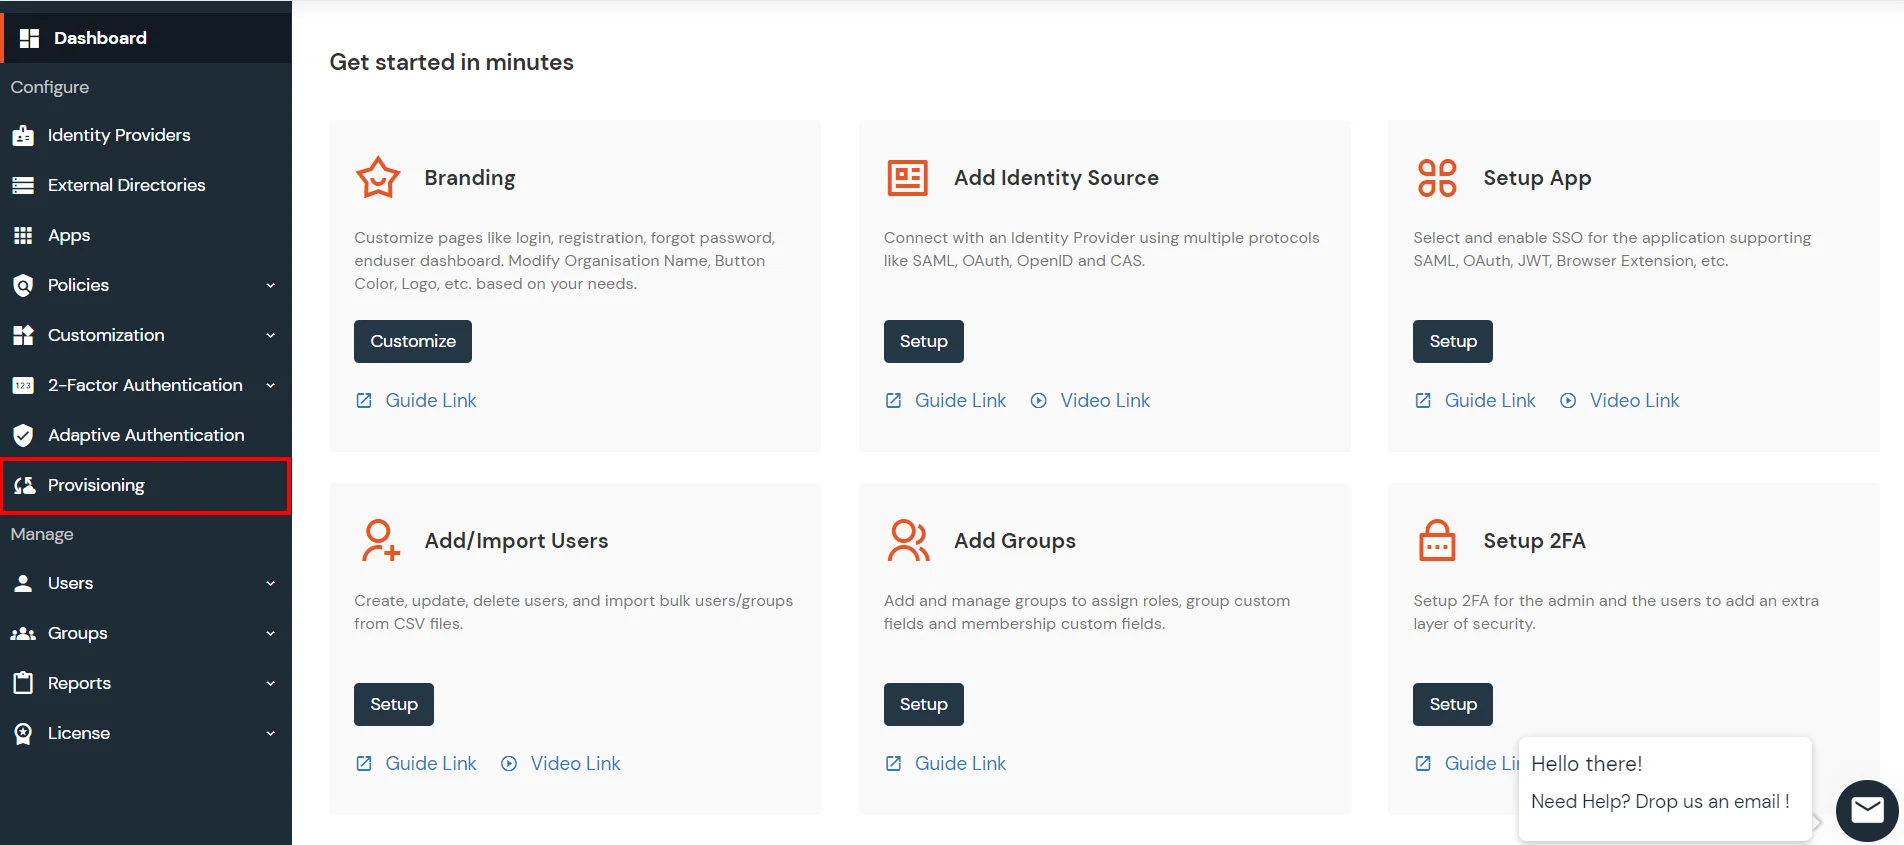
- From the Left-Side menu of the dashboard select Provisioning.
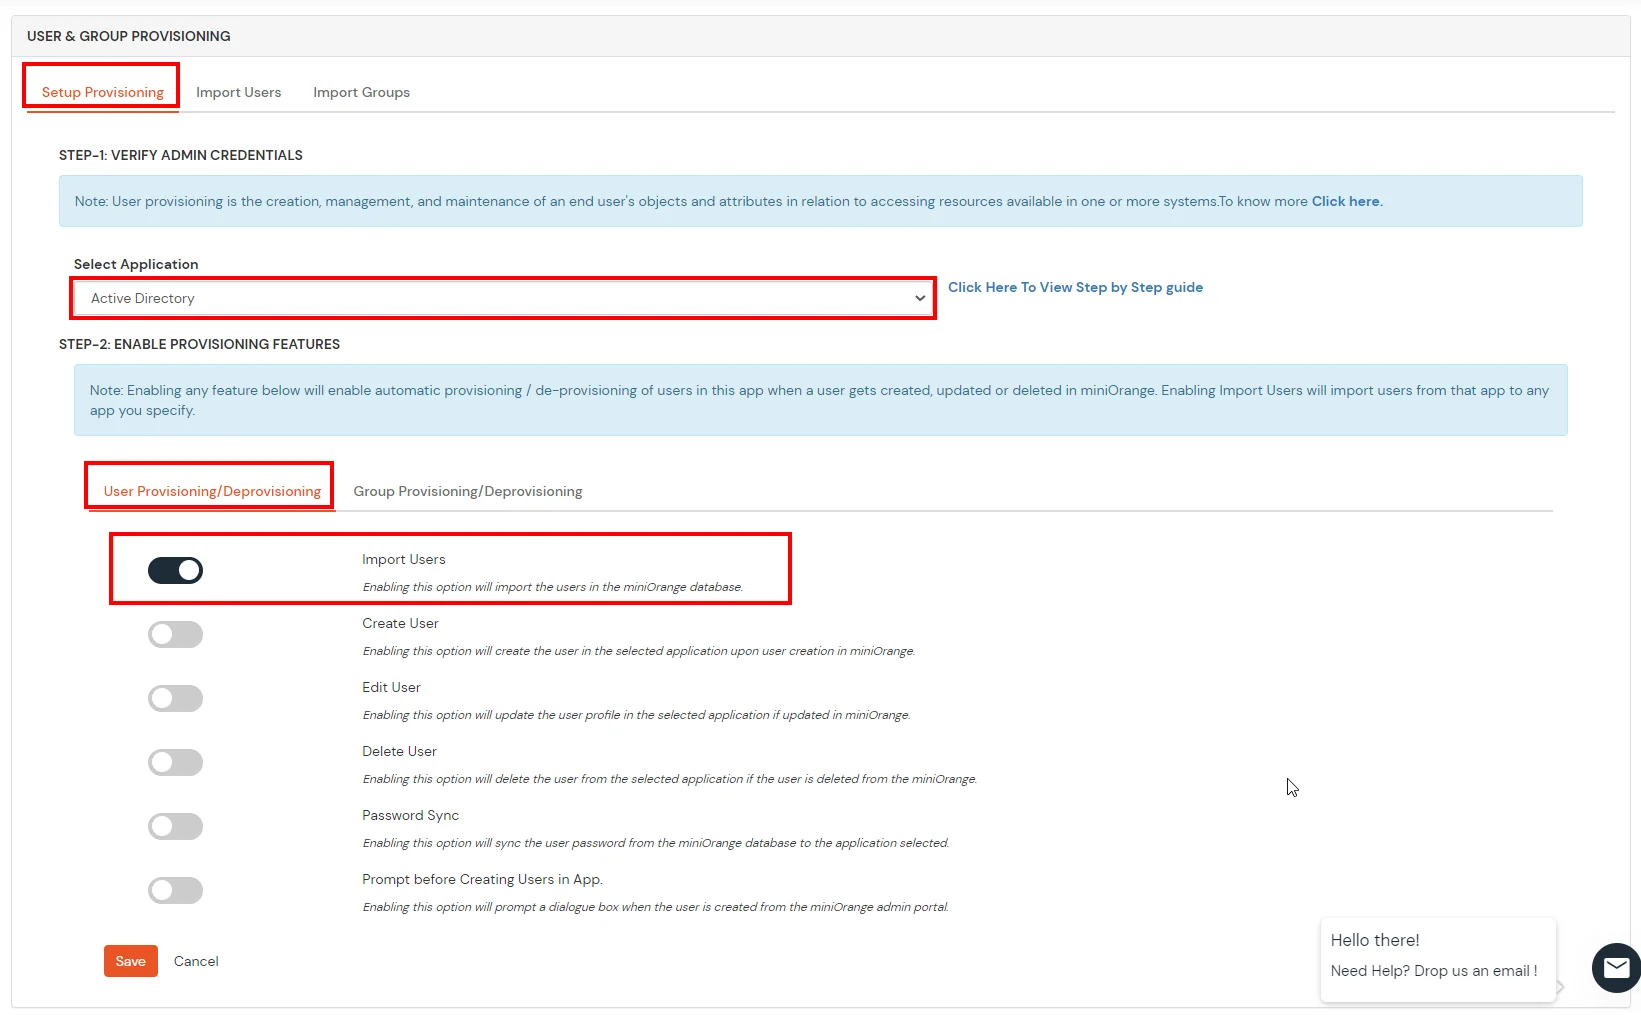
- In Setup Provisioning tab select Active Directory in the Select Application drop-down.
- Toggle the Import Users tab, click on Save button.
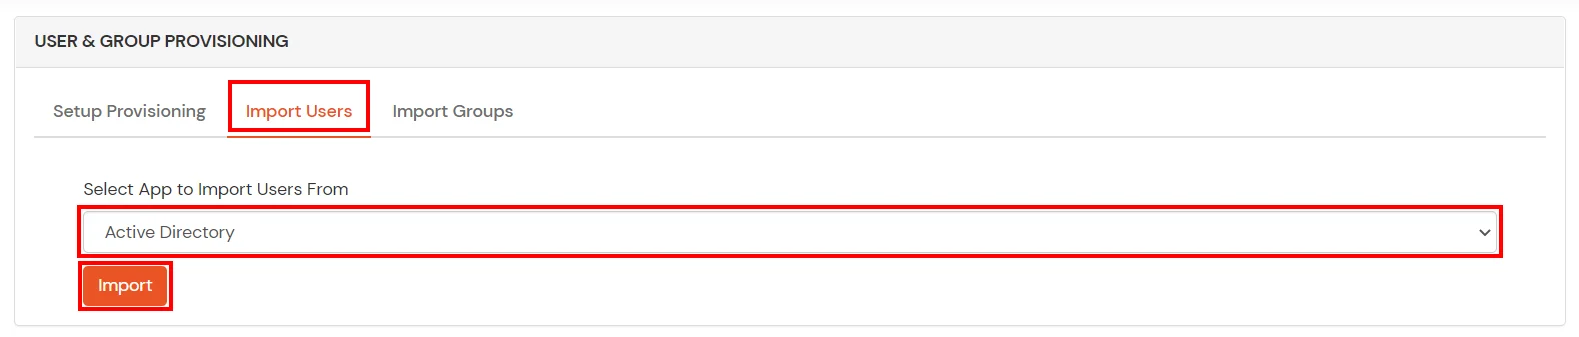
- On the same section, switch to Import Users section.
- Select Active Directory from the dropdown and click on the Import Users tab, to import all the users from Active Directory to miniOrange.
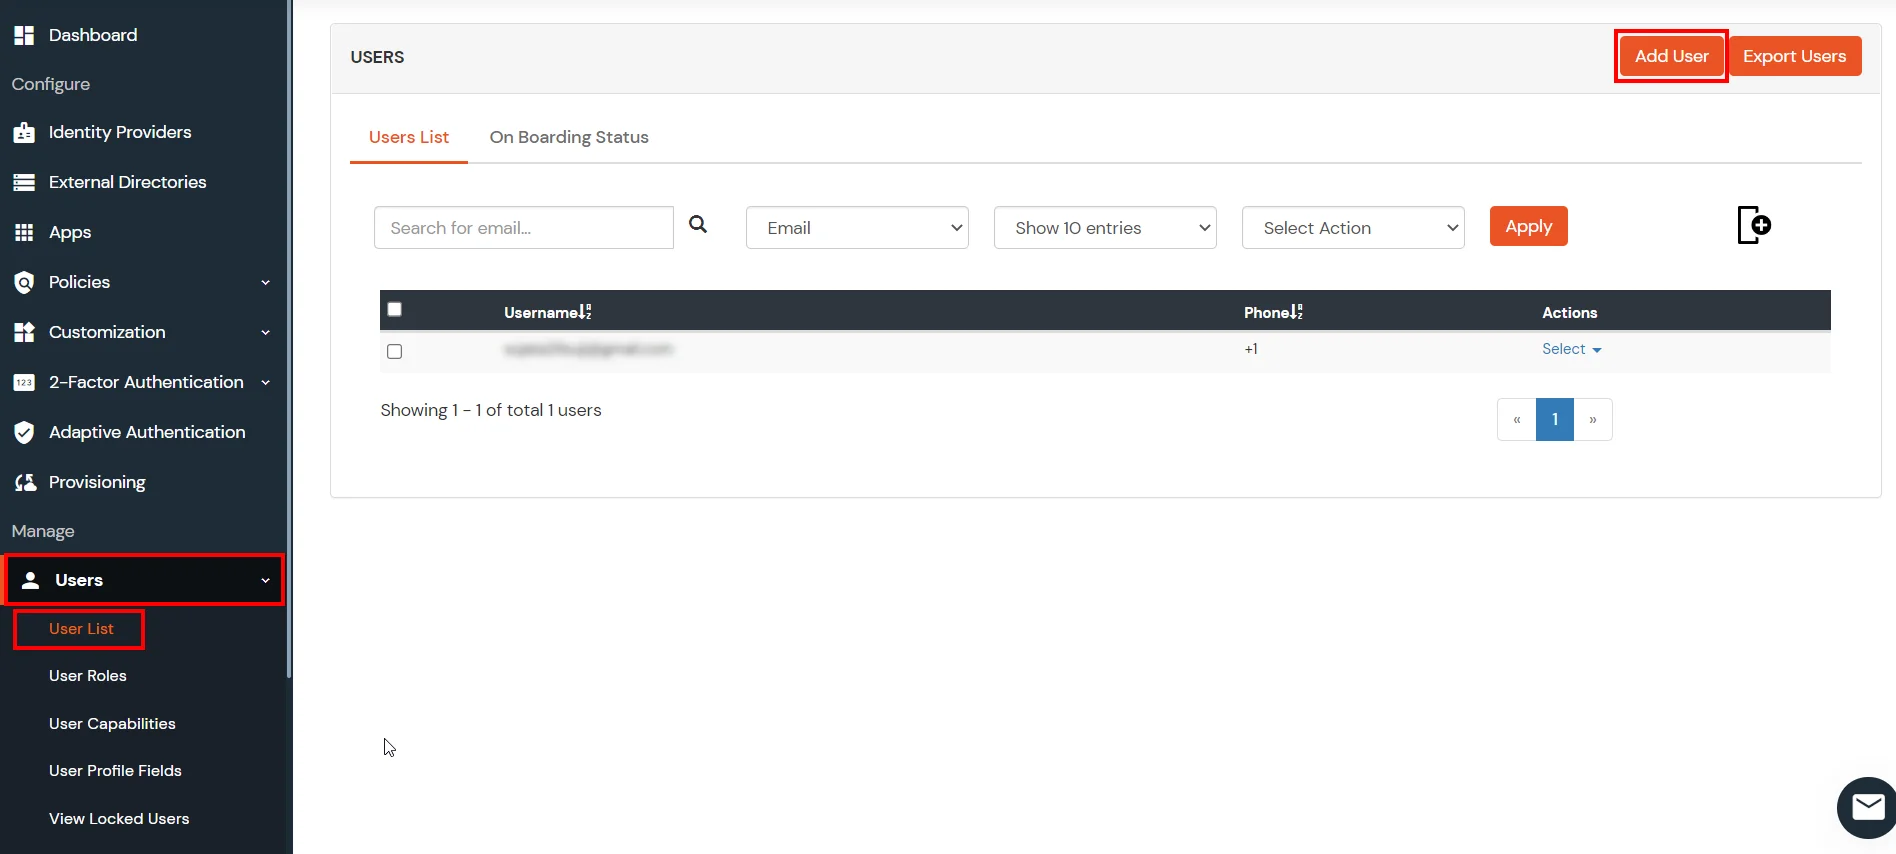
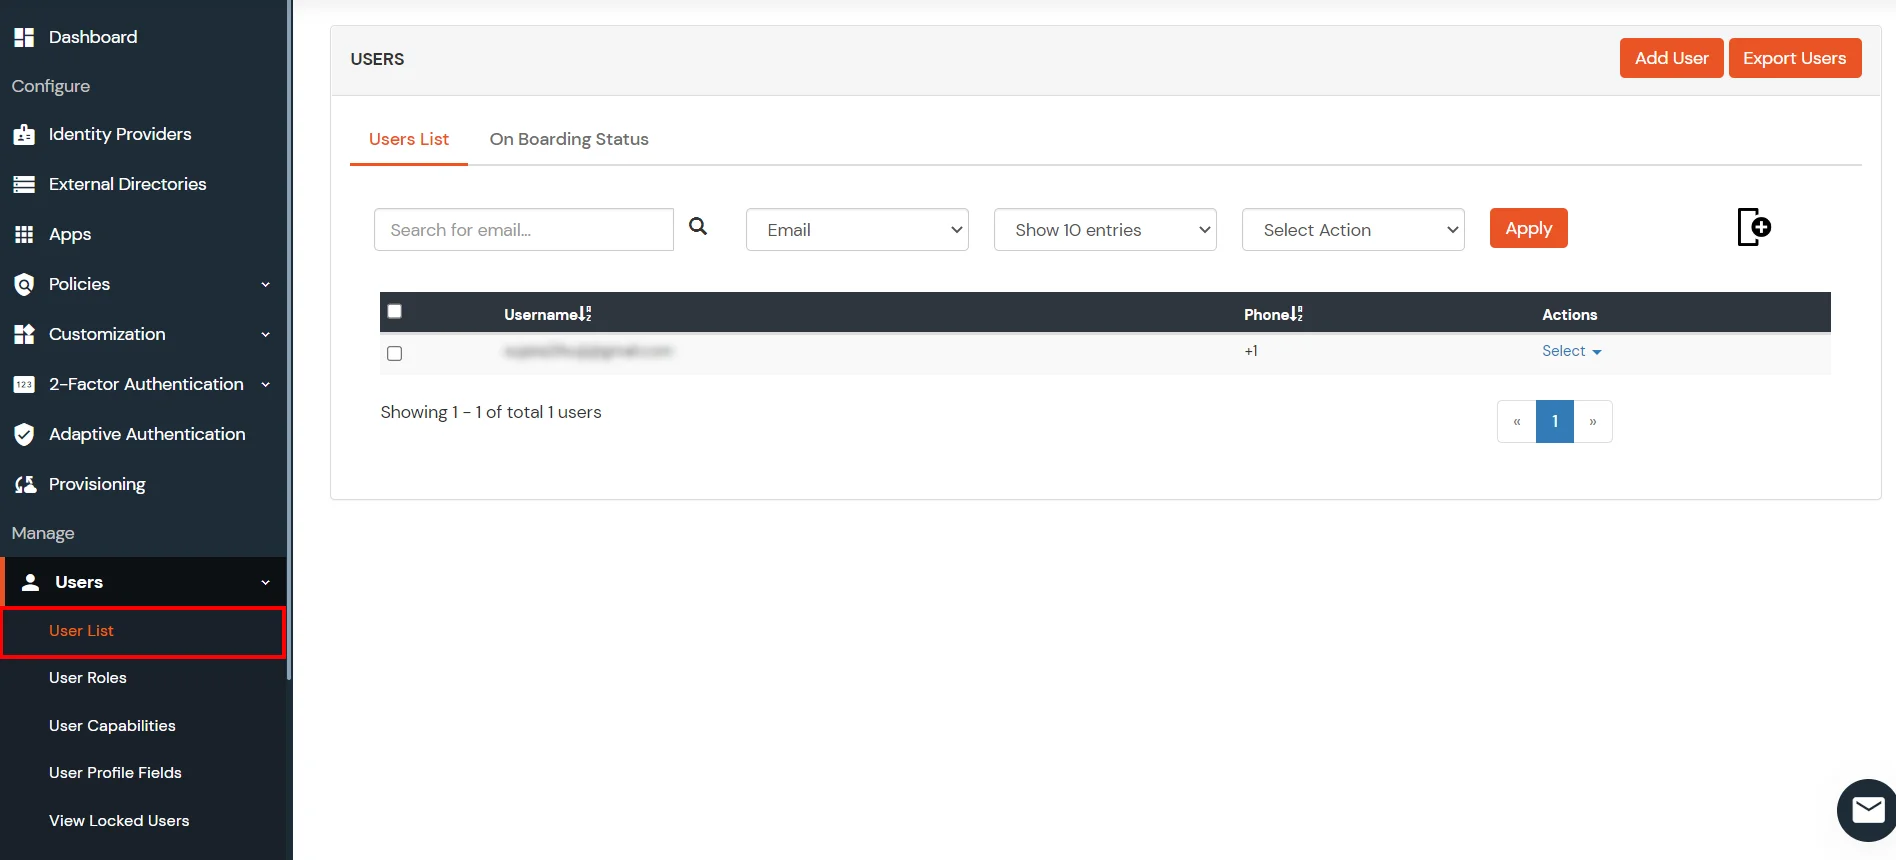
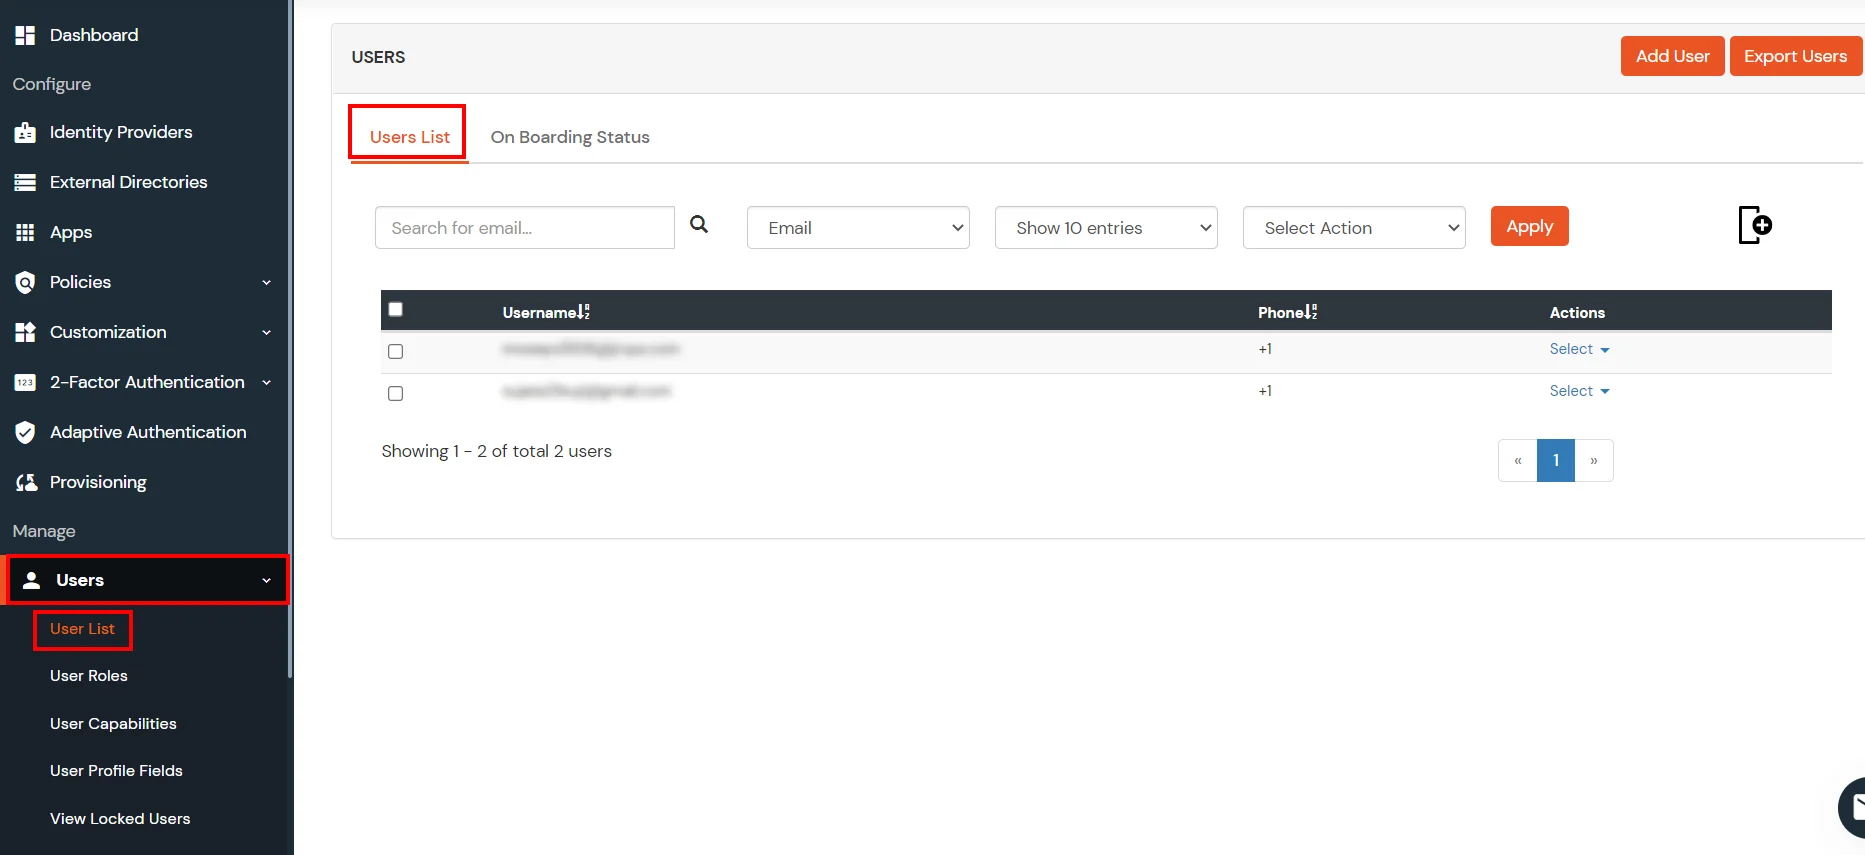
- You can view all the Users you have imports by selecting Users >> User List from Left Panel.
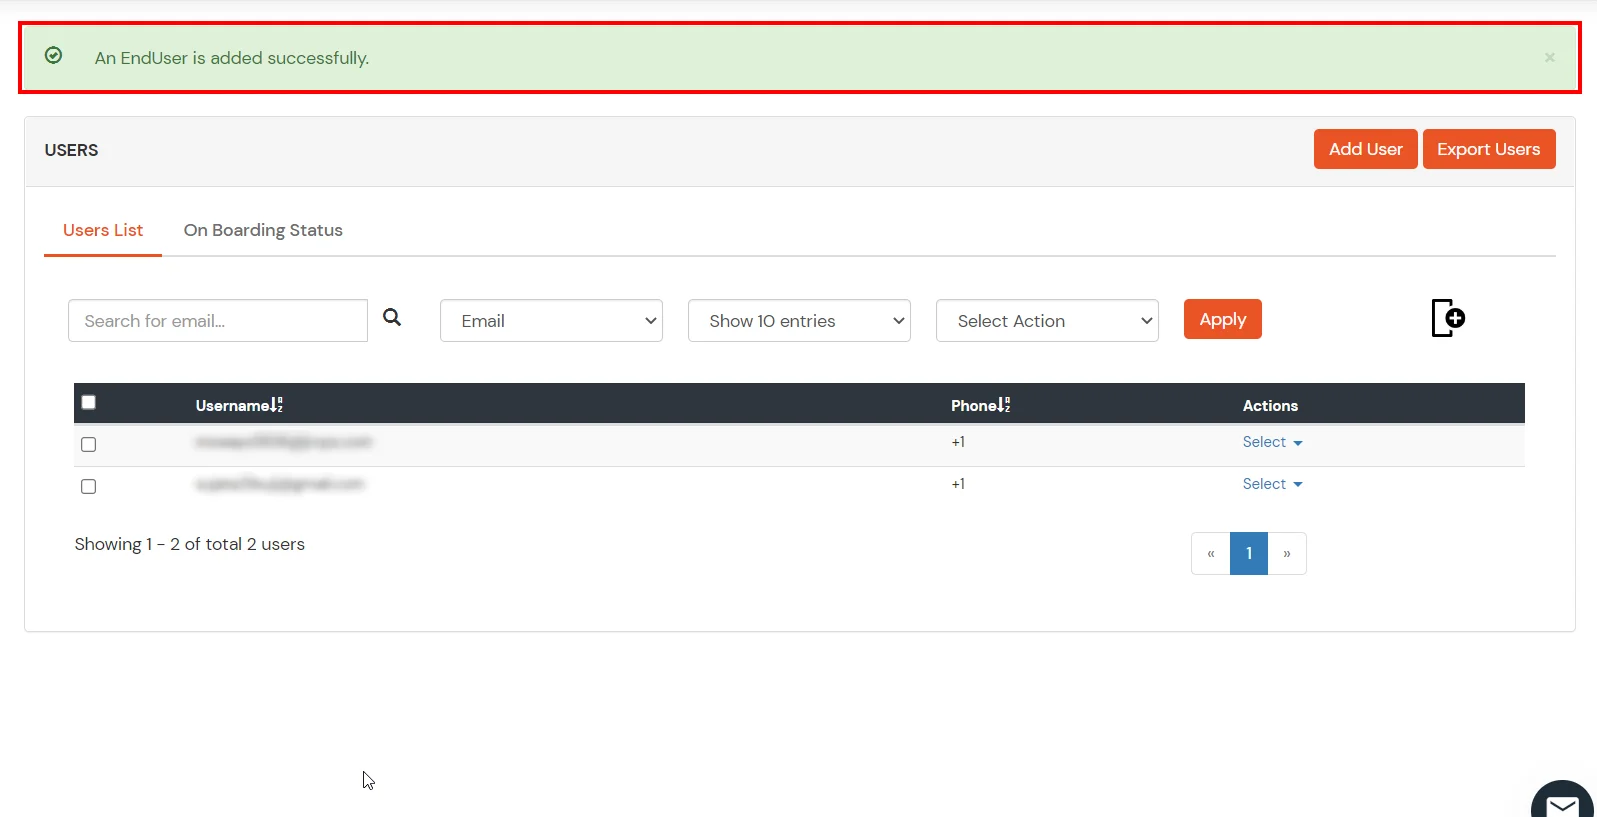
- All the imported users will be auto registered.
- These groups will be helpful in adding multiple 2FA policies on the applications.
miniOrange integrates with various external user sources such as directories, identity providers, and etc.
5. Single Logout (Optional)
If you want to ensure that all sessions (SP and IDP) for a user are properly closed, you can configure Single Logout with the steps below.
A. Configure miniOrange with IdP SLO endpoint:
- Go to the Identity Provider tab and edit the configured Identity Provider.
- Find the option Single Logout URL and configure the SLO URL provided by your IdP.

B. Configure IdP with miniOrange SLO endpoint:
- Configure your Identity Provider with below Single logout endpoint.
https://login.xecurify.in/moas/broker/login/saml_logout/<your-customer-id>
- You can find the SSO Binding option to configure the logout binding type to either REDIRECT or POST.
C. Configure your JWT application with SLO endpoint:
- Configure your JWT application with below Single logout endpoint.
https://login.xecurify.in/moas/broker/login/jwt/logout/<your-customer-id>?redirect_uri=<redirect-url>
| your-customer-id |
You have to add your miniOragne account customer ID here. |
| redirect-url |
This should be replaced with the logout URL of your JWT application. |
External References