Nexus Crowd Connector
The Nexus Crowd SSO Connector allows users to enable SAML Authentication from any SAML compliant Identity Provider(IDP), where SAML SSO requests and responses to and from the IDP will pass via the Crowd server. The user will be authenticated at the IDP, while user permissions can still be managed using Crowd.
Download and Installation
- Once you purchase a plugin license, miniOrange will share a download link for the plugin.
- There will be a ZIP containing the plugin along with required dependencies.
- Extract the ZIP, and place all the JAR files into <nexus_installation>/deploy folder, and then restart the Nexus server.
Steps To Activate The Plugin
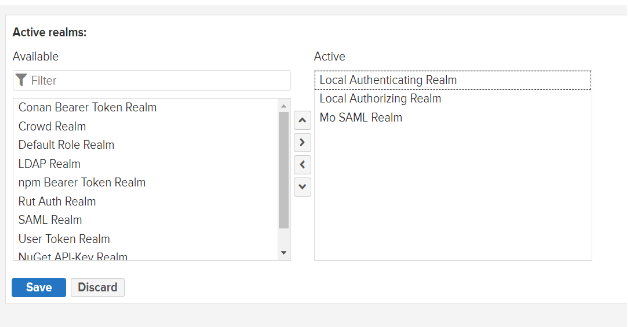
- Log into Nexus as administrator and go to Administration >> Security >> Realms.
- To activate the miniOrange SAML Realm, move the realm from the Available list to the Active list and save the changes.
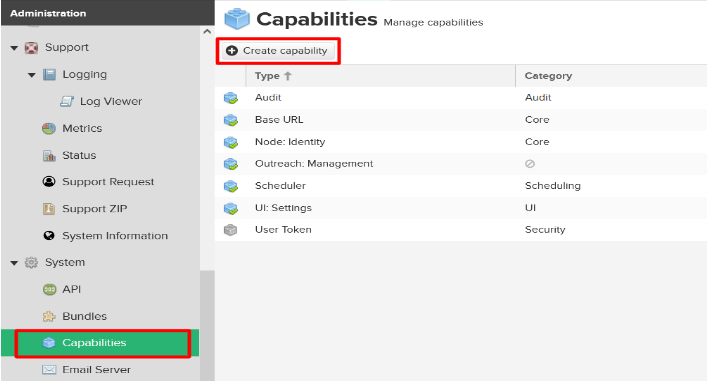
- Once miniOrange SAML Realm is active, go to the Administration >> System >> Capabilities page and click on the Create capability button.
- Find and select miniOrange SAML SSO capability and scroll to the bottom of the page.
- You’ll find the fields for Email Address and License Key. Enter your email address and the license key provided by miniOrange, and save the changes.
Note: The realm order in the given box determines the order of the
realms in your authentication flow. We recommend putting Mo SAML Realm
after the built-in realms.


Steps To Configure The Plugin
- Before proceeding with plugin configuration, make sure you create a new application on Crowd.
- Log into Crowd Admin account. Go to Applications from top menu, and click on Add application.
- Now choose the Generic Application option from the Application type dropdown, provide a Name, and Password for this application (Please note down the Application name and the password).
- Confirm your password and then click on Next button.
- Provide the base URL of your Nexus server, and click Resolve IP Address button. Once the process is done, click on Next button.
- On the next screen, select the desired Crowd directory, and click on Next.
- Now select the desired groups from the selected directory, or you can also select Allow all users to authenticate checkbox to allow all the groups.
- On confirmation page, verify all the details and click on Add application button.
-
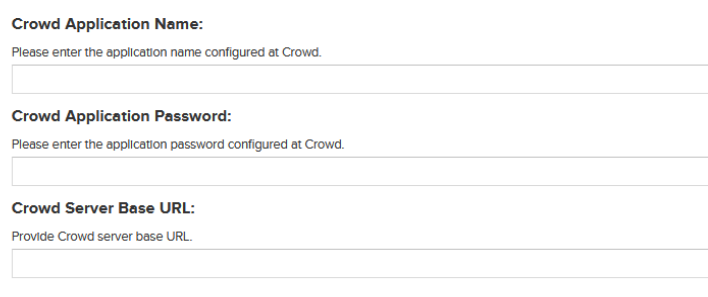
On the miniOrange SAML SSO capability page, configure the below Crowd
details.
Crowd Application Name
Crowd Application Password
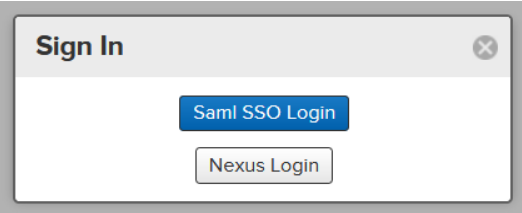
Crowd Base URL - Once the configuration are done, you can perform SSO from login page using a Saml SSO Login button, as shown below.


Crowd Troubleshooting
If you encounter any difficulties while setting up miniOrange Crowd
add-ons, please refer to this Crowd troubleshooting page for
assistance.
Additional Resources
Did this page help you?


 Try it for free