Contents
CA Identity as IdP – SAML
Step 1: Setup CA Identity Manager as Identity Provider
- Go to the Service Provider Info tab .
- Click on the link https://[application-Domain]/plugins/servlet/saml/metadata.
- choose Save As to save data in XML format on your system.
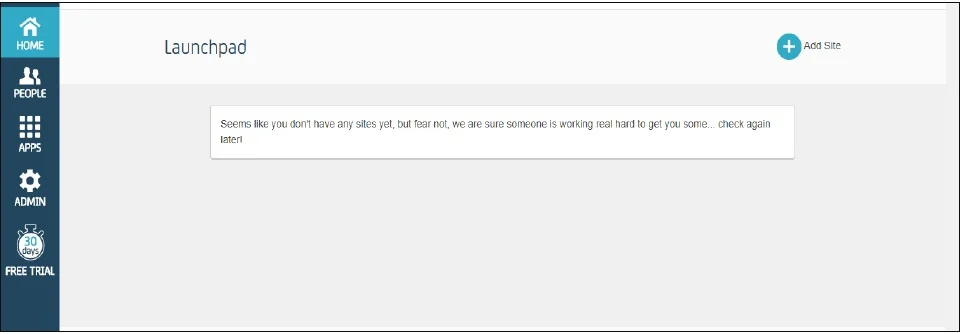
- Log in to your CA Identity service portal with the administrator account. You're going to be sent to the launchpad.
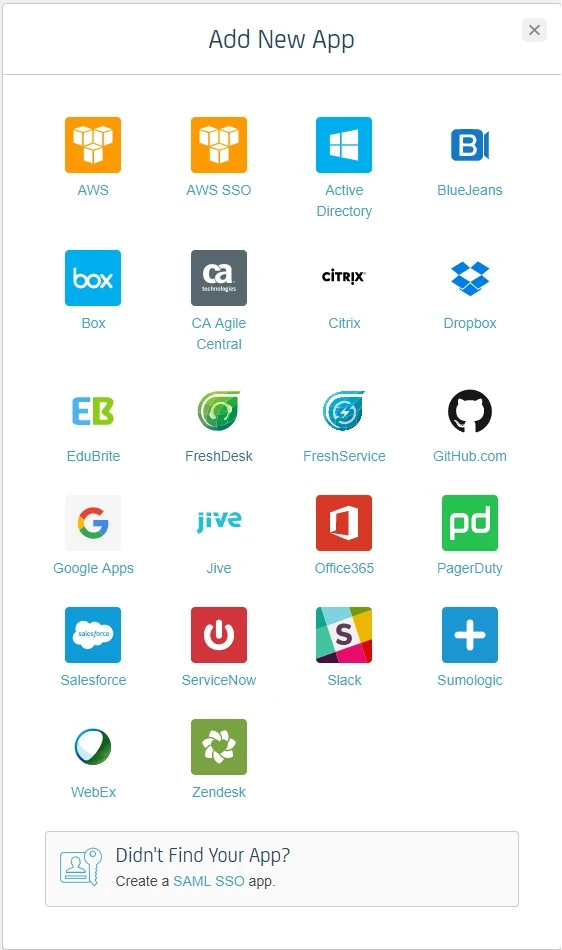
- Go to Apps and click on add an app.
- Scroll down in the Add App popup window and click Create a SSO app
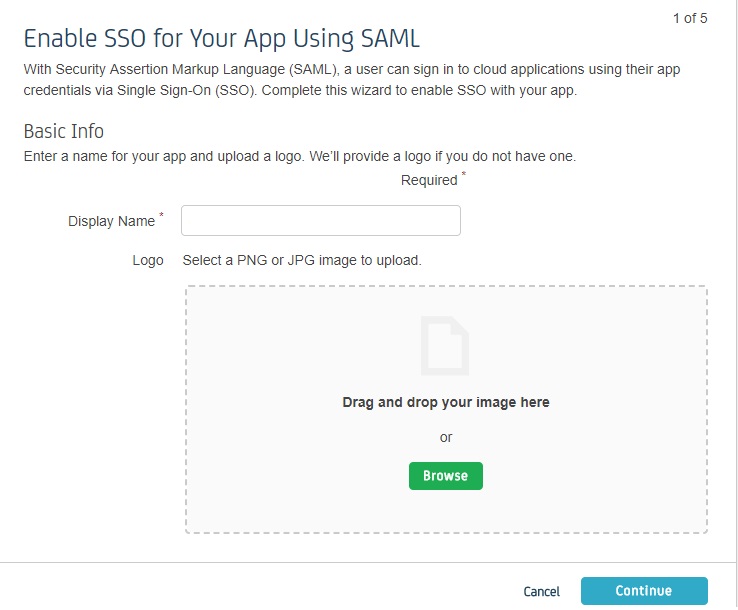
- Fill out the information in each of the steps as given below.
- In Display Name, enter the name of your app and click Continue.
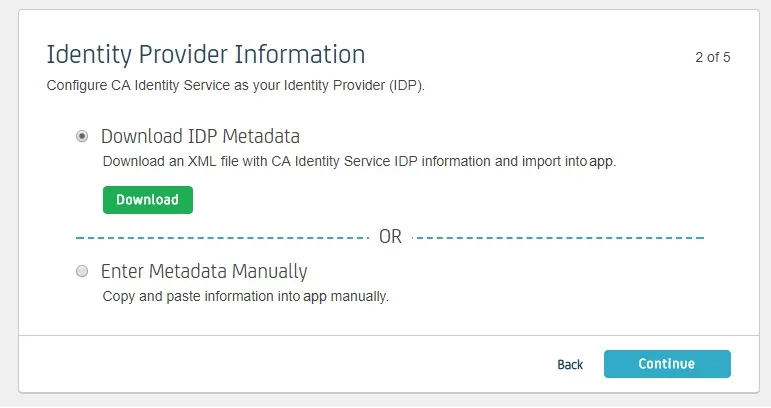
- Download IDP Metadata or you can copy the SP Entity ID and ACS URL from the plugin. This is necessary to configure the add-on later. Click on Continue.
- Upload SP metadata to Upload SP metadata and click Continue.
- You can also manually enter data. The data can be found in the add- on's SP Info tab.
- Fill Attribute Mapping as per your requirement. Set Type against NameID to User Attribute and set Value as User Name or Primary Email. These attributes are used to create user in the SP.
- Click on Continue and click Finish .
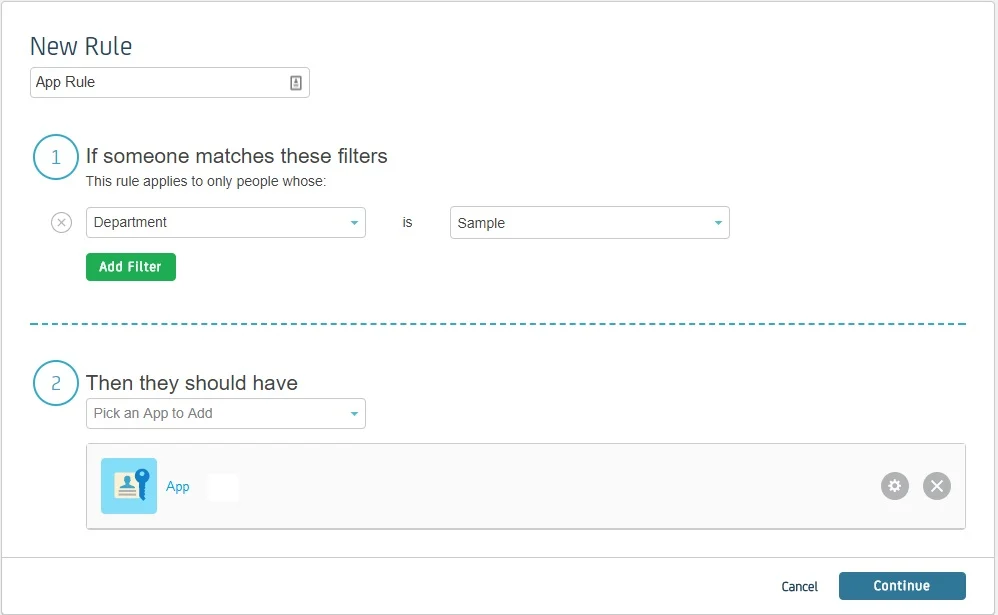
- You’ll be redirected to app Dashboard. Go to Rules. A Rule defines who has the access to app. Click on add rule.
- Enter the rule name. Click on Add Filter and select on which basis you want to assign app. You can select a department, type or title. You can add more filters according to your need. Click Continue.
- Select the SP app you setup in Then they should have. Click Continue.
- You can test the app by selecting a person from that department. Click Finish
Follow the steps below to configure CA Identity Manager as an Identity Provider.
 Pre-requisite:
To configure CA Identity Manager as IDP, you need the metadata from SSO plugin.
 Login as Administrator
 Enable SSO for Your App Using SAML
 Identity Provider Information
 Service Provider Information
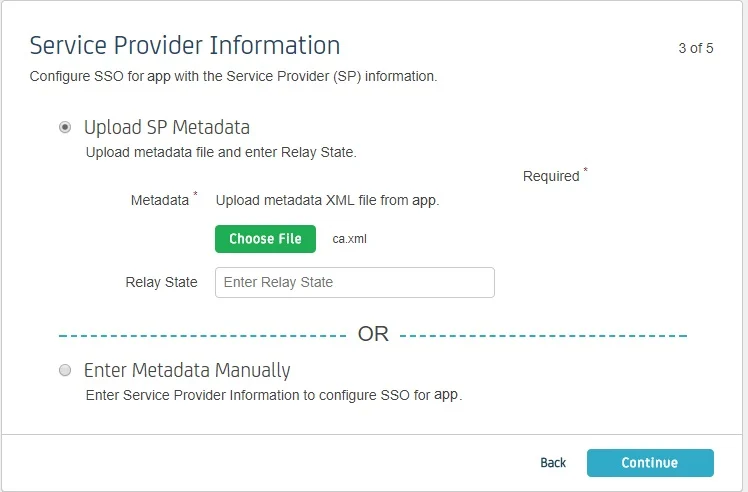
| Information to be entered in CA | Information to copy from the add-on |
| Assertion Consumer Service URL | ACS URL |
| Relay State | - |
| Entity ID | SP Entity ID |
| NameID Format | Email Address |
| Binding | POST |
| Requests Signed | Yes |
| Certificate | Download the certificate provided in SP Info tab and upload it here |
 Attribute Mapping
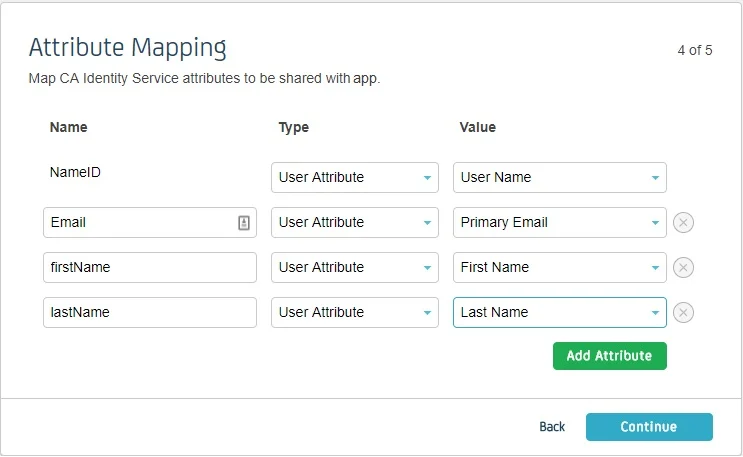
 Create a Rule
×
![ADFS_sso]()
