- Home
- Data Loss Prevention
- Data Loss Prevention for Jira

How to Setup the miniOrange Data – PII Scanner (DLP) for JIRA
The JIRA PII Scanner is a robust tool designed to improve data privacy and compliance in JIRA environments. This application thoroughly scans your entire JIRA instance, identifying and reporting potential leaks of Personally Identifiable Information (PII).
As data security becomes increasingly critical, the JIRA PII Scanner empowers you to take control of sensitive information, ensuring user privacy is protected and your organization remains compliant with regulations. Let’s explore how to get started with this essential tool and enhance your data protection efforts.
 Try it for free
Download and Installation
- Log into your JIRA cloud as an admin.
- Click on Apps from the navbar, and then click on explore more apps.
- Now, Search for Data - PII Scanner (DLP) for JIRA.
- Here you can click on Try it free to get a free trial of our app.
- Alternatively, you can click on Buy Now to purchase the app.
1: Get Started
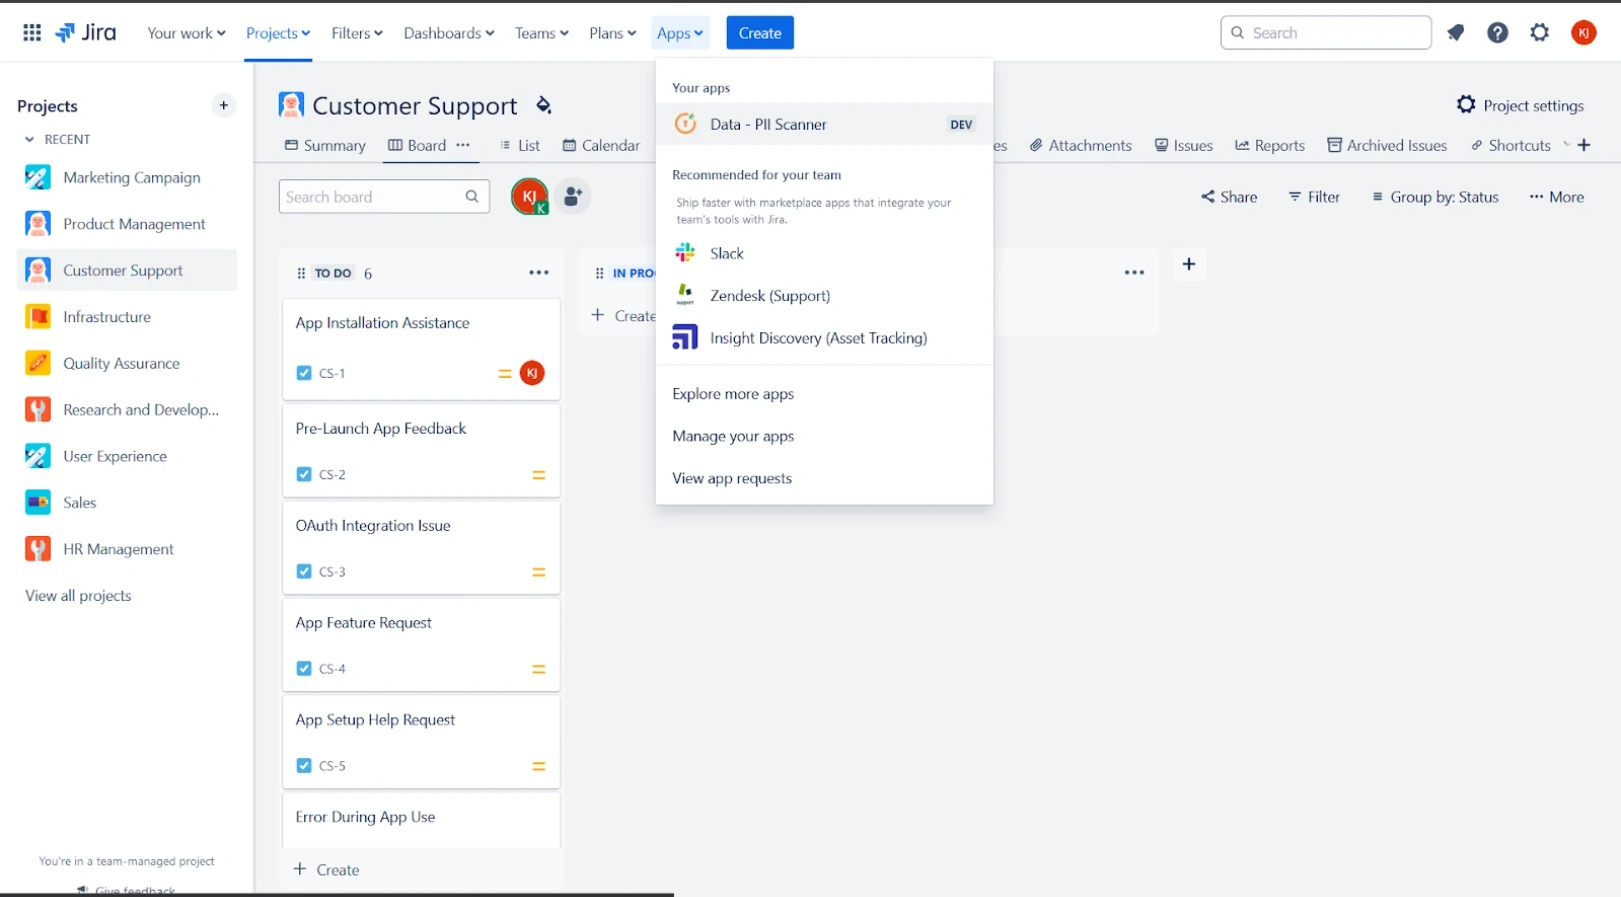
To access the Data - PII Scanner, follow these steps:
- Navigate to the Apps section in the top navigation bar of your JIRA dashboard.
- Look for Data - PII Scanner in the dropdown menu. Please note that this option is available only for users with Admin permissions.
 1.1 Comprehensive Scan of All JIRA Projects
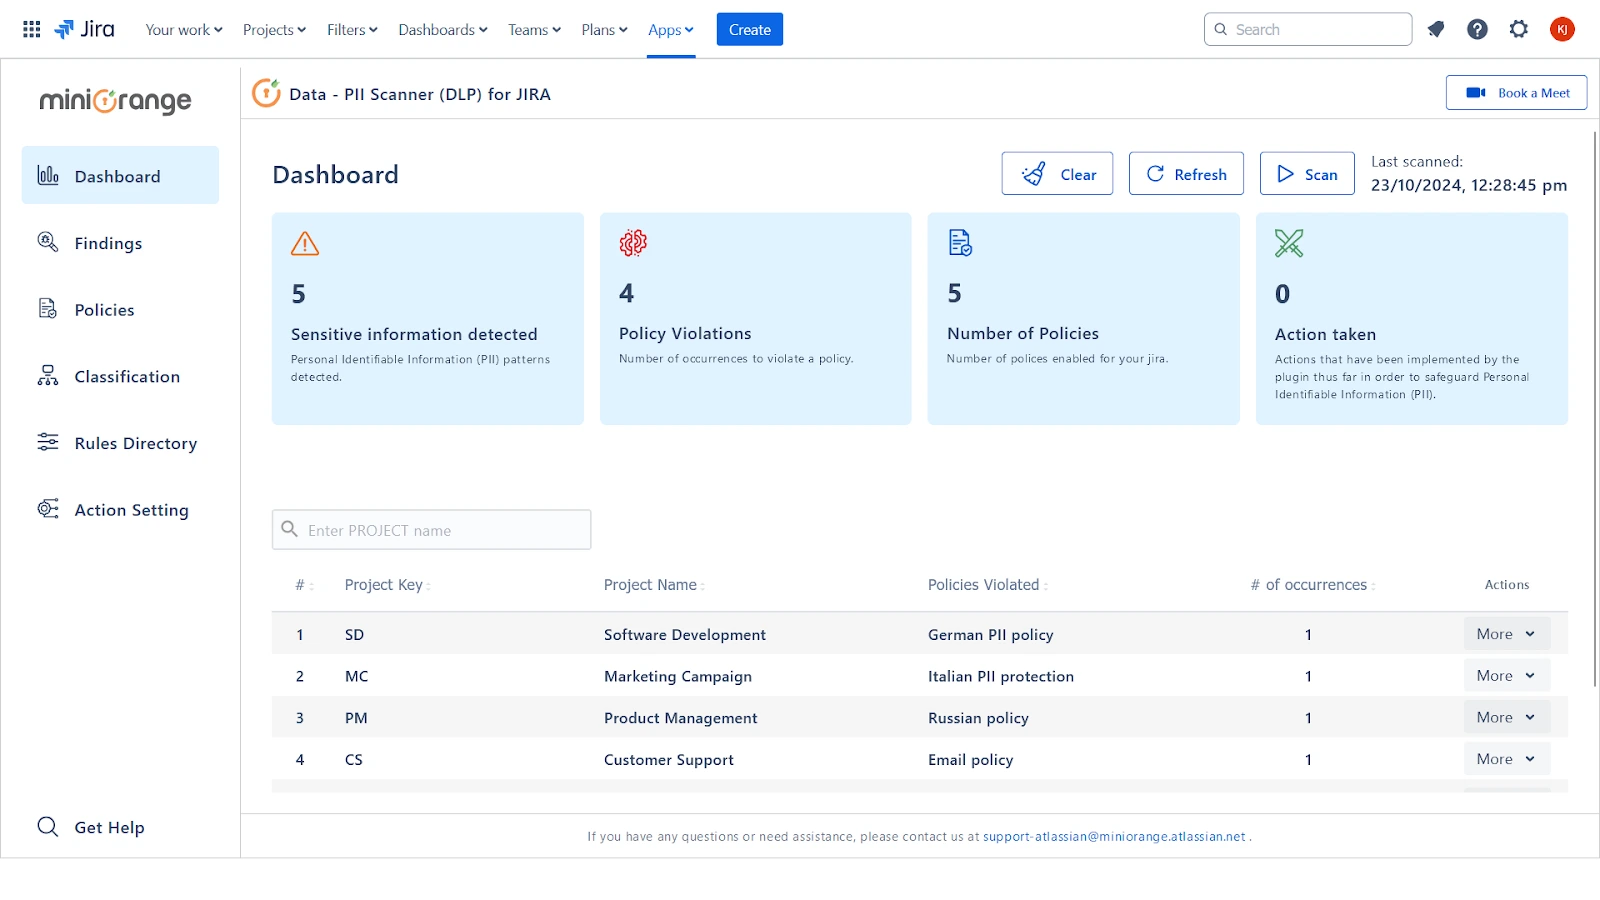
- In the Data - PII Scanner interface, navigate to the top-right corner and select the Scan option. This will initiate a comprehensive scan of all JIRA tickets across your projects.
- As the scan progresses, monitor its status through the progress bar, which provides a visual update of the scanning process.
- Once the scan is complete, you’ll receive a detailed overview of any exposed PII within your JIRA projects. From here, you can review the findings and take the necessary actions to address potential data exposure.
1.2 Detailed Project Findings and Ticket Violations
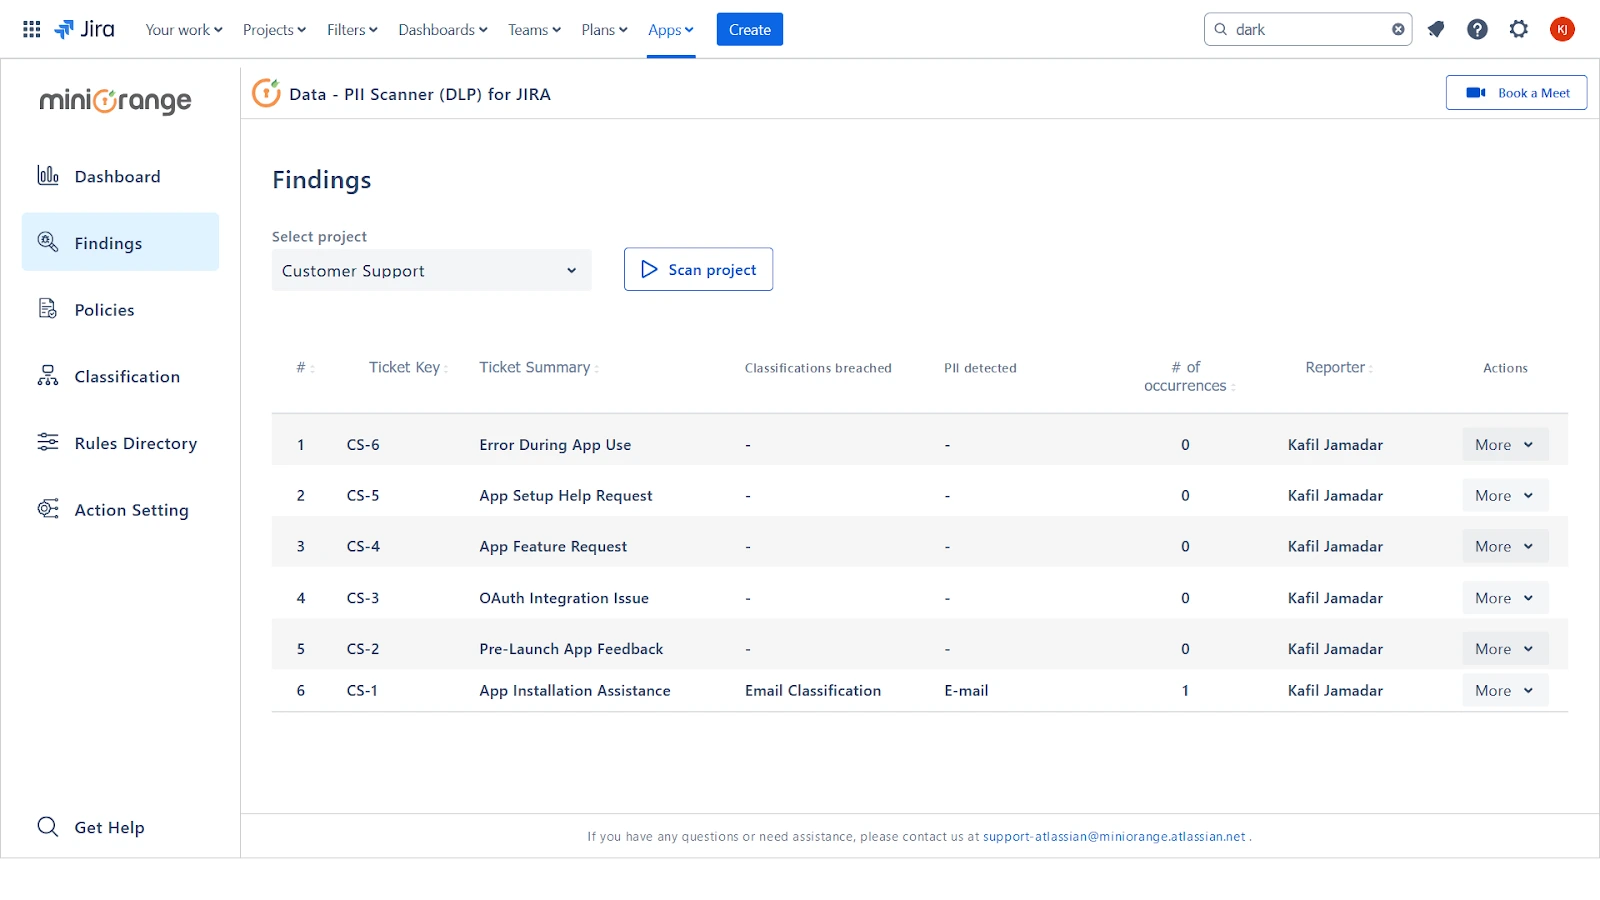
- Select the specific Project for which you want to view detailed insights into ticket-wise findings and violations.
- Click on Scan to start a new scan for the selected project. This will provide updated information on any identified issues and plugin violations.
- This process ensures that you have the most current and accurate results for the chosen JIRA Project and its tickets, helping you address any potential data exposure effectively.
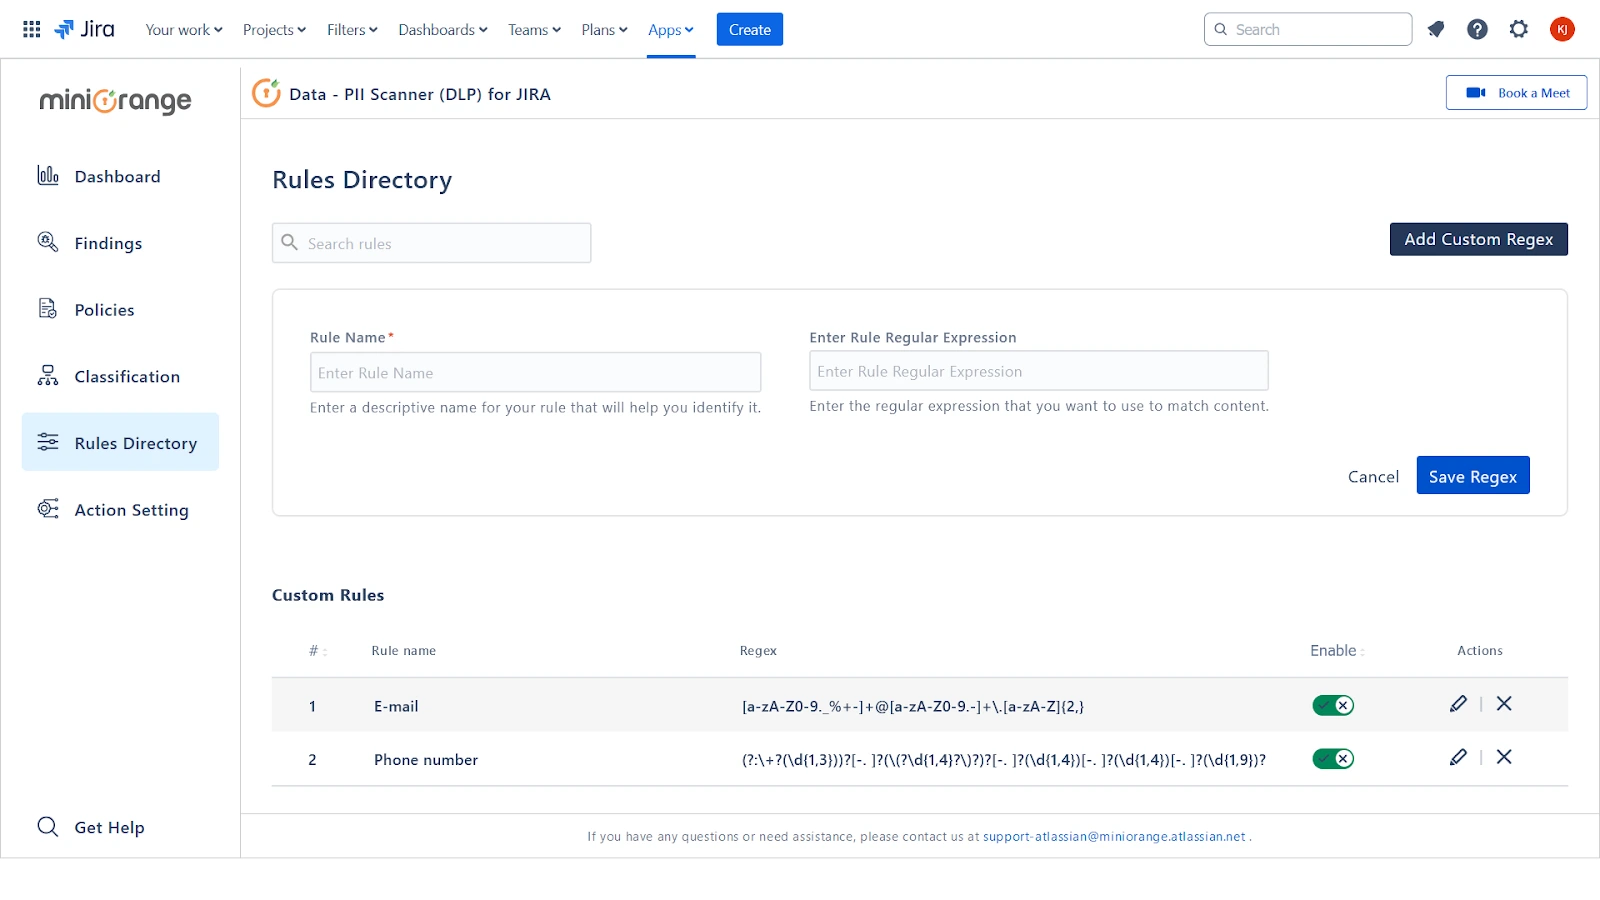
2: Create a custom rule/regex
You can create custom rules or regex patterns to thoroughly scan JIRA for specific data patterns and report any occurrences. Follow these steps to add a new rule:
- Click the Add Custom Regex button on the right side of the interface.
- Enter a Name for the rule, which will help you identify it in future findings.
- Enter the Regex pattern that matches the content you want the scanner to detect.
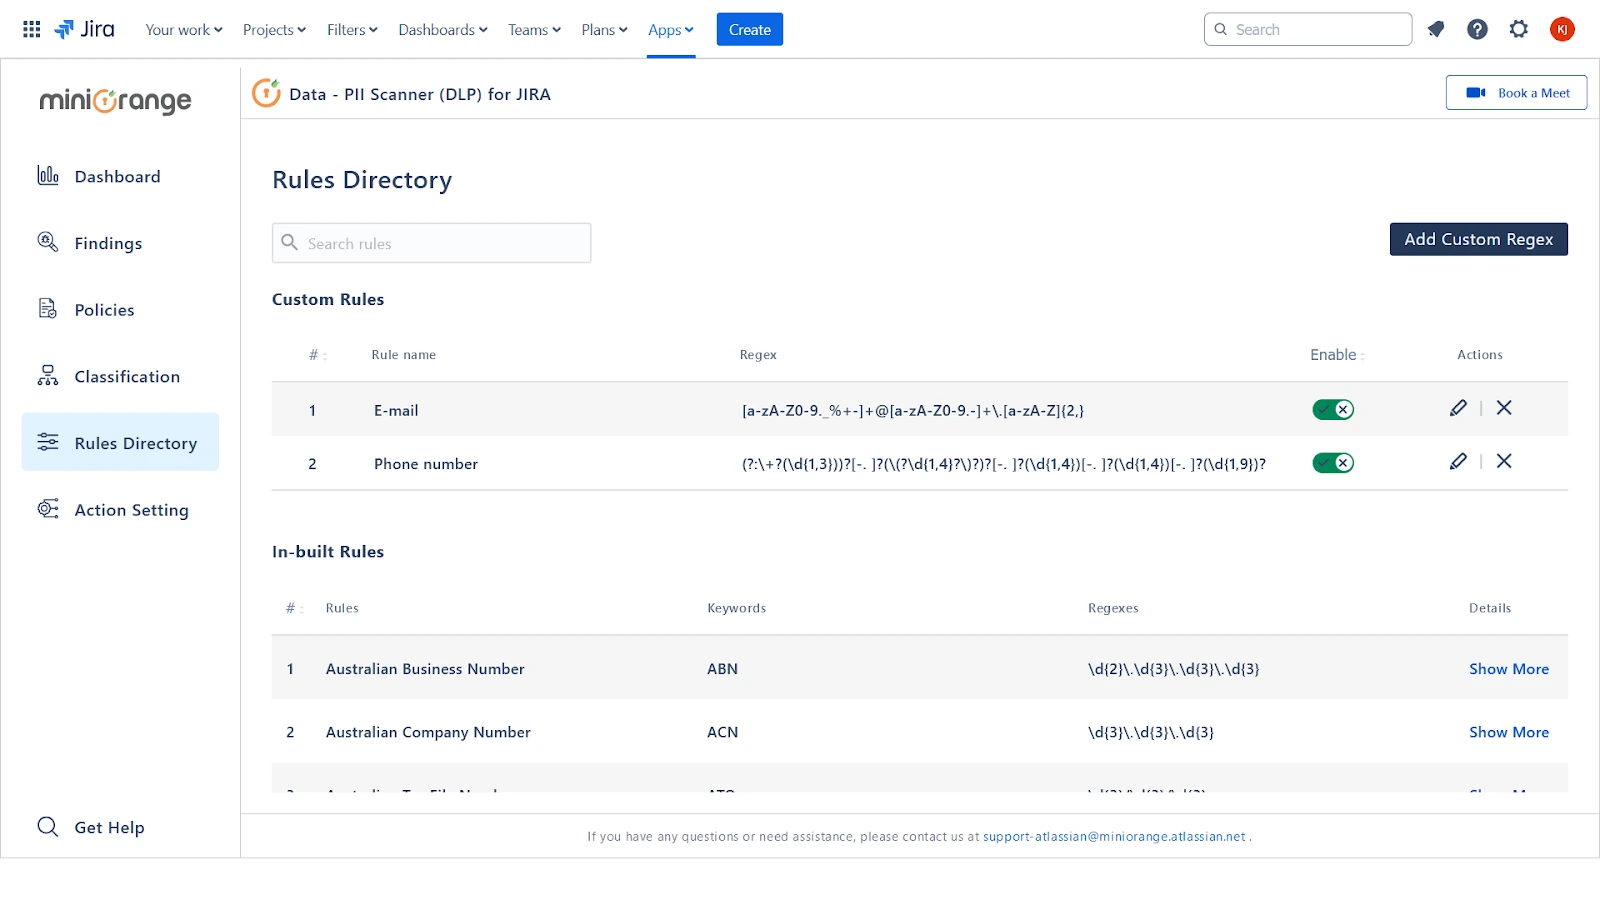
You can add multiple custom rules to tailor the scan to your organization’s specific needs.
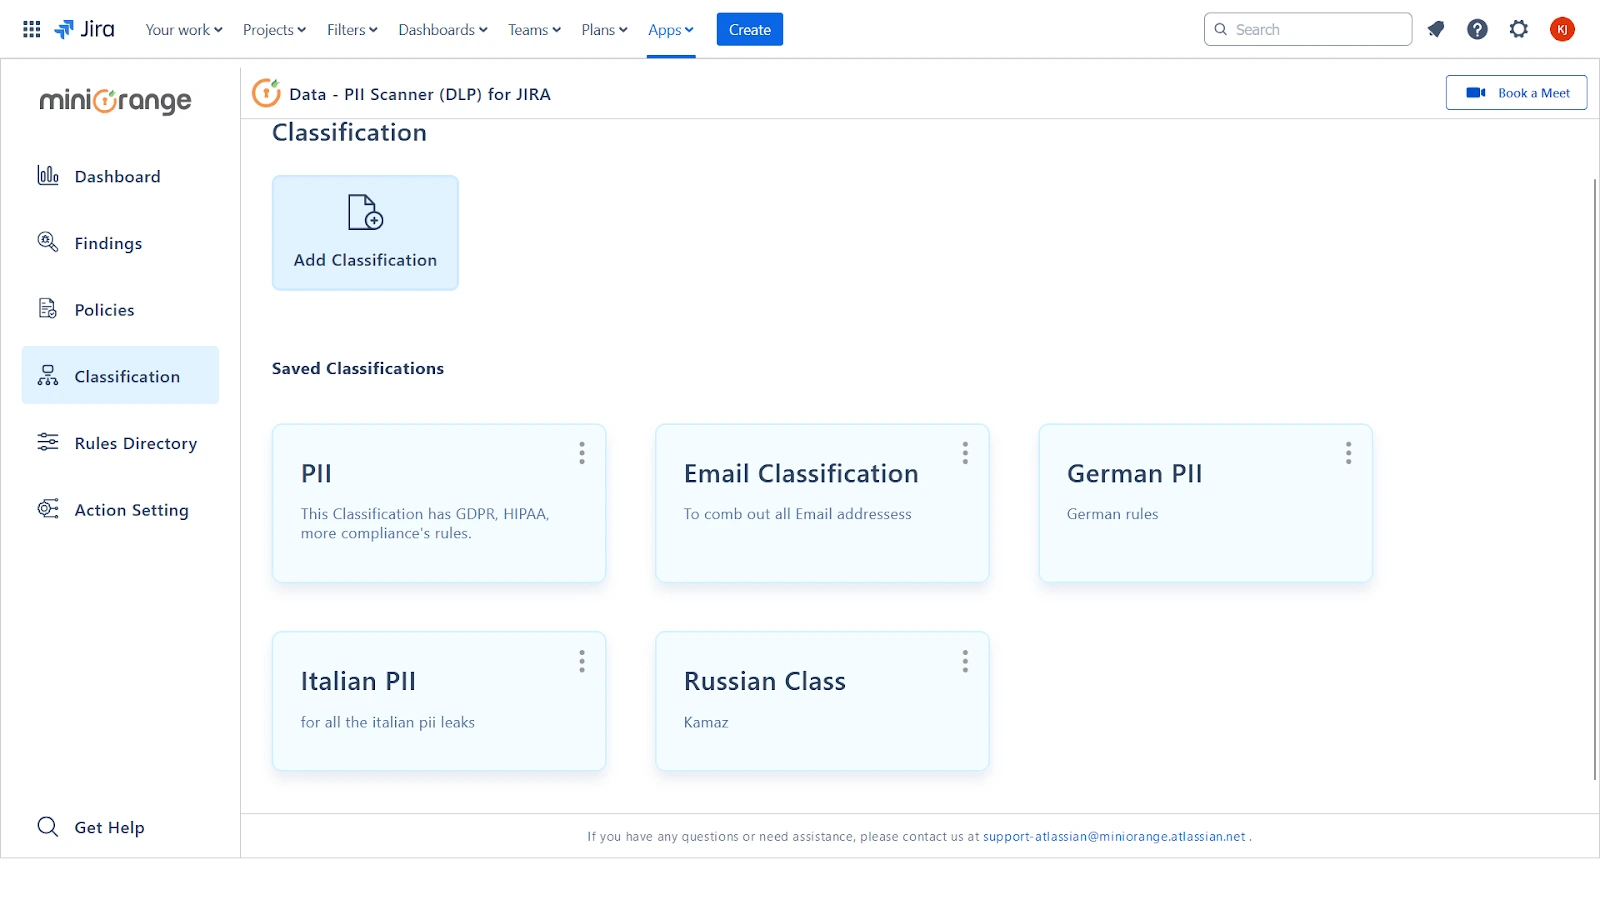
3: Group rules as a classification
You can group multiple custom rules, along with some or all built-in
rules, to create a classification that can be used in various policies.
Follow these steps to set up your classification:
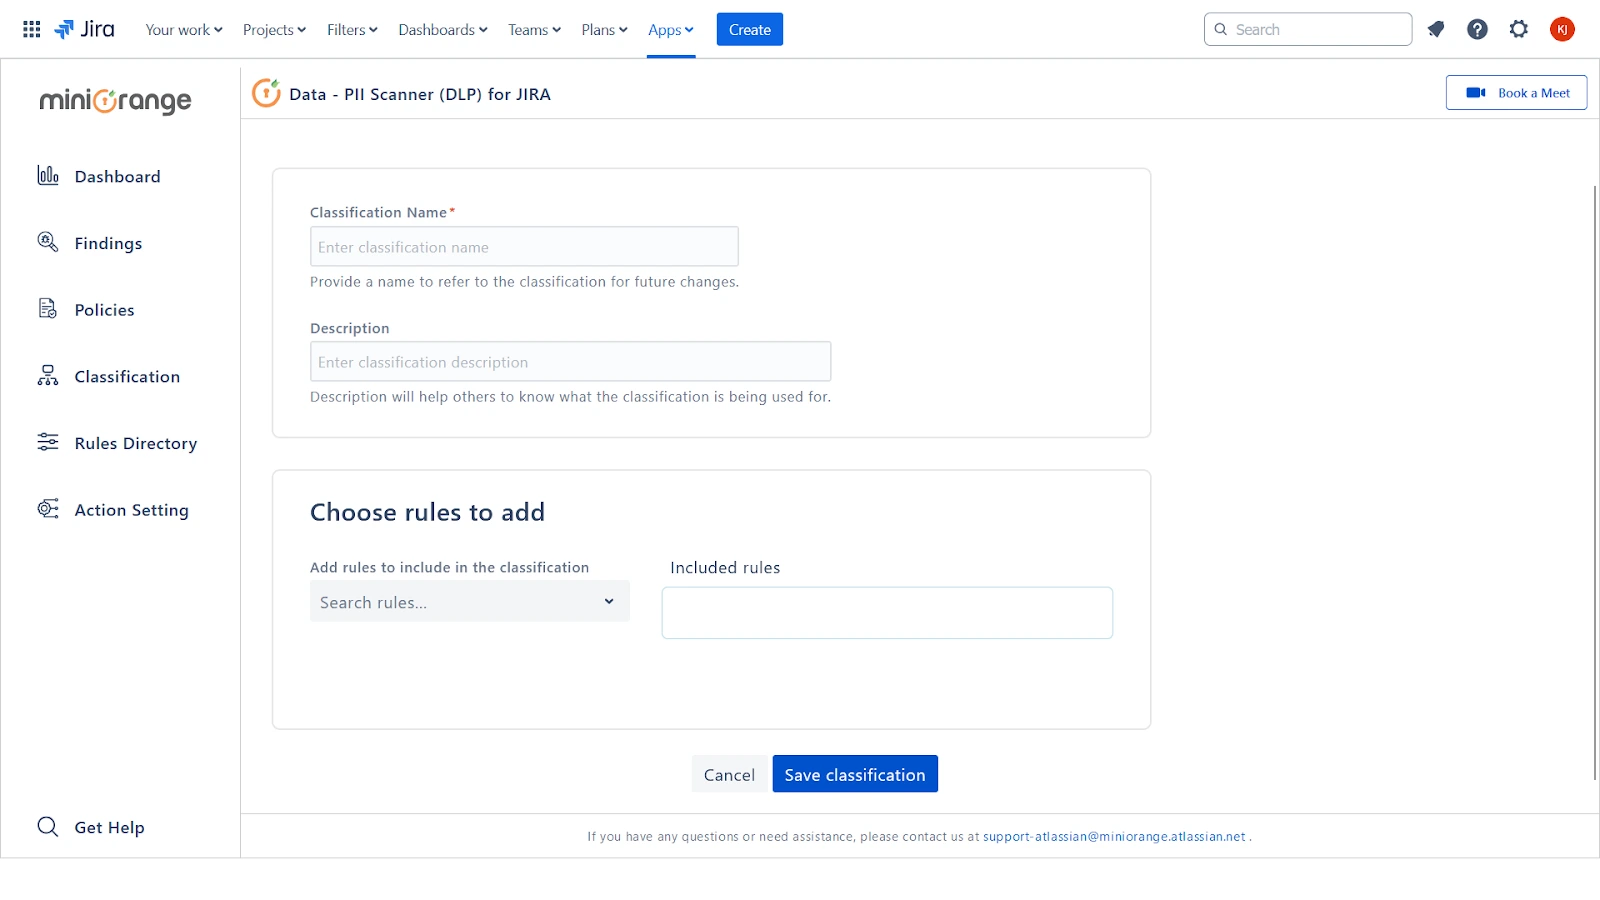
- Click Add Classification to start grouping your rules.
- Enter a Name and Description for the classification to clearly identify its purpose.
- Add the desired rules—both custom and in-built—to the classification as a set.
- Once you've added all the necessary rules, click Save to finalize your classification.
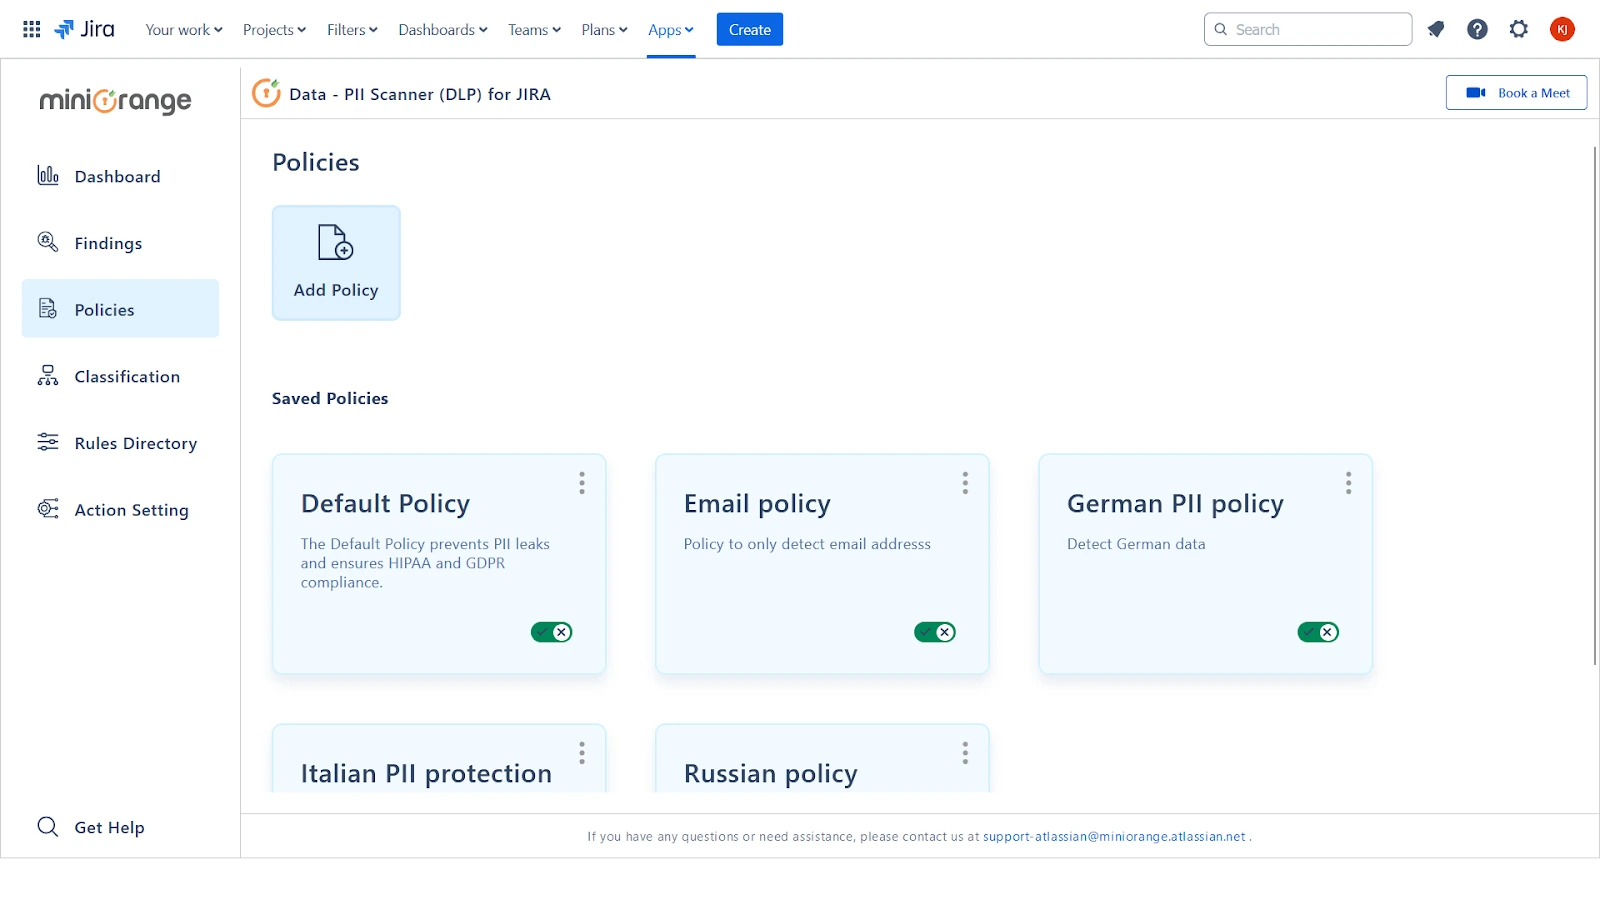
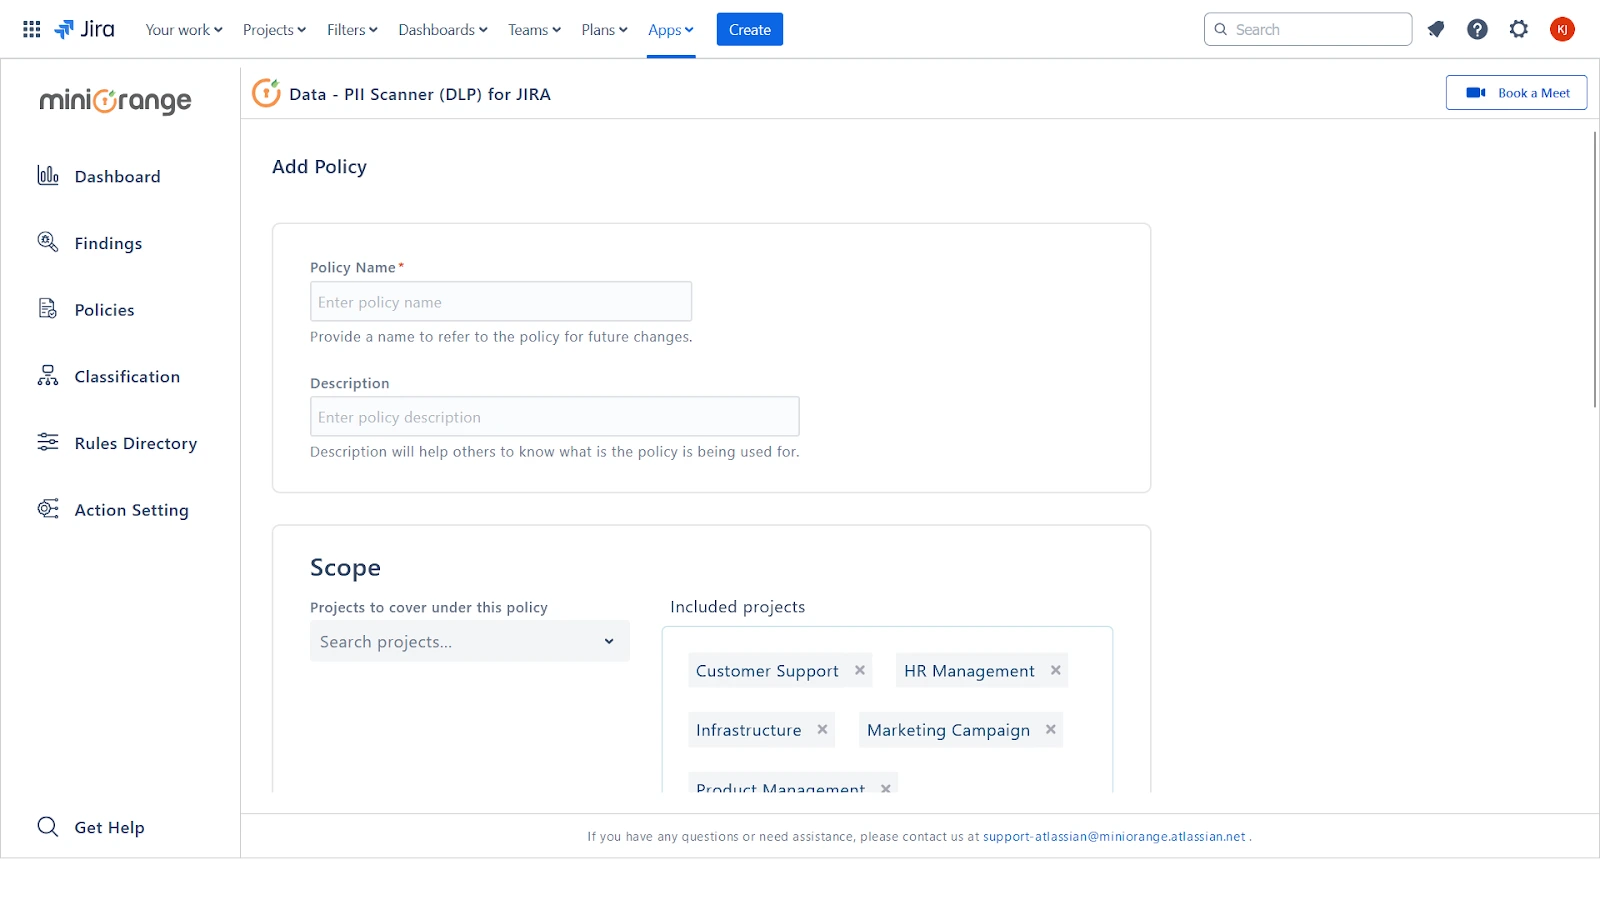
4: Design a policy
Create policies to target specific projects with different classifications. Follow these steps to set up a new policy:
- Click Add Policy to start creating a policy.
- Enter a Name and Description for the policy. These details will appear on the dashboard whenever a policy violation is detected.
- By default, the policy applies to all projects. You can adjust this by removing any projects that you don’t want to include.
- Add the necessary Classifications to the policy to define which rules will be applied during scans.
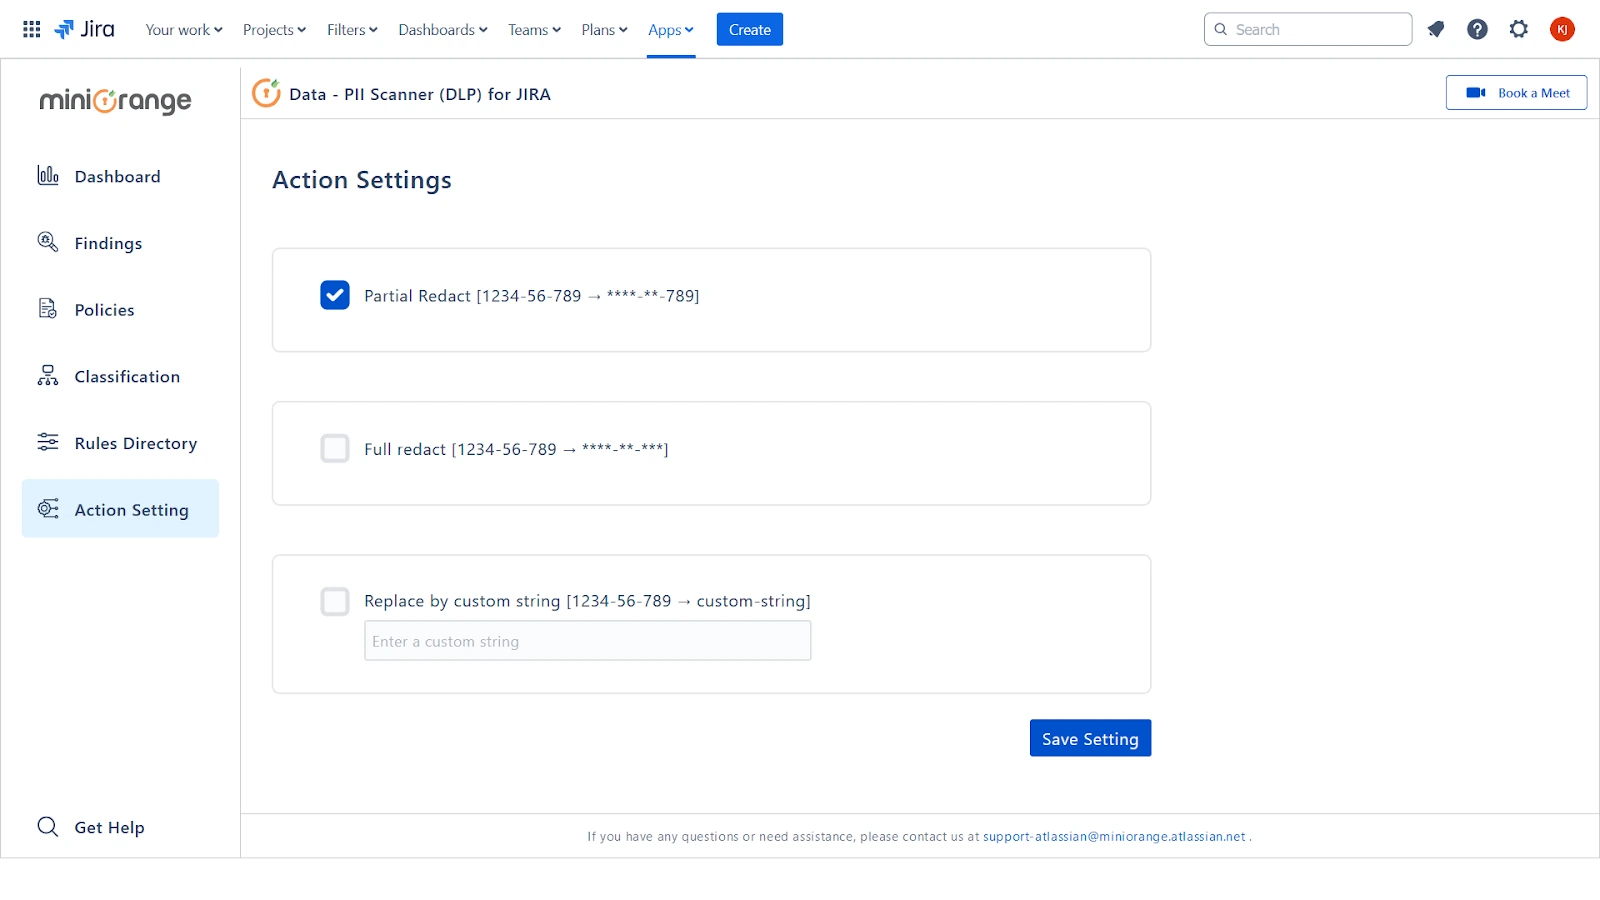
5: Action Setting
Define how PII information should be redacted by choosing from three options:
- Partial Redact: Masks only a portion of the identified PII data, leaving some characters visible for context.
- Full Redact: Completely masks the identified PII, ensuring that no part of the information is visible.
- Custom String: Replace the identified PII with a specific string of your choice.
Additional Resources
Did this page help you?
