Kerberos/NTLM Authentication SSO into Confluence
Kerberos Authentication / Integrated Windows Authentication (IWA) / NTLM gives the end-user access to Confluence without entering user name or password. Kerberos requires client machines to have access to a Key Distribution Center (KDC), which in the Windows world generally means Active Directory. For security reasons, AD is generally not reachable outside the local network/corporate intranet, making Kerberos mainly applicable within a company.
Pre-requisites
To integrate Kerberos/NTLM Authentication with Confluence, you need the following items:
- Confluence should be installed and configured.
- Admin credentials are set up in Confluence.
- Valid Confluence Server and Data center Licence.
Download and Installation
- Log into your atlassian instance as admin.
- Navigate to the settings menu and Click Manage Apps.
- Click Find new apps or Find new add-ons from the left-hand side of the page.
- Locate Kerberos/NTLM/Windows SSO for Confluence app.
- Click Try free to begin a new trial or Buy now to purchase a license.
- Enter your information and click Generate license when redirected to MyAtlassian.
- Click Apply license.
1: Setup Kerberos Authentication using miniOrange Kerberos Single Sign On/SSO Confluence add on
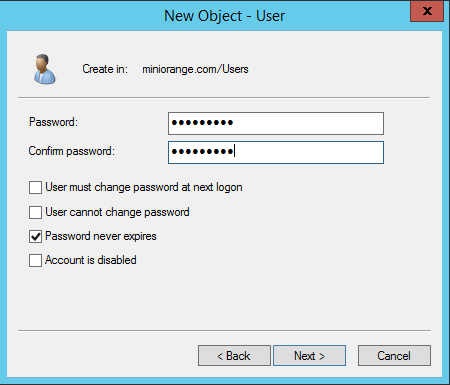
 1.1 Create a Service Account
- Login to your AD Domain Controller with an administrator account details.
- Create a new user account and enable Password never expires option.
 1.2 Choose Active Directory
- In order to allow signing into Confluence from your windows account, your Confluence instance needs you have at least one Active Directory configured.
- Active Directories can be added as User Directories in Confluence.
- To add an active directory as a user directory, go to User Management > User Directories > Add Directory.
- You will need the Hostname or Host address, the Service Account name and Service Account password of your Active Directory.
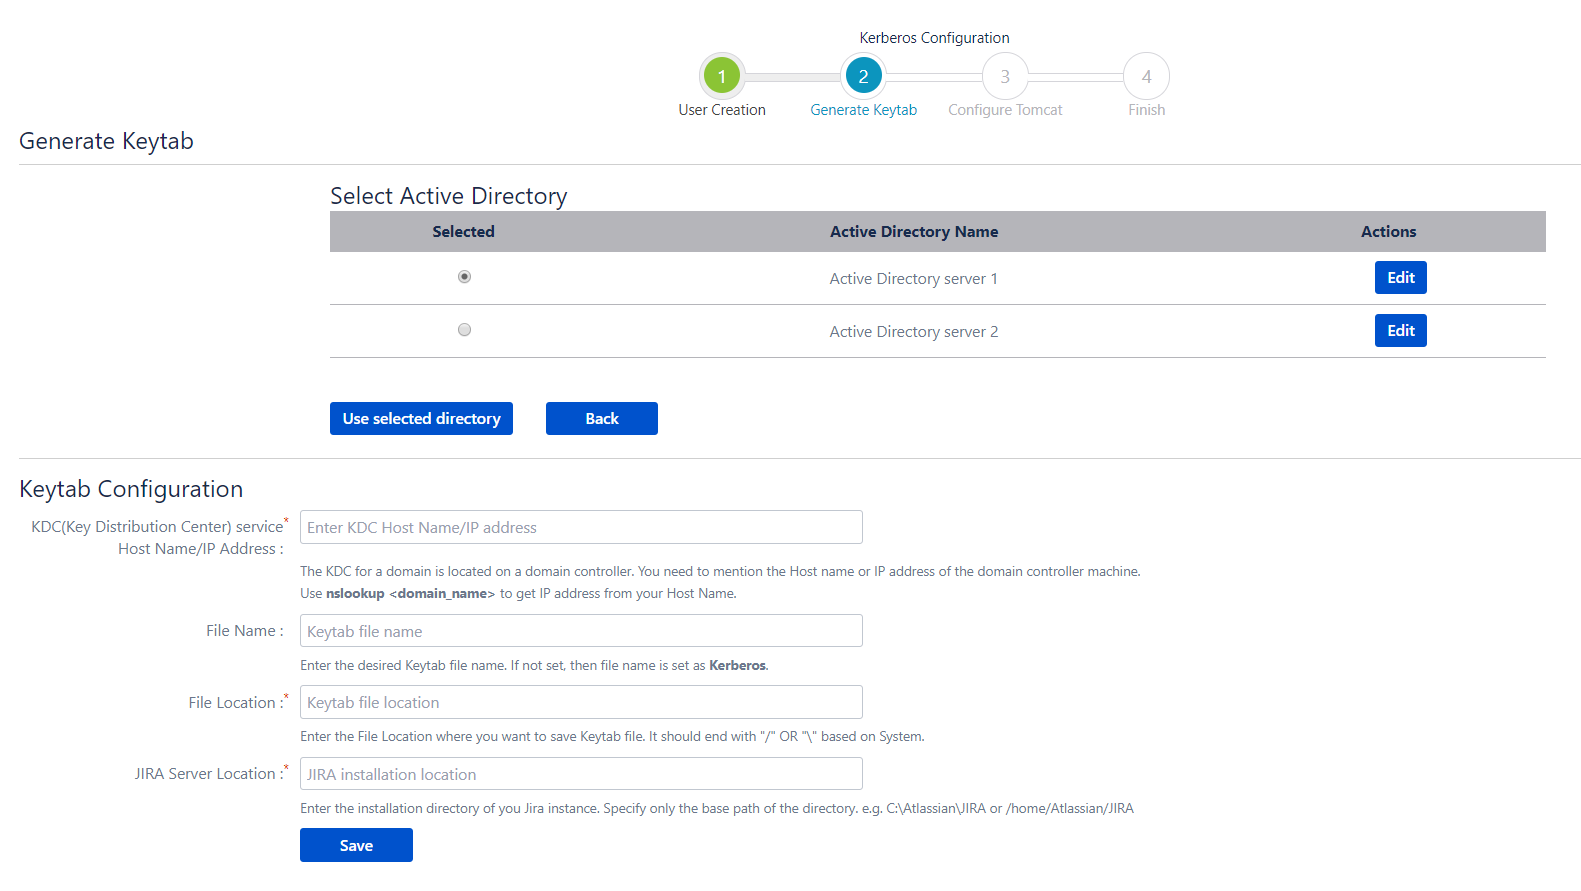
- Once you have verified that the Active Directory has been successfully added, go back to the application. You will see a table with a list of all the configured Active Directories. Use the following steps to generate your keytab file :
- Select the Active directory that you wish to use, and then click on Use Selected Directory.
- A Keytab Configuration section will be displayed. Enter your Key Distribution Center hostname or IP address in the field provided.
- Enter the filename for your keytab file.
- Enter the location to which you want to save the keytab file.
- Enter the location of your tomcat installation. The location should be the root folder containing the bin and conf folders.
- Click on Save.

 1.3 Generate a Keytab file using ktpass
- You will need to run ktpass command in order to generate Keytab file, ktpass command is simply formed by filling up required options in the Generate Keytab section.
- Open a run administrator command window.
- Execute ktpass command.
- Parameters needed to generate ktpass command:
- Domain Name: Your LDAP server Domain is your domain name, in dot-separated uppercase format. You can easily identify your Domain name by running echo %USERDNSDOMAIN% on your client machine terminal.
- Domain Controller Hostname/IP Address: Enter Hostname/IP Address of your Domain Controller (DC) machine. You can use nslookup to get an IP address from your Host Name.
- Service Principal Name: Service Principal Name would be your Confluence Server Domain name. This must be unique on your Domain Controller.
-
Username: Enter the username of the newly created user. It
should be in one of the following formats:
- domain\user example:- MINIORANGE\demouser
- Full User name with @
- Password: Enter the password of the newly created user.
- File Name: Keytab file name. If not set then takes a file name as Kerberos by default.
- File Location: File Location where you want to save the Keytab file. It should end with “/” OR “\” based on System (Windows, Linux etc).
- Confluence Server Location: Path name of your Confluence home directory. Specify the base path only.e.g. c:\apache-tomcat or /home/apache-tomcat.

Note: In-case you are hosting your Active Directory in a Linux environment, you will need the ktutil tool in-order to generate the keytab. Once you have installed all the necessary packages for this tool, you can use the command given below to generate the keytab. Replace the placeholders in angular brackets with your AD details(without the angular brackets).
Request:
ktutil

                addent -password -p @ -k 1 -e RC4-HMAC

                - -

                wkt .keytab

                q
 1.4 Configure Tomcat
- Copy .keytab file created on AD Domain Controller (DC) and deploy it on “confluence_home/conf/” directory.
- Download the krb5.ini configuration file provided in the plugin and paste it to the “confluence_home/bin/” directory.
- Download the JAAS.conf file configuration file provided in the plugin and paste it to the “confluence_home/bin/” directory.
- Edit the web.xml file present in the “confluence_home/conf/” directory and include SPNEGO Filter provided in the plugin.
- Download spnego.jar file of SPNEGO Filter and paste it in “confluence_home/lib/” directory.
 1.5 Enable Kerberos Authentication
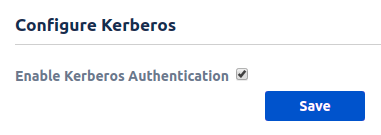
- Select Enable Kerberos Authentication and click on Save.
2: Setup NTLM Authentication using miniOrange add on
 2.1 Computer Account Creation
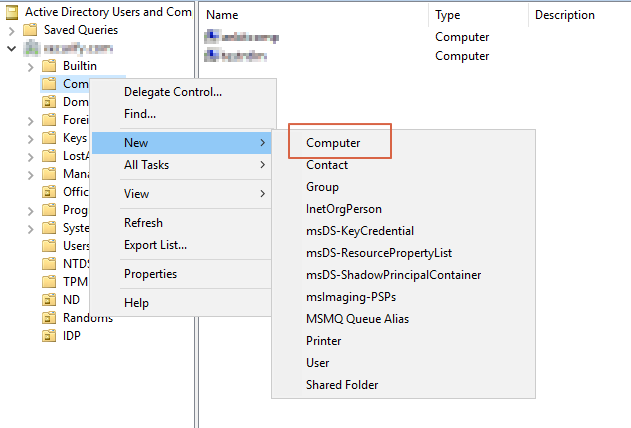
- Log in on the Domain Controller (DC) with the Administrator user.
- Create a new computer account.
- Change password of computer account using this command. The computer account name ends with $.

 2.2 AD Configuration
Use the following steps to configure AD.
- Domain Name (preWindows 2000): Enter your AD domain name is your NetBios or PreWindows 2000 Name. Please find steps to get NetBiosName here.
- Domain Controller Host Name/IP Address: Enter your Hostname or IP address of the domain controller machine. Use nslookup to get IP address from your Host Name.
- Simple (non-FQDN) Host Name: This is your machine hostname. Run the command hostname on your DC machine to find the simple hostname, e.g. EC2AMAZ-0I8J83M.
- Computer Account for Connection (Created in Step 1): Computer Account Name should be entered in this format: accountName$@domain.com.
- Computer Account Password: Enter the password for the above Computer Account.
- Server Location: Enter the installation directory of your instance. Specify only the base path of the directory. e.g. C:\Atlassian\ or /home/Atlassian/.
- Click on Save.
 2.3 Download Libraries
- Edit the web.xml file present in “/conf/” directory and include the NTLM filter provided in the plugin.
- Download libraries.zip file, extract jar files and paste them in “/lib/” directory.
- Restart your server to apply the above changes.

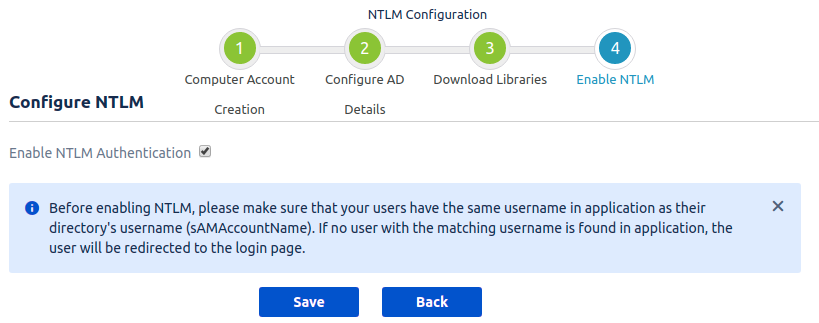
 2.4 Enable NTLM Authentication
- Select Enable NTML Authentication and click on Save.
Additional Resources
Did this page help you?

 Try it for free