What's New !!

Pricing Offers

We are happy to announce special offers for miniOrange Atlassian SSO, 2FA, REST API, User Sync and Group Sync Apps.

Contact Info

For any query, product related information or any help , contact us now. You can also raise a ticket with our support.


Contact Us Now

Jira Cloud User Provisioning (SCIM) for OneLogin


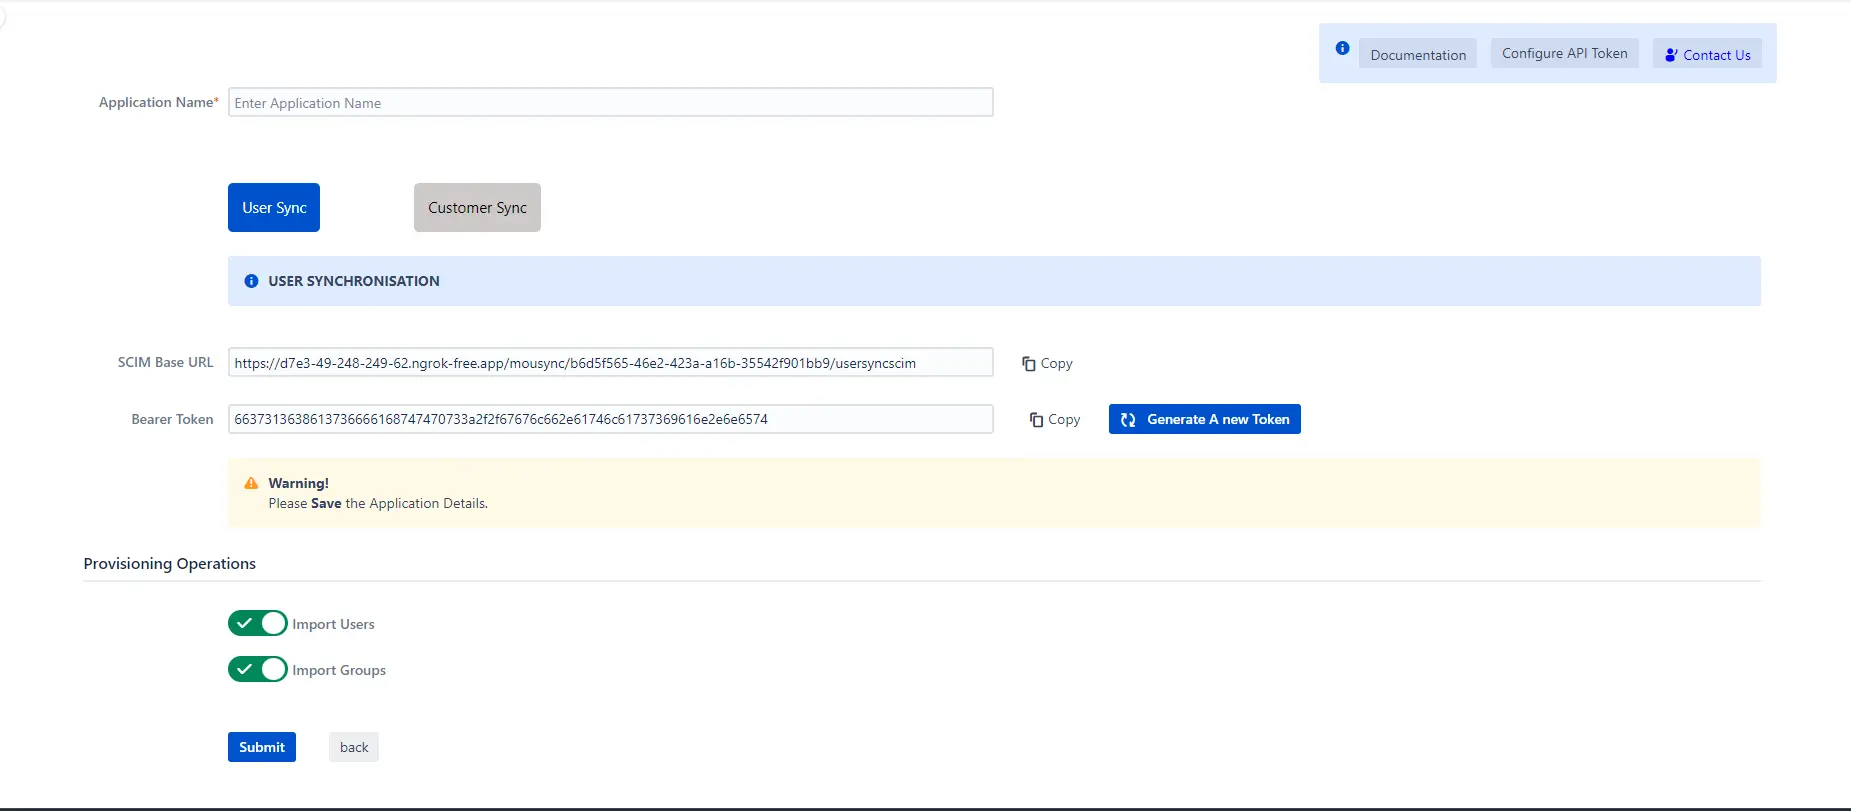
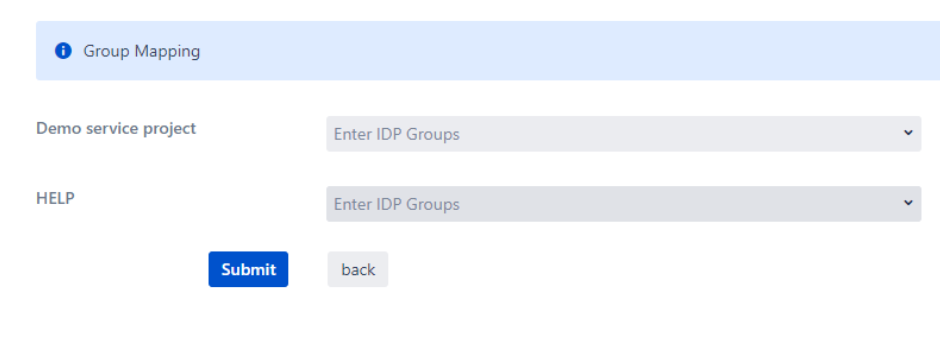
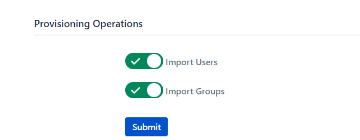
User Sync & Group Sync app sync user and group information from OneLogin to Jira Cloud. This way the administrator only needs to manage user accounts in OneLogin. This reduces the administration time required to create users and groups in Atlassian modules such as Jira Cloud.

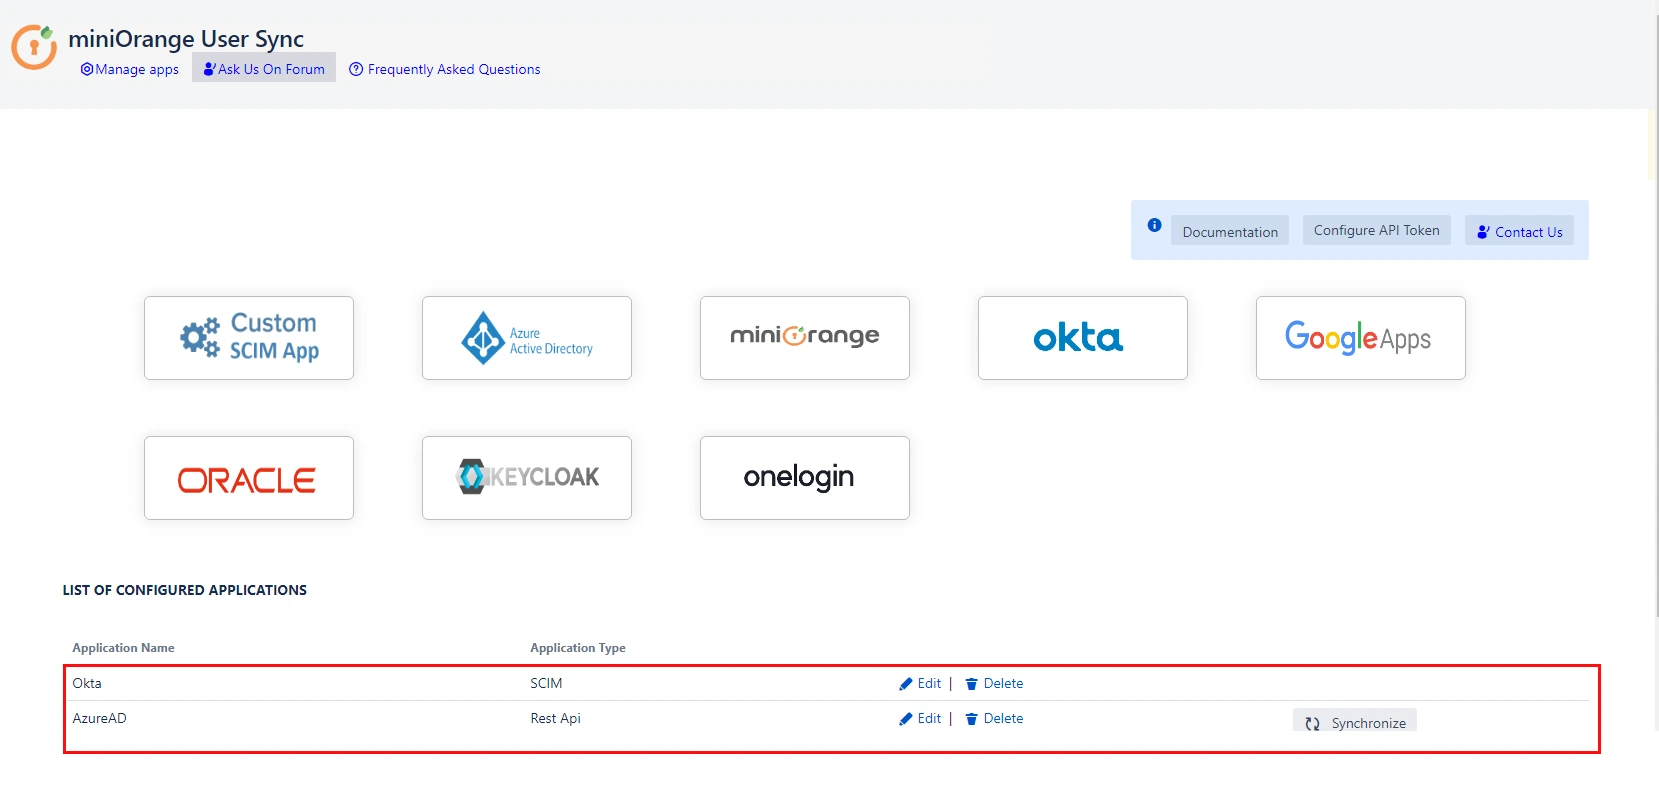
Download And Installation


  • Log into your atlassian instance as admin.
  • Navigate to the settings menu and Click Manage Apps.
  • Click on Find new apps .
  • Locate miniOrange User and Group Sync app.
  • Click Try free to begin a new trial or Buy now to purchase a license.
  • Enter your information and click Generate license when redirected to MyAtlassian.
  • Click Apply license.

Step 1: Setup OneLogin SCIM Configurations

  • Log in to your Onelogin Portal. Add SCIM Provisioner with SAML.
  • SCIM OneLogin, SCIM Provisioner
  • Start configuring it by adding Display Name.
  • SCIM OneLogin, Find application
  • Go to Configuration Tab. Enter SCIM Base URL, SCIM Bearer Token (which you will find in Step 1 above).
  • Enable provisioning from SCIM Provisioner with SAML application.
  • SCIM Configuration Details
  • Approve the provisioing request. On success, status will change to 'provisioned'.
  • SCIM OneLogin, Provisionoiong request

Step 2: Configure API token

2.1: User Sync

  • Setup API Token by clicking Configure API Token button.
  • Enter your Admin Email
  • Generate your own API token. Please refer this document here .
  • Please enter Application Name and click on Submit button. Copy the SCIM Base URL and SCIM Bearer Token, these will be used later to configure SCIM application on miniOrange IDP.

  • Jira Cloud SCIM

2.2: Customer Sync

  • In the Configuration tab, please select the IDP provider.
  • Jira Cloud SCIM
  • Select the Customer Sync option.
  • Jira Cloud SCIM
  • In the SCIM configuration, Please enter the App Name and click on the Save Settings button. Copy the Customer Base URL and Customer Bearer Token, these will be used later to configure the SCIM application on the IDP provider.
  • Jira Cloud SCIM
  • In the Group Mapping setting add the group from which you want to give permission to the project.
    eg:- If you have a private Project name:- Demo service project and you have IDP group name:- Jira-Service-group. So if we provision user who has Jira-Service-group assigned in Plugin group mapping, he will get access to the portal of Demo Service Project.
  • Jira Cloud SCIM

Step 3: Provisioning Operations

  • Enable Import Users option to create users automatically if they do not exist in Jira.
  • Enable Import Groups option to create groups automatically if they do not exist in Jira.
  • User and gruop provisioning in Jira, Confluence, Bitbucket Select Provider
  • Click on Submit.

Step 4: Multiple IDPs

  • The plugin allows for configuring multiple IDPs on your SP to accommodate your specific use case. To add another IDP, simply navigate to the "Configured IDPs" section.
  • Jira Cloud SCIM

Recommended Add-Ons


Free Trial

If you don't find what you are looking for, please contact us at support-atlassian@miniorange.atlassian.net or raise a support ticket here.