- Home
- SCIM Provisioning
- SCIM Provisioning Documentation
- Jira Using SCIM User and Group Provisioning for Microsoft Entra ID

SCIM user and group provisioning for Microsoft Entra ID in Atlassian
The User Sync & Group Sync app provisions users and groups from Microsoft Entra ID (formerly Azure AD) into Atlassian using SCIM. Provisioning is event-driven: when you create, update, or deactivate an account in Entra ID, the change flows to Atlassian automatically. Administrators manage accounts in one place instead of two.
This guide covers Data Center and applies to Jira, Confluence, and Bitbucket. The steps are the same in all three; where navigation differs slightly, both paths are noted.
 Try it for free
Before you begin
You'll need:
- Atlassian Data Center, with system administrator access
- An Entra ID tenant, with permission to create enterprise applications and configure provisioning
- An Atlassian instance URL reachable from Entra ID (public, or allowlisted for Microsoft provisioning IP ranges)
- The User Sync & Group Sync app installed and licensed (see below)
Provisioning is one-way: Entra ID → Atlassian. Changes made directly in Atlassian to a synced user may be overwritten on the next sync cycle.
Video Setup Guide
Download and Installation
- Log in to Atlassian as an administrator.
- Go to the administration area and select Manage Apps.
- Select Find new apps.
- Search for miniOrange User and Group Sync.
- Select Try free to start a trial, or Buy now to purchase.
- Enter your details and select Generate license on MyAtlassian.
- Select Apply license.
Step 1: Get SCIM Client Details
- Open the app and go to the Configuration tab.
- Select Microsoft Entra ID as your provider.
- In the dialog, select SCIM as the synchronization method.
- Enter an App Name and select Save Settings.
- Copy the SCIM Base URL and SCIM Bearer Token. You'll paste both into Entra ID in Step 2.
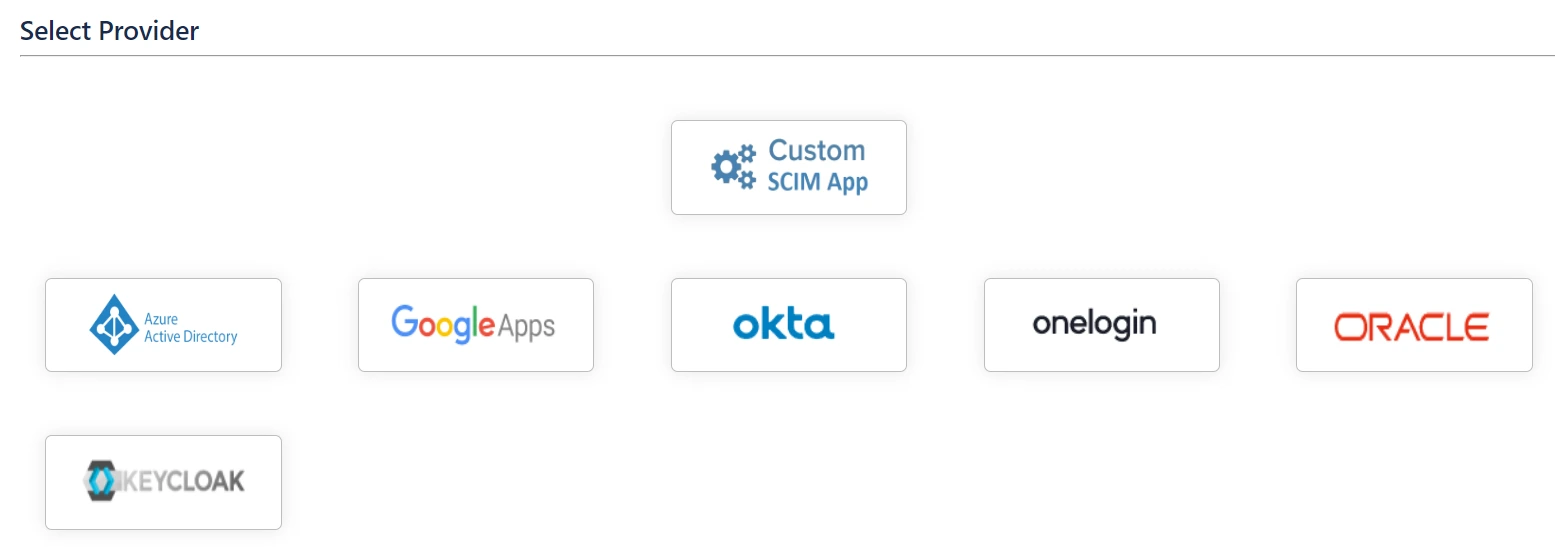
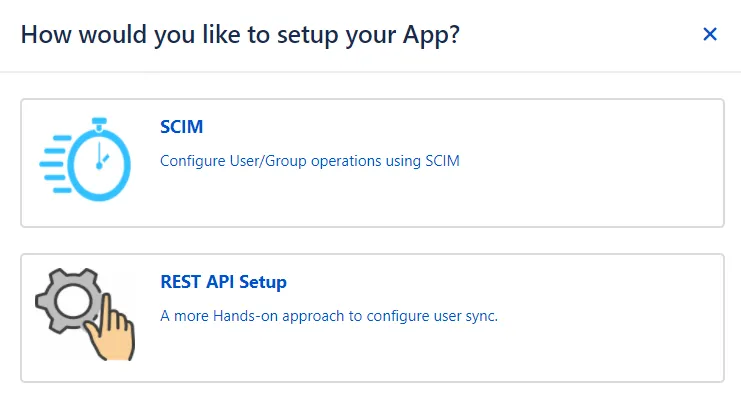
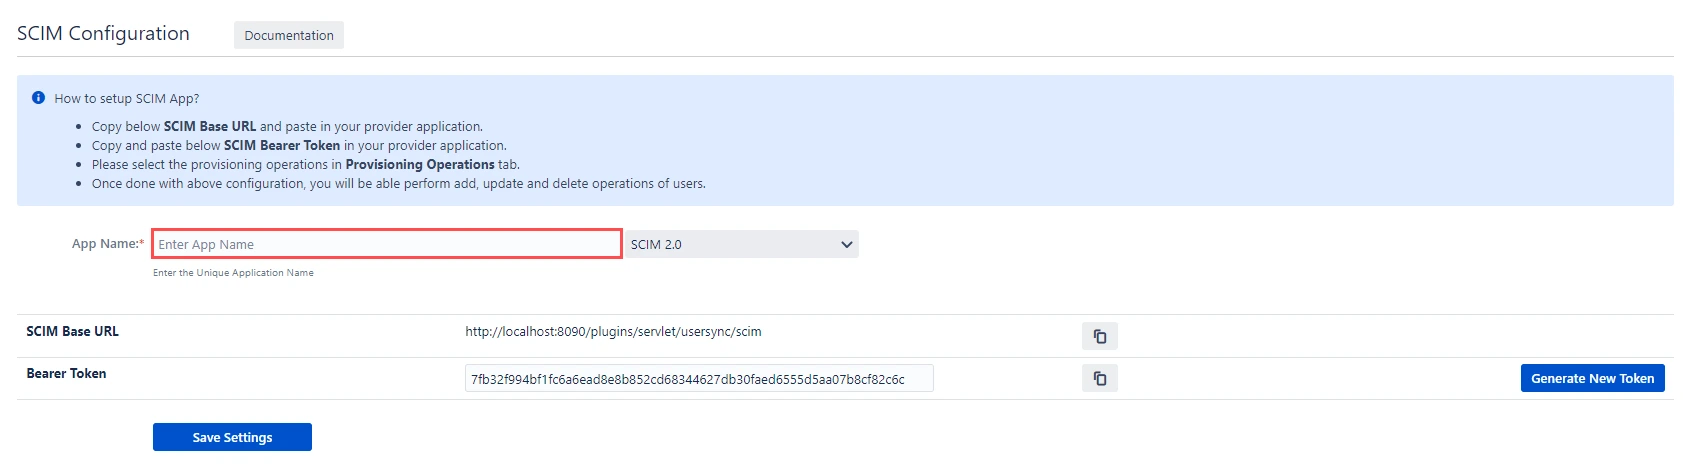
Treat the bearer token like a password. If it's exposed, regenerate it from this screen; the old token stops working immediately, and you'll need to update Entra ID.
Step 2: Create the SCIM app in Microsoft Entra ID
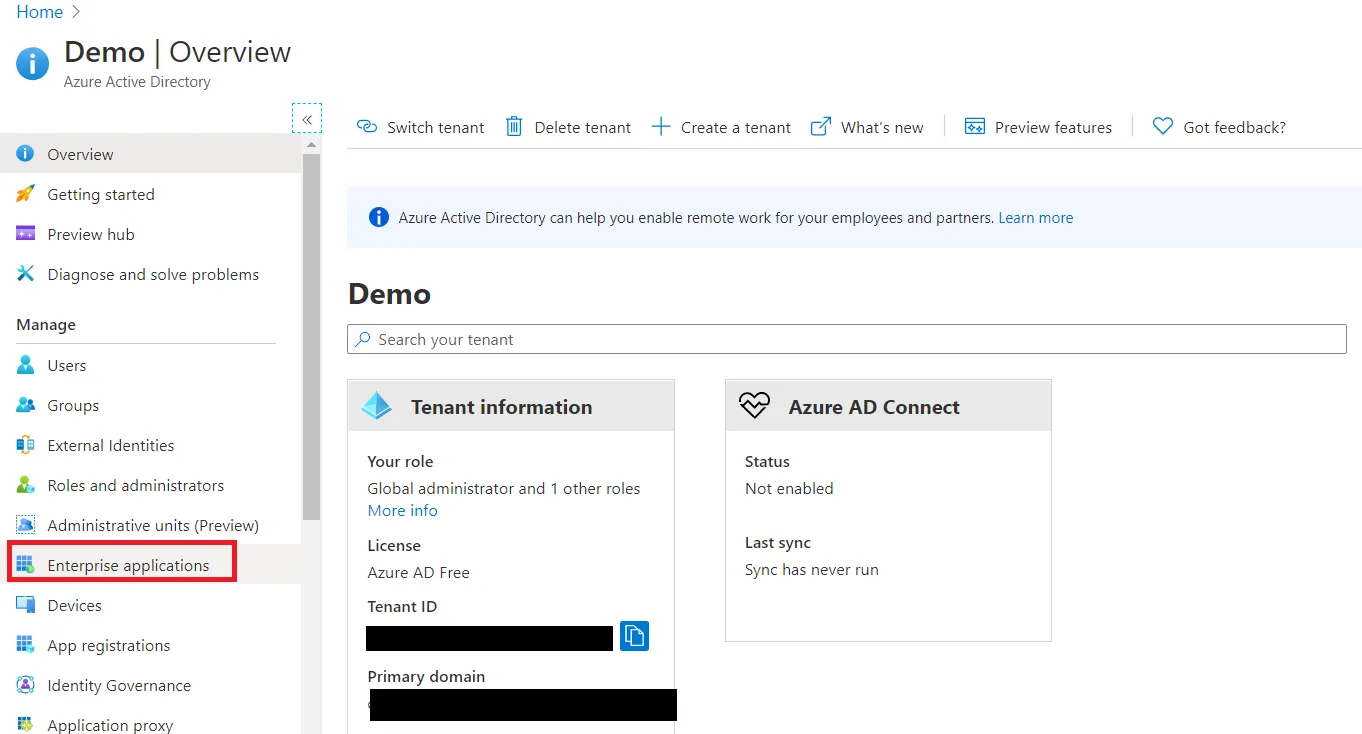
- Sign in to the Microsoft Entra admin center and select your directory.
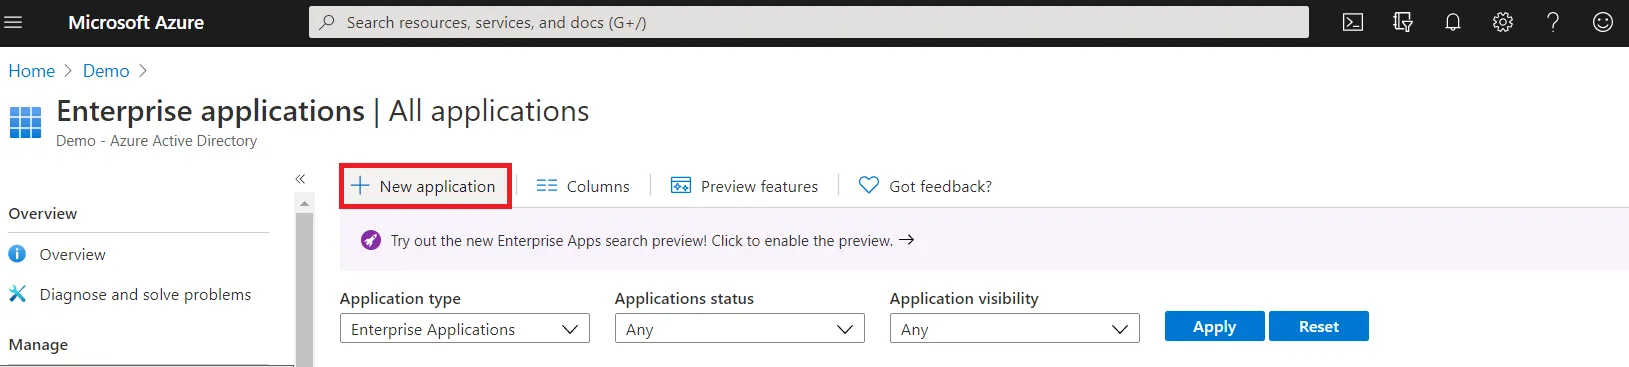
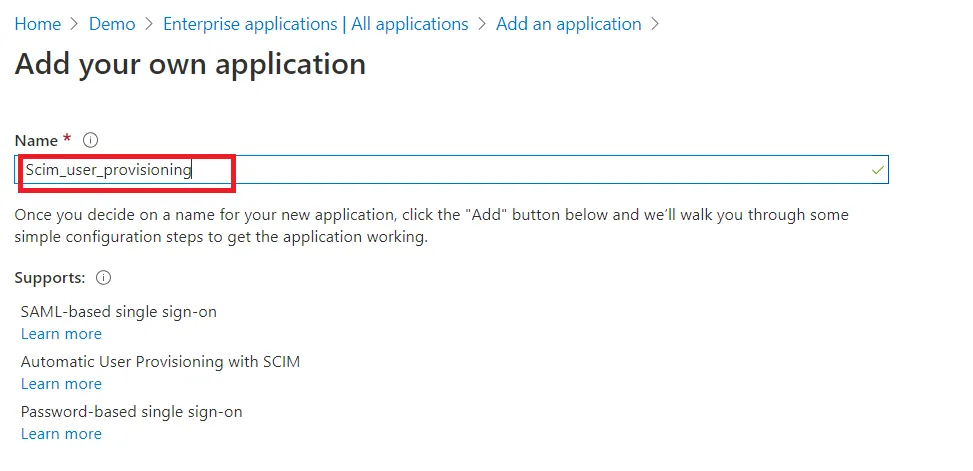
- Go to Enterprise applications → New application → Create your own application.
- Name the application, choose the non-gallery option, and select Create.
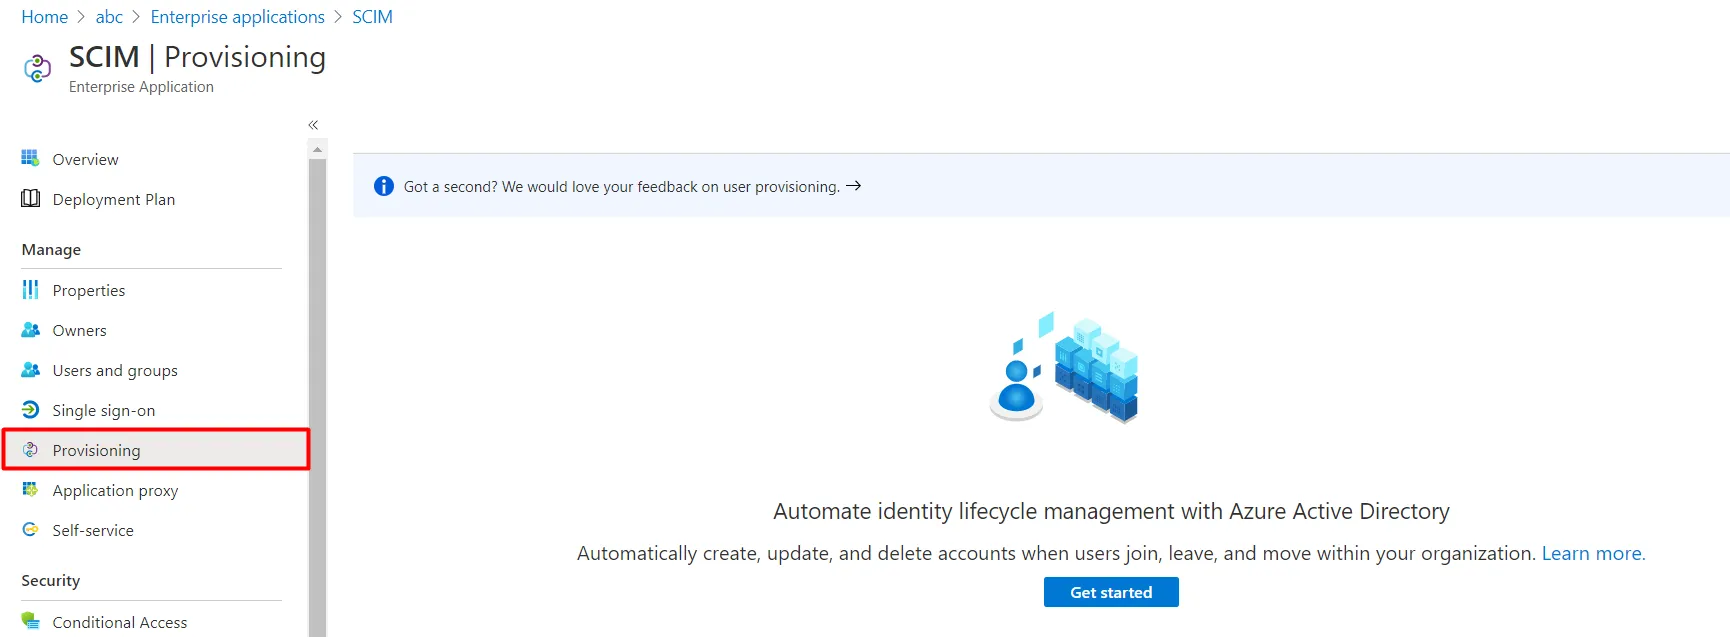
- In the left menu, select Provisioning → Get started.
- Set Provisioning Mode to Automatic.
- Under Admin Credentials, paste:
- Select Test Connection, then Save.
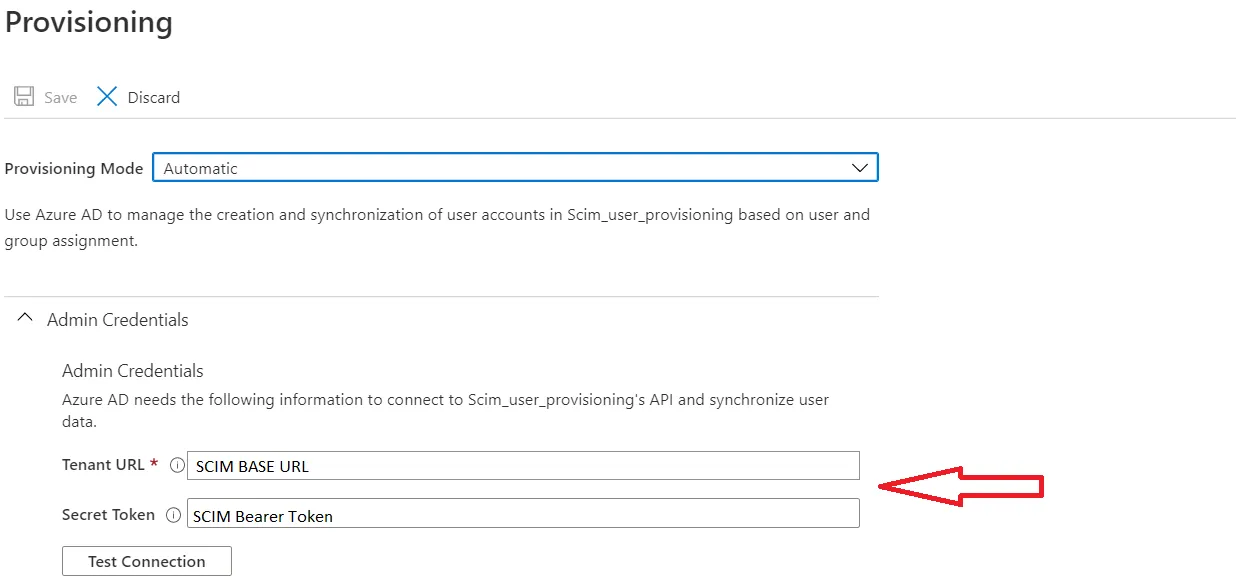
Don't start provisioning yet. Configure sync settings first (Steps 3–5), or the initial run will provision users with default attribute mappings.
Step 3: Configure user sync settings
In the app, select User Sync Settings from the left sidebar.
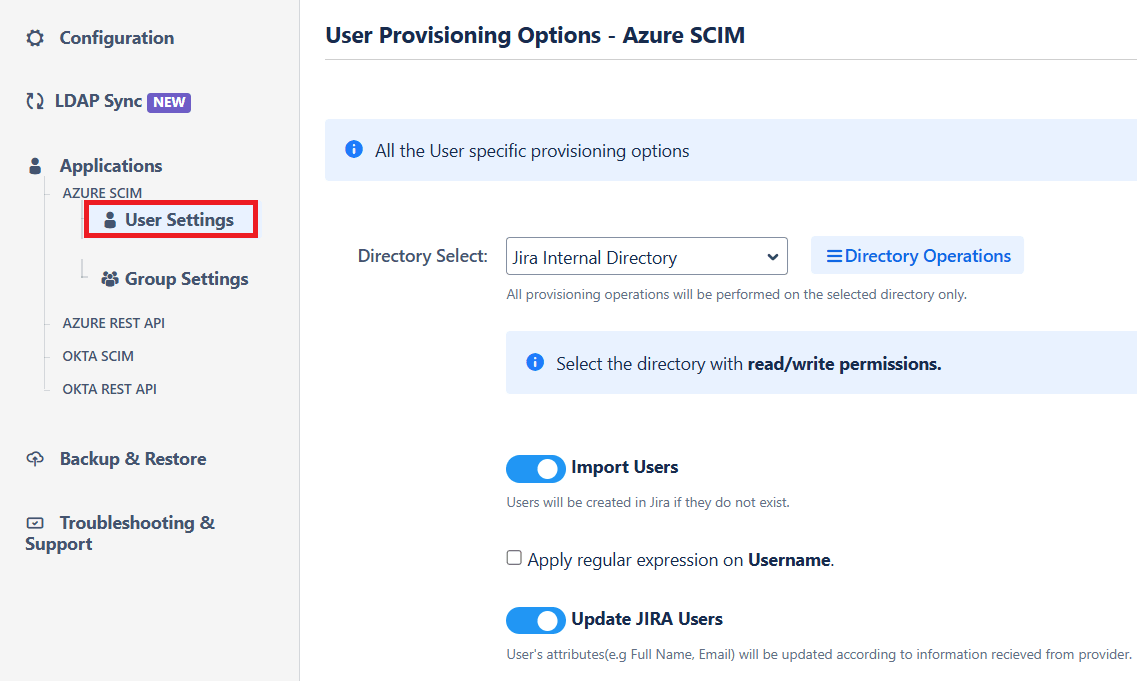
| Setting | What it does |
|---|---|
| Directory Selection | The Atlassian directory where SCIM operations run. Users and groups from this directory are created and updated. |
| Enable Import Users | Import active Entra ID users into Atlassian. |
| Regex on Username | Transform the username received from Entra ID. Example: to convert demouser@example.com to demouser, use (.*)@.* as the regex and $1 as the replacement. |
| Enable Update Users | Update existing Atlassian user profiles when they change in Entra ID. |
| Enable Users | Activate an Atlassian user when their Entra ID account is enabled. |
| Disable Users | Deactivate an Atlassian user when their Entra ID account is disabled. |
In Jira, you can also set a Default Project Lead and Default Component Lead for newly provisioned users. Lead for newly provisioned users. These fields don't appear in Confluence or Bitbucket.
Select Save Settings.
 3.1 Attribute mapping
Map Entra ID attributes to Atlassian attributes. Defaults:
| Atlassian attribute | Entra ID attribute |
|---|---|
| Username | userPrincipalName |
| Display name | Full name |
Change any row to map a different source attribute.

3.2 Custom attributes
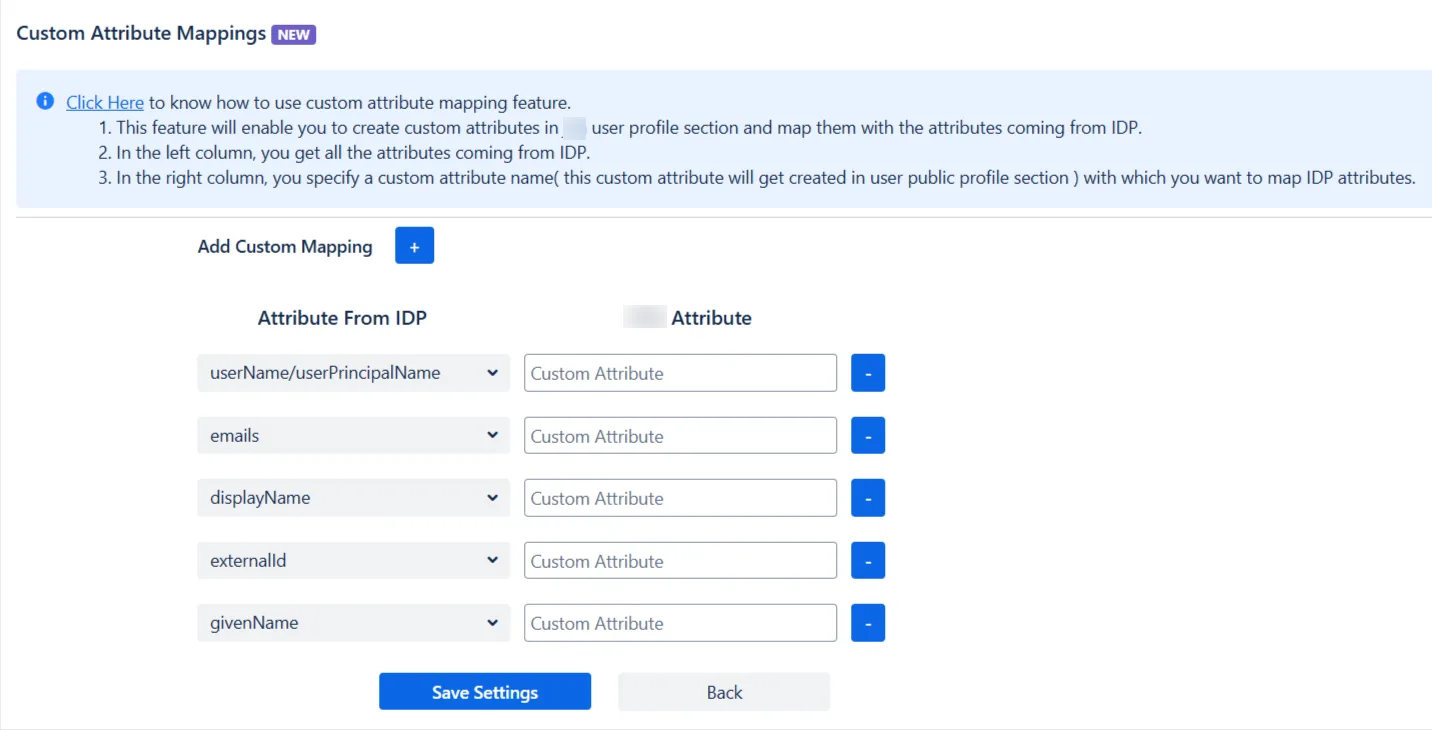
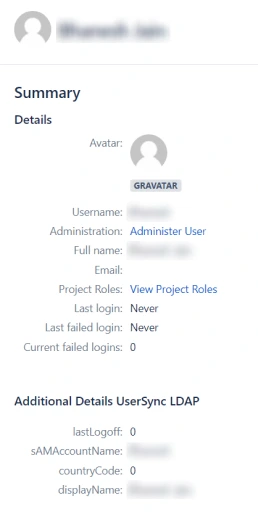
Create custom attributes and populate them from Entra ID. Choose the source attribute, give it a display name, and it appears in the user's Atlassian profile.
Step 4: Configure group sync settings
Select Group Sync Settings from the left sidebar. Set Default groups for new users or all users, then choose a mapping mode.
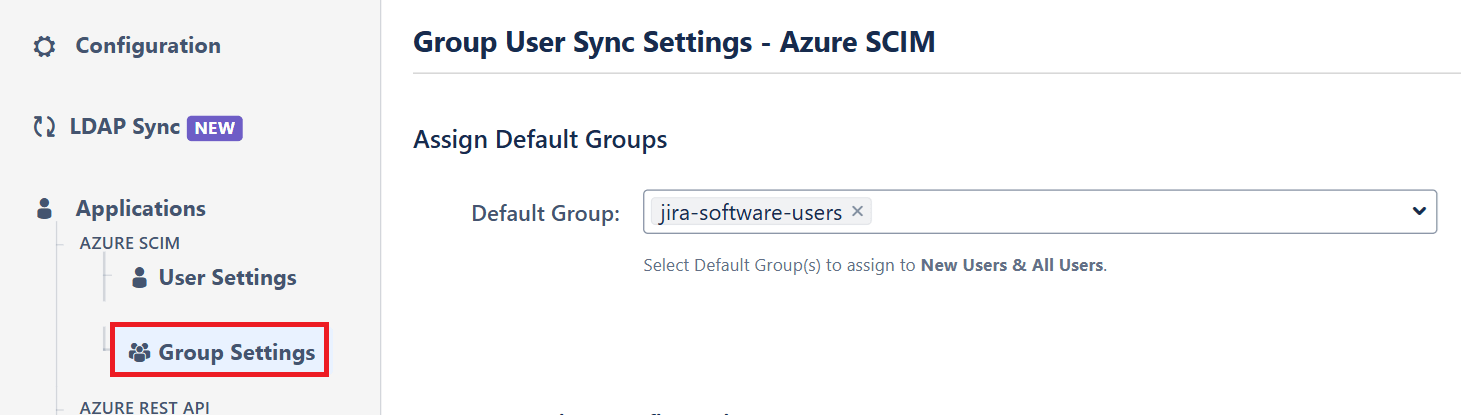
On-the-fly group mapping: users are added to the Atlassian group matching their Entra ID group name. If the group doesn't exist, it's created. You can preserve existing group memberships, filter which groups sync, and apply regular expressions to group names.
Choose this when your Entra ID group names are already the names you want in Atlassian.
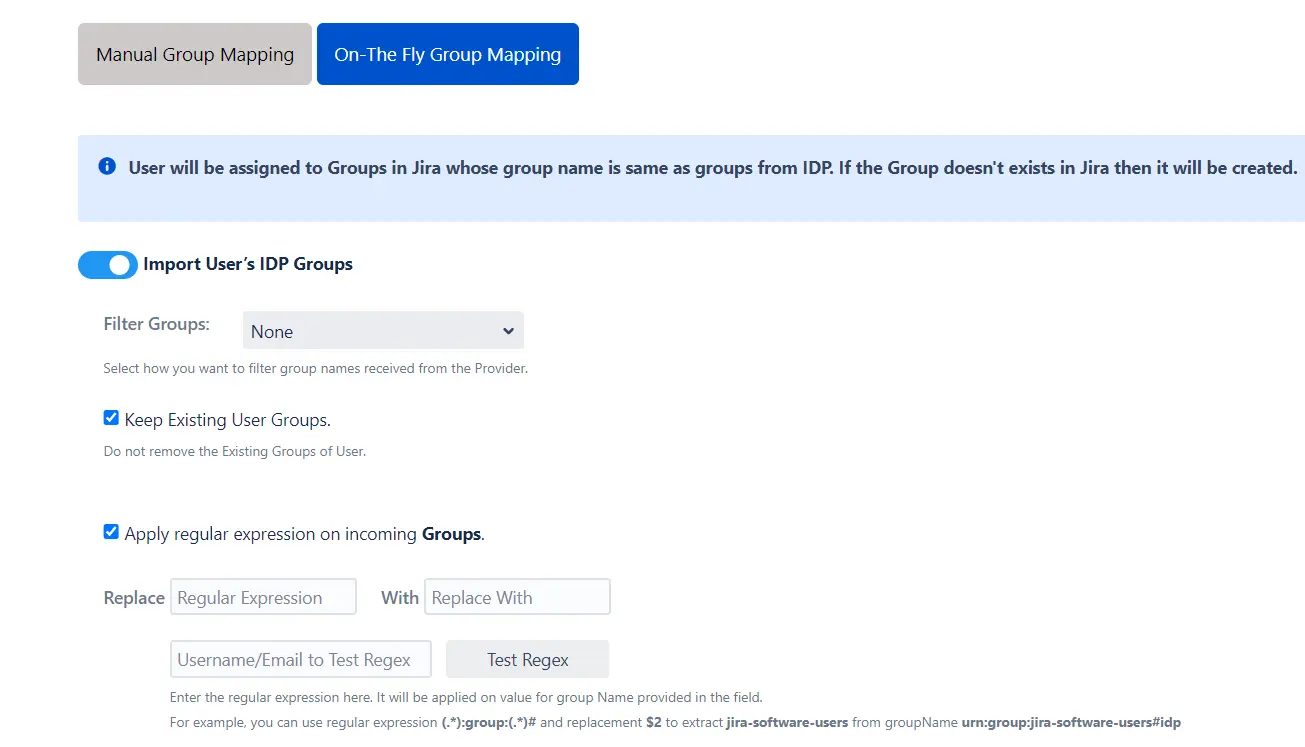
Manual group mapping: map each Entra ID group to a specific Atlassian group by hand. You can import Entra ID groups, filter them, and choose whether to preserve existing members.
Choose this when Atlassian group names differ from Entra ID, or when only a subset of groups should sync.
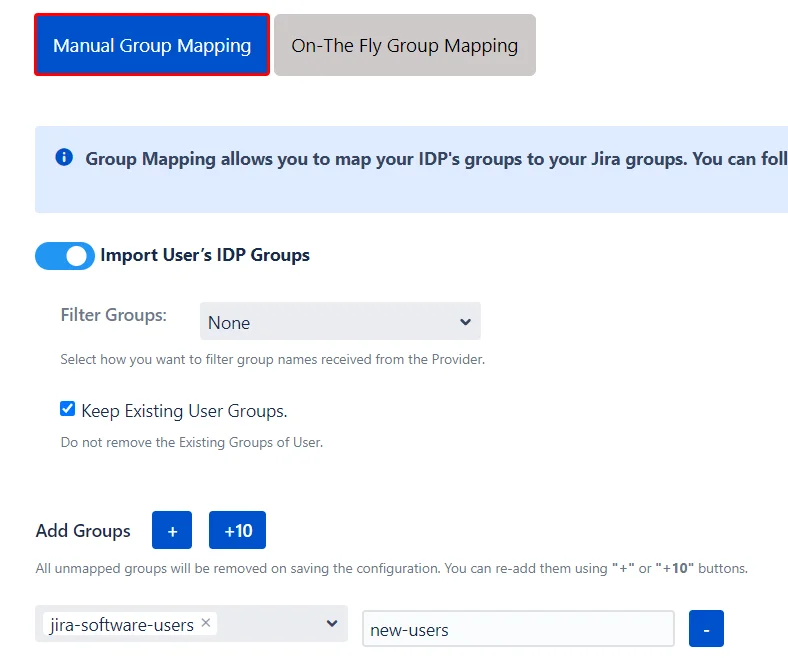
Step 5: Assign users and test with Provision on Demand
Test with a small group before enabling automatic provisioning.
5.1 Test user provisioning
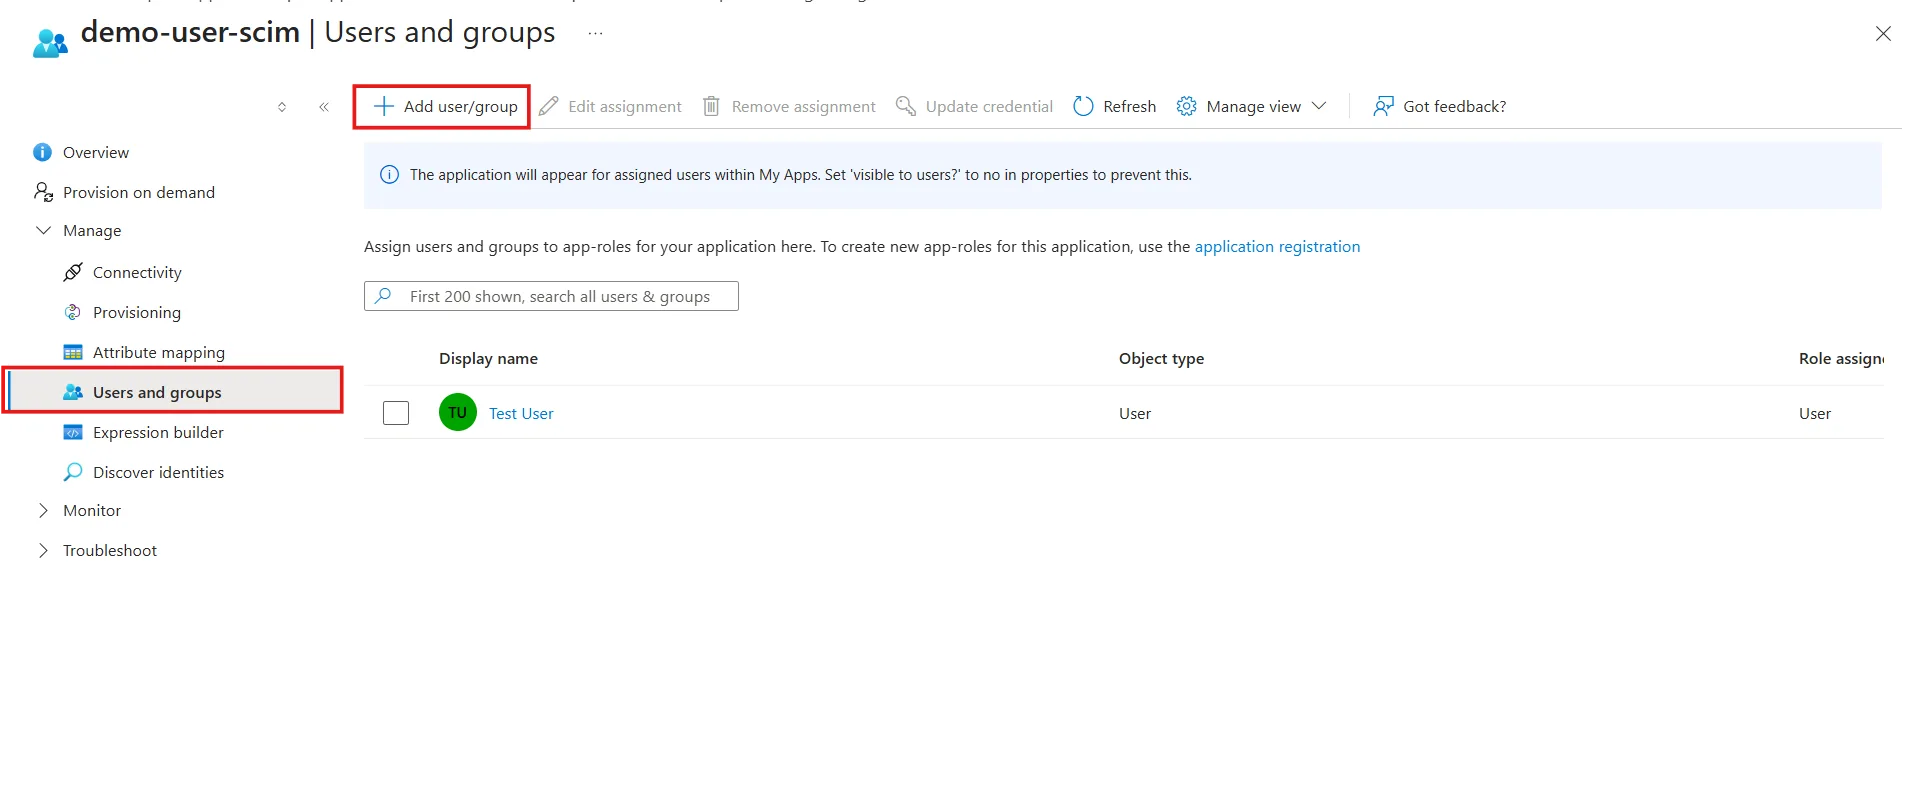
- In Entra ID, go to Users and groups and assign a test user.
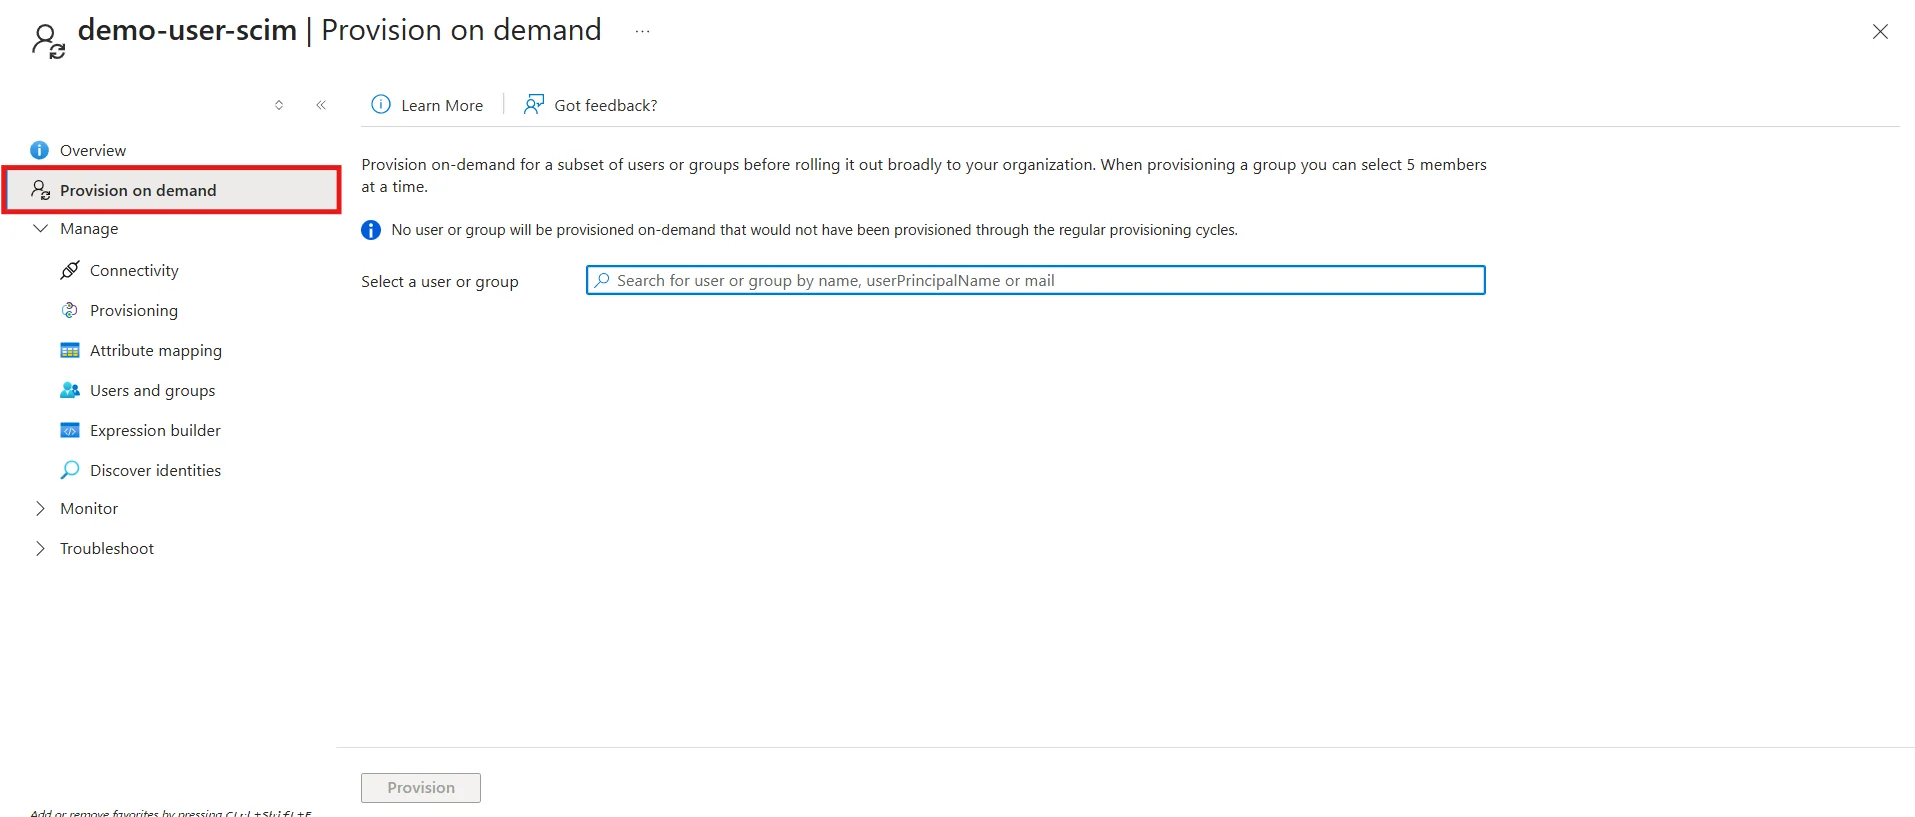
- Go to Provisioning → Provision on Demand.
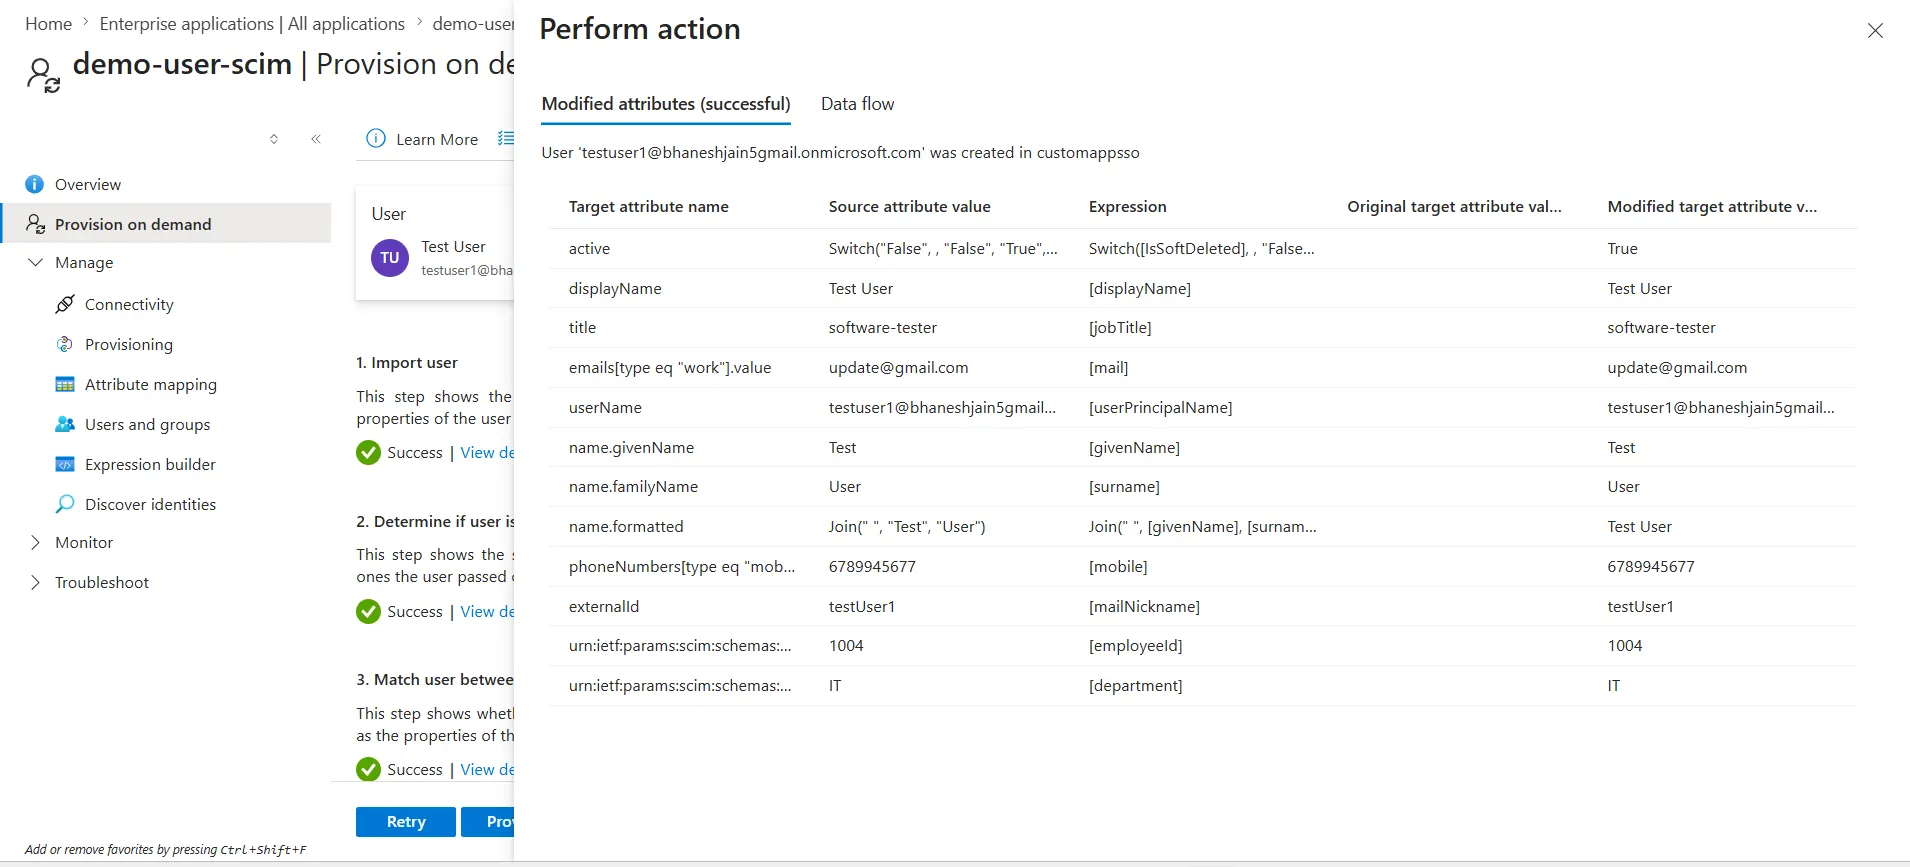
- Select the user, then select Provision.
- Review the operation results, then confirm in your instance's user management area that the user was created or activated.
- To test updates, change the user's profile in Entra ID and run Provision on Demand again.
5.2 Test group provisioning
- Assign the test group to the application.
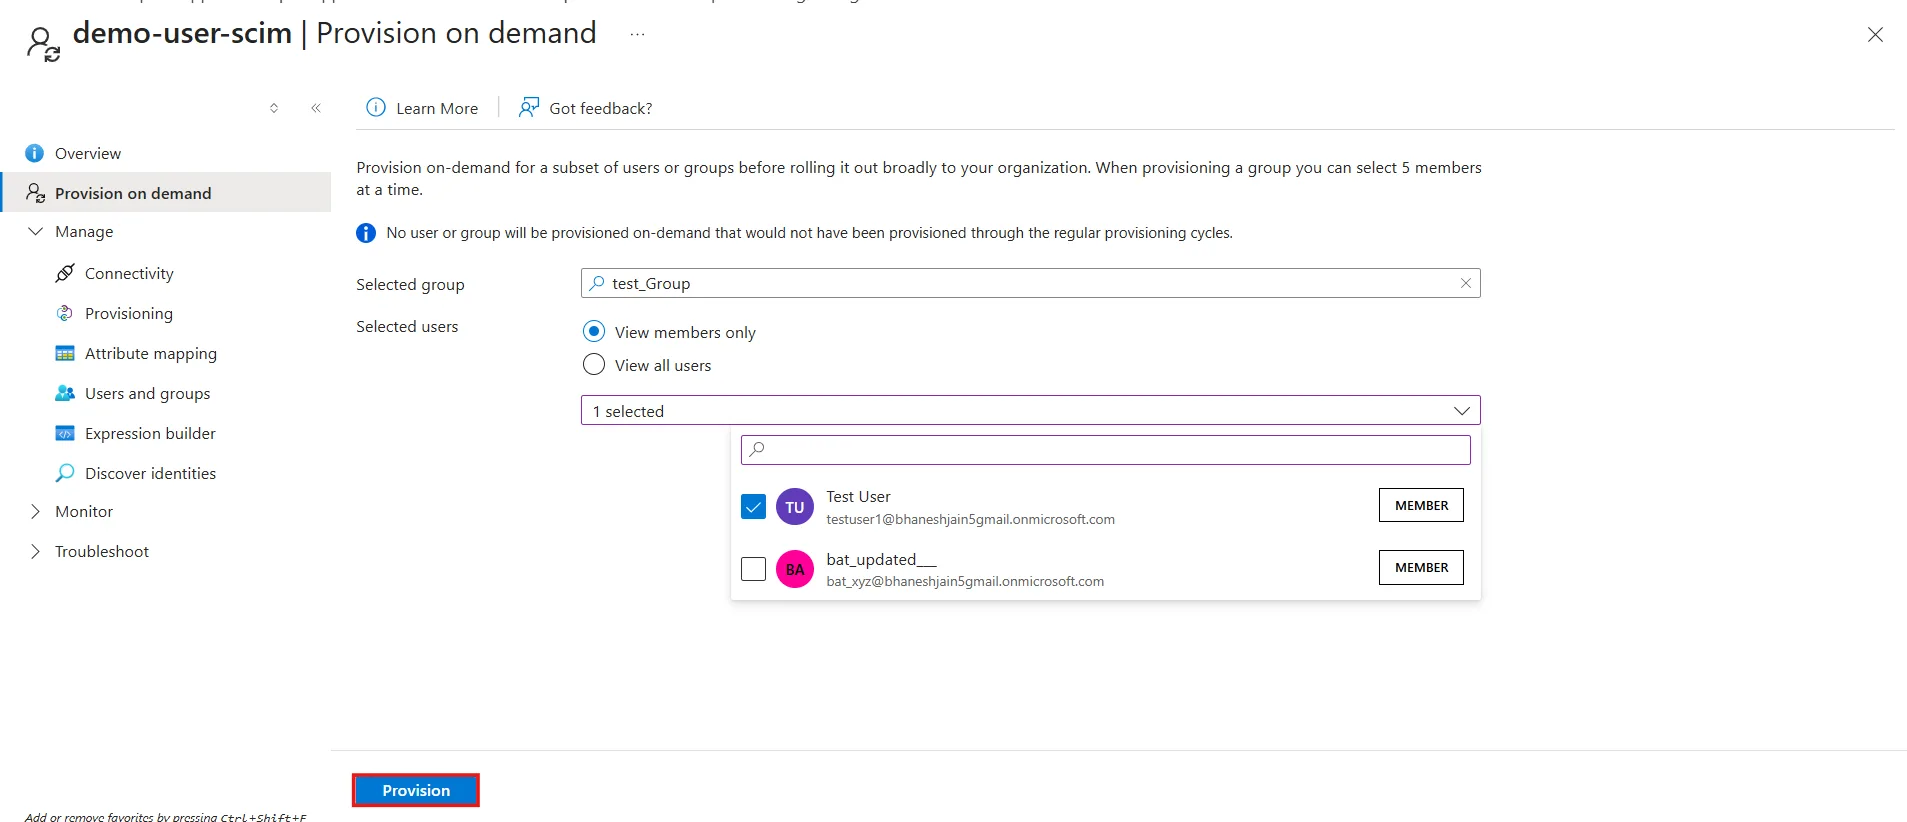
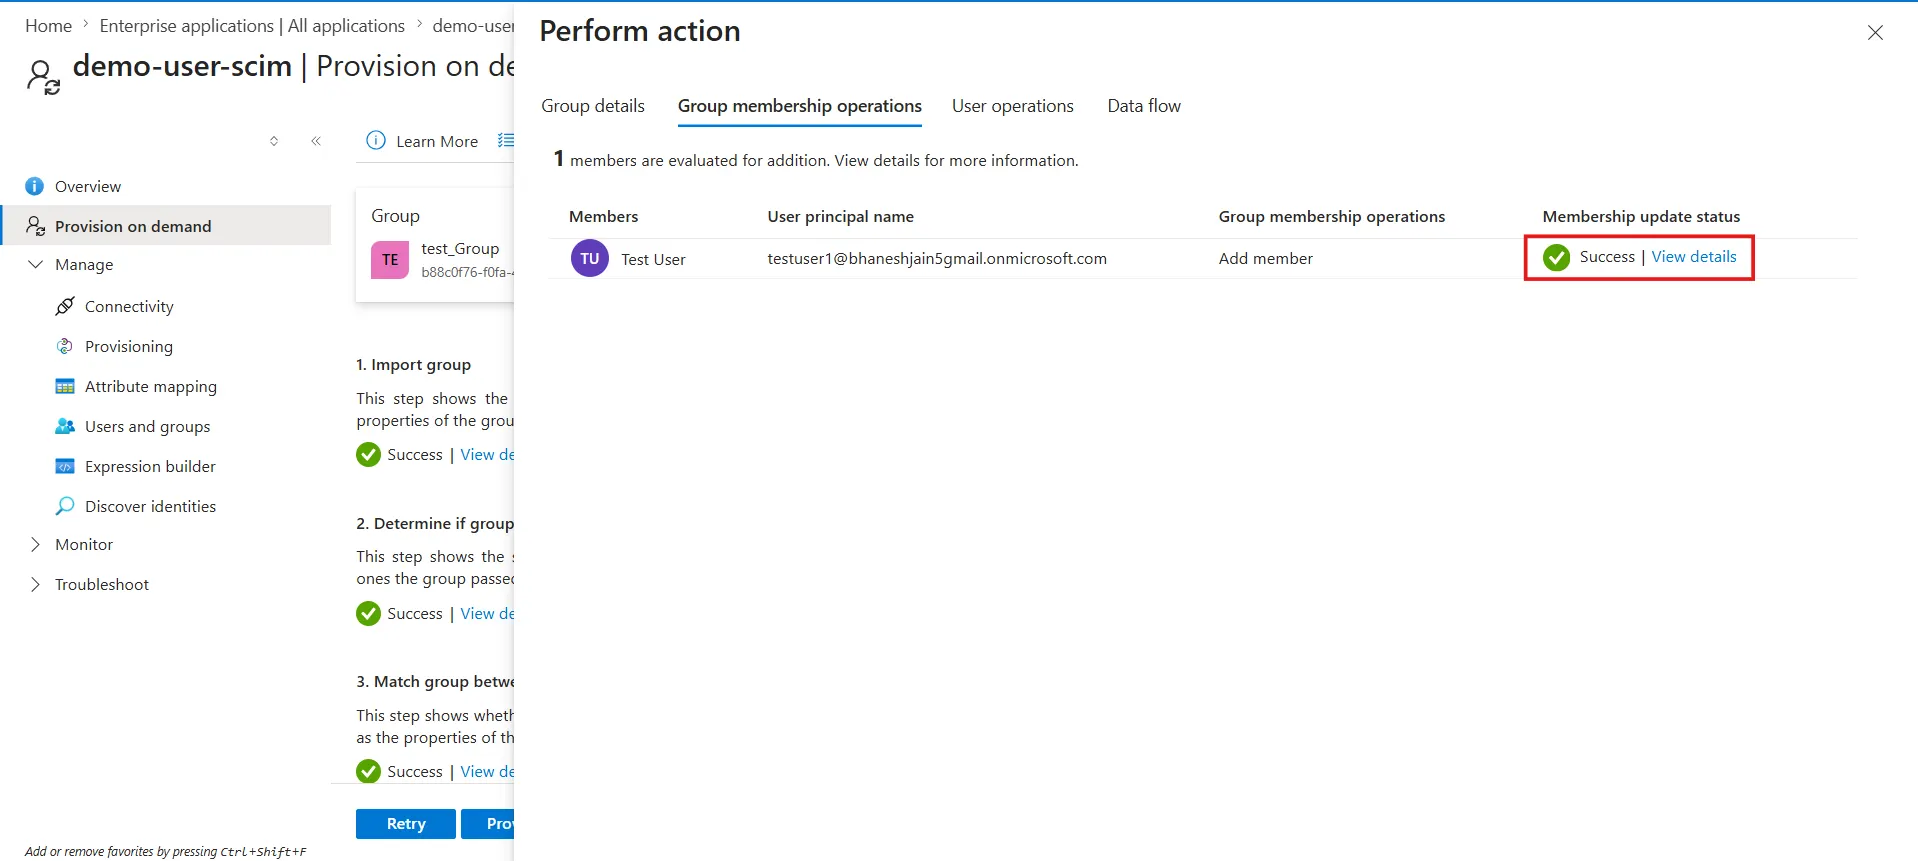
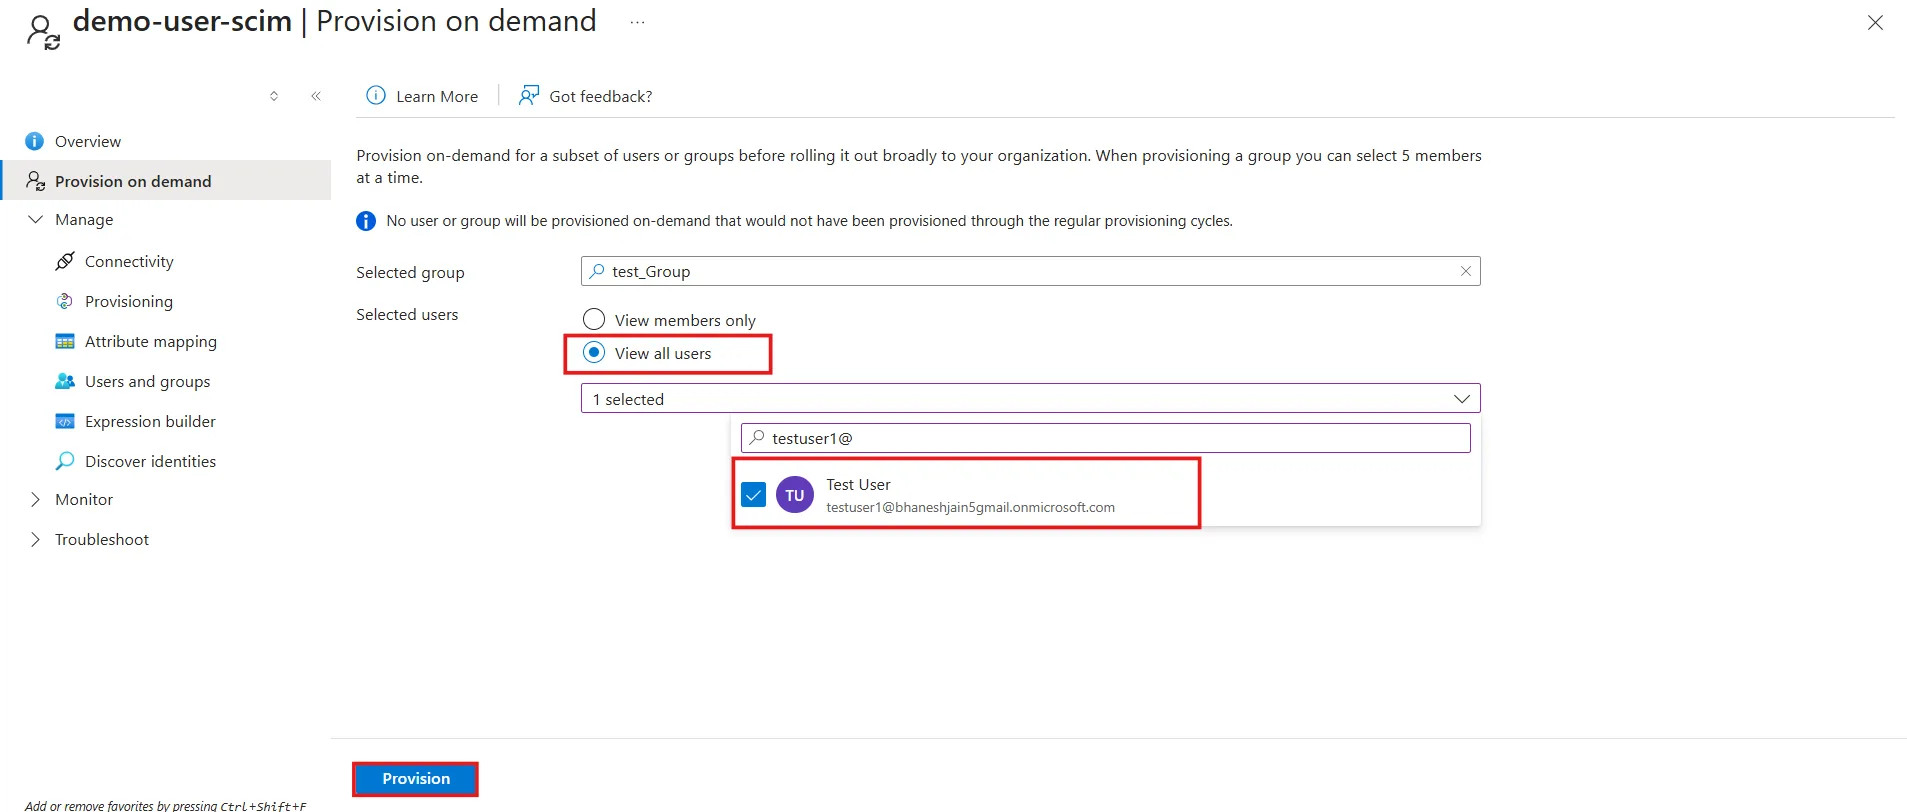
- Select Provision on Demand, choose the group, then choose a member, then select Provision.
- Confirm the group membership is reflected in your instance's user management area.
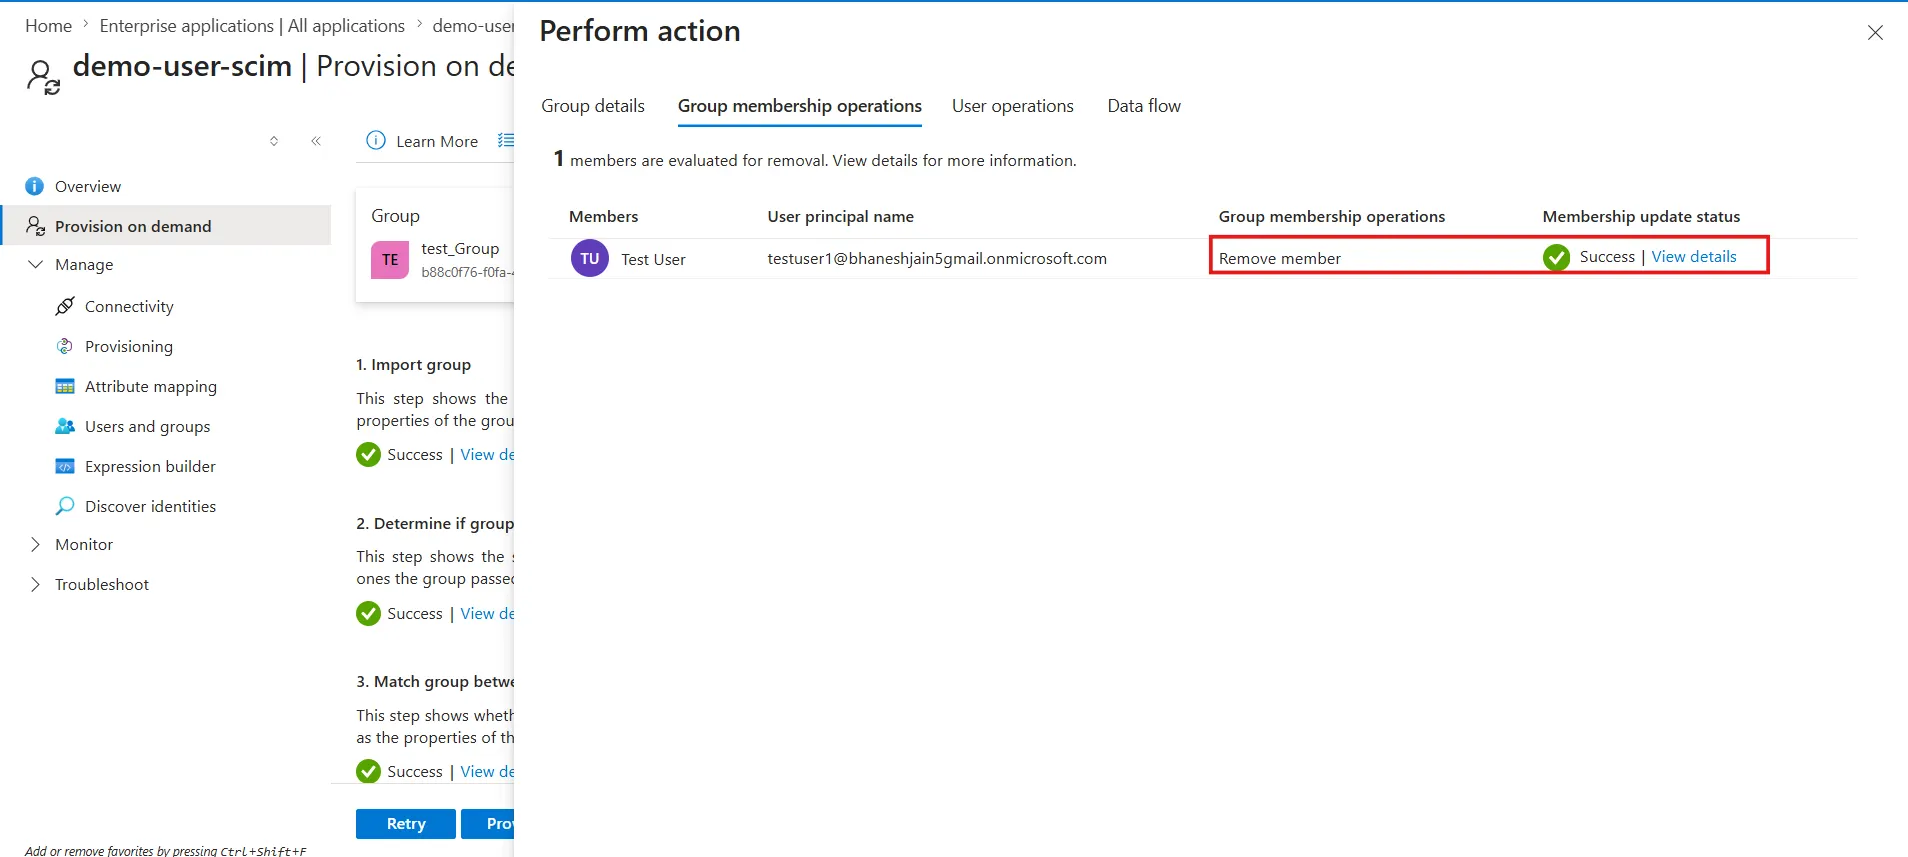
- To test removal, remove the user from the group in Entra ID, then reprovision both. Select View all users so the removed user appears in the picker.
- Confirm the membership was removed in Atlassian.
Step 6: Start provisioning and verify
- In Entra ID, return to Provisioning and select Start provisioning.
- Check your instance's user management area for newly created and updated accounts.
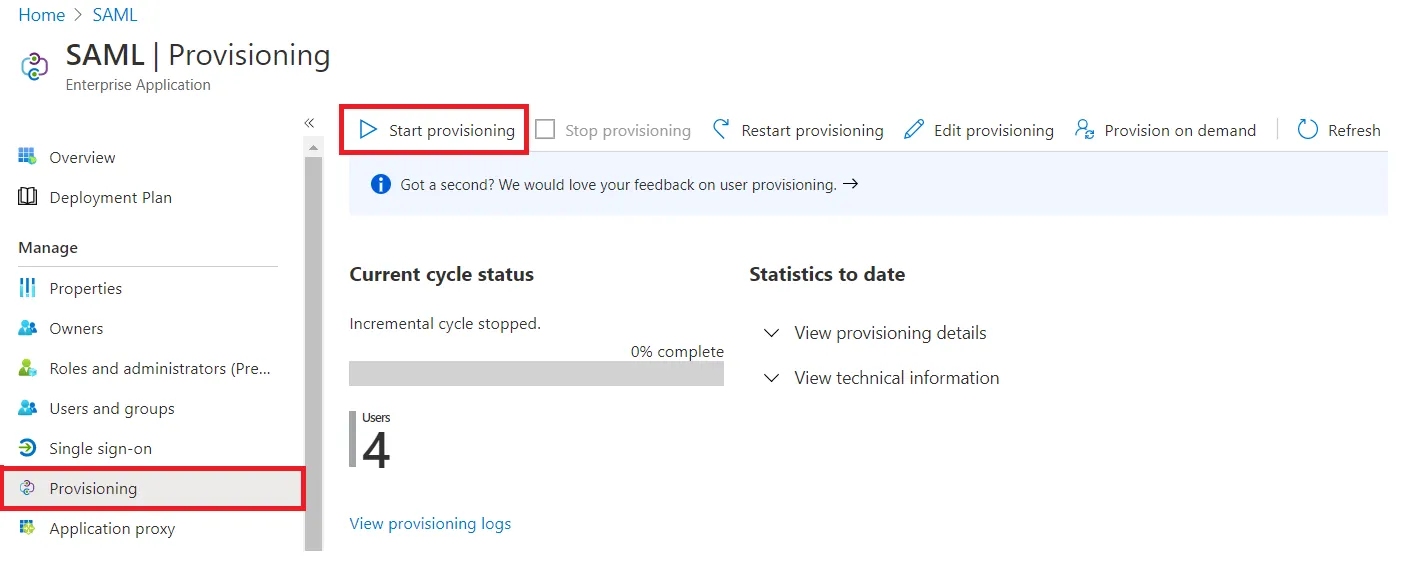
Entra ID runs automatic provisioning on its own schedule, typically every 40 minutes. The first cycle can take longer.
Step 7: Review sync history
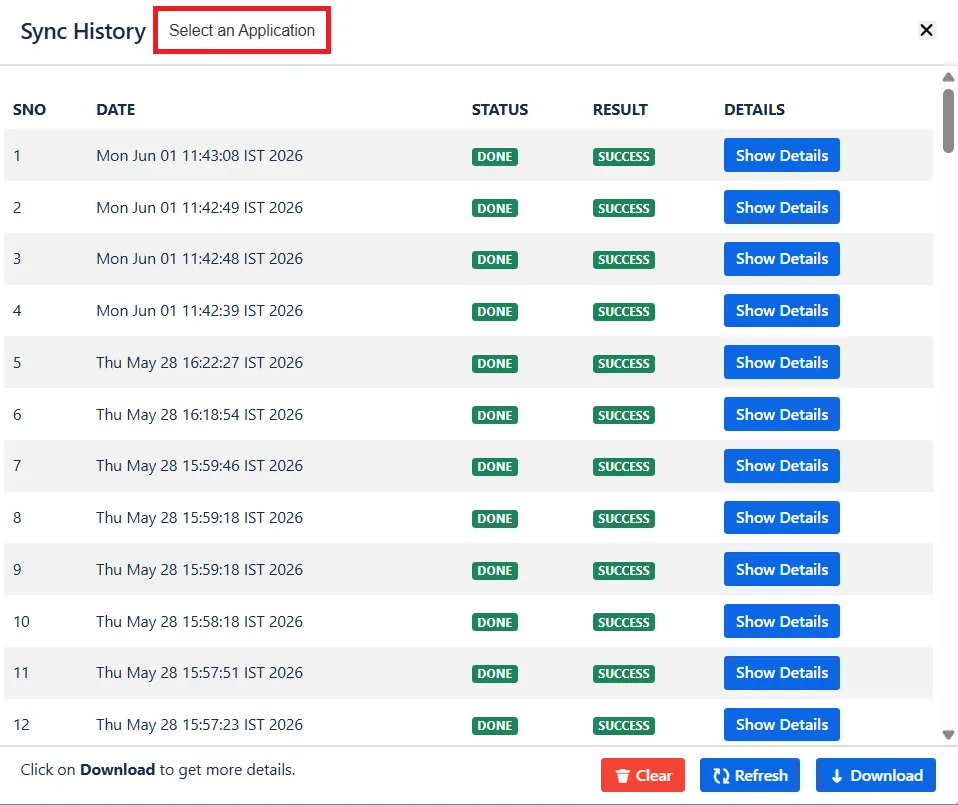
Select Sync History to see logs for every user and group operation. Filter by application to isolate a specific connection. Start here when a user didn't provision as expected.
Step 8: Connect additional IdPs
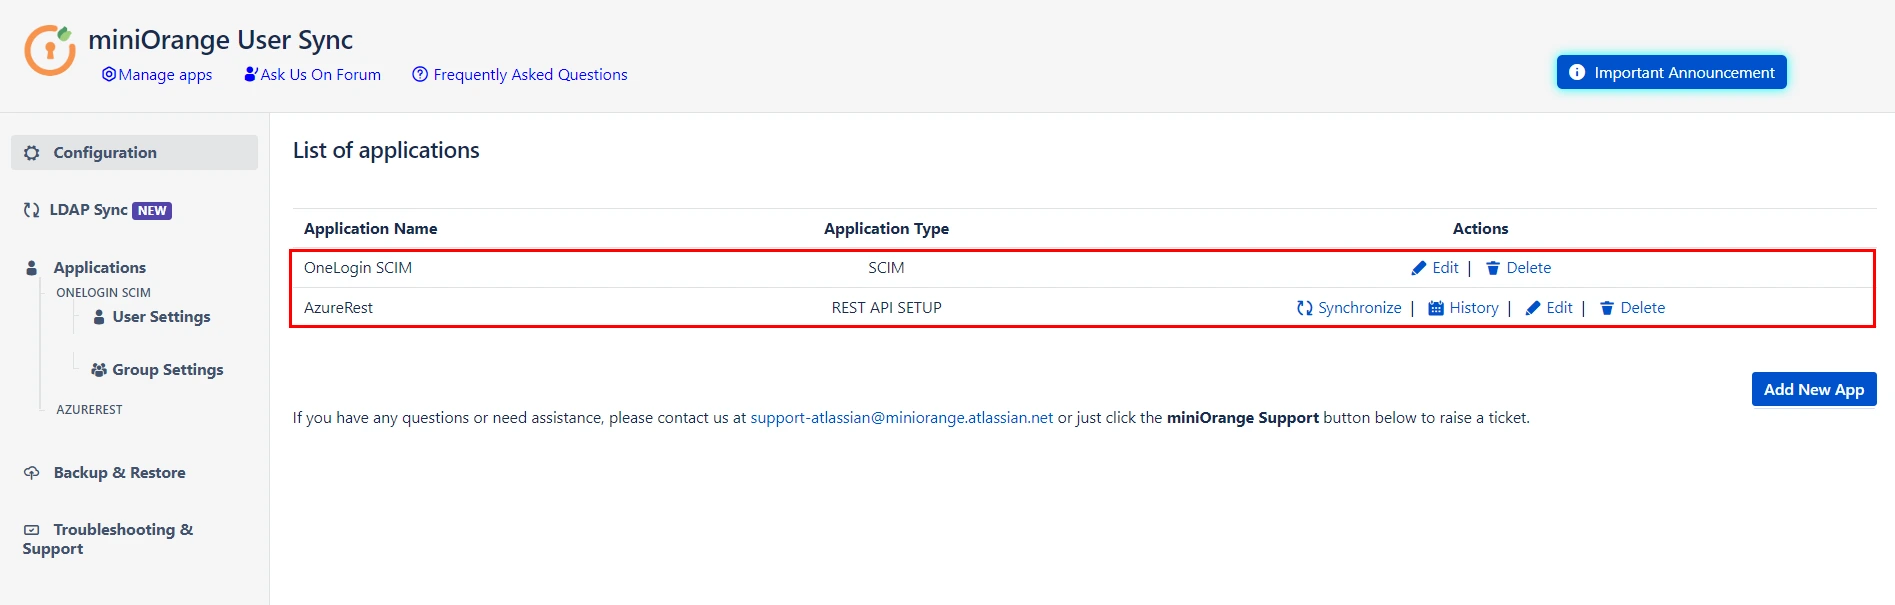
Go to Configured IDPs and select Add new App to configure additional provisioning connections against the same Atlassian instance.
Troubleshooting
| Symptom | Check |
|---|---|
| Test Connection fails in Entra ID | Base URL and token copied exactly; Atlassian reachable from Entra ID; token not regenerated since it was pasted |
| Users provision with wrong usernames | Regex on Username in Step 3; attribute mapping |
| Users don't appear after provisioning | Directory Selection points to the right directory; Enable Import Users is on; check Sync History |
| Groups created but empty | Group members assigned in Entra ID, not just the group itself |
| Deactivations don't sync | Disable Users enabled in Step 3 |
Additional resources
Did this page help you?