Contents
Setup Guide for AWS Cognito App
Step 1: Set Up AWS Cognito as OAuth Provider
- Navigate to the plugin configuration page, click the "Add New Provider" button (located either in the middle or top-right corner), select AWS Cognito as the application, and copy the callback URL from the plugin and keep it handy, as you'll need it to configure AWS Cognito as the OAuth provider.
- Go to Amazon Console and sign up/log in to your account to Configure AWS Cognito.
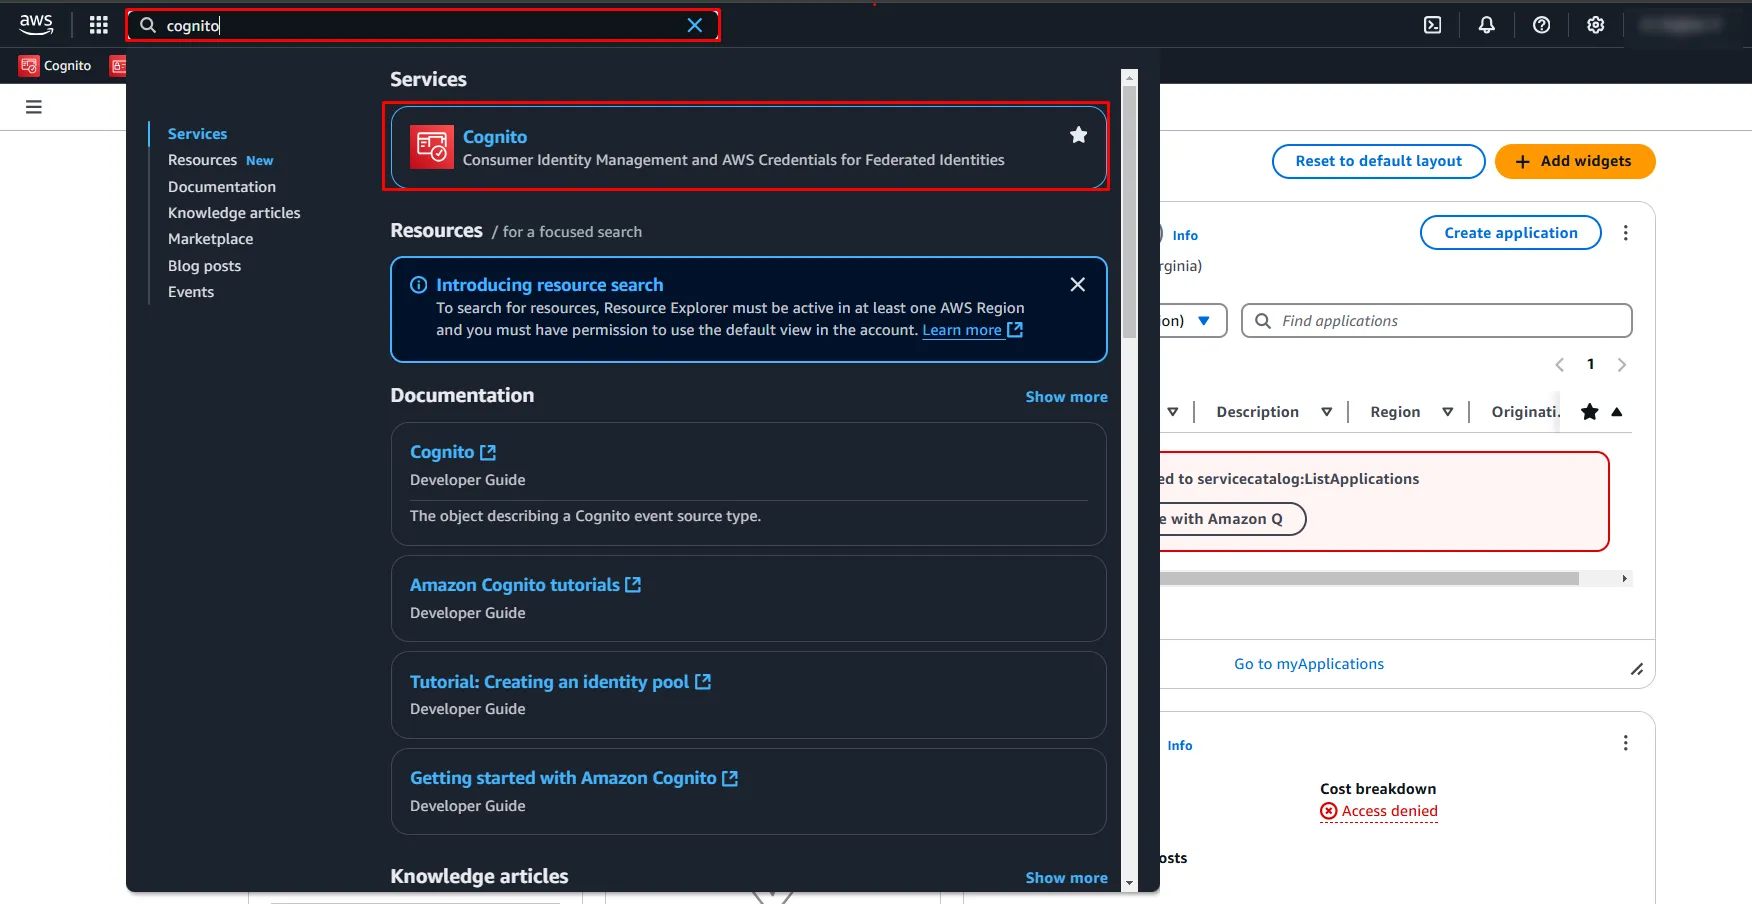
- Search for Cognito in the AWS Services search bar as shown below.
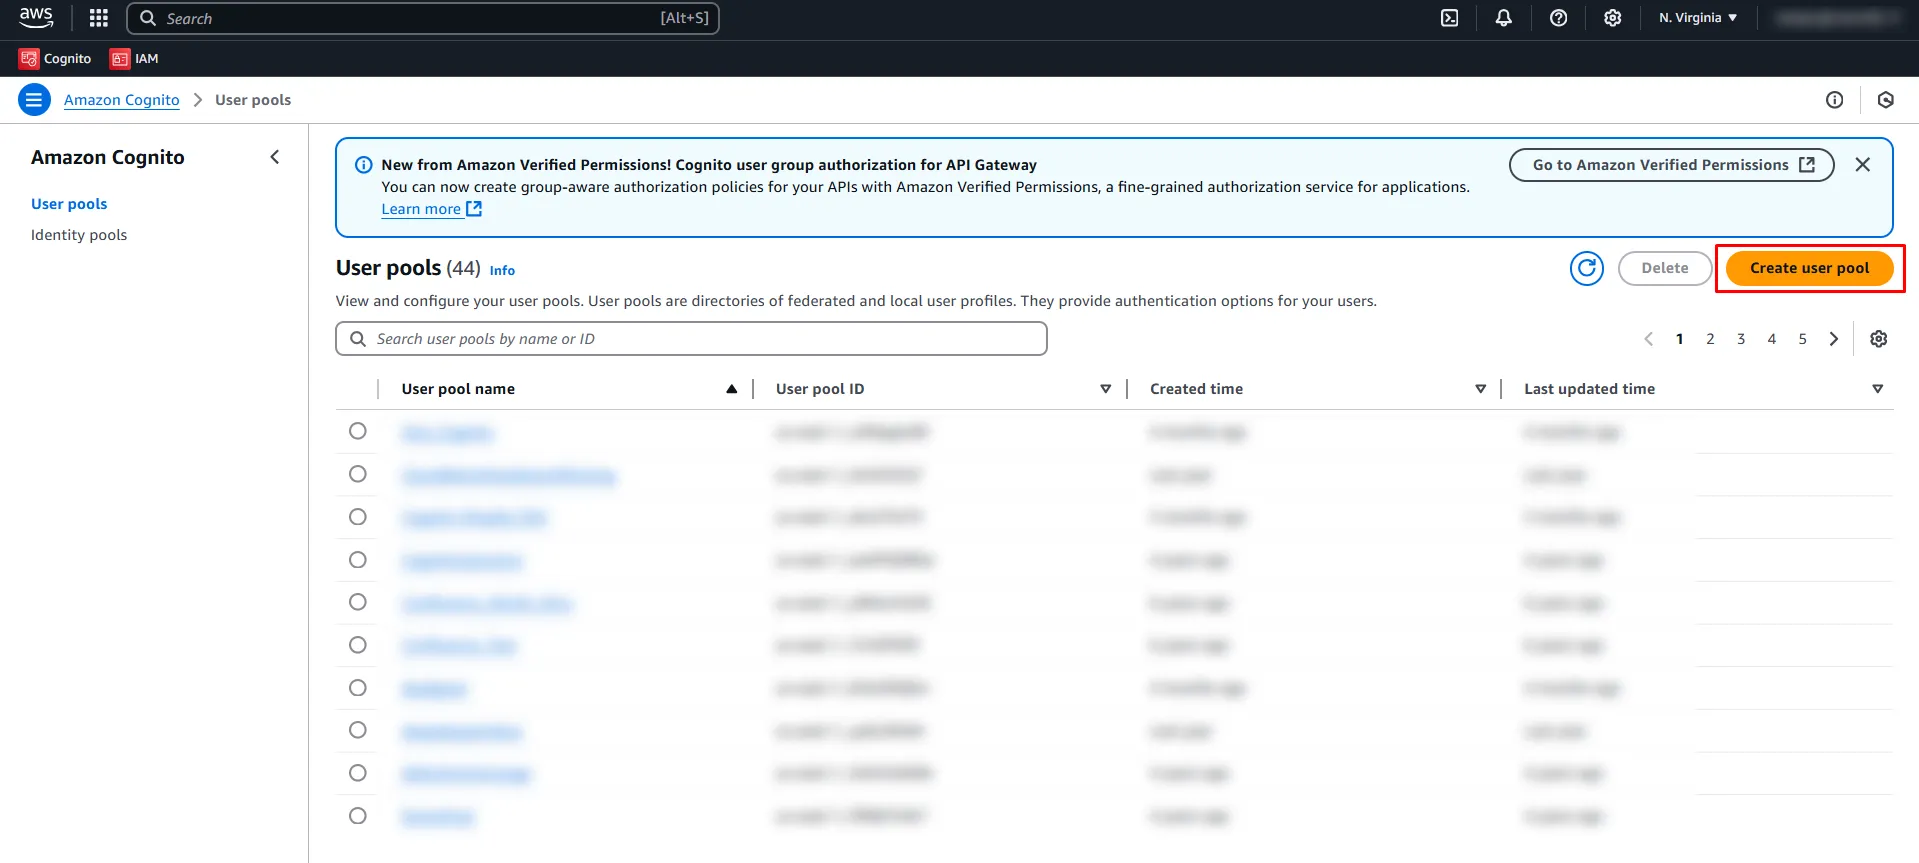
- Click on Create a User Pool button to create a new User Pool.
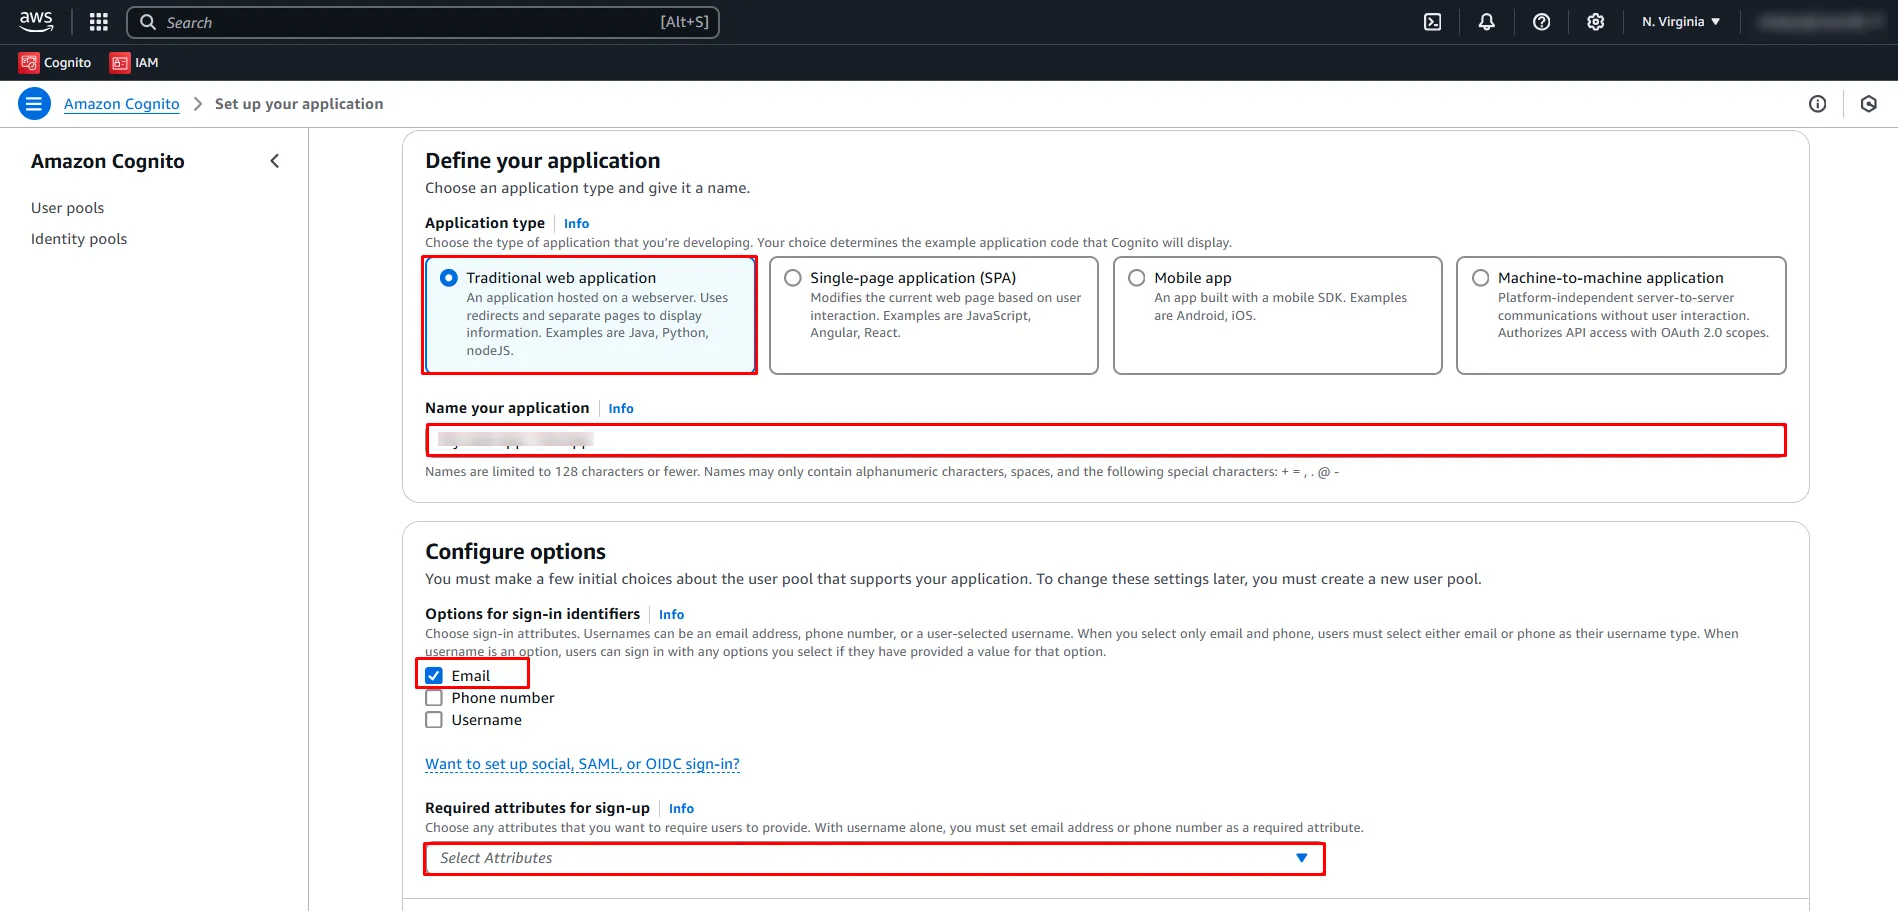
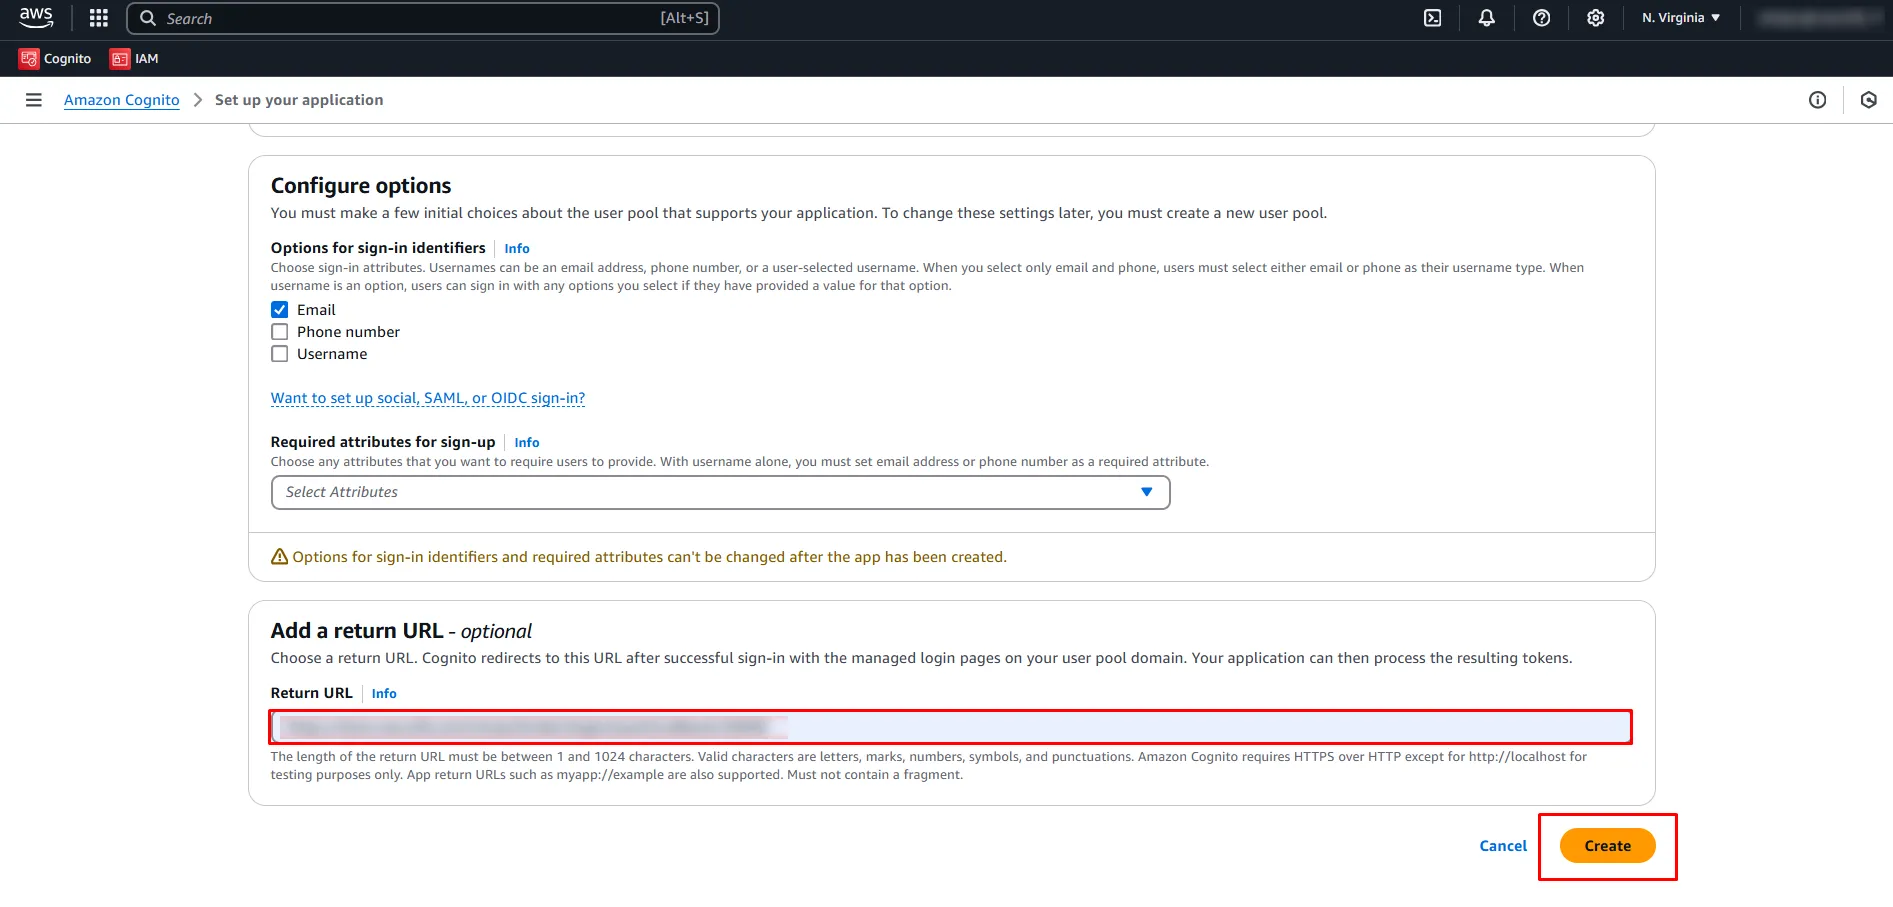
- Select the Application type as a Traditional web application. Provide a name for your application and choose the attributes in your user pool to be used during the sign-in process. Select the attributes that you require during the sign-up process from the Required attributes for the sign-up section.
- Add callback URL in the Return URL field under the Add a Return URL section. You will get this callback URL from the plugin. Click on the Create button.
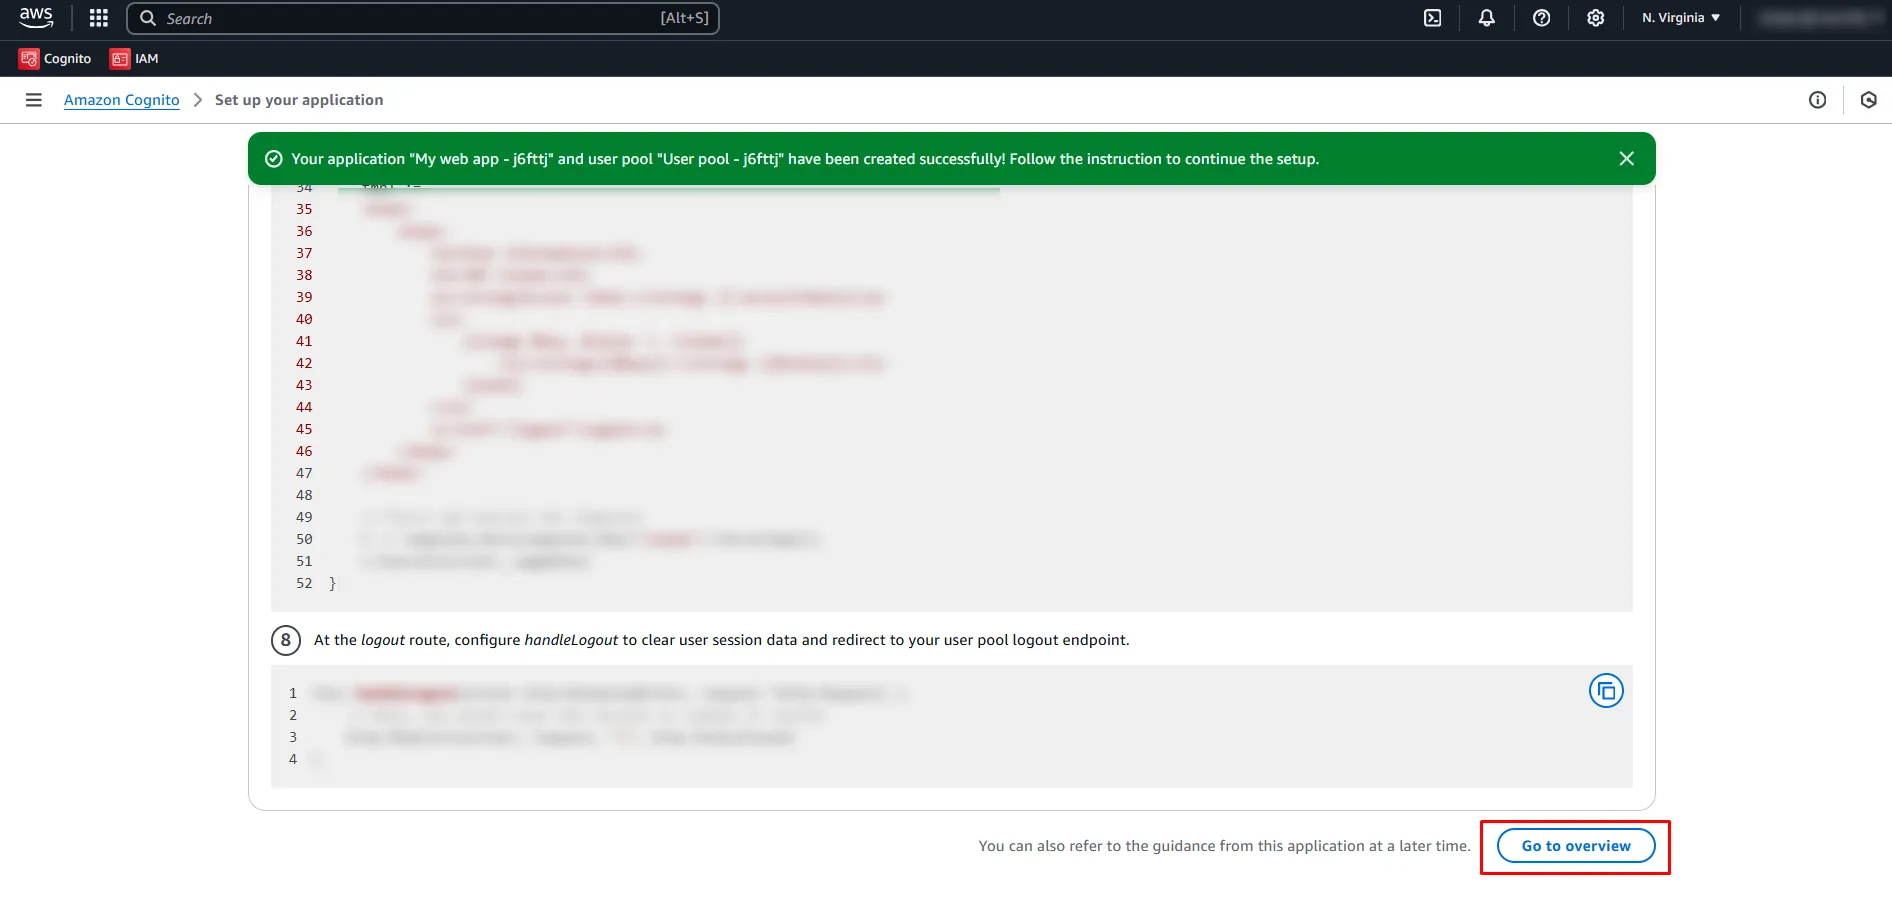
- Scroll down and click on the Go to Overview button.
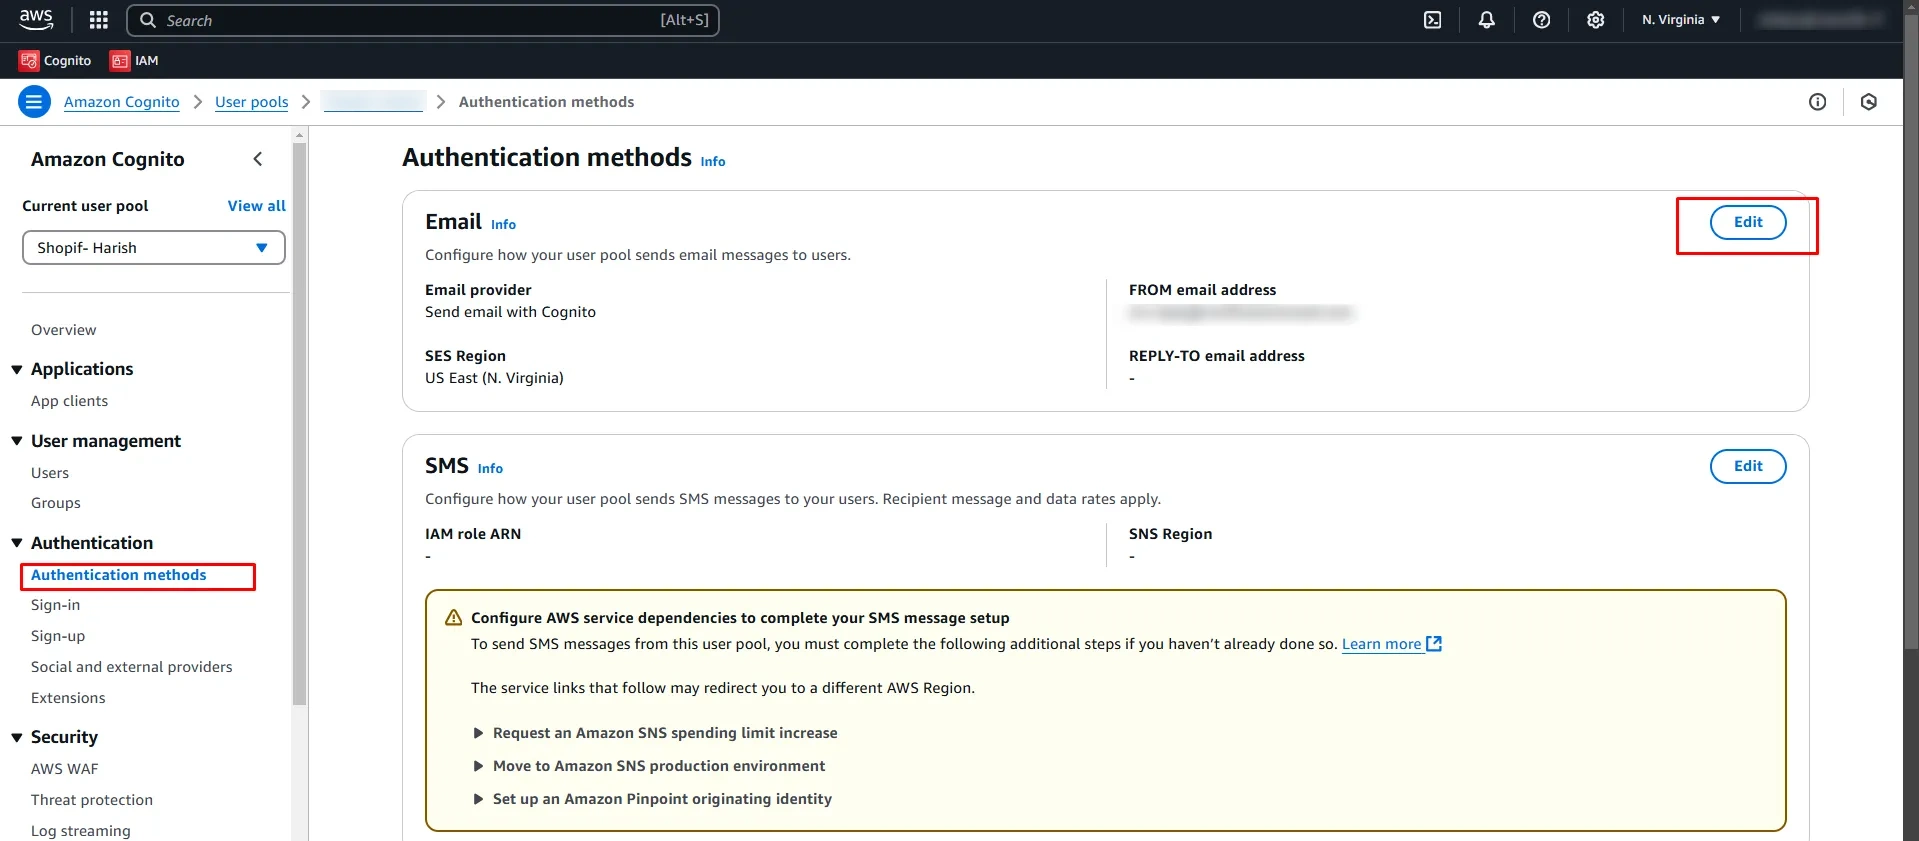
- To configure how your user pool sends email messages to users, navigate to the Authentication methods under the Authentication tab and click on Edit under the Email section.
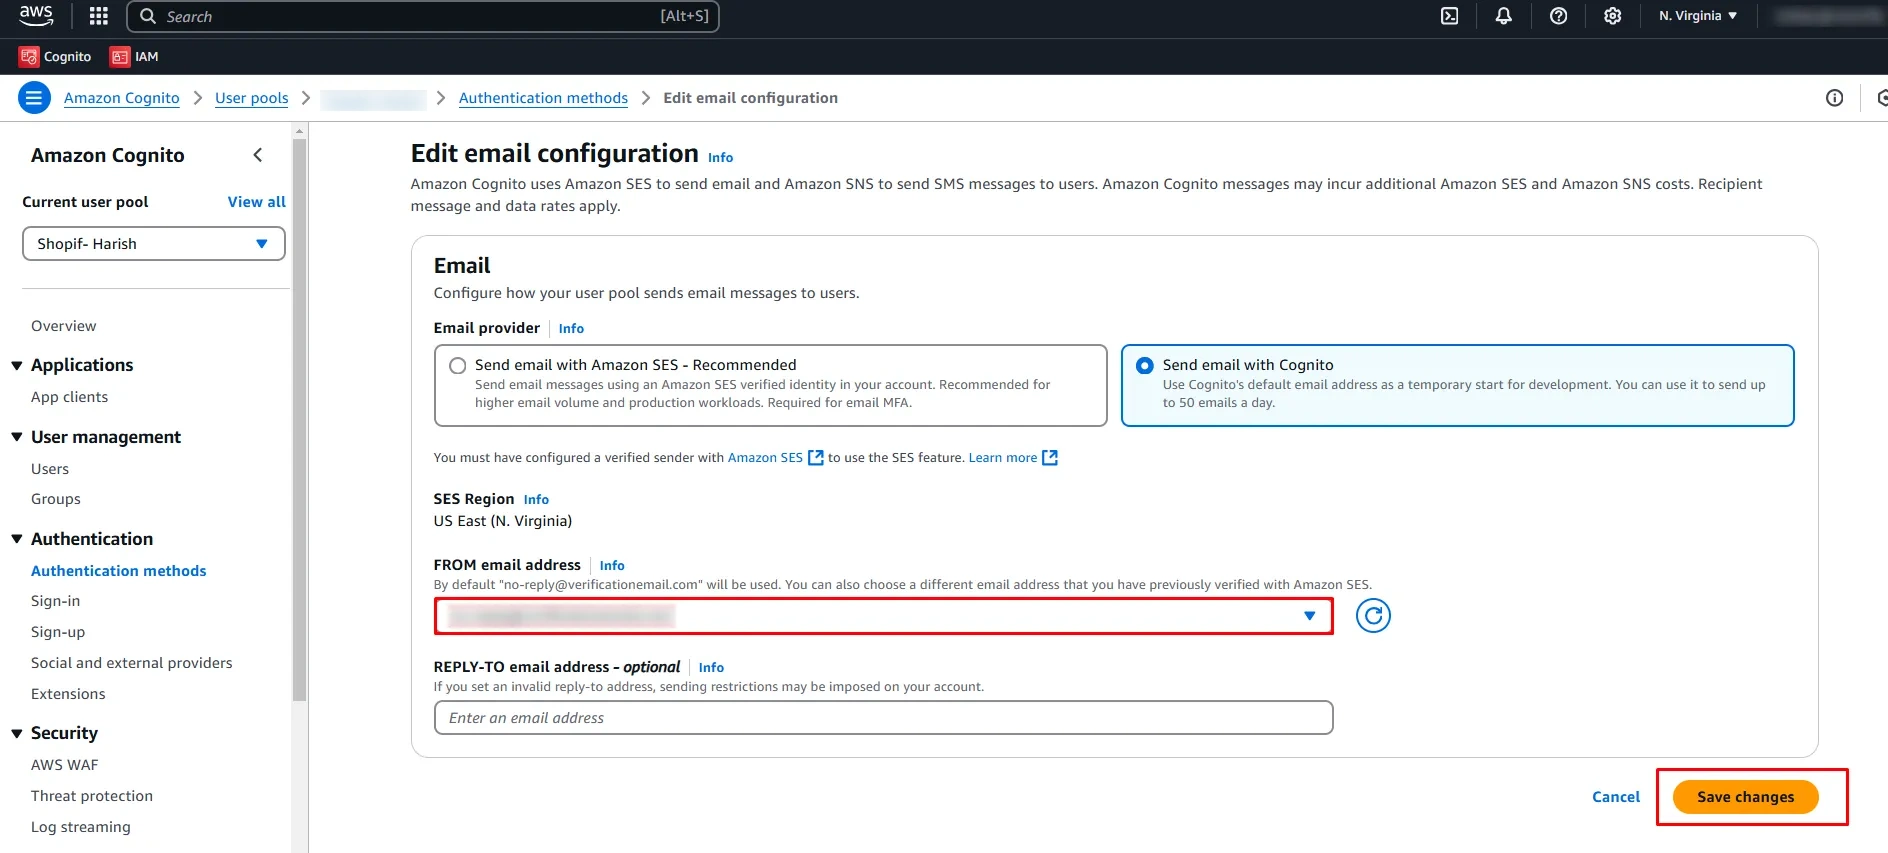
- Here you can add email address from which your user pool sends email messages to users. Click on Save Changes.
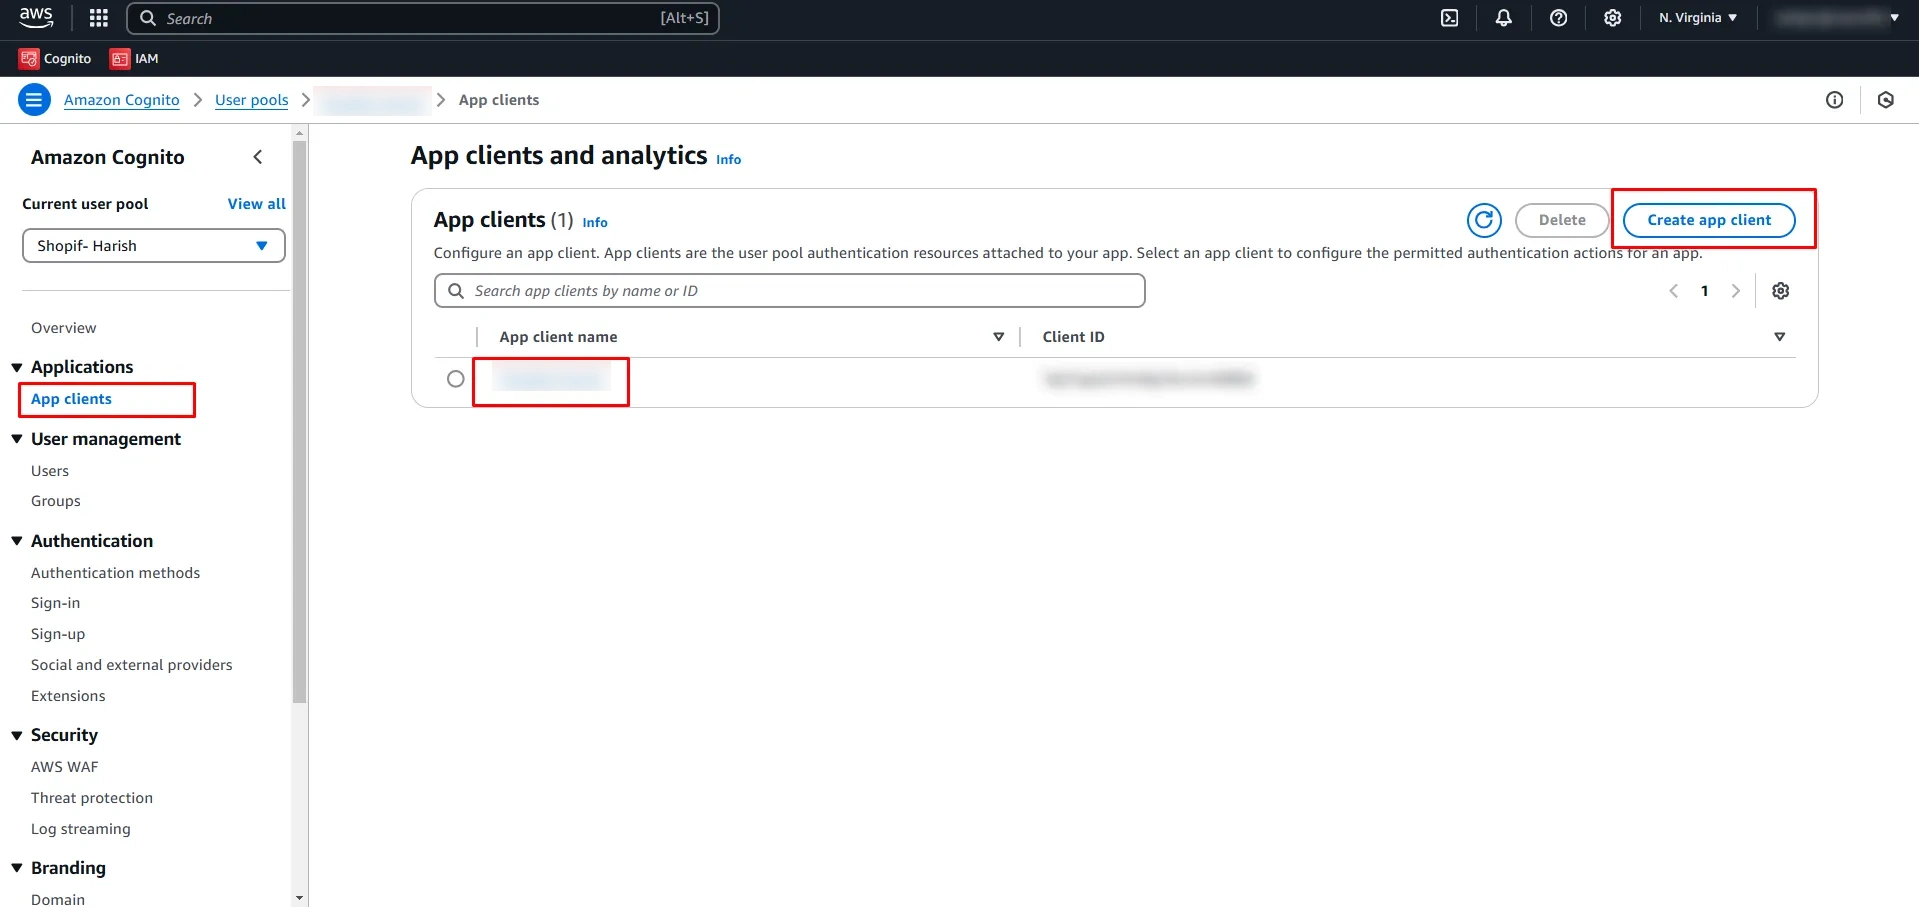
- Navigate to the App Clients tab under the Applications section, and select your App Client. If you don't have an app client, then click on Create app client button.
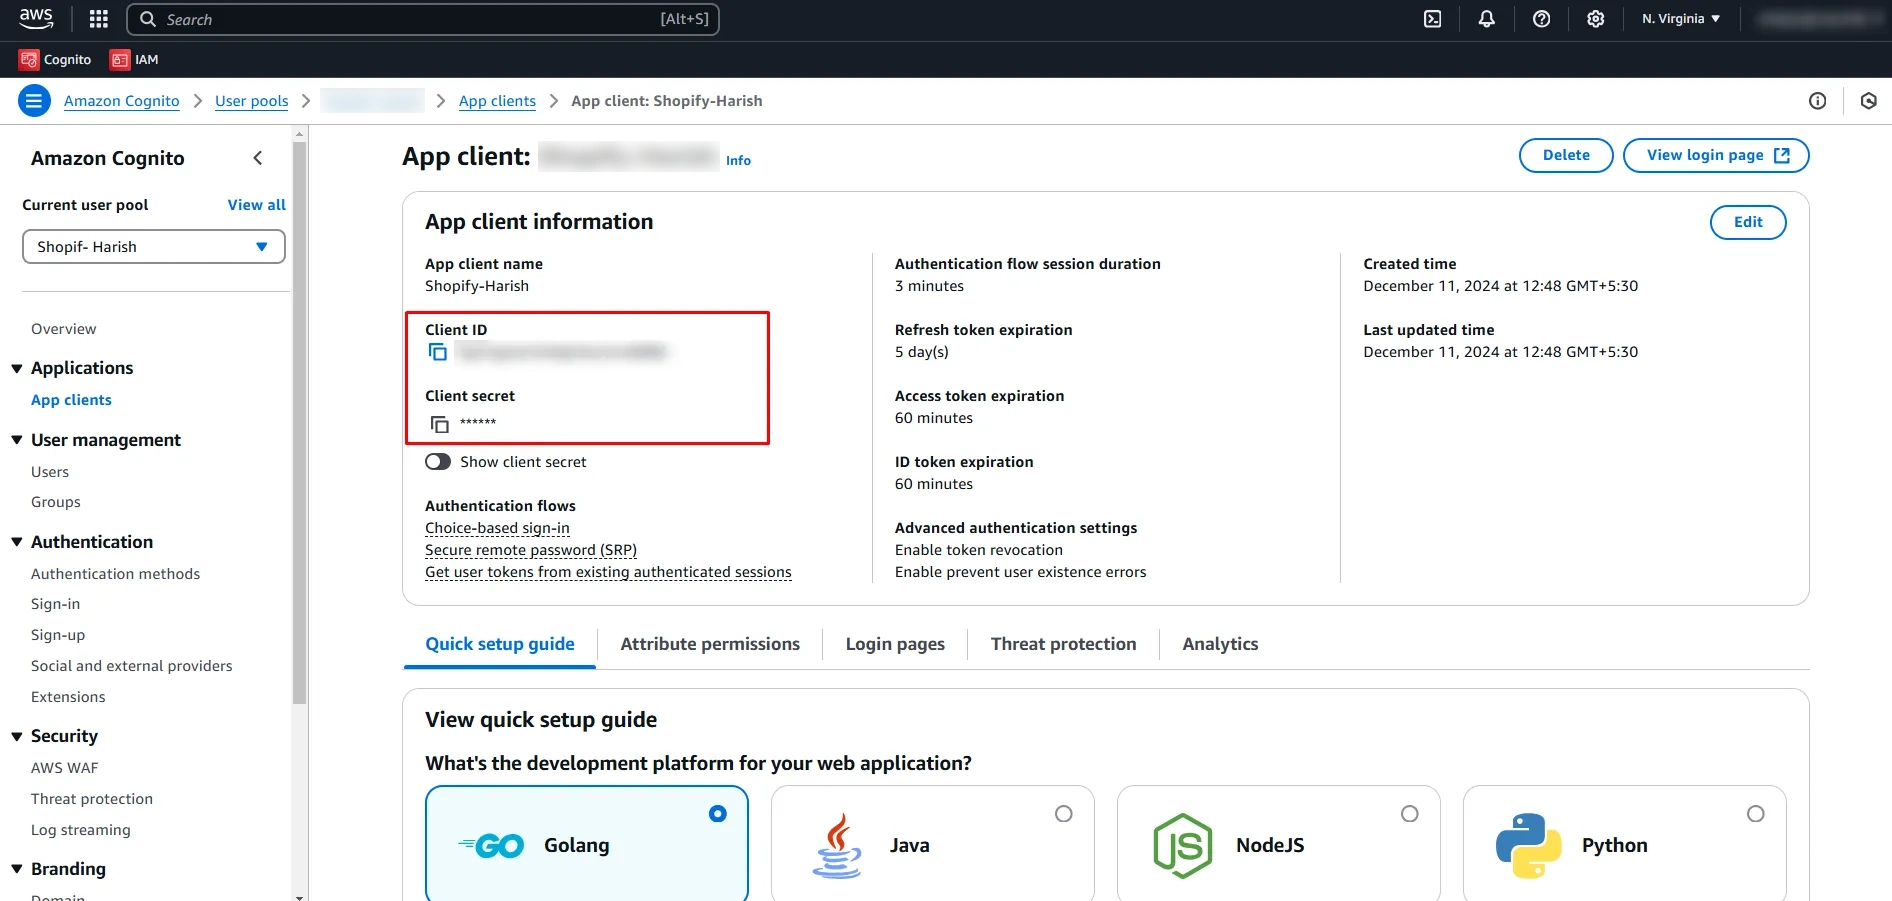
- Copy the Client ID and Client Secret and keep them handy as they will be used in further steps.
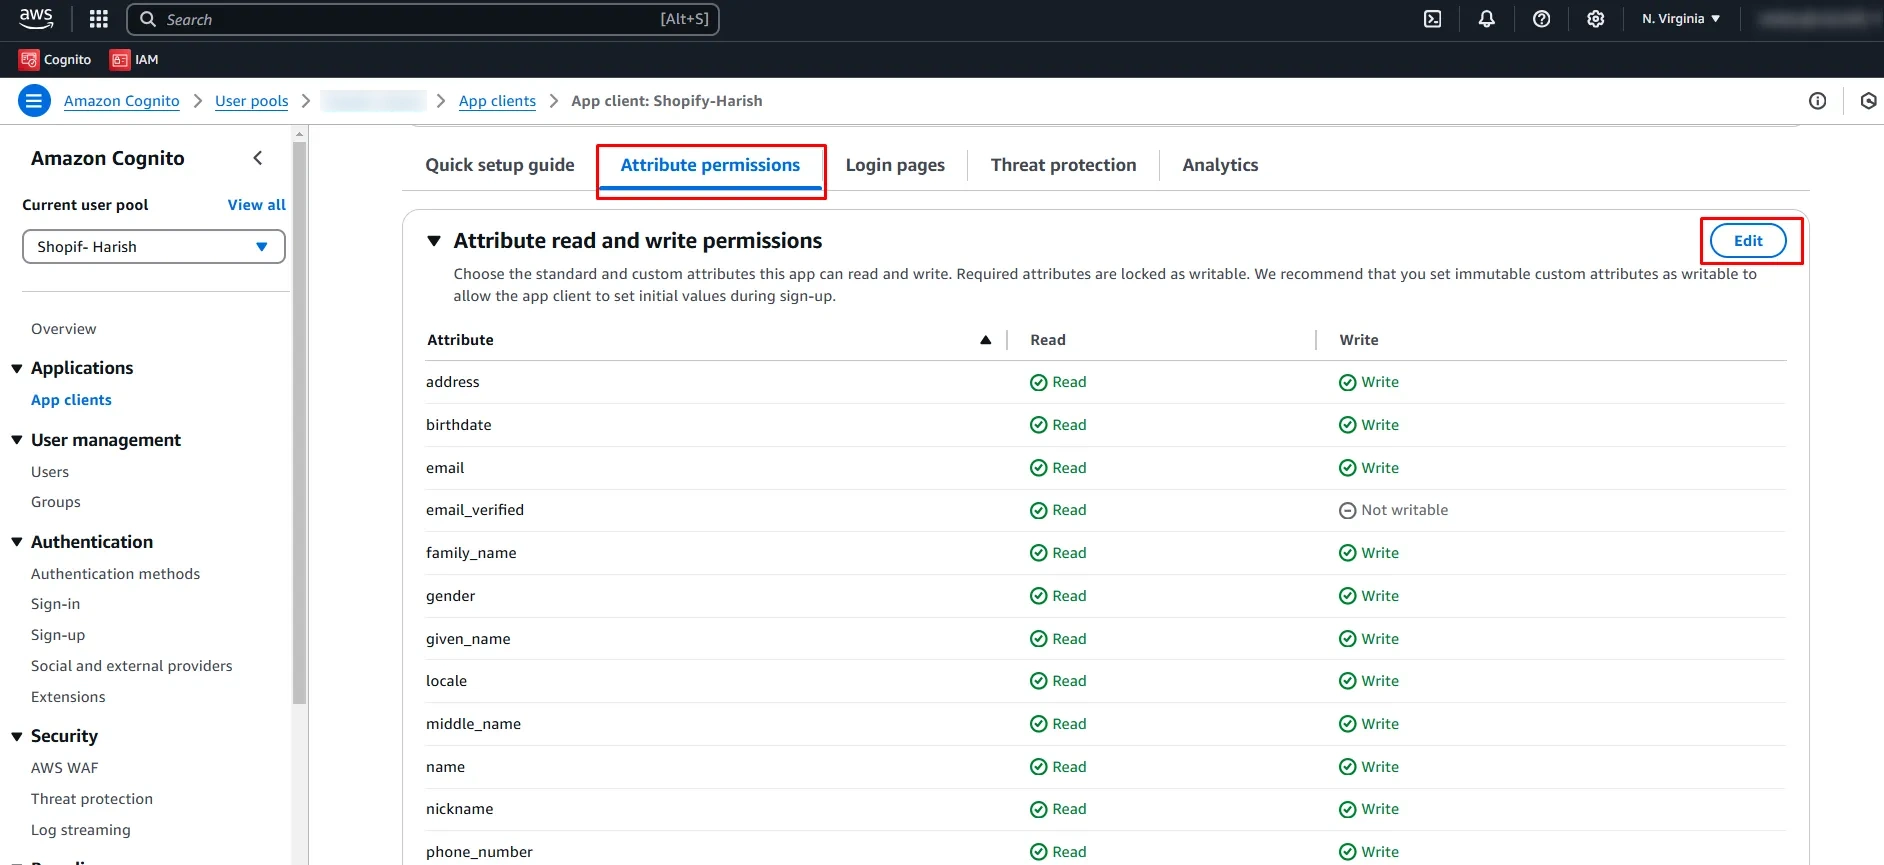
- Go to the Attribute permissions tab. Click on the Edit and select the attributes that you want during the sign-up process. Click on Save.
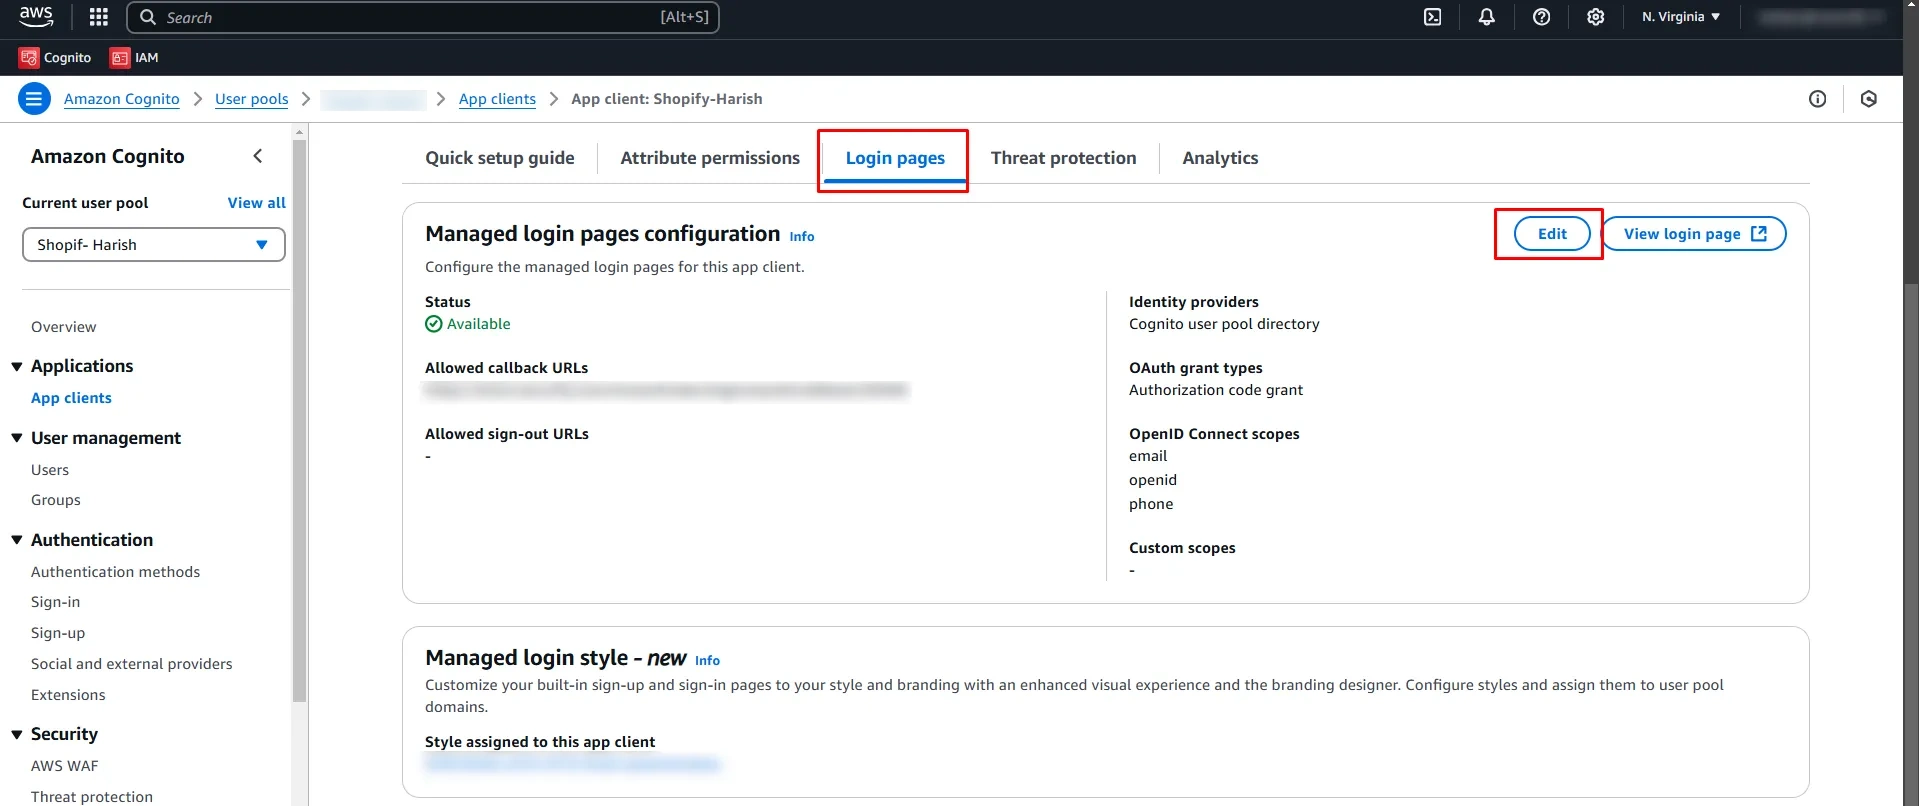
- Now go to the Login pages tab and click on the Edit button as shown in the below image.
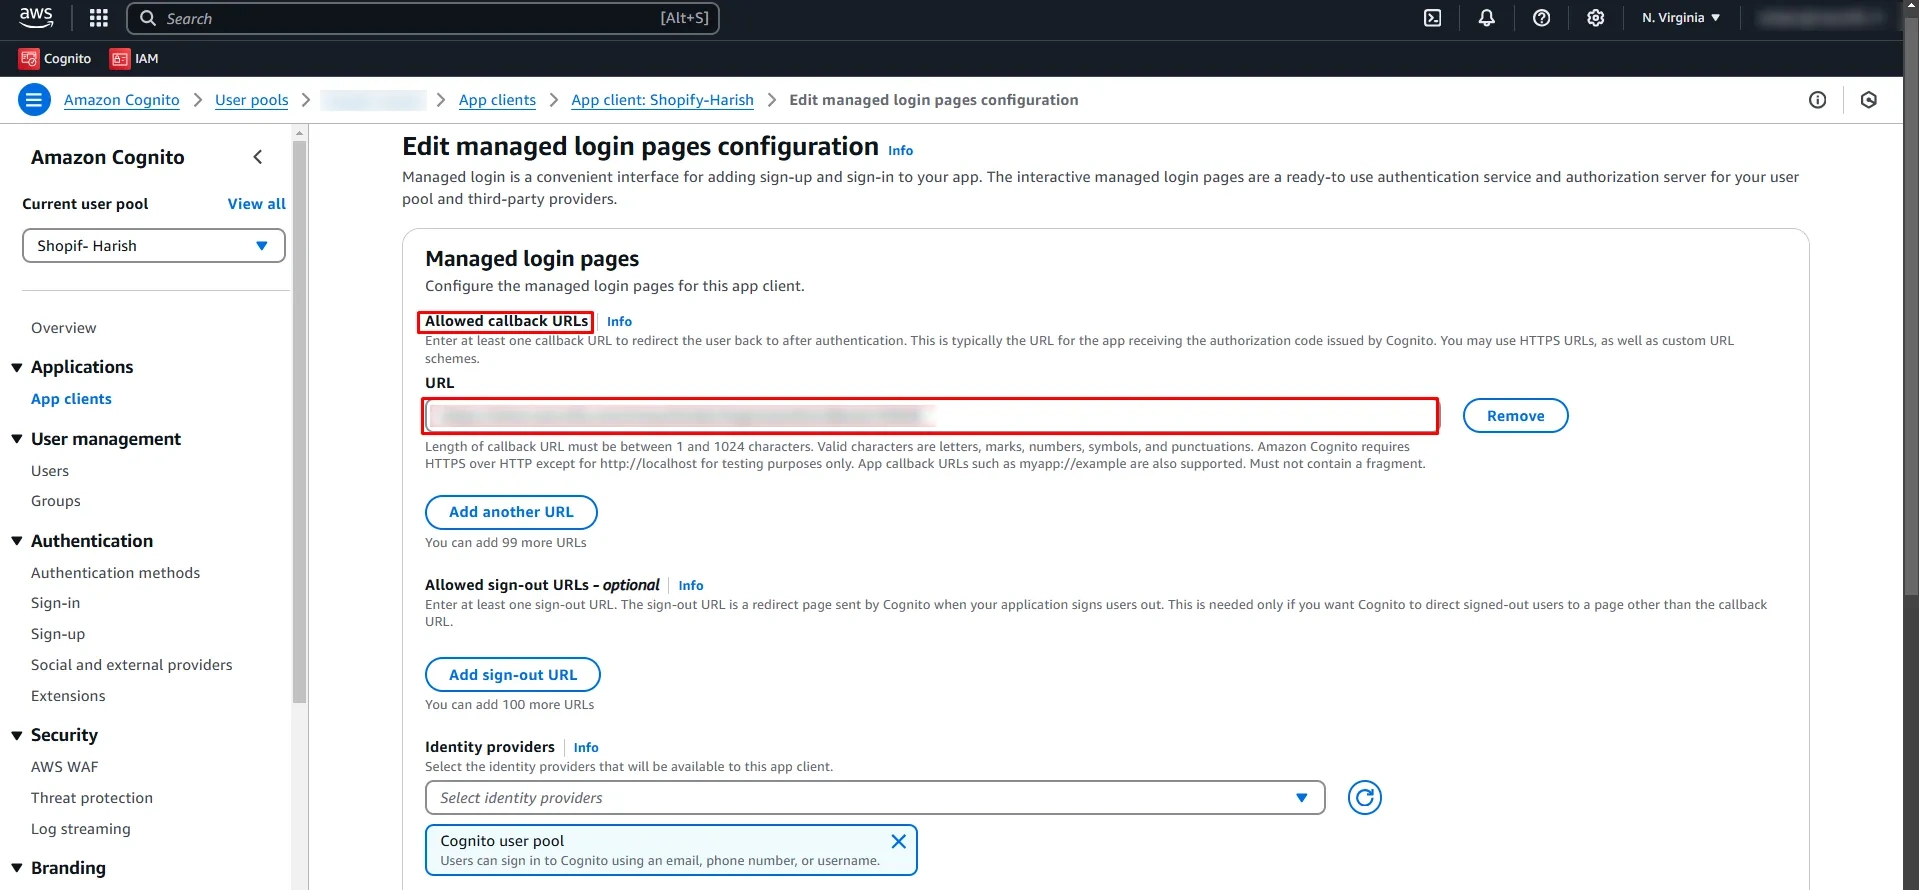
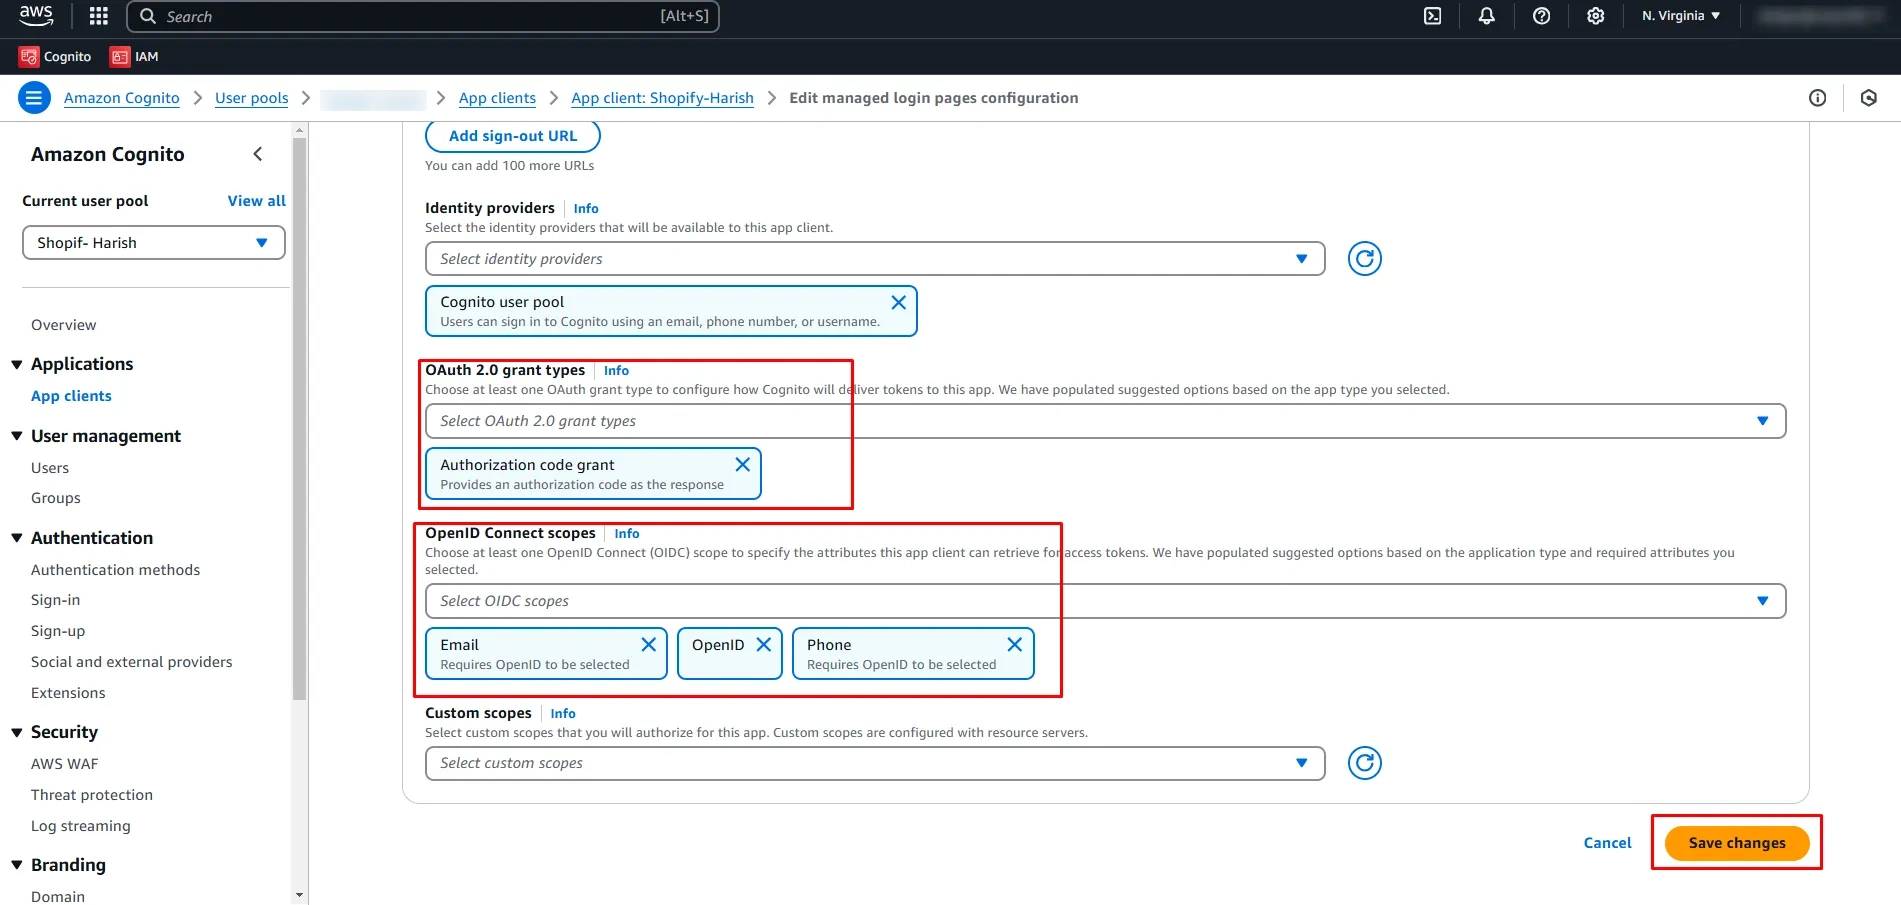
- Verify that the Callback URL is added to the URL field under the Allowed Callback URLs section and under the Identity Provider section, the Identity Provider selected is the Cognito user pool, and select Authorization code grant under the OAuth 2.0 grant types. Under the OpenID Connect scopes section the scopes selected are Email, OpenID, and Profile. (Please refer to the images below) Click on the Save Changes button.
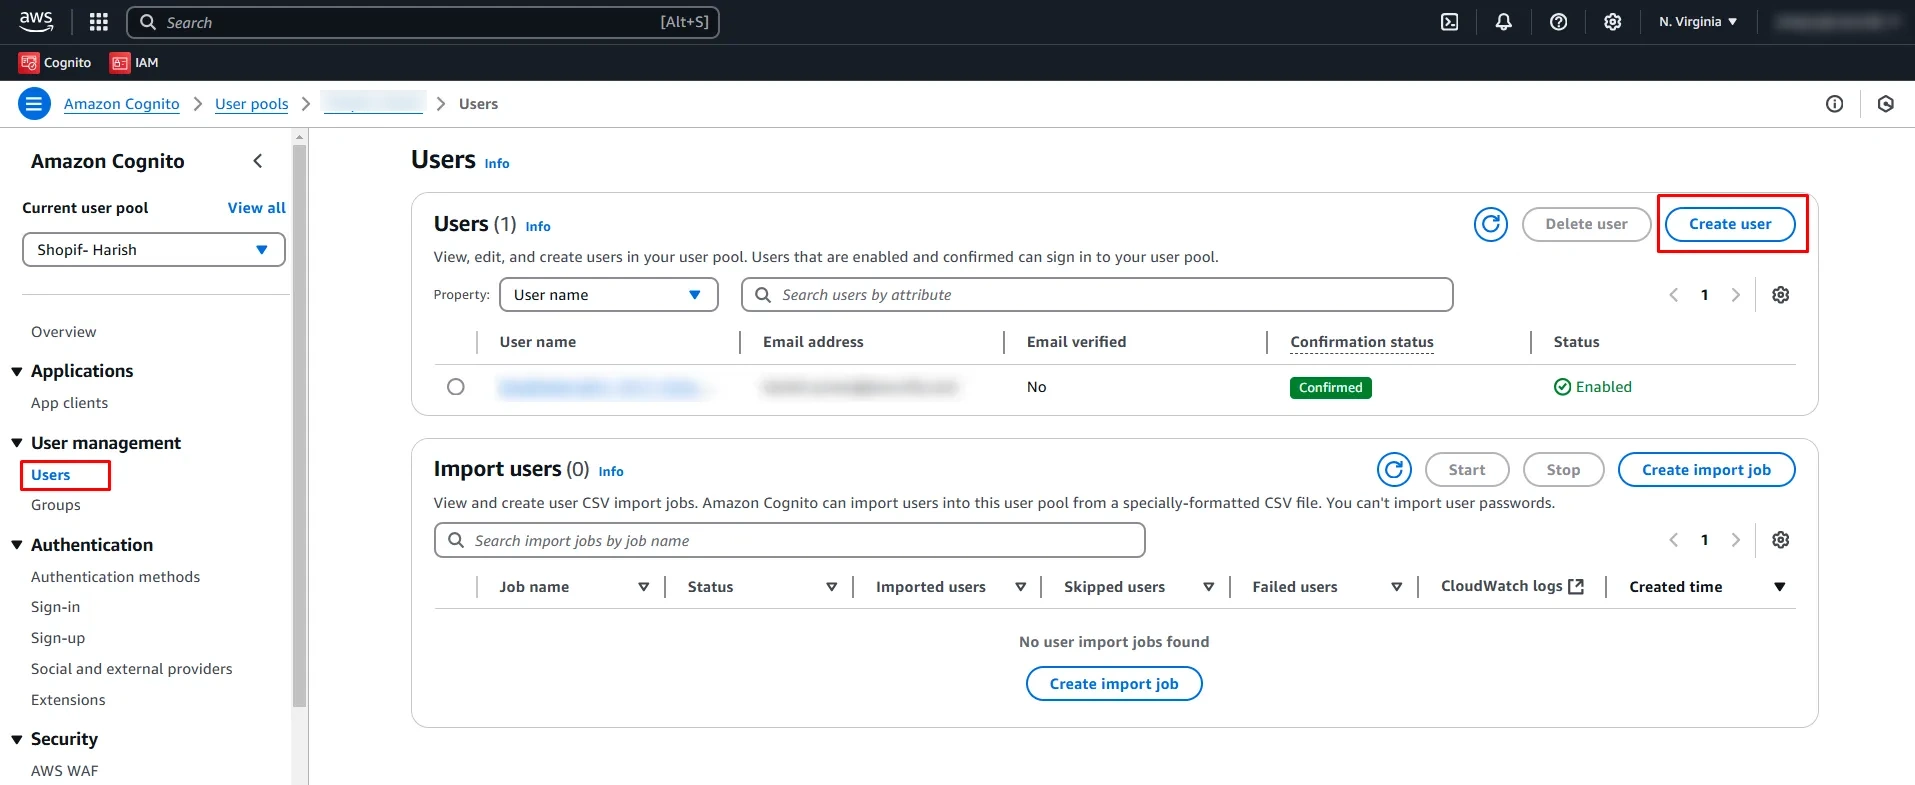
- Go to the Users tab under the User Management section, and click Create user.
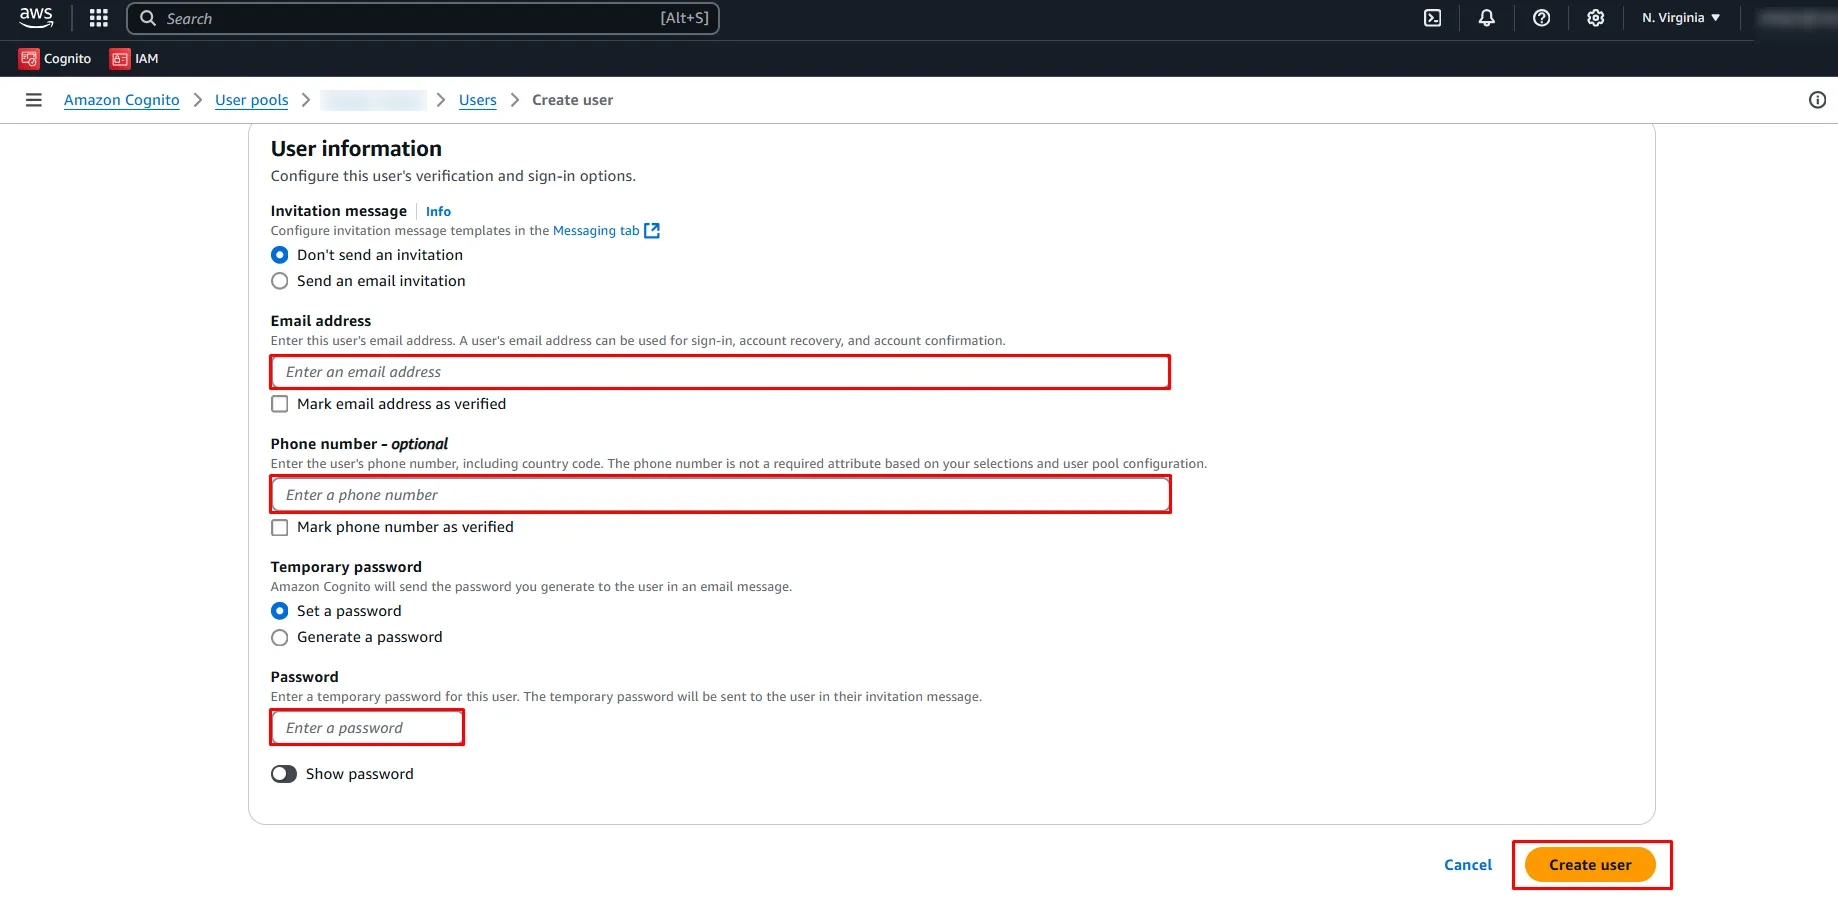
- Enter details such as email address, phone number & password. Click on Create user to save the details.

×
![ADFS_sso]()
