- Home
- OAuth SSO
- OAuth SSO Documentation
- OAuth SSO into Jira using ADFS as OAuth Provider

OAuth/OpenID Single Sign On (SSO) into Jira using ADFS
Jira OAuth/OpenID app gives the ability to enable OAuth/OpenID Single Sign On for Jira Software and Jira Service Desk. Jira Software and Jira Service Desk are compatible with all OAuth/OpenID Providers. Here we will go through a guide to configure SSO between Jira and your OAuth/OpenID Provider. By the end of this guide, users from your OAuth/OpenID Provider should be able to login and register to Jira Software and Service Desk.
 Try it for free
Video Setup Guide
Pre-requisites
Before proceeding with the integration of your OAuth/OpenID Provider and Jira, ensure that the following prerequisites are met:
- Ensure that Jira has been installed and configured appropriately.
- Enable HTTPS on the Jira Server (optional, but recommended).
- Establish admin credentials for Jira.
- Obtain a valid Jira Server and Data Center License.
Download and Installation
Now, let’s look at how you can download and install the miniOrange Jira OAuth/OpenID Connect Single Sign On (SSO) plugin for your Jira Data Center.
- Log into your Jira instance as an admin.
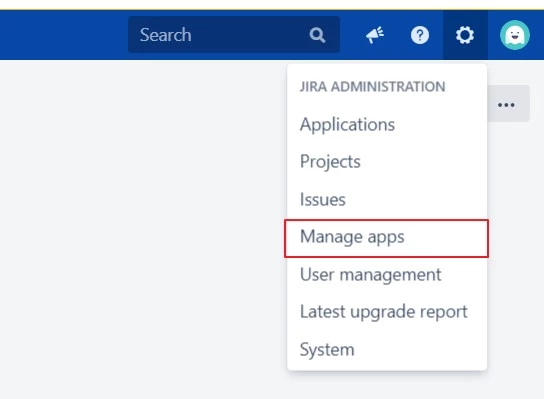
- Navigate to the Settings Menu and click on Manage Apps.
- Next, click on Find new apps option on the left-hand menu of the page.
- Here, locate miniOrange Jira OAuth/OpenID Connect Single Sign On (SSO) plugin on Atlassian marketplace via search.
- Click on Try it free to begin a new trial of the plugin with a temporary license.
- When redirected to MyAtlassian, enter your information and click Generate license.
- Next, click Apply license.
Step 1: Set Up ADFS as OAuth Provider
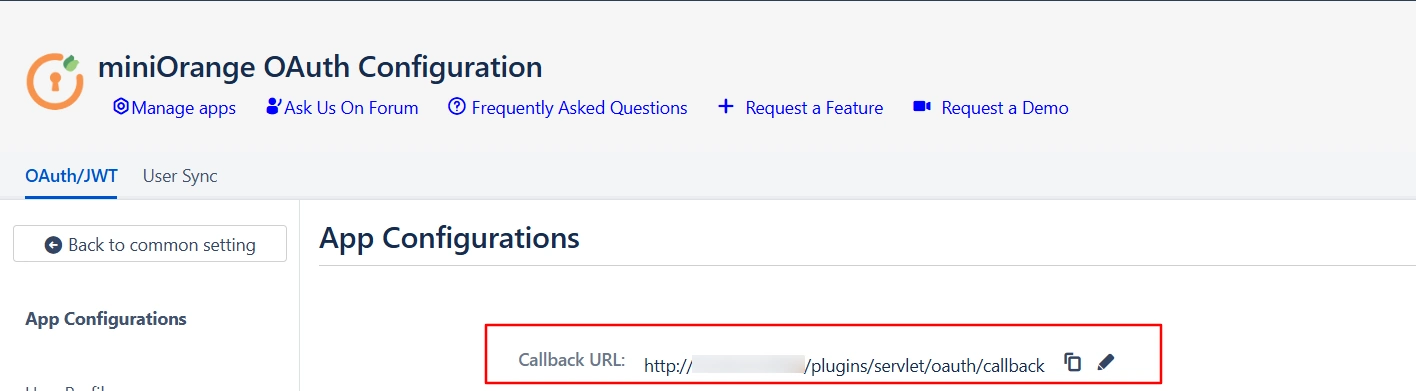
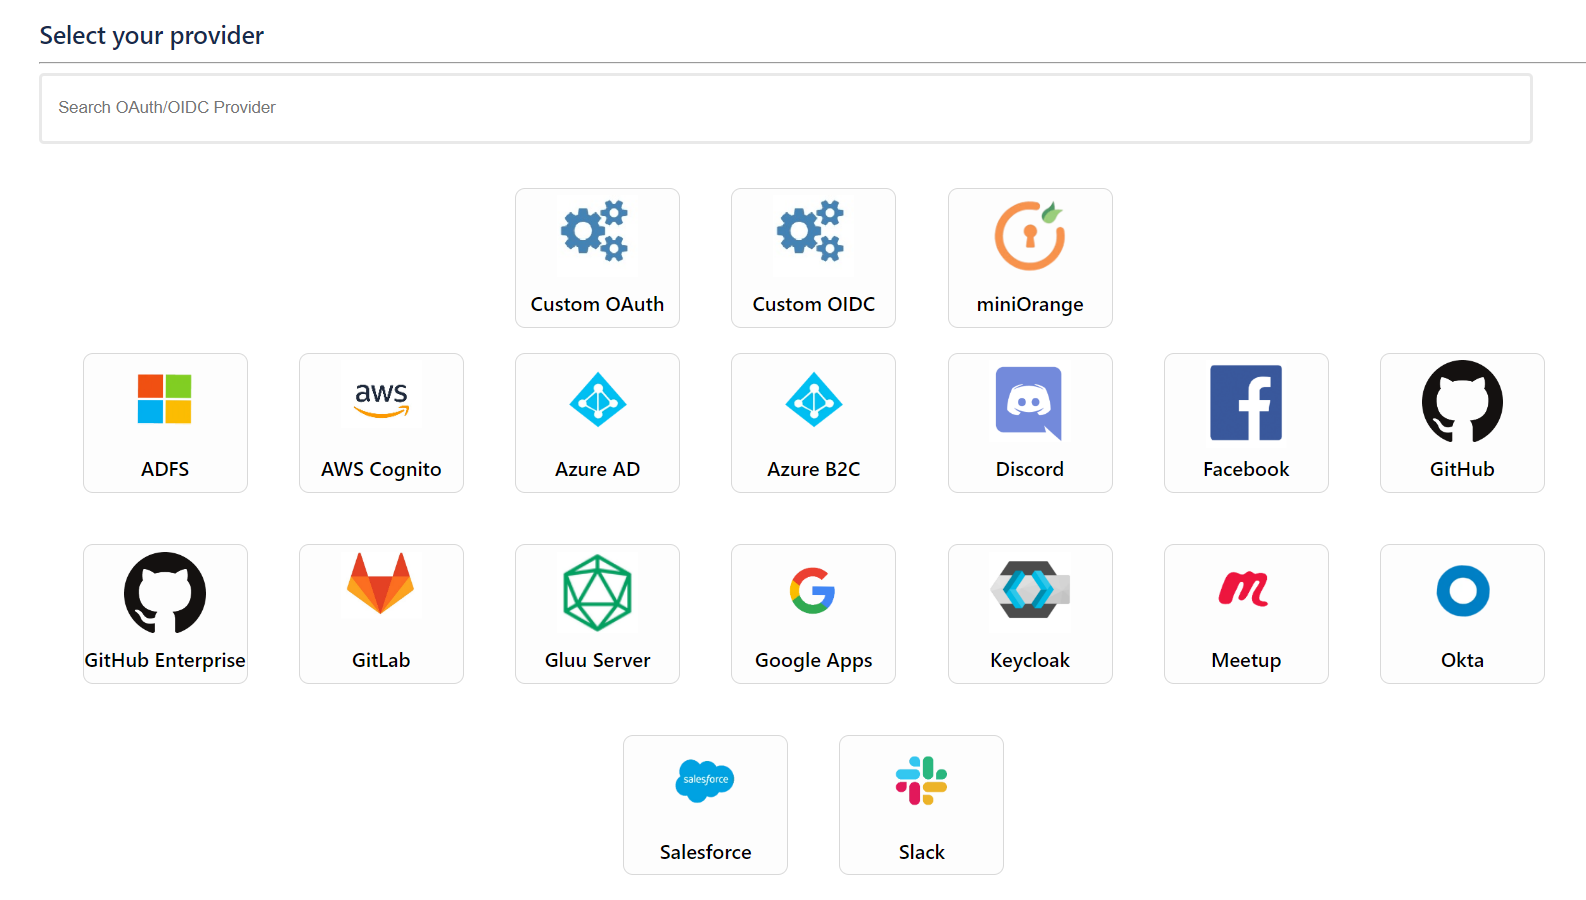
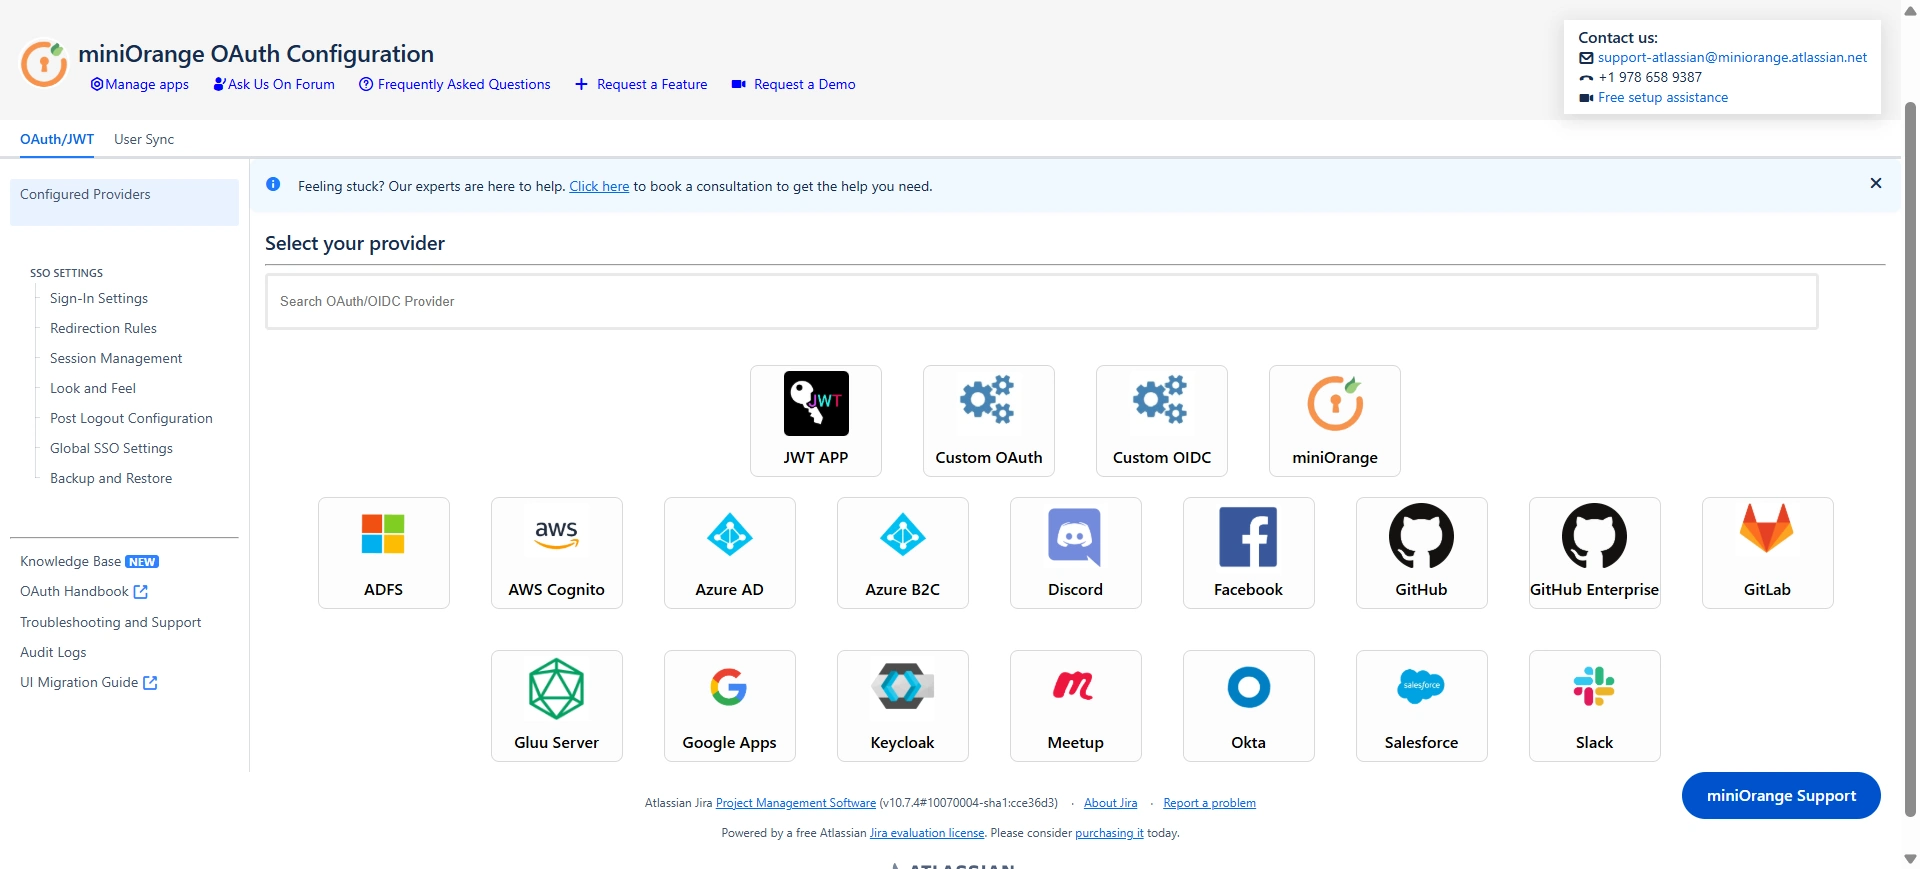
- Navigate to the plugin configuration page, click the "Add New Provider" button (located either in the middle or top-right corner), select ADFS as the application, and copy the callback URL from the plugin and keep it handy, as you'll need it to configure ADFS as the OAuth provider.
- To perform SSO with ADFS as Provider, your application must be https enabled.
- Navigate to Server Manager Dashboard->Tools->ADFS Management.
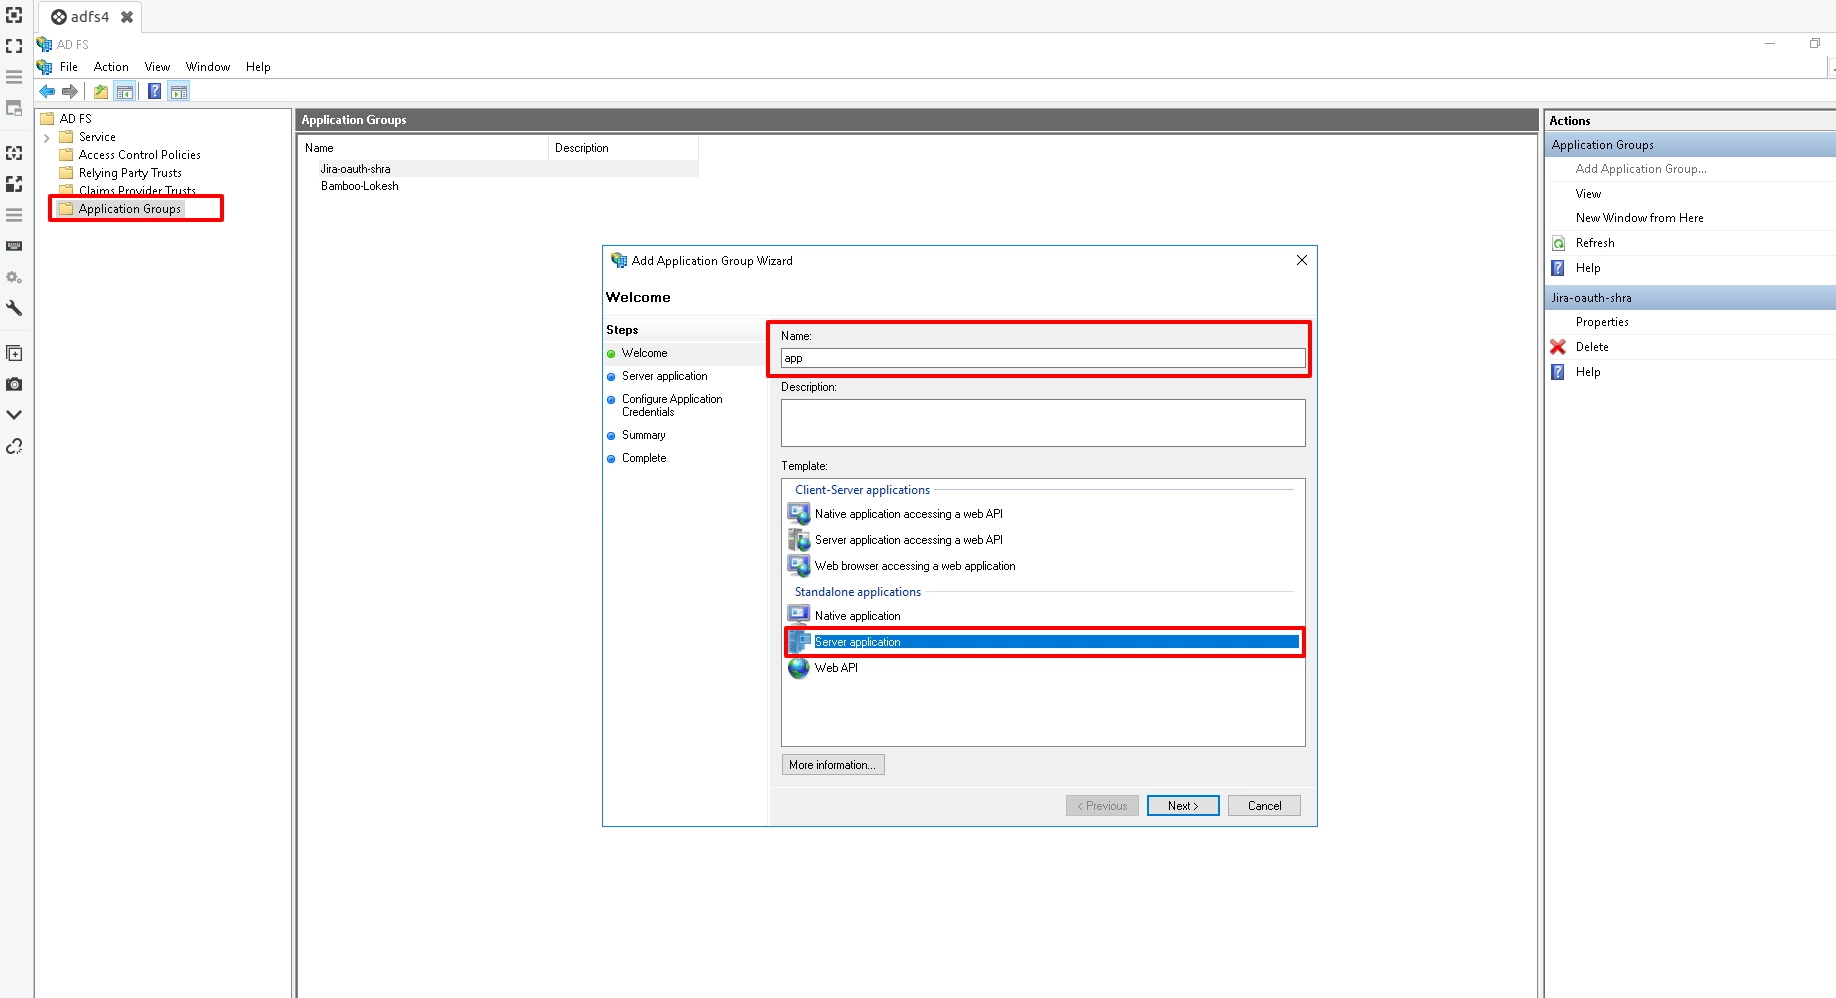
- Navigate to ADFS->Application Groups. Right click on Application Groups & click on Add Application group then enter Application Name. Select Server Application & click on next.
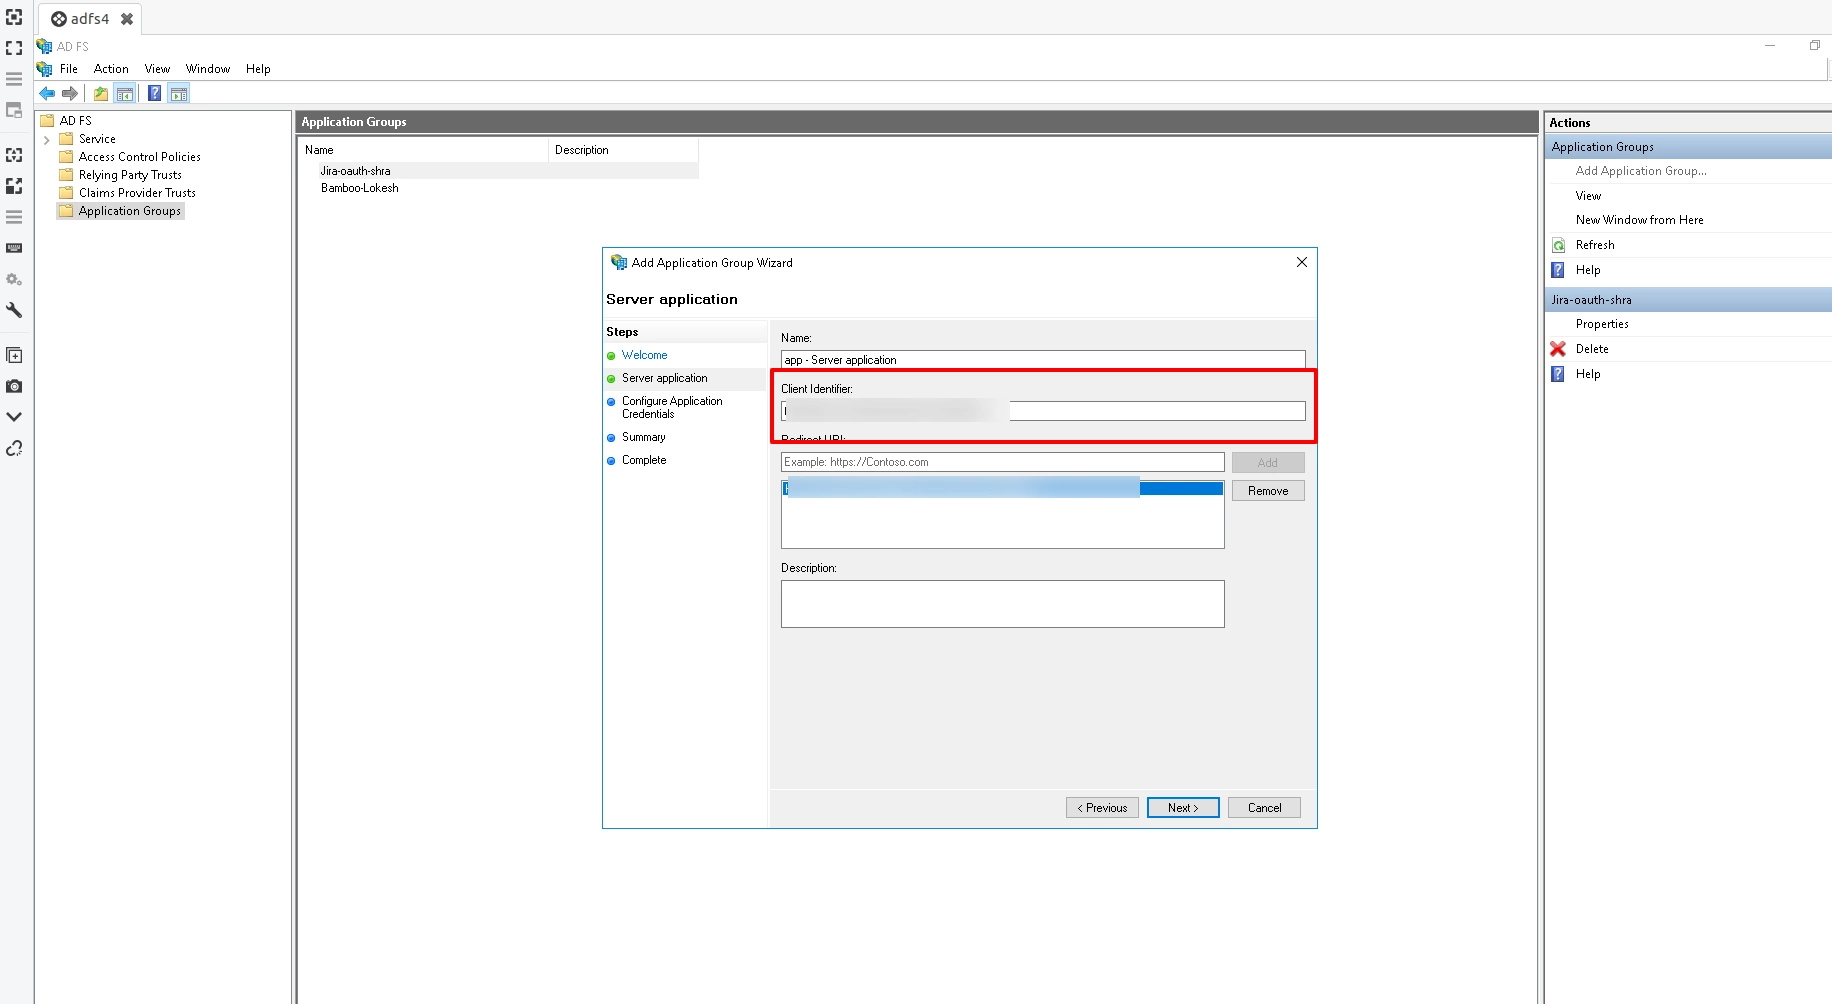
- Copy Client Identifier. This is your Client ID. Add Callback URL in Redirect URL. You can get this callback URL from plugin. Click on next.
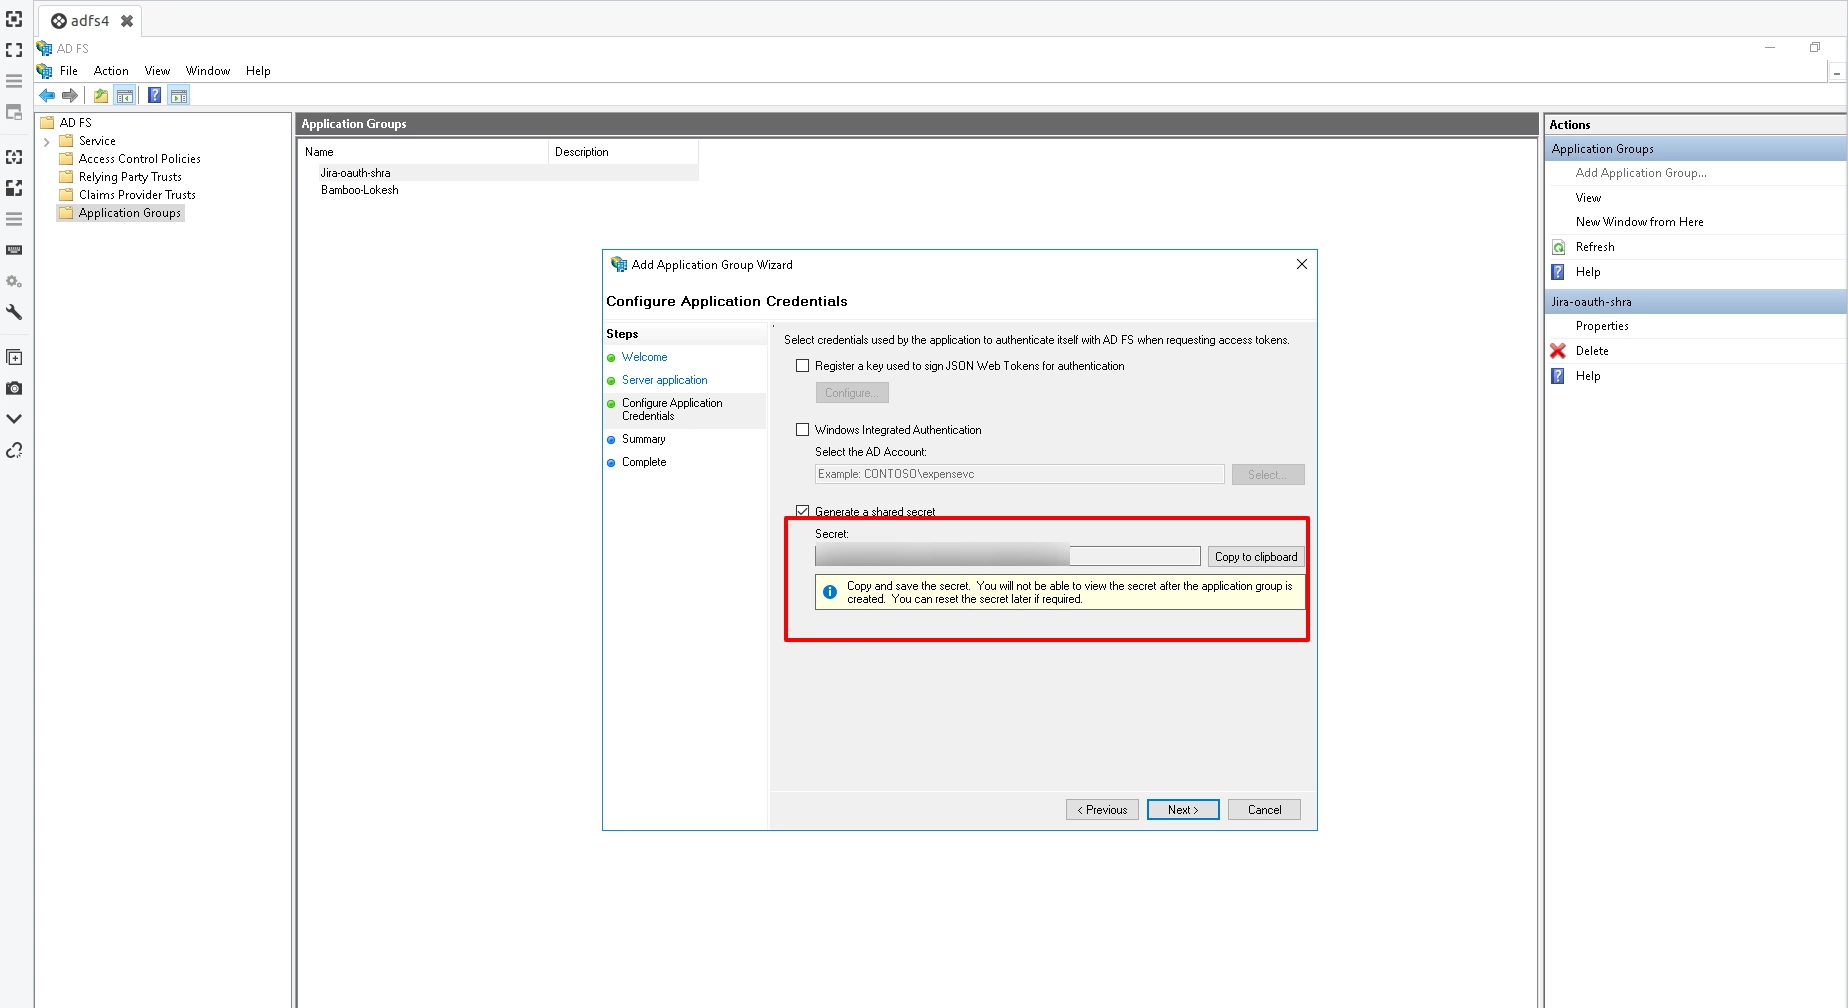
- Click on Generate shared secret. Copy the Secret value. This is your Client Secret. Click on Next.
- On the Summary screen, click Next. On the Complete screen, click Close.
- Now, right-click on the newly added Application Group and select Properties.
- Click on Add application from App Properties.
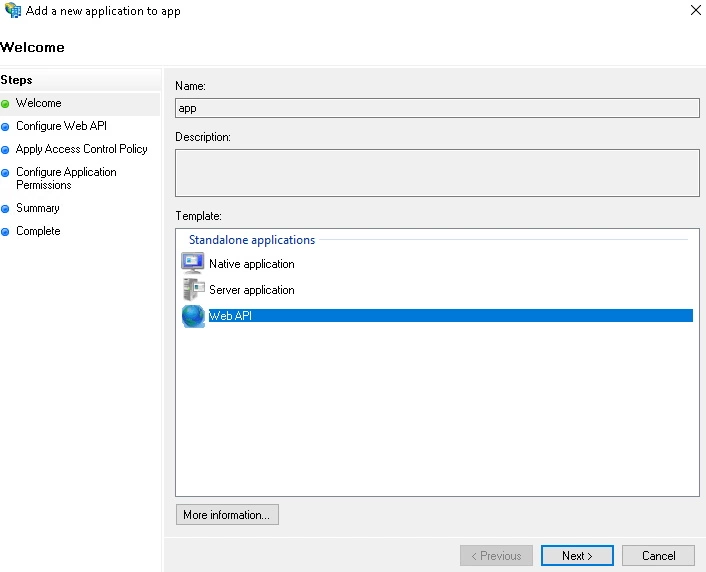
- Click on the Add application. Then select Web API and click Next.
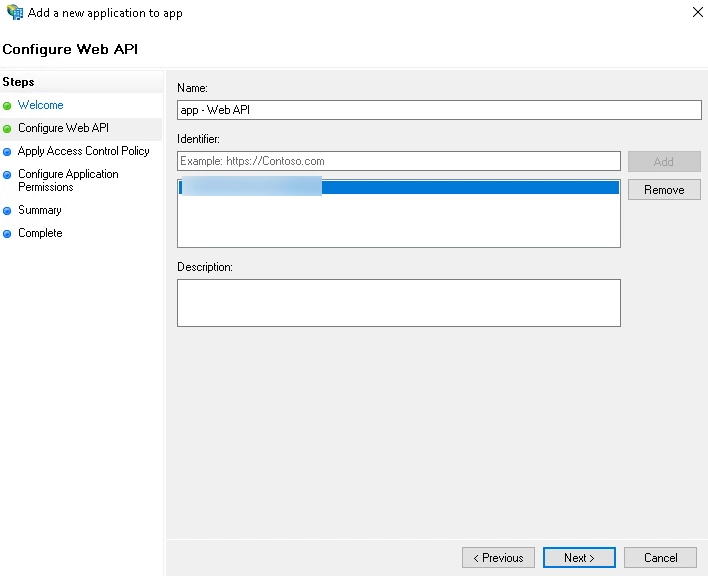
- On the Configure Web API screen, enter the domain name address into the Identifier section. Click Add. Click Next.
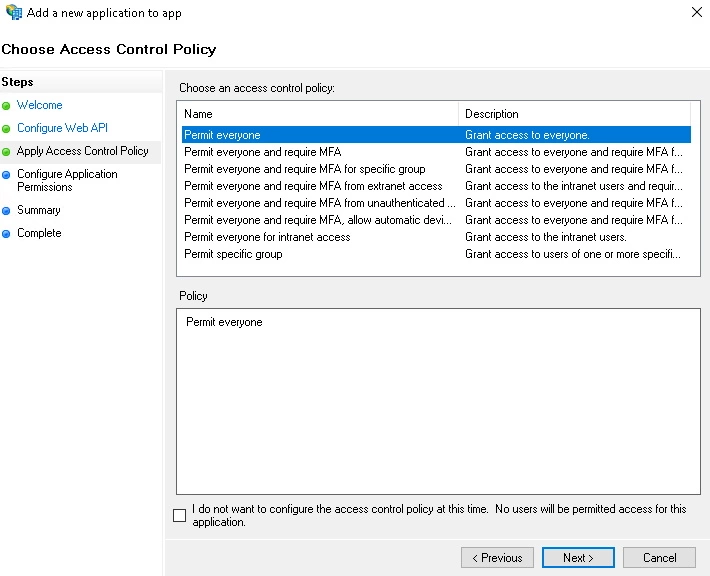
- On the Choose Access Control Policy screen, select Permit everyone and click Next.
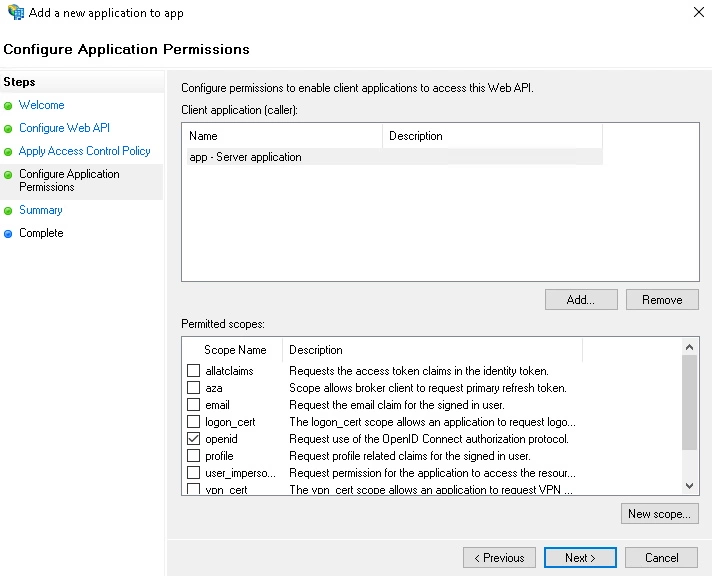
- On the Configure Application Permission, by default openid is selected as a scope & click on next.
- On the Summary screen, click Next. On the Complete screen, click Close.
- On the Sample Application Properties click OK.

Step 2: Set Up Jira as OAuth Client
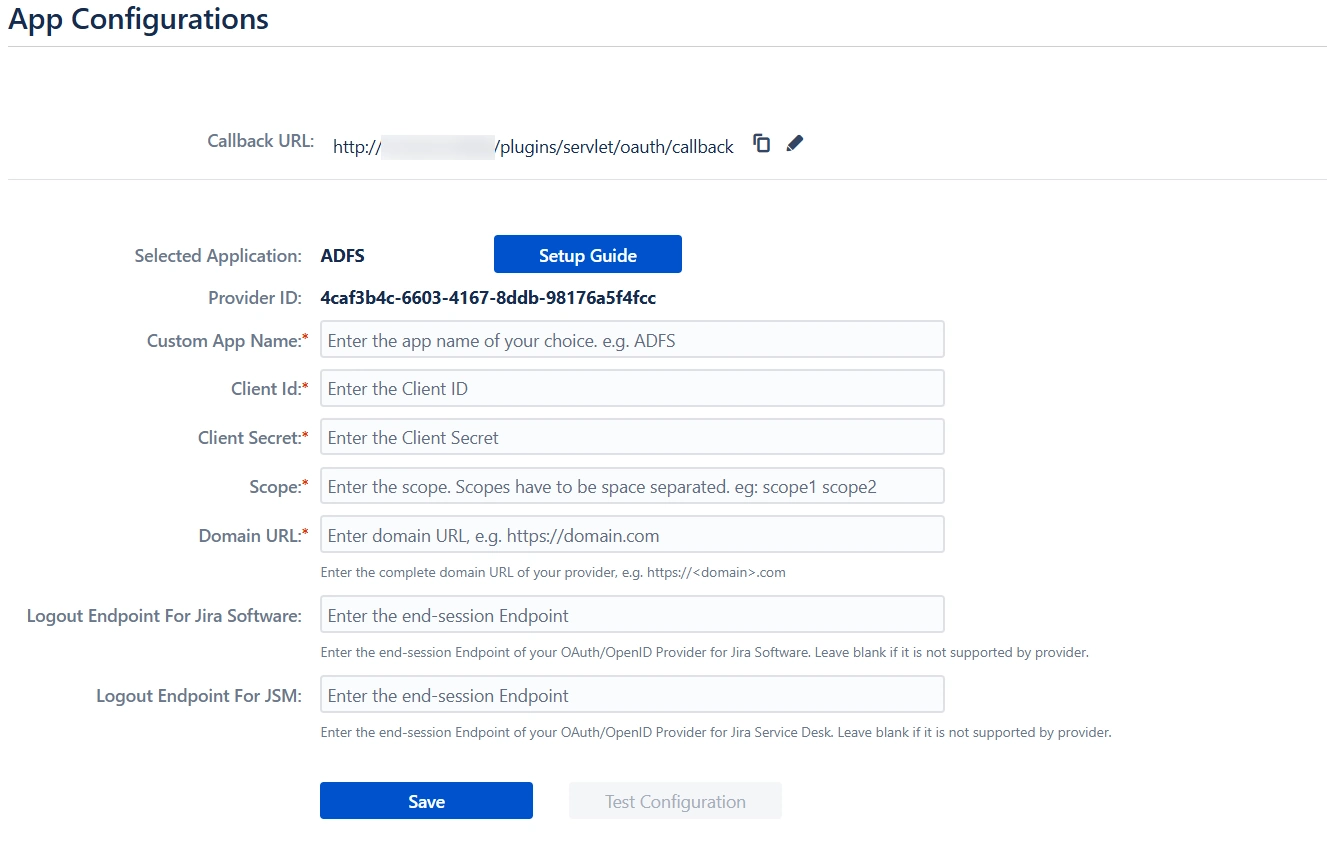
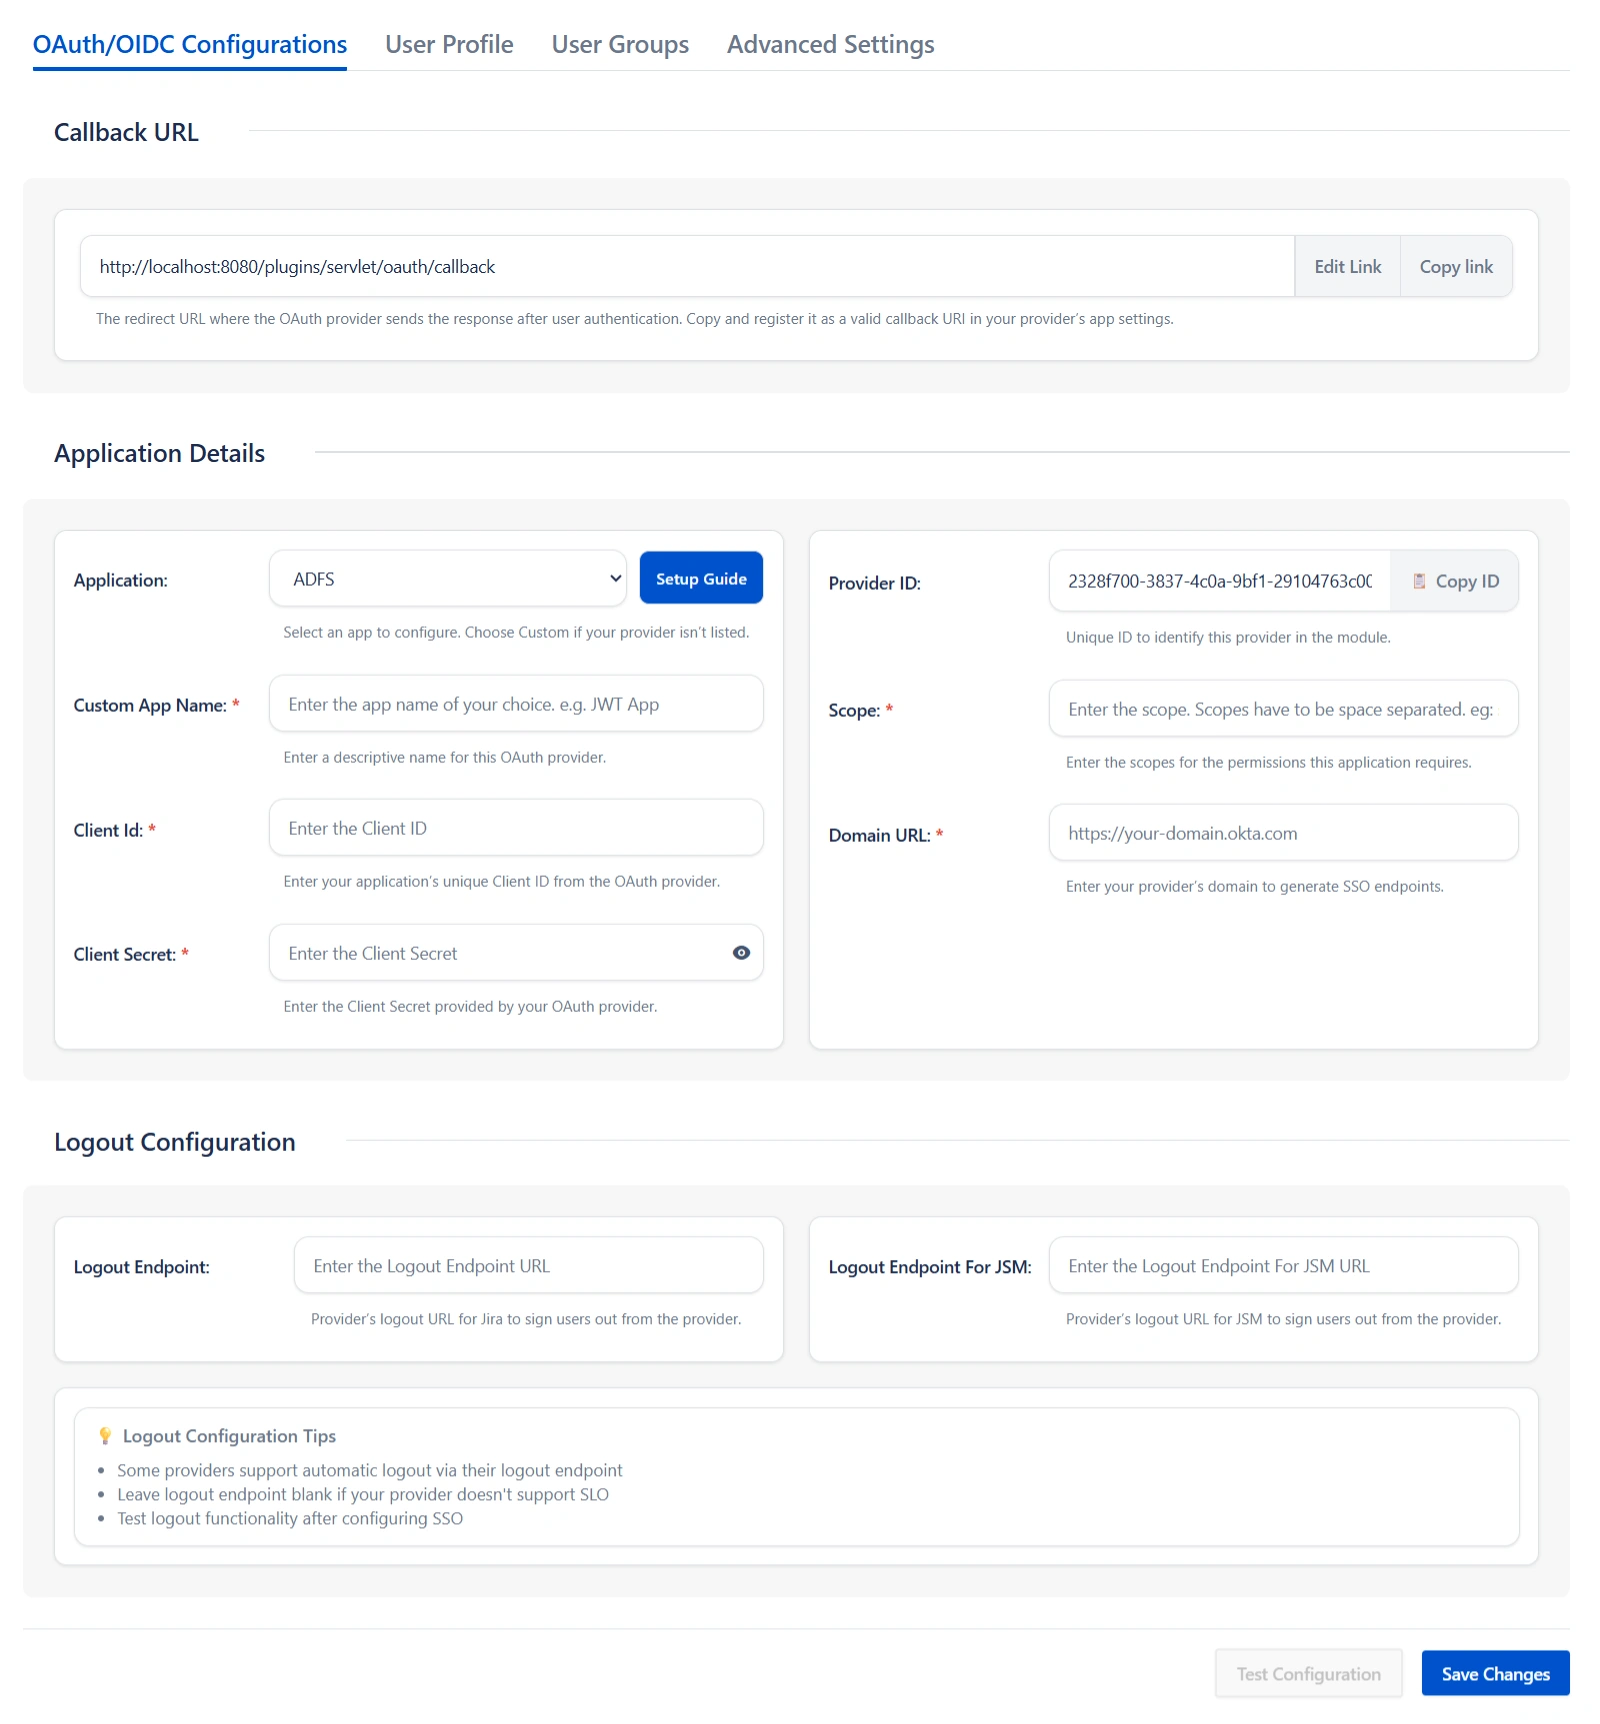
- Go to Jira Manage Apps -> click Configure under OAuth/OpenID Connect (OIDC) for Jira SSO. Then click on Add New Provider button. Select ADFS as OAuth provider.
- Once done, enter Client Id, client secret & ADFS domain, and scope as openid.
- Finally, click on Test Configuration to verify the accuracy of the provided details.
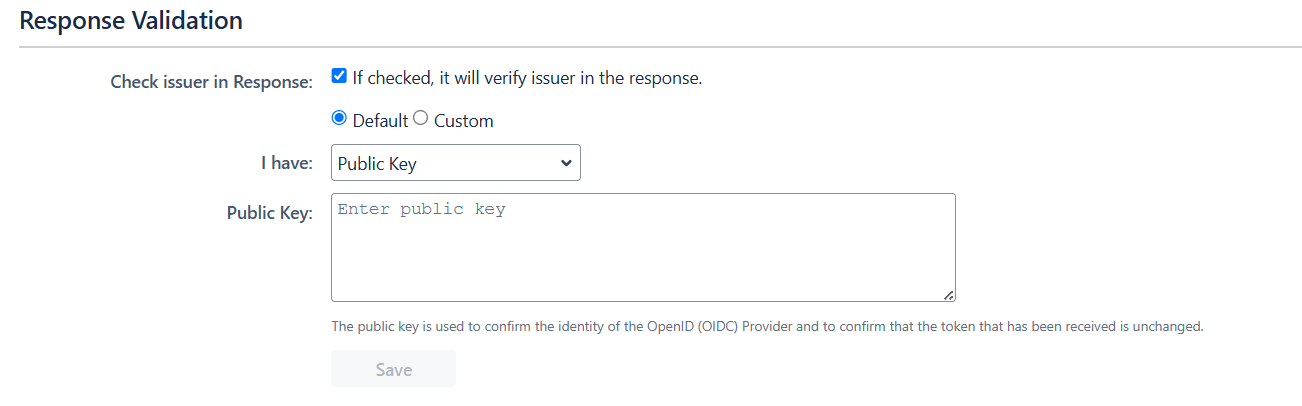
- Additionally, you can provide the JWKS Endpoint URL or Public Key for signature validation. You can find this option under the Advanced Settings tab.
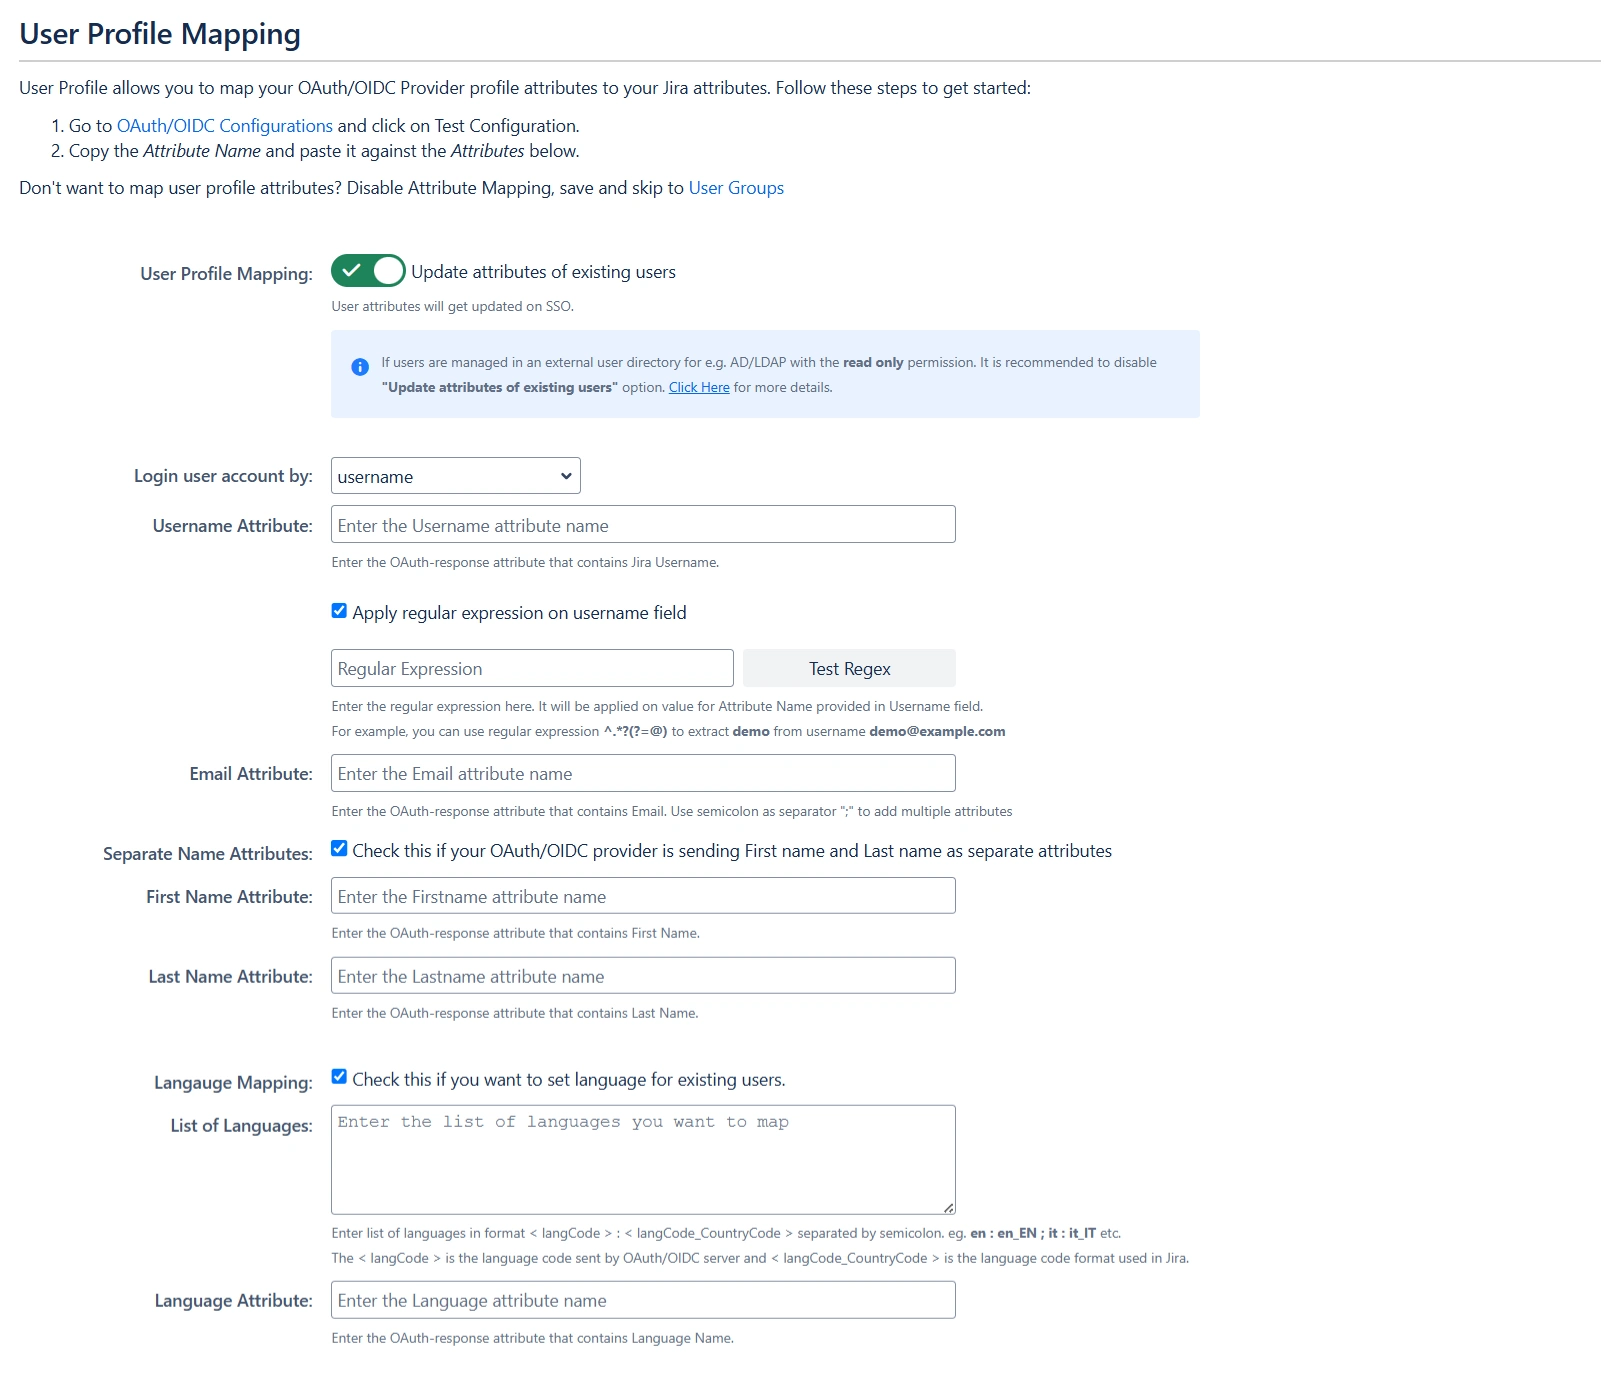


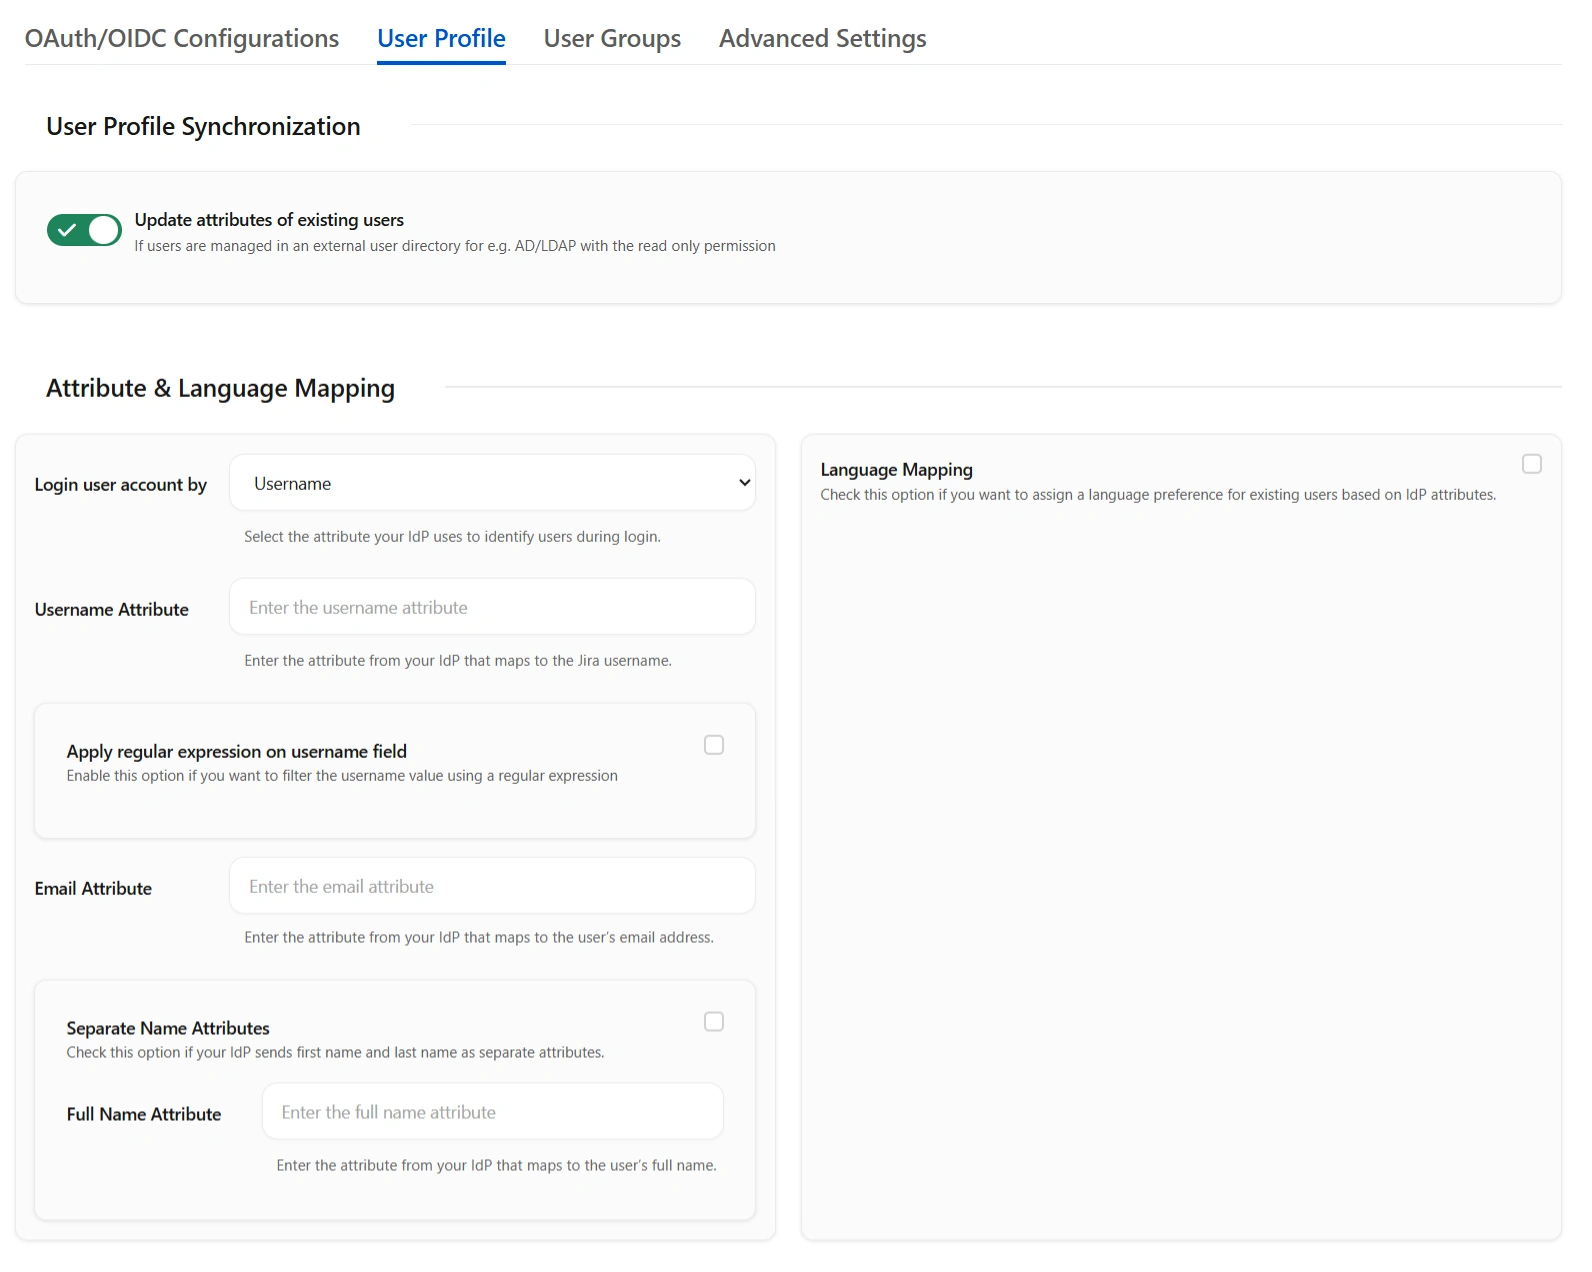
Step 3: User Profile Mapping
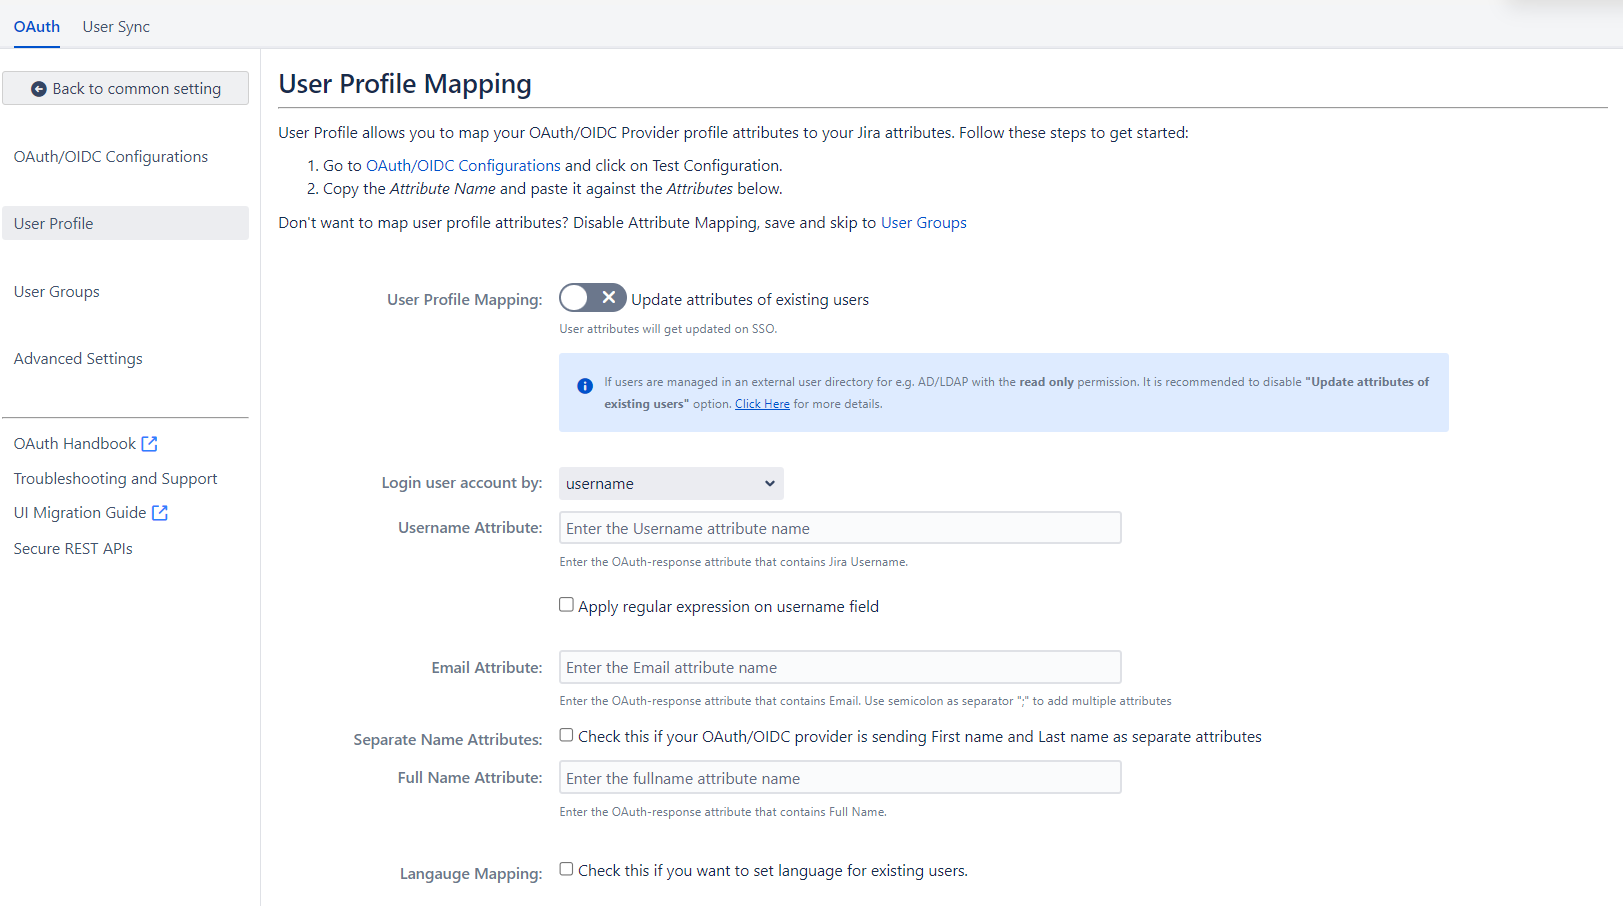
Navigate to the User Profile section in the top to set up user profile attributes for Jira. If your user directory is read-only, disable the User Profile Mapping option in this tab and proceed directly to the Matching a User step.
Click on Test Configuration.
 User Attribute
Matching
User Attribute
Matching
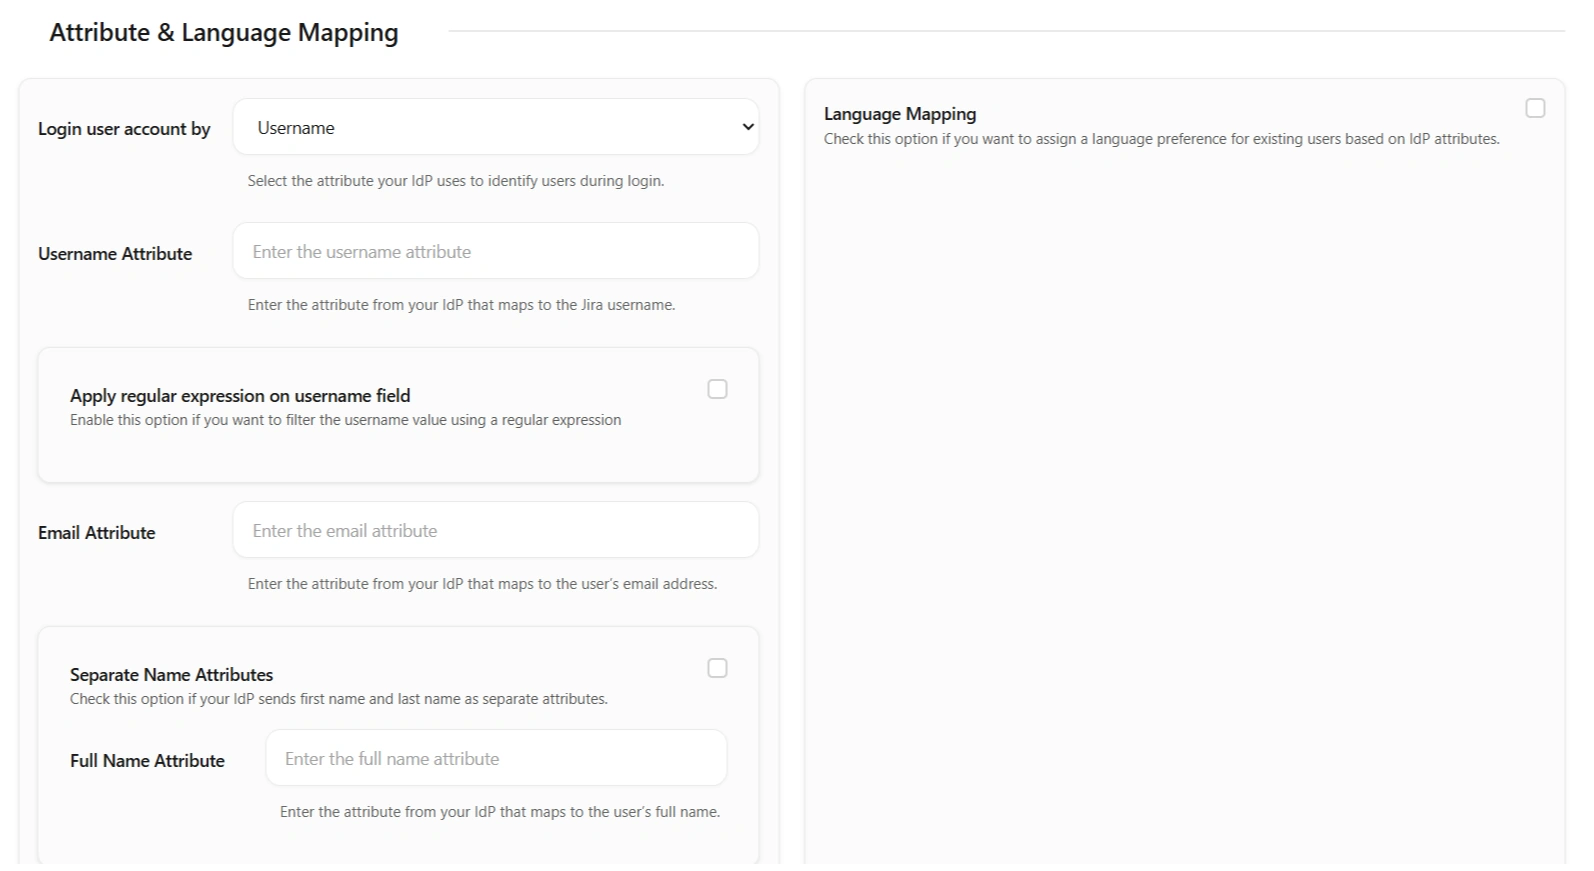
When a user logs into Jira, data or attributes from the OAuth/OpenID provider are used to search for that user in Jira and facilitate login. To match the attributes:
- Navigate to the User Profile tab.
- Choose either Username or Email as the login for the Jira user account.
- Enter the attribute name from the OAuth/OpenID Provider that corresponds to the Username or Email as identified in the Identifying Correct Attributes step.
Custom Attribute
Mapping
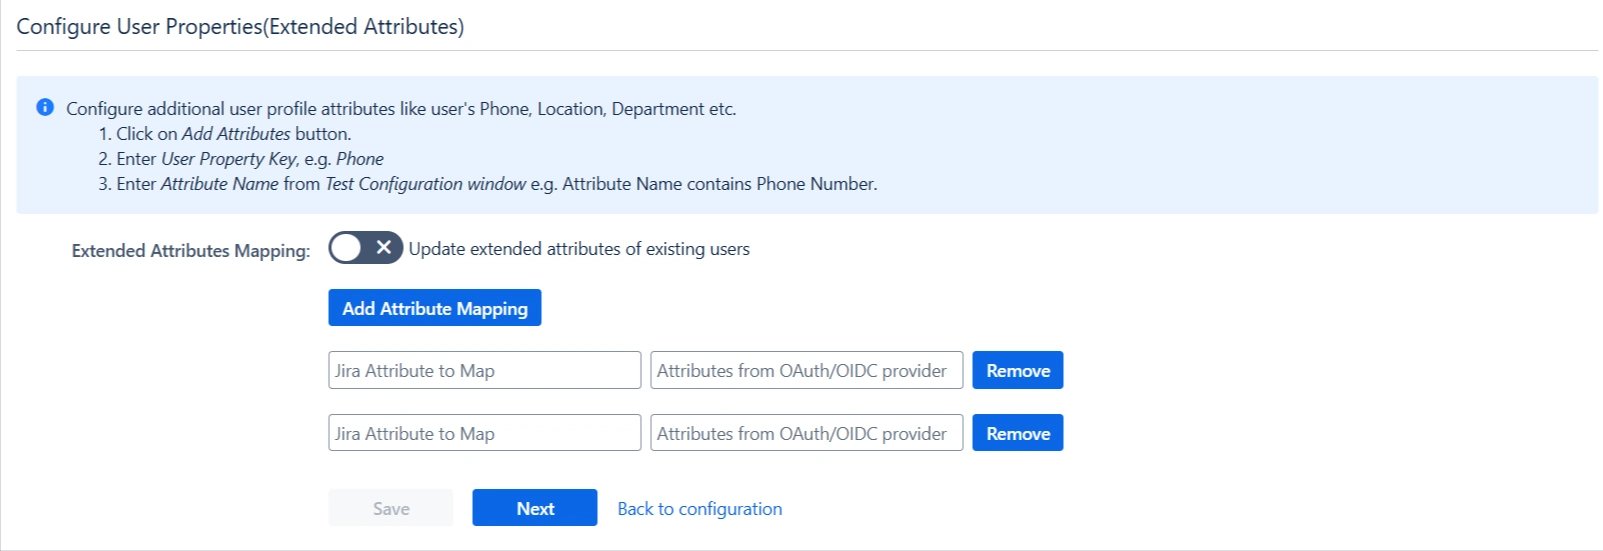
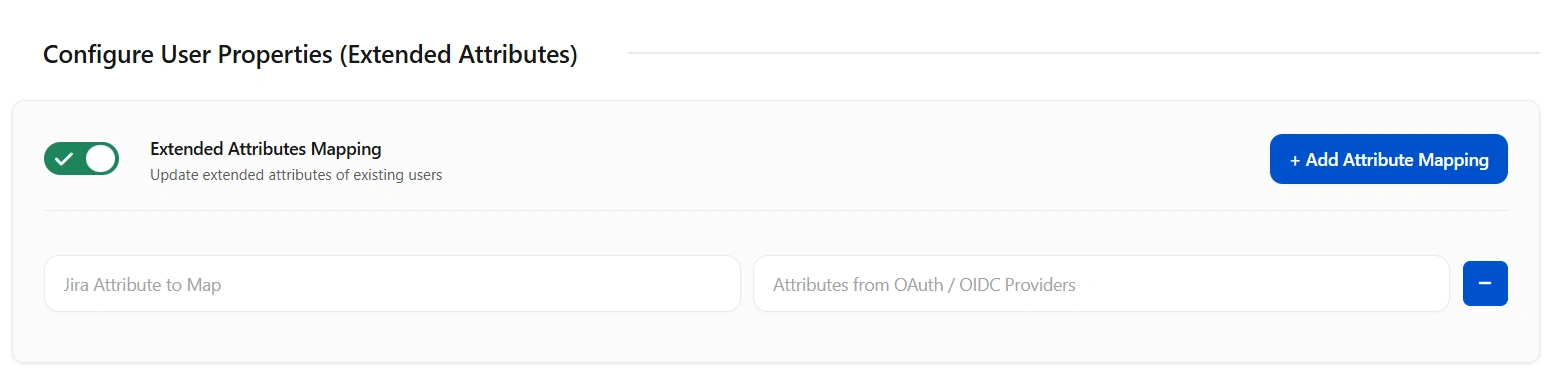
You can configure custom attributes received in the OAuth/OpenID response using the Configure User Properties(Extended Attributes) section.
- Click on Add Attribute Mapping.
- Enter the attribute name( E.g. department) as User Property Key in the Select Jira Attribute to Map field.
- For each attribute, input the corresponding value retrieved from the Attributes from your OAuth provider tab in the Test Configuration window. For example, if the attribute name in the Test Configuration window is Department, enter Department as the Attribute Value.
- Additional attributes, such as location, can be added by selecting the Add Attribute Mapping option.
Step 4: User Group Mapping
As we proceed to configure user group attributes for Jira, you have the option to enable group mapping.
If you wish to do so, please ensure to select Enable Group Mapping in the User Groups tab. Alternatively, you can proceed directly to setting the default group.
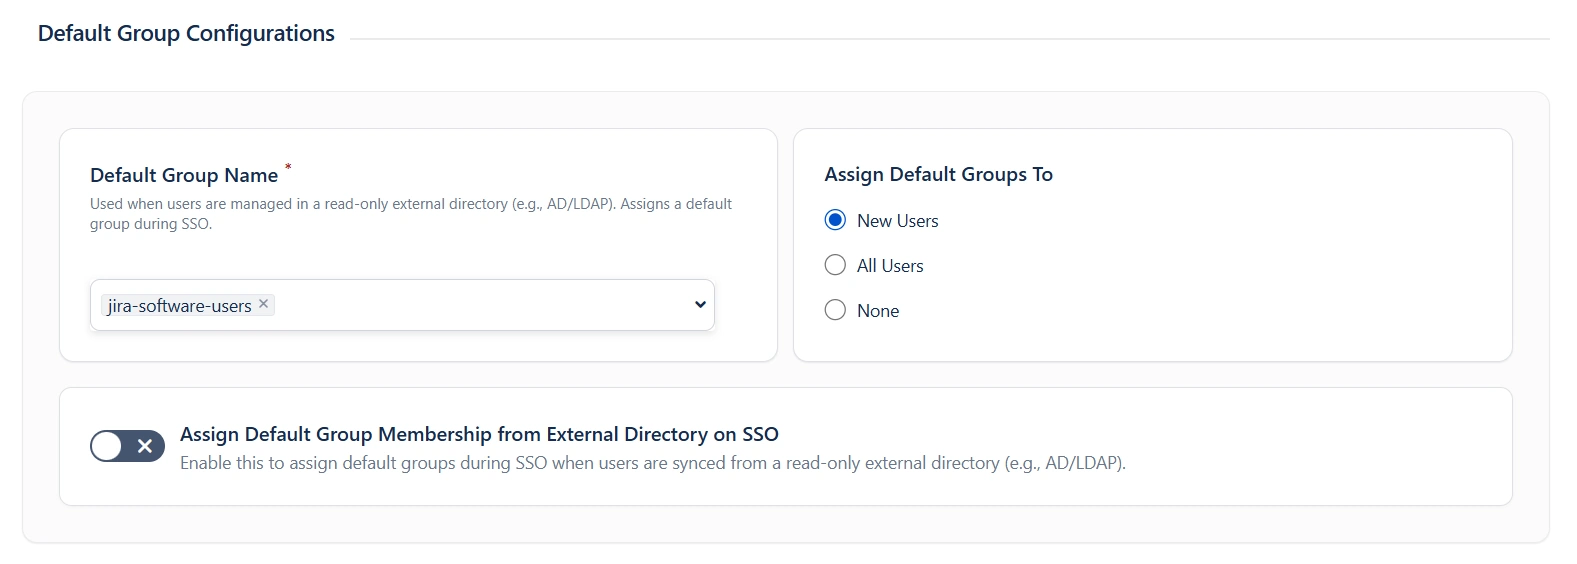
4.1 Setting the Default Group
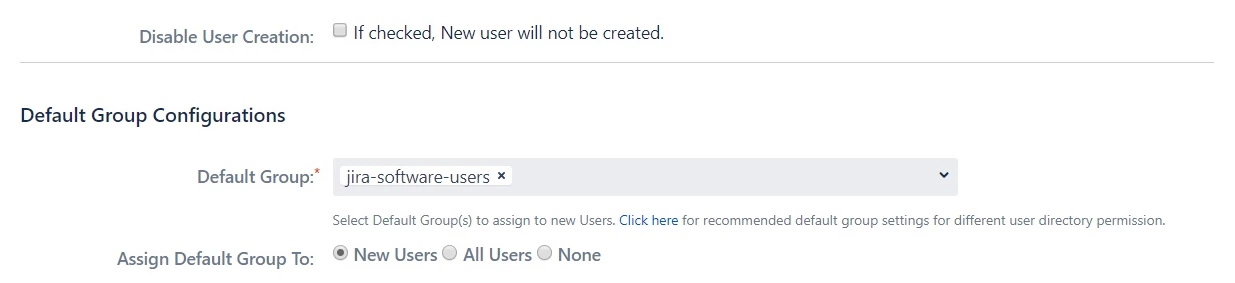
- In the User Groups tab, select the default group for users. If no group is mapped, users are automatically added to this group.
- Using the Assign Default Group To option, you can assign default groups to all users or new users. Choose None if you prefer not to assign any default group to SSO users.
4.2 Finding Group Attribute
- To identify group Attribute, click on Test Configuration. Review the values returned by your OAuth/OpenID provider to Jira in the table. If group values are missing, adjust the settings in your OAuth provider to include group names.
- Check Enable Group Mapping option if you disable this then group mapping wont be updated for existing users.
4.3 Group Mapping
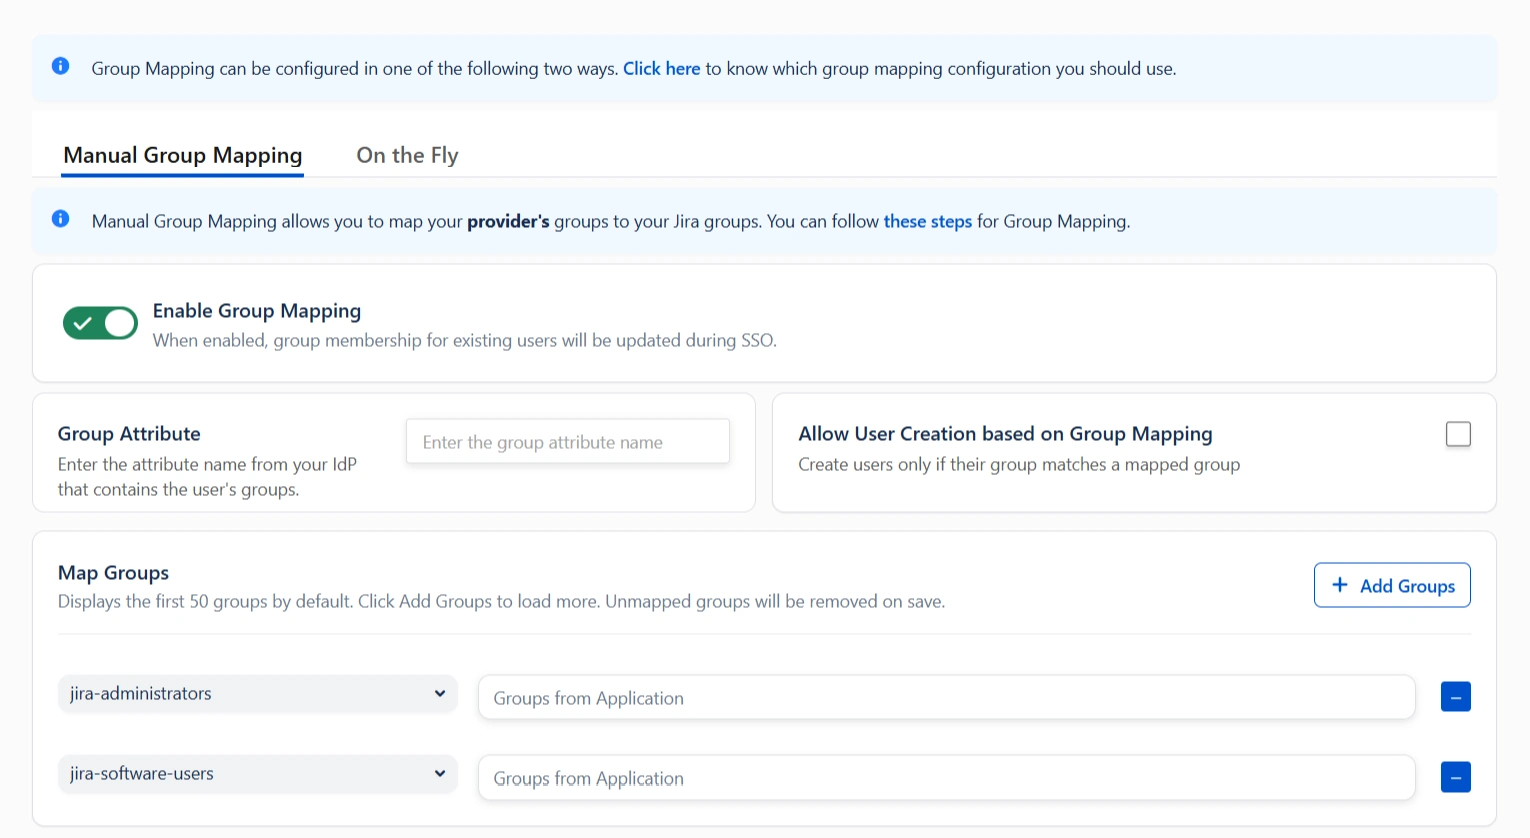
Group mapping can be done manually or on the fly:
- Manual group mapping: If the names of groups in Jira are different than the corresponding groups in OAuth/OpenID Provider, then you should use Manual group mapping.
- On-The-Fly group mapping: If the names of groups in Jira and OAuth/OpenID Provider are same, you should use On-The-Fly group mapping.
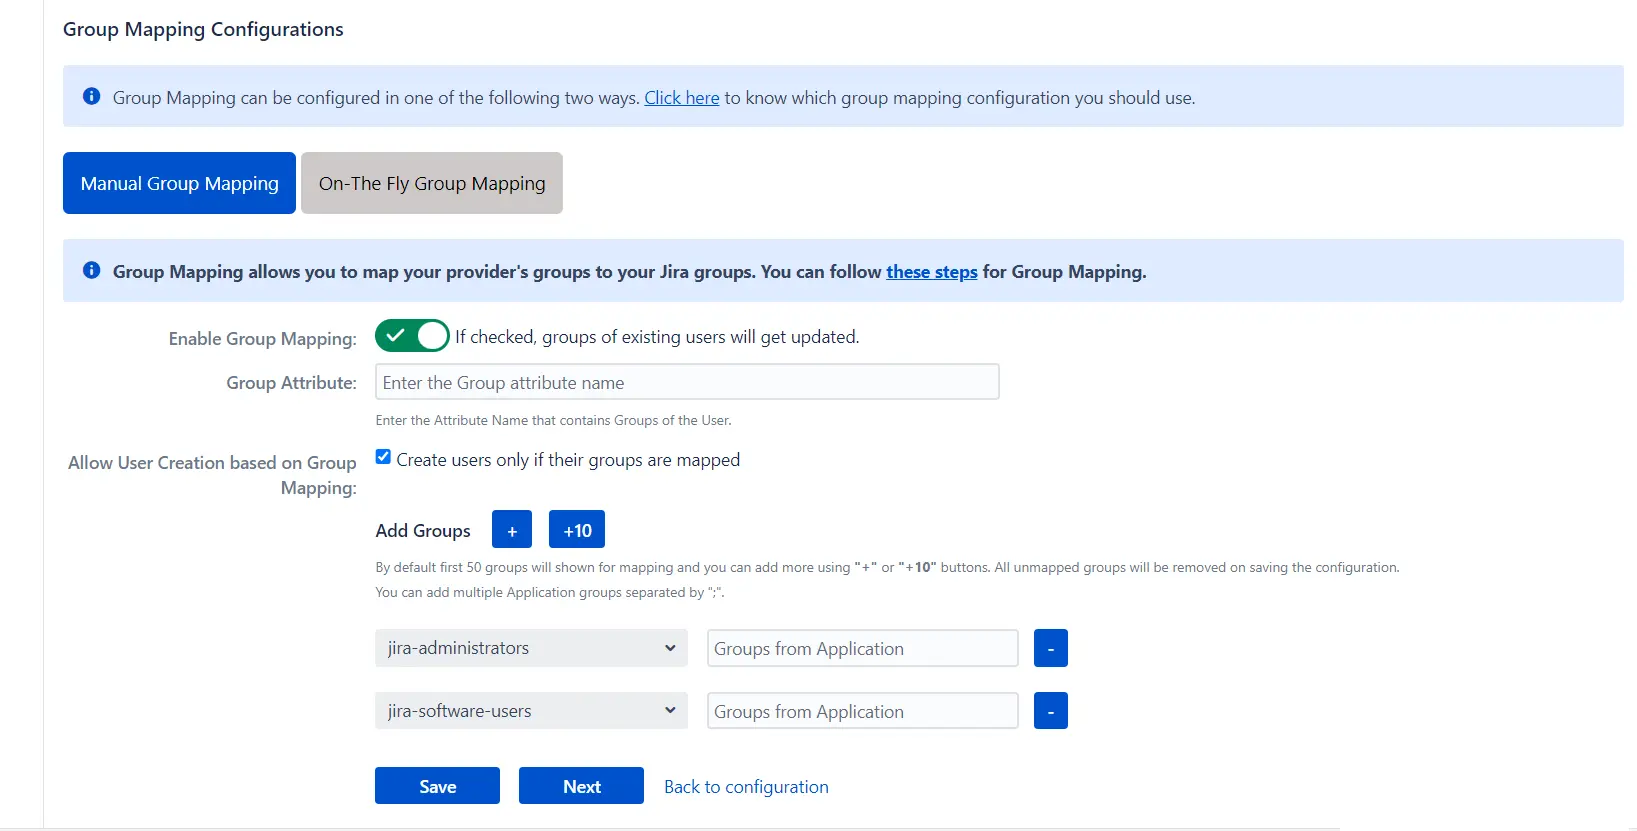
I. Manual group mapping
- Check the Allow User Creation based on Group Mapping option if you want new users to be created only if at least one of the user's OAuth/OpenID Provider groups is mapped to a group in the application.
- Select a Jira group from the dropdown list and enter the name of the OAuth/OpenID Provider group to be mapped in the Groups from Applications textbox.
- For instance, if you want all users in the 'dev' group of OAuth/OpenID providers to be added to jira-software-users, you will need to select jira-software-users from the dropdown and enter 'dev' against jira-software-users.
- If you want to add extra mapping fields, click on Add Groups button.
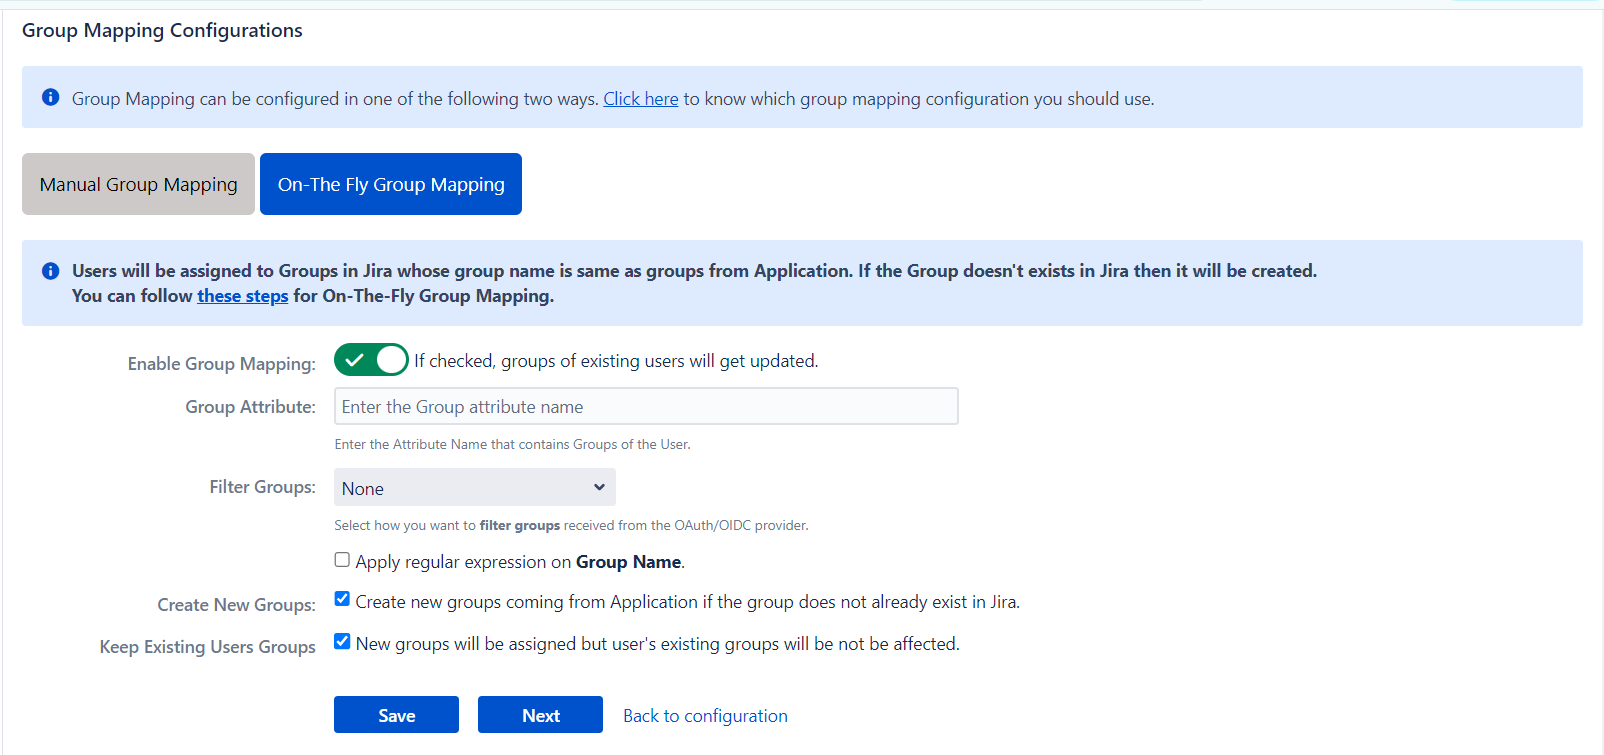
II. On-The-Fly group mapping
- If the group names in both Jira and the OAuth/OpenID provider match, opt for On-The-Fly group mapping.
- Check the Create New Groups option to create new groups from the OAuth/OpenID Provider if not found in Jira.
- Preserve existing user groups by selecting the Keep Existing User Groups option. Unticking this option will remove the user from a Jira group if it's not present in the OAuth/OpenID response. However, you can exclude some groups from removal in the Exclude Groups field.

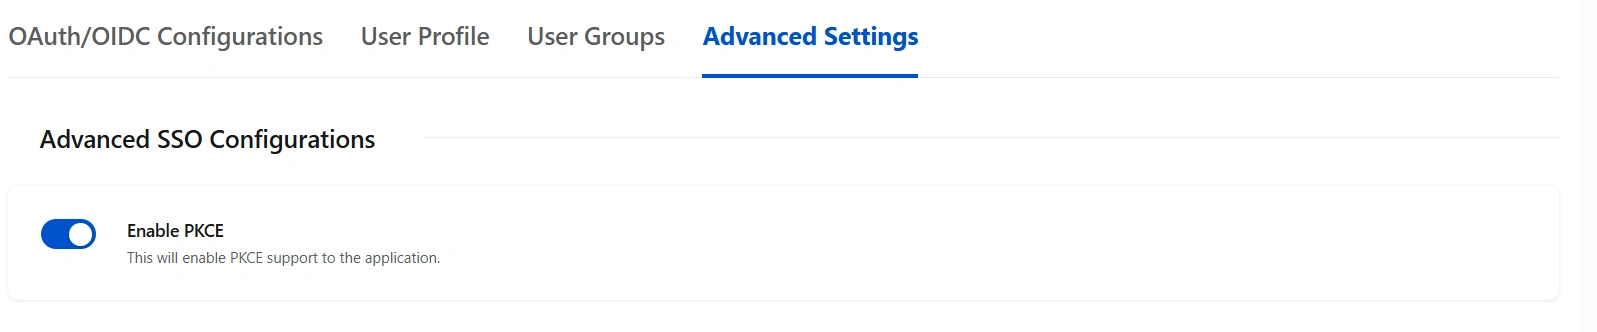
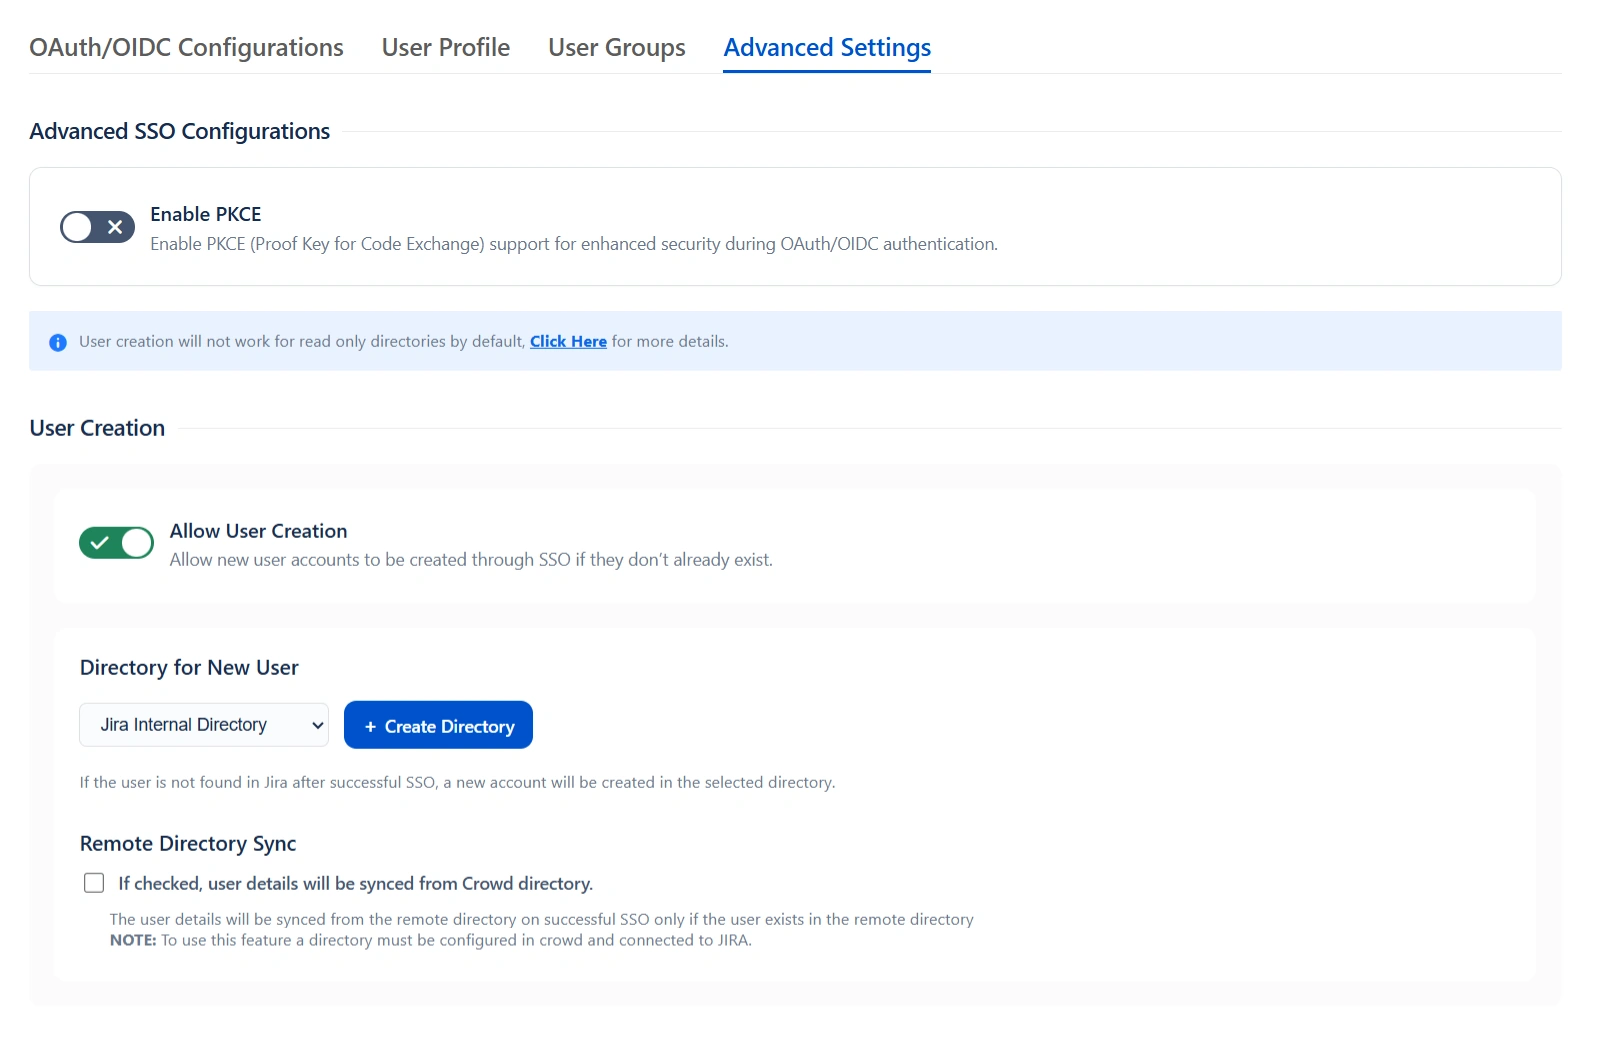
Step 5: Advanced SSO Configurations
- Enable PKCE to enhance security by adding an extra layer of protection to the OAuth flow, preventing authorization code interception attacks.
- Allow User Creation:- Enabling this will allow you to create new users through SSO.
- Directory for New User:- After a successful SSO, if the user is not found in JIRA , a new user account will be created in the selected user directory.
- Remote Directory Sync:- The user details will be synced from the remote directory on successful SSO only if the user exists in the remote directory.
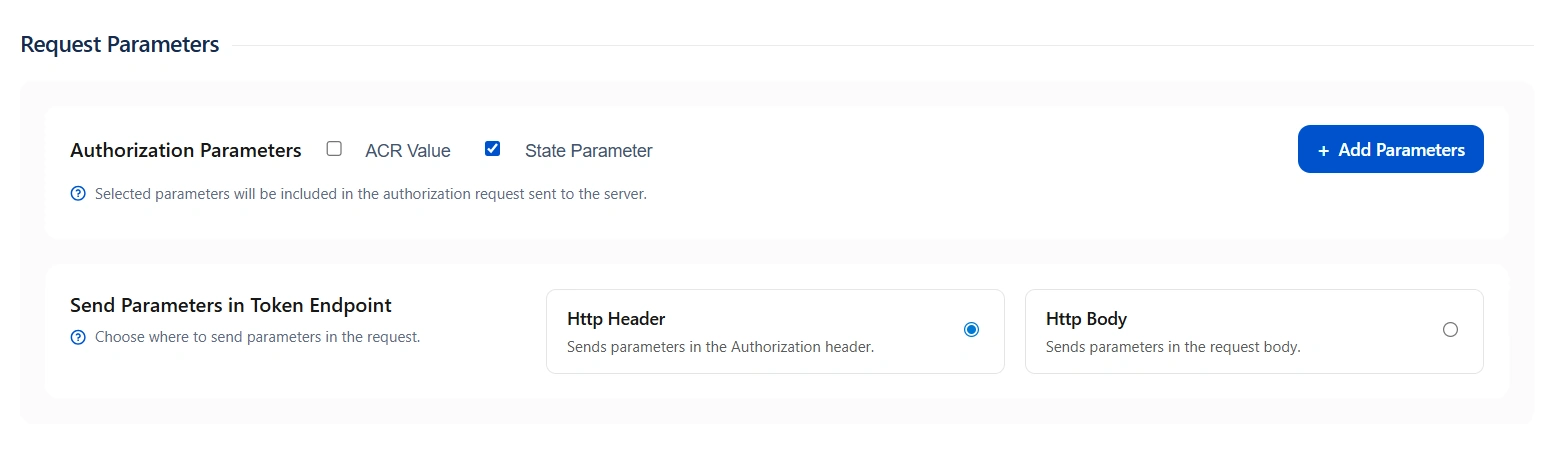
- ACR Value: Requests additional information from the OpenID provider to determine the Level of Assurance for user authentication.
- State Parameter: Protects against CSRF attacks by sending a unique, non-guessable value with the authorization request, mandatory for certain providers.
- Add Custom Parameters: Allows the inclusion of extra parameters in the authentication request.
Step 6: SSO Setting
The configurations within the SSO Settings tab are pivotal in shaping the user experience for Single Sign-On.
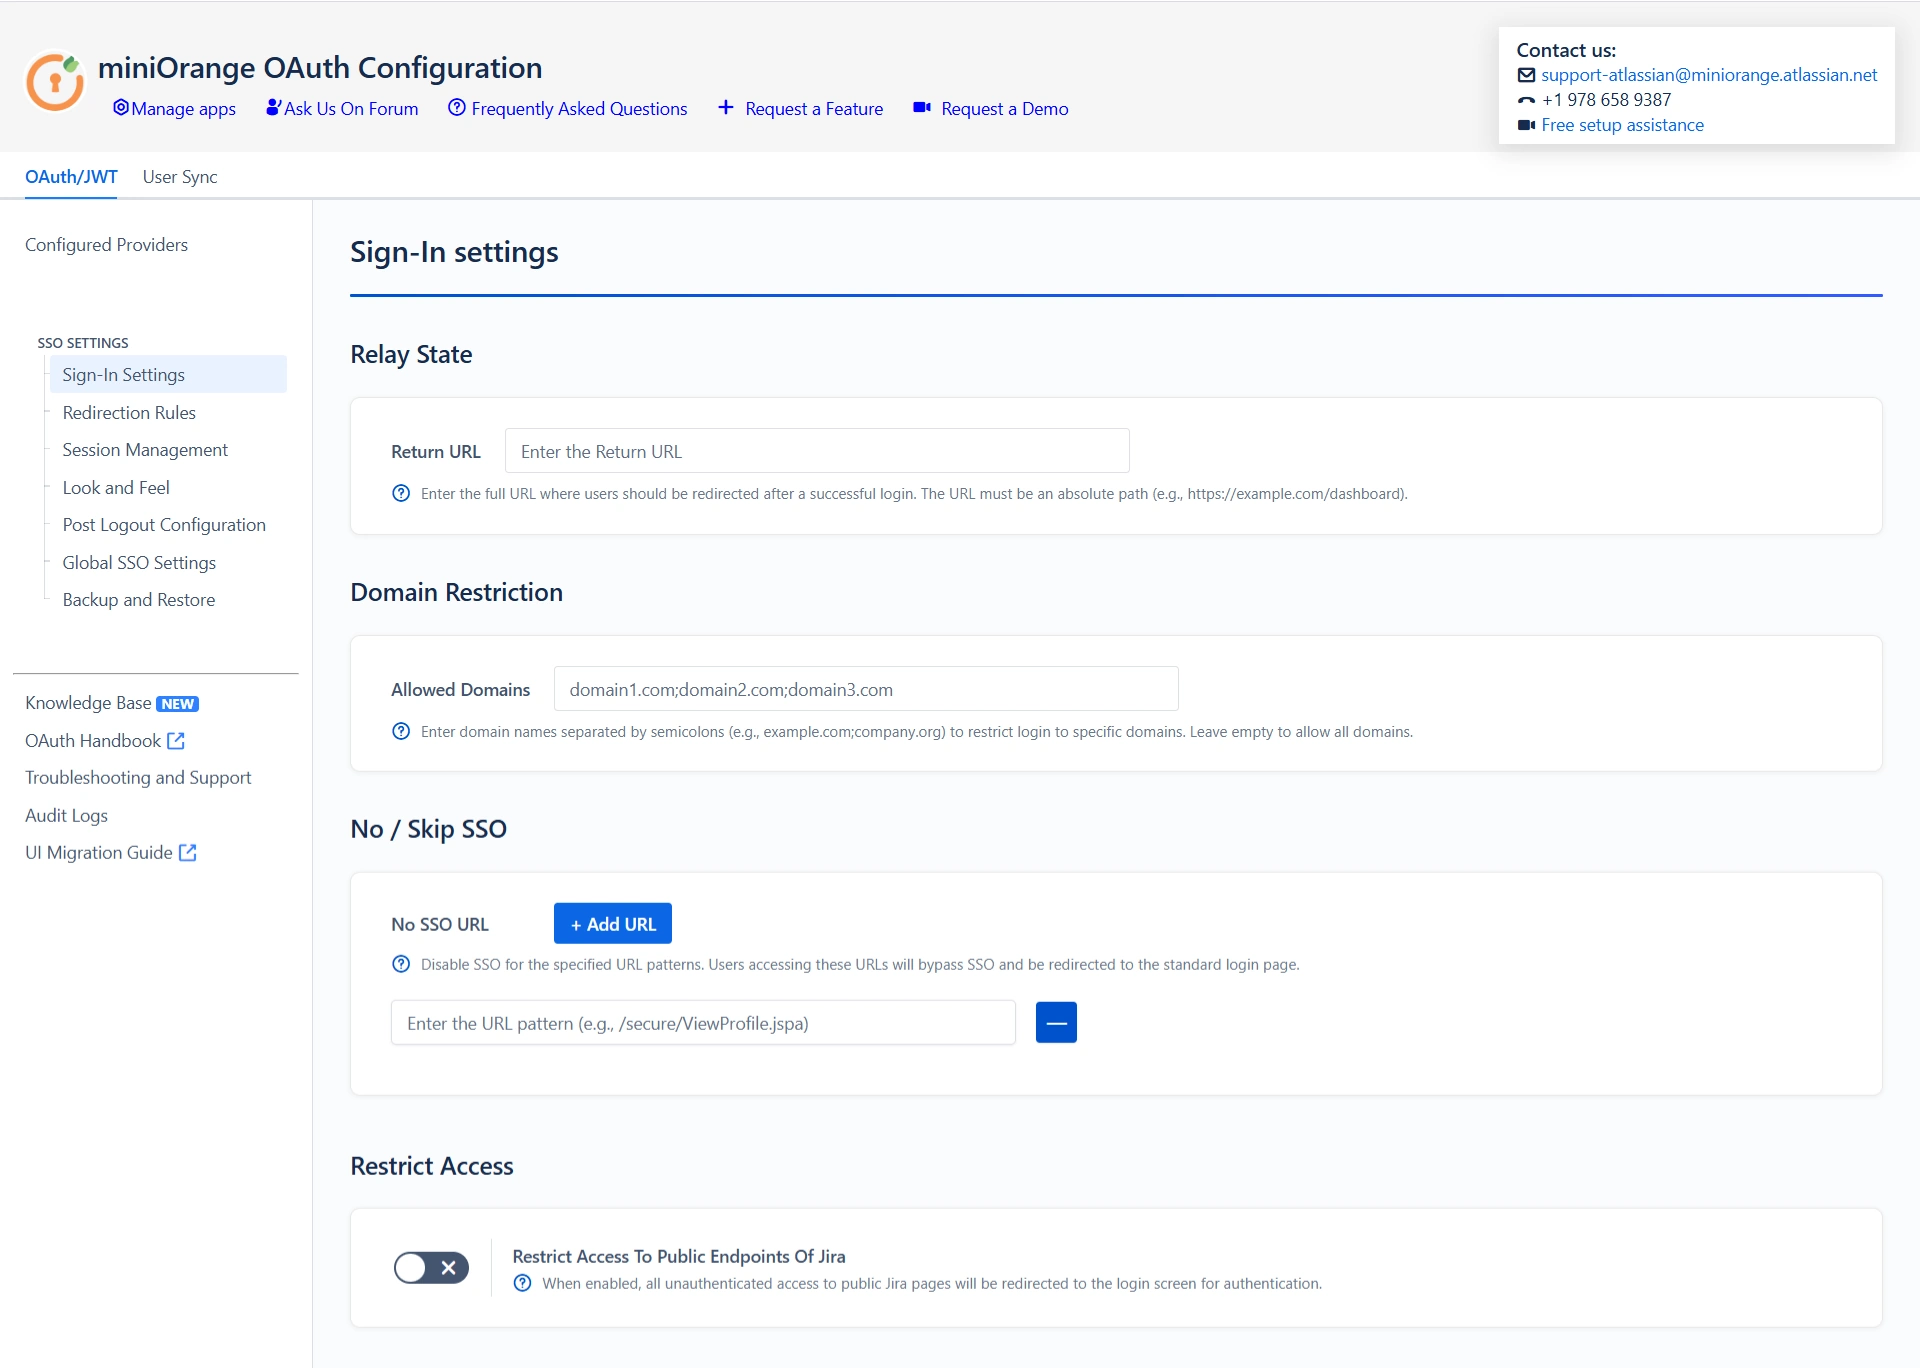
6.1 Sign In
Settings
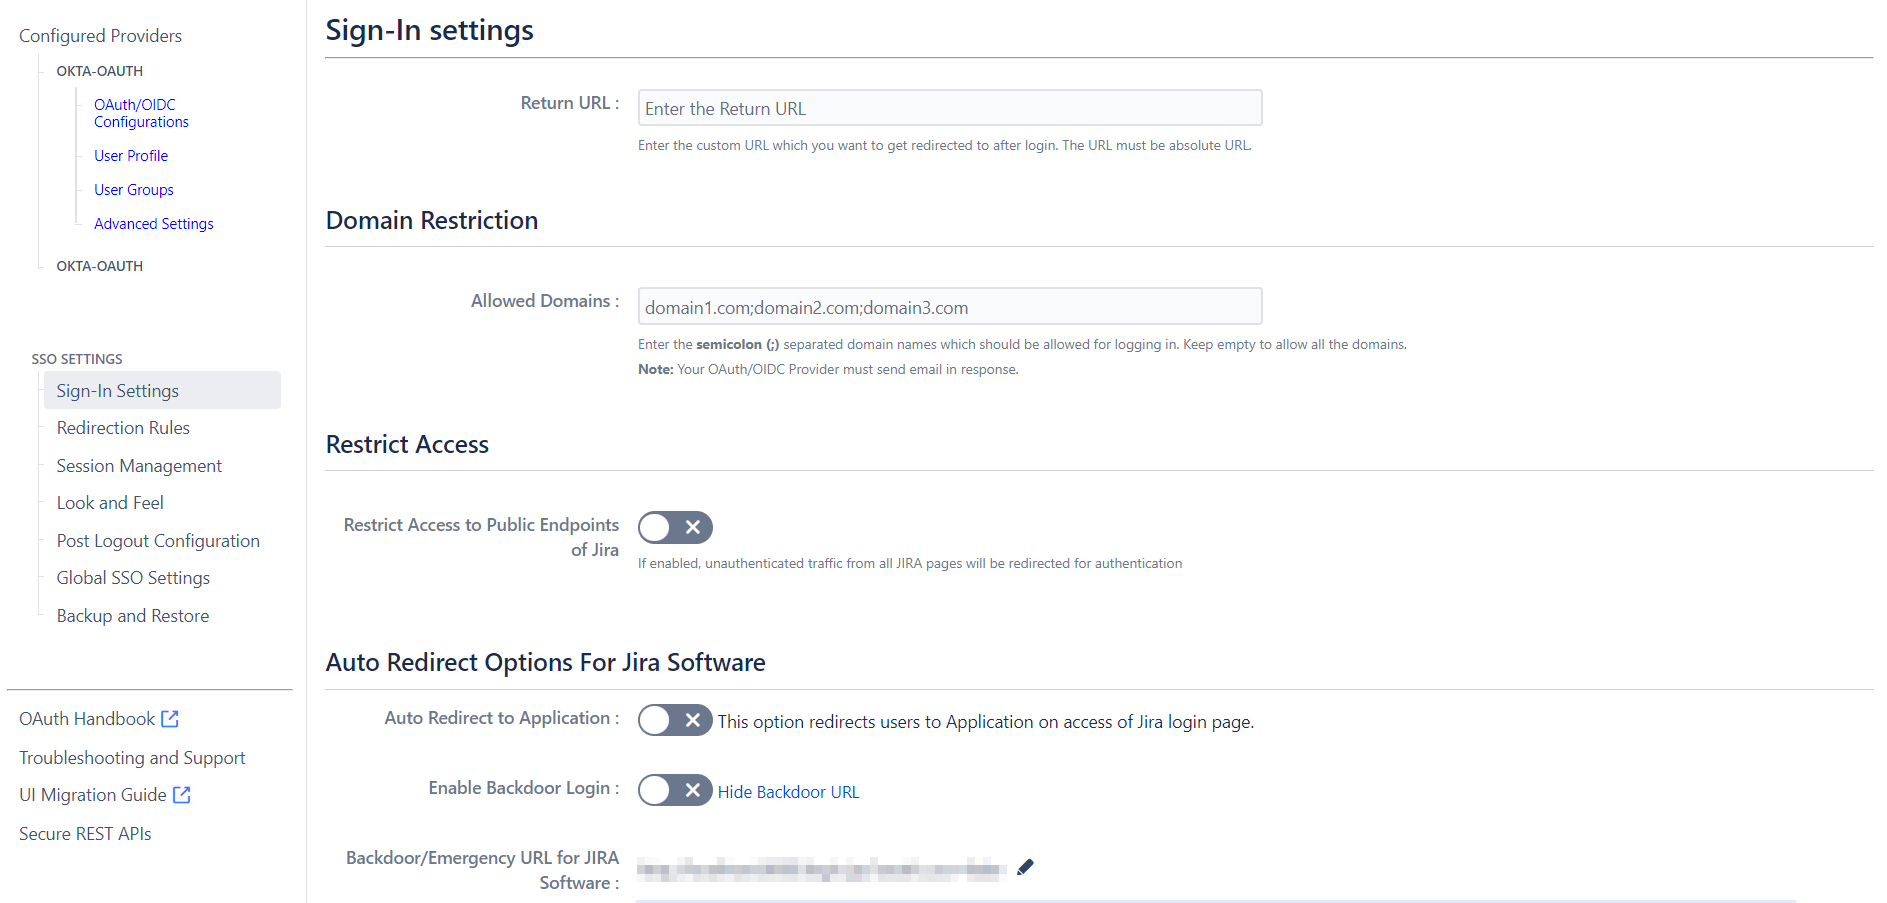
- Enable Auto Redirect to Application to redirect users to the OAuth/OIDC provider when accessing the Jira login page. You can set a delay before redirection.
- Next, toggle the Enable Backdoor Login option for emergency access using a backdoor URL. Restrict access to this URL for specific groups if needed.
- You can use Domain Restriction to allow login for specific user domains and configure multiple allowed domains (semicolon-separated).
- The Secure Admin Login option ensures the re-authentication of admin users before accessing pages with administrative permissions.
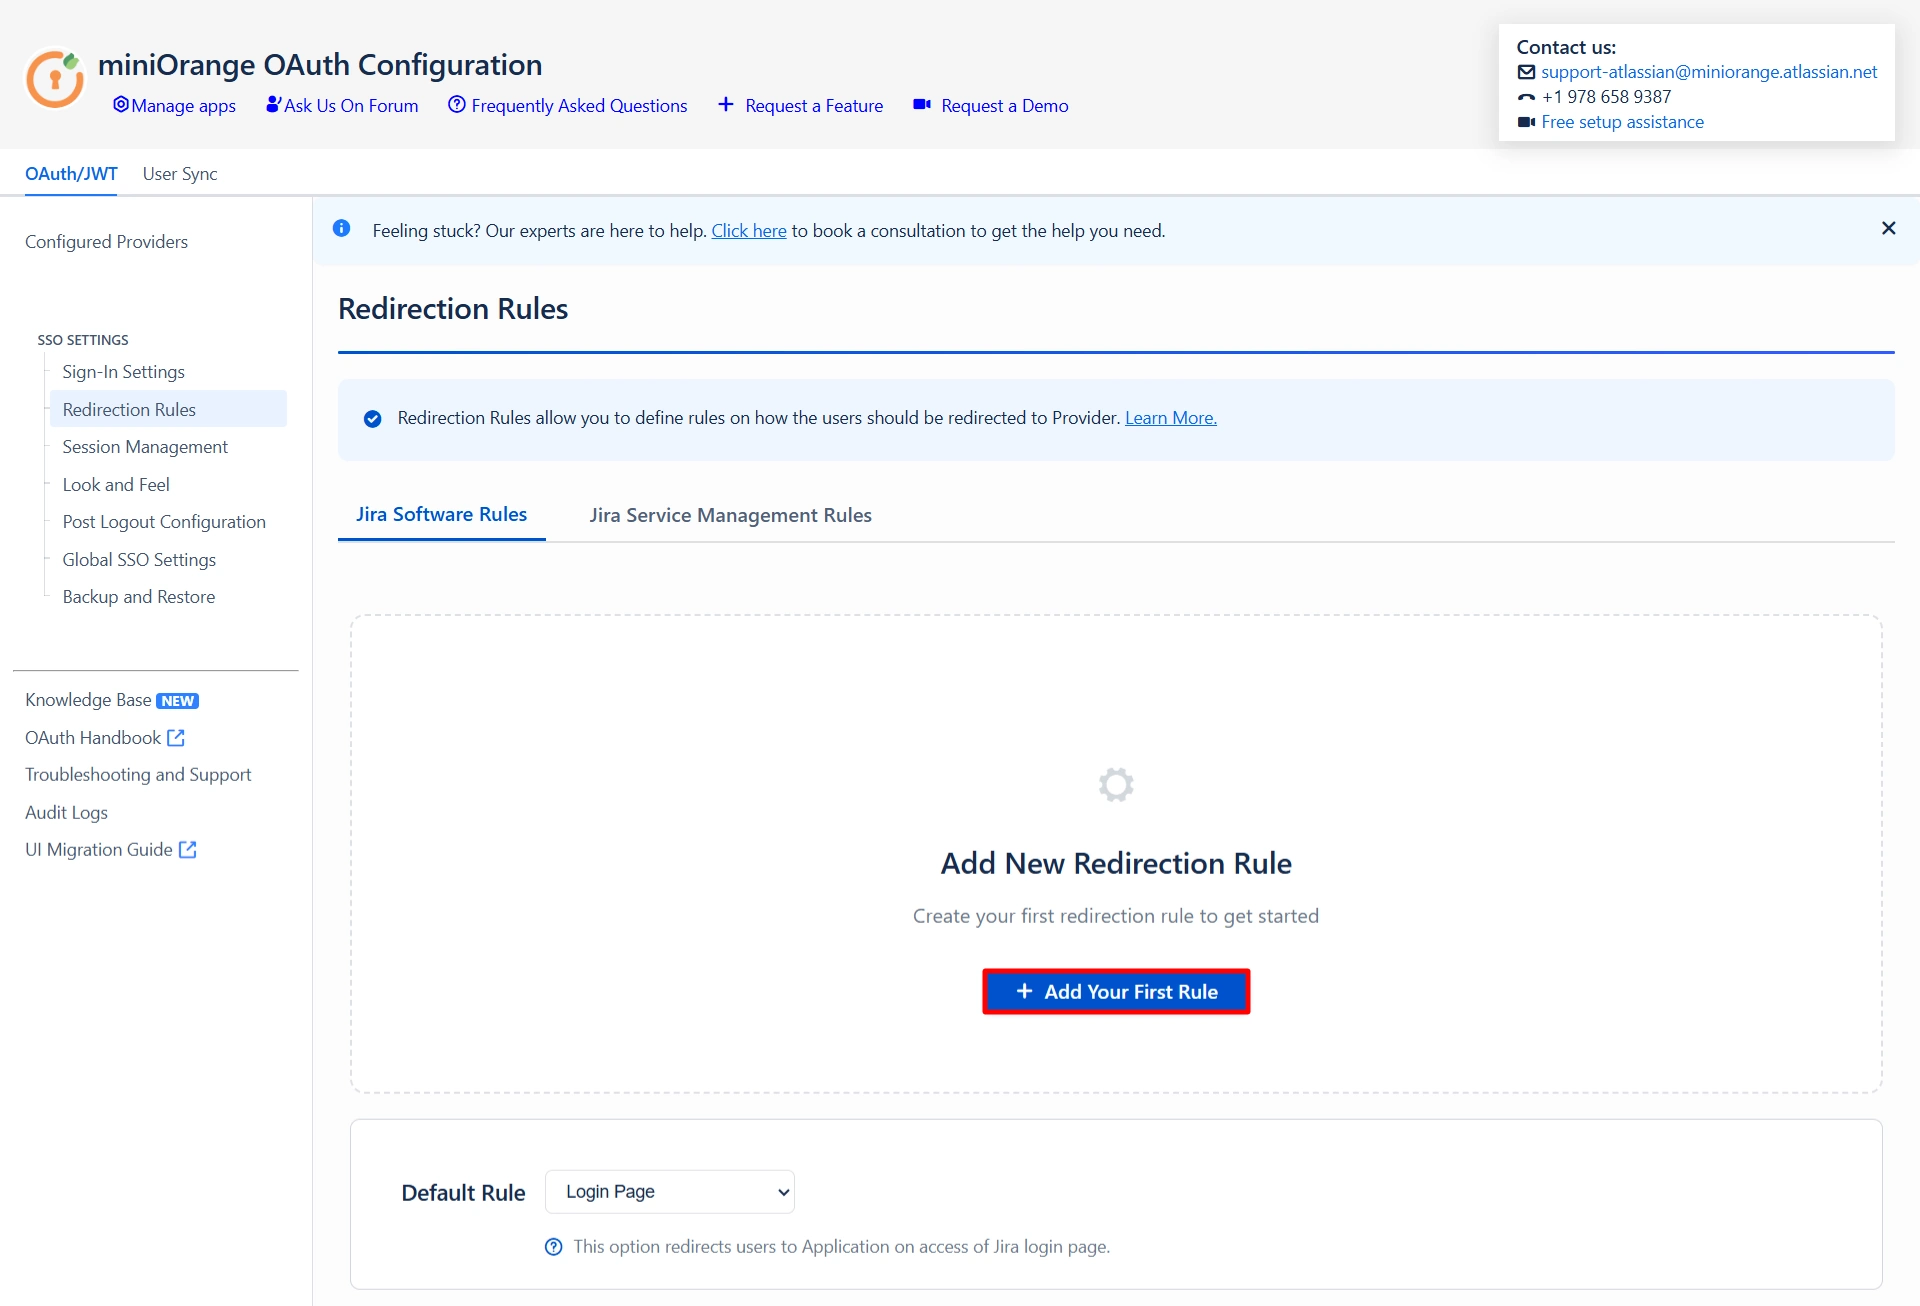
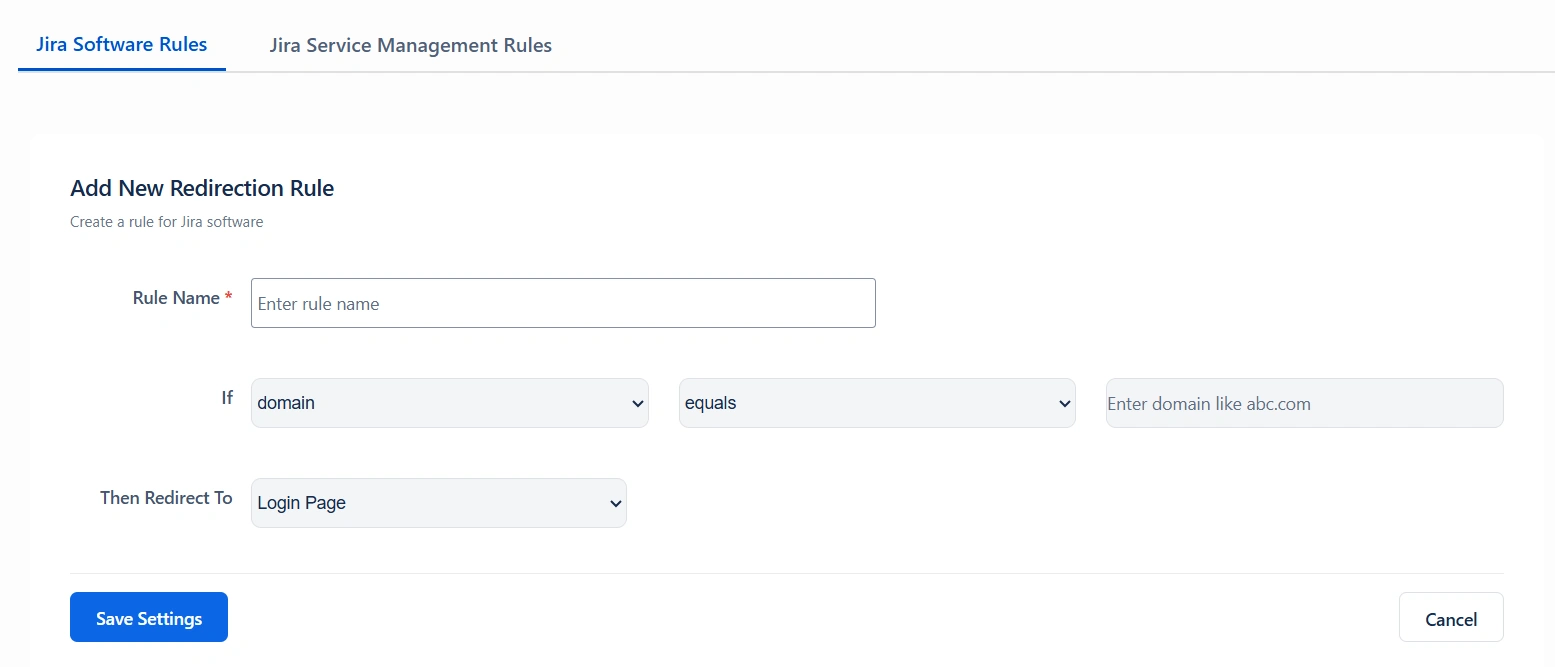
6.2 Redirection Rules
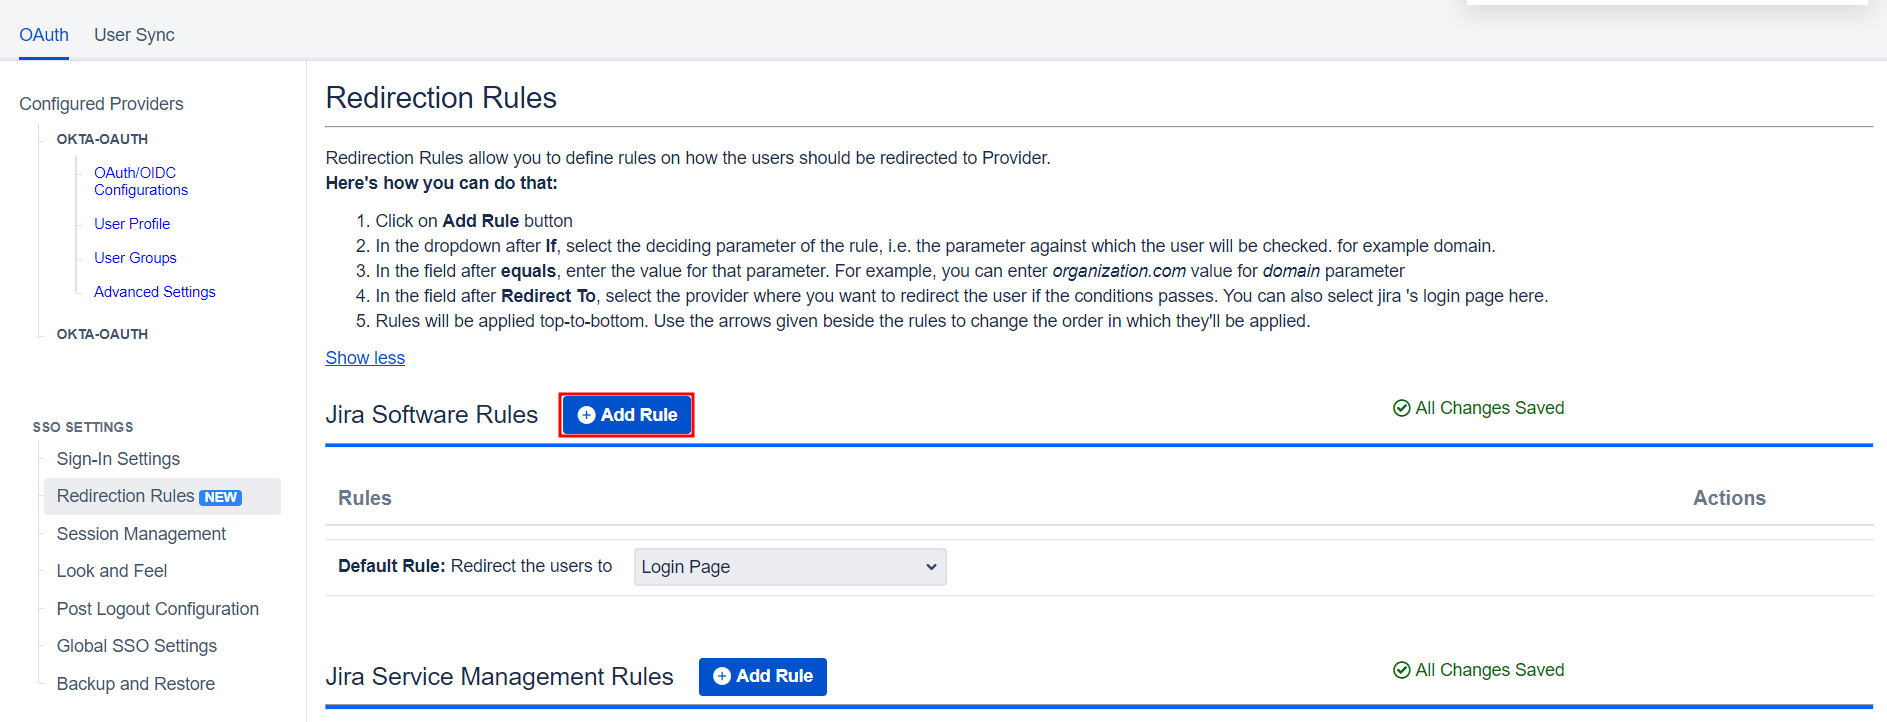
- Redirection rules allow you to redirect users to login pages/providers based on their email domains, groups, or directories. This functionality is especially useful with multiple configured providers.
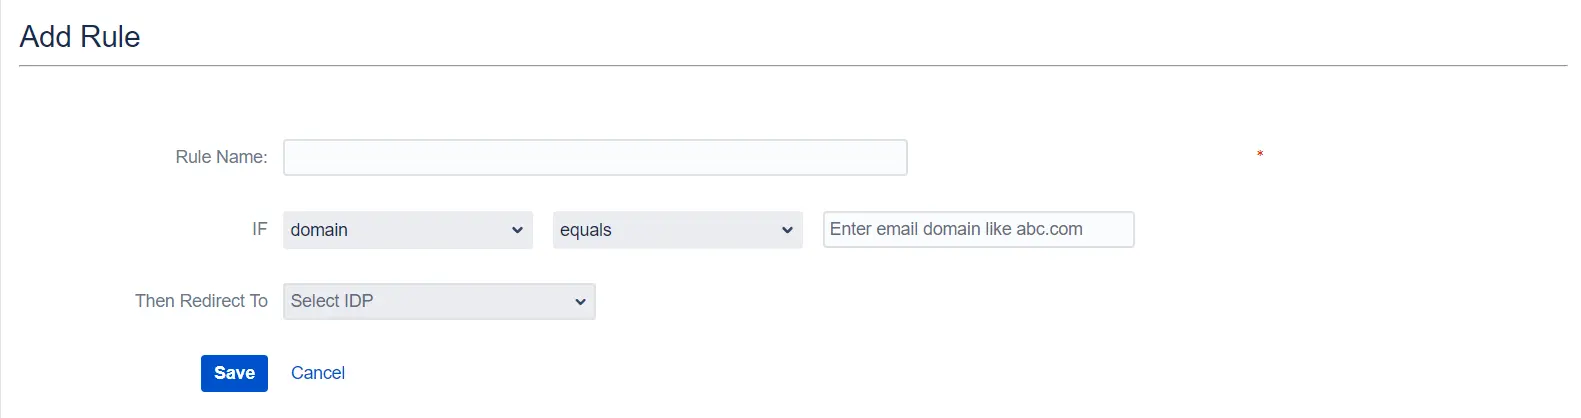
- To create a new rule, go to the Redirection Rules tab and click Add Rule.
- Next, give the rule a name and set the conditions for redirection. Click Save once you’re done.
- You can also set a default rule if no other rule conditions are met.
- Once you set a redirection rule, users who fulfill its conditions will be shown a login form, prompting them to input their username/email address. You can set domain-based rules for directing users to specific providers as well.

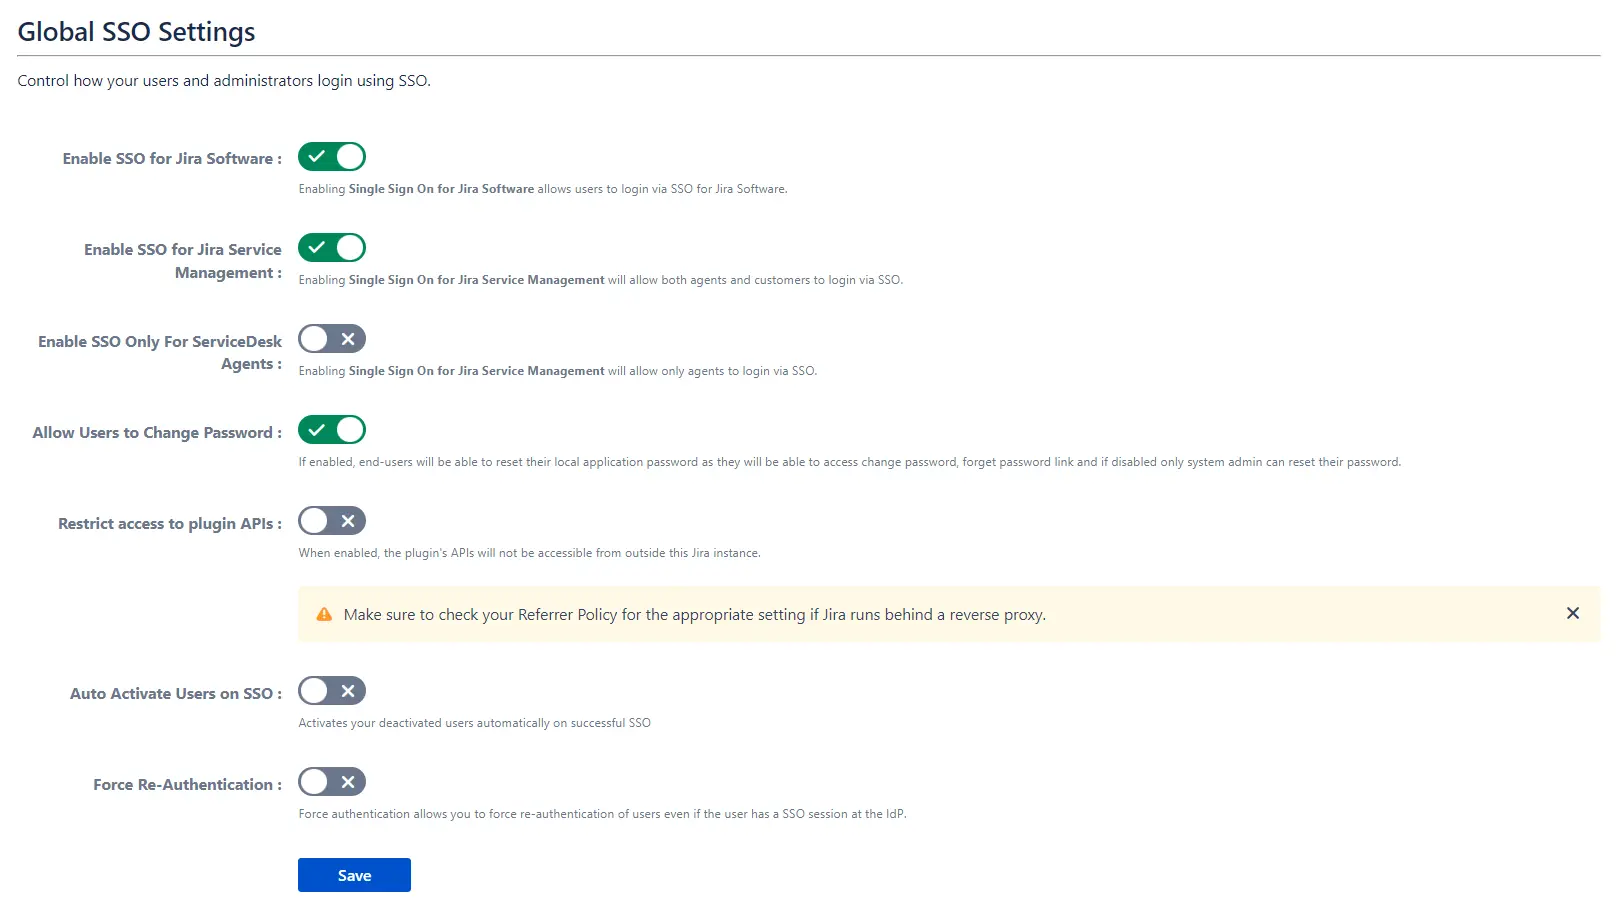
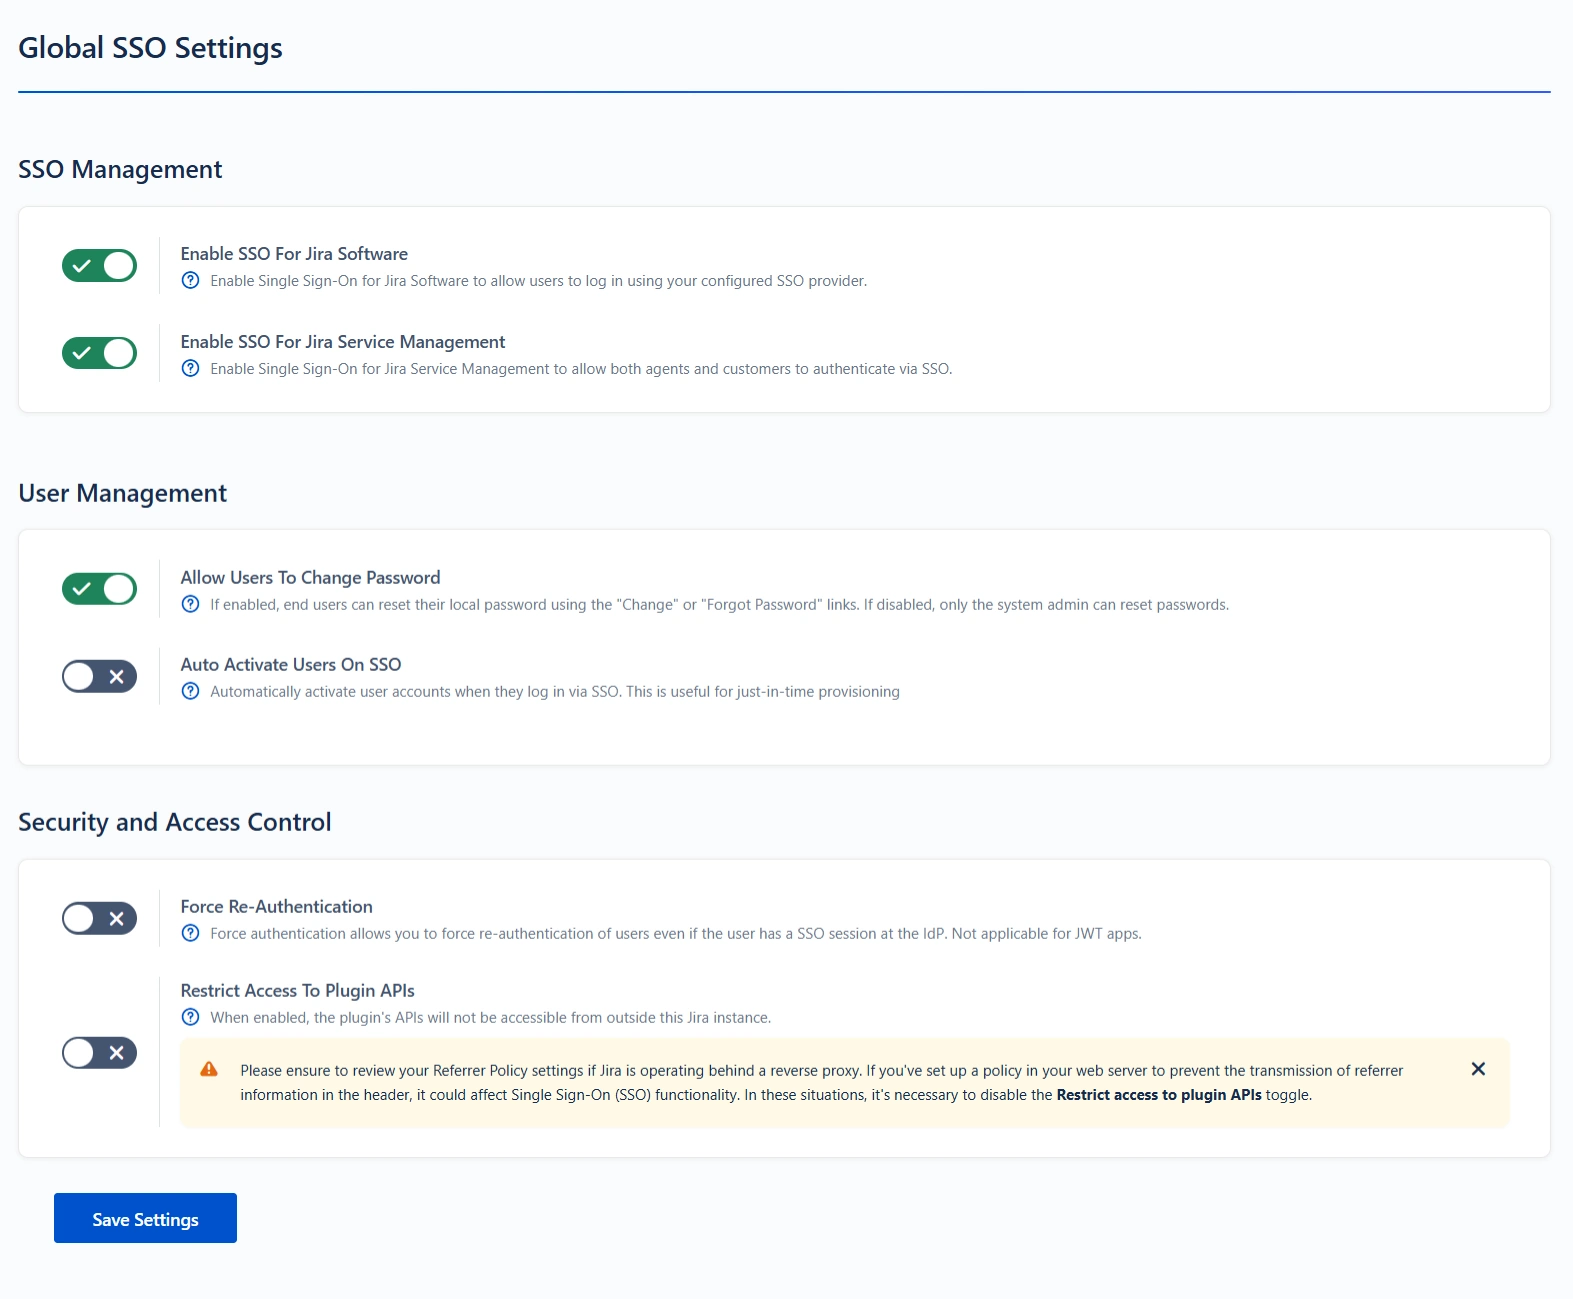
6.3 Global SSO
Settings
- You can enable/disable SSO for Jira Software and Service Desk from the Global SSO Settings tab.
- You have the option to activate SSO for both Jira software and service desk by selecting Enable SSO for Jira Software and Enable SSO for Jira Service Desk respectively.
- The app also gives you options to adjust additional settings like Allow Users to Change Password, Restrict Access to Plugin APIs, and Auto Activate Users on SSO.
- To keep users logged in until explicitly logged out, you can enable Remember Me-Cookie in the Session Management tab.
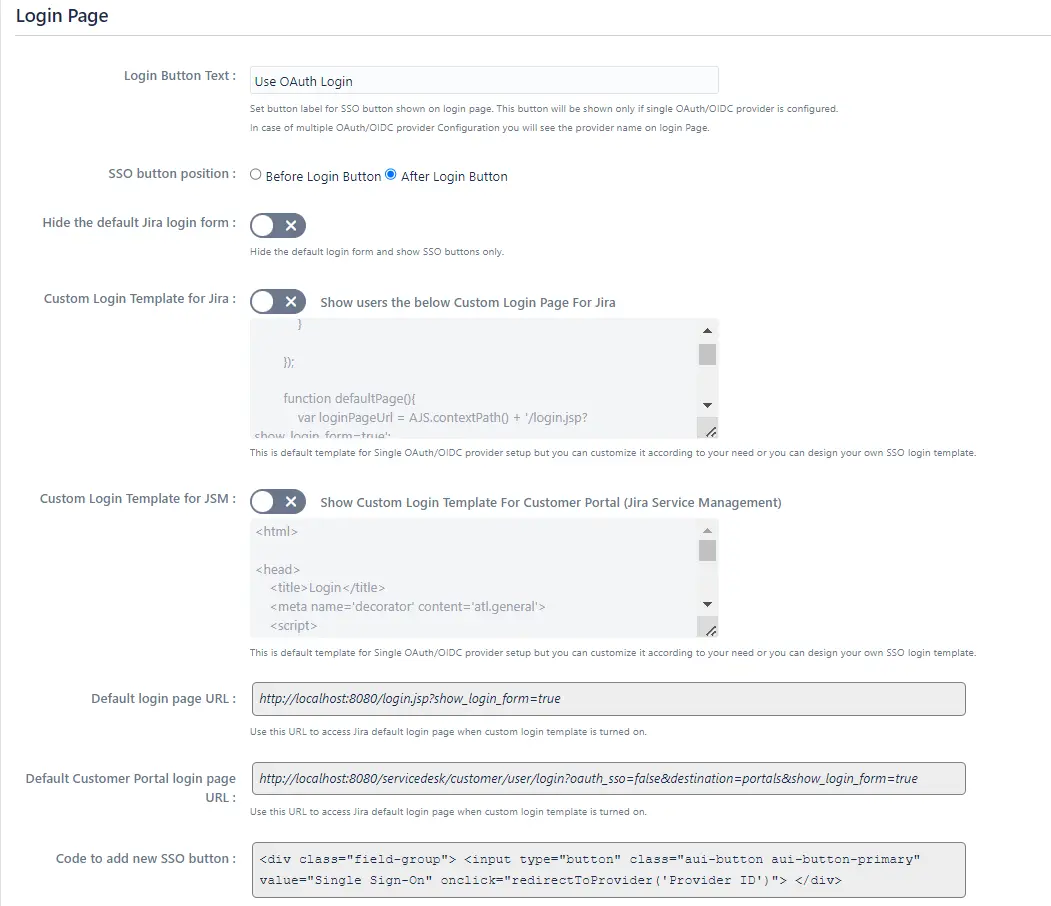
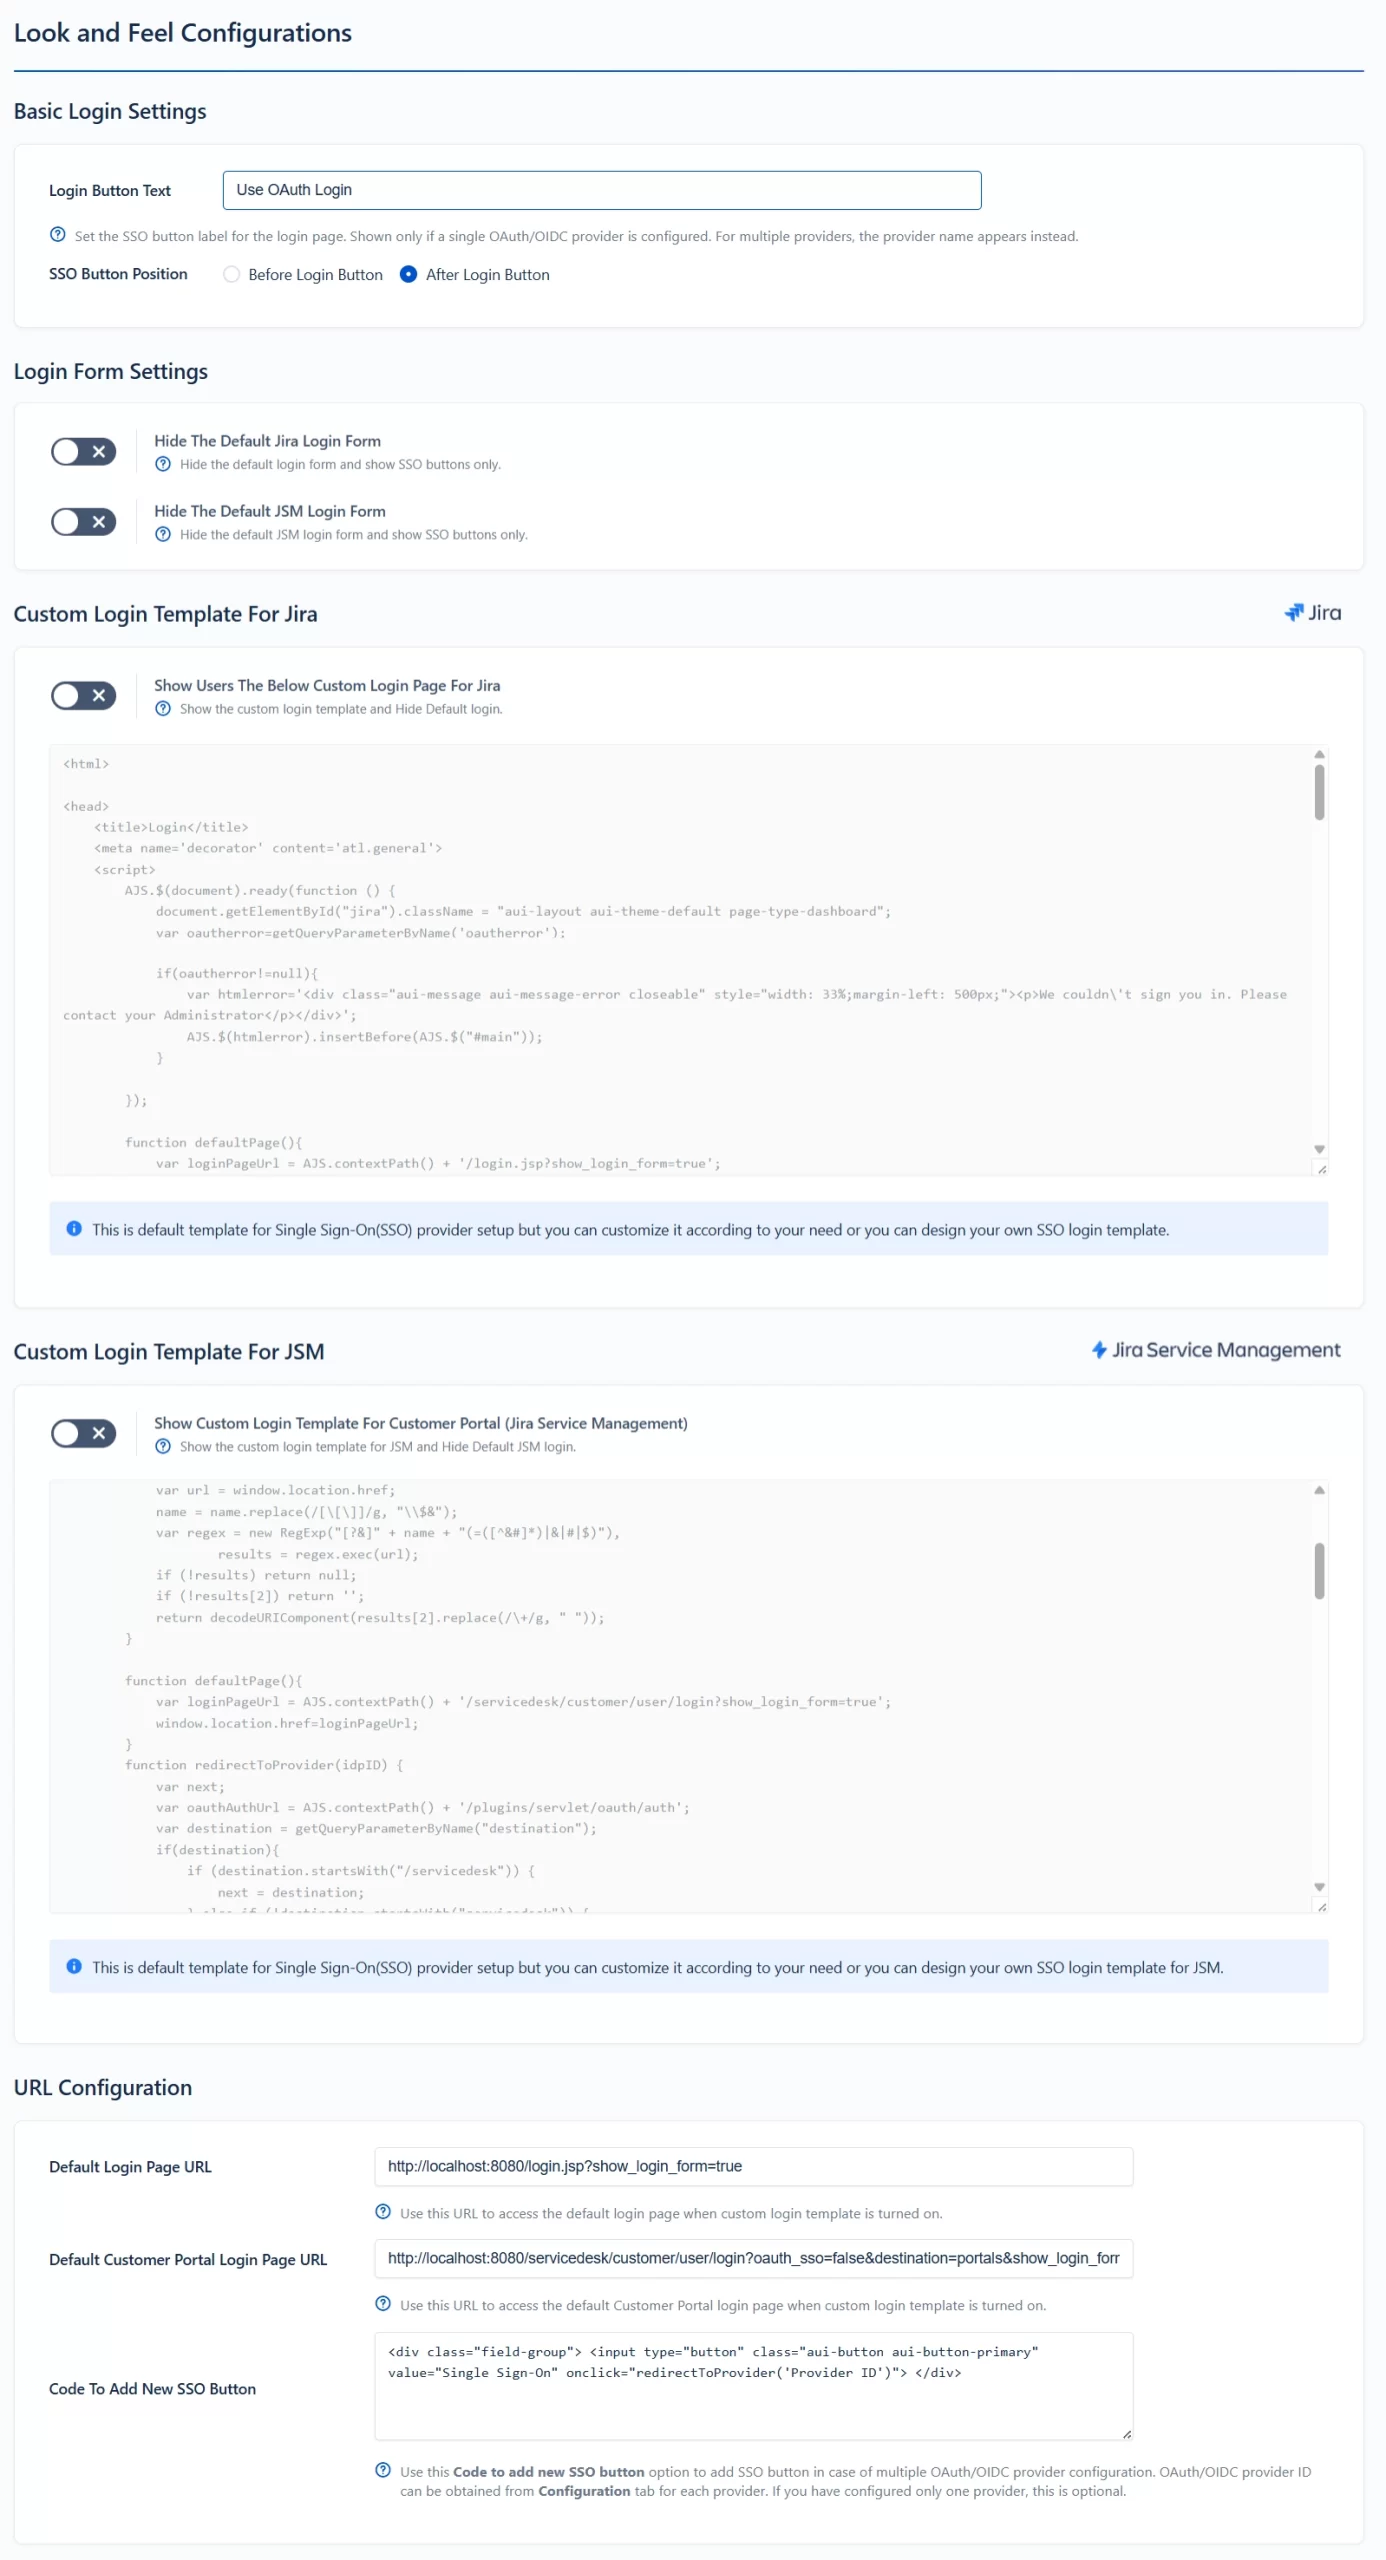
6.4 Look and
Feel
- You can customize the appearance of your login page and error messages from the Look and Feel tab.
- The plugin has provisions for modifying the default login button text and designing the login page using customisable templates.
- You can also set a Custom Logout URL from the Post Logout Configuration tab to redirect users to a specific screen after they logout.
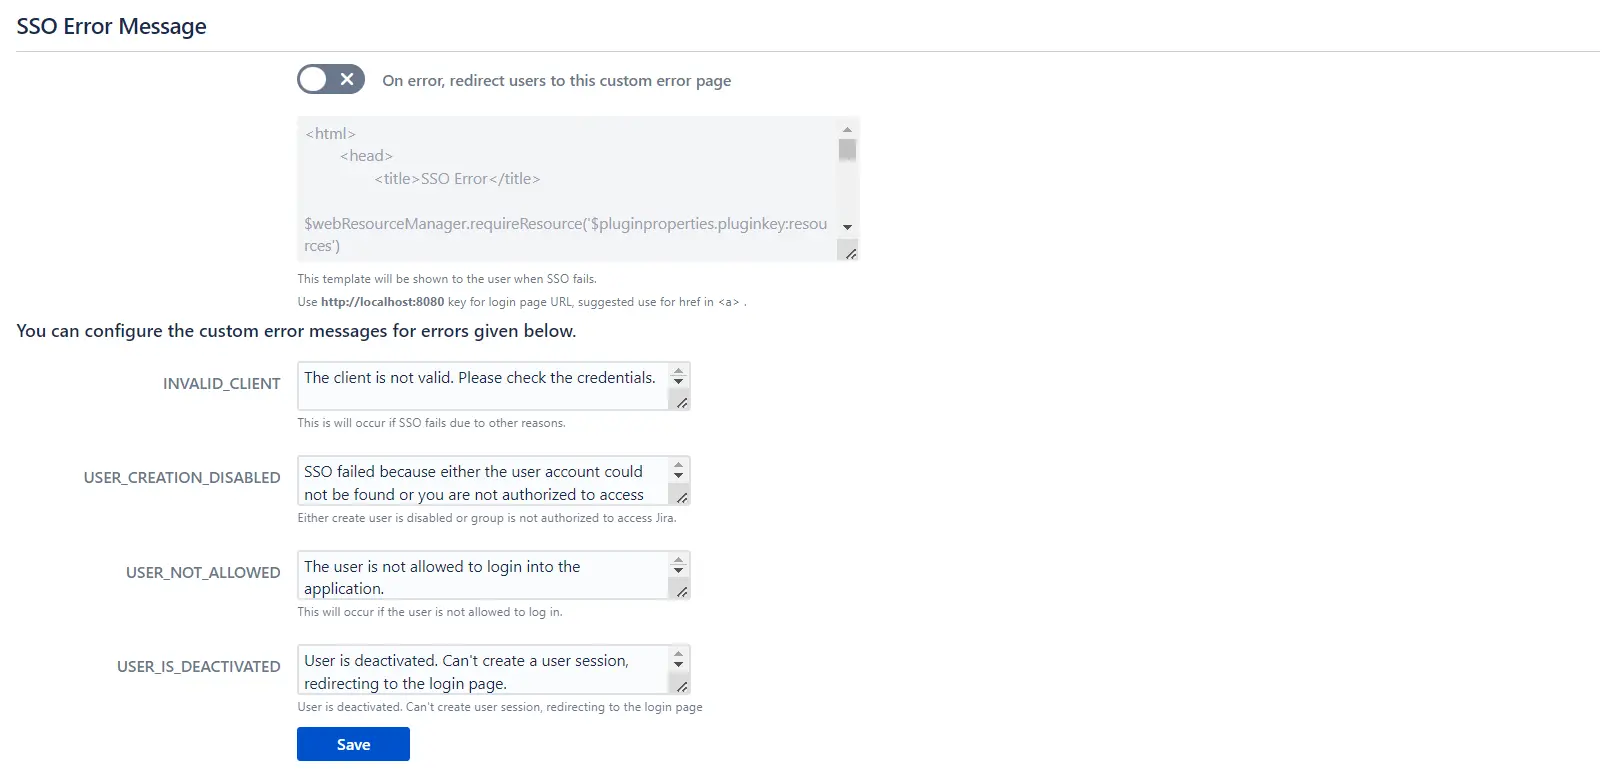
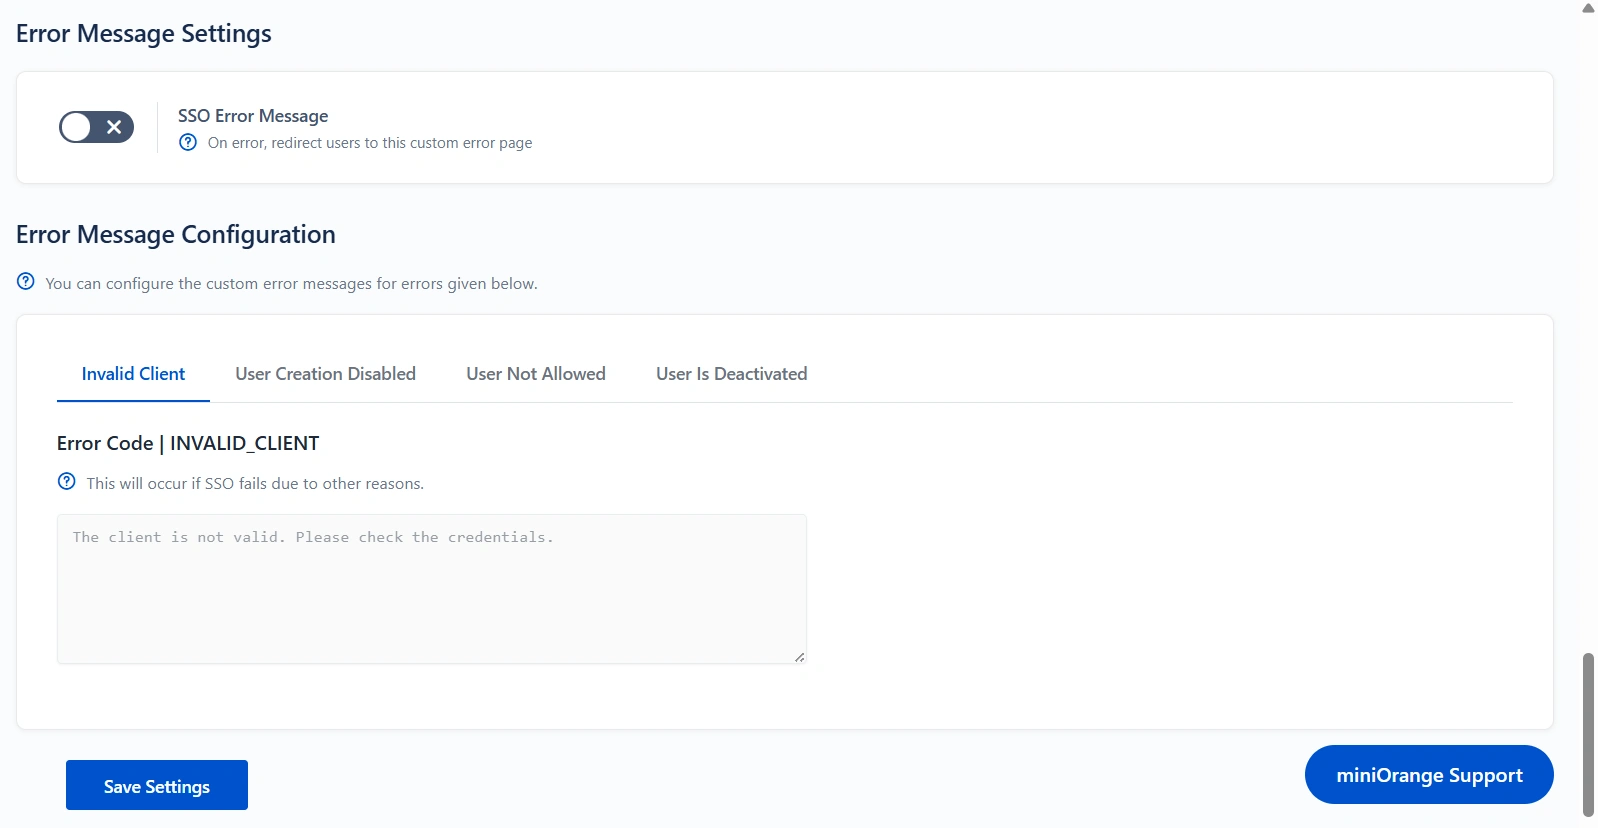
- The SSO Error Message section allows you to customize the error message displayed to users.
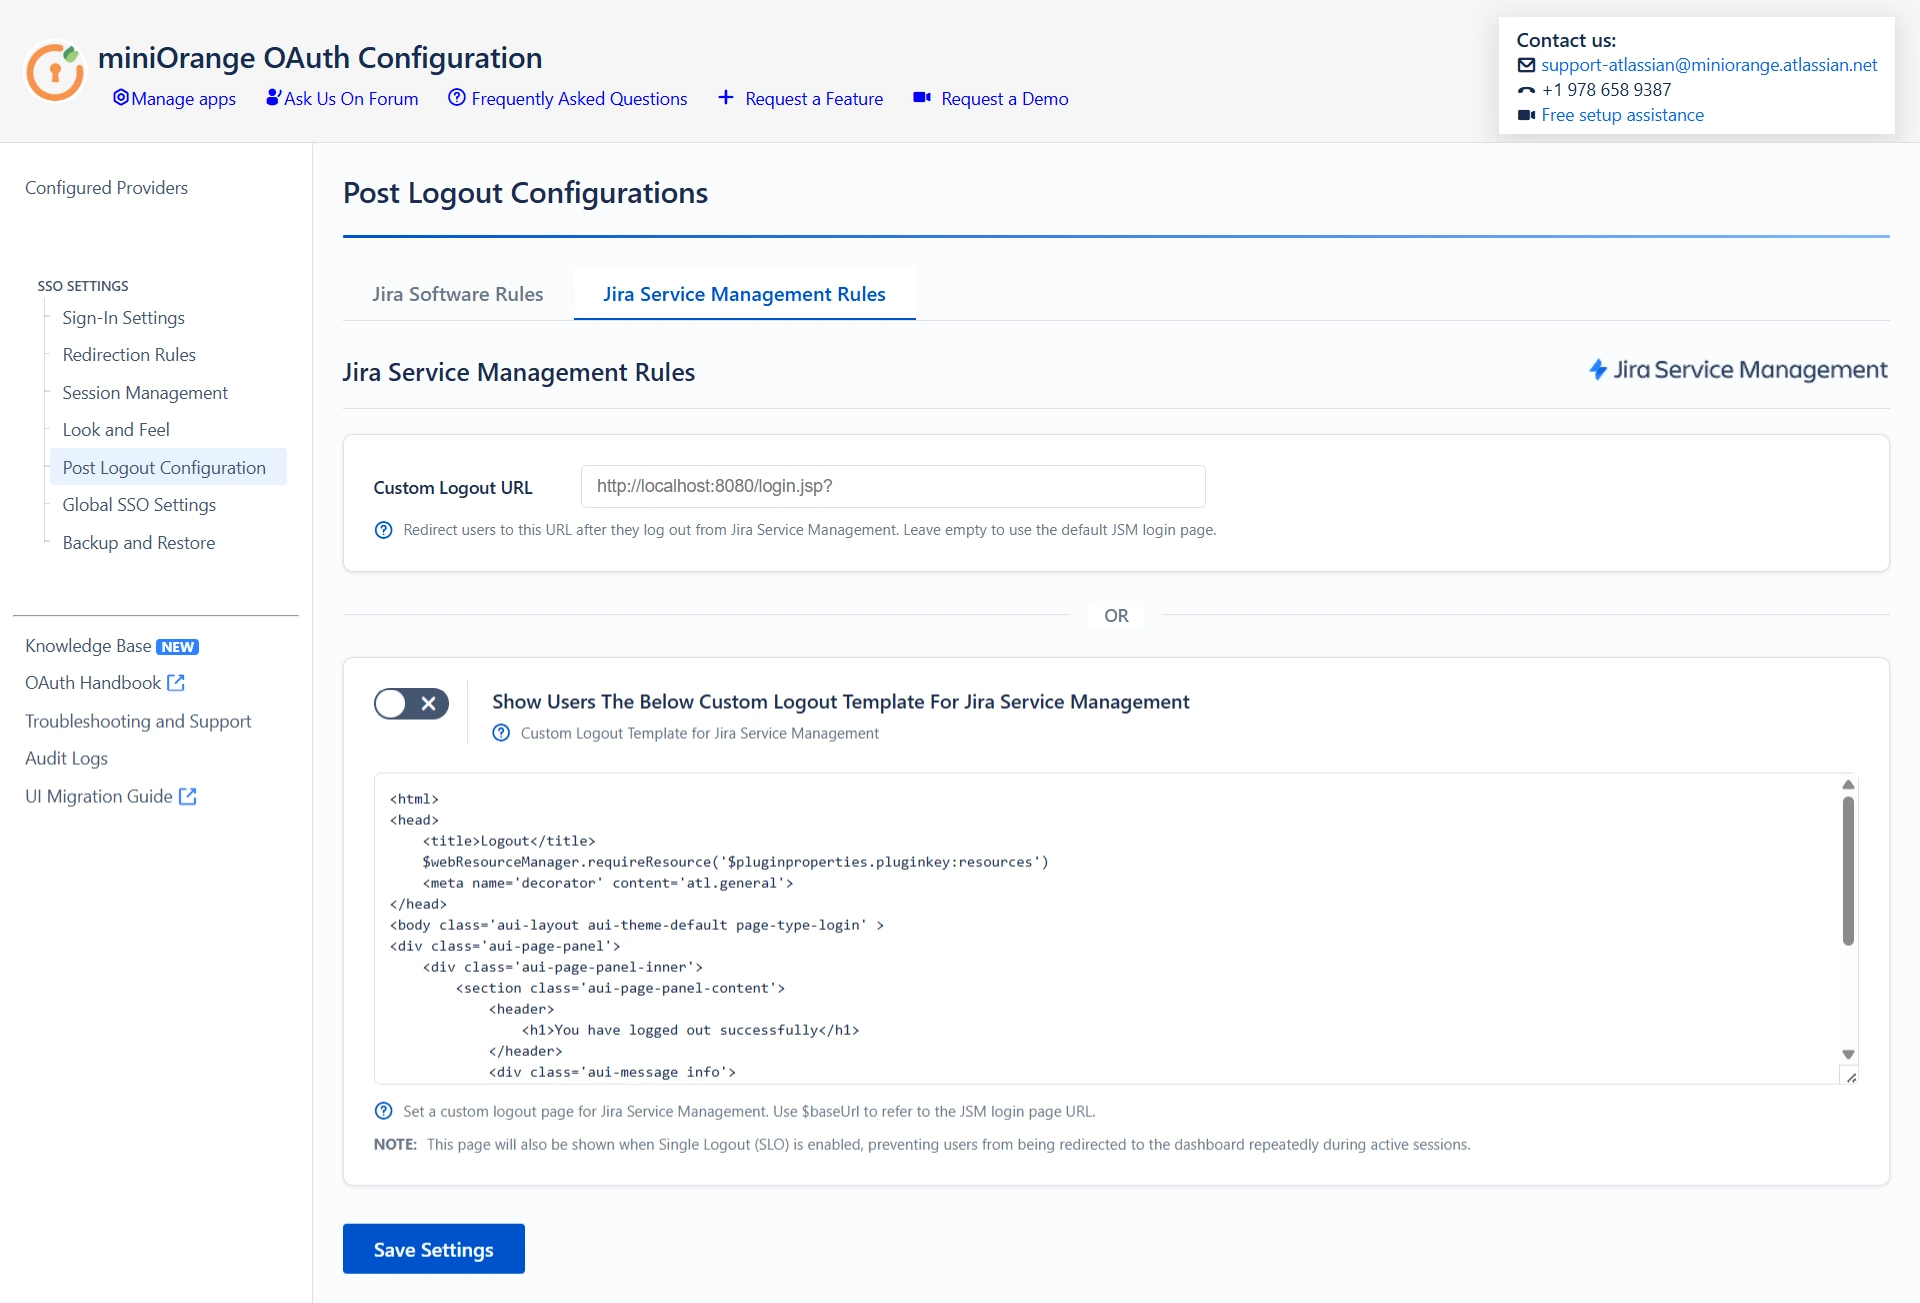
6.5 Post Logout Configuration
- You can also set a Custom Logout URL from the Post Logout Configuration tab to redirect users to a specific screen after they logout.
Additional Resources
Did this page help you?
