SAML Single Sign On (SSO) into SonarQube using RSA SecureID as IDP
SonarQube SAML plugin gives the ability to enable SAML Single Sign On for the SonarQube. Here we will go through a guide to configure SSO between SonarQube and RSA SecureID. By the end of this guide, RSA SecureID users should be able to log in and register to the SonarQube Server.
Video Setup Guide
You can refer the steps from the video or documentation below to configure your IDP with SonarQube.
Step 1: Set Up RSA SecurID as Identity Provider
All the information required to configure RSA as Identity Provider i.e. plugin’s metadata is given in the Service Provider Info tab of the miniOrange SAML plugin.
- Login to the RSA Secure ID as Super Admin.
- In the Administration Console, click Applications → Application Catalog.
- Click Create From Template button on the top right corner.
- Next to the SAML Direct, click the Choose Connector Template page. The Add Connector wizard appears.
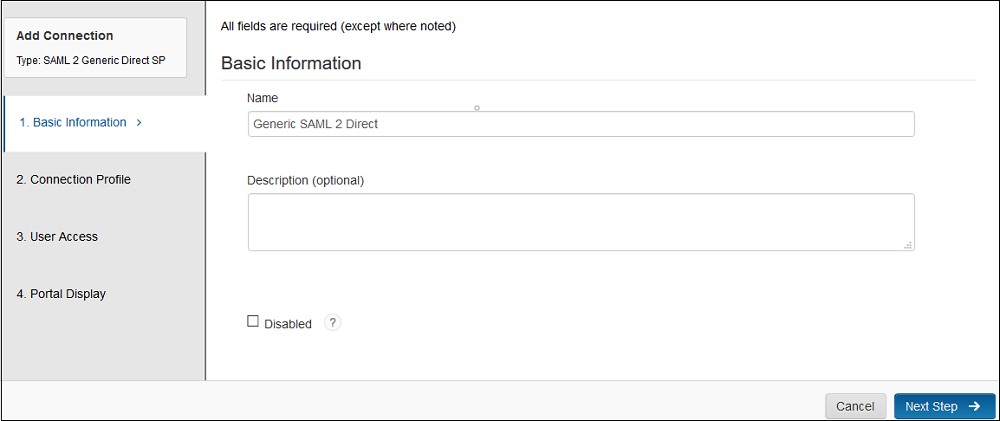
- Fill the required information in the Basic Information page on the Add Connector wizard.
- Name:- Name of the application for eg. miniOrange Plugin.
- Description (Optional):- Description for your application.
- Disabled [a checkbox] (optional): Select this only if you want to make this application unavailable to users. When disabled, the application appears in My Application but does not appear in the RSA application portal.
- Click Next Step button.
- Fill the required information in the Connection Profile page.
- Upload the miniOrange plugin’s metadata file and click on the Import Metadata button. You can obtain plugin metadata from the Service Provider info tab of the plugin.
- Verify the configured URLs and clicks on the Save button on the top right corner of the pop-up window.
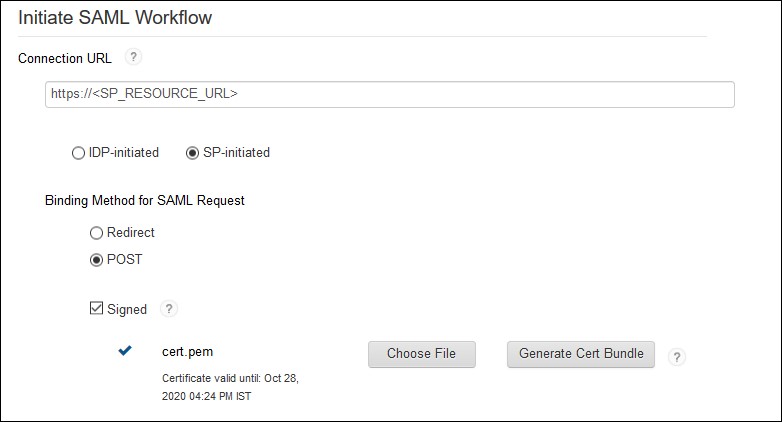
- Select SP-Initiated, if you want the SSO should be invoked from application or select IDP-initiated, if you want the user should log in into RSA first and then access application from his RSA Dashboard.
- Configure base URL of your application as Connection URL or you can leave it blank if IDP-initiated is selected.
- Select Binding type: POST and Signed option as Checked.
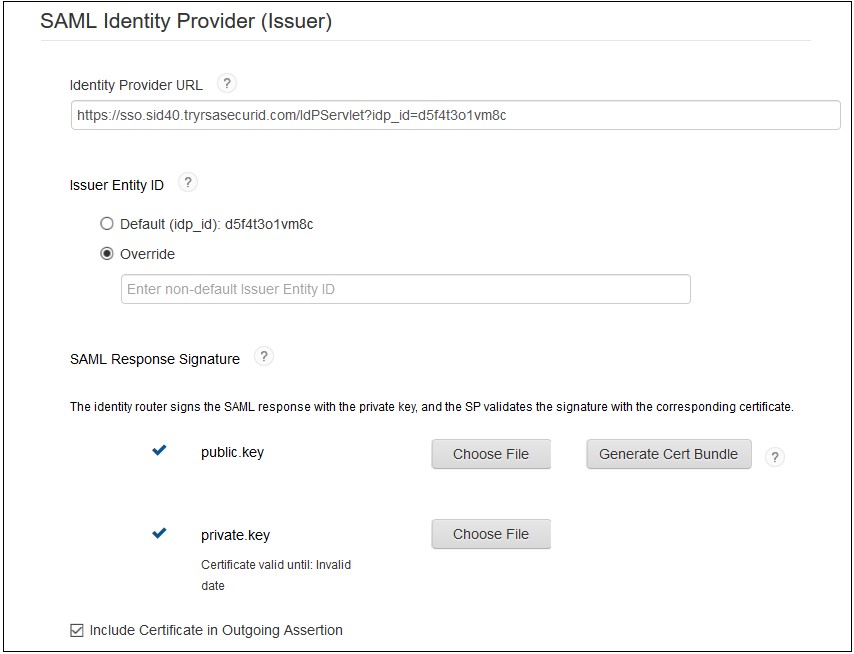
- Upload the public and private key which will be used to signed SAML response or you can generate new key pair by clicking on the Generate Cert Bundle button.
- (Optional) Enable checkbox for Include Certificate in Outgoing Assertion.
- Assertion Consumer Service URL and Audience URL should be preconfigured if you have uploaded plugin’s metadata in the Connection Profile section. If not, you can find the required URLs from Service Provider Info tab of the miniOrange SAML plugin and update the URL here.
- Configure NameID information that identifies the user on whose behalf the SAML assertion is generated.
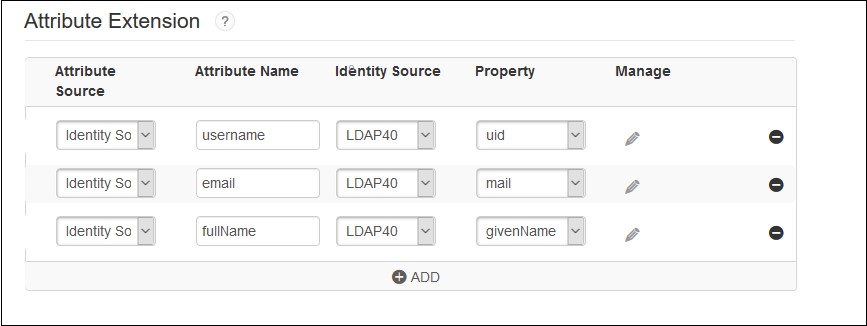
- Configure additional user information to be sent to the application in the SAML response, for example, username, email, display name, groups etc.
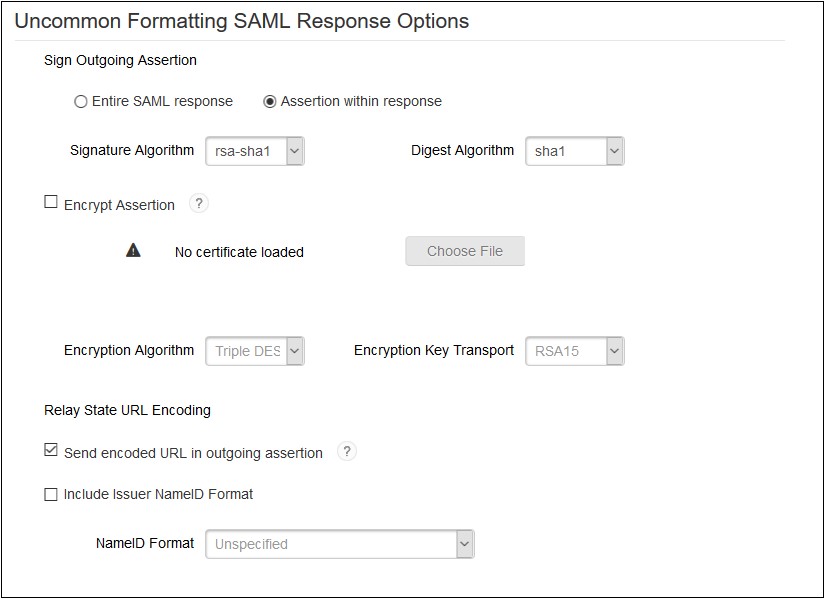
- Sign outgoing Assertion:- Assertion within Response.
- Encrypt Assertion (Optional): If checked, you need to load miniOrange plugin’s public certificate and you can download it from the Service Provider Info tab of the plugin.
- Unchecked Send encoded URL outgoing in assertion .
- Checked include issuer NameID format and select NameID Format as Unspecified.
- Save the configuration and move to the next page i.e. User Access page.
- Define application access in the User Access page.
- Configure application display settings for RSA end users like app icon etc and save the settings.
- Now, In the Administration Console, click Application My Application.
- Find the app that you have configured and click on Edit Export Metadata. Keep the metadata handy, it will require to configure miniOrange plugin.
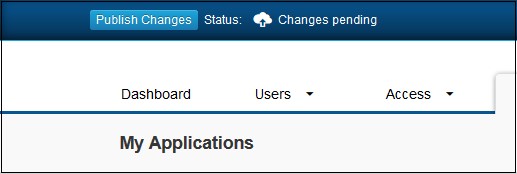
- Click on Publish Changes in the top left corner of the RSA Admin Console to publish this configuration and immediately activate it.


 Connection Profile

 Initiate SAML Workflow
 SAML Identity Provider(Issuer)
 Service Provider

 User Identity

 Advanced Configuration: Attribute Extention
 Advanced Configuration: Uncommon Formatting SAML Response

Step 2: Set Up SonarQube as Service Provider
 Fetch the Identity Provider (IdP) Details
- After configuring the IdP, get its metadata to configure SonarQube as a Service Provider(SP).
-
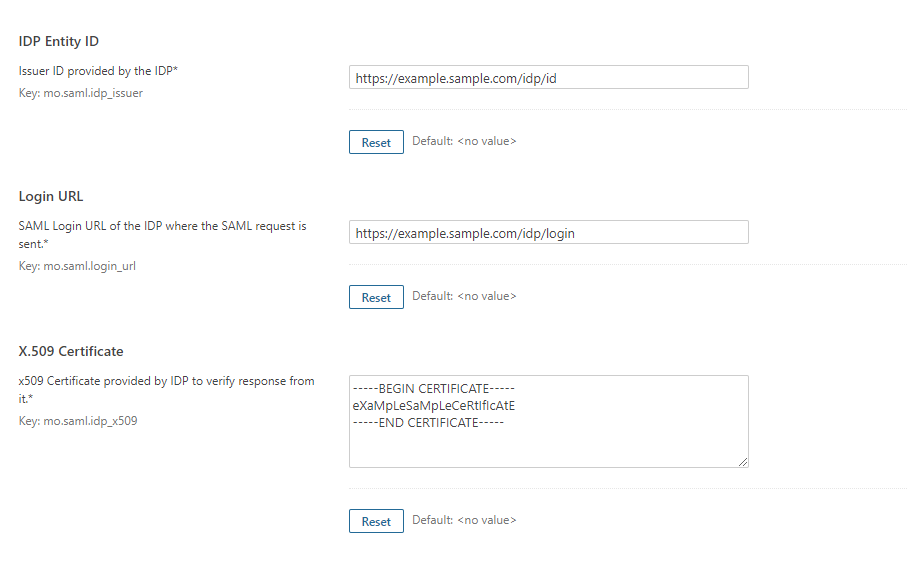
Copy the following details from the IdP metadata and paste them
into the corresponding text fields in the SonarQube plugin.
- IdP Entity ID
- Login URL
- X.509 Certificate
- Save all the details.
 Test Configuration
- Once you have filled all the IdP details, go to Administration >>Configuration >>miniOrange SAML Support and then click on the Test Configuration tab.
- It will show you the IdP login page. Enter your IdP credentials and log in.
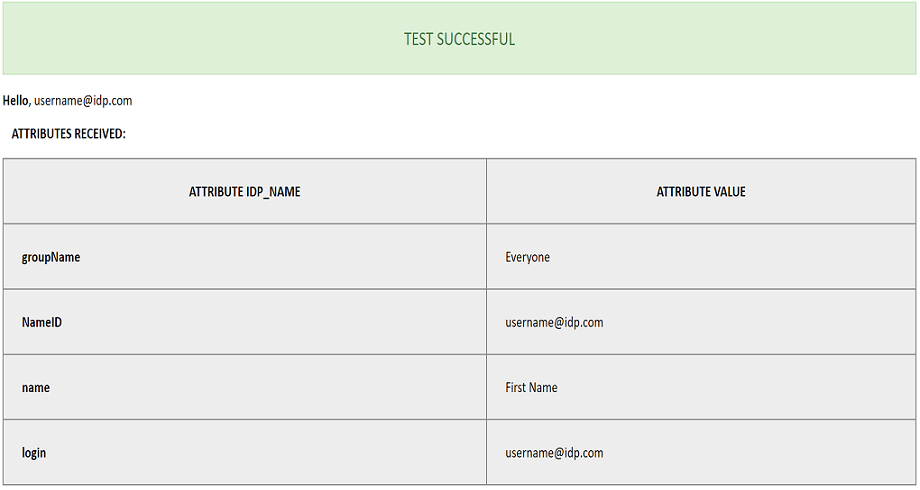
- If all the configurations are correct, it will show you the user details received from the IdP.
- If the test fails, check if you have missed out any steps or try to debug through SonarQube .
- To be able to troubleshoot through logs, first you'll have to set a higher log level in your SonarQube application.
- To do so, go to the SonarQube Dashboard >> Administration >> System.
- Under the system settings, you'll find an option to change the log's level. Select DEBUG and save it. Now try to configure the plugin.
- If you face any problem during configuration, go to %SONARQUBE_HOME% / logs directory.
- Find and open the web.log file. Go through the logs recorded.
- You'll find the stacktrace of performed actions, along with date and time information.
 Attribute & Group Mapping
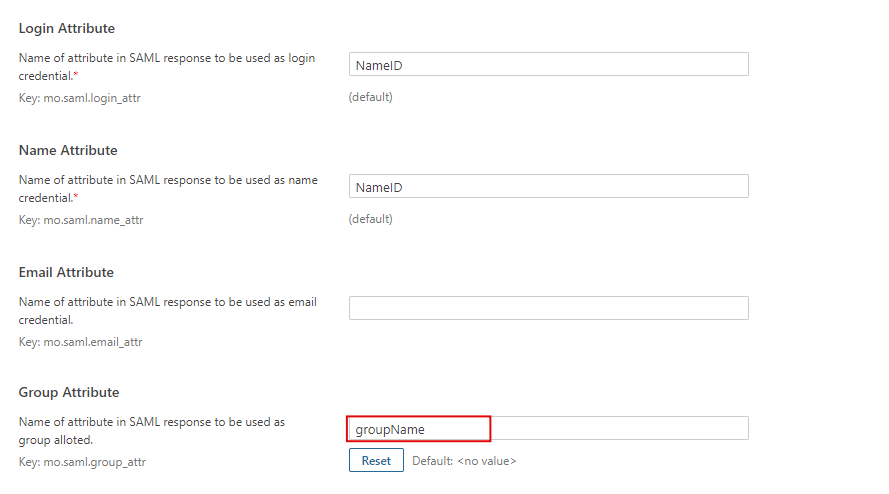
- In order to map attributes from the Identity Provider to the application, the attribute names received in the SAML response need to be entered in their corresponding fields.
- To view these attribute names, click on the Test Configuration tab in the plugin support page.
-
Attributes used in SonarQube Application are described briefly as
below:
- Login Attribute is a unique name assigned to the user to identify them uniquely within the SonarQube system. It's a required attribute.
- Name Attribute is the full name of the user, to be mapped from the IdP to the SonarQube. It's a required attribute.
- Email Attribute is an optional attribute and represents an email address of the user, to be mapped from the IdP to the SonarQube.
- Group Attribute mapping requires the group names, in the application, to be same as the group names in the Identity Provider. Otherwise, the default SonarQube Group is assigned to the user.
- Eg. To map group value Everyone from SAML response we have to paste groupName in Group Attribute field.
Additional Resources
Did this page help you?

 Try it for free