How Admins and Users Can Configure 2FA
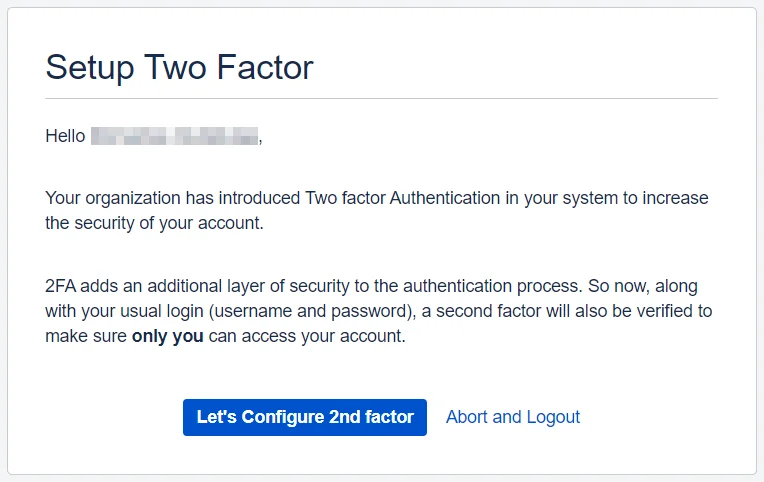
1: Welcome Message for Users
After the admin enables 2FA for the users they will see a welcome screen that prompts them to configure their Two-Factor Authentication methods the next time they try to log in.
2: How to Configure Mobile Authenticator
A mobile authenticator app generates a unique, time-based code on your phone that changes every 30 seconds. Here's how both users and admins can set up this method:
Admins:
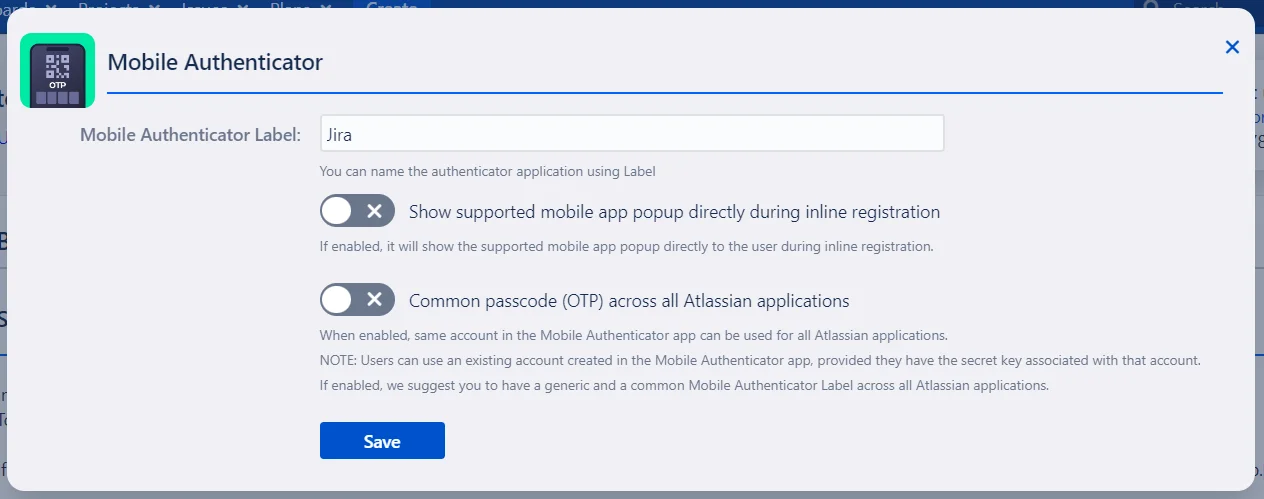
- Once the Mobile Authenticator 2FA method is enabled for users from the Basic Configurations tab, admins can further customize the authentication process by configuring additional settings.
- To access these options, click on the settings icon next to the Mobile Authenticator method in the Basic Configurations tab:
- Label: Customize the label for the Authenticator app by entering a specific name in the provided text box.
- Show Supported Mobile App Popup: Enabling this option will display a popup to users during online registration, highlighting the supported mobile apps.
- Common Passcode: To streamline the user experience, you can allow users to use the same OTP across all Atlassian applications. This is done by using the secret key from an existing account in the Mobile Authenticator app during the first registration.
Users :
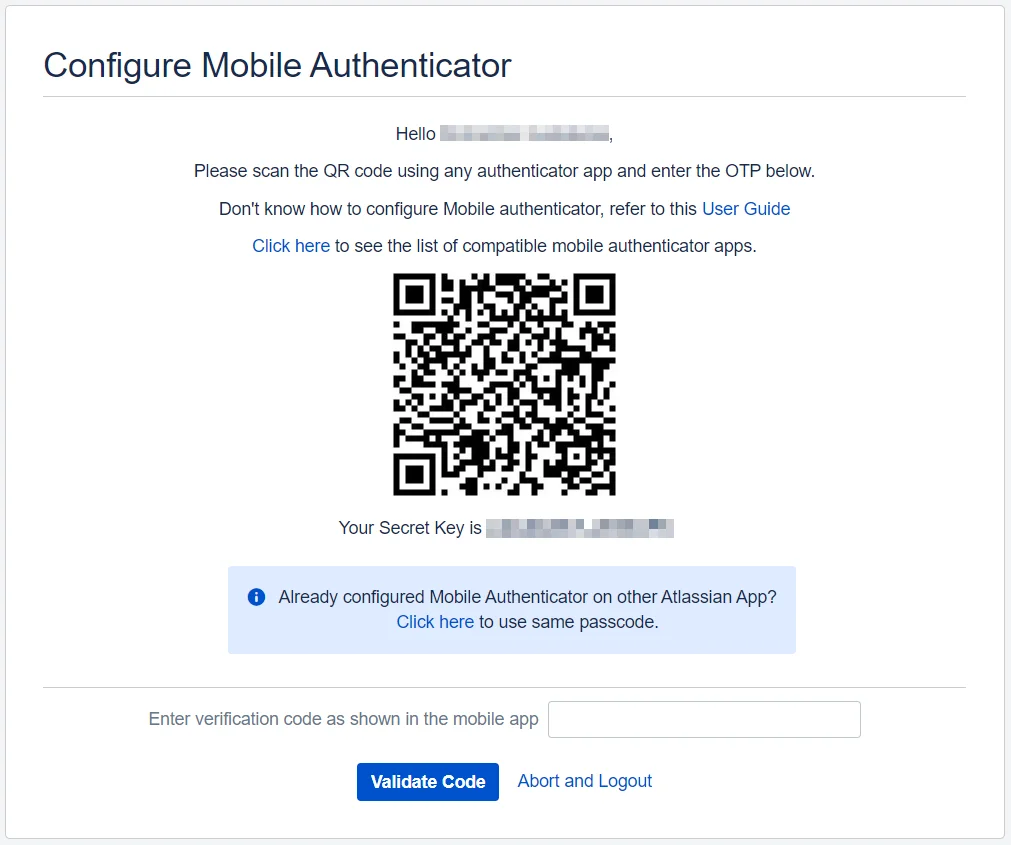
The miniOrange 2FA app provides users with a list of eligible authenticator apps.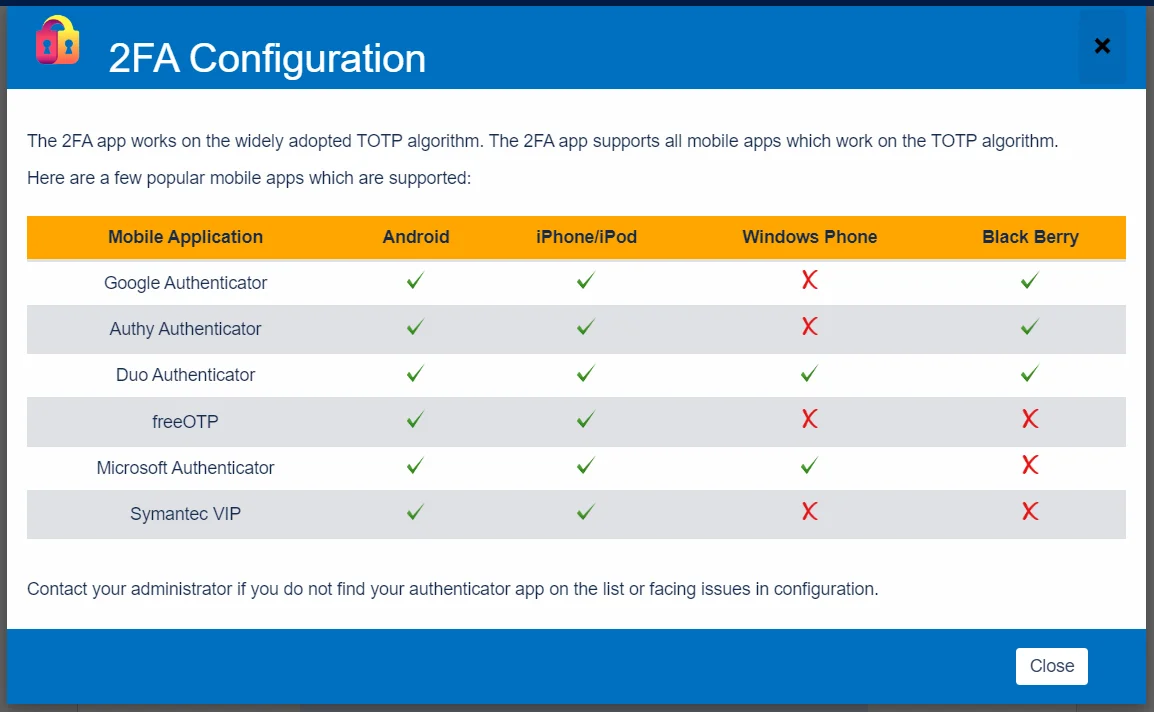
- Choose an authenticator app from the provided list and install it on your phone through the official App Store.
- After installing the app, close the popup and either scan the QR code or manually enter the secret key to link the app with your application account.
- From then on, each time you log in, you'll need to enter the 6-digit code generated by the app for verification.
3: How to Configure Yubikey Hardware Token
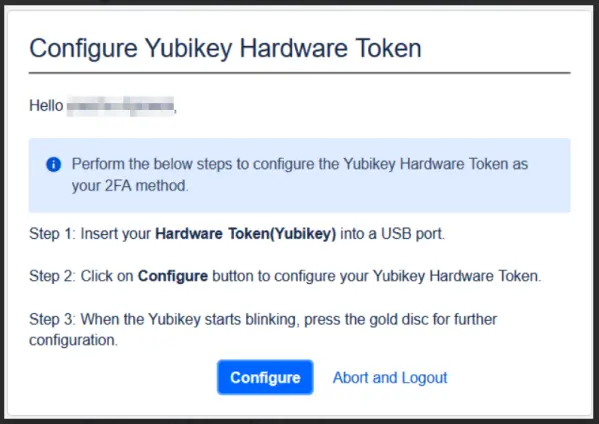
- YubiKey is a hardware-based 2FA device that streamlines identity verification. Unlike software-based methods, YubiKey requires a physical touch on the device to generate a unique code for login authentication.
- To set up YubiKey as a 2FA method, be sure to configure SSL on your Jira instance. After that, follow the steps provided in the setup wizard to complete the configuration.
4: How to Configure Security Questions
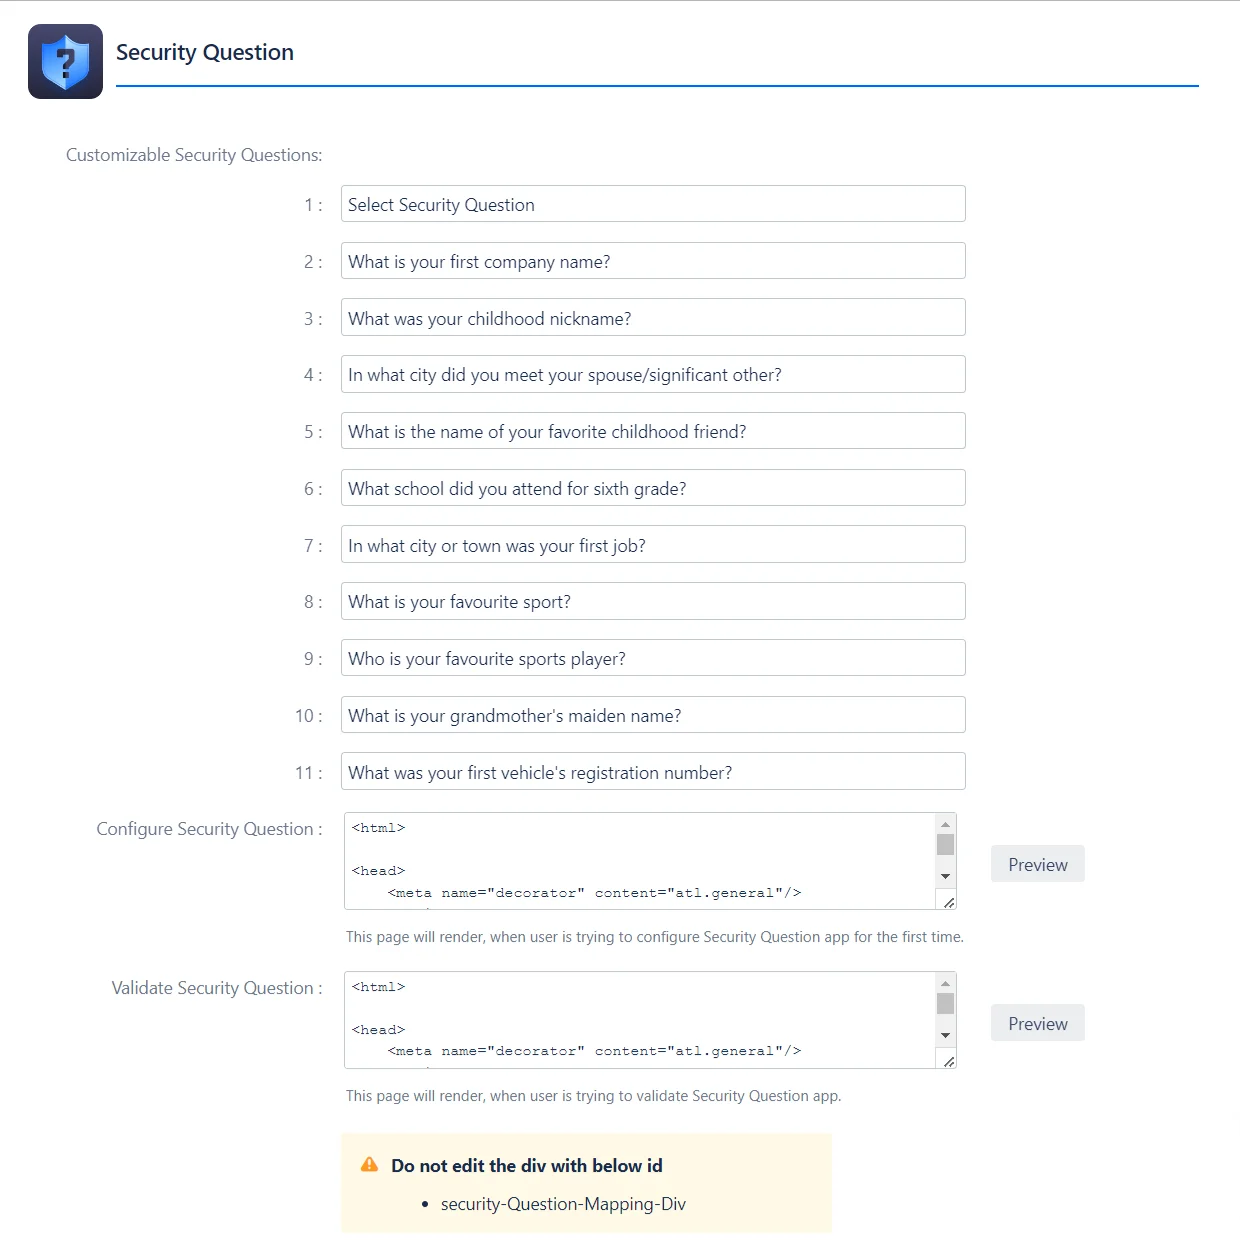
- Admins can use the Security Questions settings to customize the list of security questions that users can use to perform 2FA.
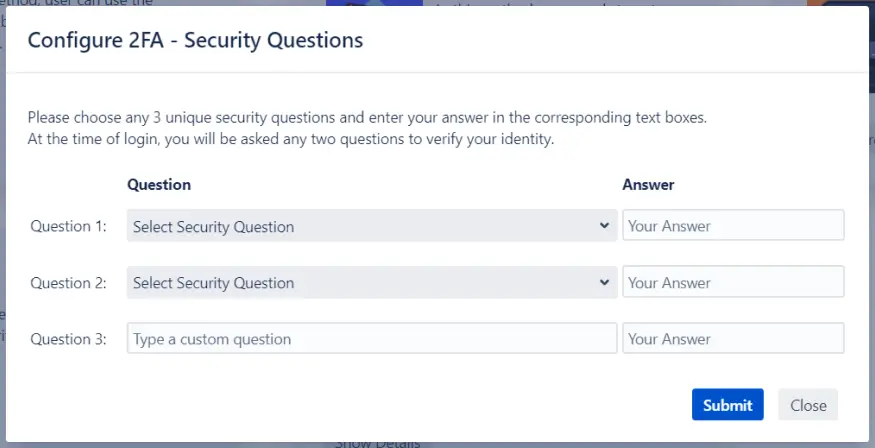
- In this method, users will see the screen to set up three Security Questions that would help confirm their identity during 2FA.
Security questions involve users setting up answers to personal questions that only they know. When they log in, they'll need to answer one of these questions to verify their identity, providing an extra layer of security.
Admins:
Users :
5: How to Configure OTP Over Email
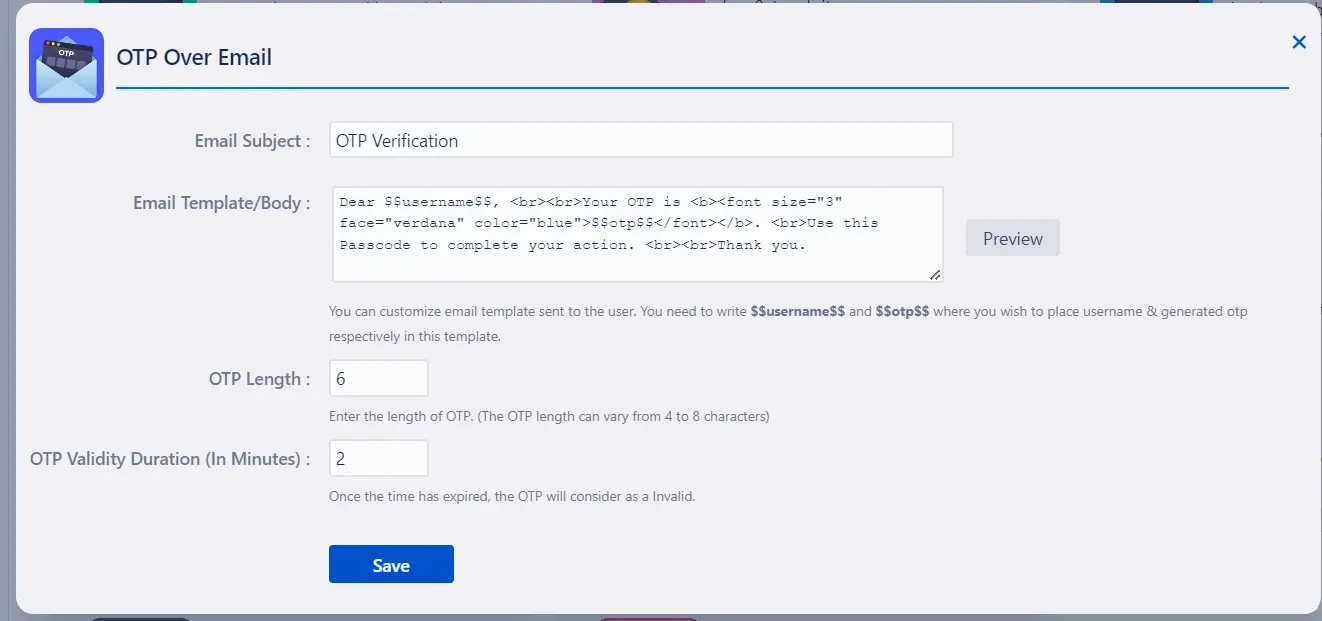
- To configure the OTP over Email method, click the settings icon next to the method in the Basic Configurations tab. You can customize the email template used for sending OTPs, including adjusting the OTP length and expiry duration.
- Additionally, you have the option to set up a custom mail server for sending OTPs to users. If a custom server is not configured, the 2FA app will default to using Jira's mail server for this purpose.
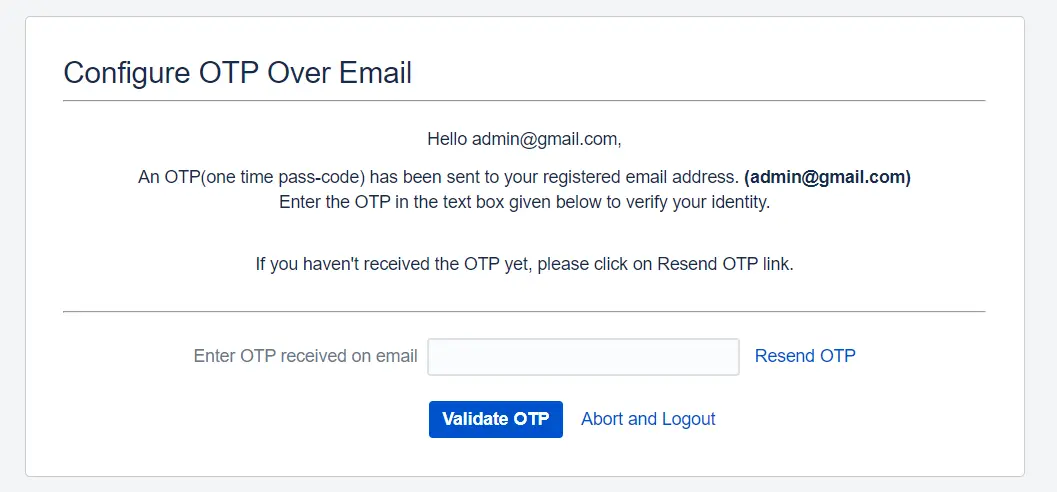
- You just need to enter the OTP sent to your email into Jira to verify your identity, ensuring secure access.
OTP (One-Time Password) over email involves you receiving a unique code on your registered email address each time you log in.
Admins :
Users :
6: How to Configure OTP Over SMS
- Before you can enable this authentication method for your users, you need to configure an SMS gateway to send the OTPs required for verification.
- Here are detailed steps to configure SMS gateways for the OTP Over SMS method:
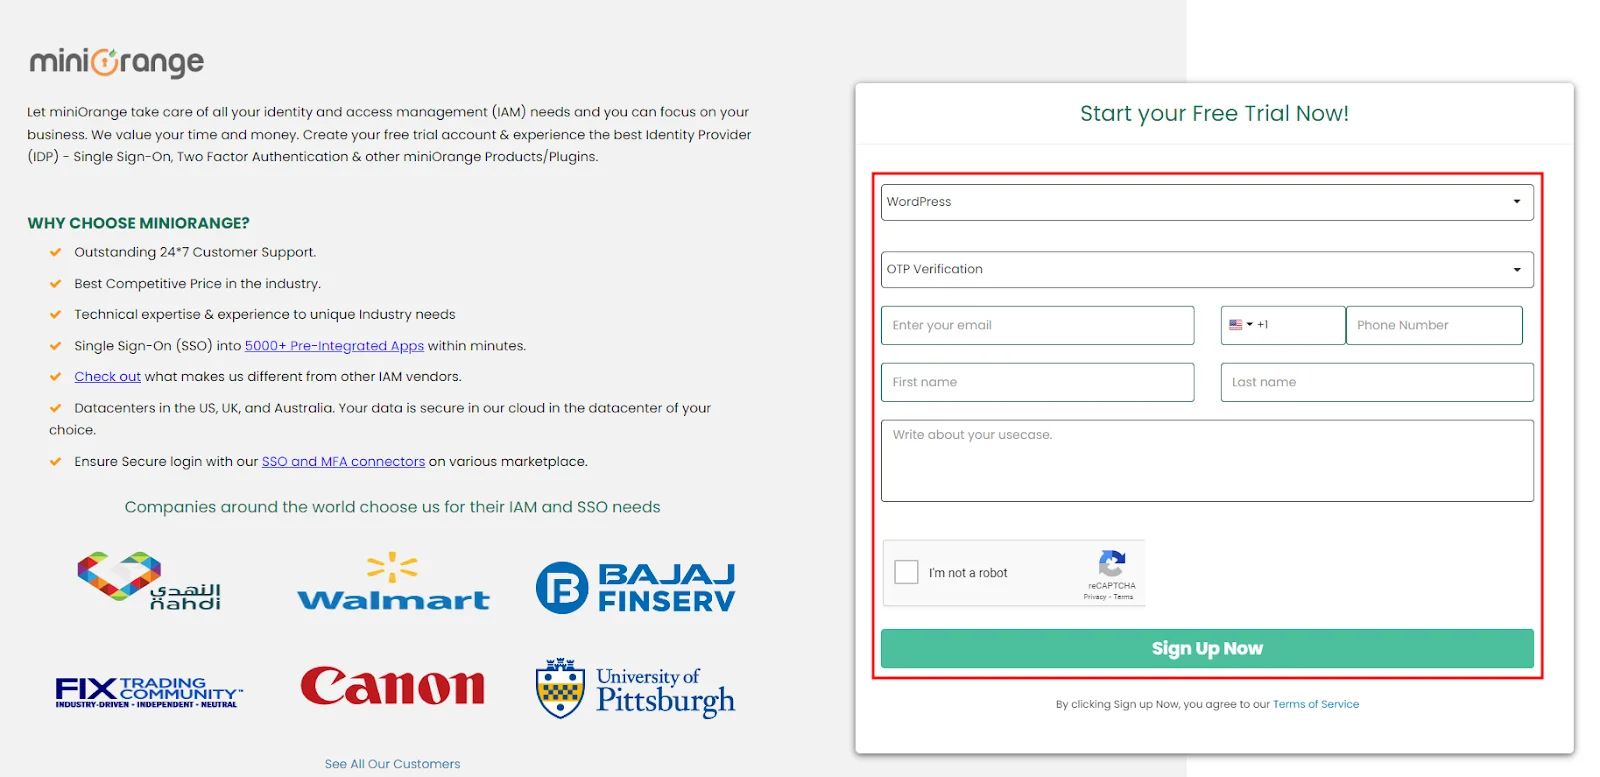
- Visit miniOrange Business.
- Select WordPress from the Select Area of Interest dropdown and choose OTP Verification from the Product Category dropdown.
- Describe your use case and enter your details to create a demo account.
- Go to miniOrange Login and log in with the credentials received after signup.
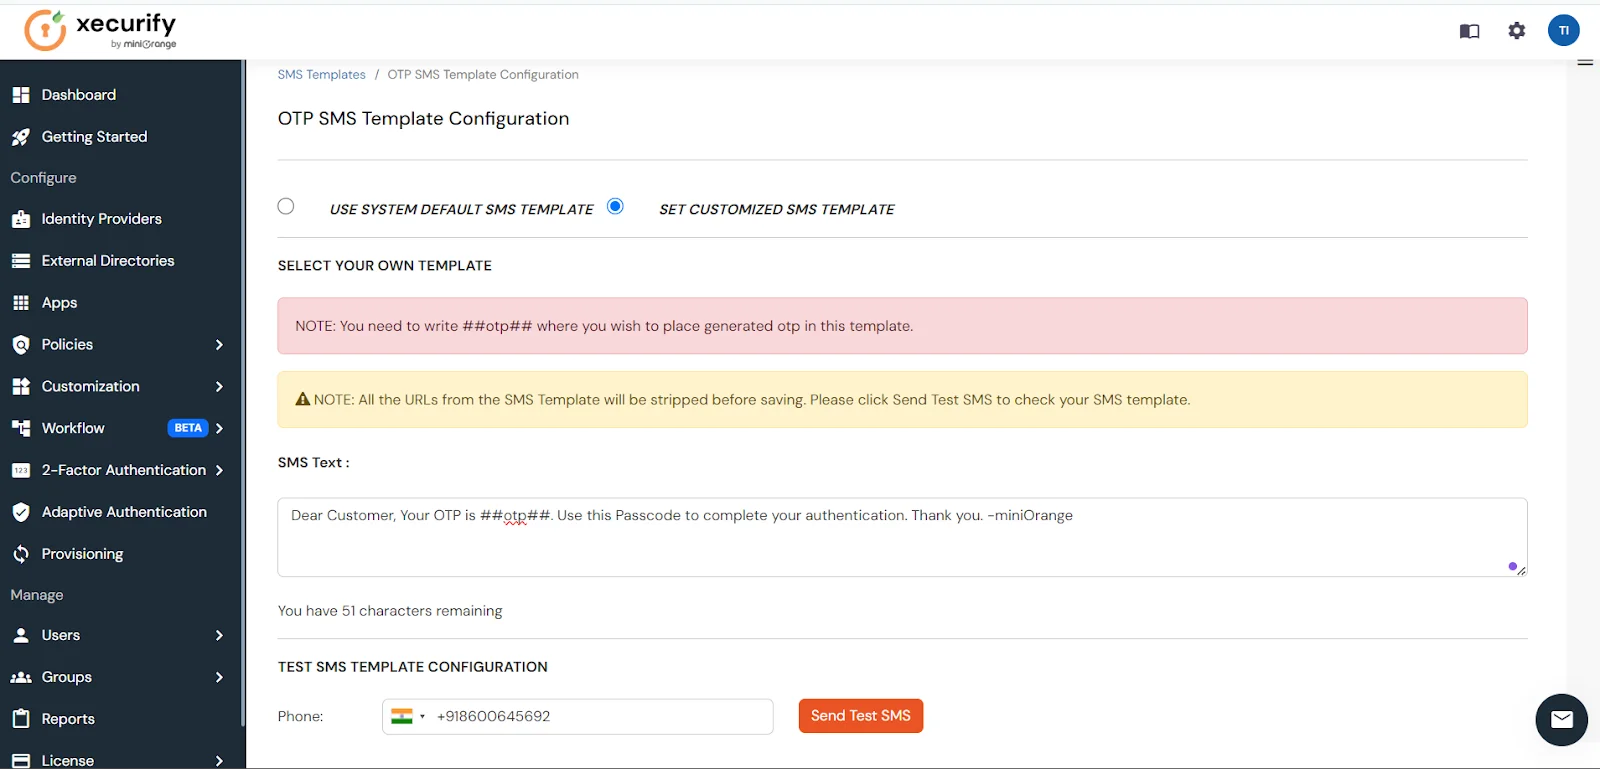
- Visit this link to update the SMS message template content with the following message:
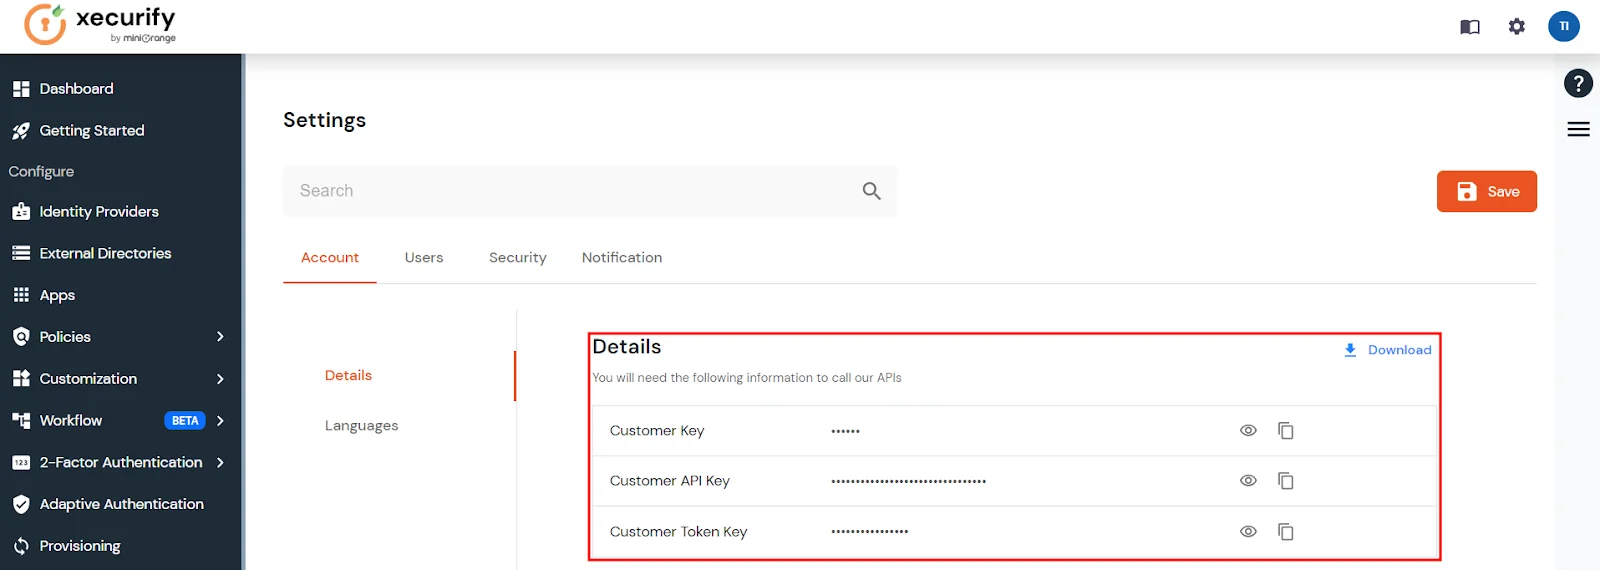
- Click the settings icon in the top right corner and note the Customer Key and Customer API Key for configuring the miniOrange gateway.
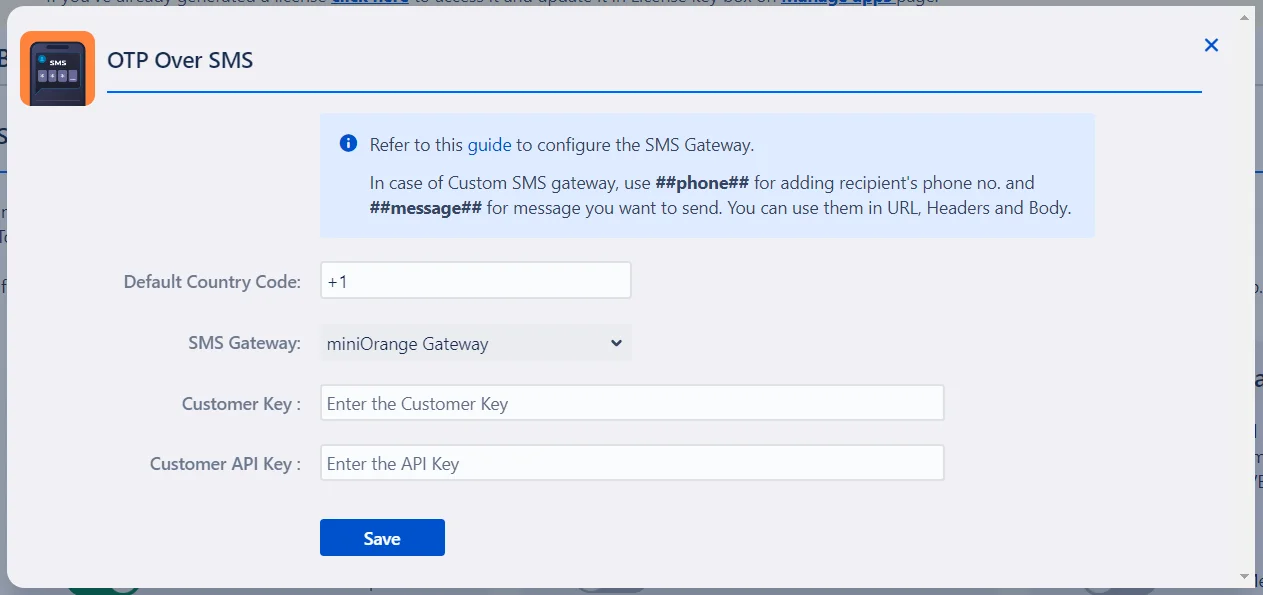
- In the Basic Configurations tab, click on the settings icon for OTP Over SMS.
- Next, choose miniOrange Gateway from the dropdown menu, input the Country Code, Customer Key, and API Key, and then save the settings.
- You’ll receive 10 free SMS with your signup. Use these for testing. Track your SMS transactions here.
- For additional SMS, purchase more here.
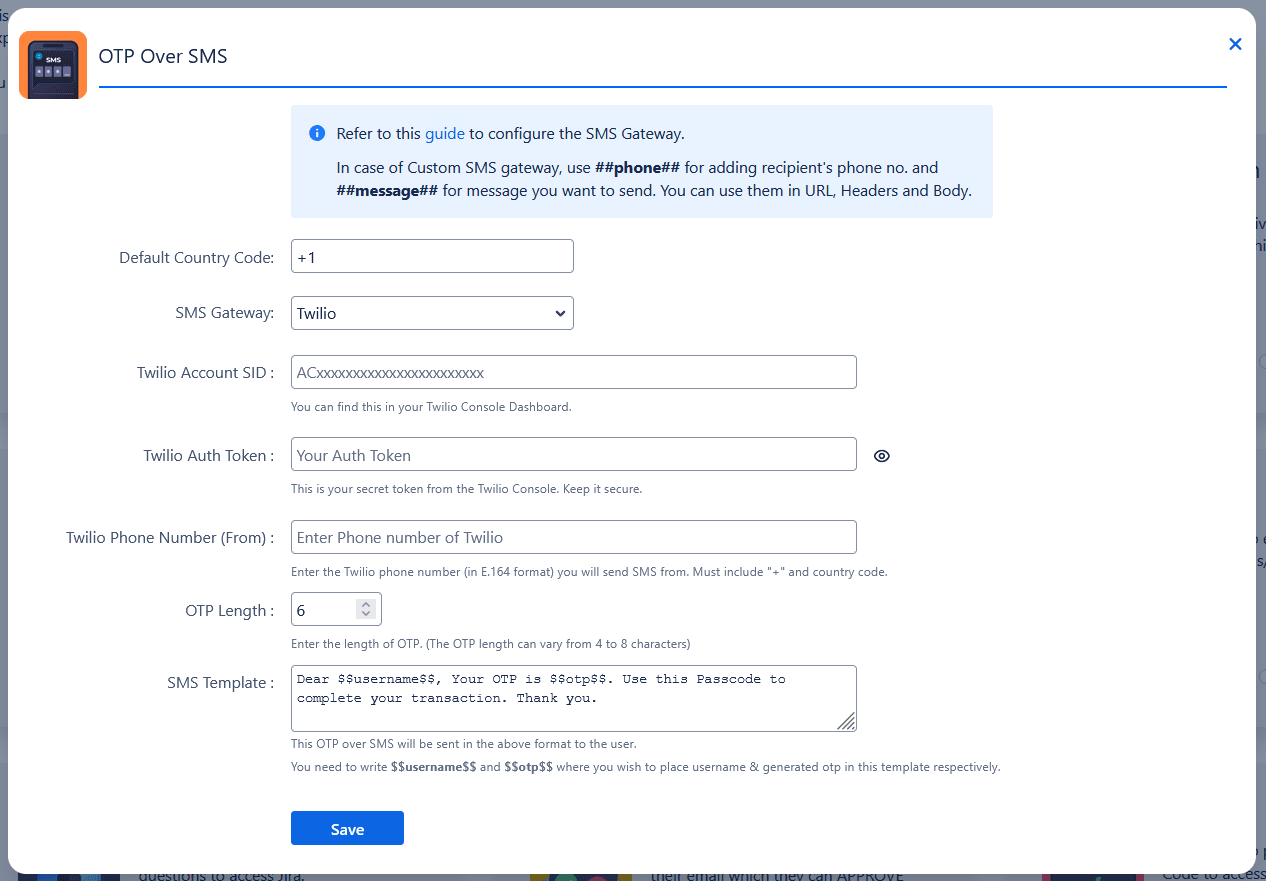
- Enter your Twilio Account SID. You can find this in the Twilio Console Dashboard.
- Enter your Auth Token from the Twilio Console. Keep this token confidential and secure.
- Enter the Twilio phone number (in E.164 format) from which SMS will be sent.
- Make sure to include the “+” sign and the country code (e.g., +1XXXXXXXXXX). You can find this number in your Twilio Console.
- Specify the length of the One-Time Password (OTP).
- Allowed values: 4 to 8 digits.
- Customize the SMS template to include placeholders like $$username$$ and $$otp$$ where needed.
- Enter the URL used to request the gateway and select the request type (GET/POST).
- Choose the authorization method (Basic Auth/Bearer Token/API Key Authorization) and enter the required credentials.
- Add any required information to the request header, including key-value pairs. Use placeholders like ##phone## for the recipient’s number and ##message## for the message content.
- Define the content of the request body based on your gateway’s requirements. Use placeholders such as ##phone## and ##message##, and select the appropriate content type (JSON/TEXT/XML).
- Customize the SMS template to include placeholders like $$username$$ and $$otp$$ where needed.
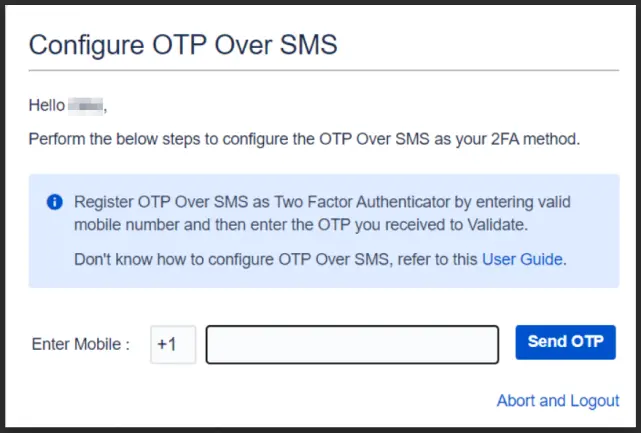
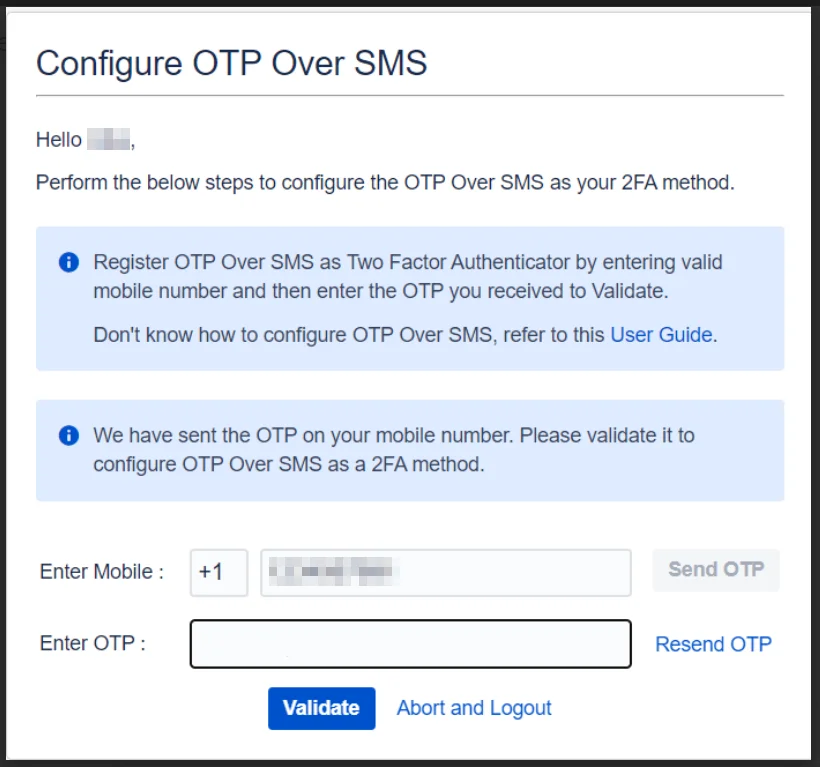
- When setting up the OTP over SMS 2FA method for the first time, you need to enter the appropriate country code and a valid phone number on the setup screen.
- The 2FA app will then send a verification code to the provided number, which you need to enter on the setup screen to complete the configuration.
Admins :
How to Configure miniOrange SMS Gateway:
Step 1: Sign Up for miniOrange IDP
Step 2: Log in to miniOrange
Step 3: Change the SMS Template
Step 4: Copy Customer Key and API Key
Step 5: Configure miniOrange Gateway
Step 6: Test the OTP Feature
How to Configure Twilio SMS Gateway:
Step 1: Twilio Account SID
Step 2: Twilio Auth Token
Step 3: Twilio Phone Number (From)
Step 4: OTP Length
Step 5: SMS Template
How to Configure Custom SMS Gateway:
Step 1: Gateway API URL and Request Type
Step 2: Authorization
Step 3: Header
Step 4: Body
Step 5: SMS Template
OTP (One-Time Password) over SMS method sends users a unique code to their registered mobile number each time they try to log in to application.
Users :
7: How to Configure Duo push notification
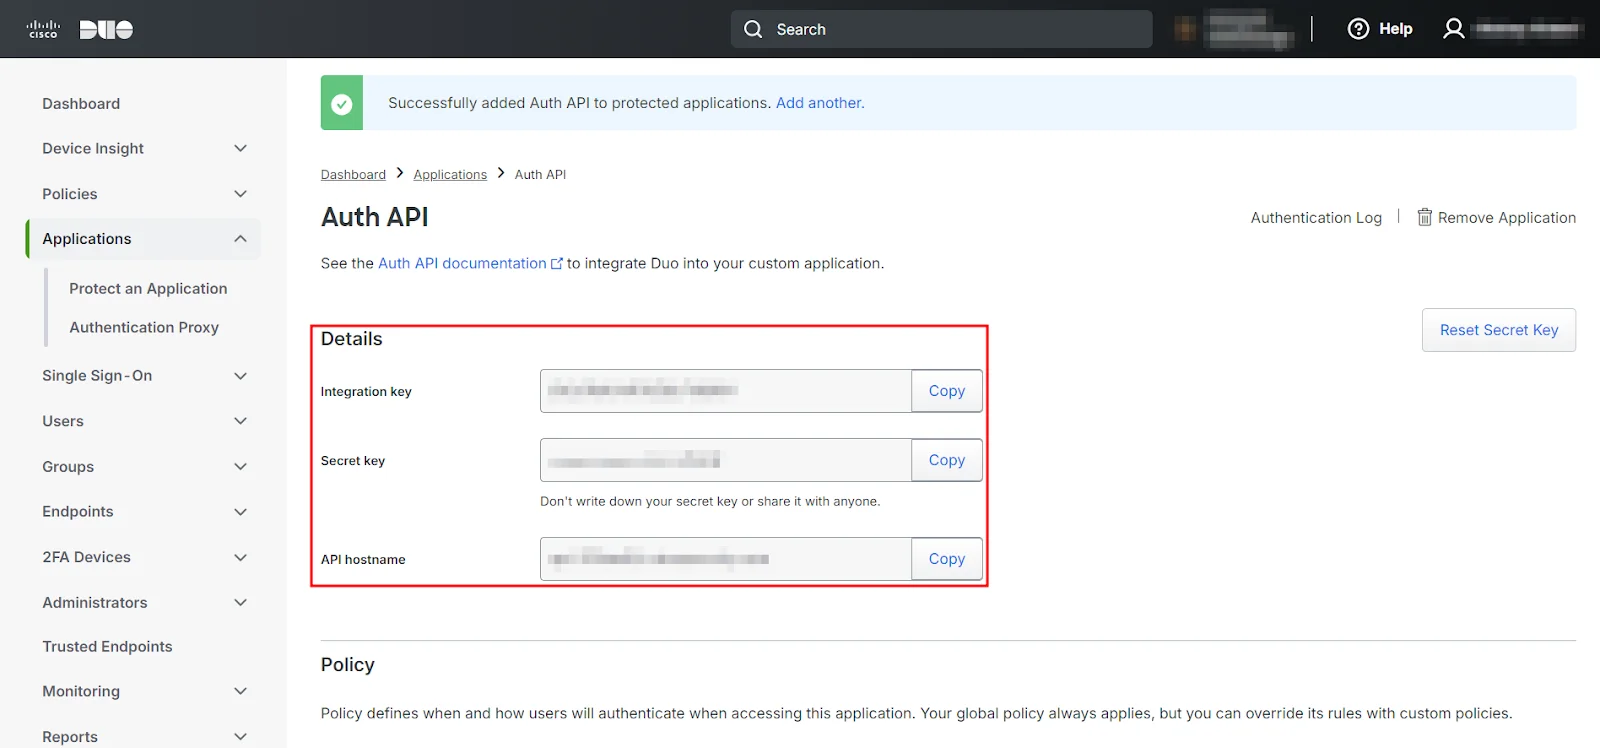
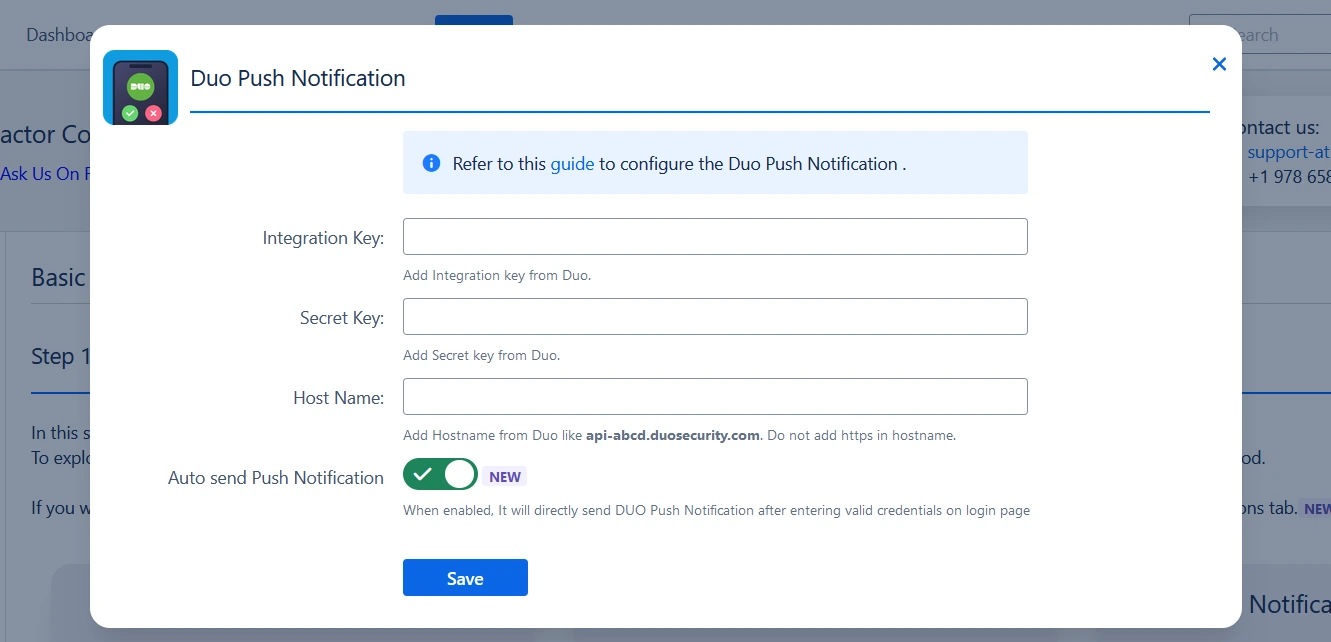
- To enable Duo Push Notification for all users Jira admins need to integrate Jira with Duo by creating an application in Duo and configuring the settings in Jira by copying the Integration Key, Secret Key, and API hostname from Duo and pasting them into Duo Push Notification Settings in the 2FA app in Jira.
- Users will have to register their devices and approve the authentication request to complete configuration. Let’s look at steps to configure this authentication method:
- Create a Duo account if you don’t have one yet.
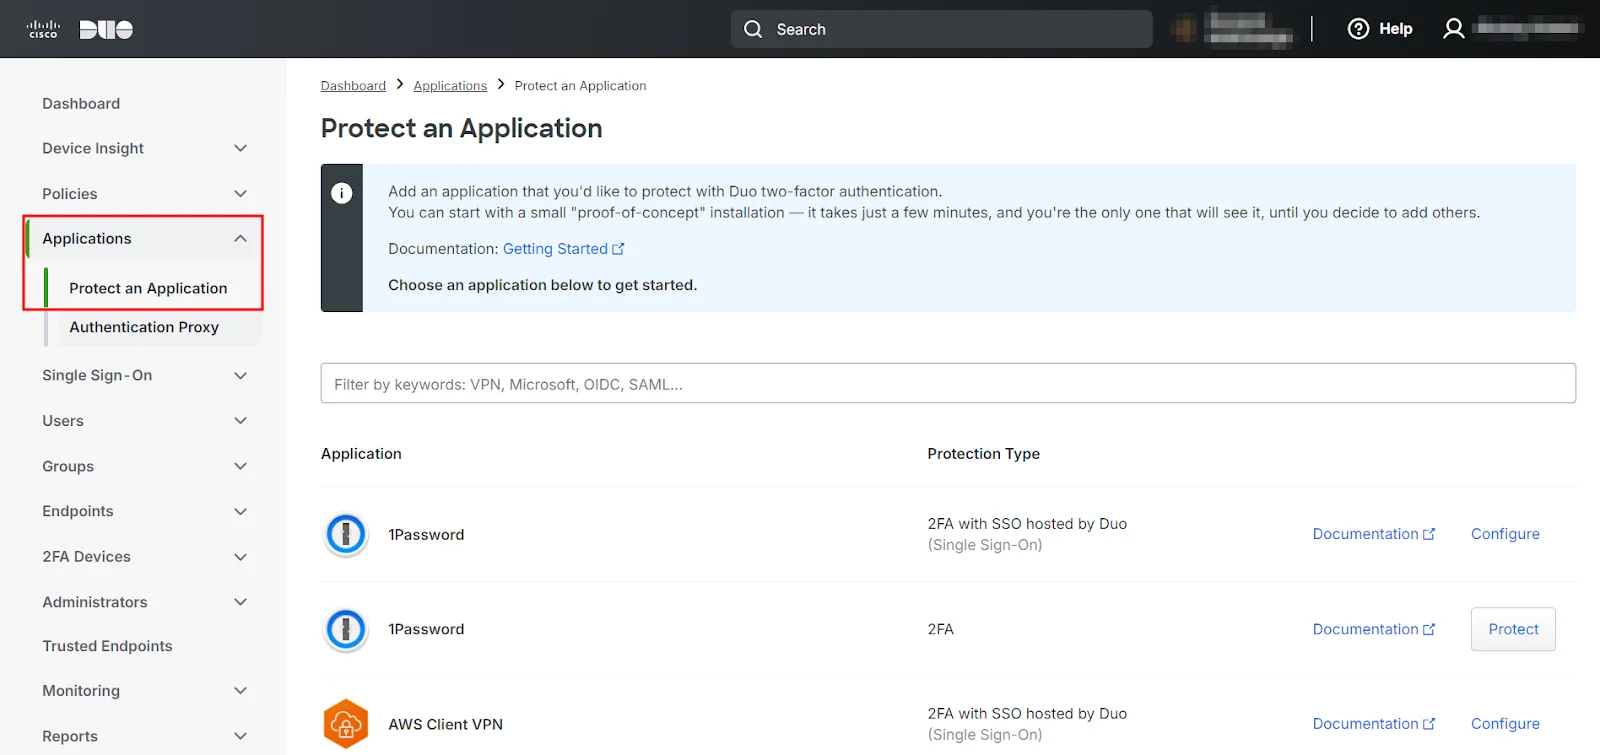
- Access the Duo Admin Panel and go to Applications and click on Protect an Application.
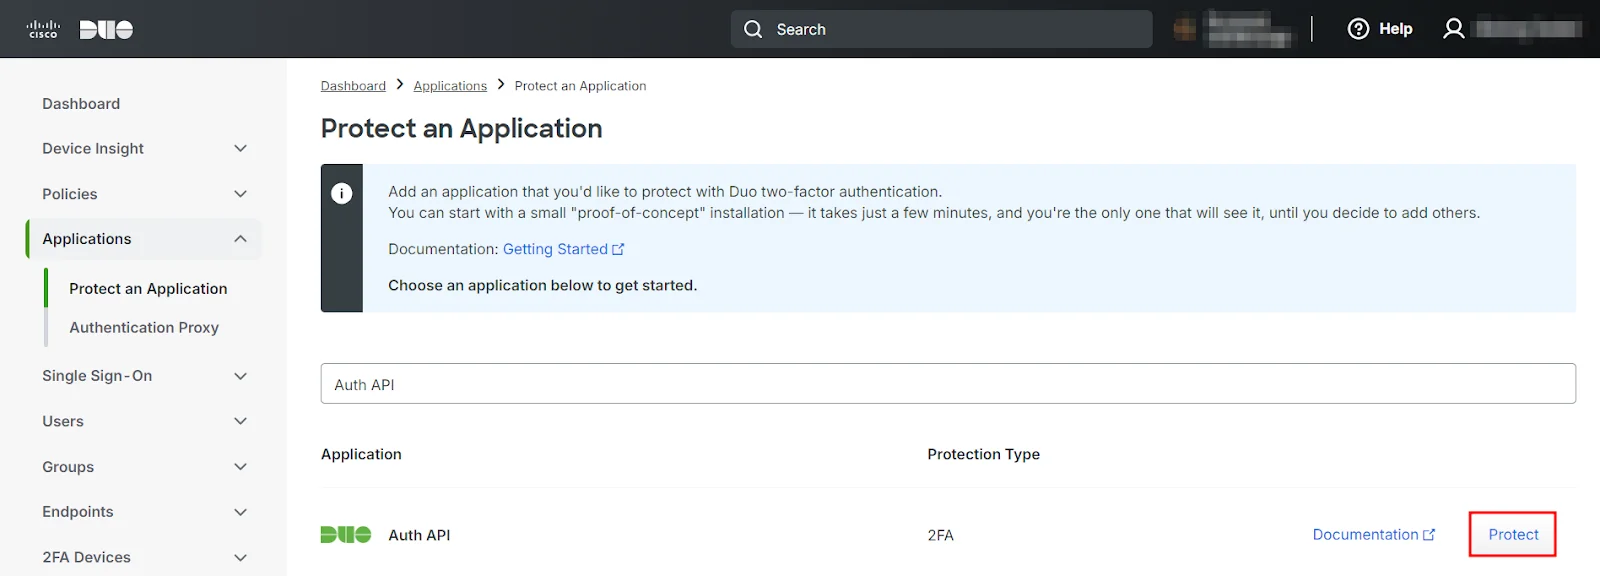
- Next, search for Auth API in the list and click on Protect on the far-right to configure the application.
- Note down your Integration Key, Secret Key, and API Hostname.
- Go to the Basic Configurations window and click the Settings icon on the Duo Push Notification card.
- Next, input the Integration Key, Secret Key, and API Hostname in the Duo Push Notification Settings section.
- Enable the toggle Auto send Push Notification and save the configuration. This feature enhances the user experience by eliminating the need for an additional step to send a DUO Push Notification. When enabled, users who have configured this method will directly receive push notification right after successful login without any extra action required.
- Go to the Two Factor Settings tab and select Duo Push Notification as a 2FA method for users.
- Optionally, you can enable a Backup Method for emergency logins in case users lose access to their devices.
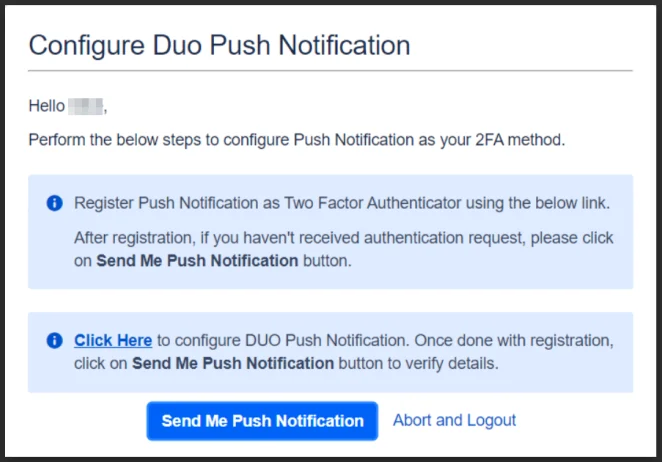
- Upon logging in with 2FA enabled, you will be directed to the Duo Push Notification setup screen. Click Next to proceed.
- On the next screen, you will receive instructions to configure Duo Push Notification. Complete the registration process and click Send Me Push Notification.
- Finally, click APPROVE on the push notification that’ll be sent to your registered device to continue.
The Duo Push Notification method streamlines identity verification by sending an approval request to users’ registered devices, allowing them to verify their identity with a simple tap.
Admins :
Step 1: Set Up Duo Account
Step 2:Integrate Duo Push with Atlassian Application
Step 3: Set Duo Push as 2FA Method
Users :
8: How to Configure Web Authentication
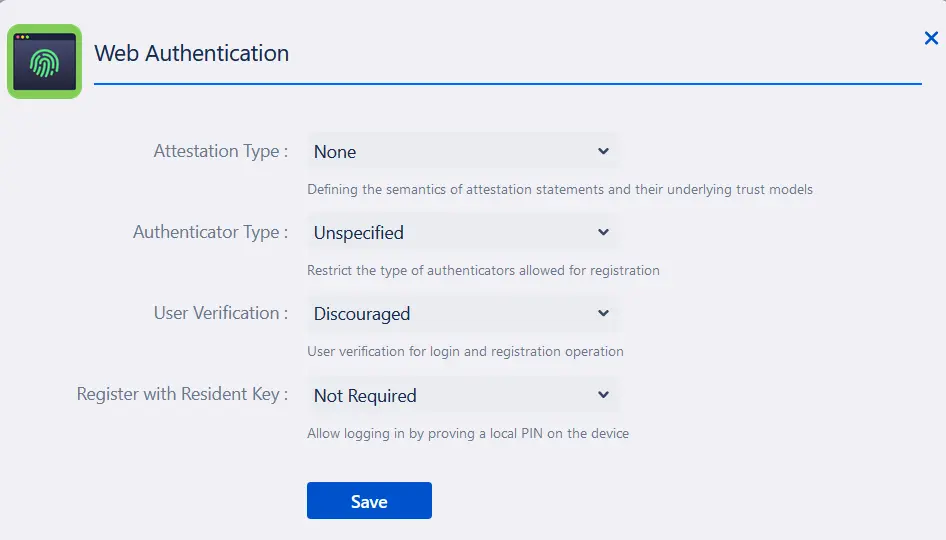
- Begin by making sure your Atlassian instance is set up with Secure Context (HTTPS). Once confirmed, you can customize the system authenticator settings by accessing the configuration options.
- From there, you can select the attestation type, specify the authenticator type, determine user verification requirements for login, and enable resident key registration for enhanced security.
- To set up system authenticators for 2FA, follow the step-by-step instructions provided in the pop-up window.
- This guide will help you register your device and configure the authenticator, ensuring a secure and smooth authentication process for future logins.
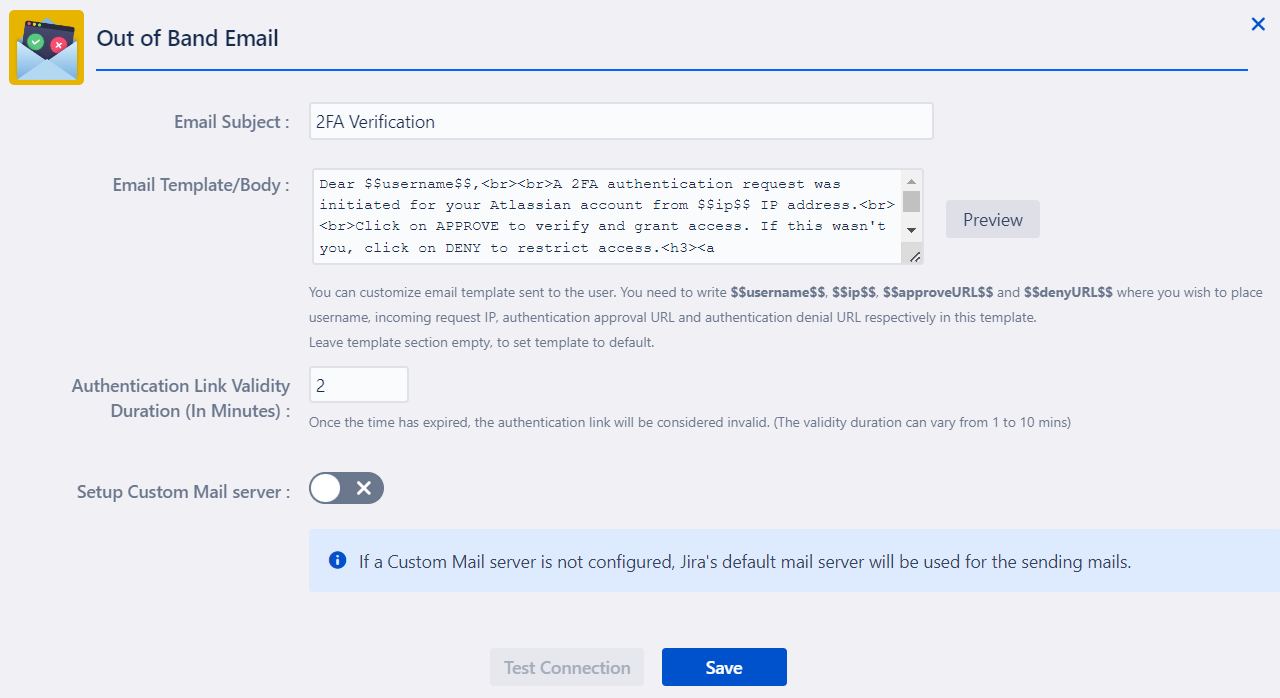
- To configure the Out of Band Email method, click the settings icon next to the method in the Basic Configurations tab.
- From here, you can customize the email template, including the subject line, to suit your needs. Additionally, you can specify the validity duration of the authentication link that will be sent to users in the email.
- You also have the option to set up a custom mail server for sending these authentication links. If you do not configure a custom server, the 2FA app will automatically use the default mail server of your Atlassian application.
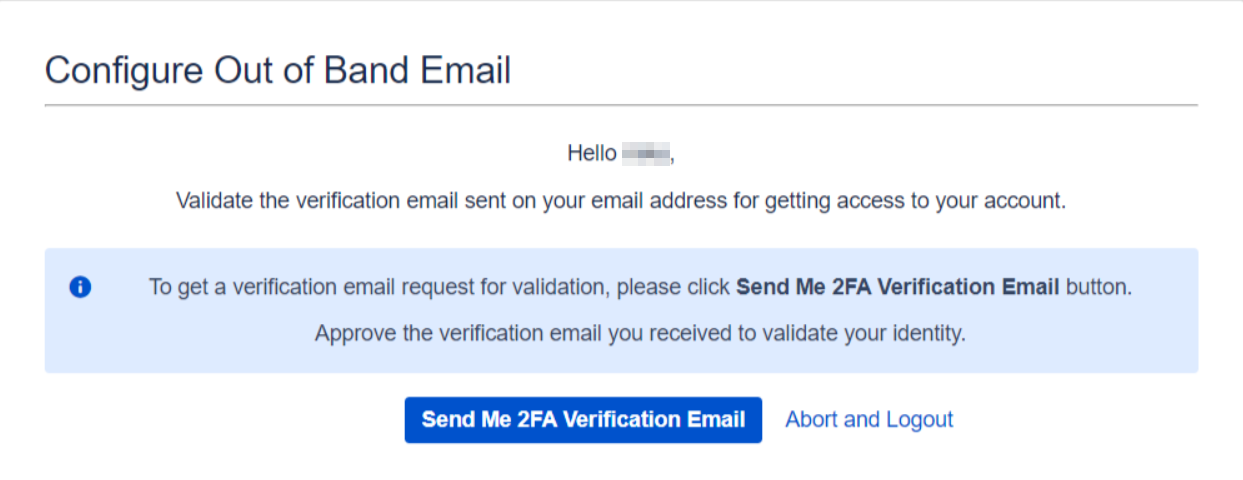
- Since the email addresses are already configured by admins during the setup process, end users simply need to click the Send Me 2FA Verification Email button to receive the authentication link on their email and complete the 2FA process.
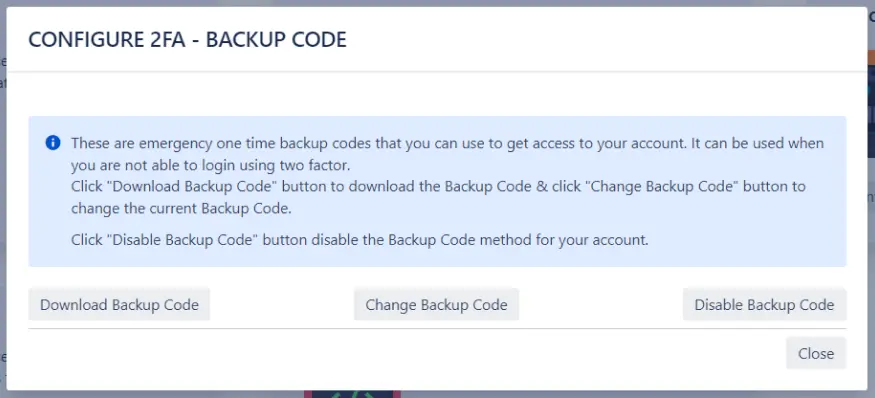
- Backup codes are single-use codes generated during the 2FA setup process. They serve as a fallback option for logging in if your primary 2FA method is unavailable.
- Be sure to store these codes securely for emergency access. The setup screen will provide a list of these one-time passcodes for you to keep.
Web Authentication allows you to use your device's built-in security features, like Windows Hello PIN, Apple’s Touch ID, Face ID, or other biometric methods, to log in.
Admins :
Users :

9: How to Configure Out of Band Email
The Out of Band Email method sends a verification link directly to the user’s email address. To complete the authentication process, users simply need to click on the link to Accept or Deny the request.
This method provides an easy and secure way to verify user identity without needing an additional app or device.
Admin :
Users :
10: How to Configure Backup Codes
Did this page help you?
