Contents
Tempo Timesheets In Jira Cloud Pdf Exporter
Tempo Timesheets Integration in the Jira Cloud Tempo Timesheets In Jira Cloud PDF Exporter plugin enables you to generate comprehensive exports of timesheets, including customer-specific logged work (invoices). This feature empowers users to easily export and share detailed time-tracking data, facilitating streamlined billing and invoicing processes for enhanced customer management.
Prerequisites
- Tempo Timesheets Time tracking app must be installed on your cloud instance.
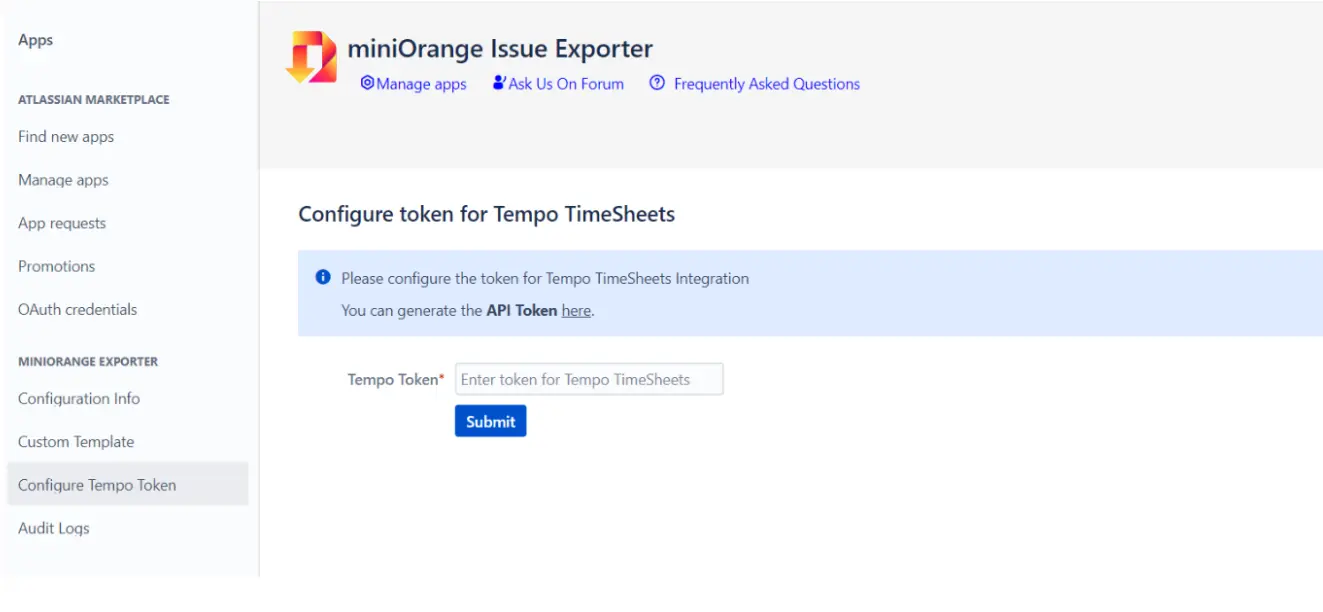
- Tempo token can be generated from the Tempo Timesheets Time tracking app. On token creation, save it inside the “Configure Tempo Token” tab of the Jira Cloud Tempo Timesheets In Jira Cloud PDF Exporter plugin.
- The Tempo Token creation path is as followed:-
1. Manage apps -> Apps->miniOrange Exporter -> Configure Tempo Token Tab.
2. Save the generated token
1: Features Provided
1.1: Timesheet Export
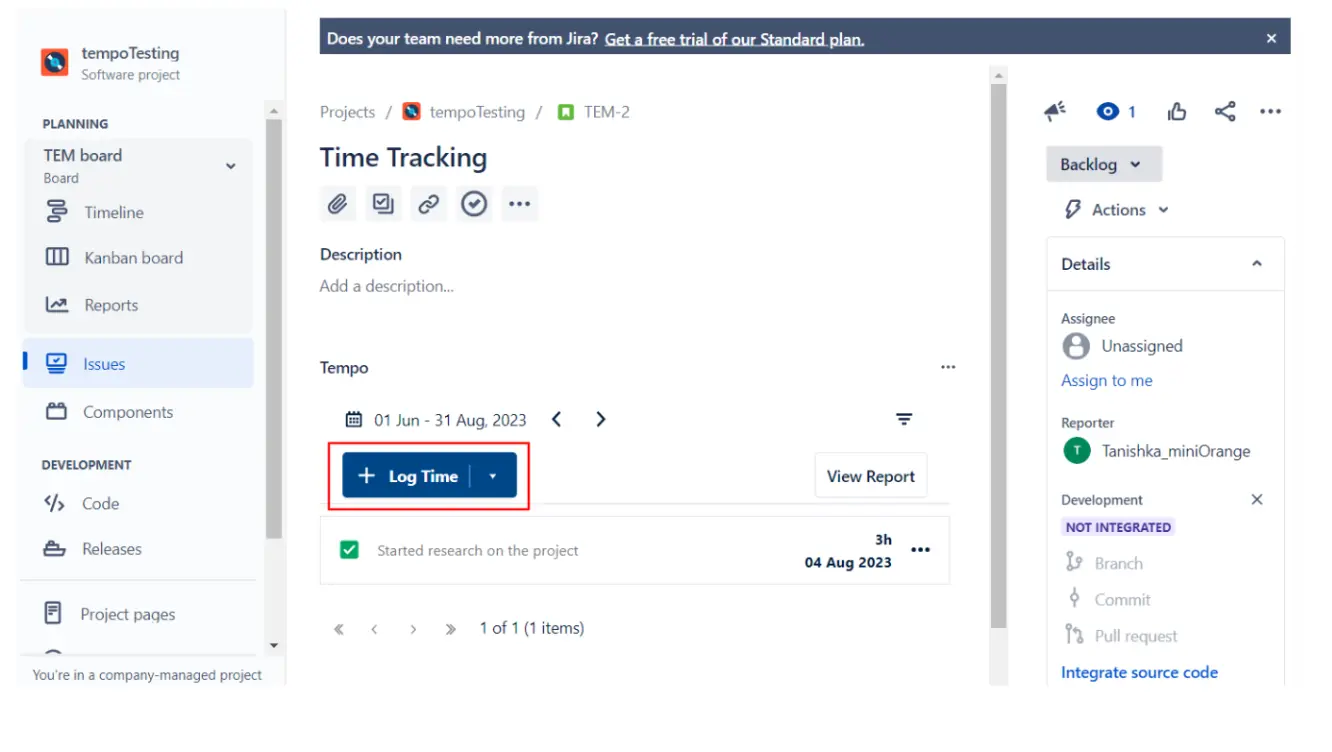
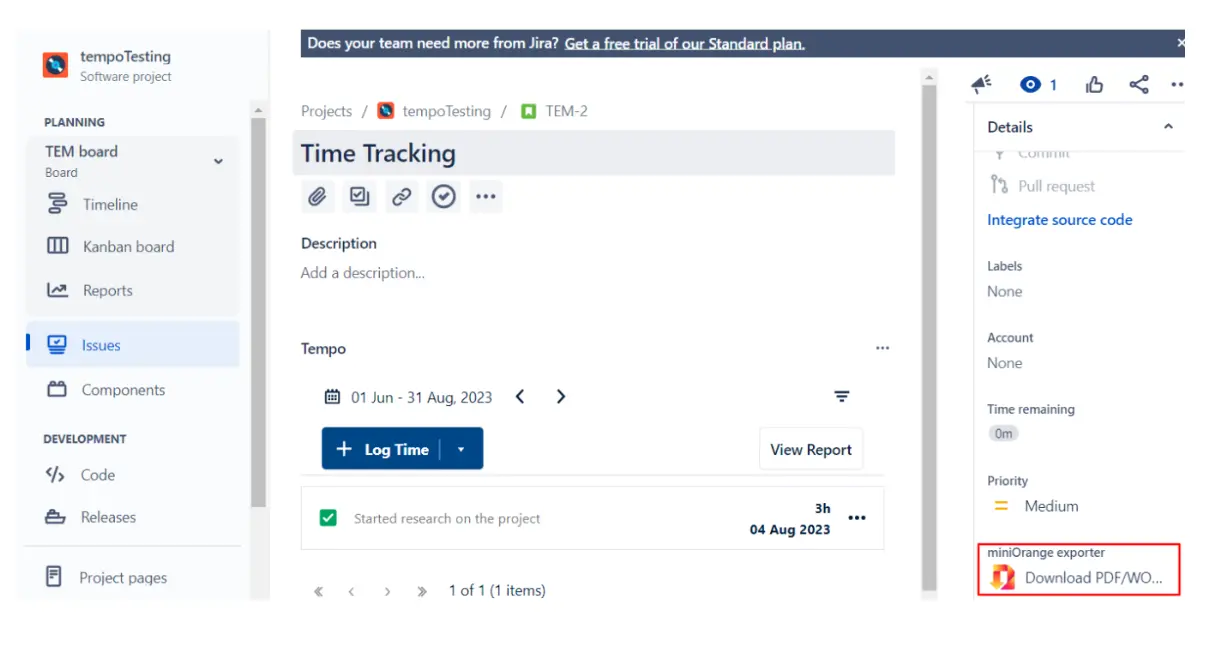
- Exporting your logged work in Jira issues has never been this simpler. With the plugin, you can export all your recorded work effortlessly with just one click.
- Steps:- Logged Time In Issues -> miniOrange Exporter -> Select Timesheet template -> Export


1.2: Generating Customer Invoices
- Tempo Time tracking app provides a practical solution for organizations dealing with customer-specific projects and tasks. It introduces Tempo Accounts, which are associated with each customer. By linking these accounts to relevant issues, the app miniOrange Tempo Timesheets In Jira Cloud PDF Exporter simplifies the process of generating invoices based on the performed activities, enabling easy extraction and export of all work logs related to that particular customer.
- Refer to the steps below for generating an Invoice:-
- Add an account field in your Jira issues. The account field can be added in two ways:-
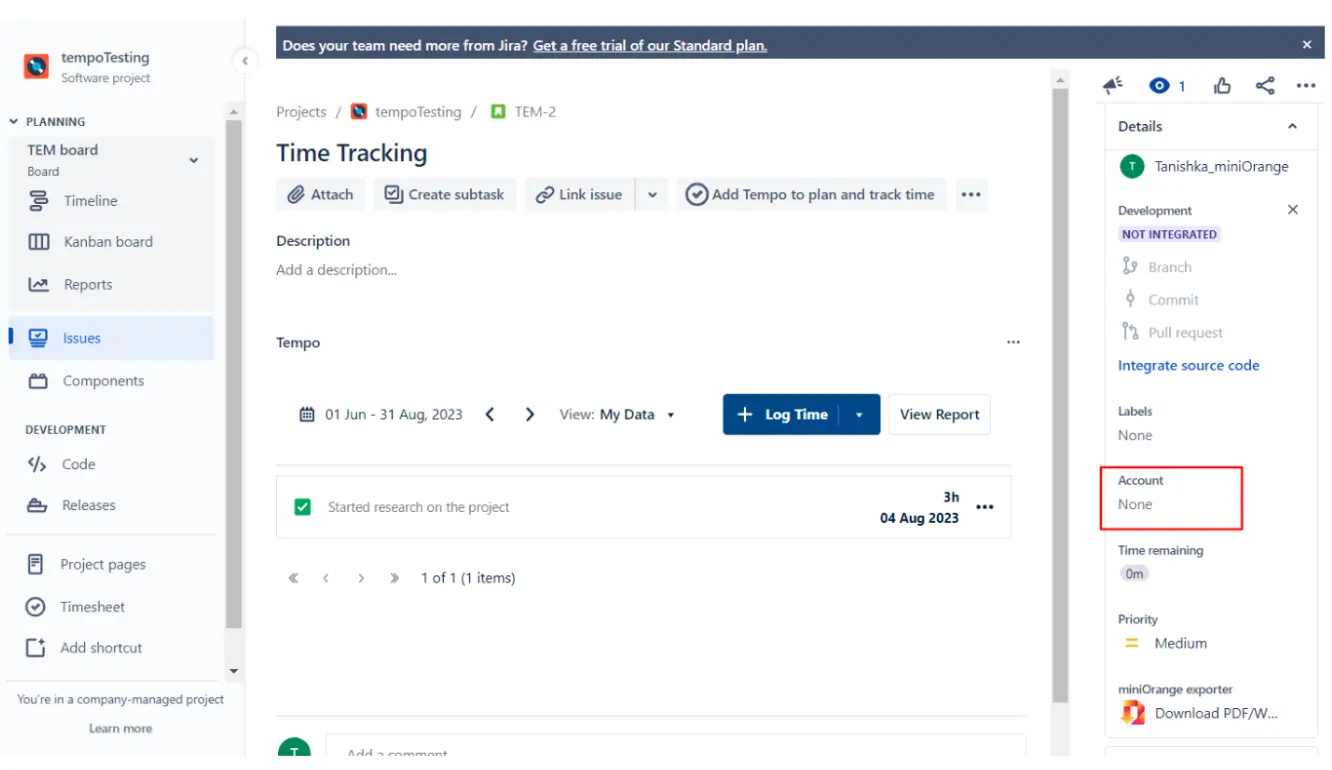
- The Tempo time tracking app offers a customizable feature inside the "Custom Field." Within this section, you have the option to set up a specific field named "Account," which can be associated with your projects, allowing it to become visible and accessible as needed.
- The steps for the custom field creation is:- Configure -> Go to Custom Fields Section -> Select Tempo Account Field - > Associate it to Screens.
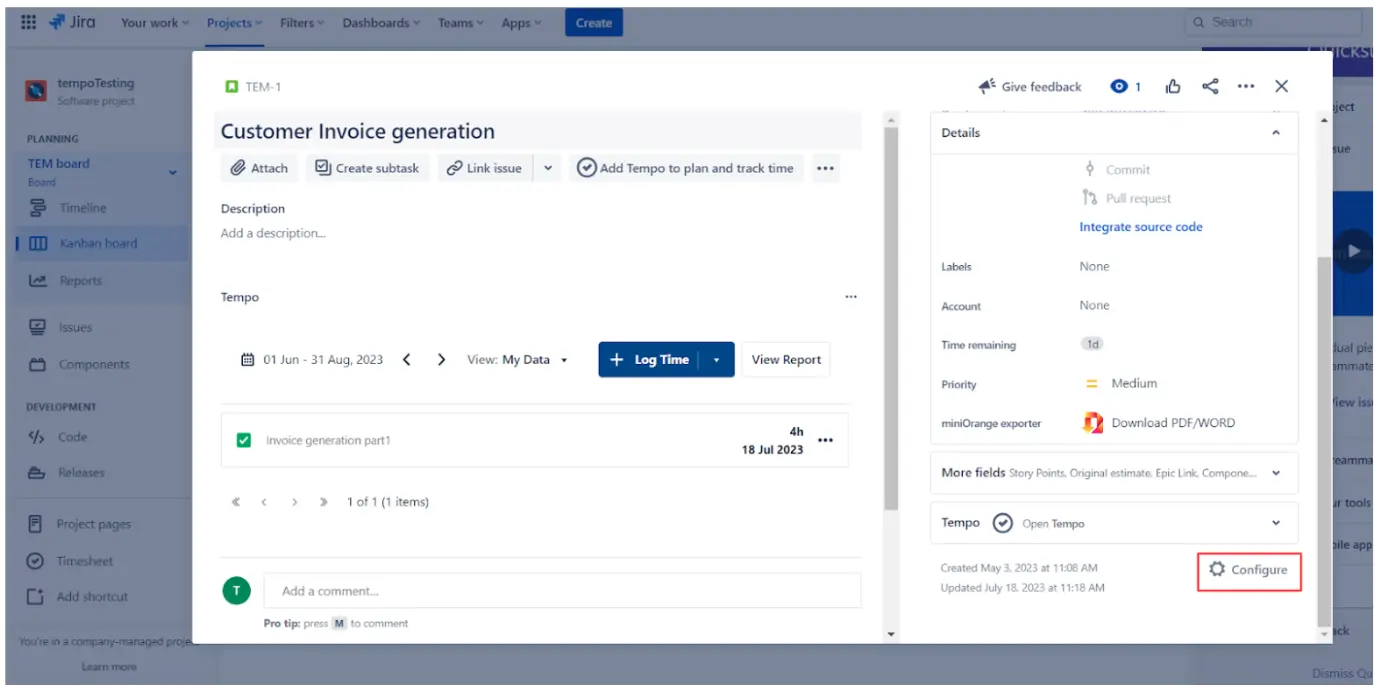
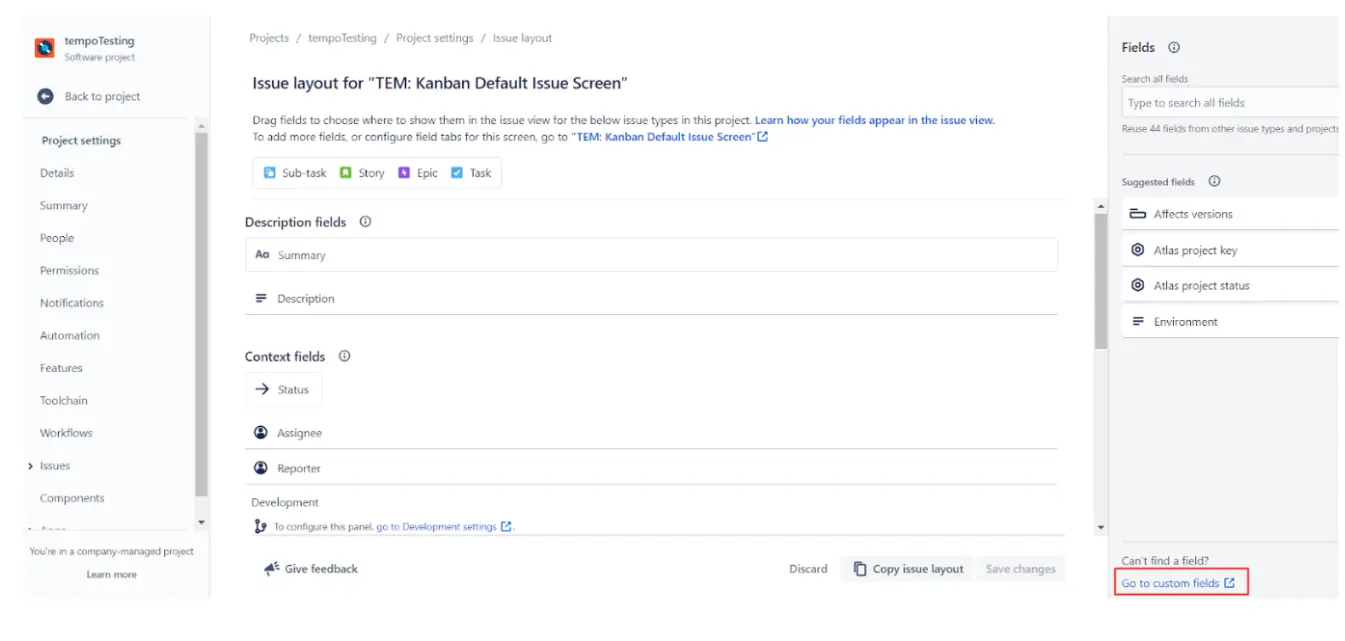
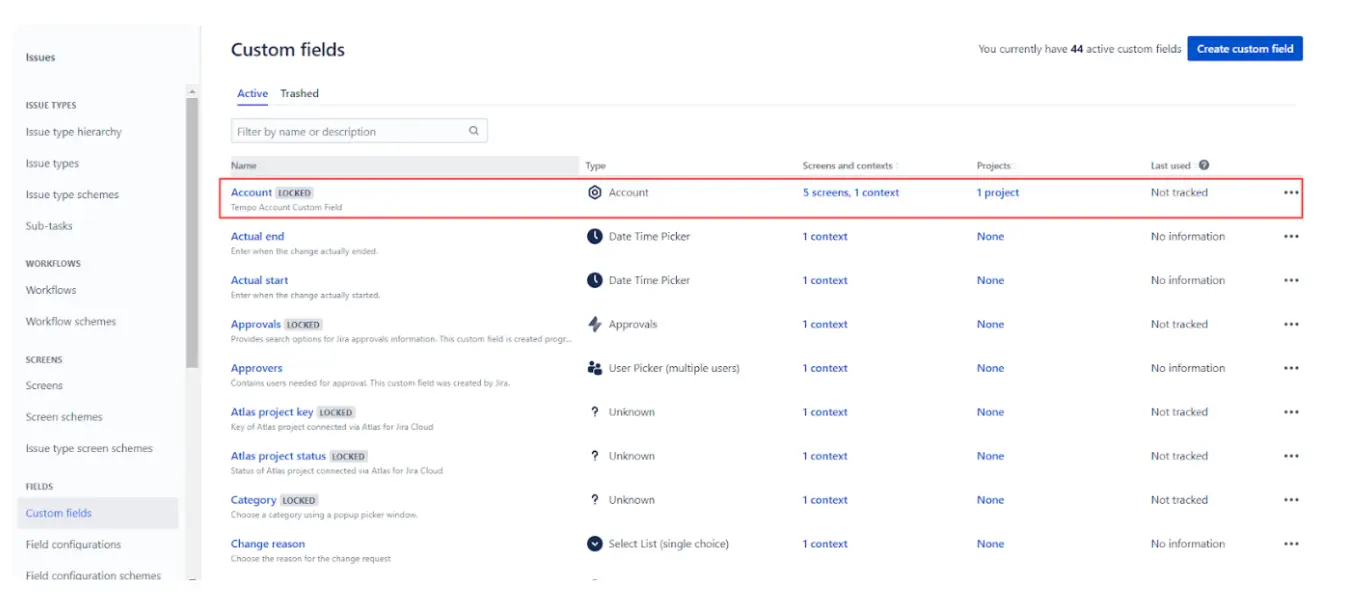
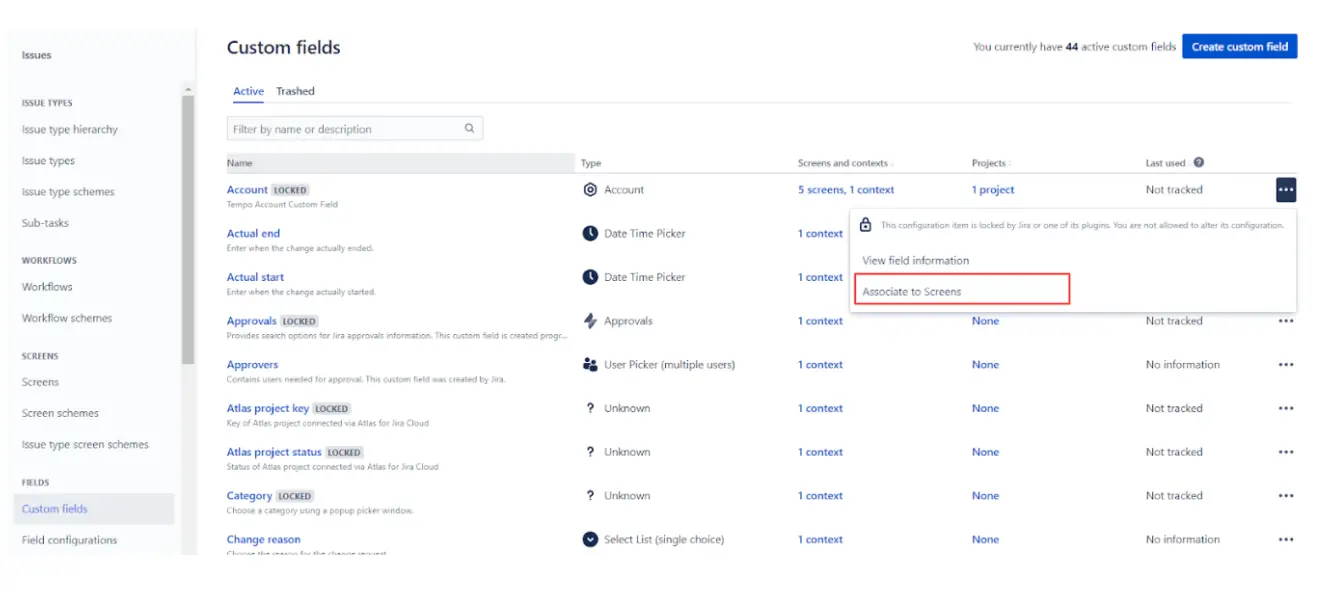
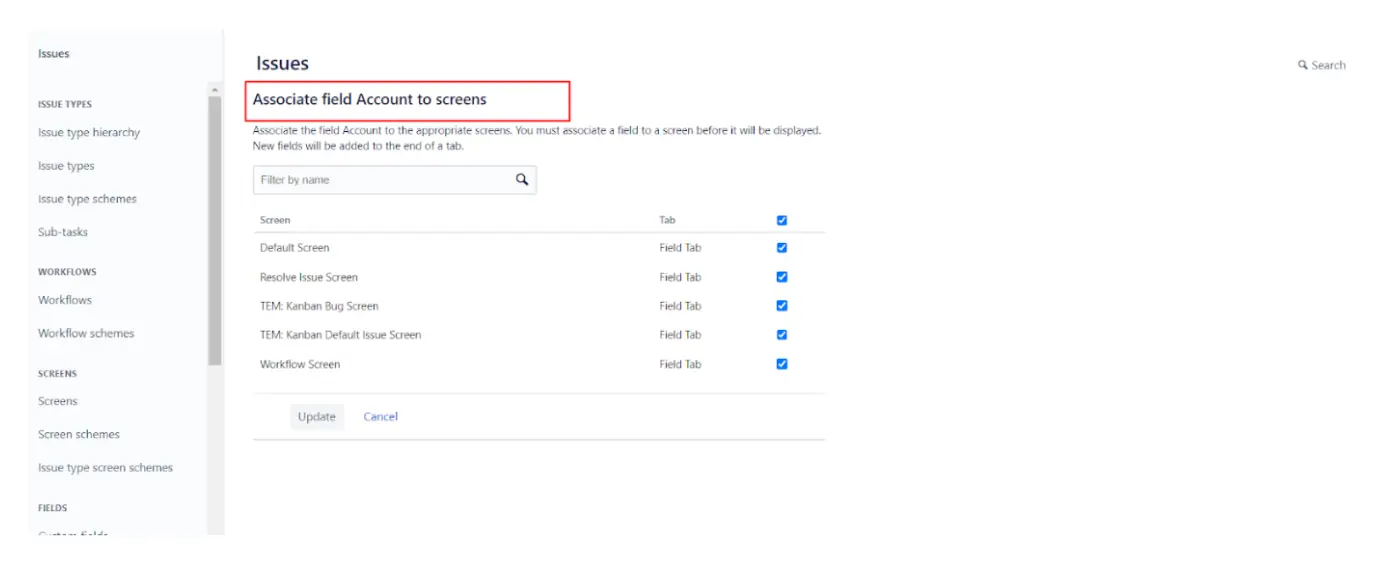
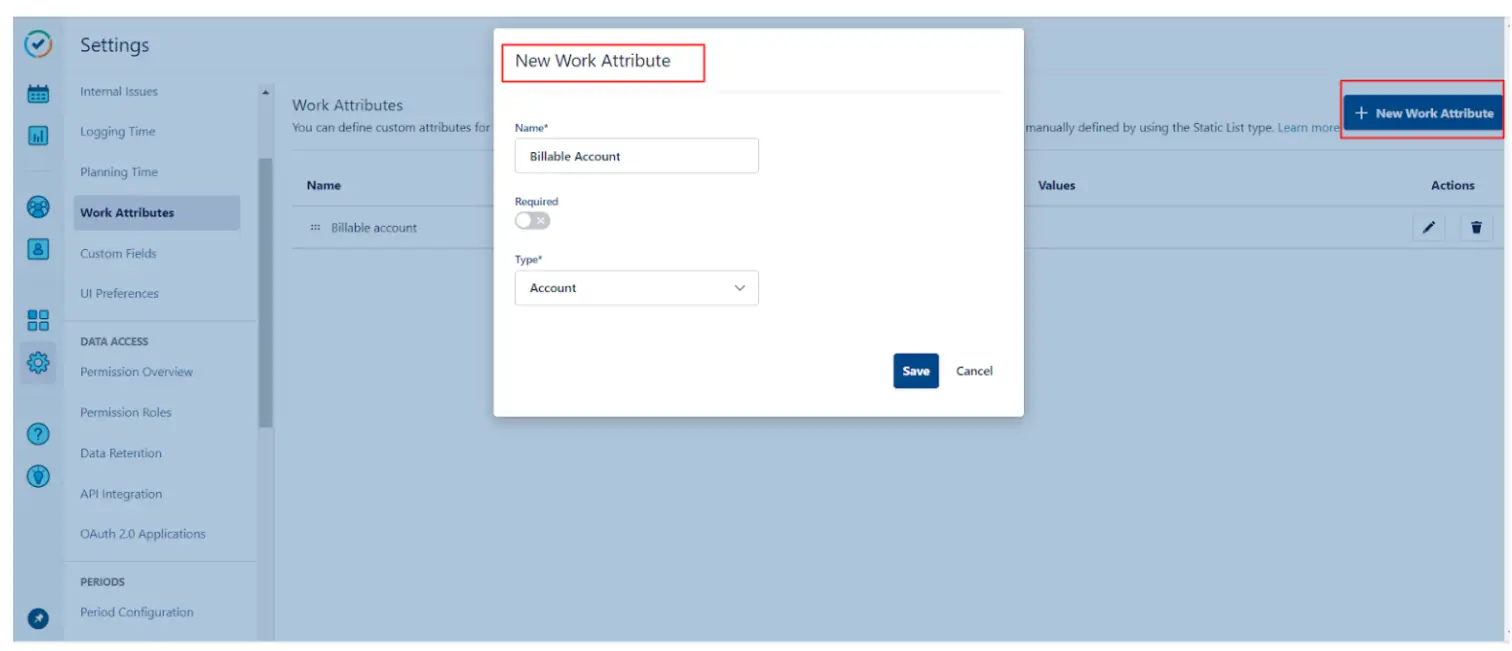
- Work attributes can be created inside the settings of the tempo app installed. By creating the work attribute, an Account field will be visible under the logged time section of Tempo.
- Tempo Time Tracking app settings -> Work Attributes -> New Work Attribute -> View your work Attribute Inside the Logged Time Section.

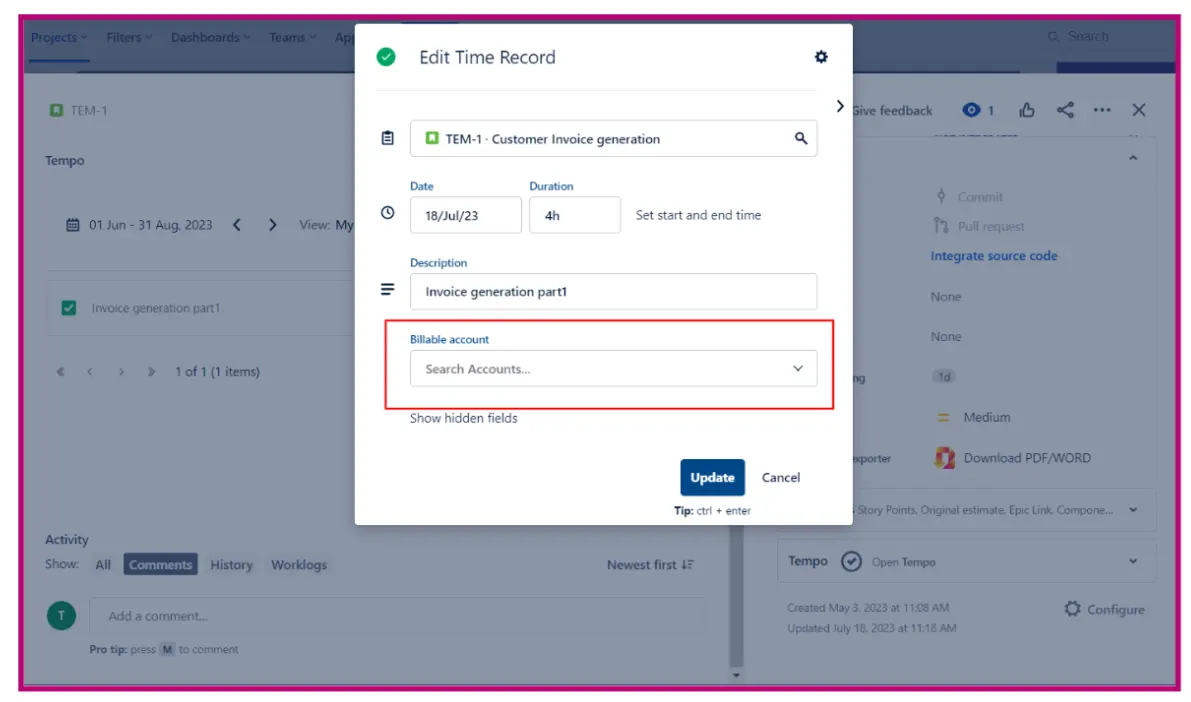
- Generate the tempo Accounts once the Account field is rendered either by the custom field or by the work attributes:-
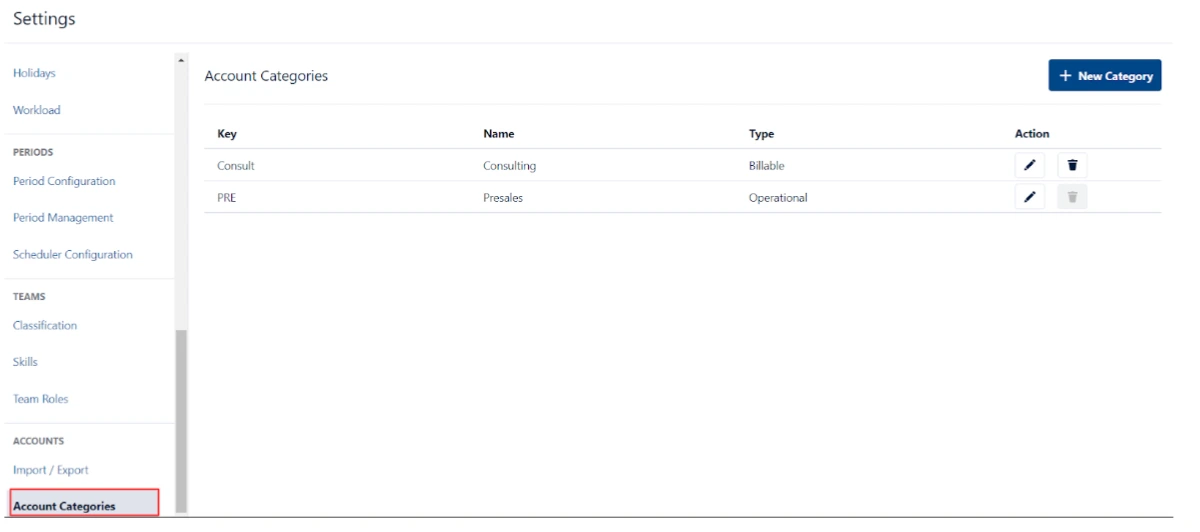
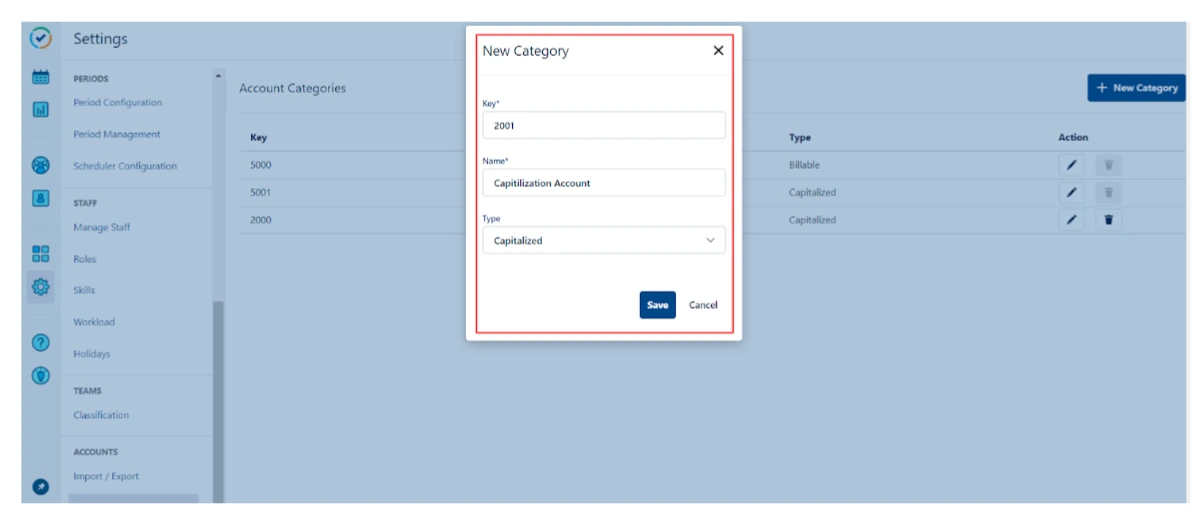
- Prior to setting up Tempo accounts, it's necessary to configure account categories and customers. These account categories establish the classification to which the Tempo Account will be assigned, such as Billable, Operational, Consulting, and more. Account categories can be created by:- Tempo Time Tracking app - > settings -> Account Categories -> New Category->Save settings
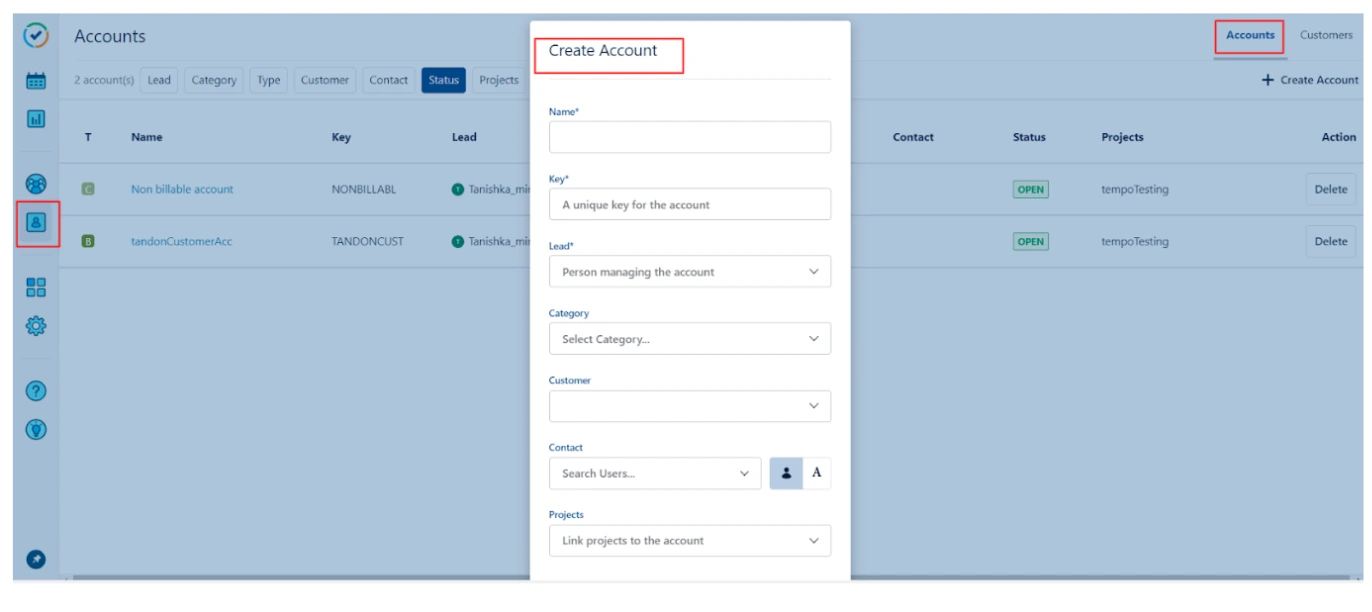
- On creating the account categories, proceed to creating the tempo customers which would be associated with every tempo account on creation. Tempo Customers can be created inside the Tempo Accounts tab of the time tracking app as shown below. Customer will be uniquely identified by the customer ID.
- Once the customer and account categories are created, Tempo Accounts can be created. On Account creation, assign the account to a customer and link the accounts to the specific projects where you want that specific account to be visible inside the Account field being created whose steps are mentioned above.
- Once the accounts have been created, they can be linked to the specific projects.
- Accounts created can be linked in two ways:-
- On Adding the Accounts to the Jira Issues, Invoices can be generated. Invoices will be generated on the basis of the customer associated with the account linked to the Jira issues. And hereby you can log all the time and amount chargeable from the customer.


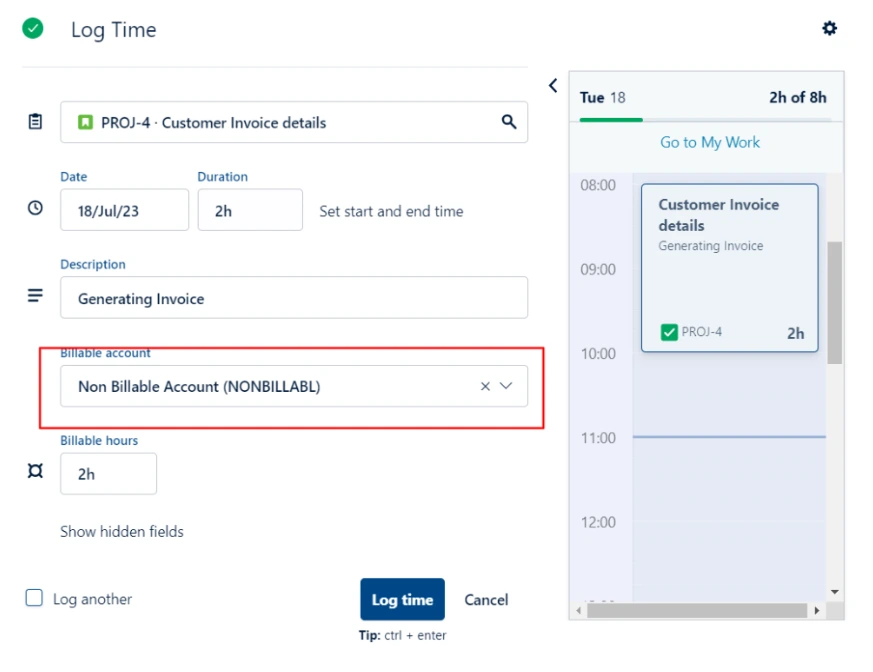
A. While logging time in your jira issues.
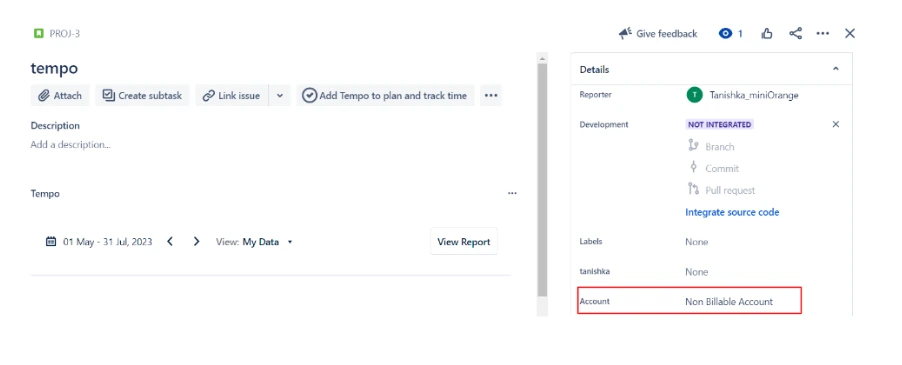
B. By adding the accounts in the custom “Account” field created.
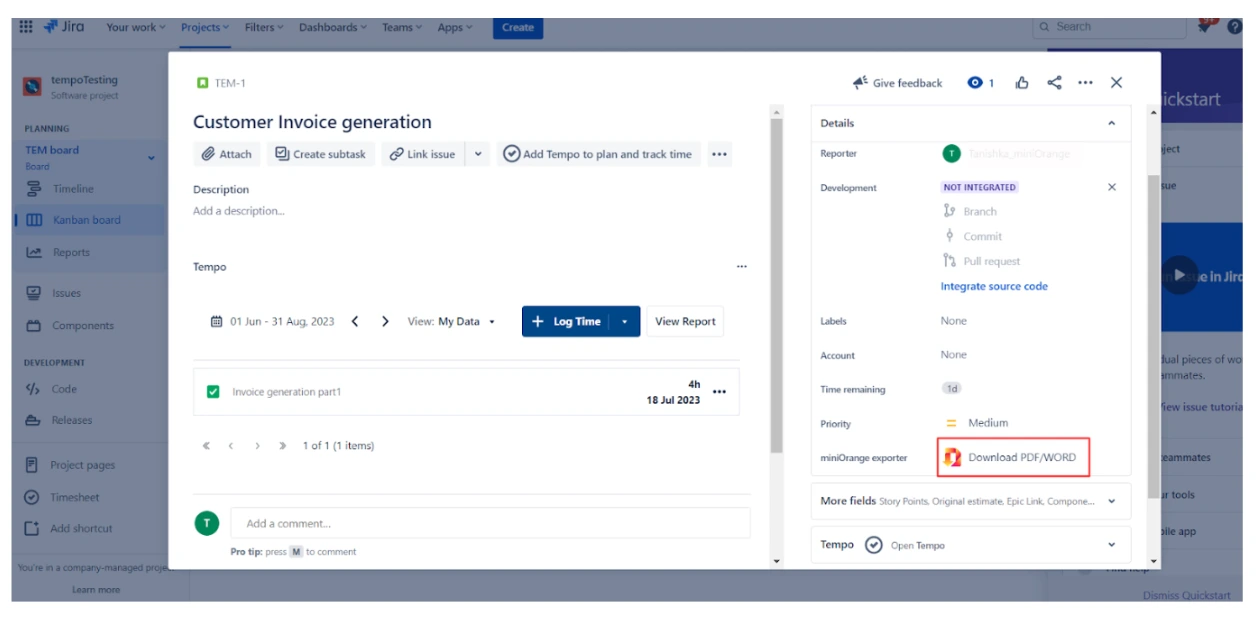
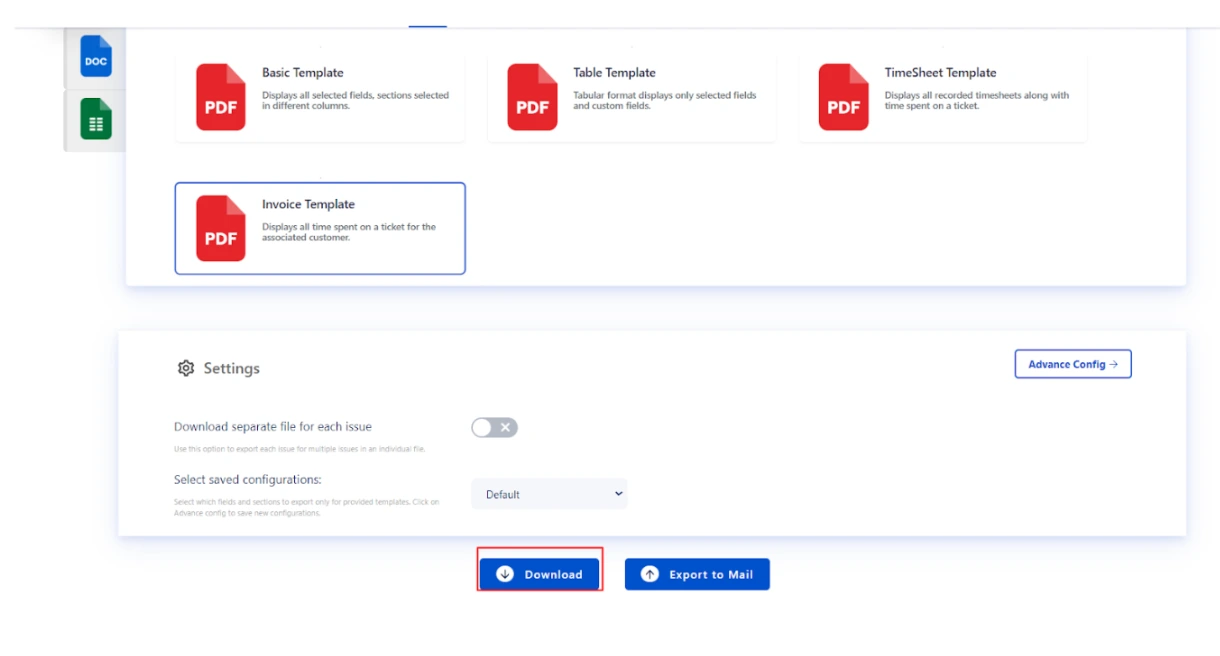
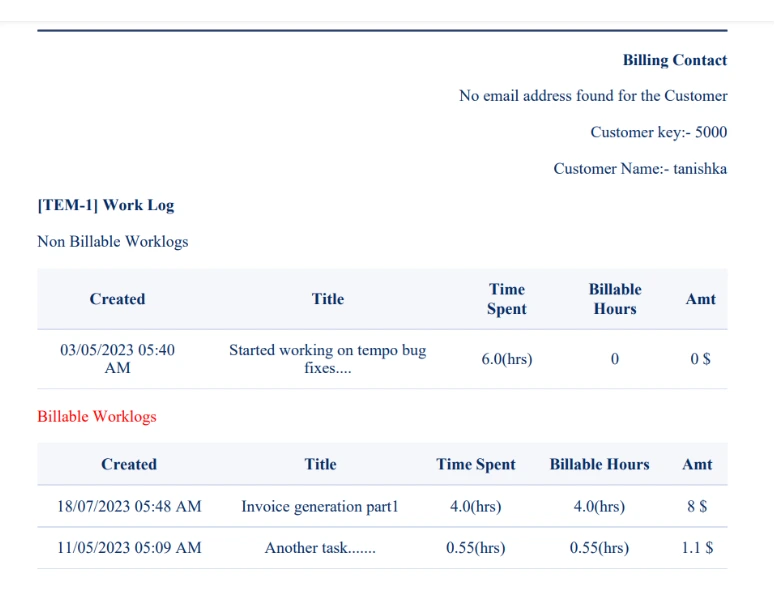
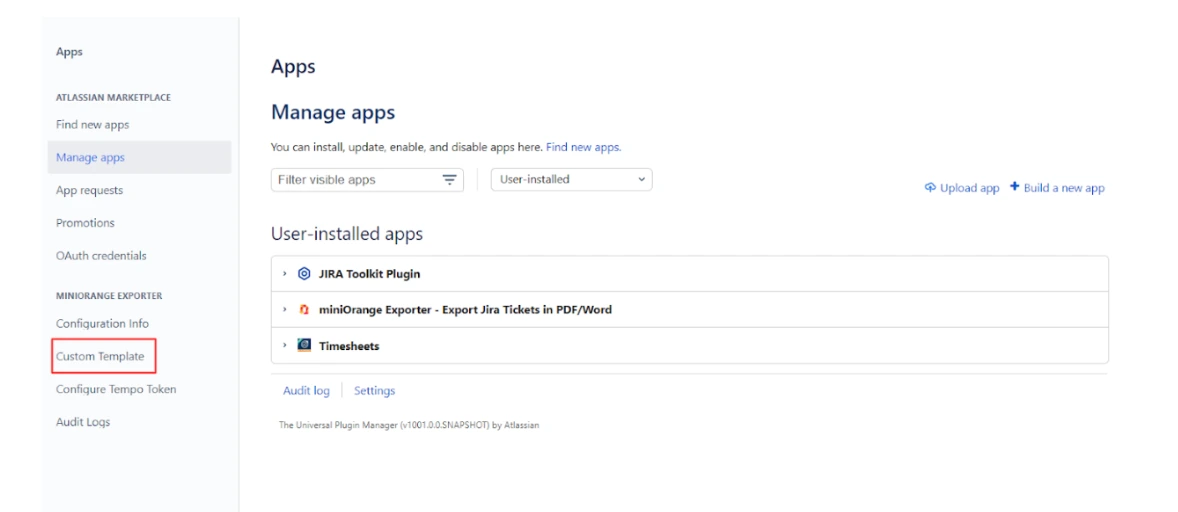
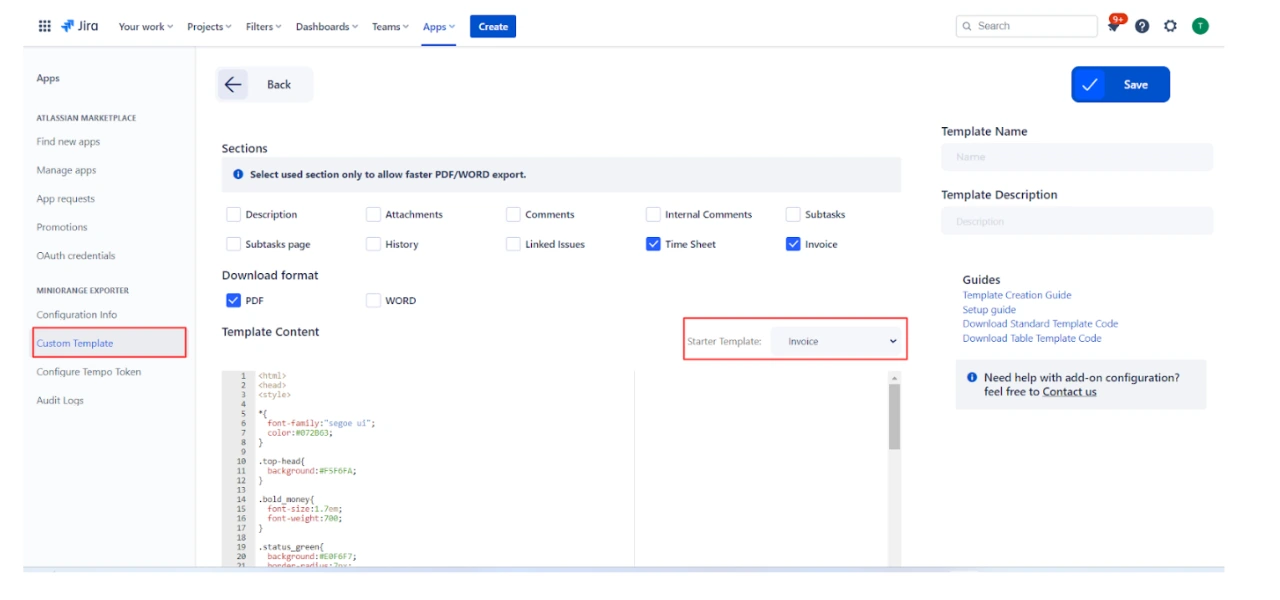
Note:- You can also customize the Invoice template in accordance to your needs from the custom templates tab of the miniOrange Tempo Timesheets In Jira Cloud PDF Exporter .
Recommended Add-Ons

Jira SAML SSO
Jira SAML SSO application enables SSO for Jira Software and Jira Service Desk.
Know More
User Sync SCIM Provisioning
Synchronize users, groups and directory with SCIM and REST APIs for Server DC.
Know More
Crowd Bulk User Management
It allows to manage users in Crowd and Automatically and efficiently deactivate users.
Know MoreBitbucket Git Authentication App | Kerberos/NTLM Apps | Word/PDF Exporter | WebAuthn | SonarQube SSO | Jenkins SSO
If you don't find what you are looking for, please contact us at support-atlassian@miniorange.atlassian.net or raise a support ticket here.
