Hello there!
Need Help? We are right here!

Need Help? We are right here!
Search Results:
×Zendesk SSO solution by miniOrange allows your users to securely sign into Zendesk using their existing login credentials. Credentials here means existing Organizational Identity, Directory, Database, or Identity Provider (Azure Active Directory, Ping, ADFS, Database) where your users are stored.
miniOrange gives you easy and safe access to your Zendesk account with full control of authentication for the application through miniOrange's Zendesk Single Sign-On (SSO) solution.
In addition, miniOrange offers an easy-to-install system for Zendesk Single-Sign-On together with other Identity Access Management features. You can checkout additional IAM features for Zendesk here.
With miniorange IDP service you can Single Sign-on (SSO) into multiple applications using a single set of login credentials. You can also authenticate your users from other User stores, external Idenitity Provider (IdP) and external directories as well. Single Sign-On (SSO) integration with Zendesk prevents users to log in separately into different applications eliminating user-managed passwords which lessens down the difficulty of remembering and entering username and password repeatedly. With the help of the given guide you can configure Zendesk SSO easily.
Following are Single Sign-on Options for Zendesk :
Enable Single Sign-on for zendesk account using Social and Business account such as Twitter, Facebook, Google, Microsoft, etc.
Enable SAML SSO and authenticate using any User Store or IdP of your choice
How does Zendesk SAML SSO Work?
miniOrange provides user authentication from various external sources, which can be Directories (like ADFS, Microsoft Active Directory, OpenLDAP, AWS etc), Identity Providers (like Microsoft Entra ID, Okta, AWS), and many more. You can configure your existing directory/user store or add users in miniOrange.
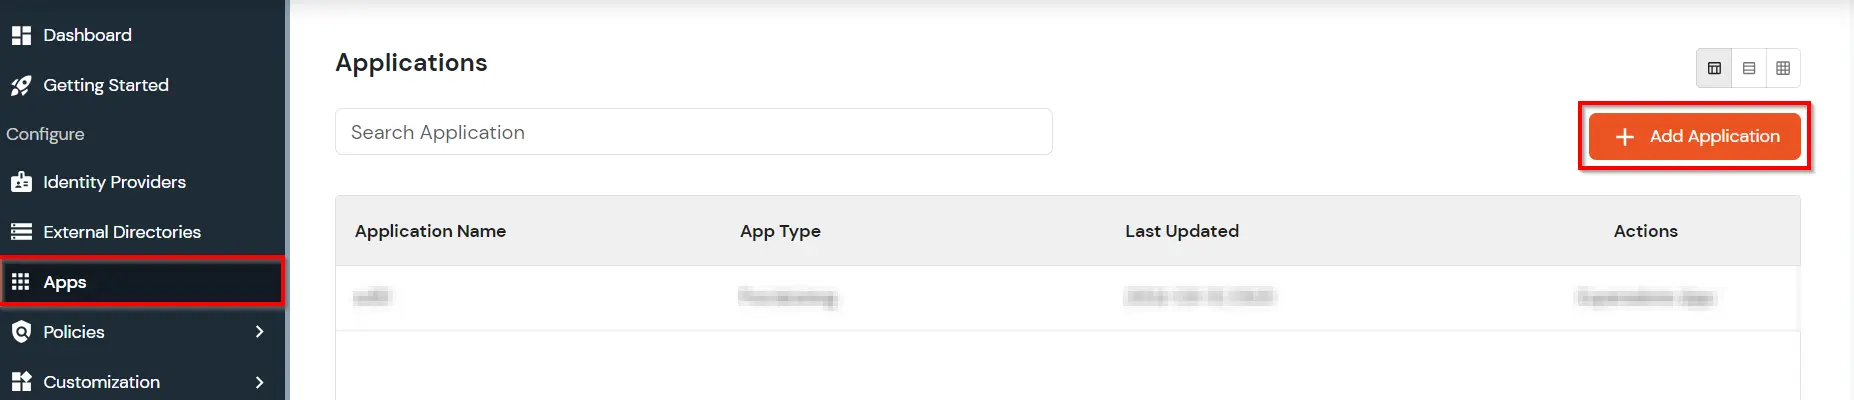
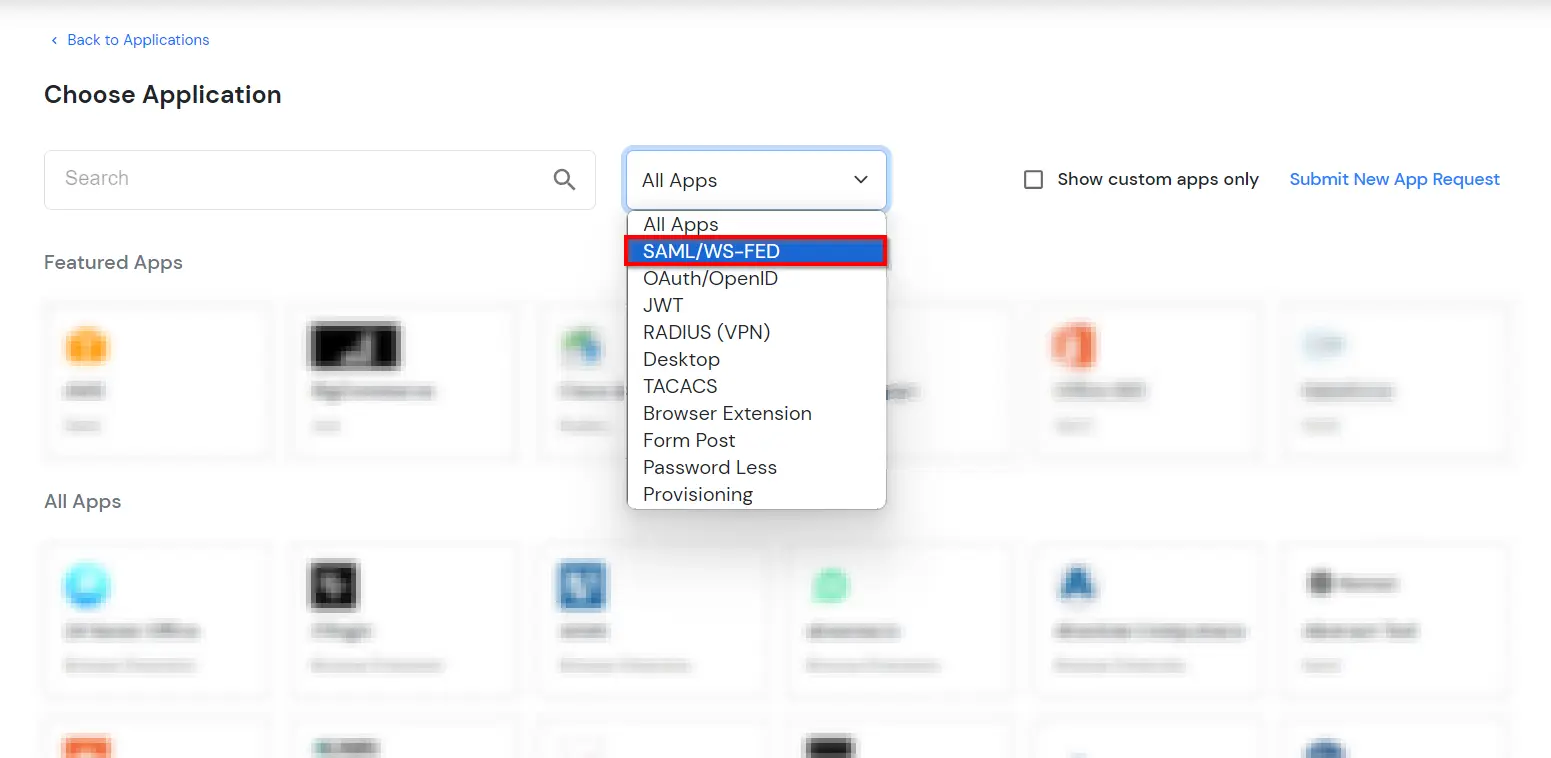
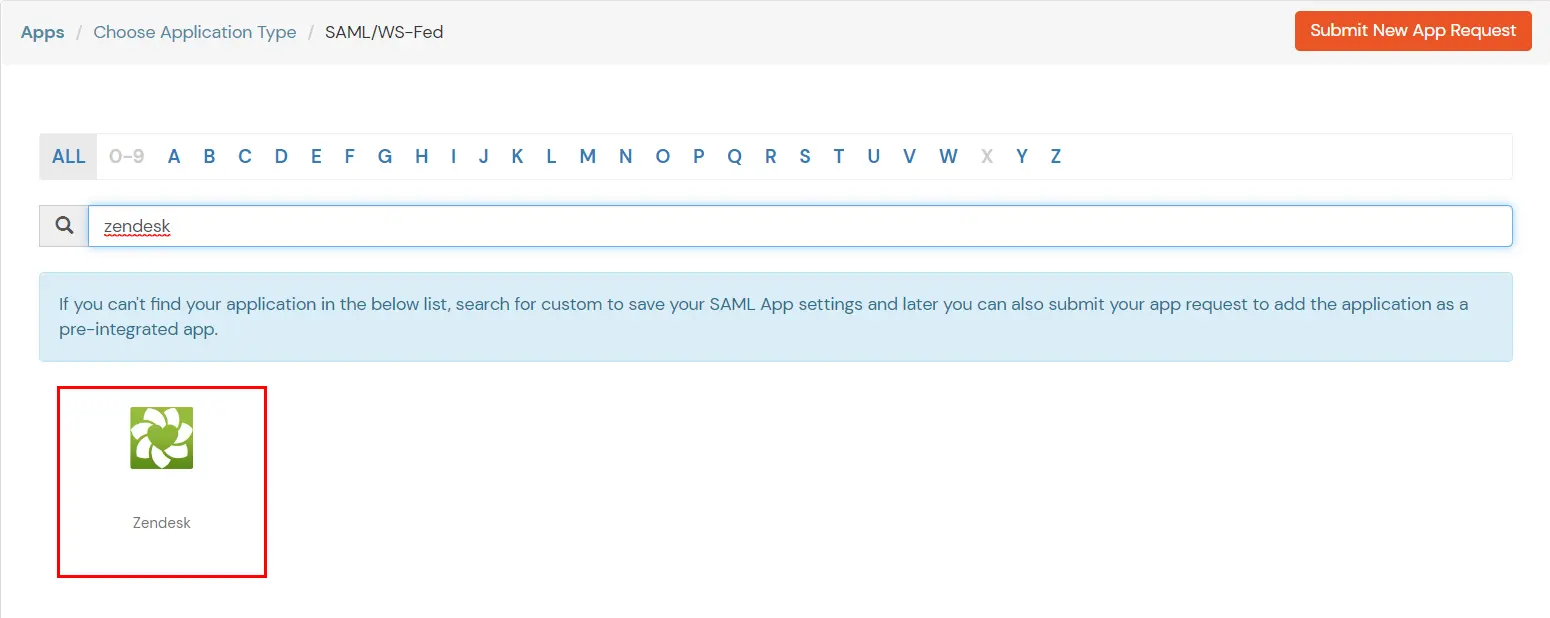
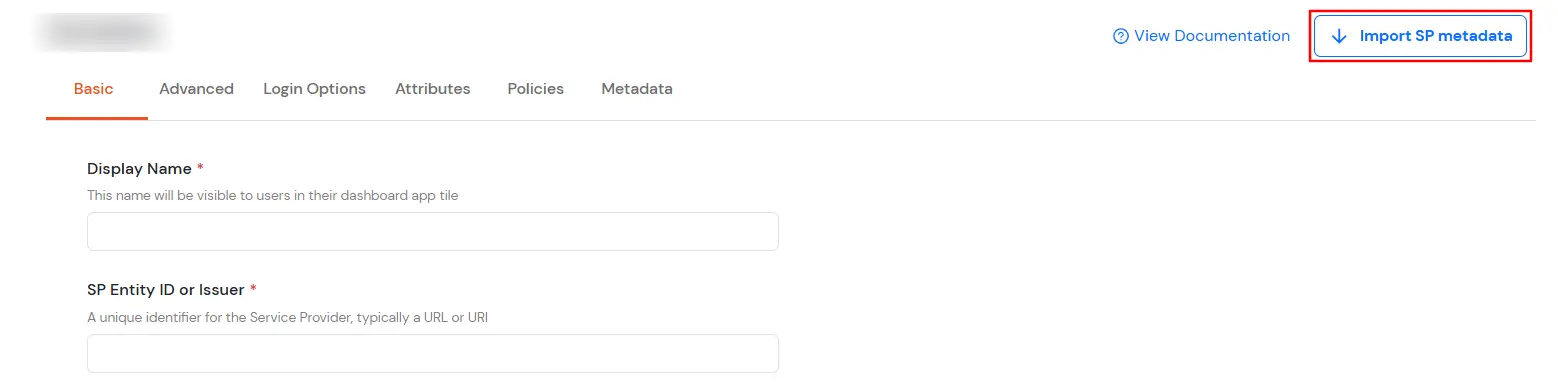
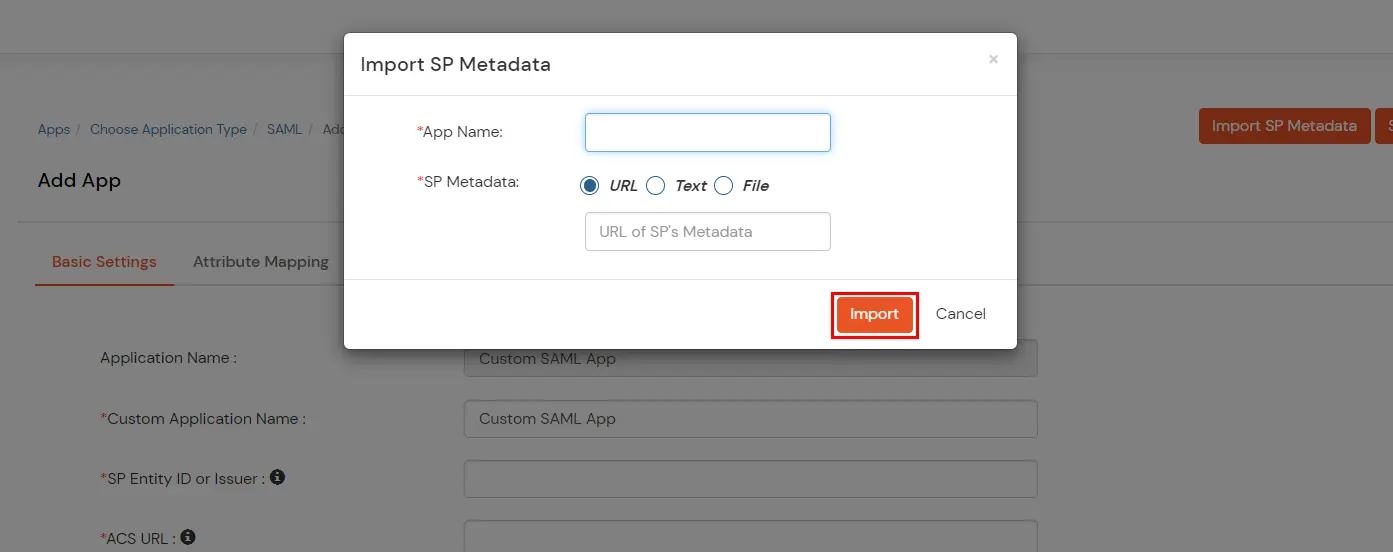
Note: You can configure your application using Manual Configuration or Import Metadata. Follow the steps below based on your preferred method.
| Display Name | Zendesk |
| SP Entity ID or Issuer | https://your_domain.zendesk.com |
| ACS URL | https://your_domain.zendesk.com/access/saml |
| Single Logout URL | https://your_domain.zendesk.com/home |

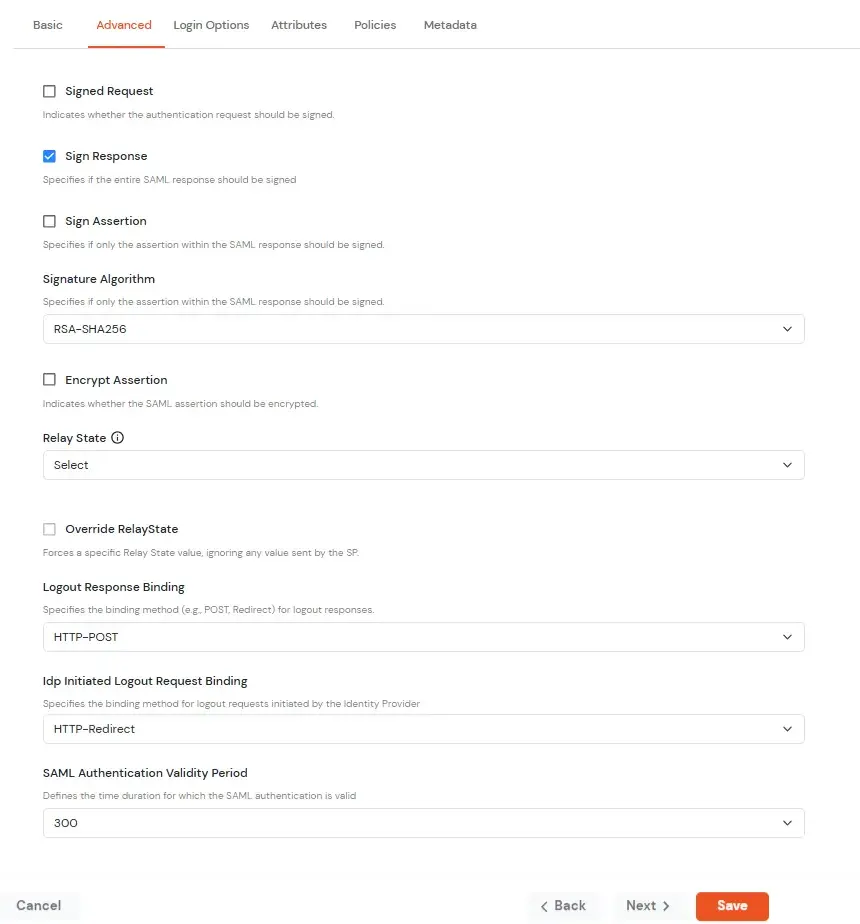
| Signed Request | Enable this to sign the saml request sent by SP. Provide the X509 certificate or upload the certificate. |
| Sign Response | Enable this if you want the entire SAML response to be signed. |
| Sign Assertion | Enable this if you want only the assertion within the SAML response should be signed. |
| Signature Algorithm | Select the algorithm that will be used to sign the SAML request/response. |
| Encrypt Assertion | Select this if you want to encrypt the assertion in SAML response and provide the algorithm and certificate for encryption. |
| Relay State | Enter the URL where you want the user to redirect after sign in to the application. |
| Override Relay state | Enable this to override the default relay state of the SP. |
| Logout Response Binding | A Logout Response is sent in reply to a Logout Request from SP. It could be sent by an Identity Provider or Service Provider. |
| IdP initiated Logout Request Binding: | A Logout Response is sent in reply to a Logout Request from the IdP dashboard. It could be sent by an Identity Provider or Service Provider.
|
| SAML Authentication Validity Period | The time for which the authentication should be considered valid and the user should be able to perform SSO. After that, the user will have to sign in again. |
| Enable Shared Identity | This feature lets you control whether a specific application can be accessed by shared user or not. |
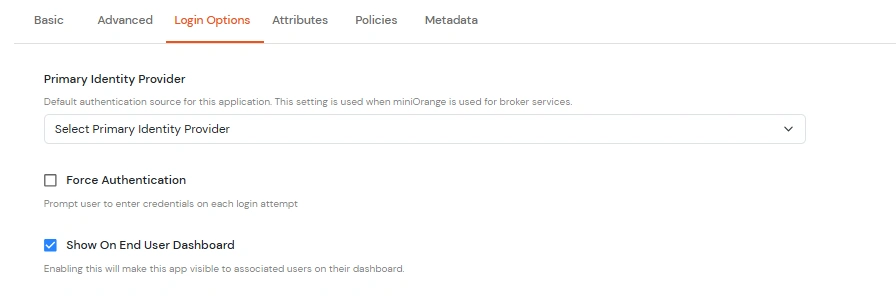
| Primary Identity Provider | Select the identity source from where you want the authentication to happen. You will see the list of all configured sources. |
| Force Authentication | Enable this to enforce authentication on each request to access the application. |
| Show On End User Dashboard | Disable this if you do not want the app to be visible for all users on end user dashboard. |
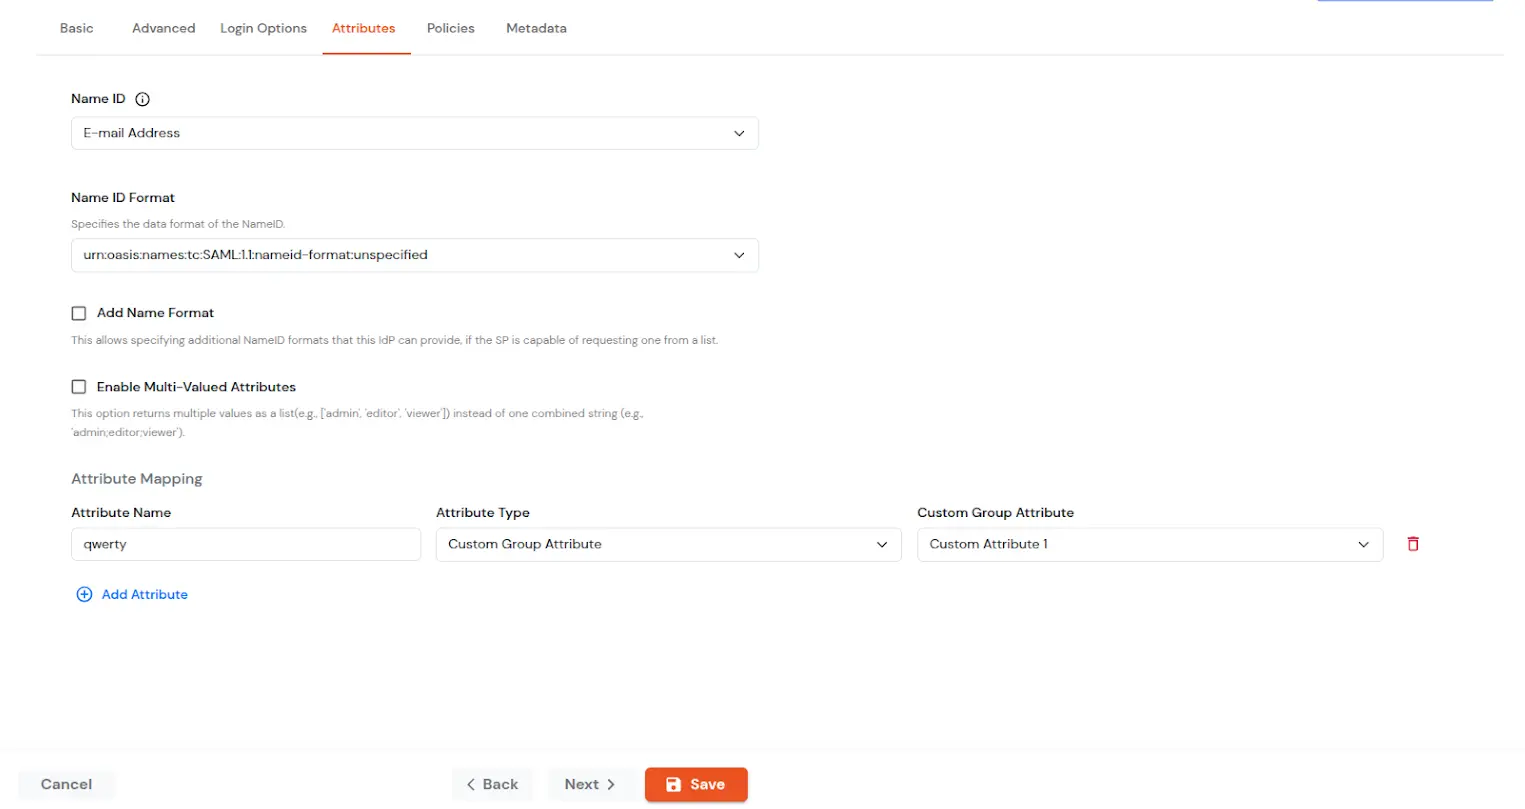
| NameID | NameID is the unique identifier for the authenticated user included in the SAML assertion. It allows the Service Provider to recognize and map the user to an account. Generally, NameID is a username or Email Address. |
| NameID format | Defines what type of identifier is used in the NameID (e.g., email, persistent, transient) so the SP can correctly map the user. If the SP does not request a specific format, the IdP can leave it unspecified and use a default. |
| Add Name Format | Name Format defines how attribute names are represented in a SAML assertion (e.g., as simple strings or URIs). It helps the SP correctly interpret attribute naming and ensures consistency between IdP and SP. |
| Enable Multi-Valued Attributes | Enabled:Commas (,) and semicolons (;) are treated as separators, so the attribute is split into a clean list. Example: roles = ['admin', 'editor', 'viewer']. Disabled:Commas and semicolons are not treated as separators, so the attribute stays as one combined string. Example: roles = "admin;editor;viewer". |
| Attribute Mapping | You can Add Attributes to be sent in SAML Assertion to SP. The attributes include user’s profile attributes such as first name, last name, full name, username, email, custom profile attributes, and user groups, etc. |
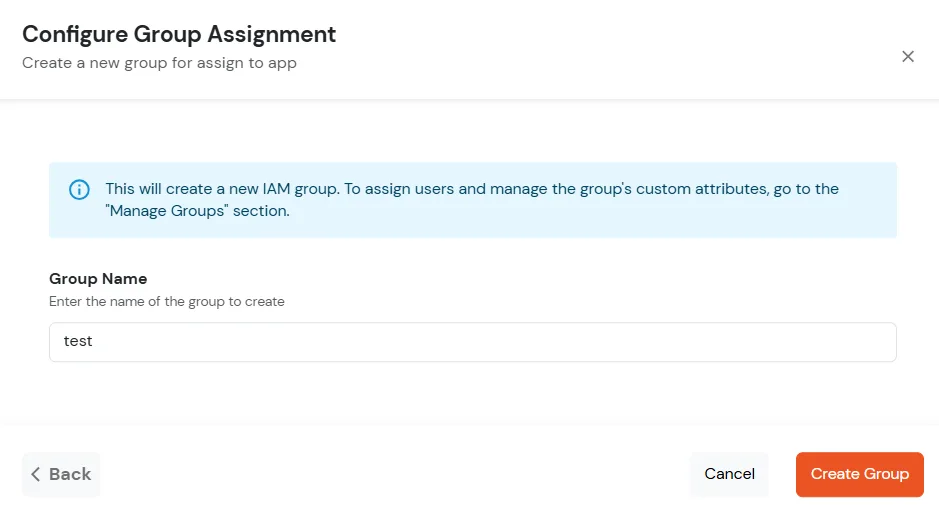
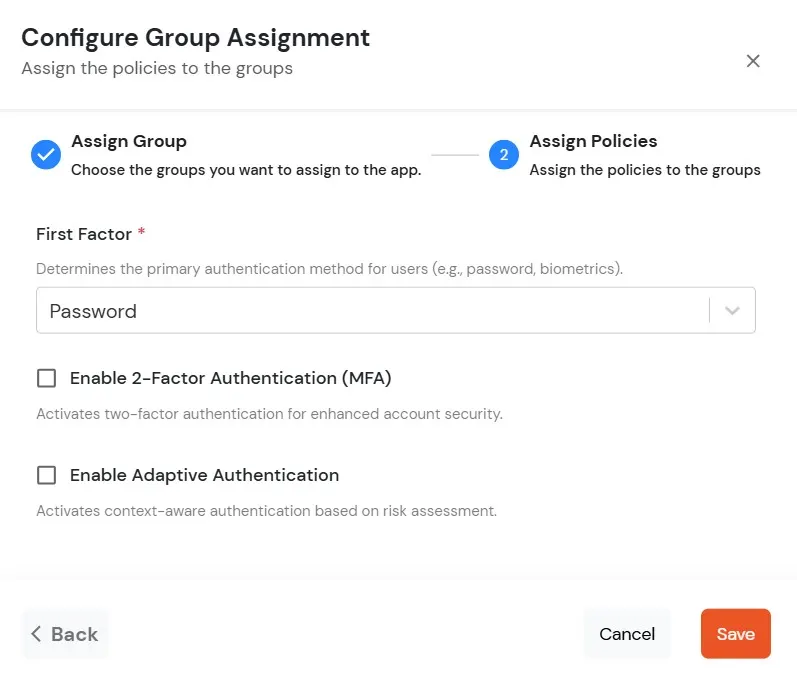
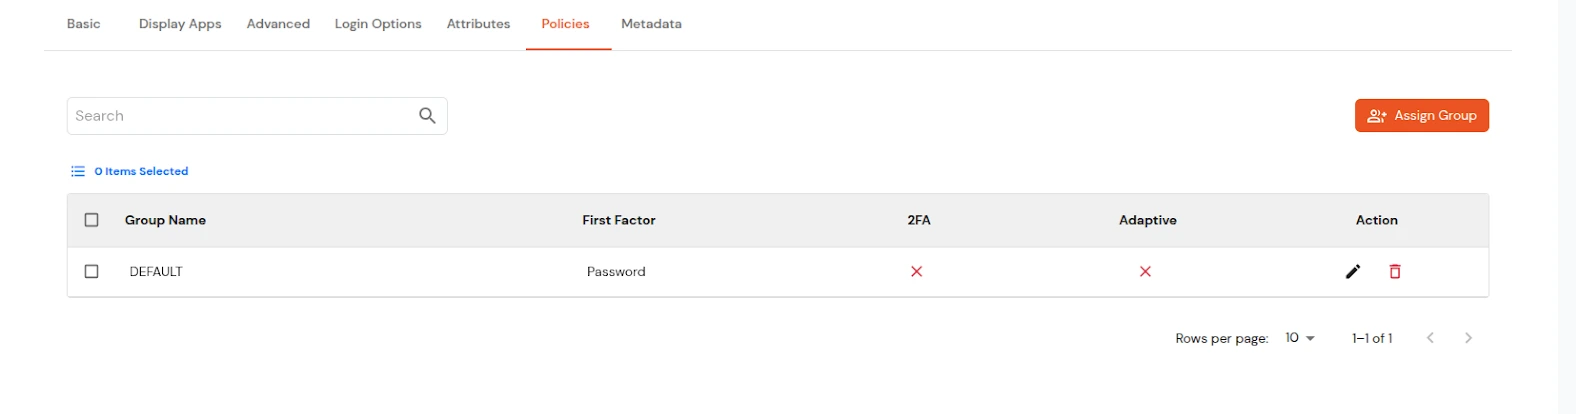
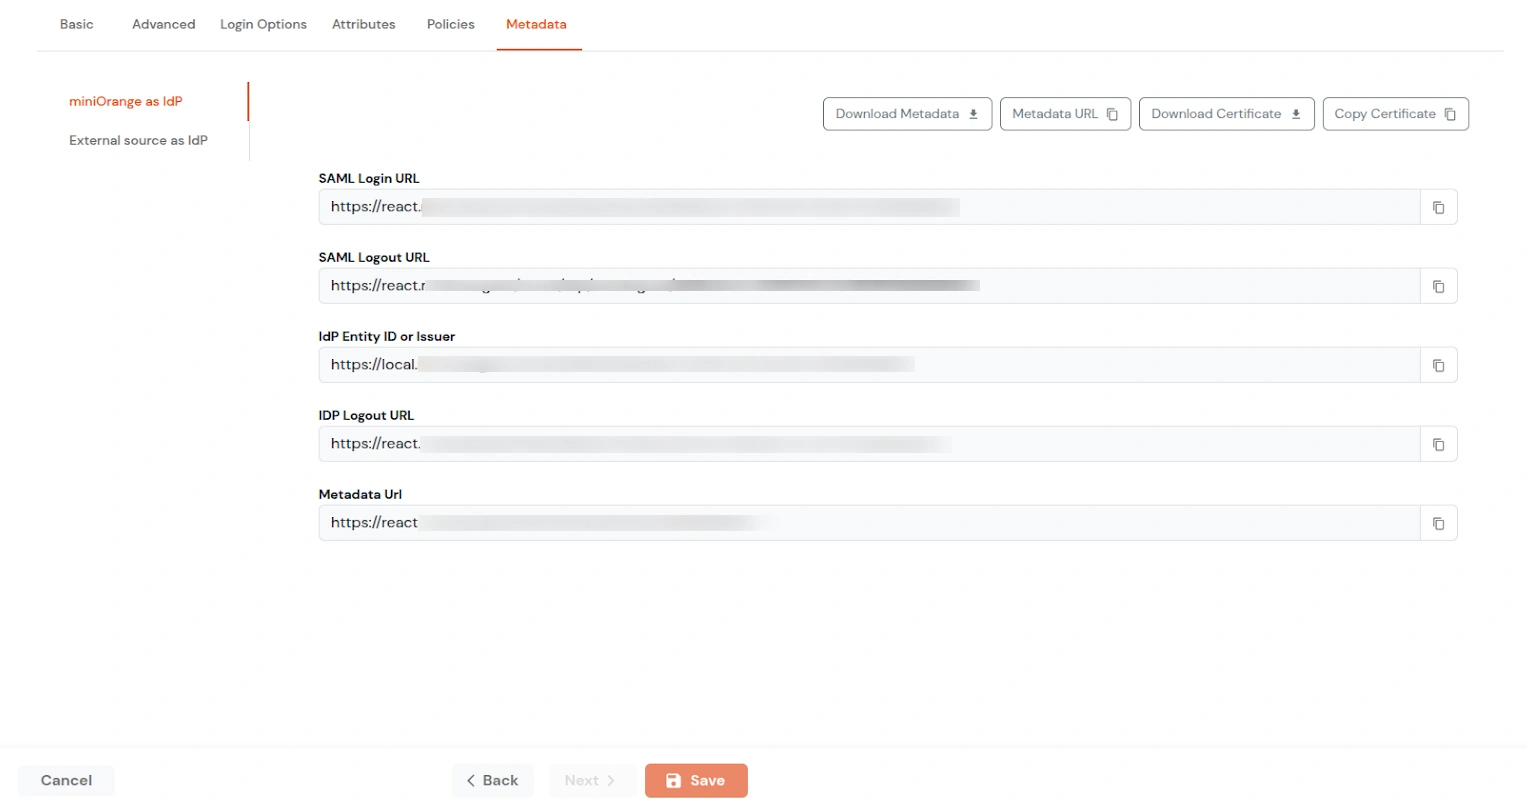
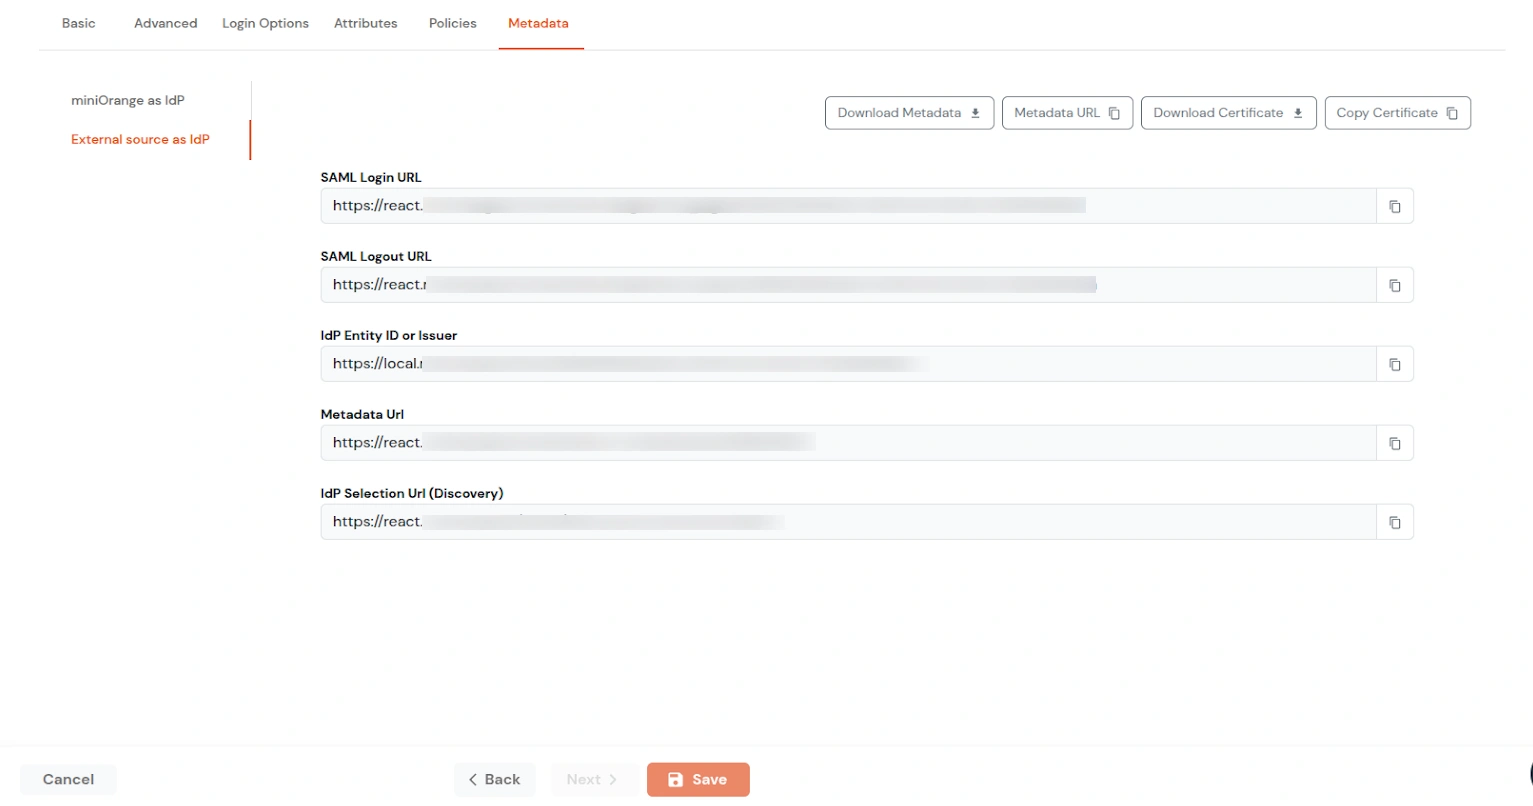


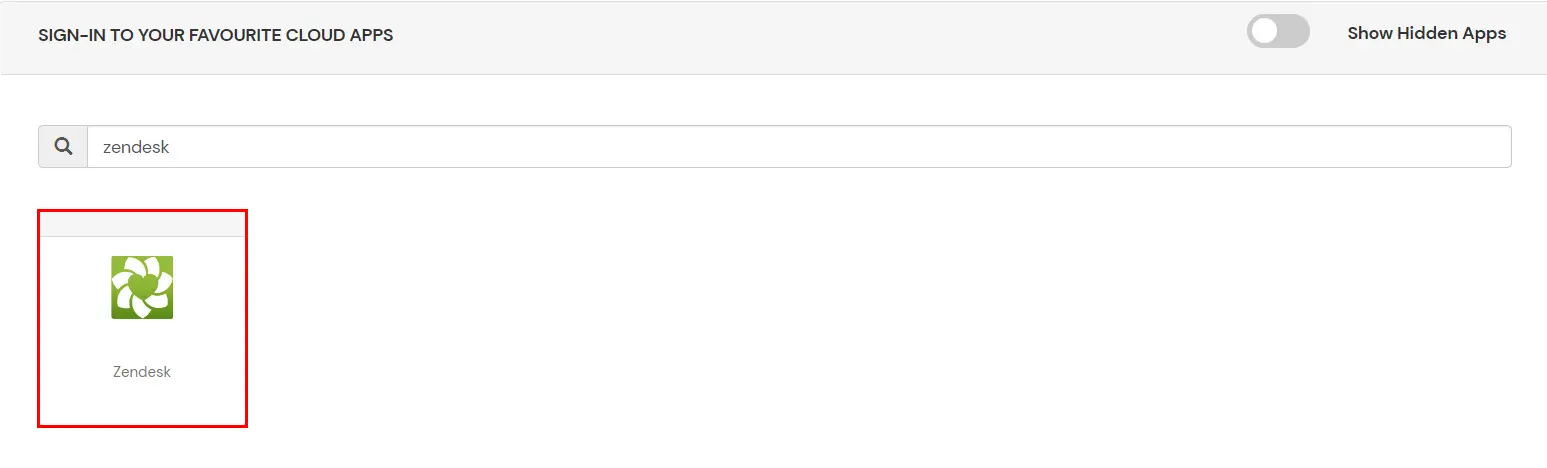
Test SSO login to your Zendesk account with miniOrange IdP:
Contact us or email us at idpsupport@xecurify.com and we'll help you setting it up in no time.
miniOrange provides user authentication from various external sources, which can be Directories (like ADFS, Microsoft Active Directory, Microsoft Entra ID, OpenLDAP, Google, AWS Cognito etc), Identity Providers (like Okta, Shibboleth, Ping, OneLogin, KeyCloak), Databases (like MySQL, Maria DB, PostgreSQL) and many more. You can configure your existing directory/user store or add users in miniOrange.
1. Create User in miniOrange
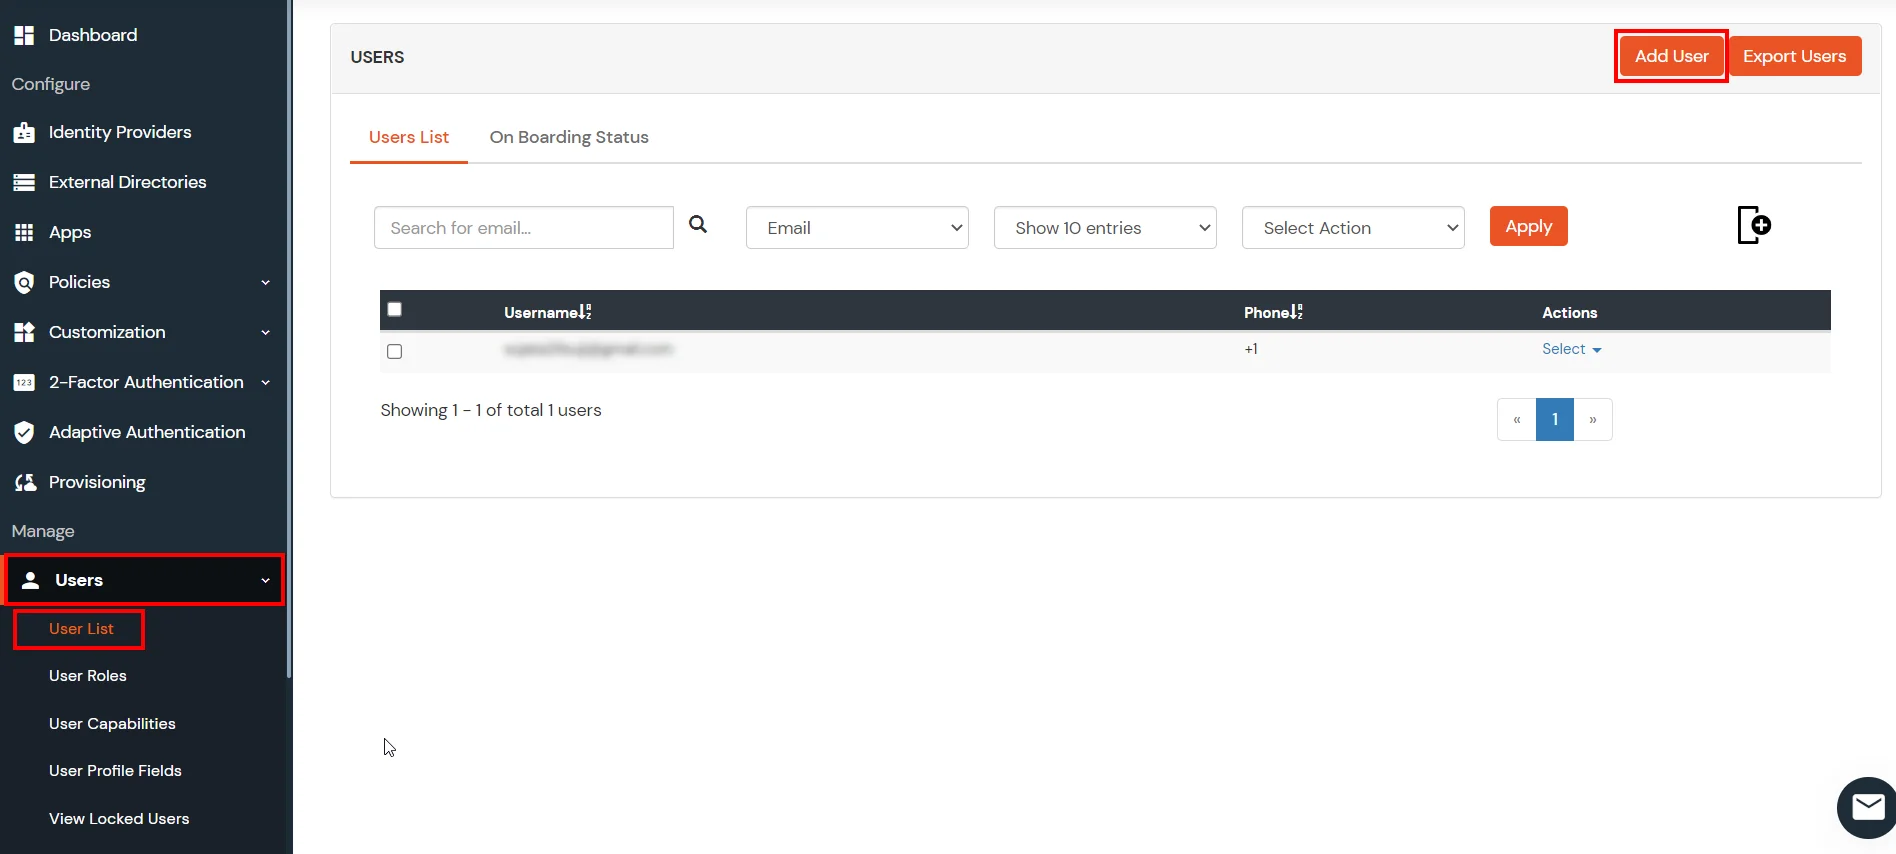
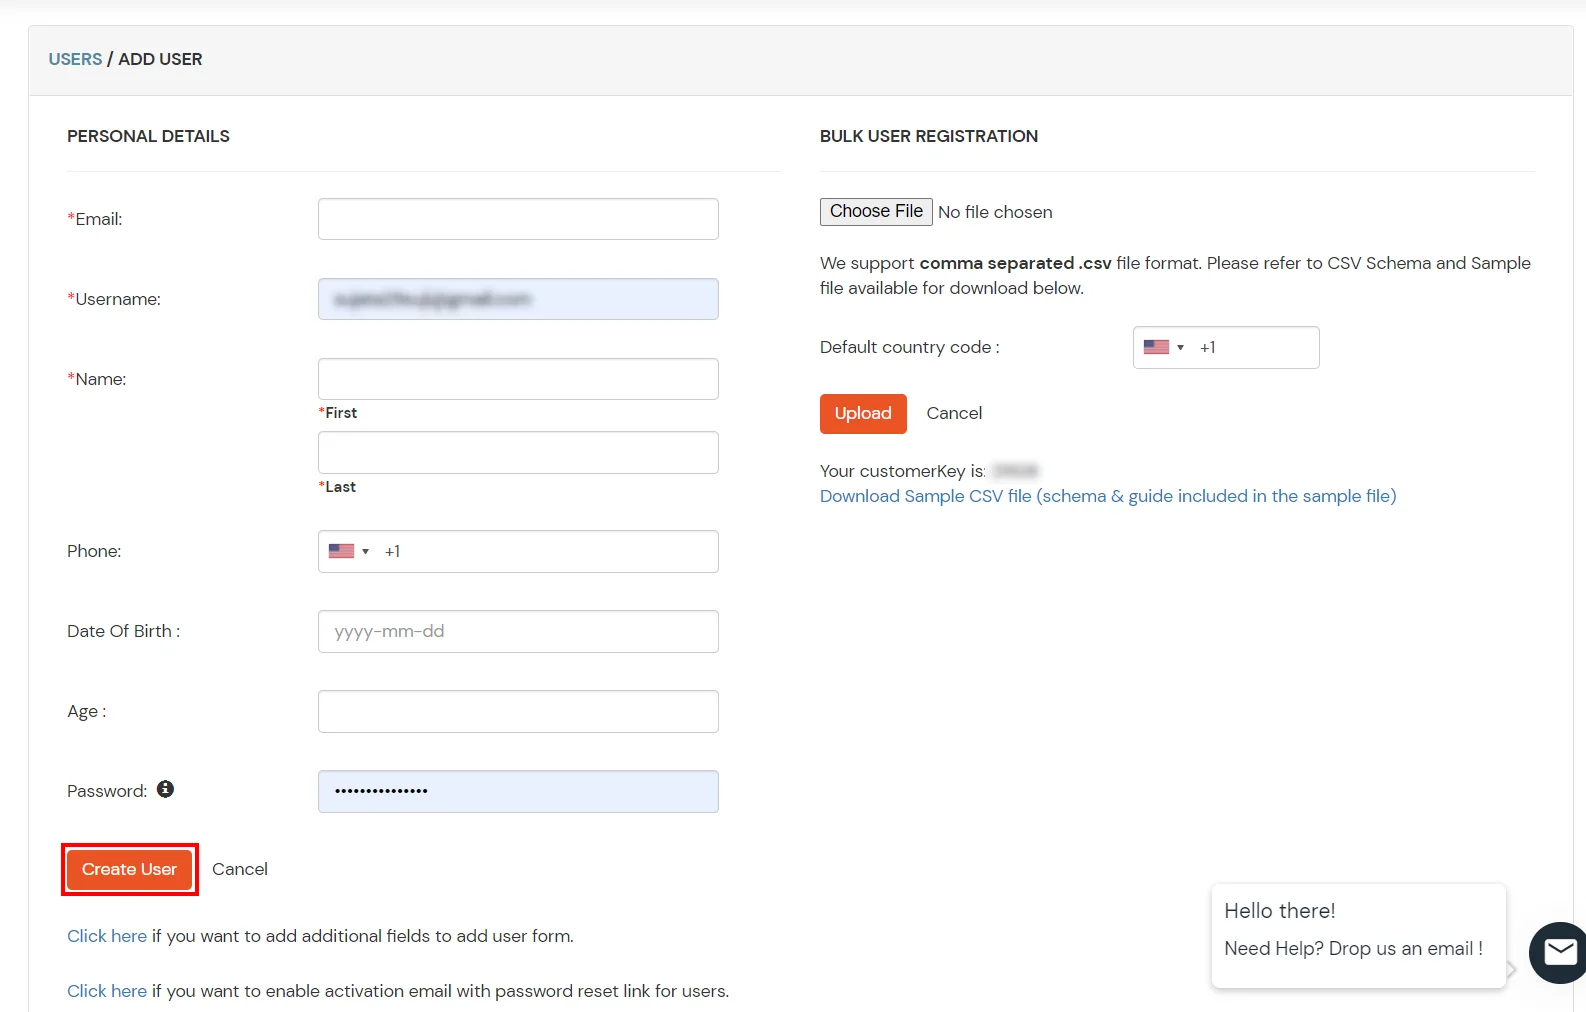
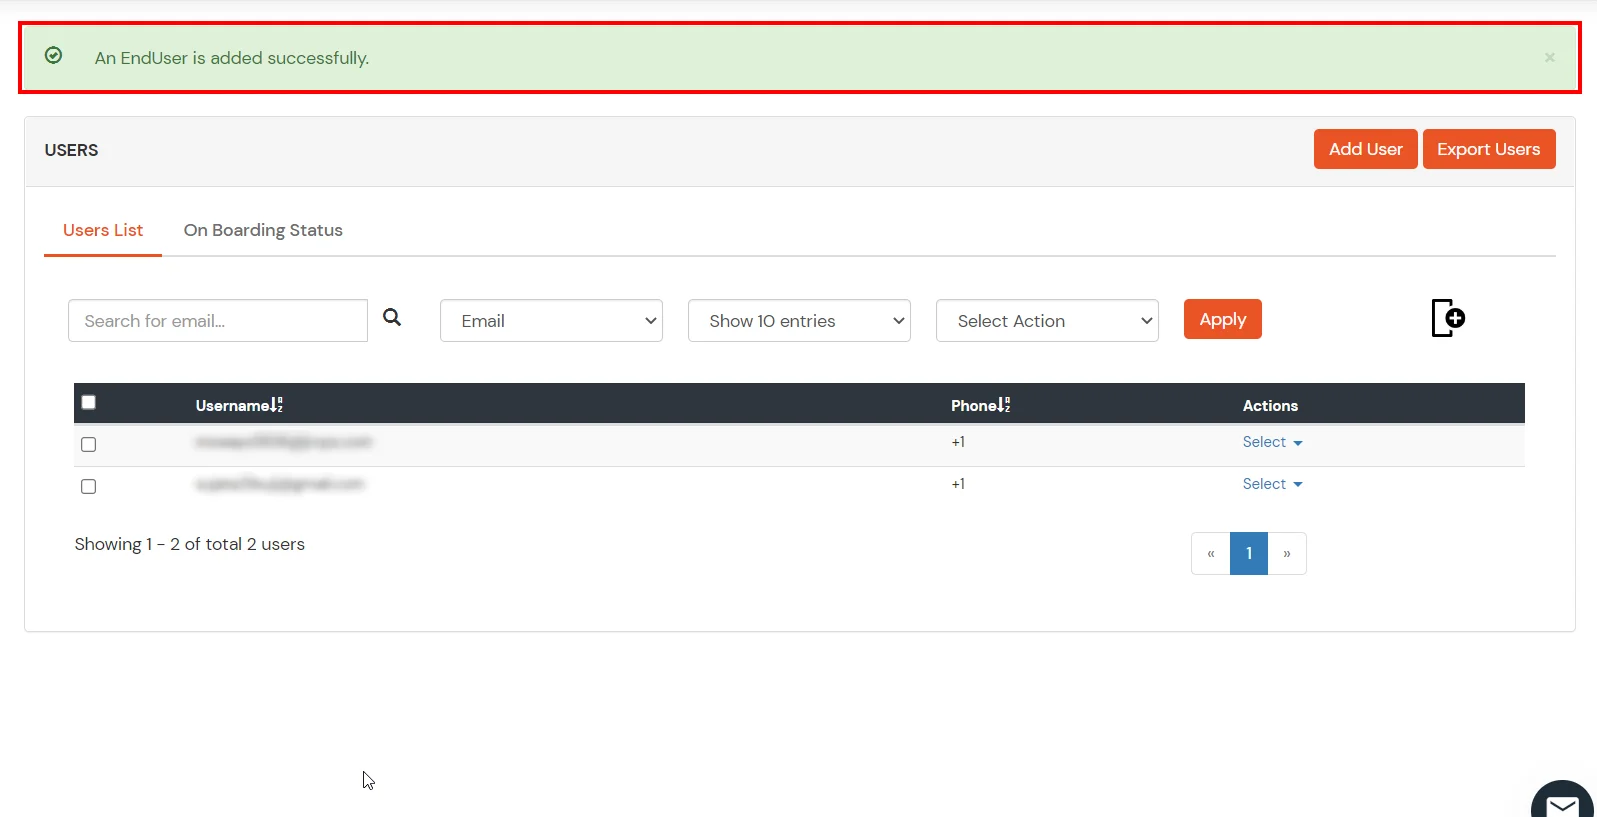
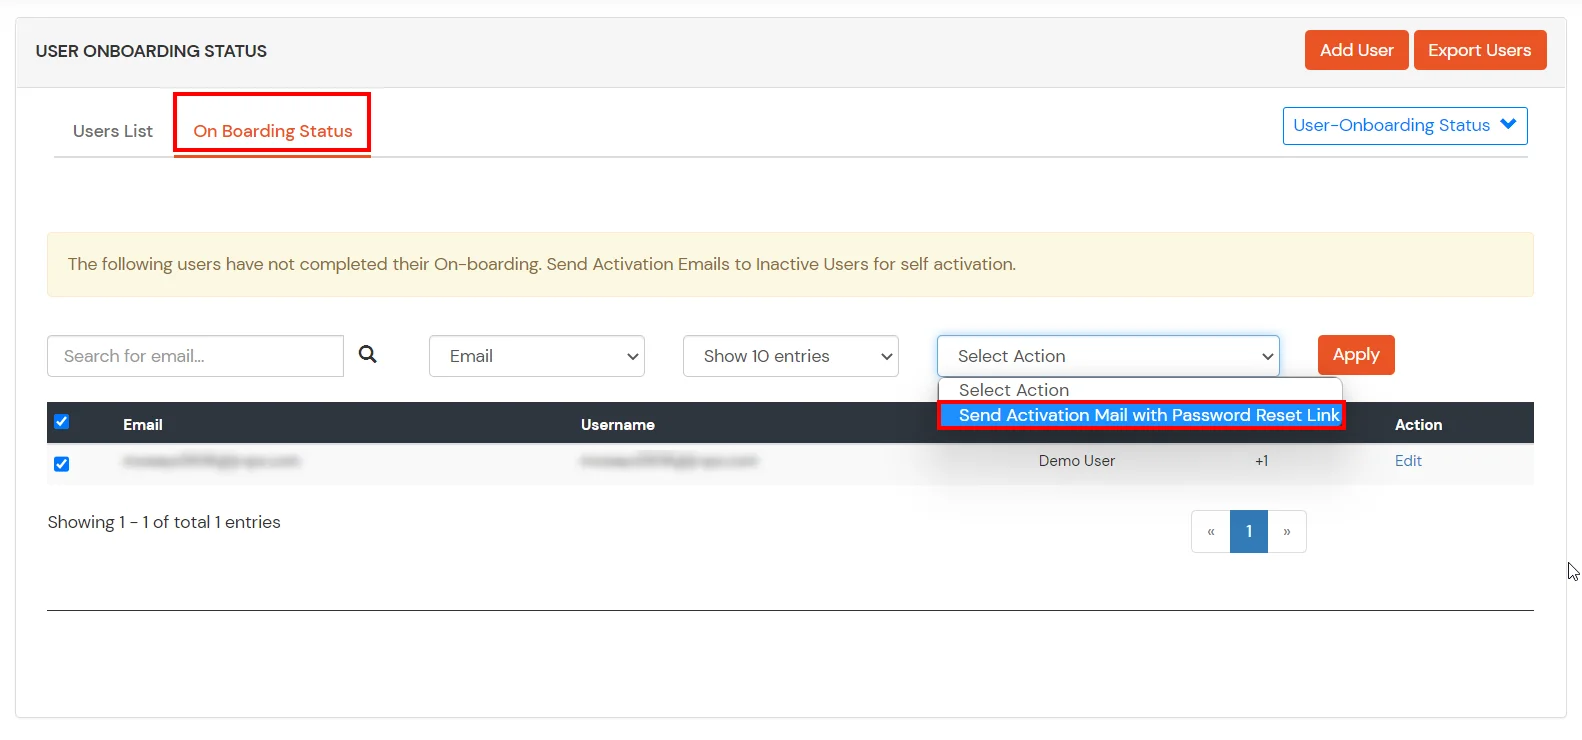
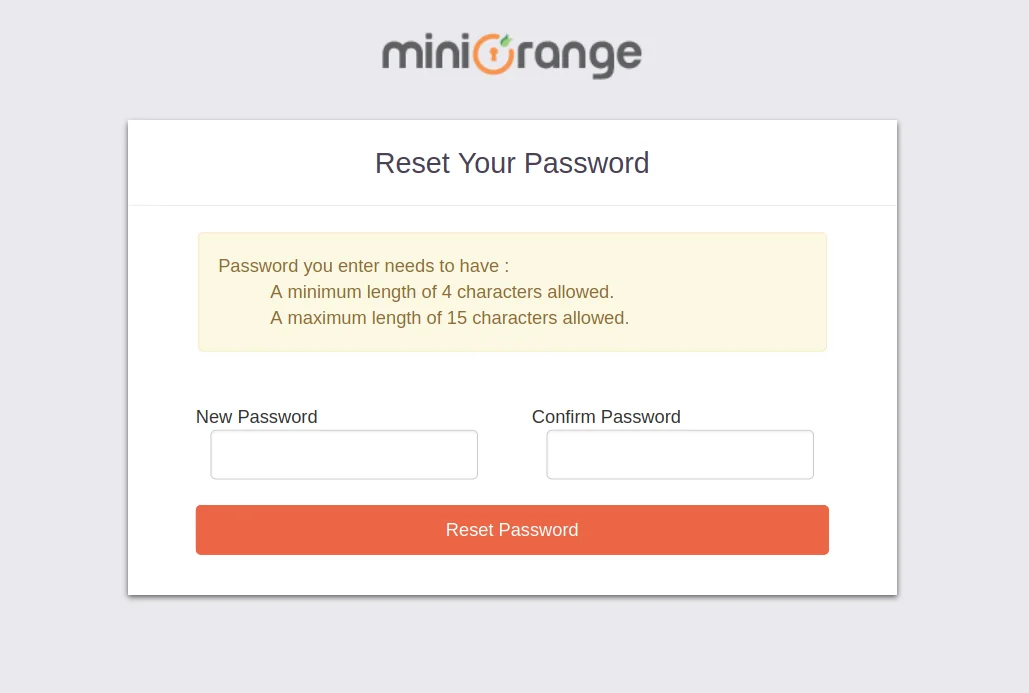
2. Bulk Upload Users in miniOrange via Uploading CSV File.
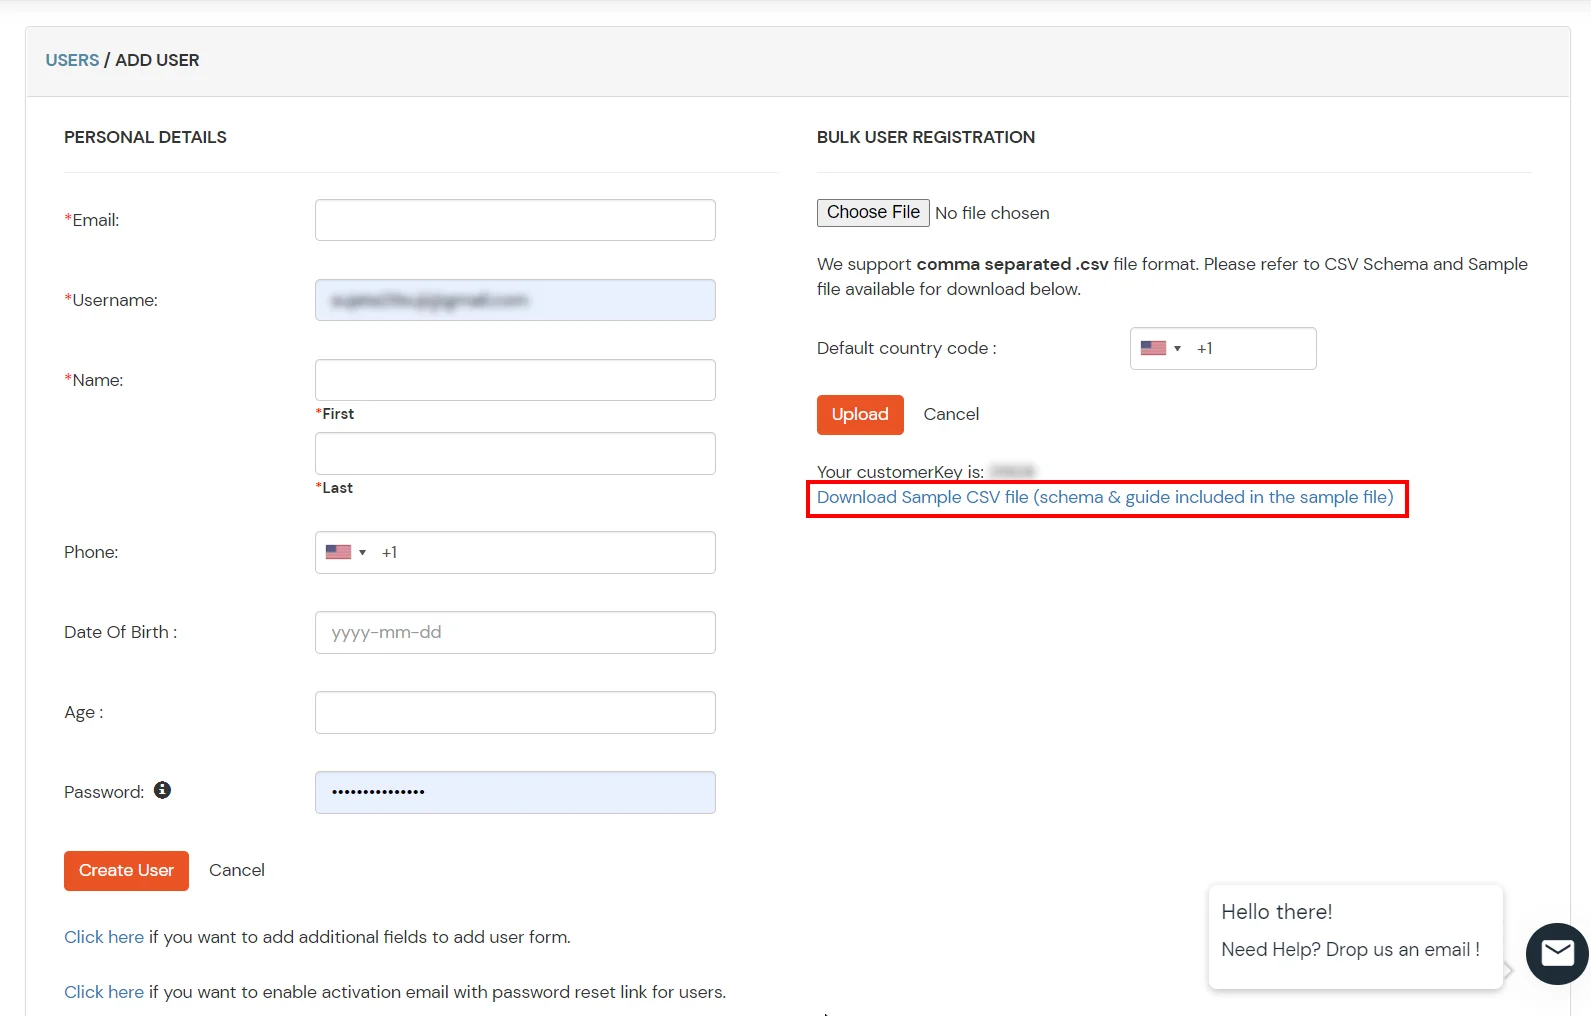
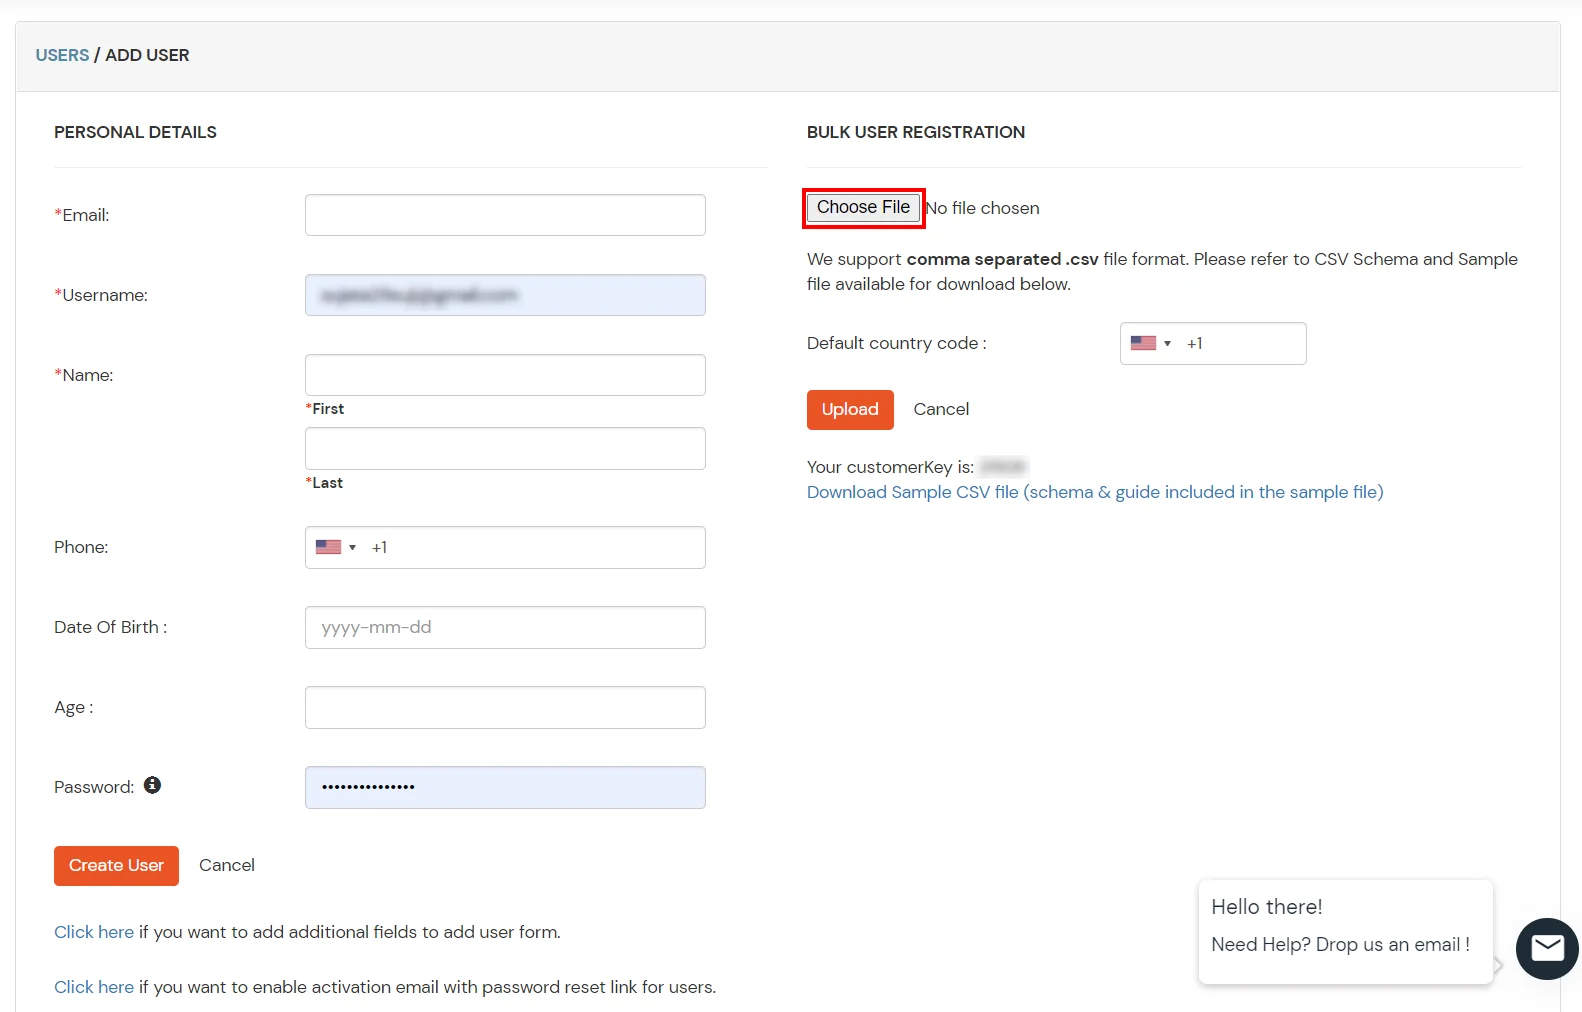
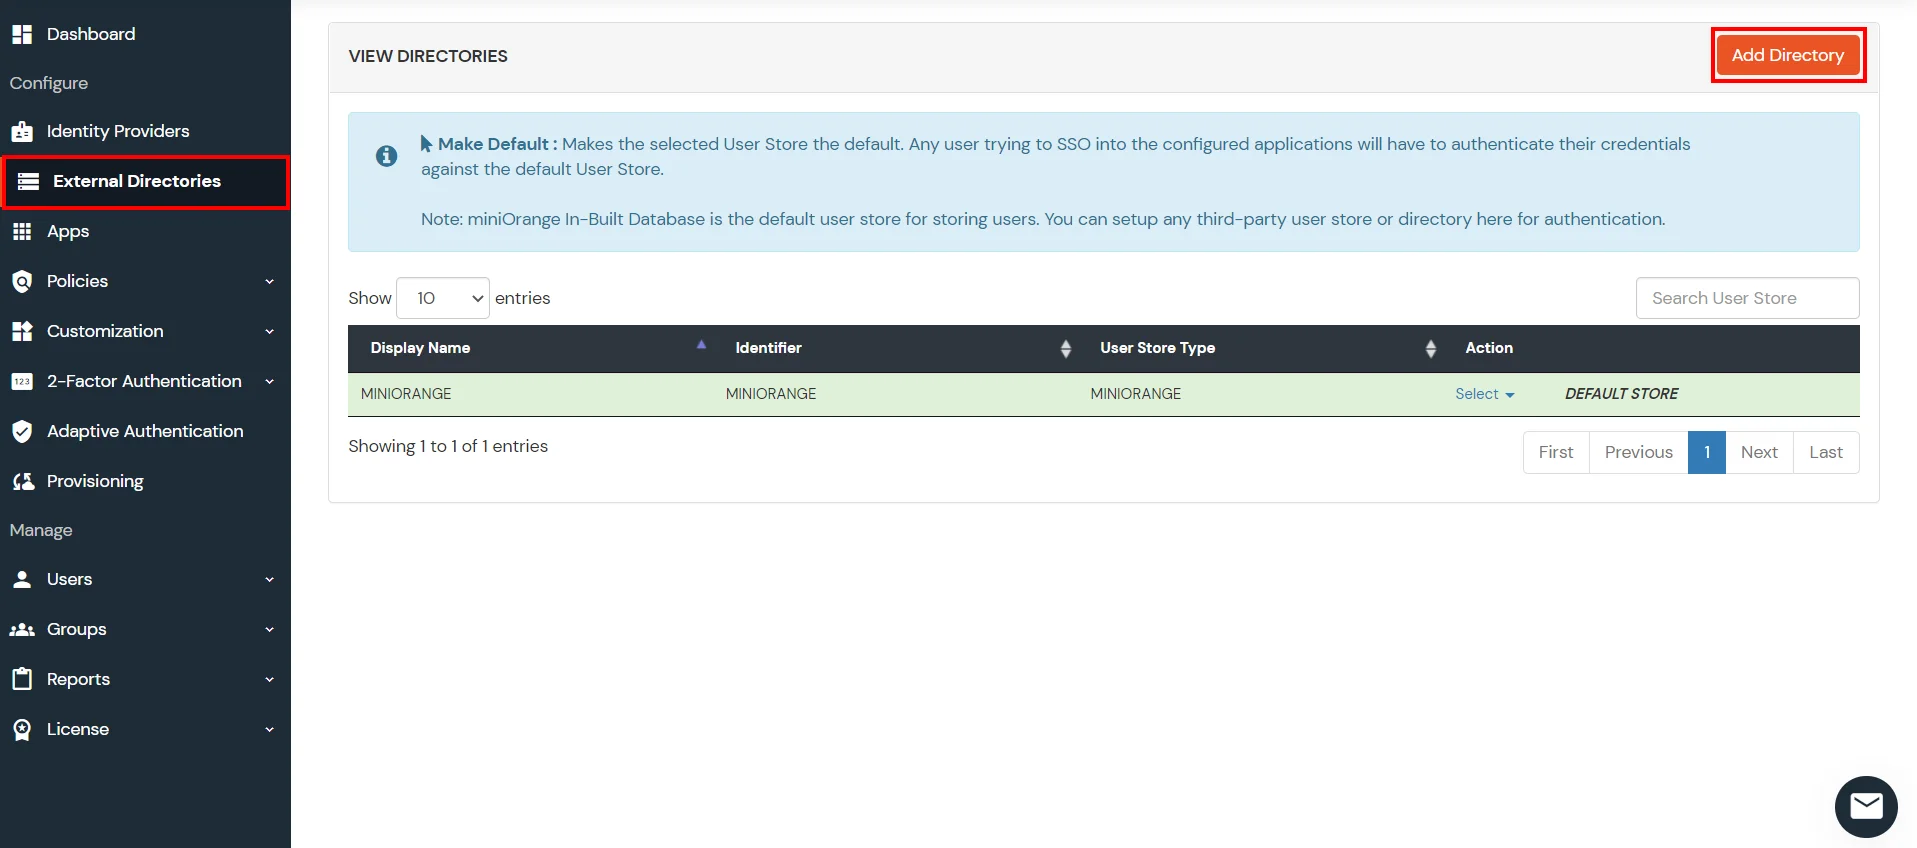
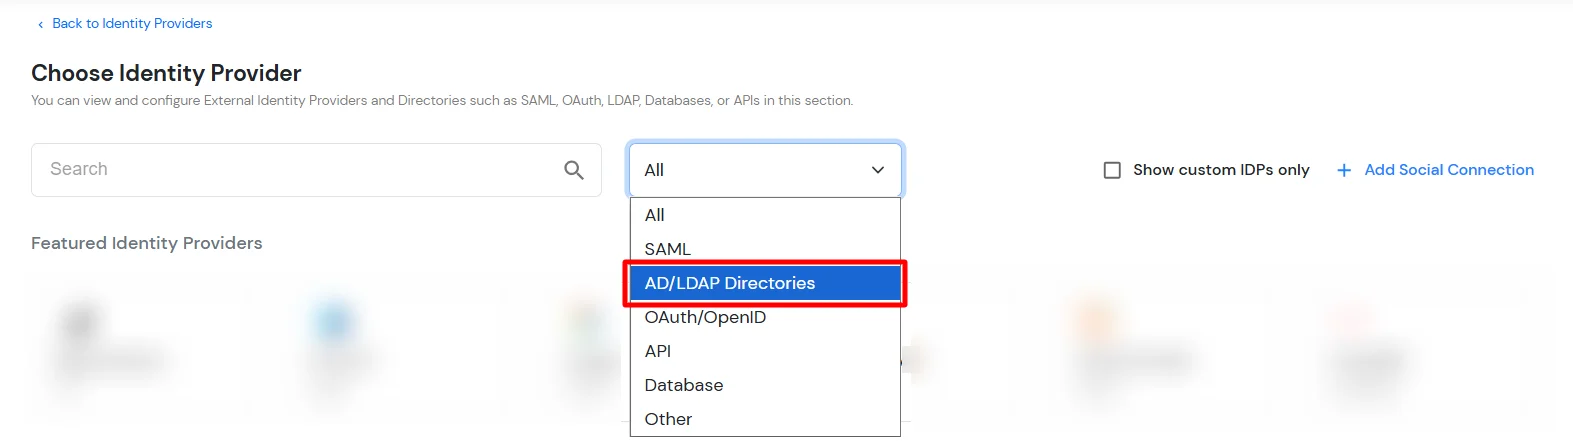
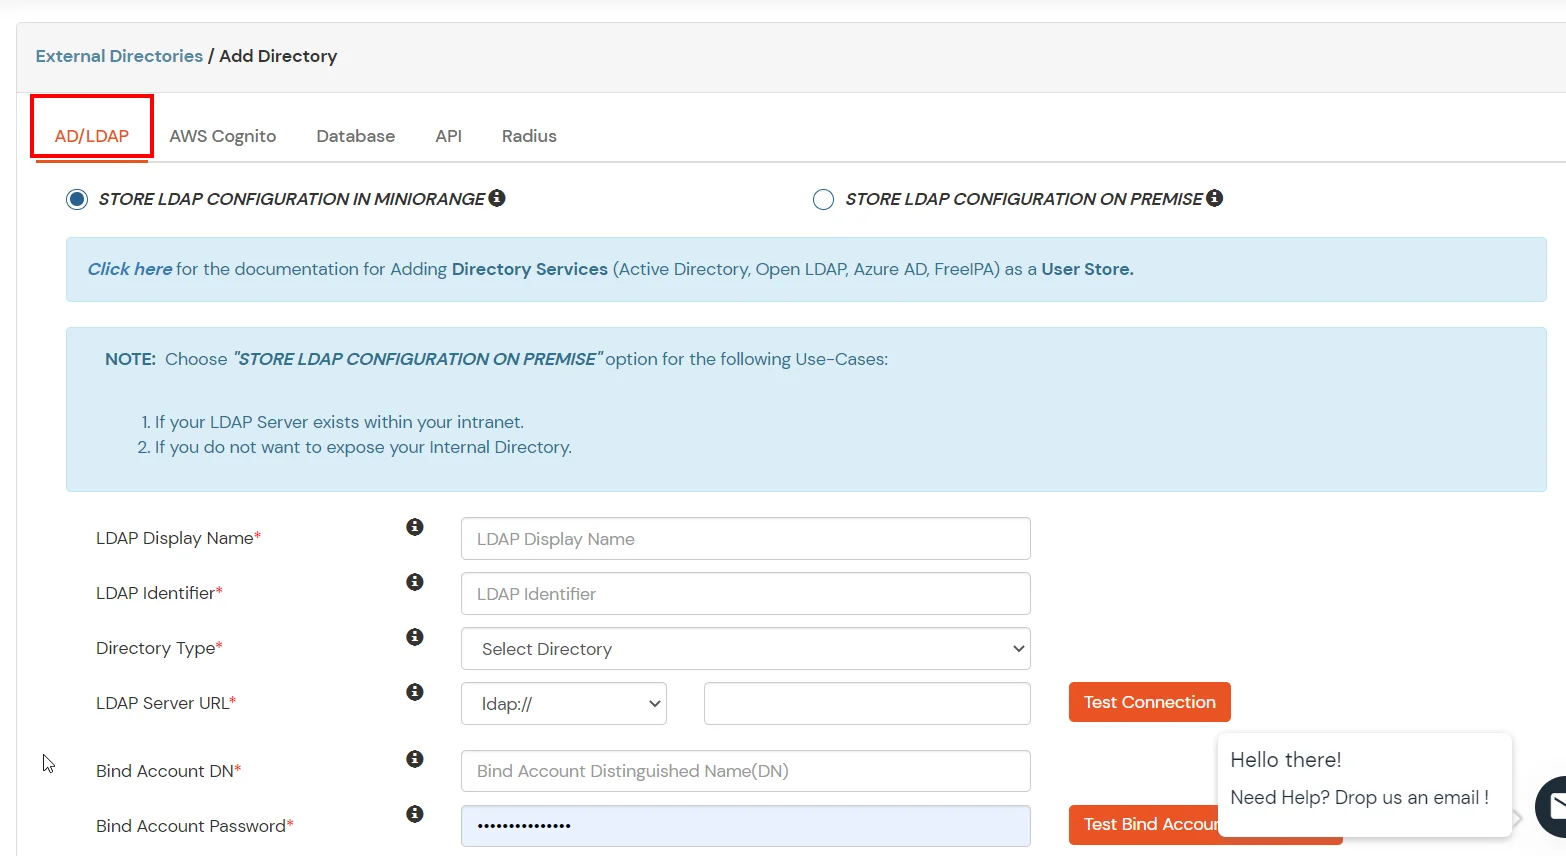
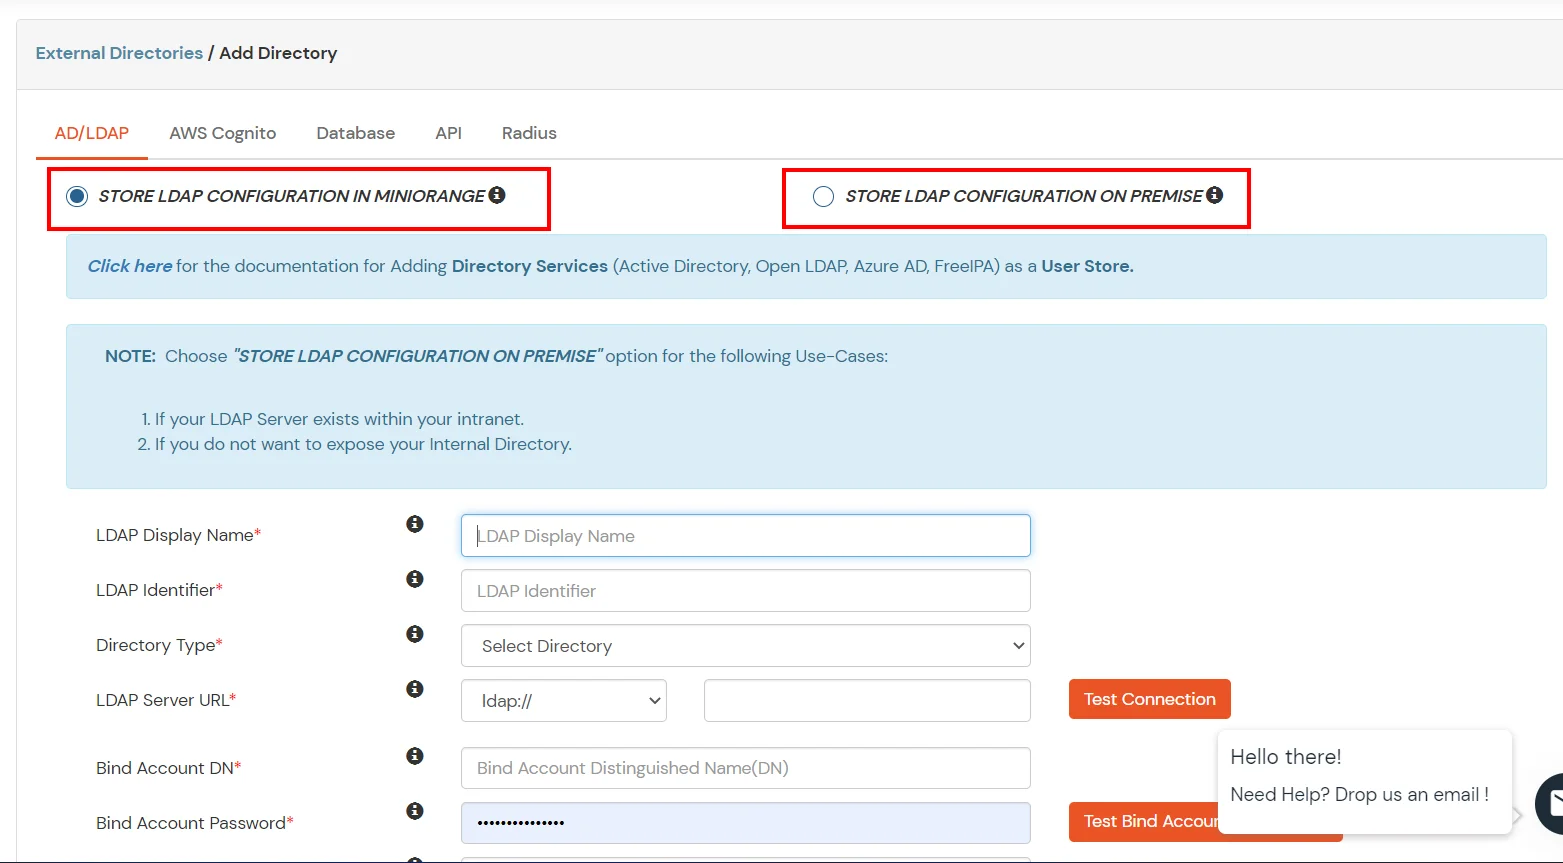
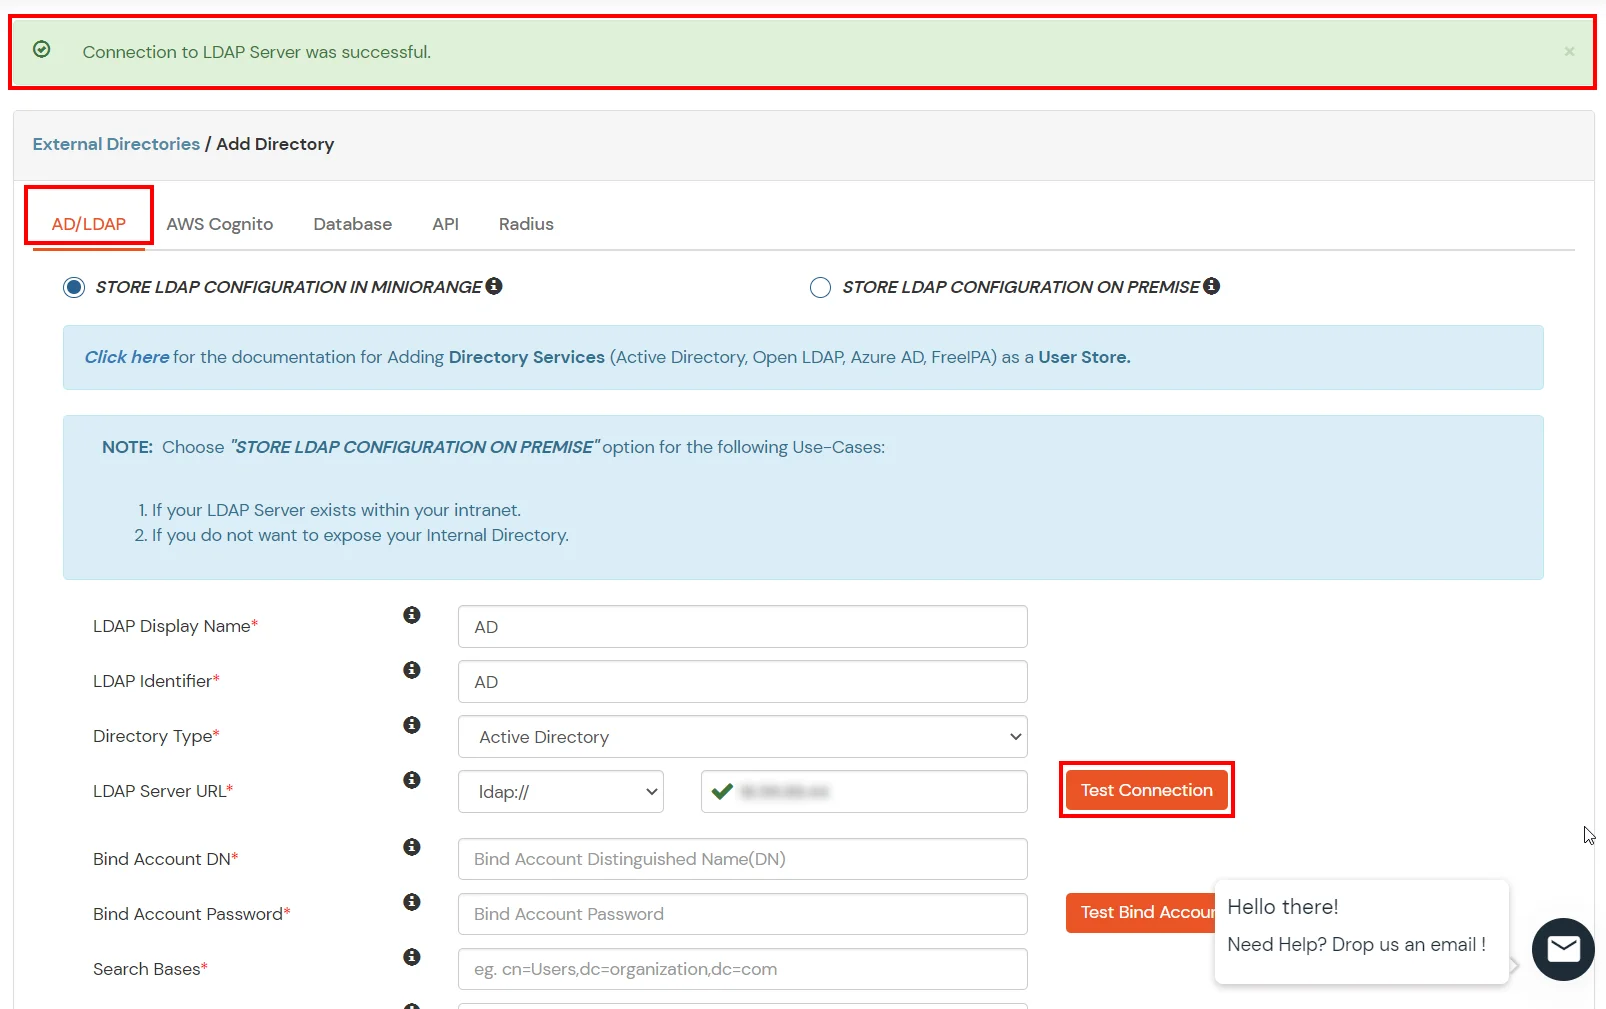
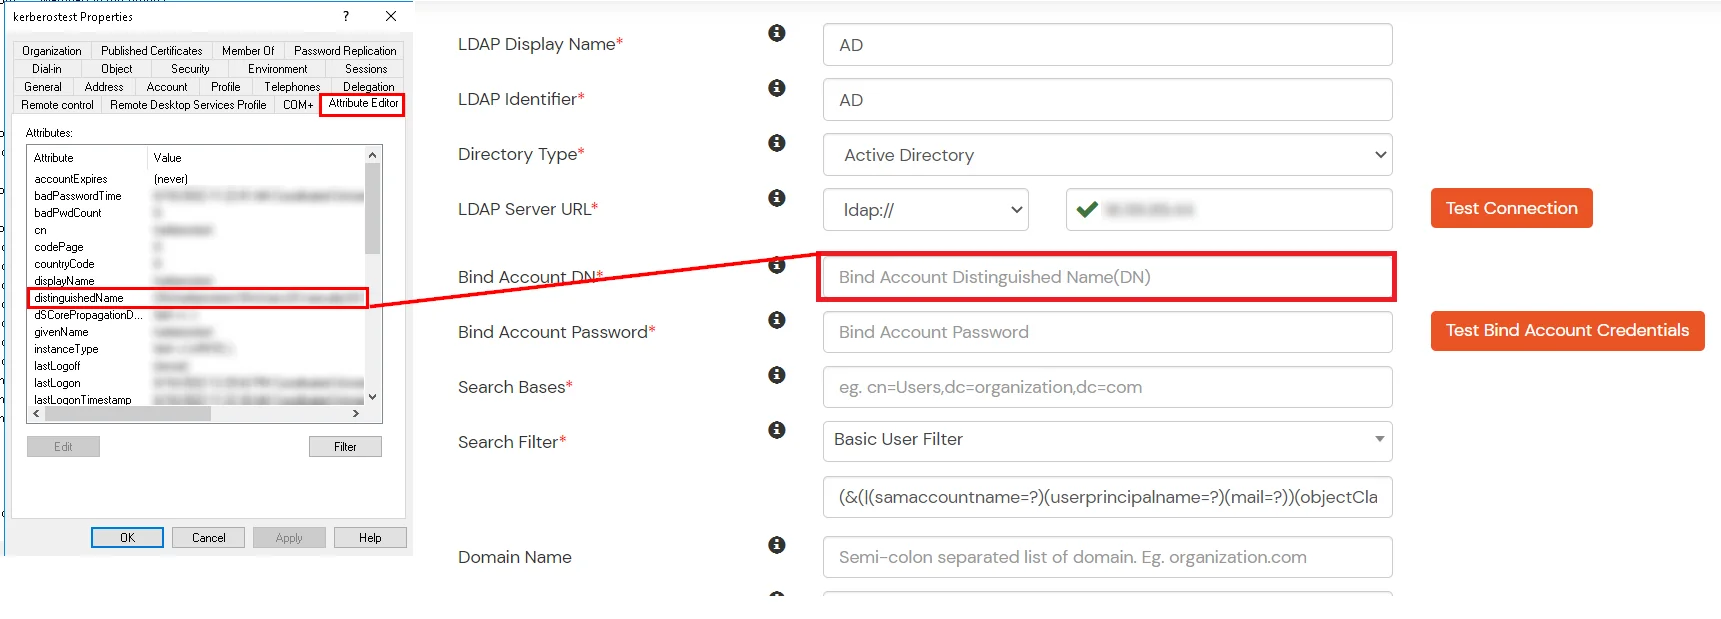
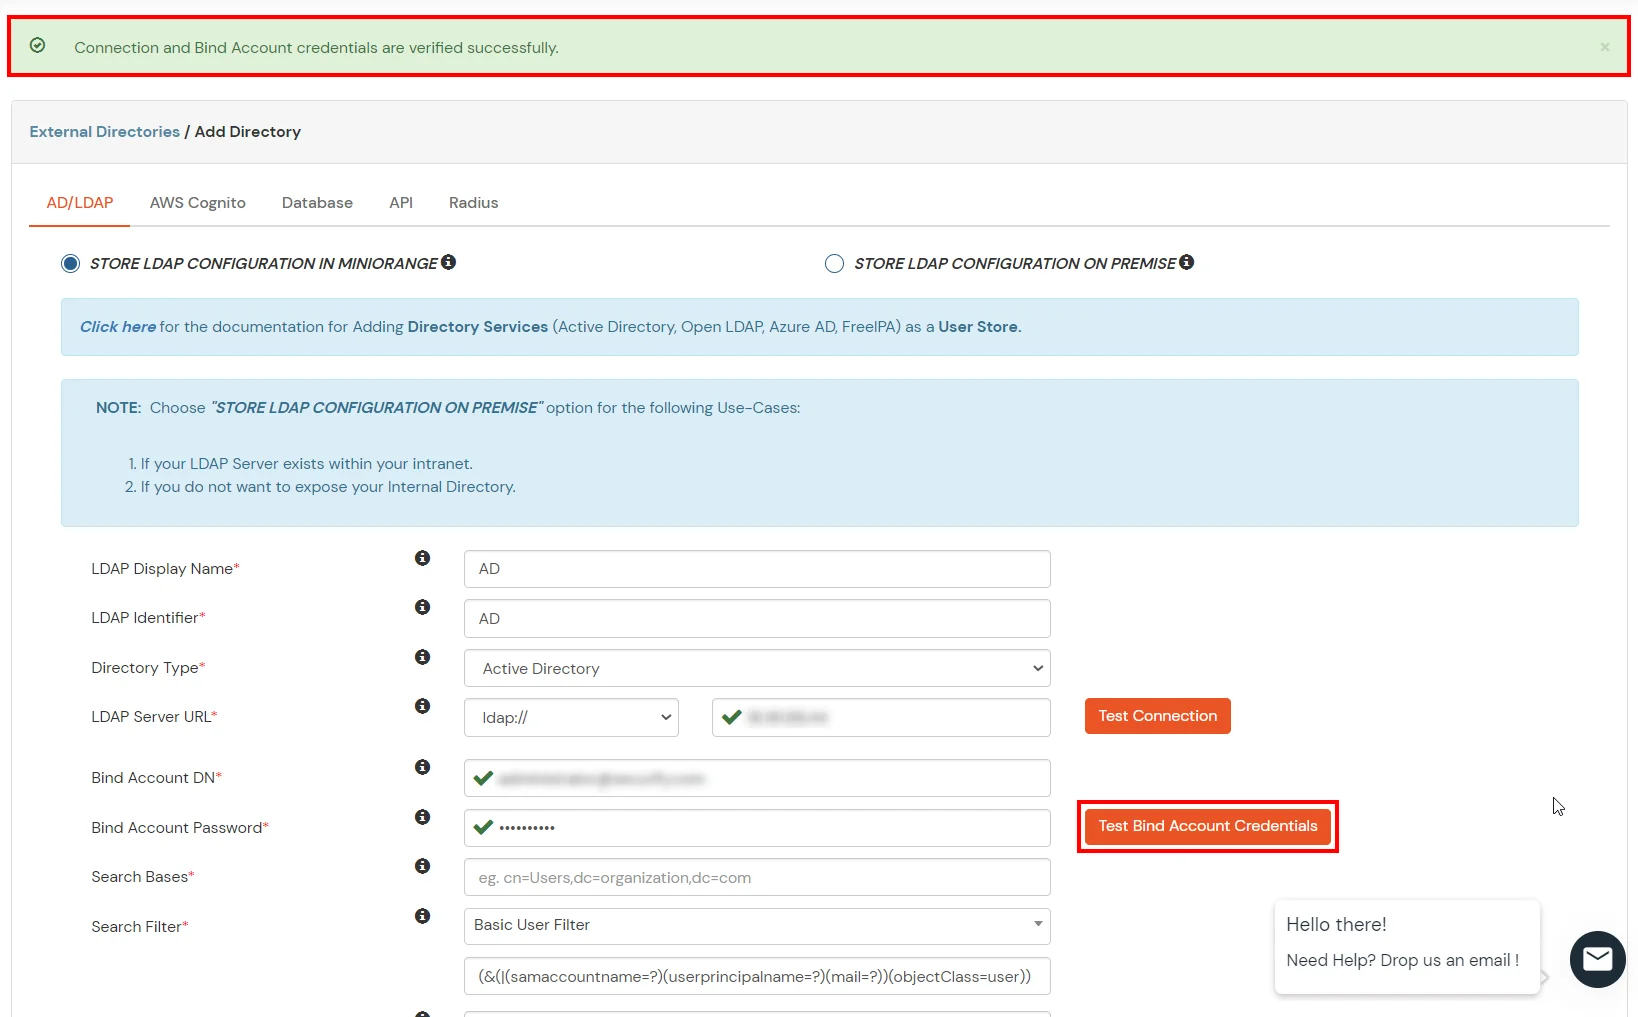
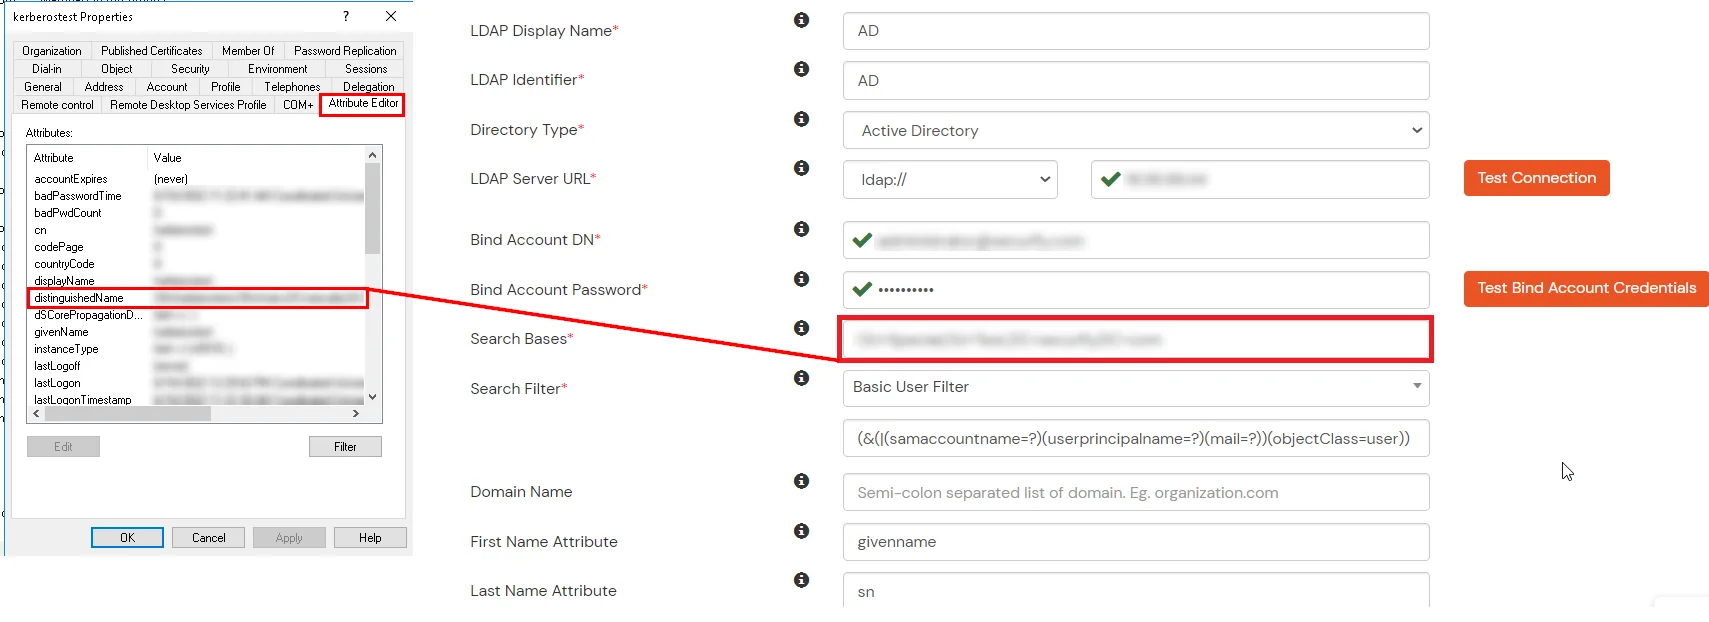
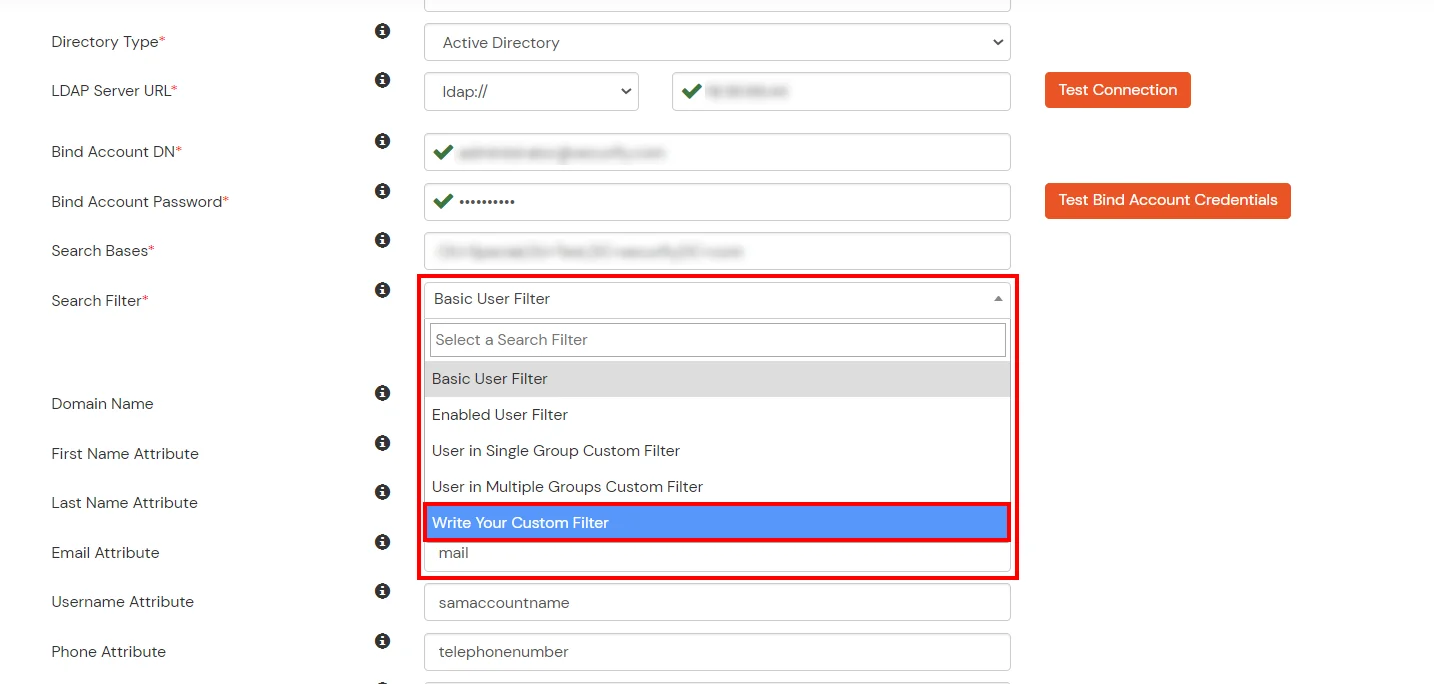
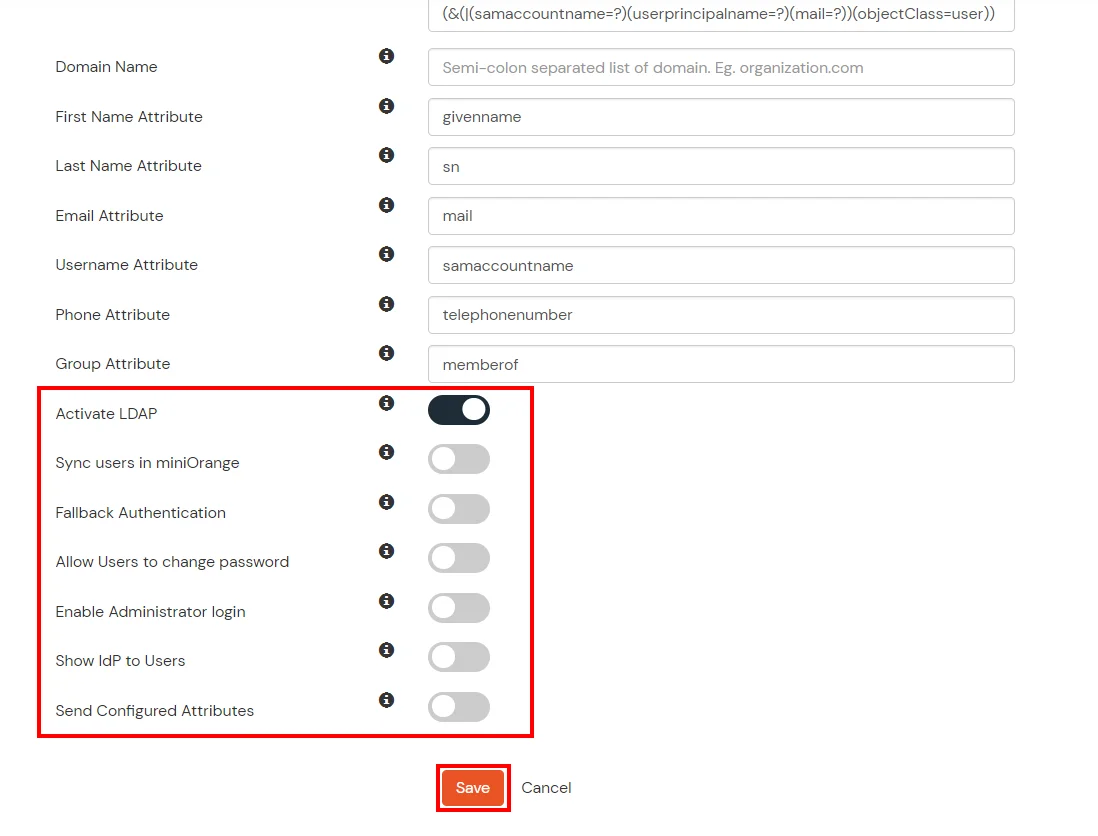
Here's the list of the attributes and what it does when we enable it. You can enable/disable accordingly.
| Attribute | Description |
|---|---|
| Activate LDAP | All user authentications will be done with LDAP credentials if you Activate it |
| Fallback Authentication | If LDAP credentials fail then user will be authenticated through miniOrange |
| Enable administrator login | On enabling this, your miniOrange Administrator login authenticates using your LDAP server |
| Show IdP to users | If you enable this option, this IdP will be visible to users |
| Sync users in miniOrange | Users will be created in miniOrange after authentication with LDAP |
Attribute Name sent to SP = organization
Attribute Name from IDP = company
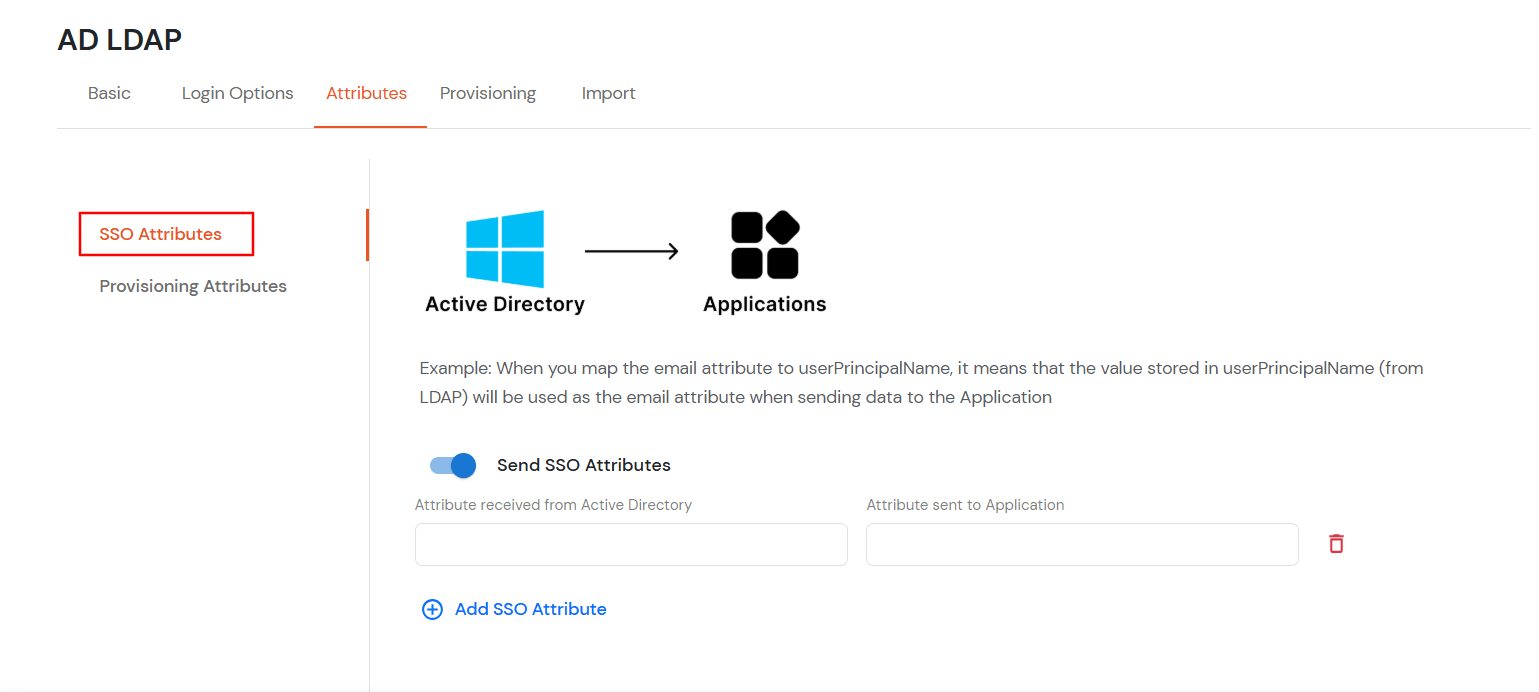
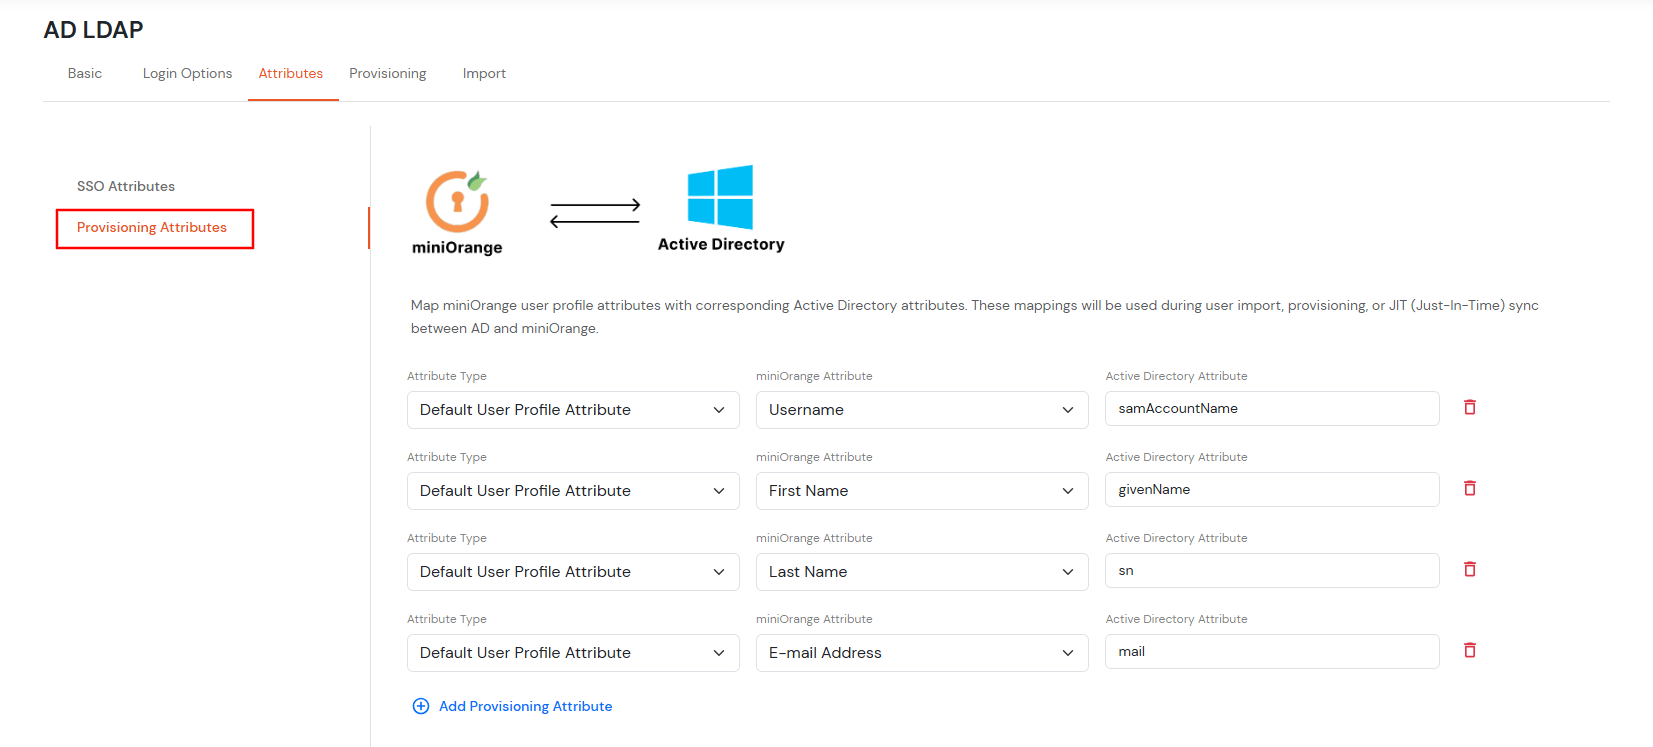
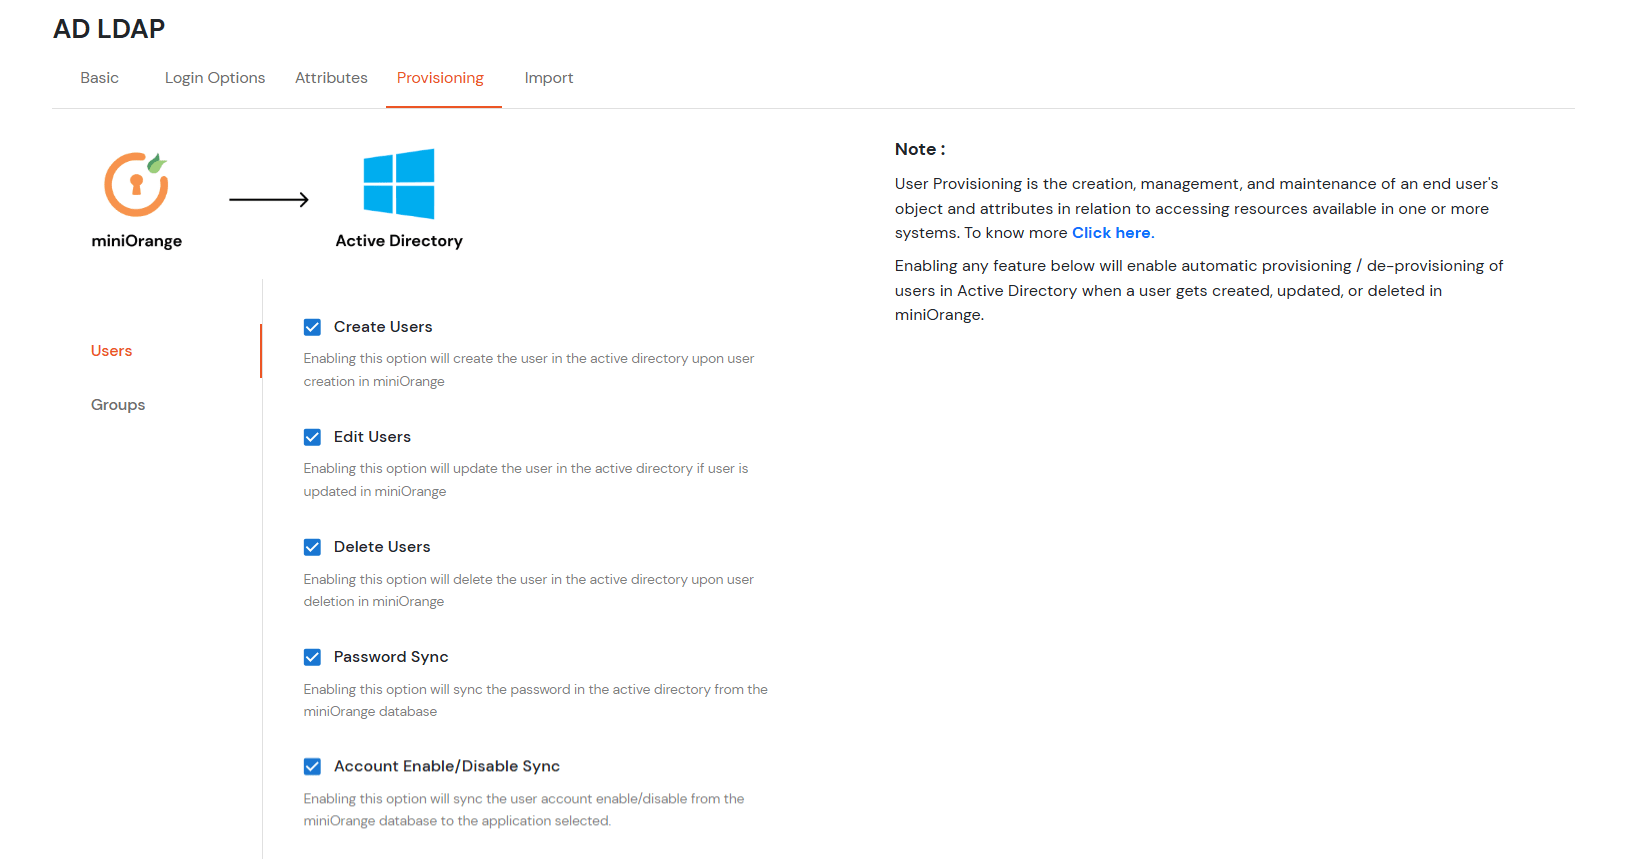
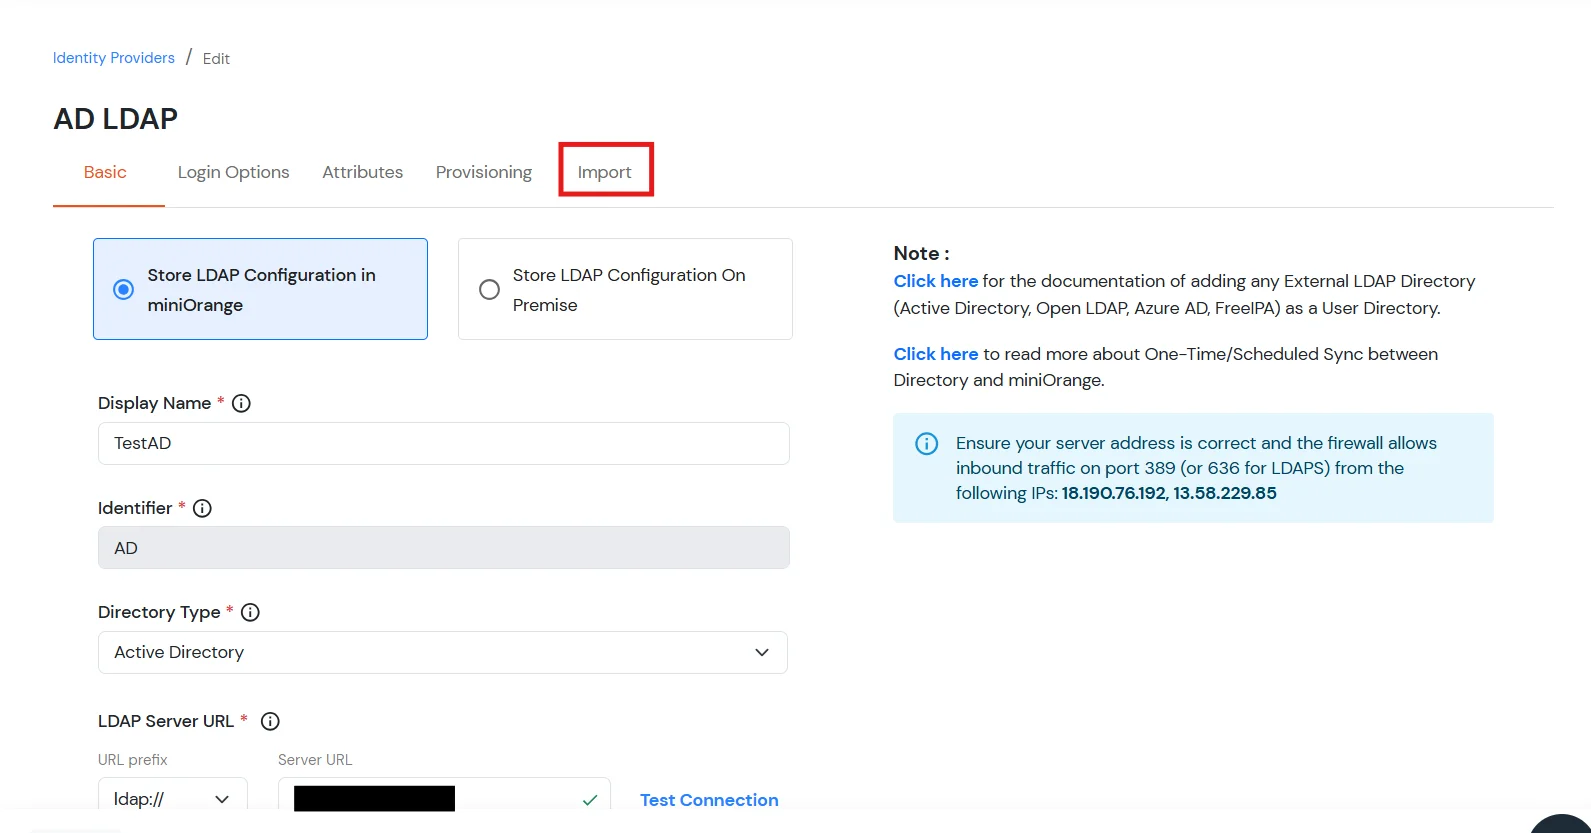
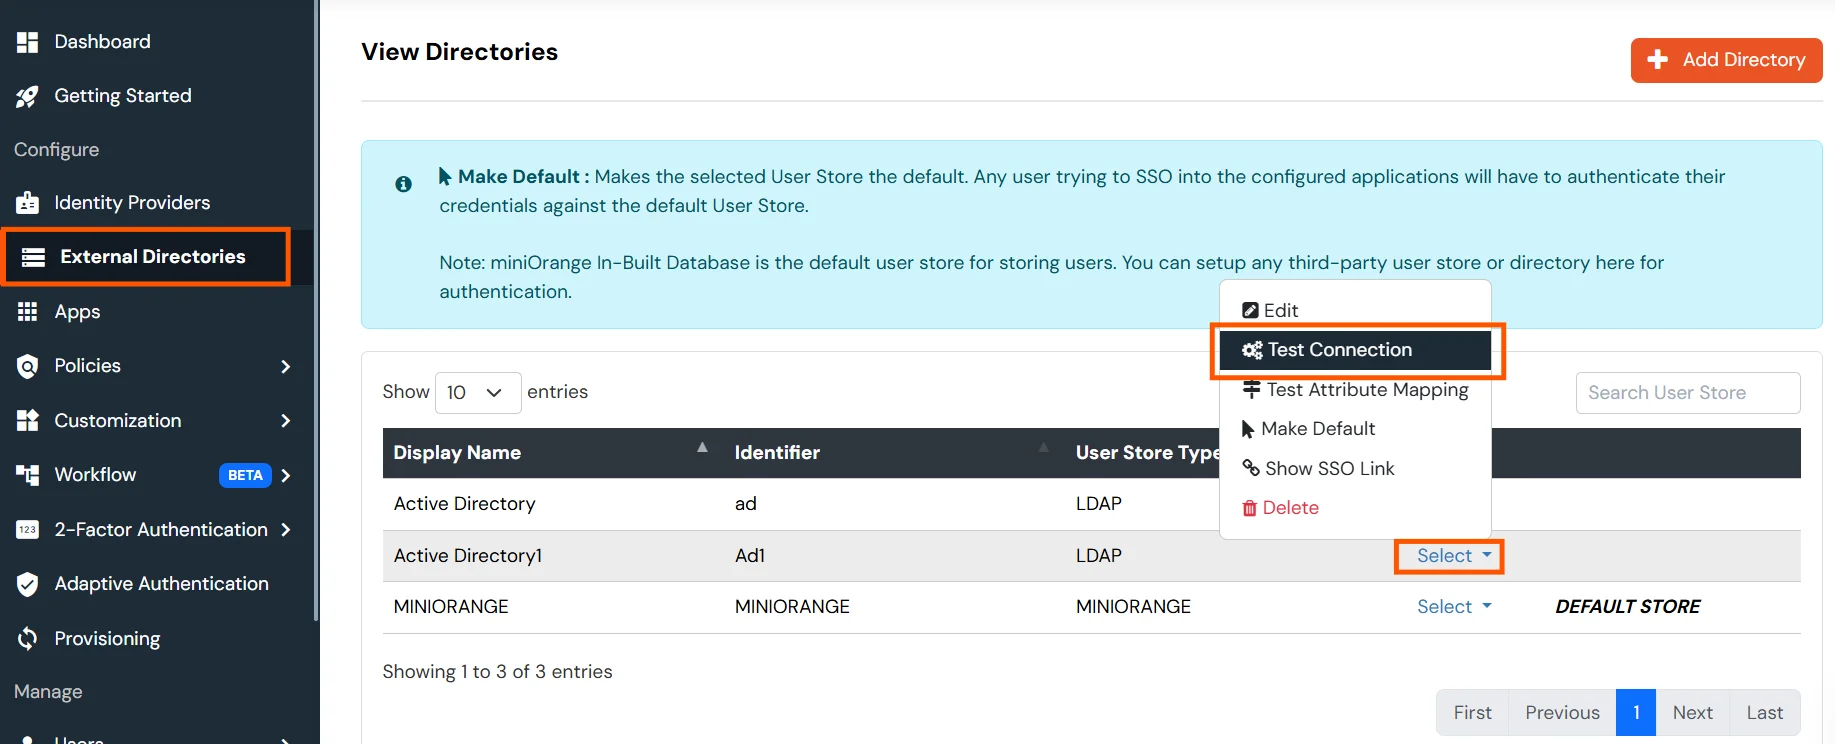
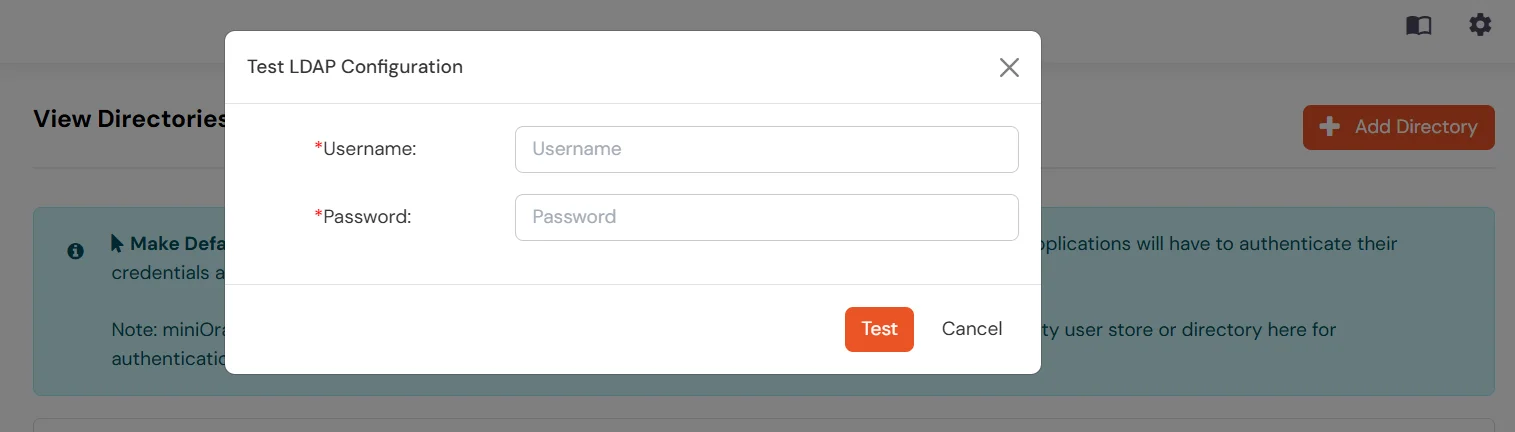
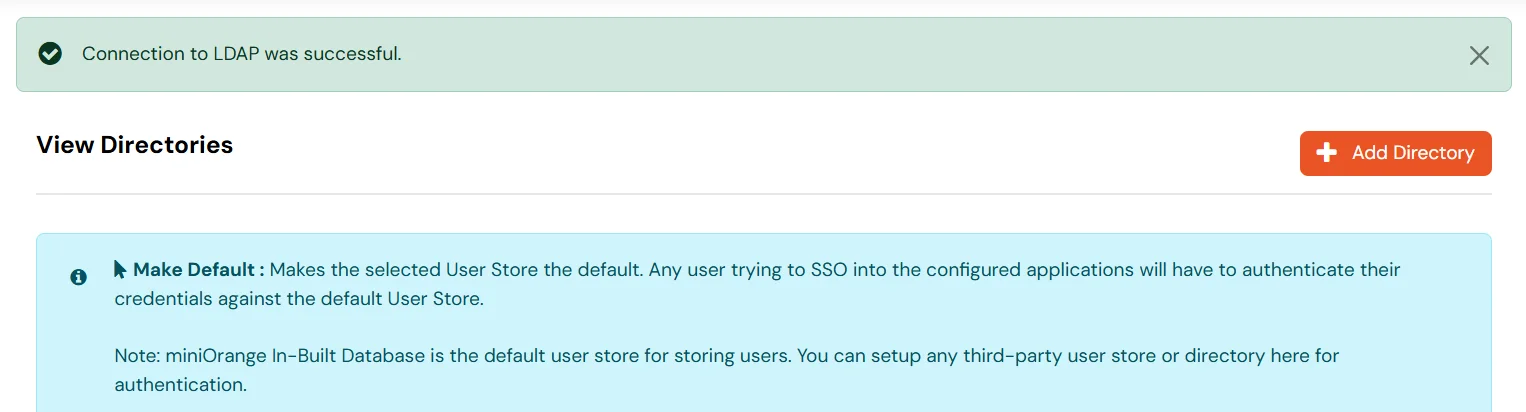
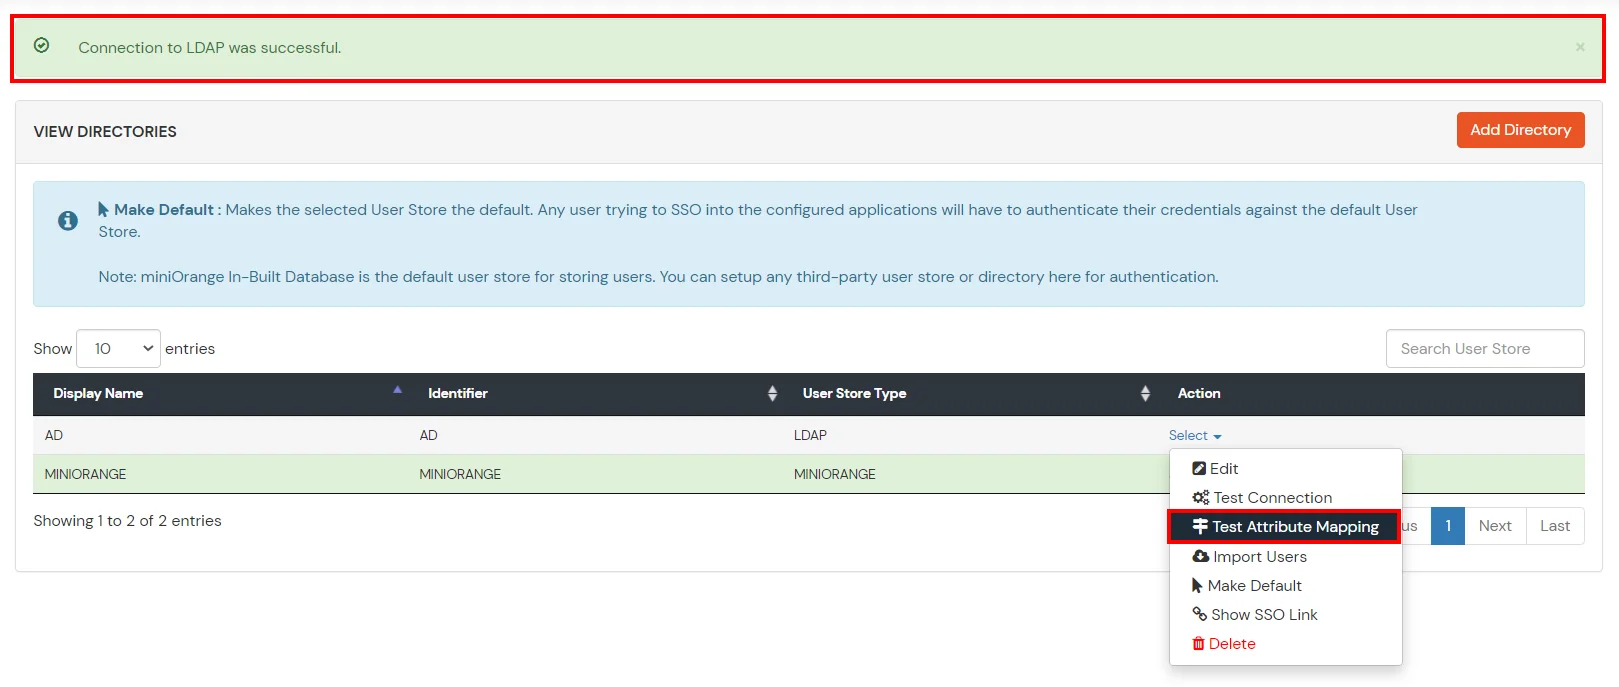
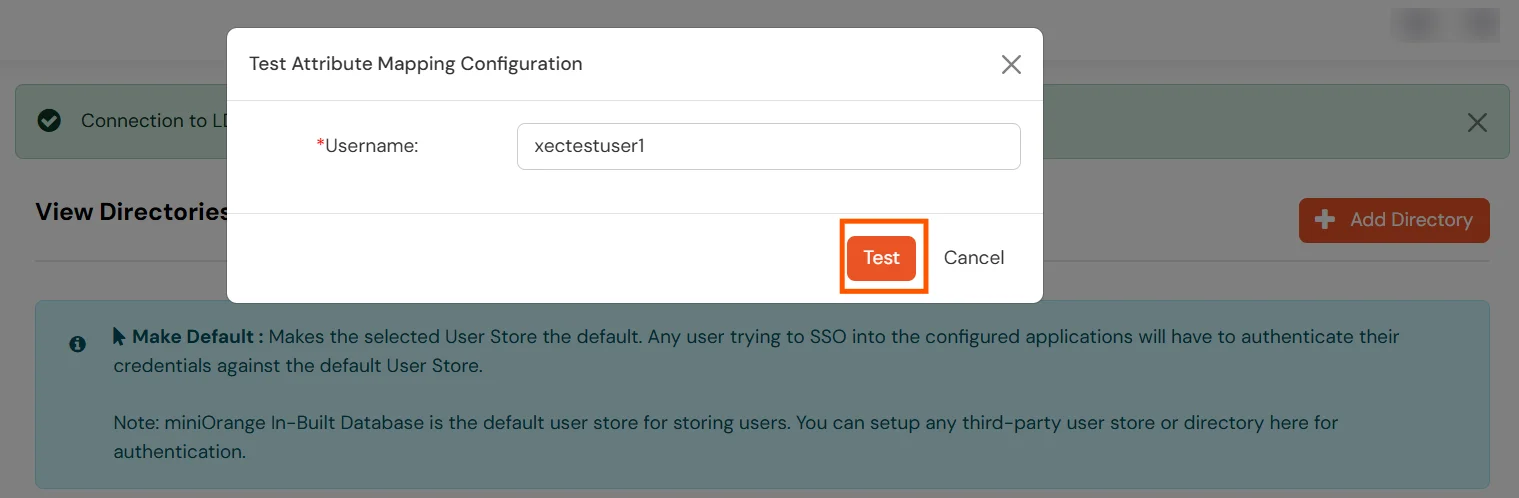
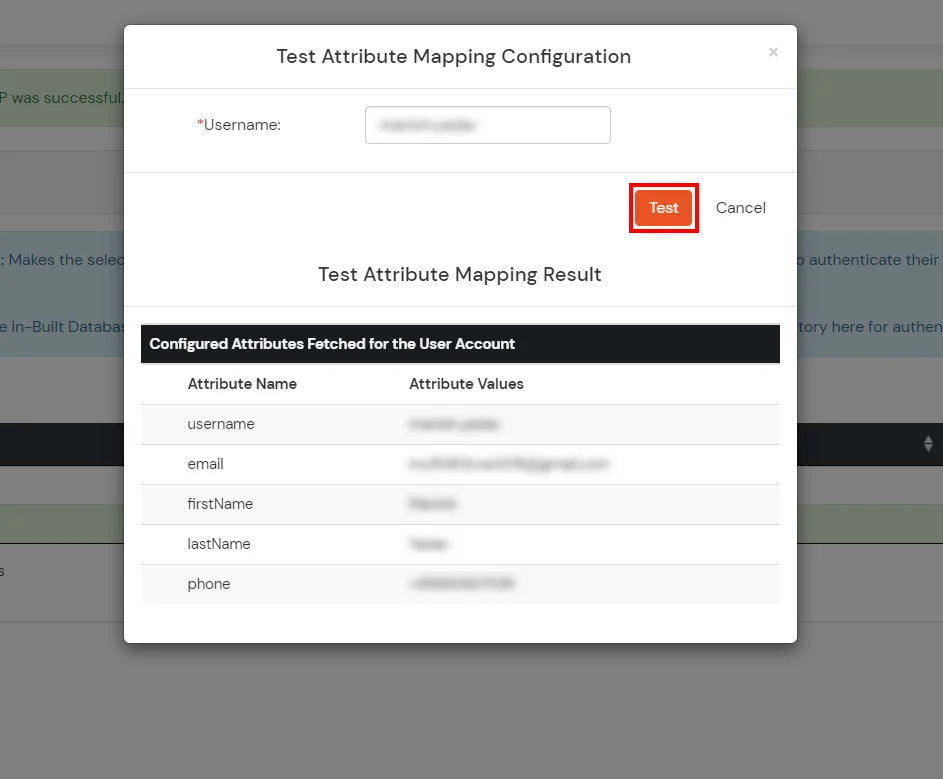
Set up AD as External Directory configuration is complete.
Note: Refer our guide to setup LDAP on windows server.
miniOrange integrates with various external user sources such as directories, identity providers, and etc.
Contact us or email us at idpsupport@xecurify.com and we'll help you setting it up in no time.
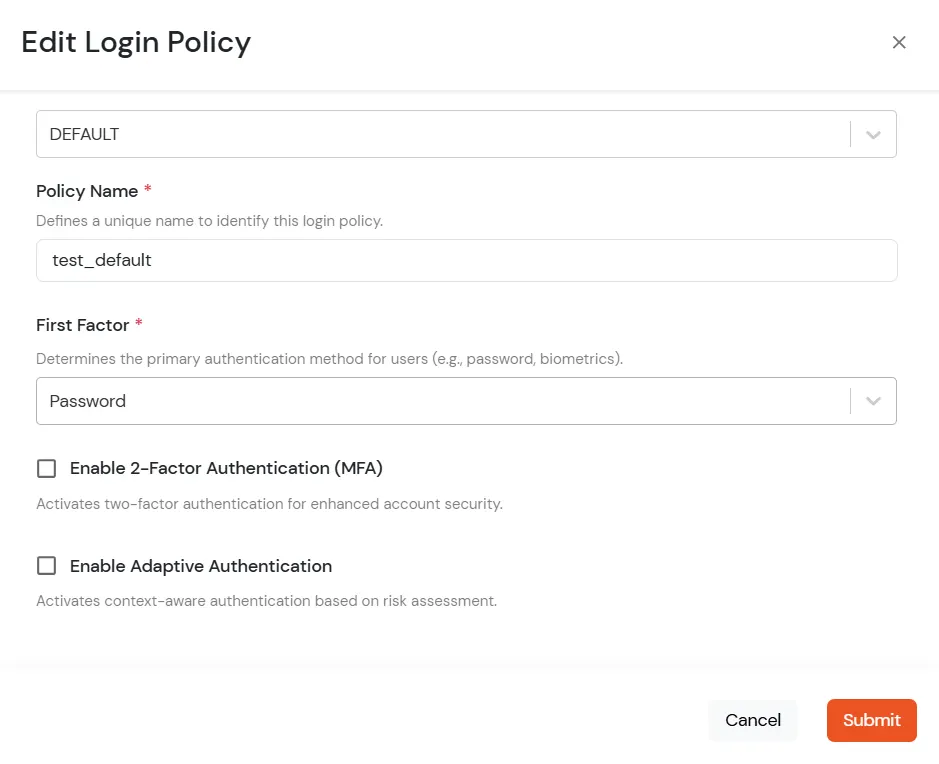
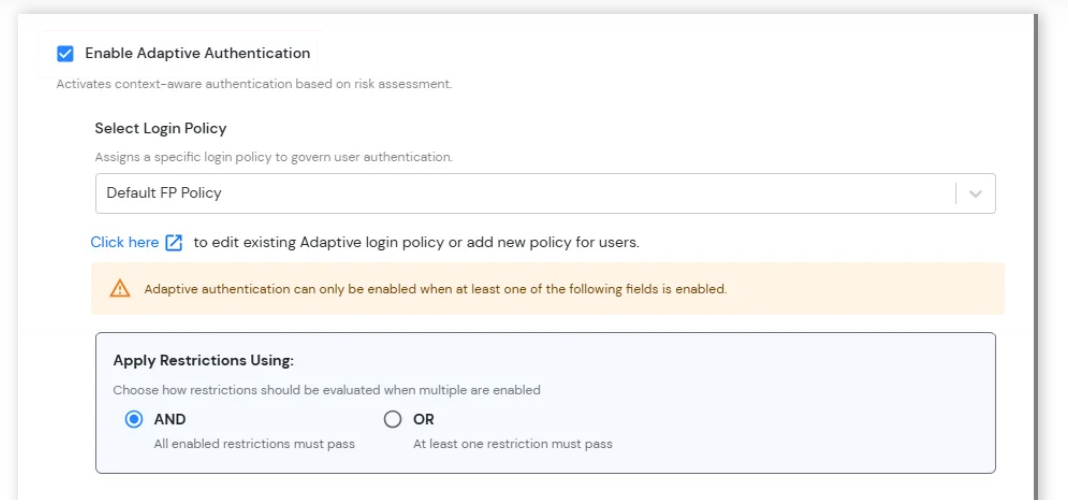
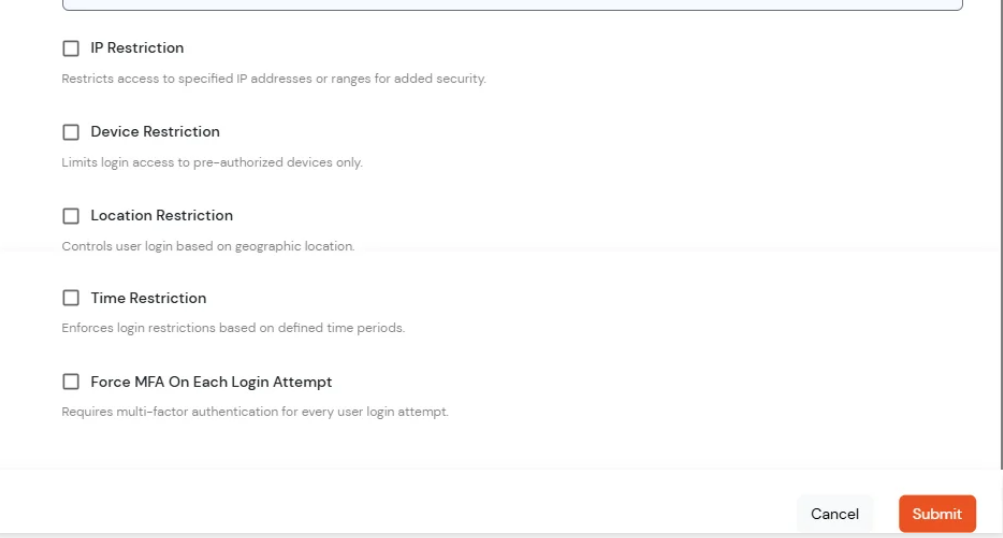
Adaptive Authentication for Zendesk enables administrators to enforce context-aware access policies by evaluating user login conditions such as IP address, device, location and login time. Based on the configured policy, users can be allowed access, challenged with additional verification or denied access. Administrators can also configure email alerts, customize user-facing error messages, review policy settings before deployment and assign adaptive authentication policies to application login policies to strengthen security and prevent unauthorized access.
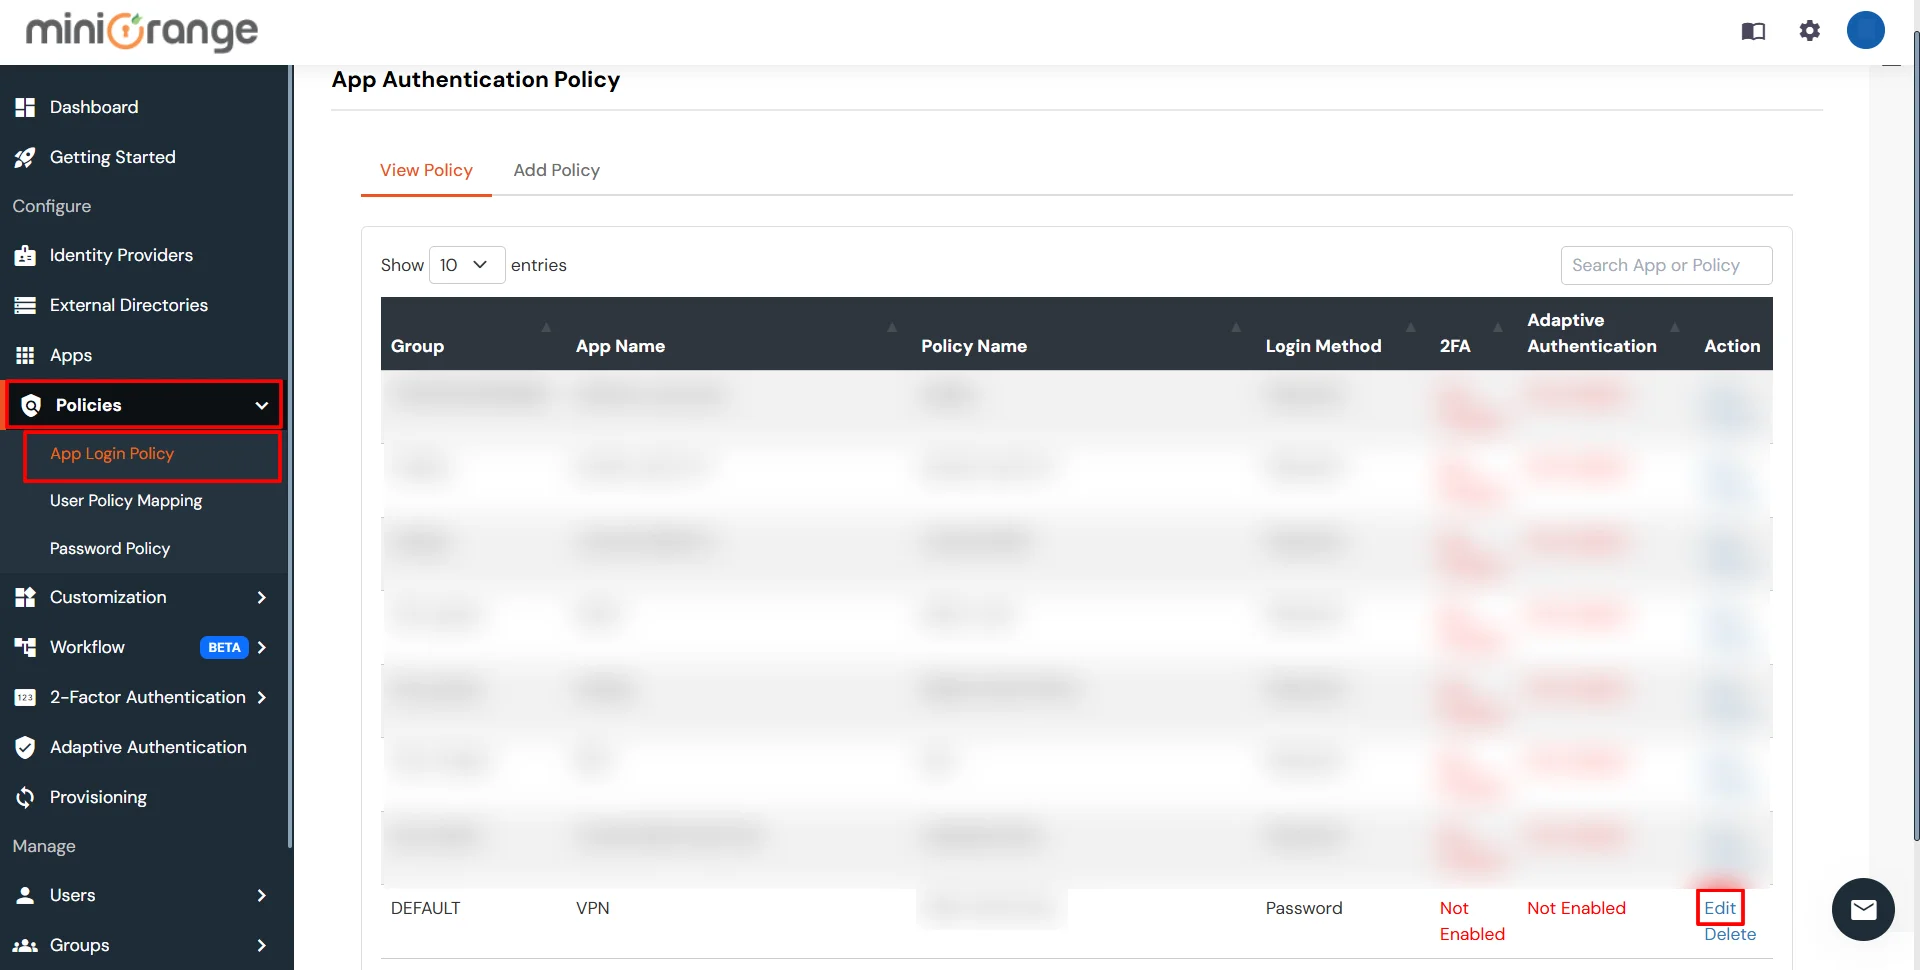
[Note: The Adaptive Authentication section has been moved from the left navigation menu. You can now access and manage adaptive authentication policies by navigating to Policies >> Adaptive Access Policy.]
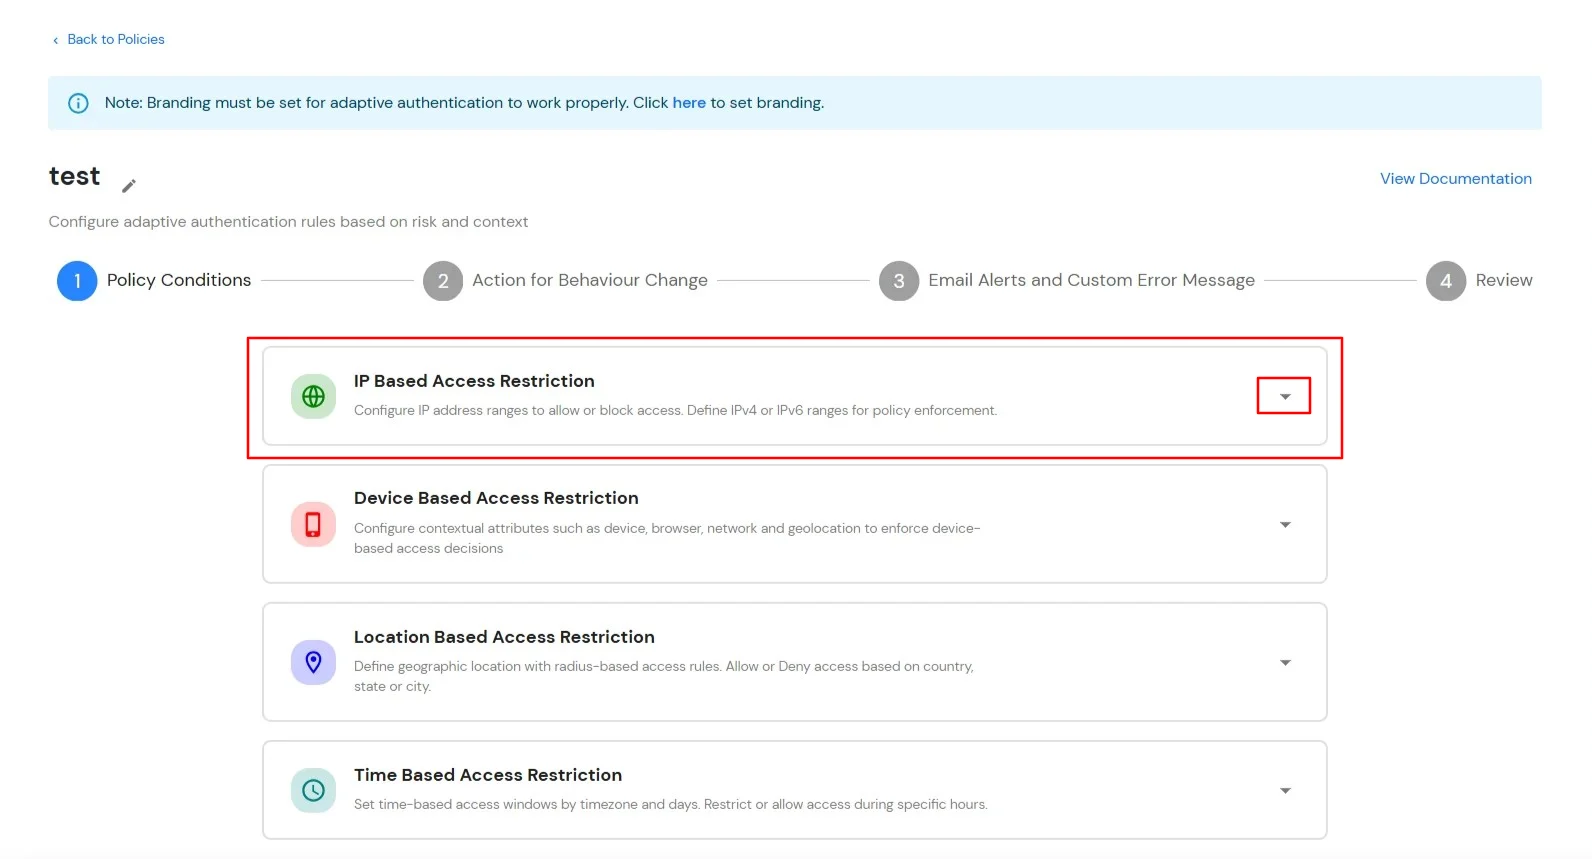
A. Restricting access to Zendesk with IP Based Access Restriction
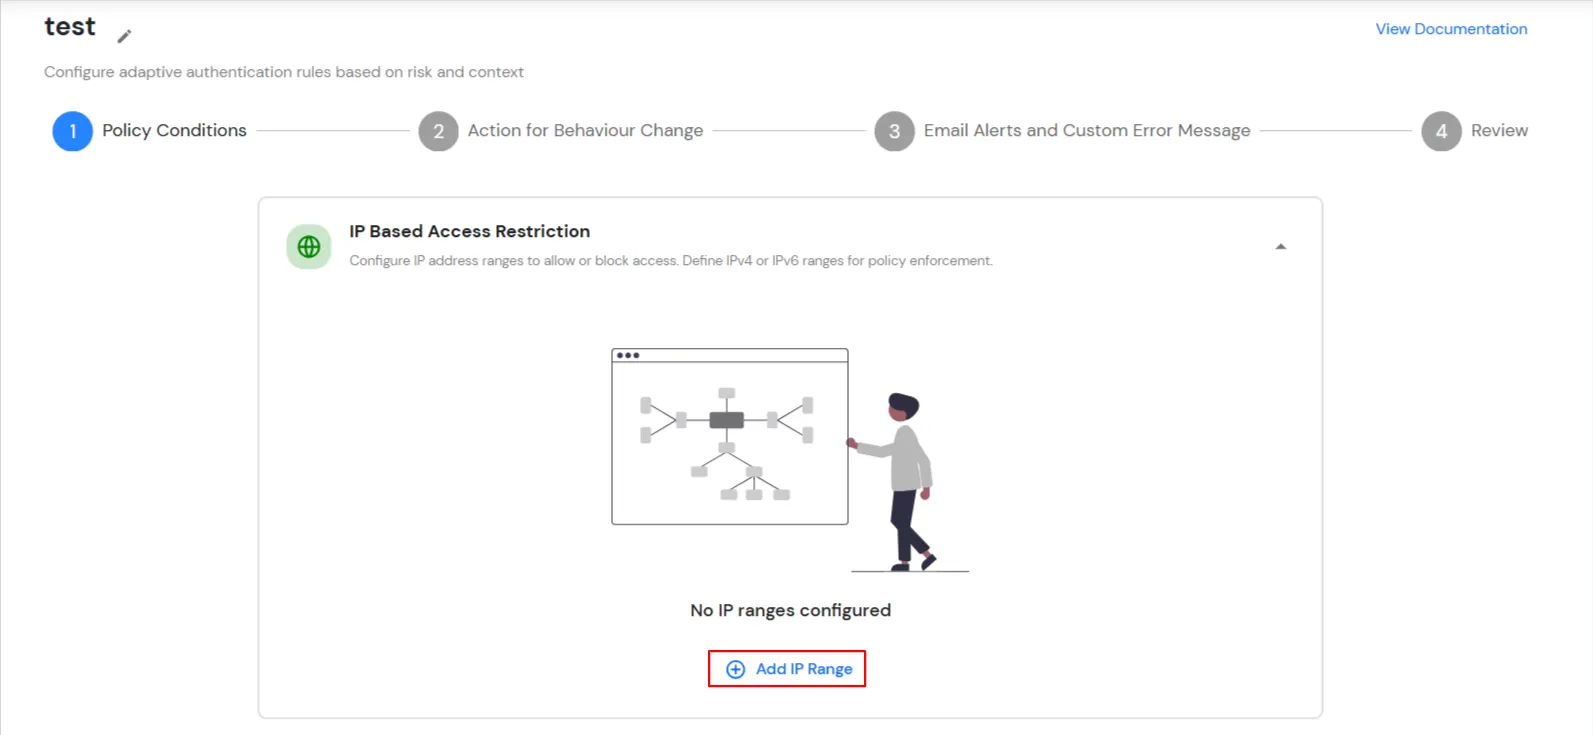
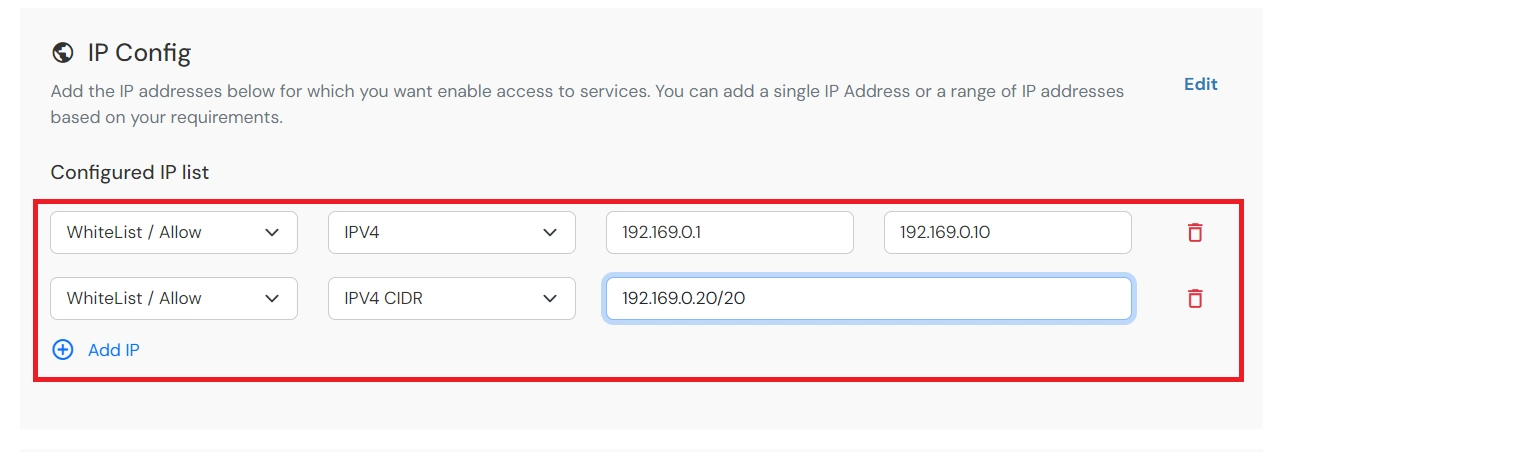
IP Based Access Restriction allows administrators to control user access based on the source IP address of the login request. Administrators can configure trusted or restricted IP addresses and IP ranges and define the action to be taken when a user's IP address matches the configured criteria. During authentication, the user's IP address is evaluated against the configured policy and access is either Allowed, Denied or Challenged based on the selected configuration.
You can configure Adaptive Authentication with IP Based Restriction in following way :
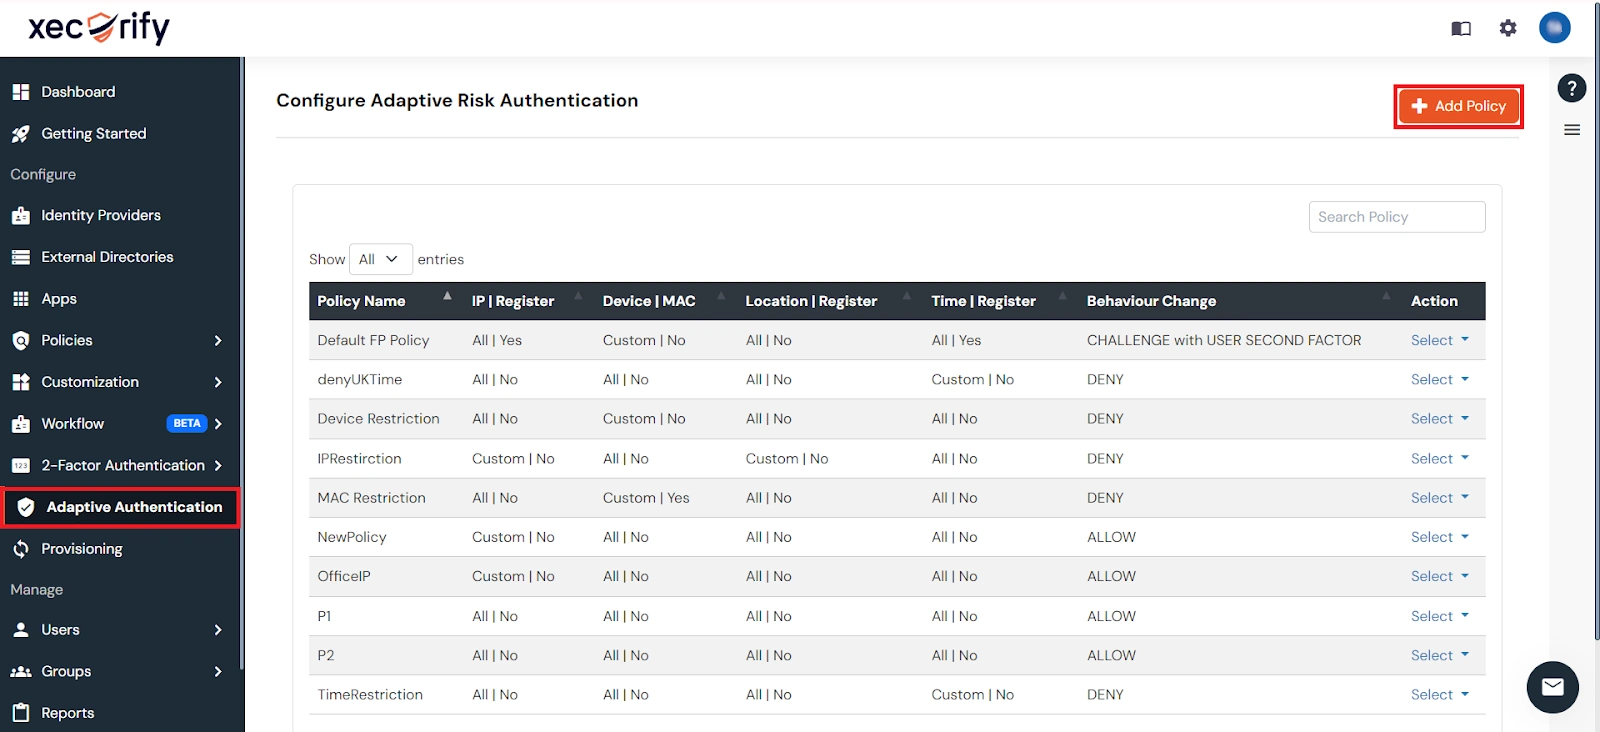
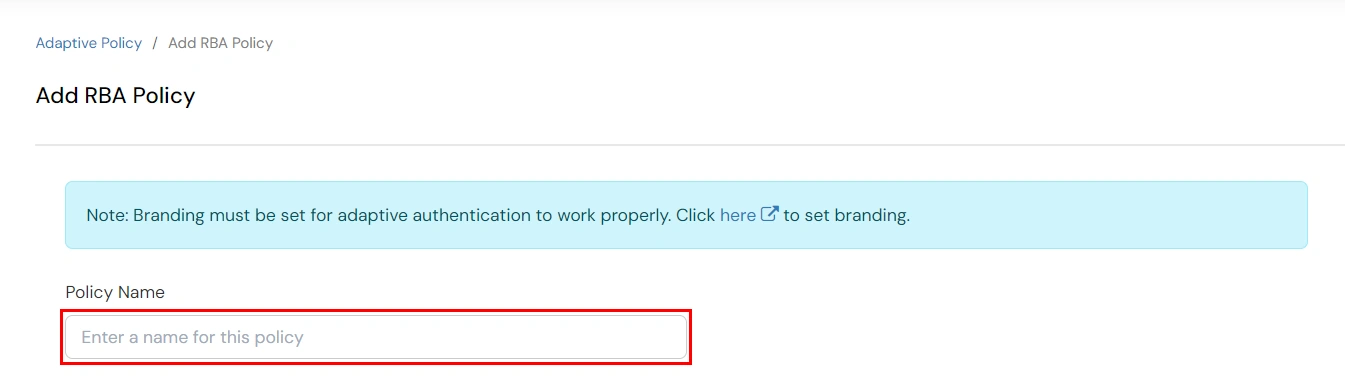
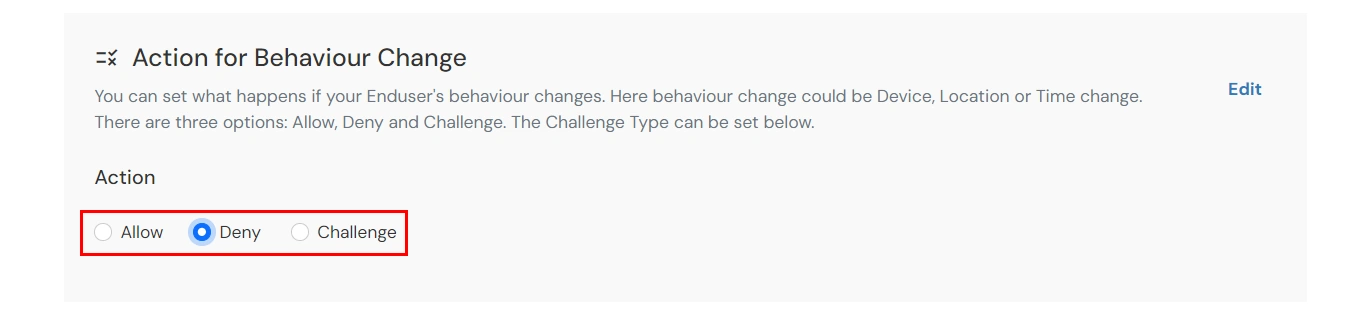
| Attribute | Description |
|---|---|
| Allow | Allow users to authenticate and use services if Adaptive authentication condition is true. |
| Deny | Deny user authentications and access to services if Adaptive authentication condition is true. |
| Challenge | Challenge users with one of the three methods mentioned below for verifying user authenticity. |
| Attribute | Description |
|---|---|
| User second Factor | The User needs to authenticate using the second factor he has opted or assigned for such as
|
| KBA (Knowledge-based authentication) | The System will ask the user for 2 of 3 questions he has configured in his Self-Service Console. Only after the right answer to both questions is the user allowed to proceed further. |
| OTP over Alternate Email | User will receive an OTP on the alternate email they have configured through the Self Service Console. Once the user provides the correct OTP, they are allowed to proceed further. |
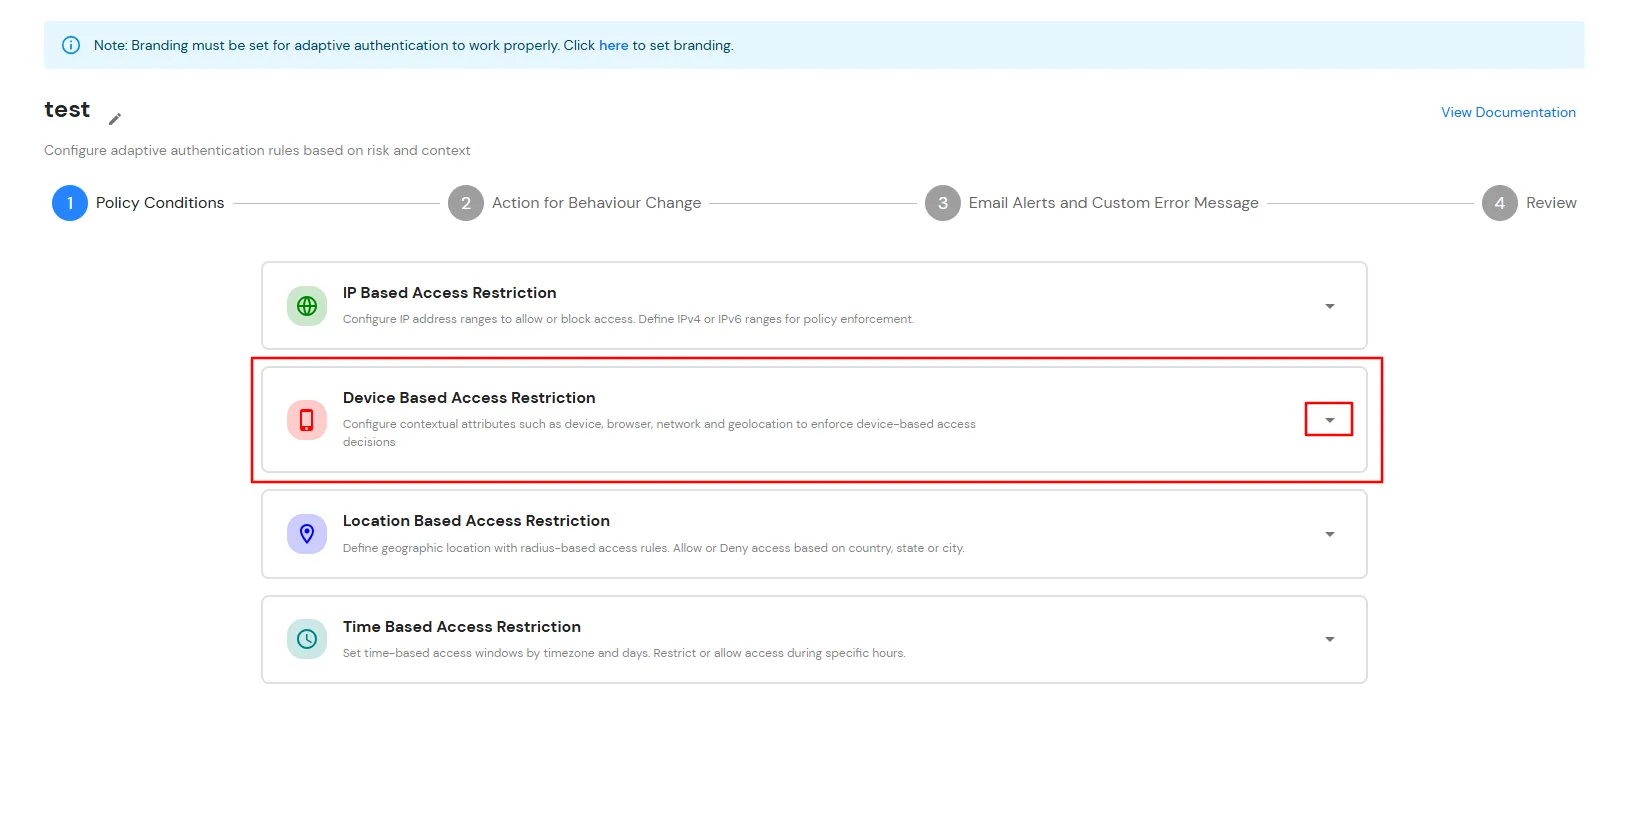
B. Restricting access to Zendesk with Device Based Access Restriction
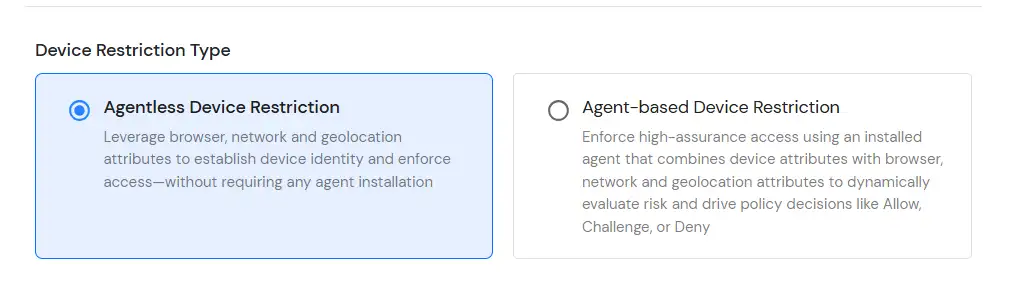
Device Based Access Restriction allows administrators to control user access based on trusted and registered devices. By leveraging device identification and verification mechanisms, administrators can define policies that evaluate the device used during authentication. When a user attempts to log in, the device is assessed against the configured policy and the appropriate action: Allow, Challenge or Deny is applied based on the configured conditions.
You can configure Adaptive Authentication with Device Based Restriction in following way :

C. Restricting access to Zendesk with Location Based Access Restriction
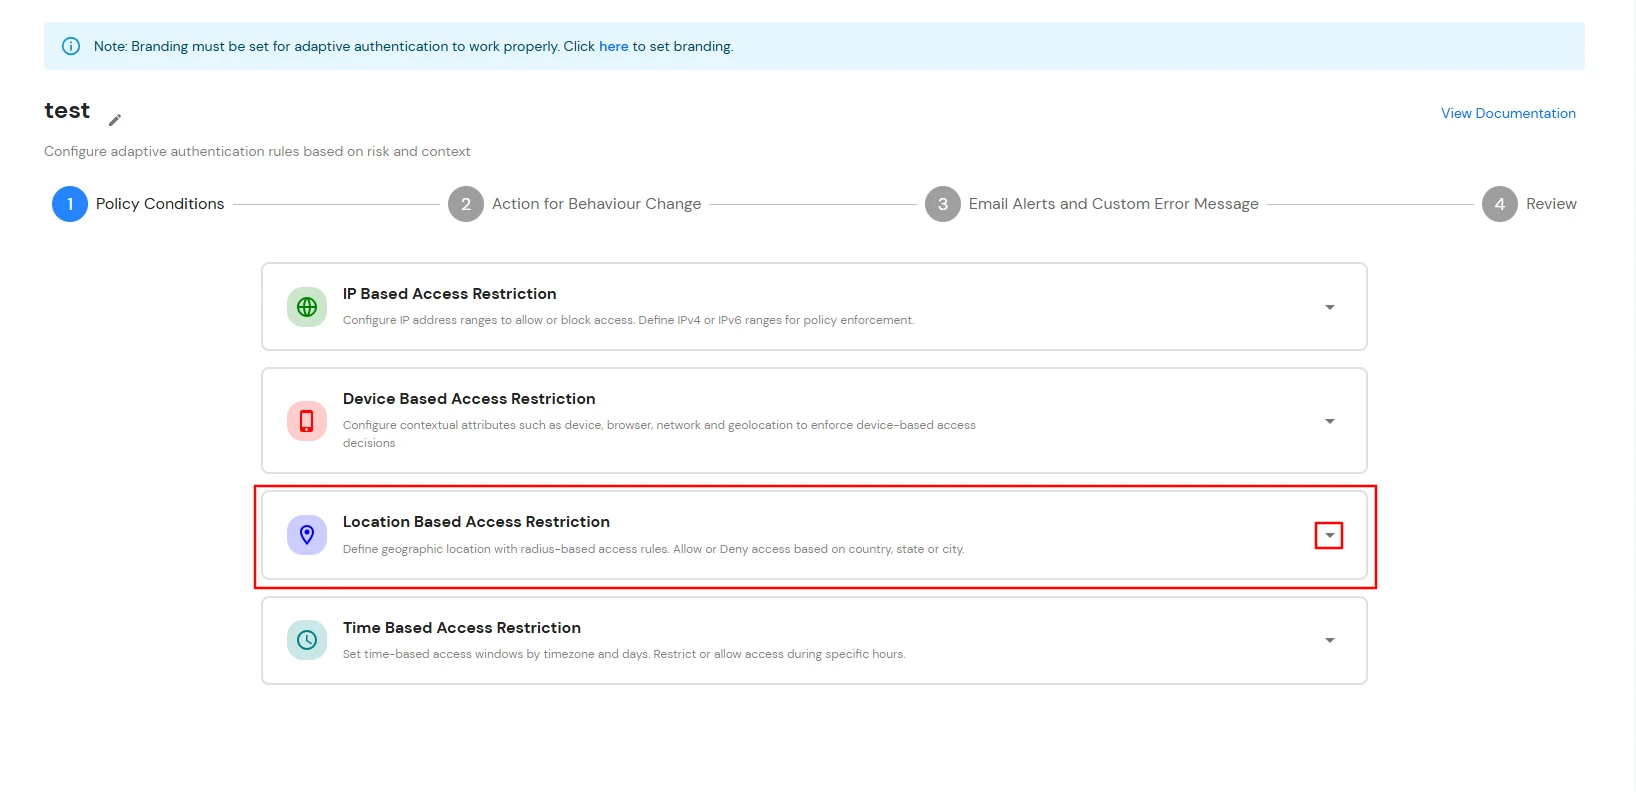
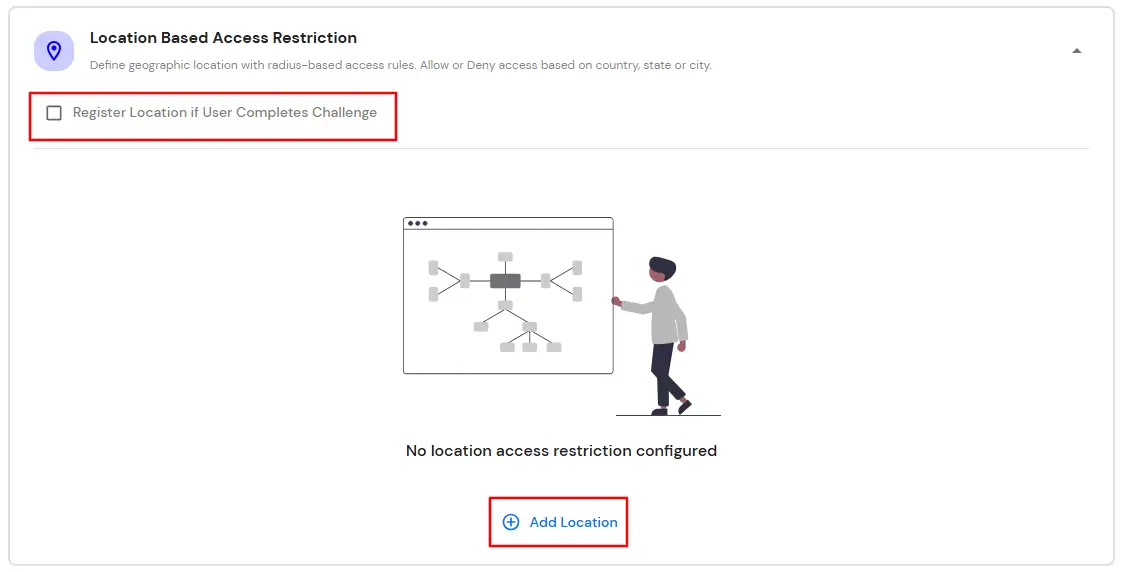
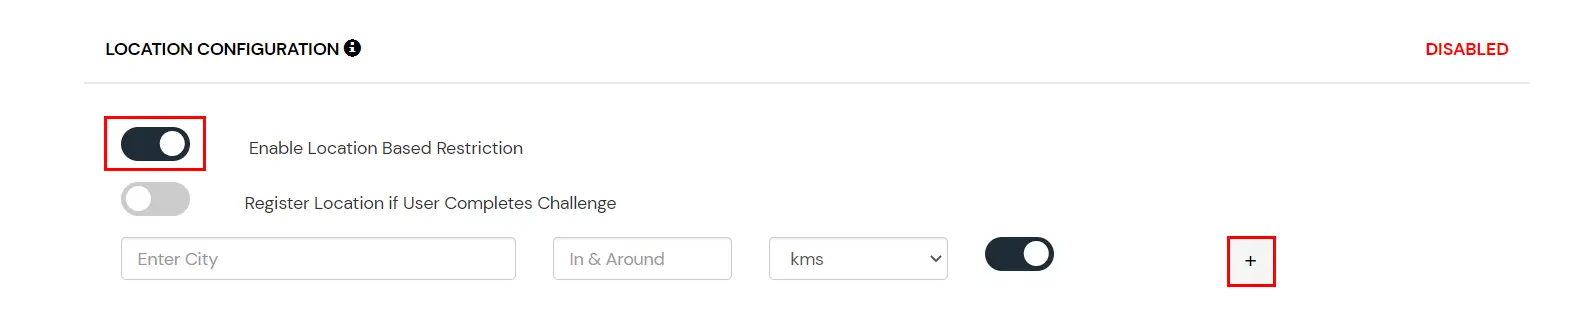
In location restrictions, admin configures a list of locations where they want to allow end-users to either login or deny based on the condition set by the admin. When a user tries to login with adaptive authentication enabled, their Location Attributes, such as (Latitude, Longitude and Country Code) are verified against the Location list configured by the admin. Based on this user will be either allowed, challenged or denied.
You can configure Adaptive Authentication with Location Based Restriction in following way :
D. Restricting access to Zendesk with Time Based Access Restriction
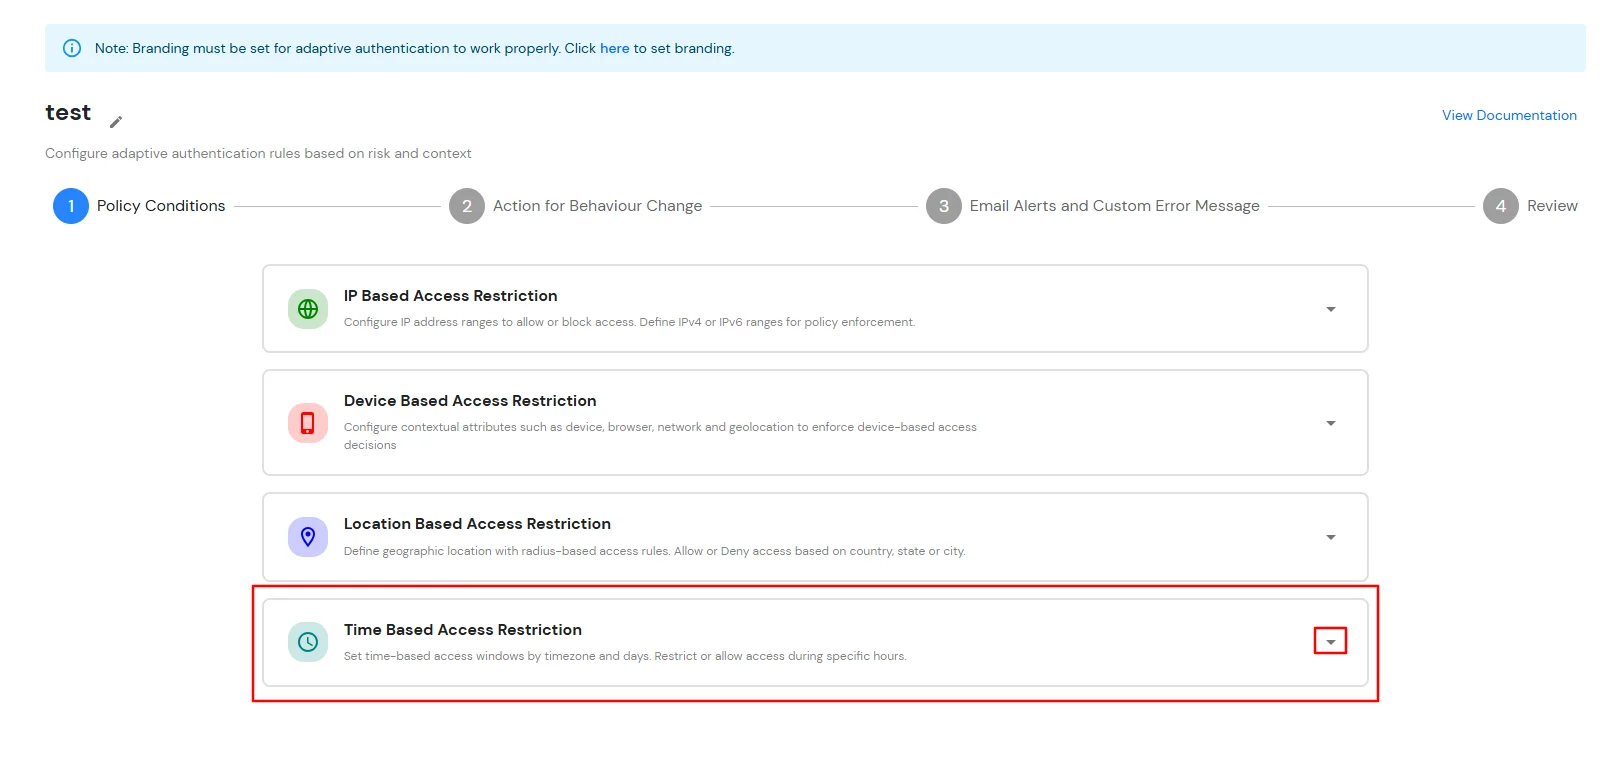
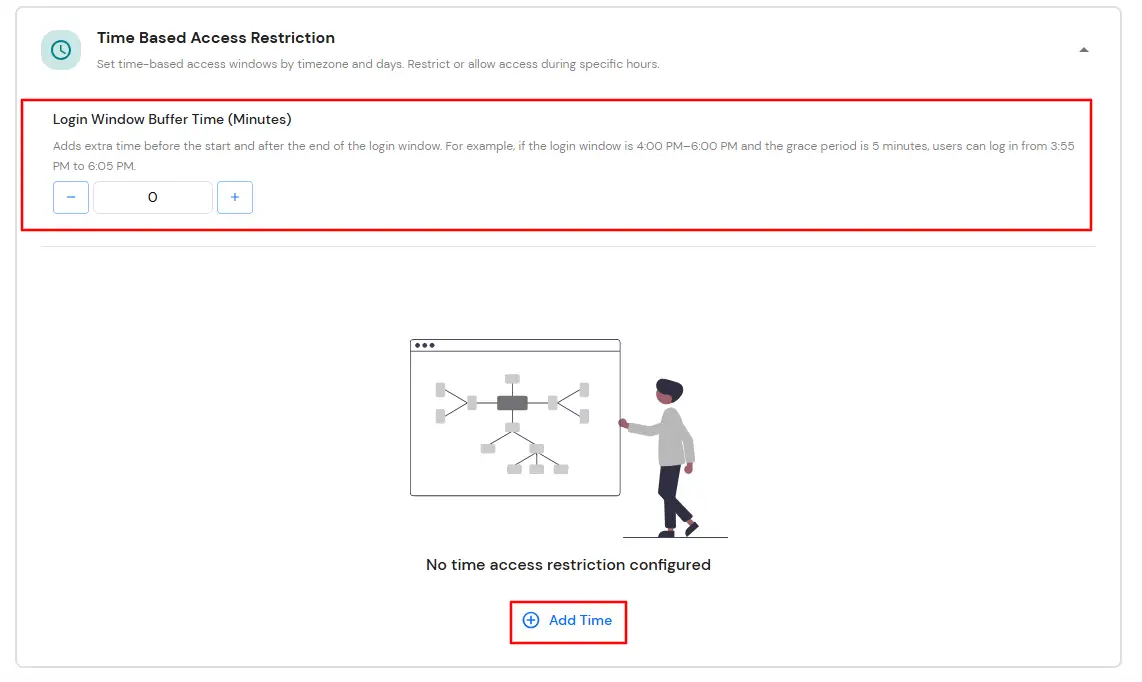
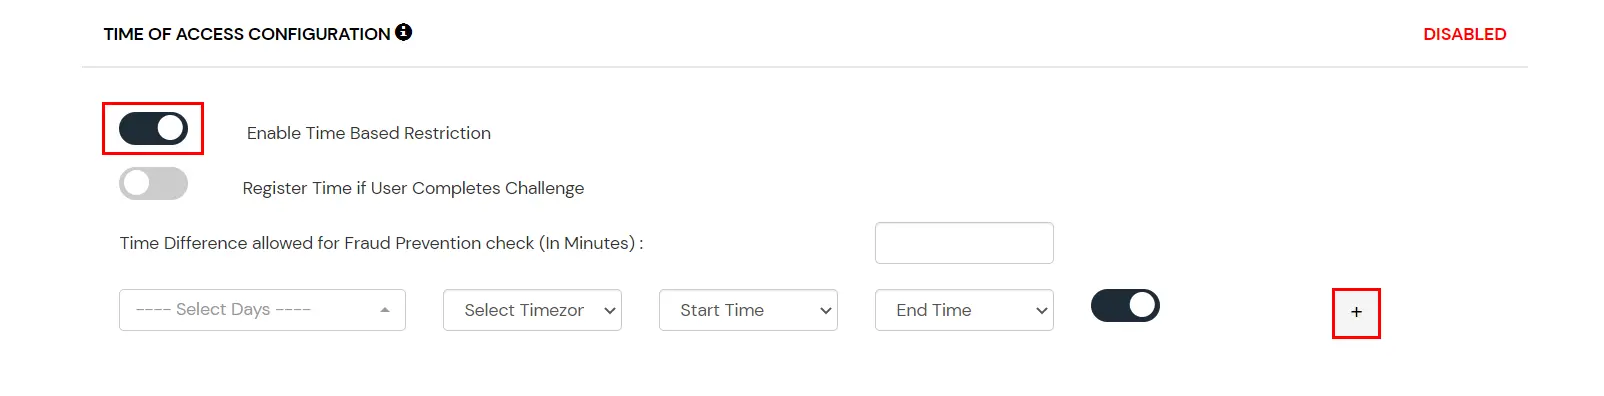
In time restriction, admin configures a time zone with Start and End Times for that timezone and users are either allowed, denied or challenged based on the condition in the policy. When an end-user tries to login with the adaptive authentication enabled, their time zone-related attributes such as Time-Zone and Current System Time, are verified against the list configured by the admin and based on the configuration, the user is either allowed, denied or challenged.
You can configure Adaptive Authentication with Time Based Restriction in following way :
E. Email Alerts and Custom Email Message
This section handles the notifications and alerts related to Adaptive Access Policy. It provides the following options:

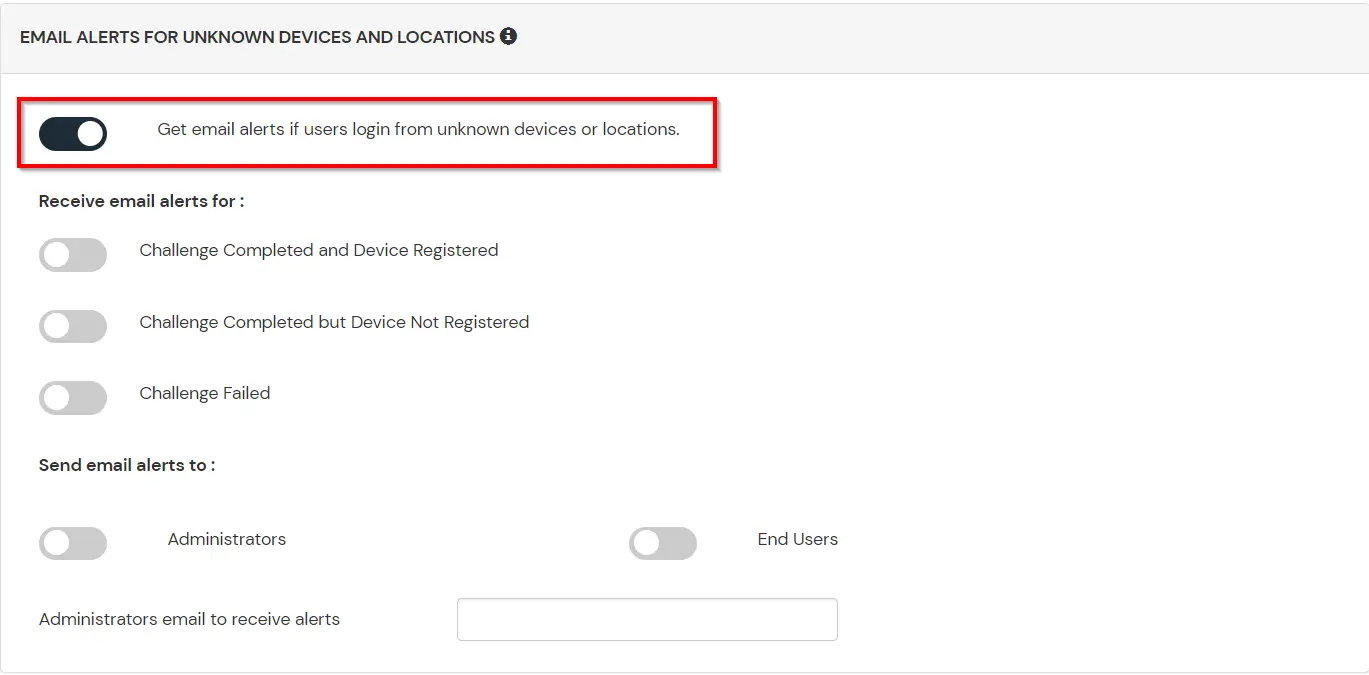
| Option | Description |
|---|---|
| Users login from unknown IP addresses, devices or locations | Enabling this option allows you to login from unknown IP addresses or devices and even locations. |
| Challenge Completed and Device Registered | Enabling this option allows you to send an email alert when an end-user completes a challenge and registers a device. |
| Challenge Completed but Device Not Registered | Enabling this option allows you to send an email alert when an end-user completes a challenge but do not registers the device. |
| Challenge Failed | Enabling this option allows you to send an email alert when an end-user fails to complete the challenge. |


F. Review
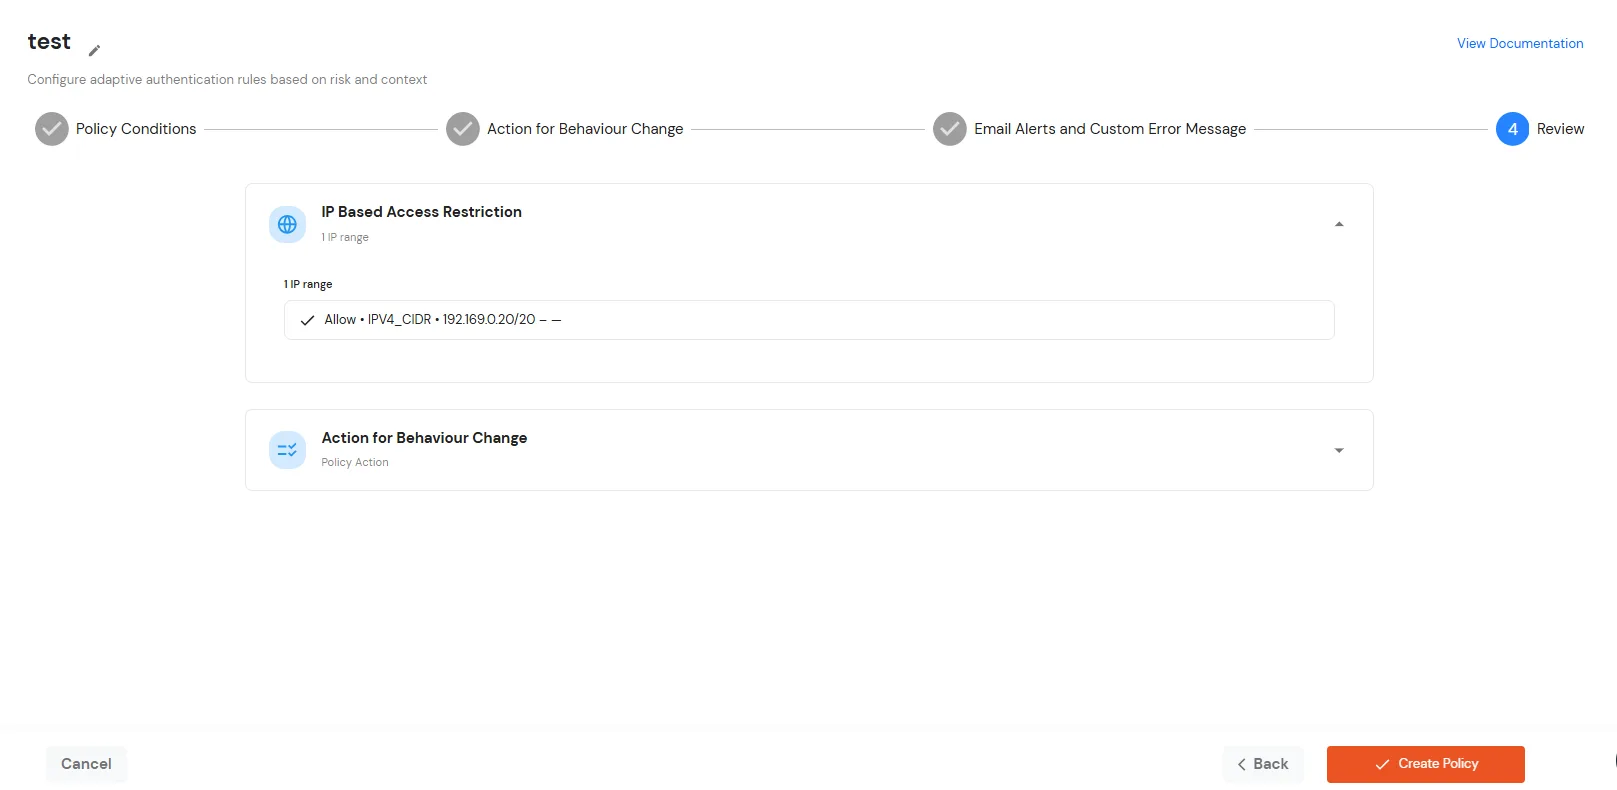
Review the configured policy conditions, behavior change actions, email alert settings and custom error messages before creating the adaptive authentication policy. This step provides a consolidated view of all configured settings, allowing you to verify the policy configuration and make any necessary changes before saving.


miniOrange SSO allows users to securely log in to Zendesk and other applications with a single set of credentials, eliminating the need for multiple usernames and passwords.