Hello there!
Need Help? We are right here!
Need Help? We are right here!
Search Results:
×Outlook Web Access (OWA) SSO (Single Sign-On) solution by miniOrange provides seamless SSO to your Outlook Web Access (OWA) Application and on-premises Exchange server for secure SSO login. With miniOrange’s OWA SSO configuration, your users will be able to login to Outlook Web Access (OWA) and other SaaS or on-premises applications with your existing IDP credentials. miniOrange’s Outlook web access SSO provides IDP integration with ADFS, Okta, Onelogin, Microsoft Azure Active Directory, AWS Cognito etc. You can also connect miniOrange’s solution with Active Directory, LDAP, Google or use miniOrange as your directory in the cloud. We support multiple protocols like SAML,OAuth, LDAP, OIDC etc.
In this flow, the user tries to login to the Service Provider (On-Premises Exchange OWA Outlook Web Access account) directly. The request is redirected to the Identity Provider (Azure AD, etc.) for authentication. On sucessfull authentication from the Identity provider, the user is given access to the application (OWA account).
In this flow, the user logs in to the Identity Provider (Azure AD, etc.) using his credentials. Now the user can access any of the configured Service Providers (OWA account, etc.) through the Identity Provider Dashboard without having to enter the credentials agian.
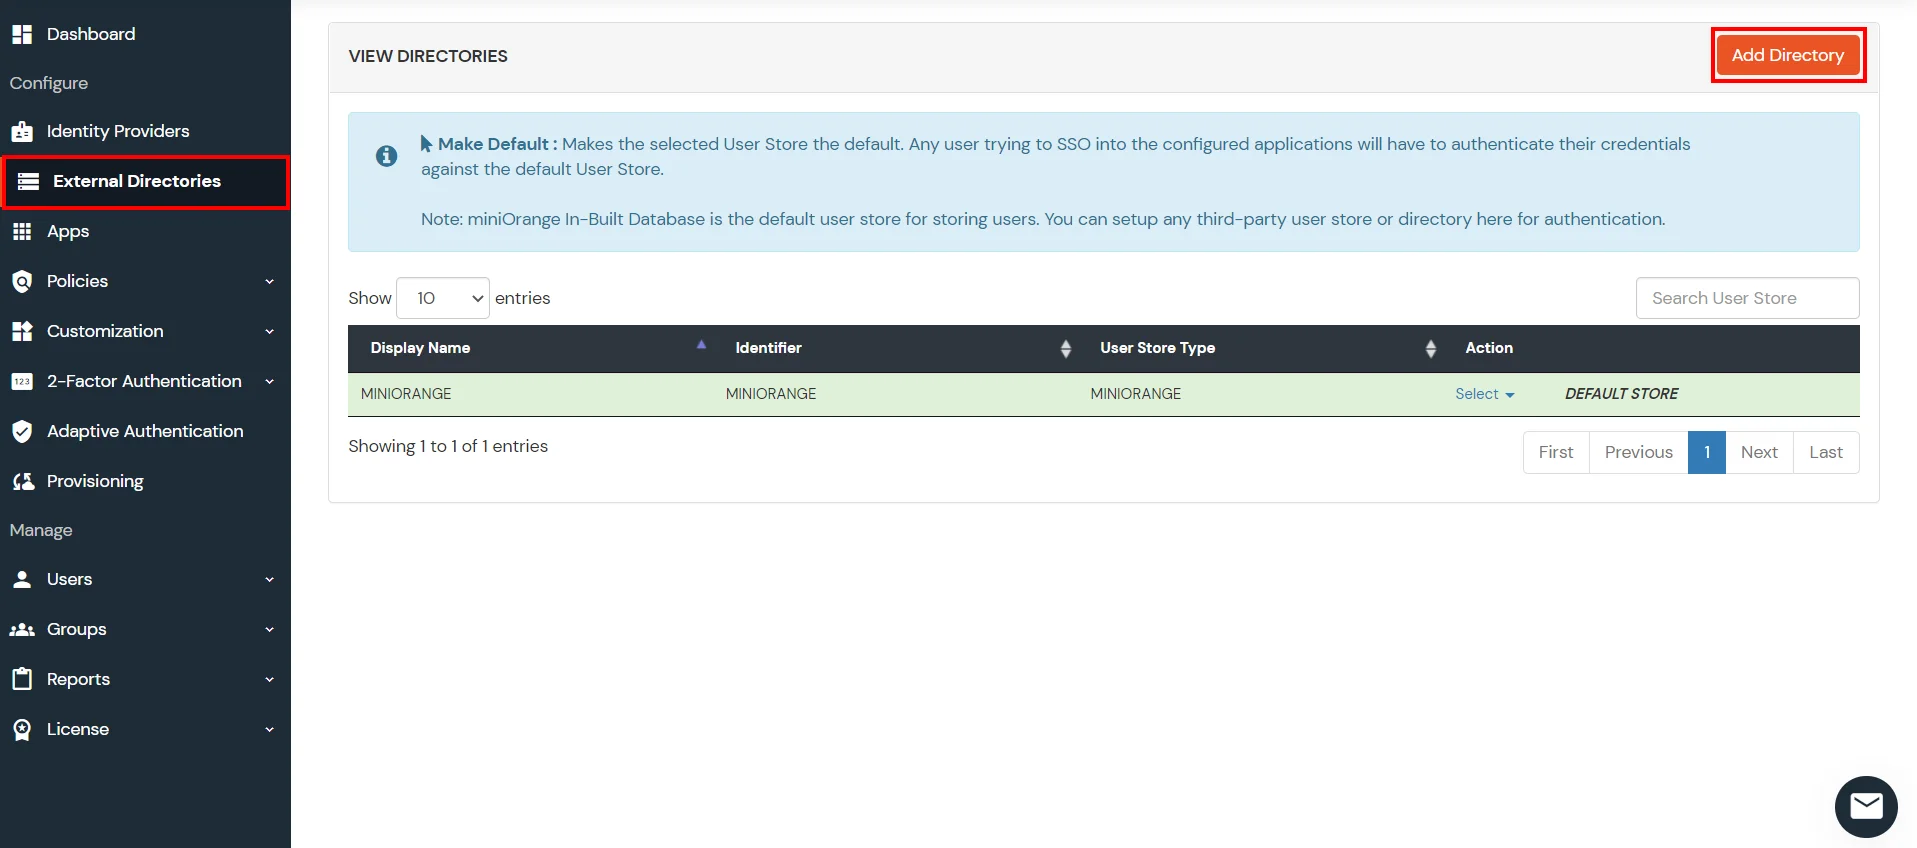
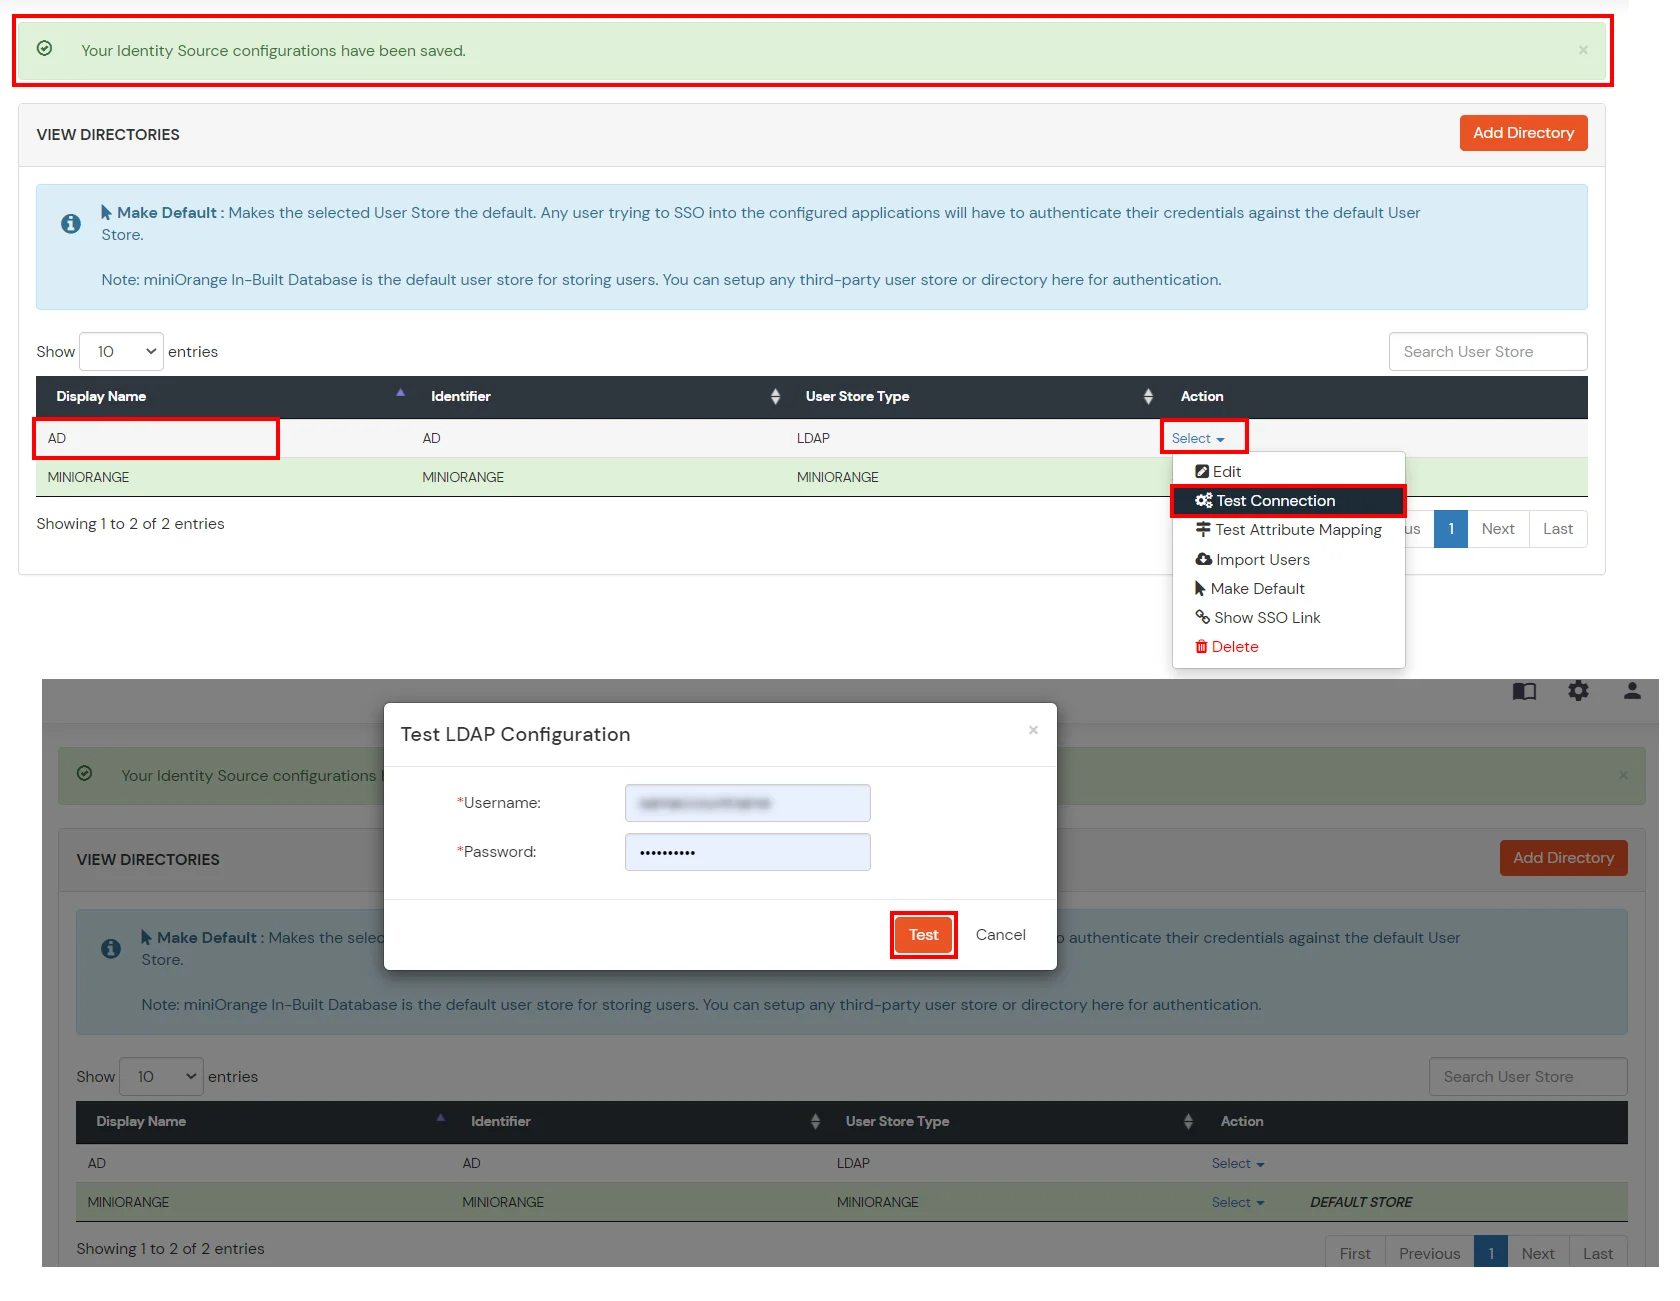
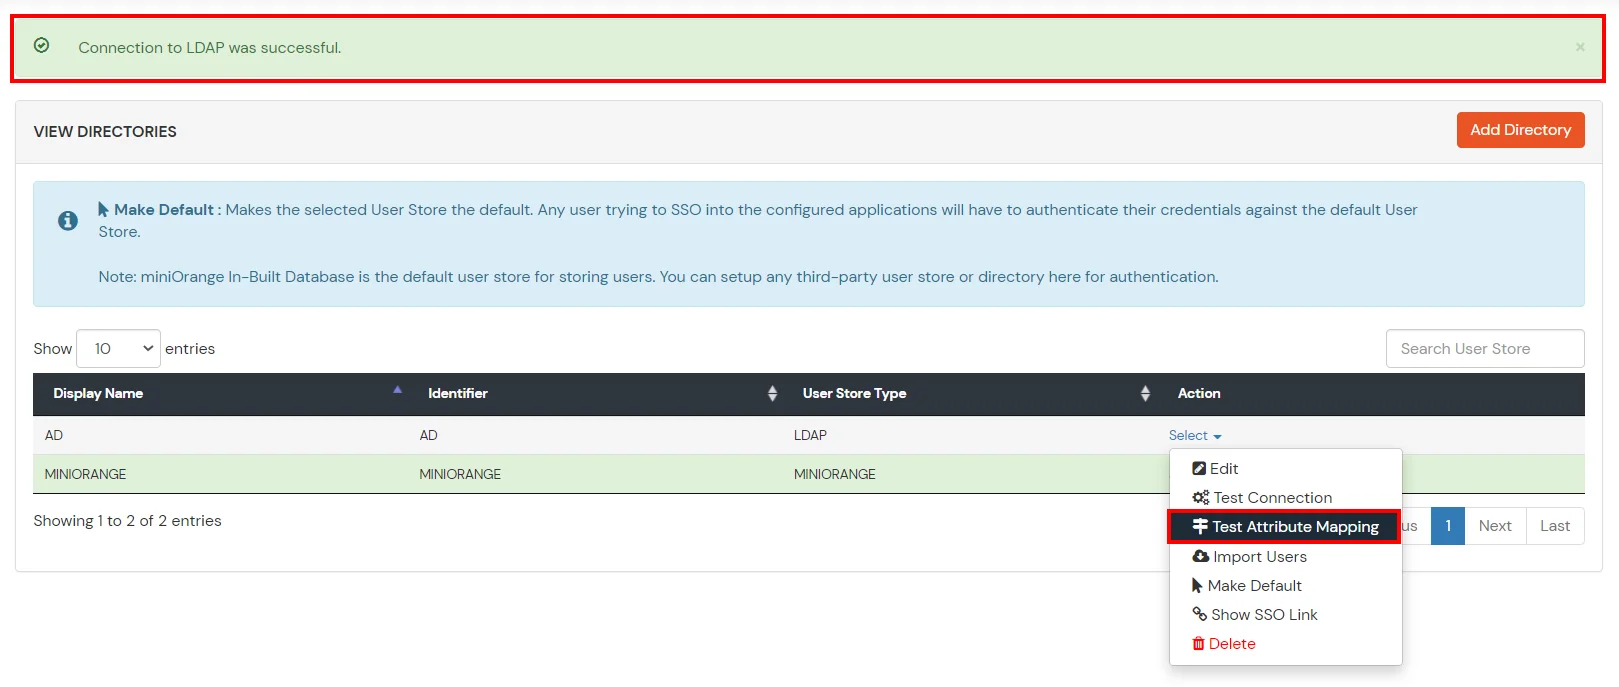
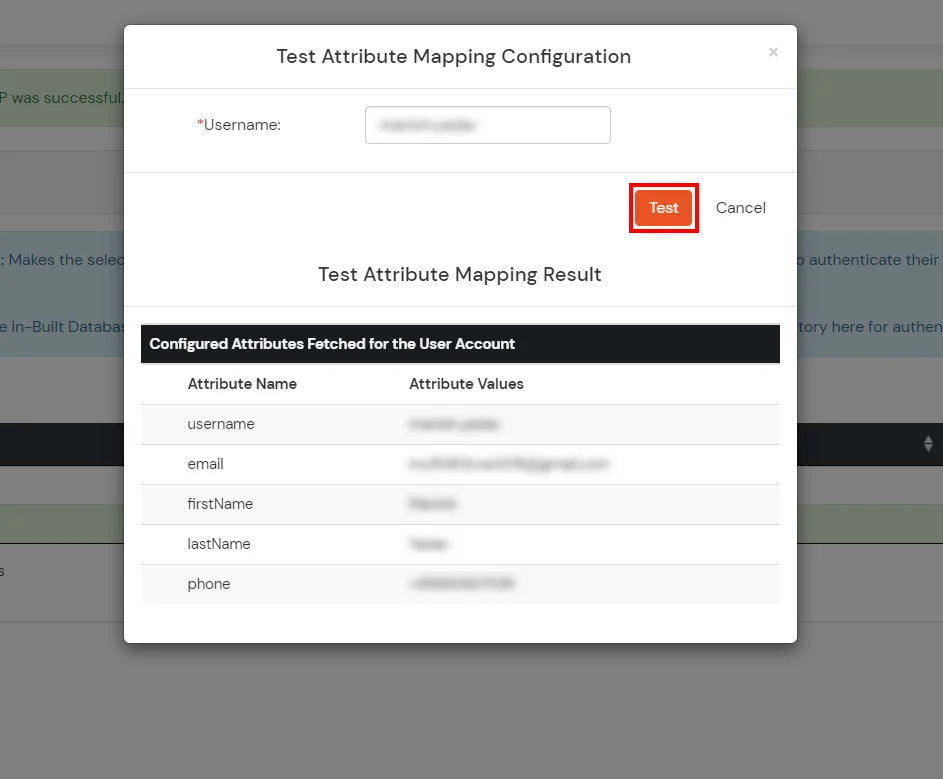
miniOrange provides user authentication from various external sources, which can be Directories (like ADFS, Microsoft Active Directory, Azure AD, OpenLDAP, Google, AWS Cognito etc), Identity Providers (like Shibboleth, Ping, Okta, OneLogin, KeyCloak), Databases (like MySQL, Maria DB, PostgreSQL) and many more.

Outlook Web access Owahttps://{owa-url} e.g. https://mail.example.com/owa https://{owa-url} e.g. https://mail.example.com/owa 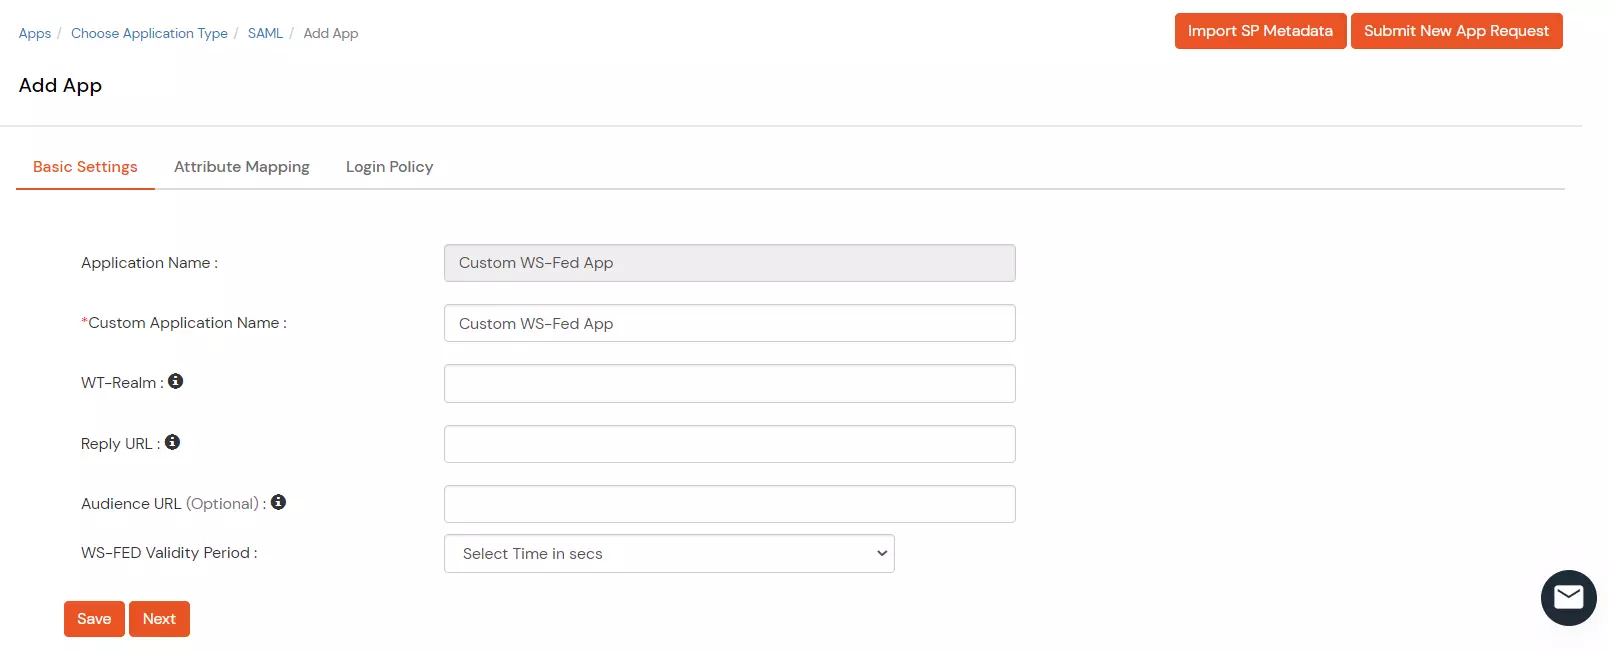

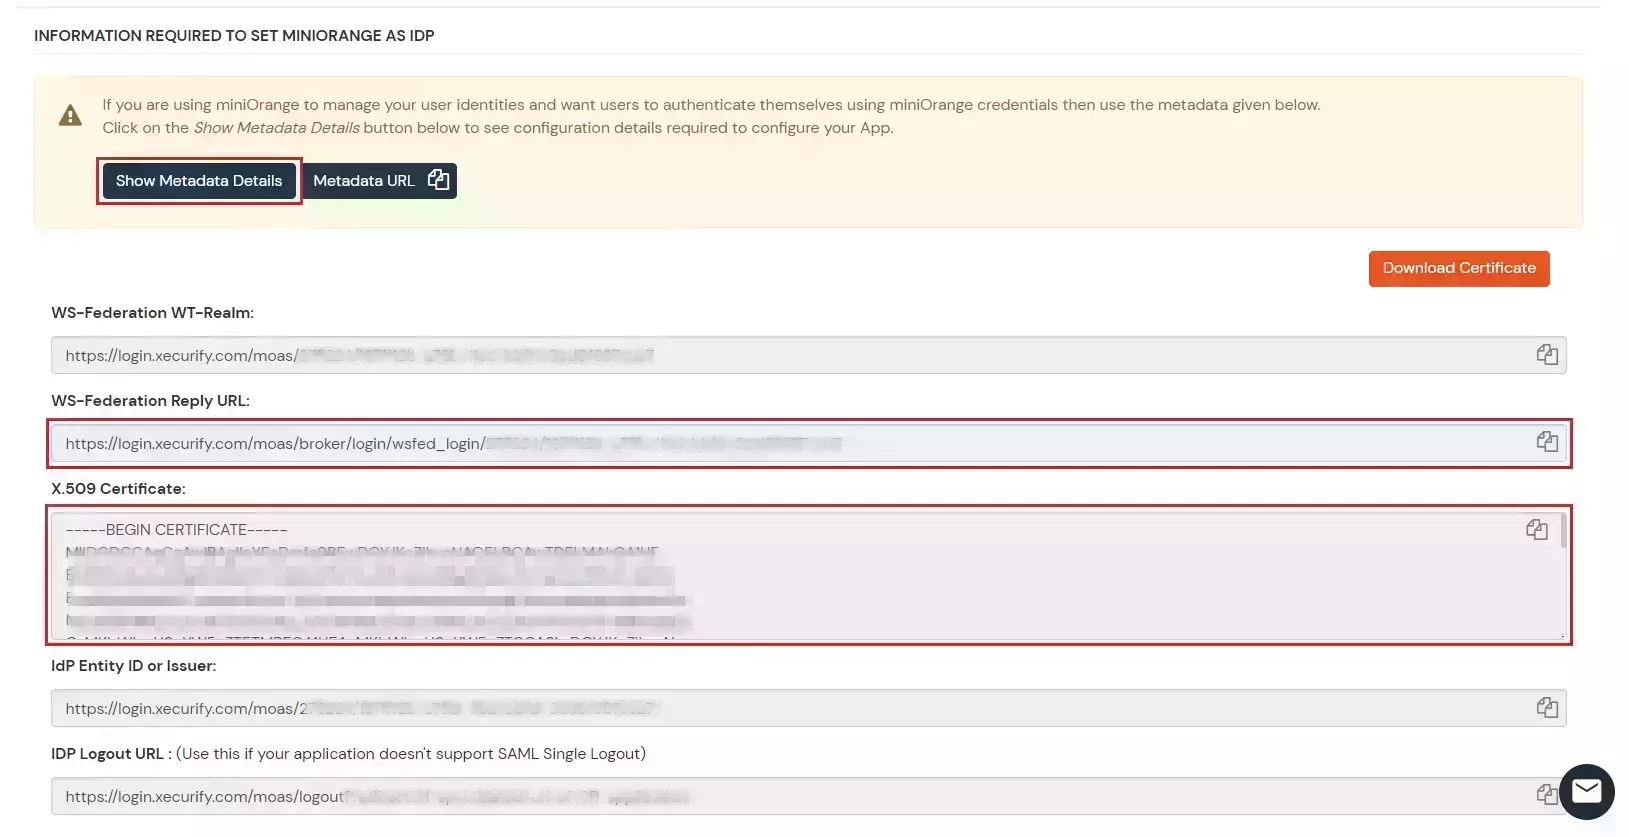
$uris=@("https://##Base URL##/owa/","https://##Base URL##/ecp/","https://##Base URL##/owa","https://##Base URL##/ecp")Note: Make sure the certificate thumb print is in uppercase.
Set-OrganizationConfig -AdfsIssuer "##miniOrange URL##" -AdfsAudienceUris $uris -AdfsSignCertificateThumbprint ##Cert Thumbprint##
Get-EcpVirtualDirectory | Set-EcpVirtualDirectory -AdfsAuthentication $true
        -BasicAuthentication $false -DigestAuthentication $false -FormsAuthentication $false
        -WindowsAuthentication $false
Get-OwaVirtualDirectory | Set-OwaVirtualDirectory -AdfsAuthentication $true
-BasicAuthentication $false -DigestAuthentication $false -FormsAuthentication $false
-WindowsAuthentication $false -OAuthAuthentication $false# Restart w3svc and was
net stop was /y
net start w3svc
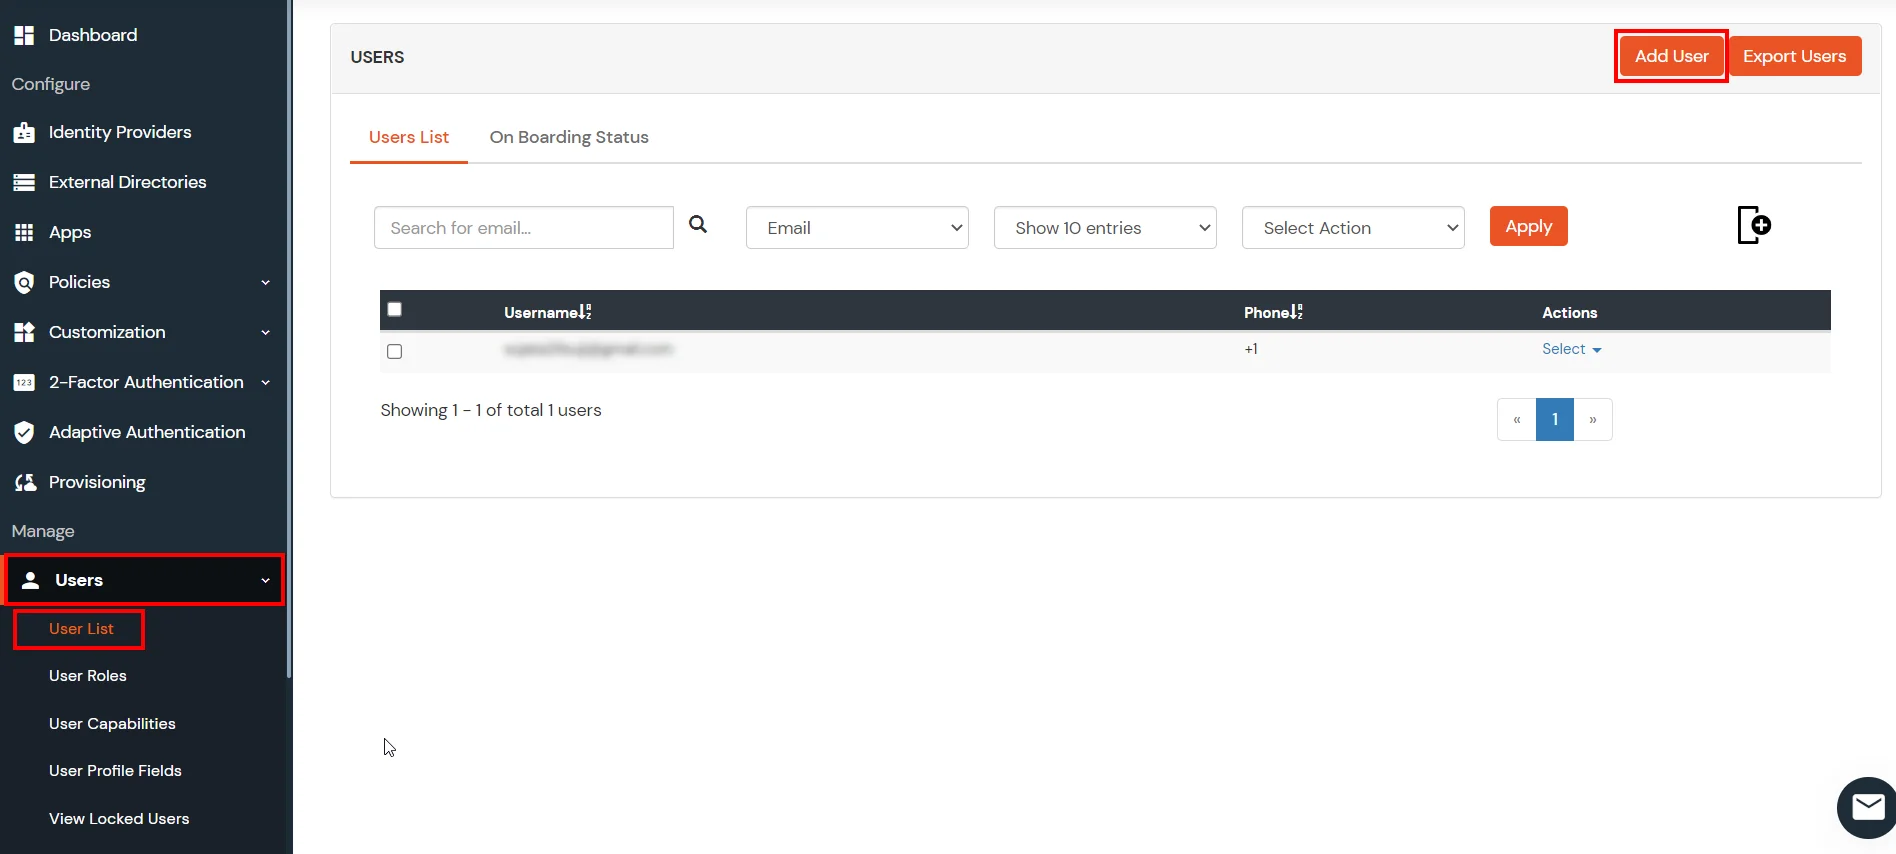
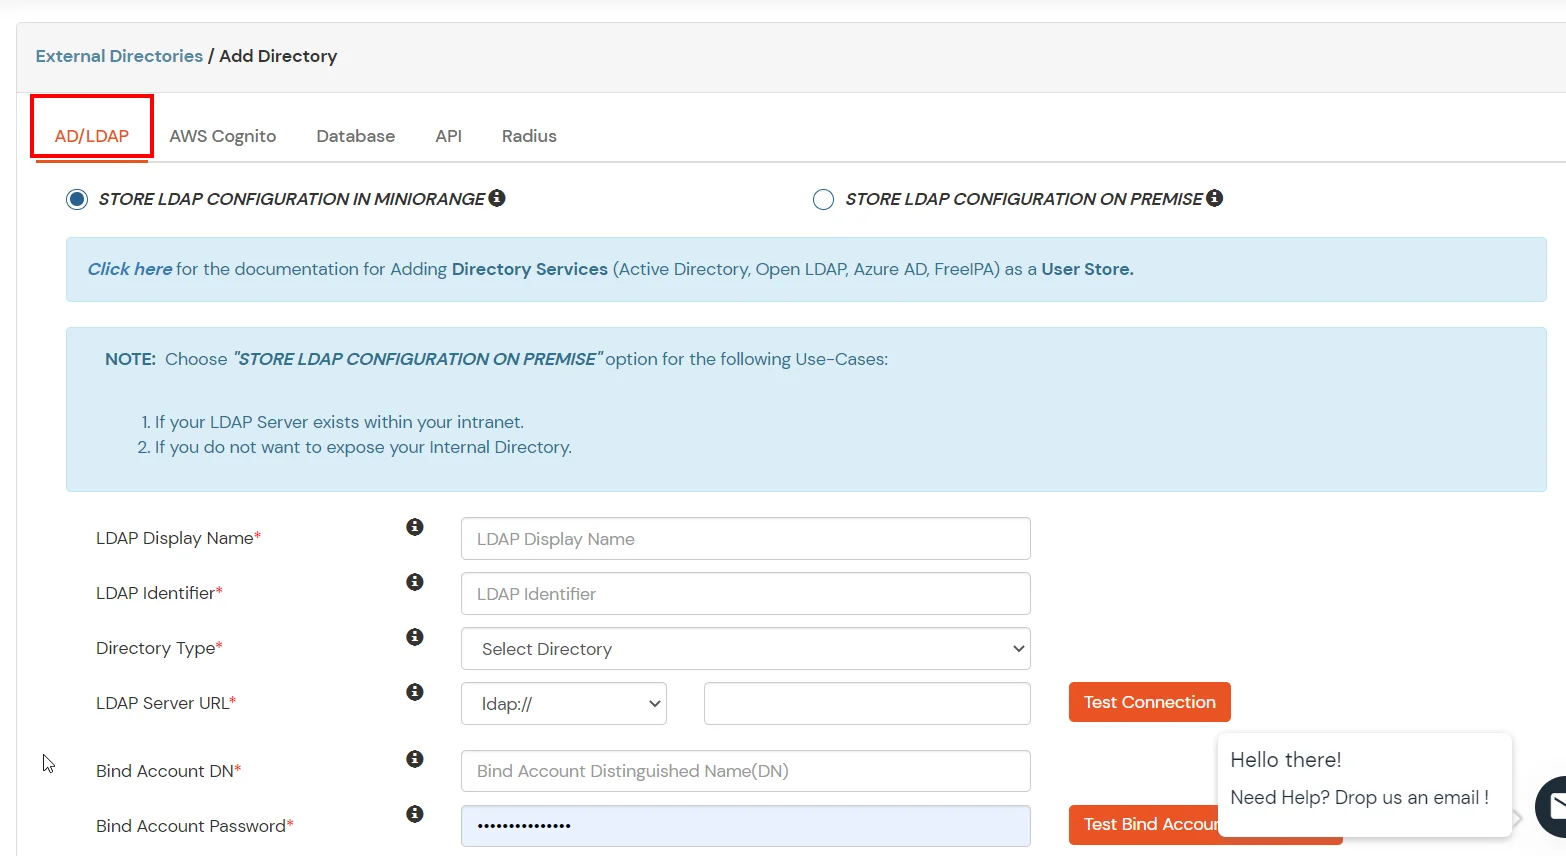
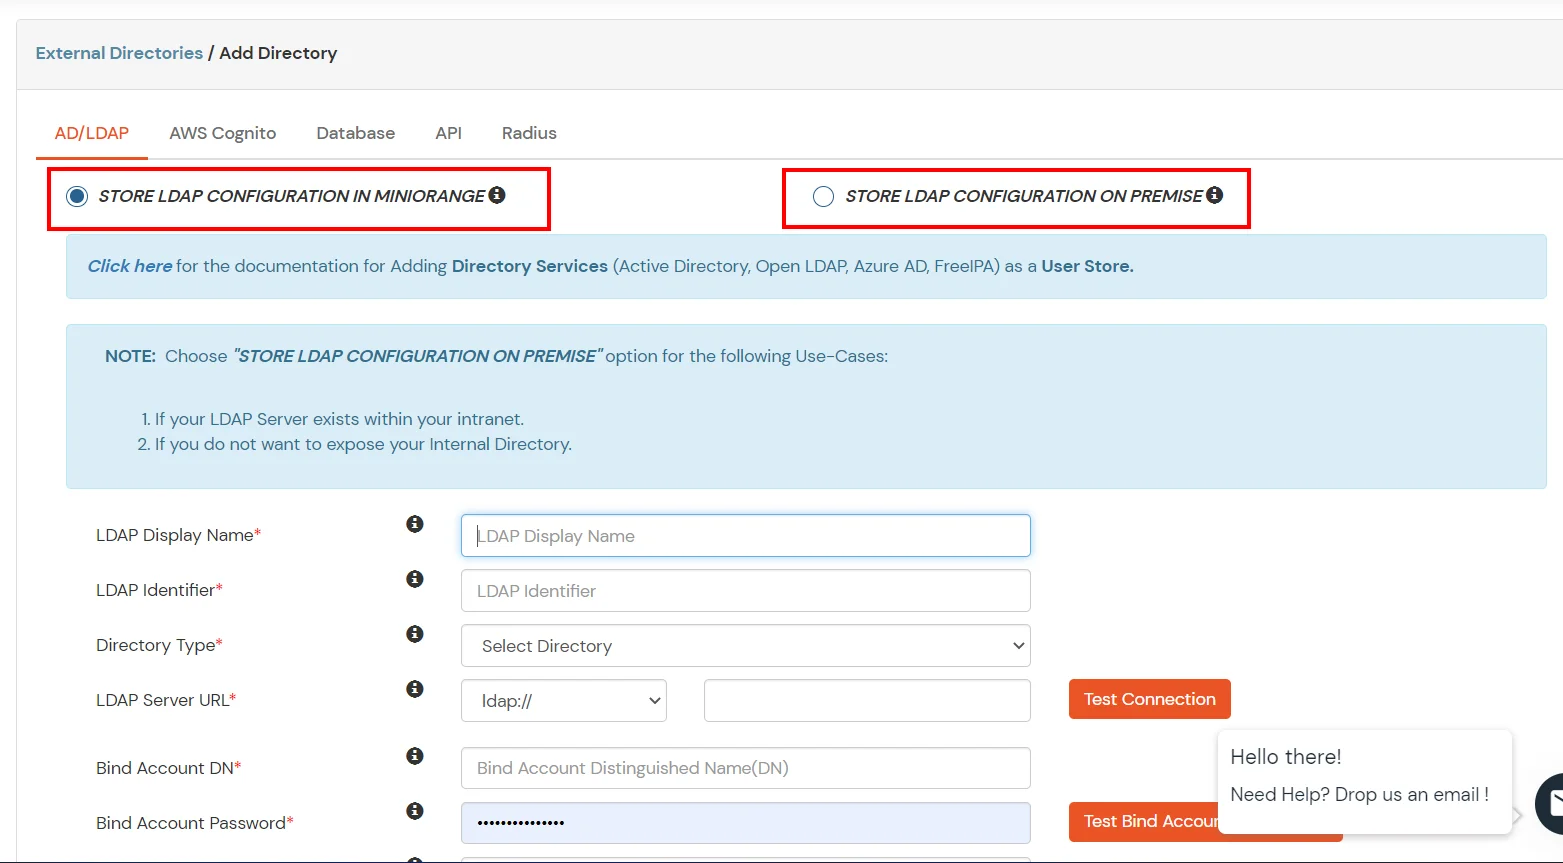
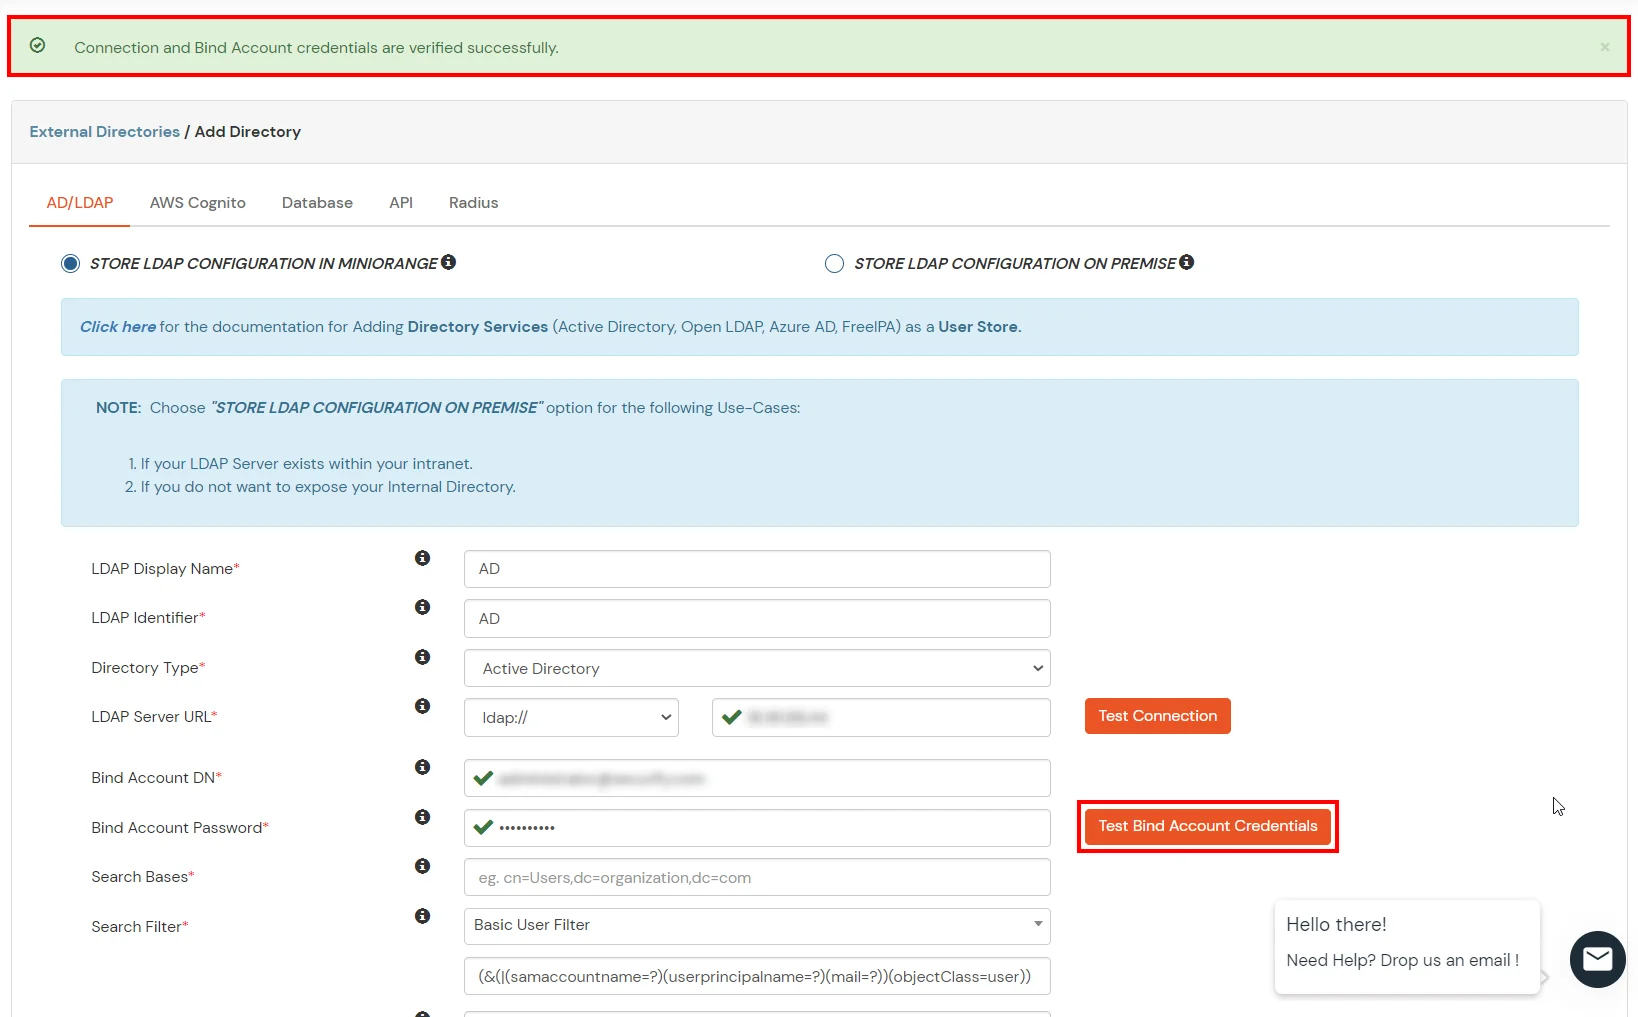
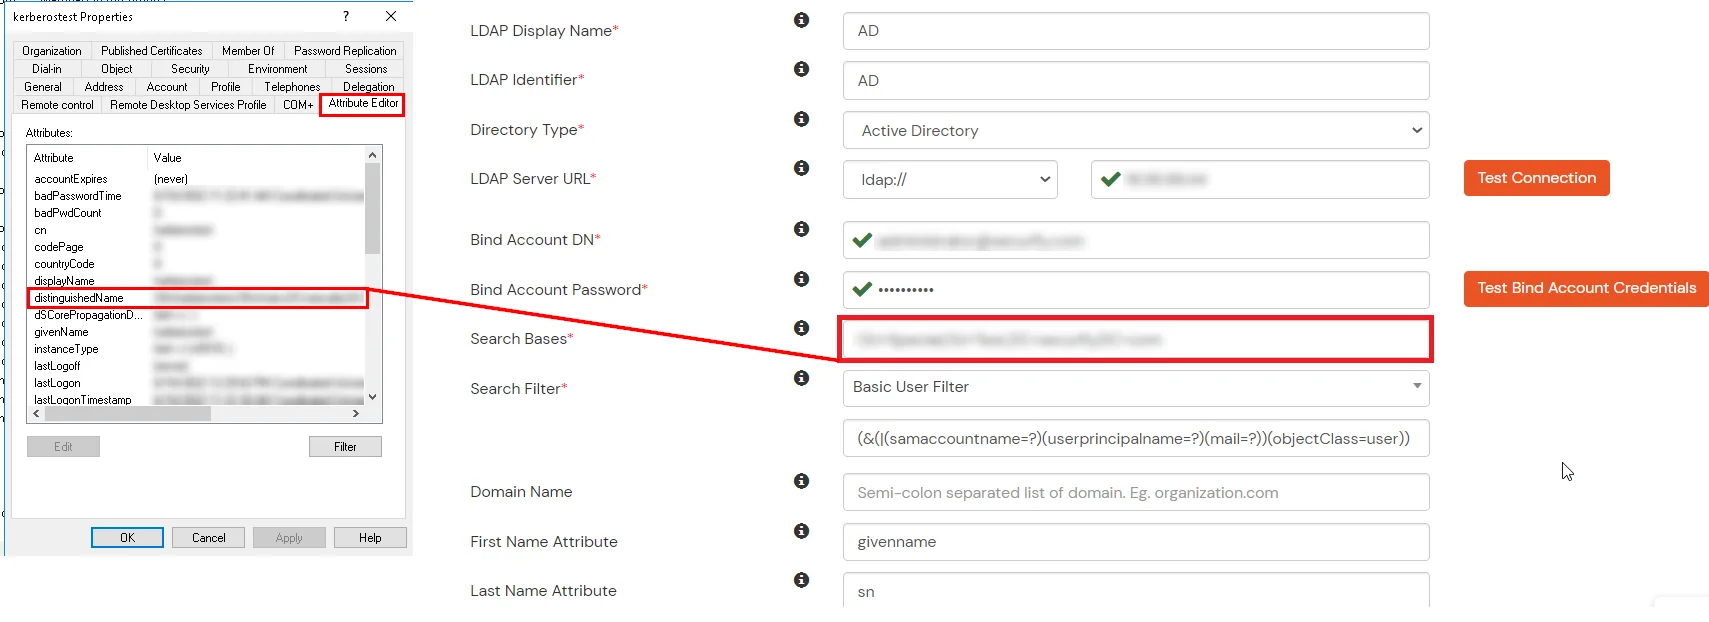
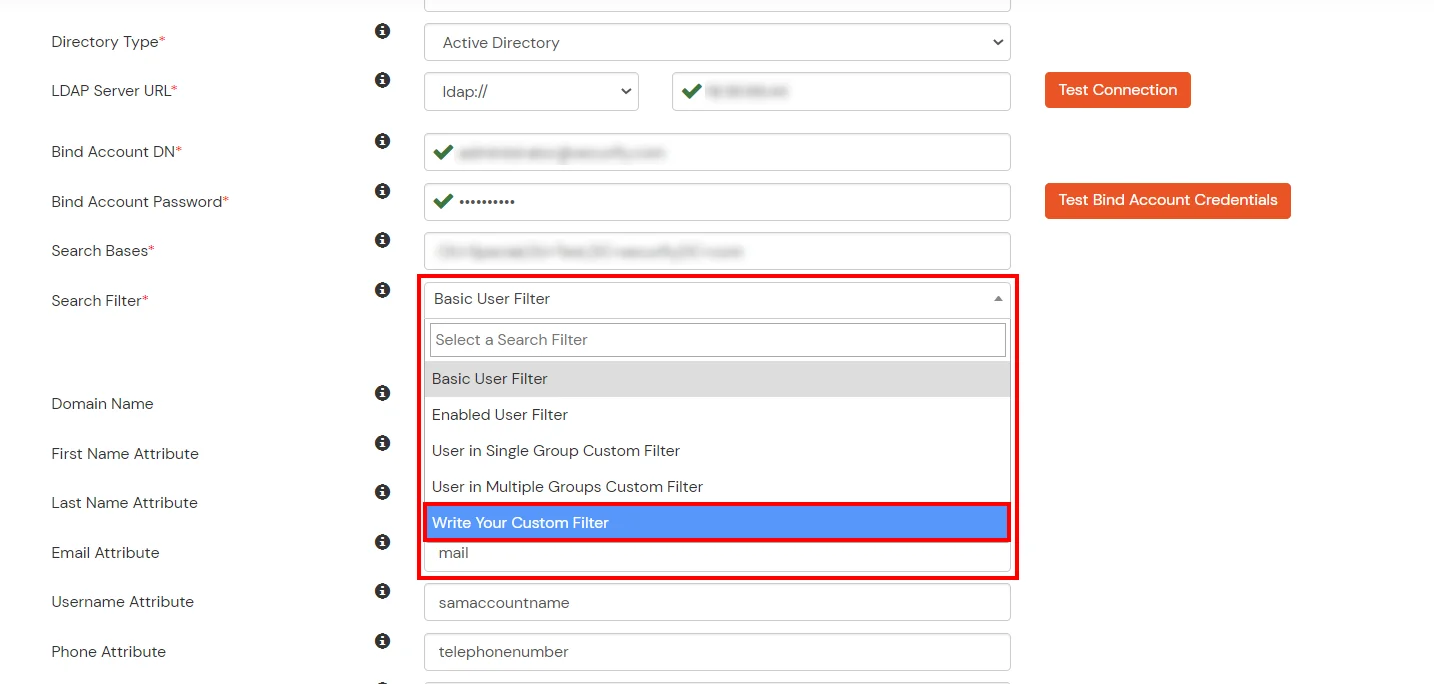
miniOrange provides user authentication from various external sources, which can be Directories (like ADFS, Microsoft Active Directory, Microsoft Entra ID, OpenLDAP, Google, AWS Cognito etc), Identity Providers (like Okta, Shibboleth, Ping, OneLogin, KeyCloak), Databases (like MySQL, Maria DB, PostgreSQL) and many more. You can configure your existing directory/user store or add users in miniOrange.
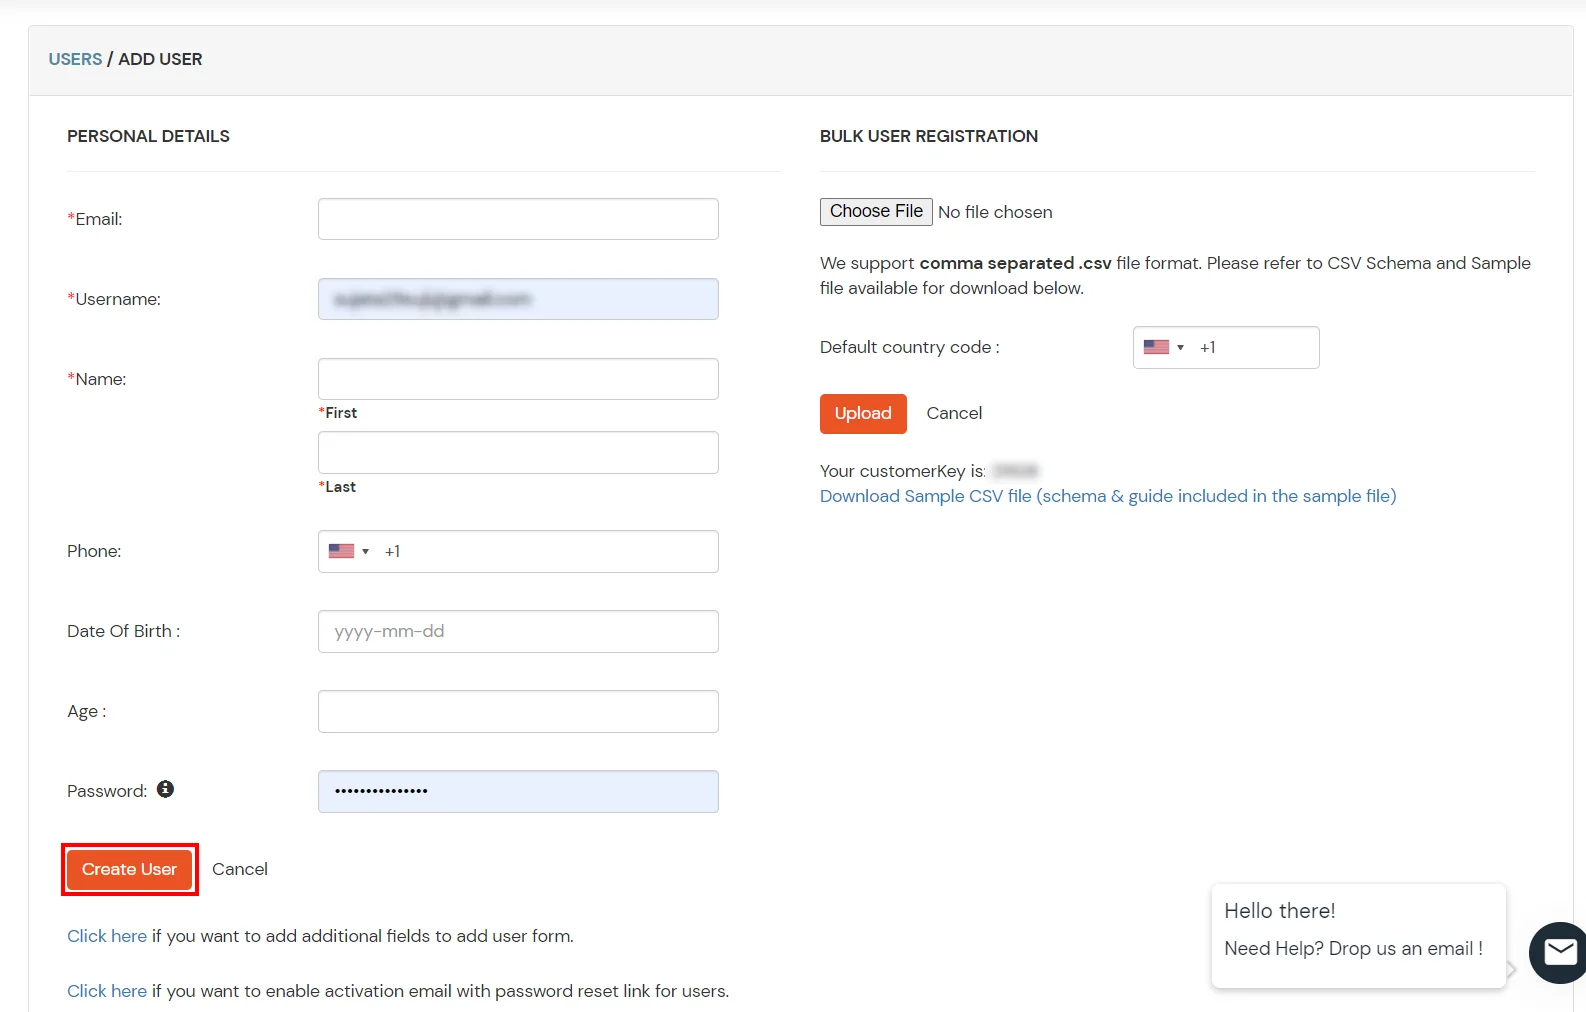
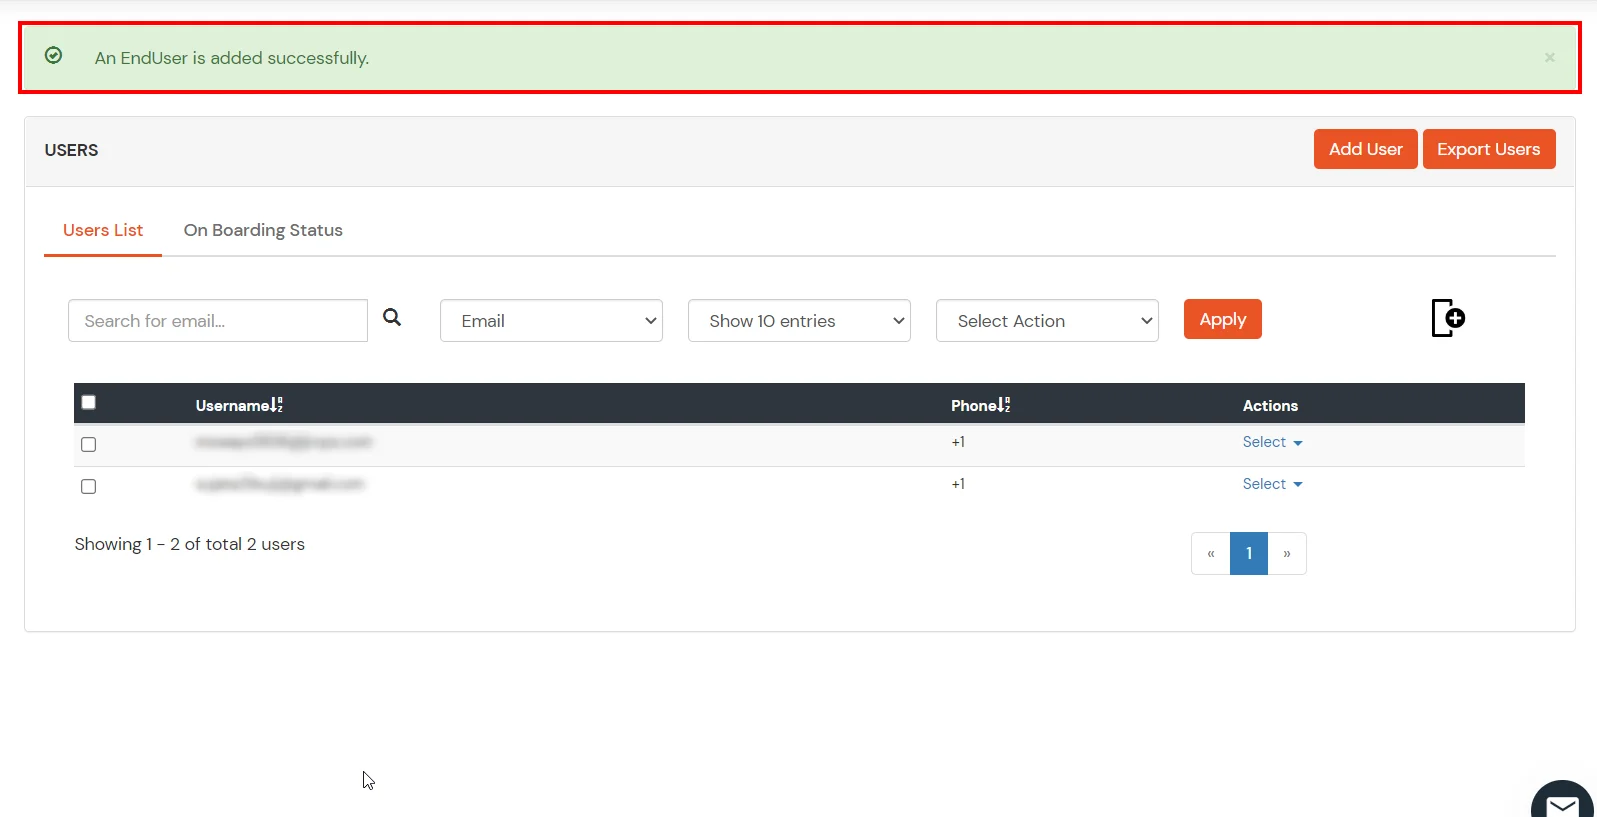
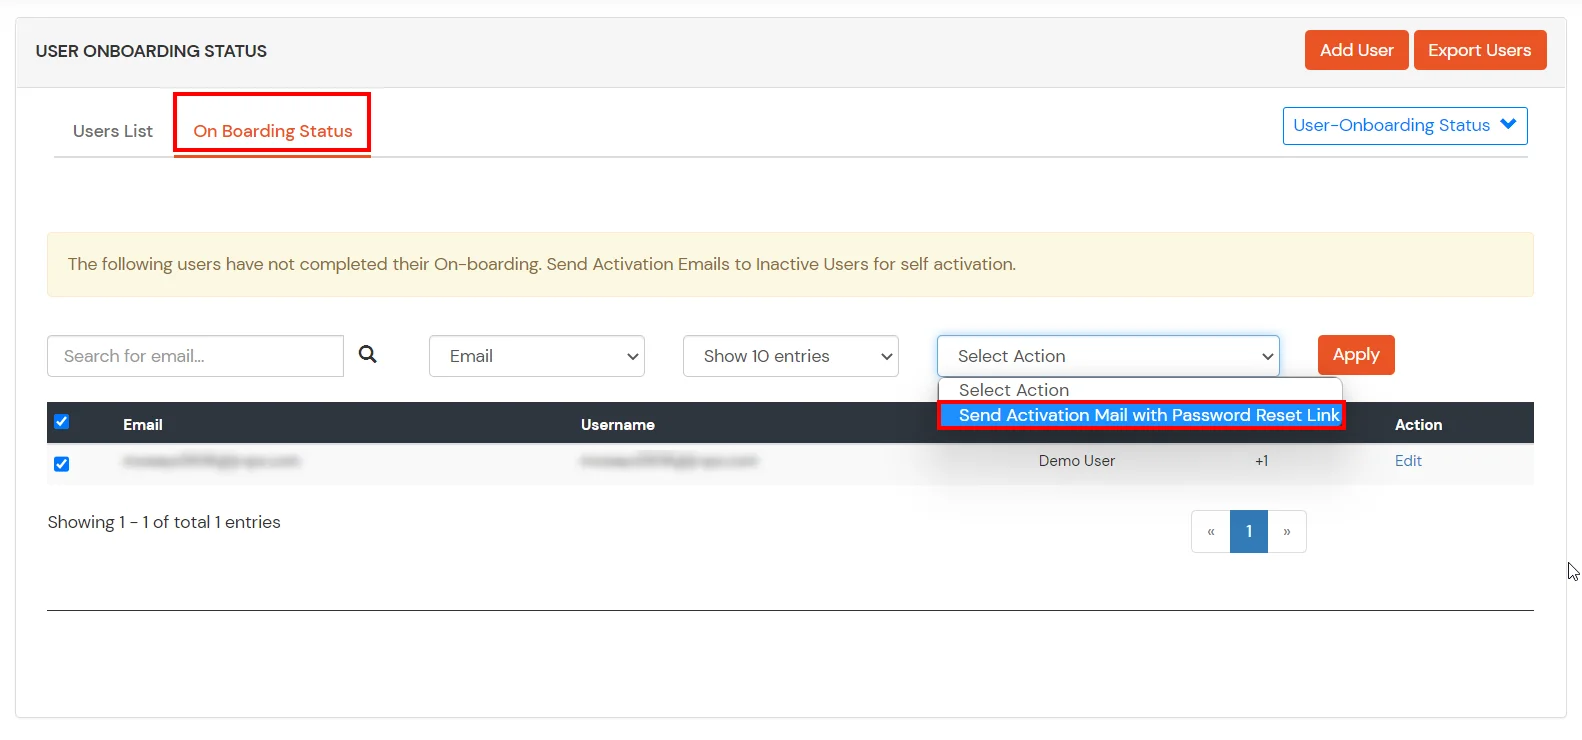
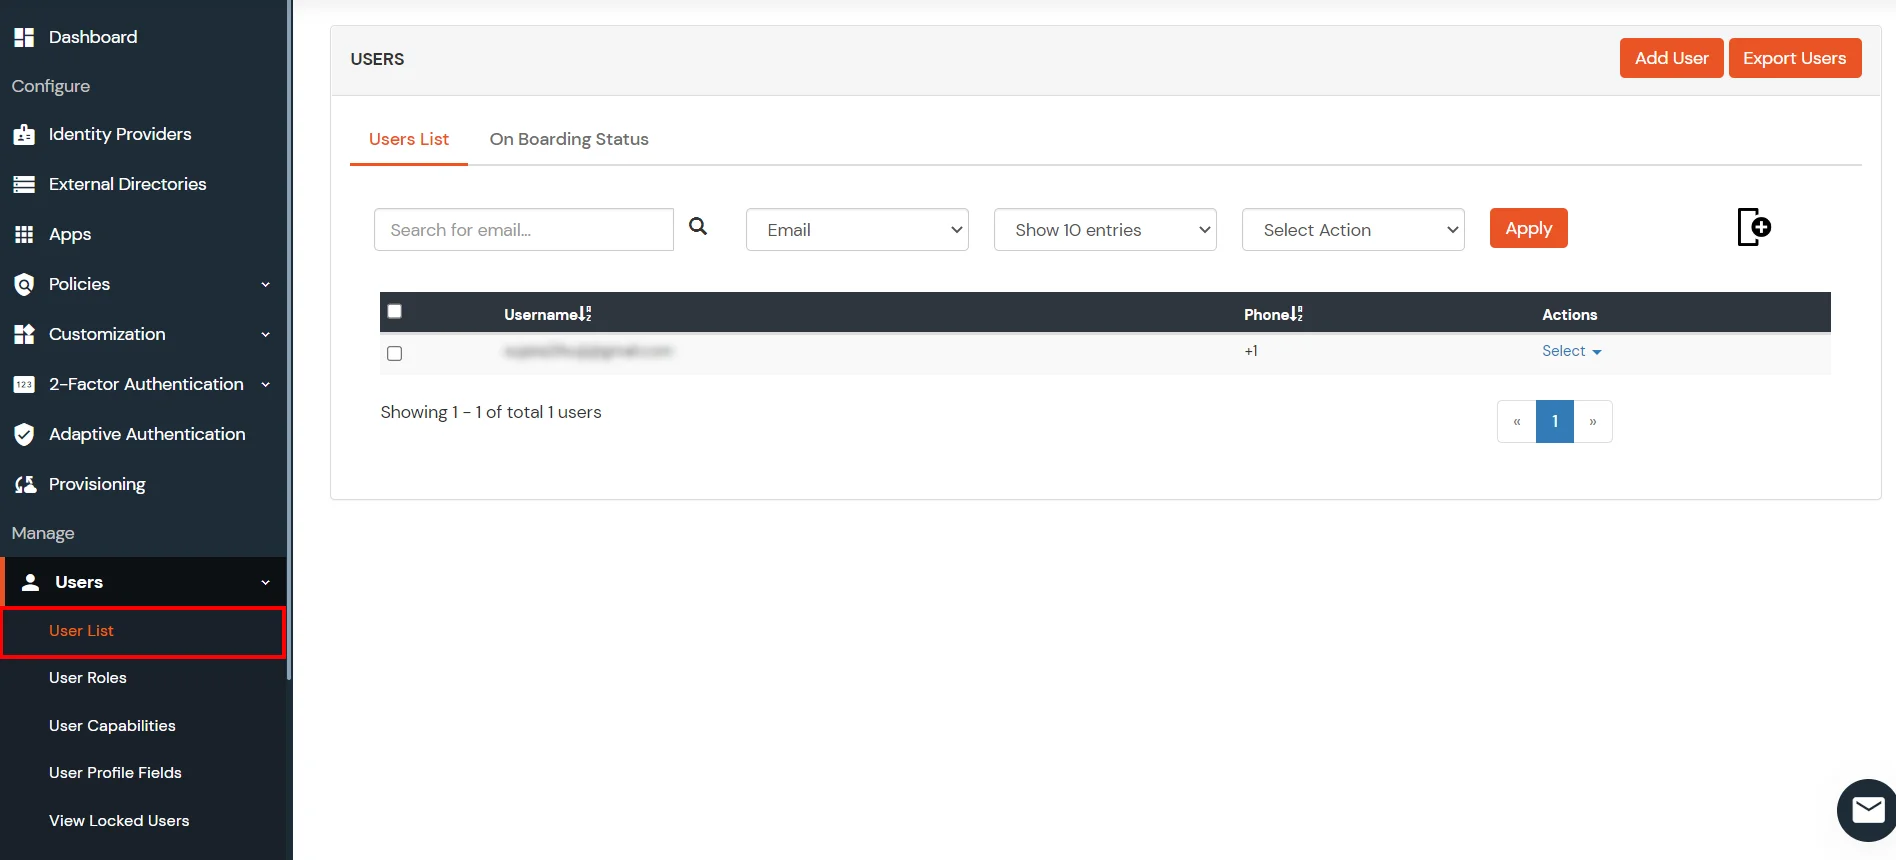
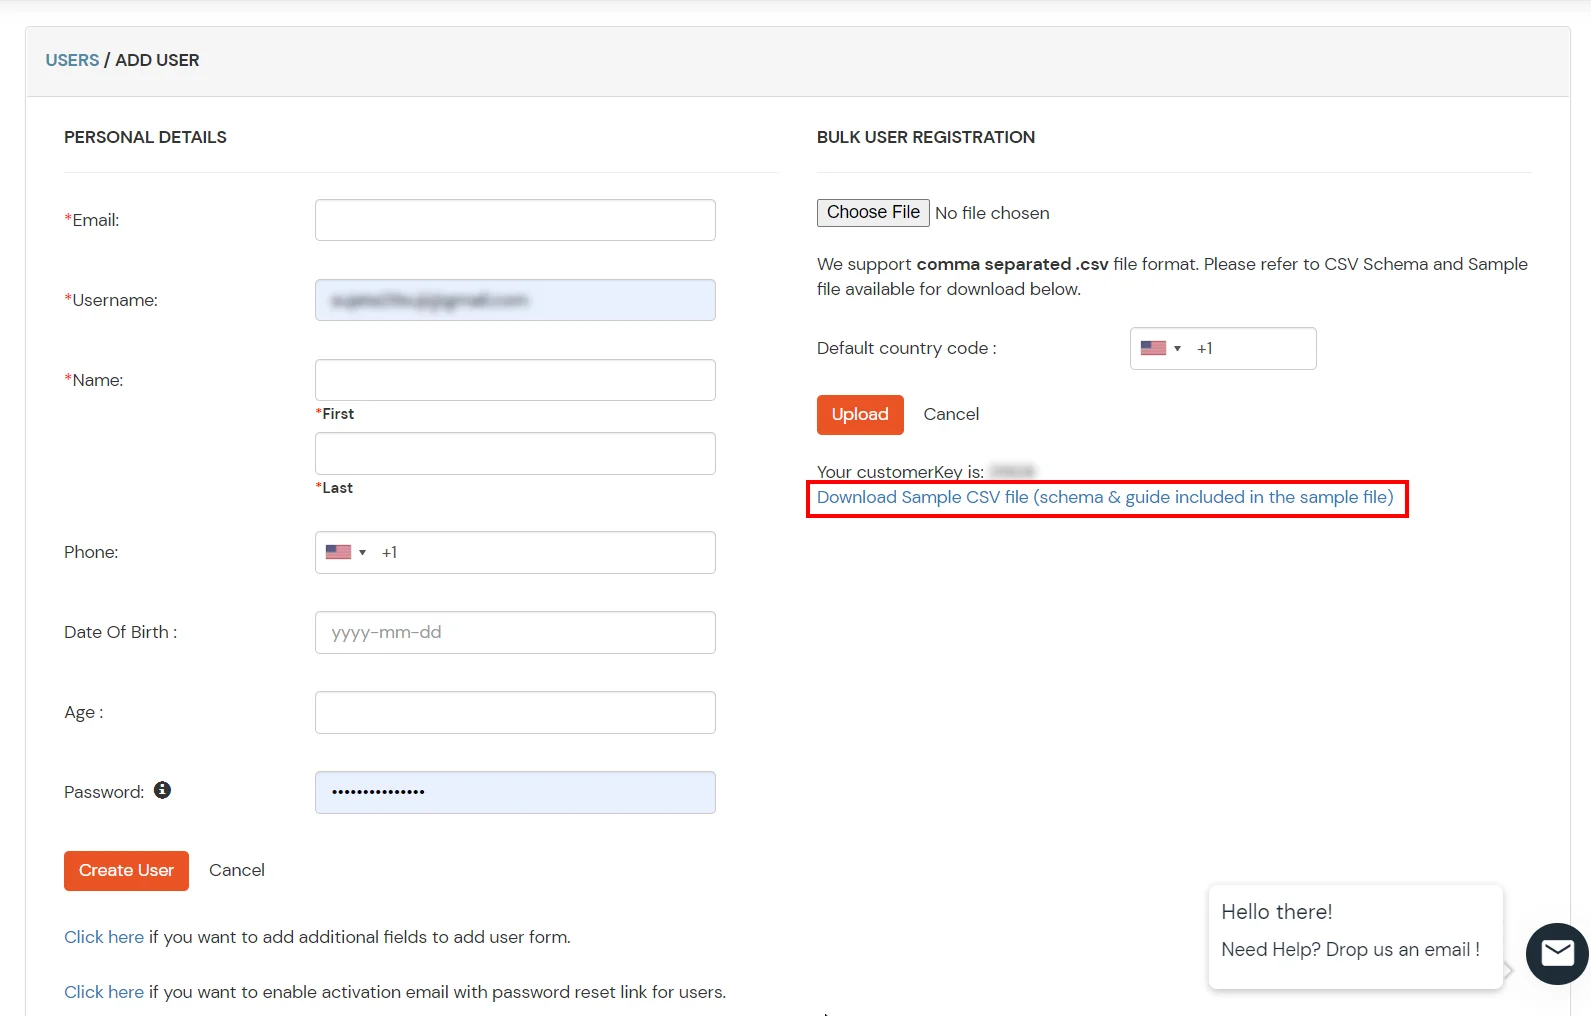
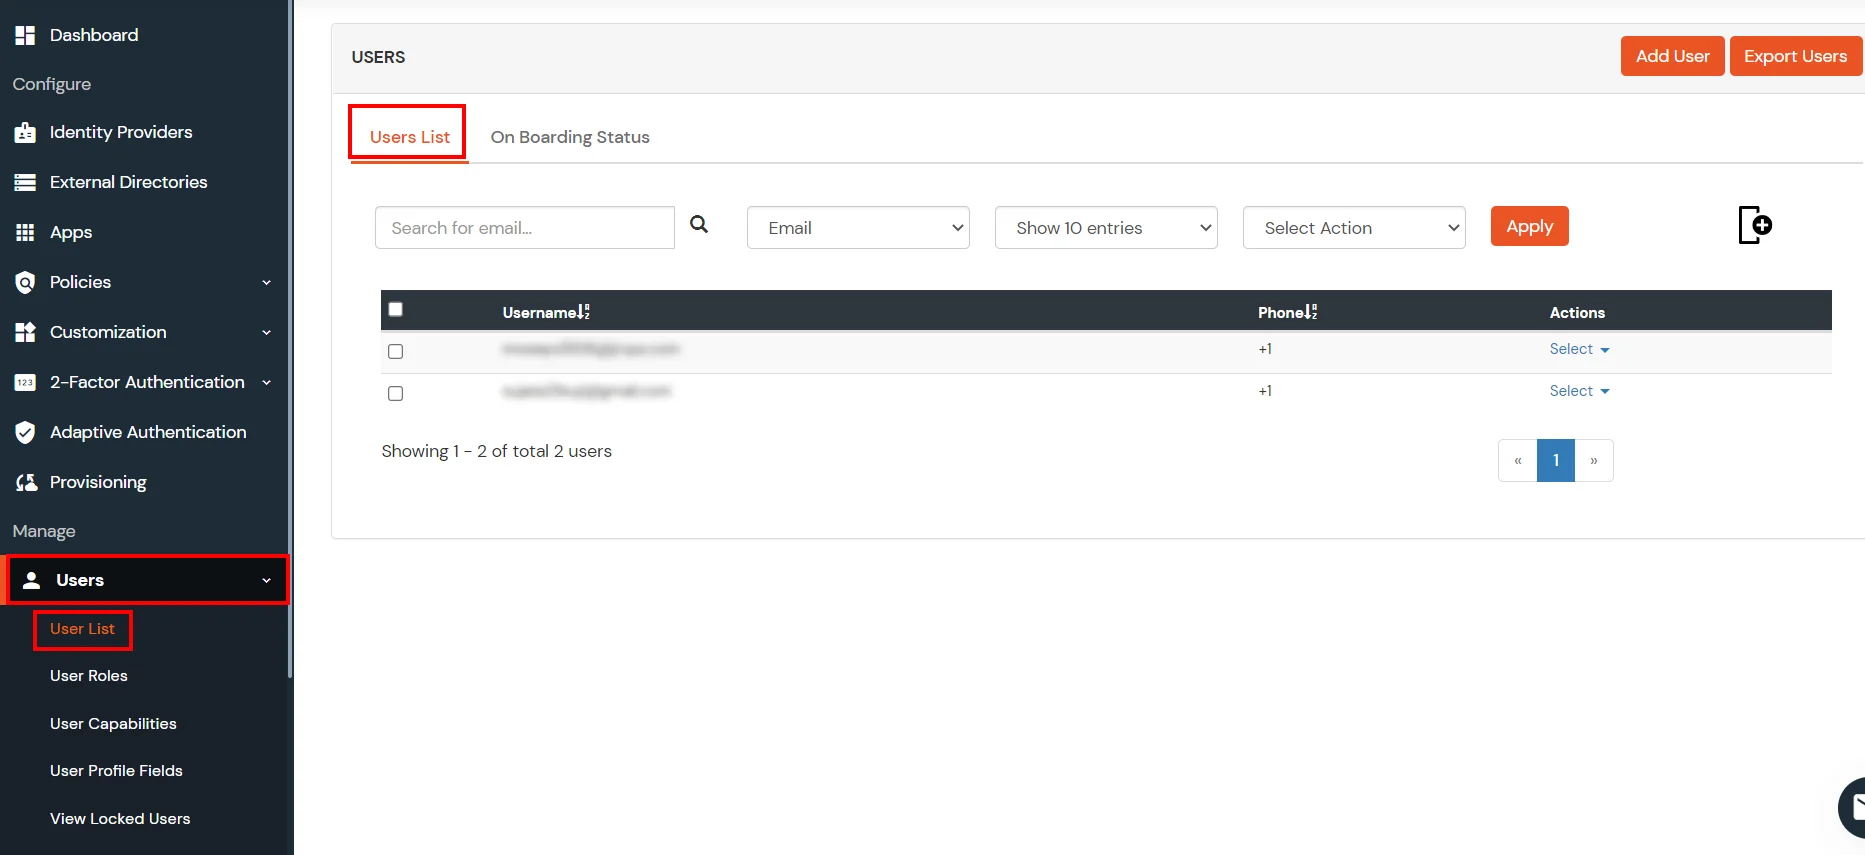
1. Create User in miniOrange
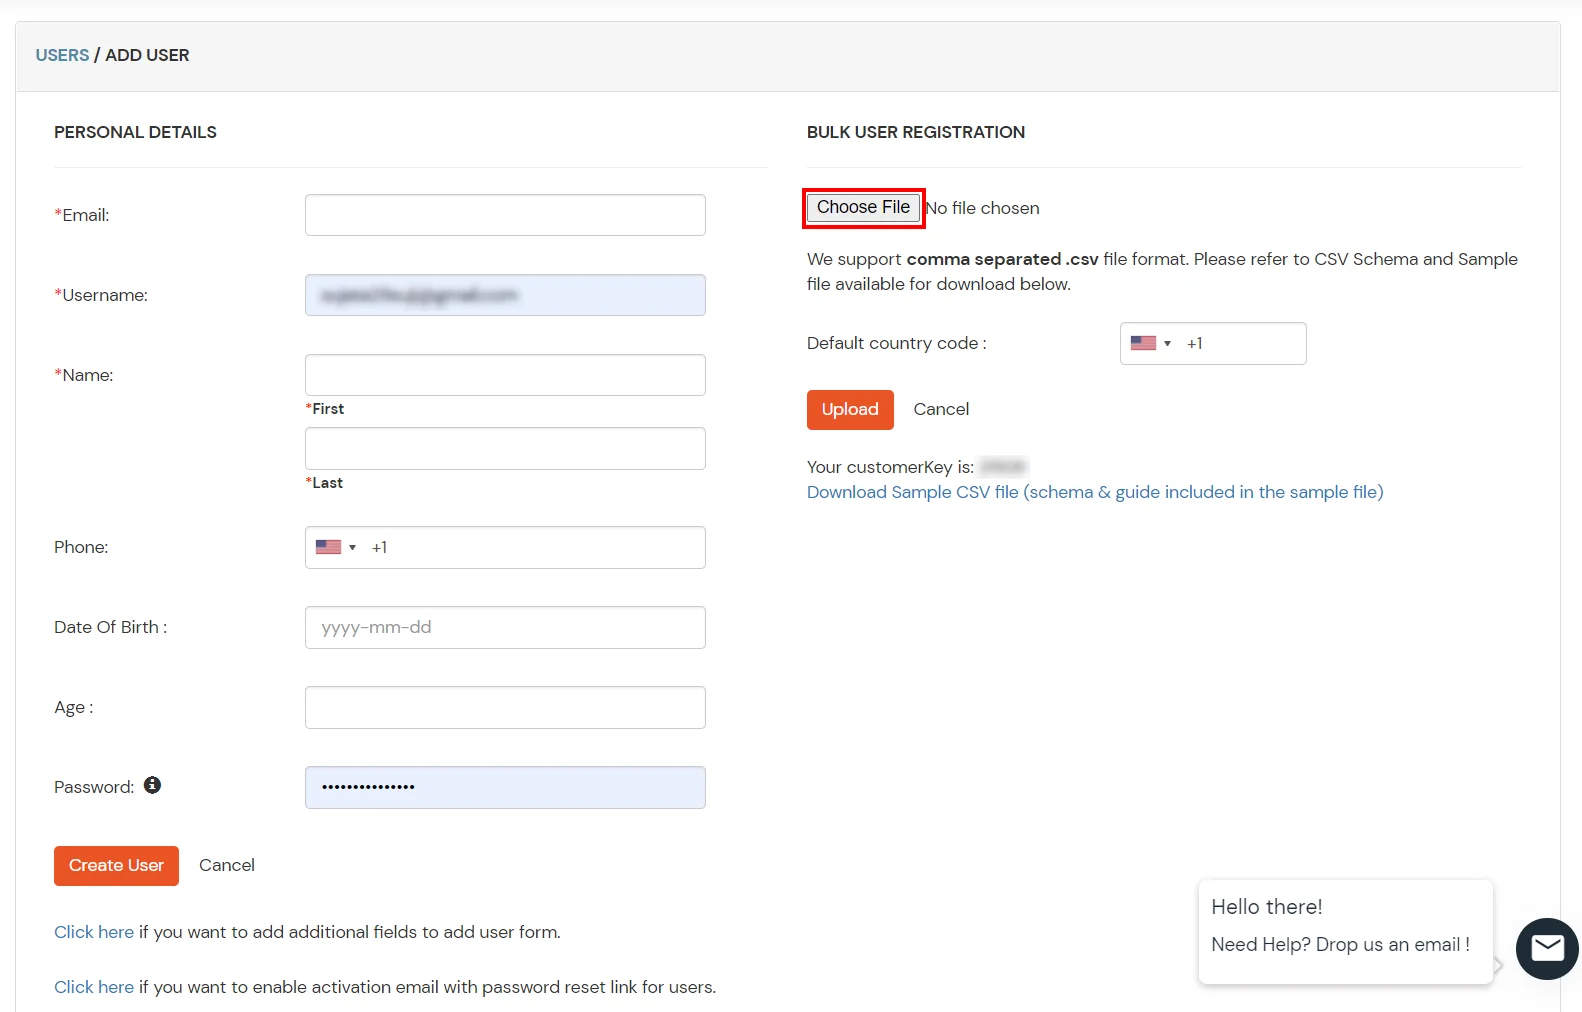
2. Bulk Upload Users in miniOrange via Uploading CSV File.

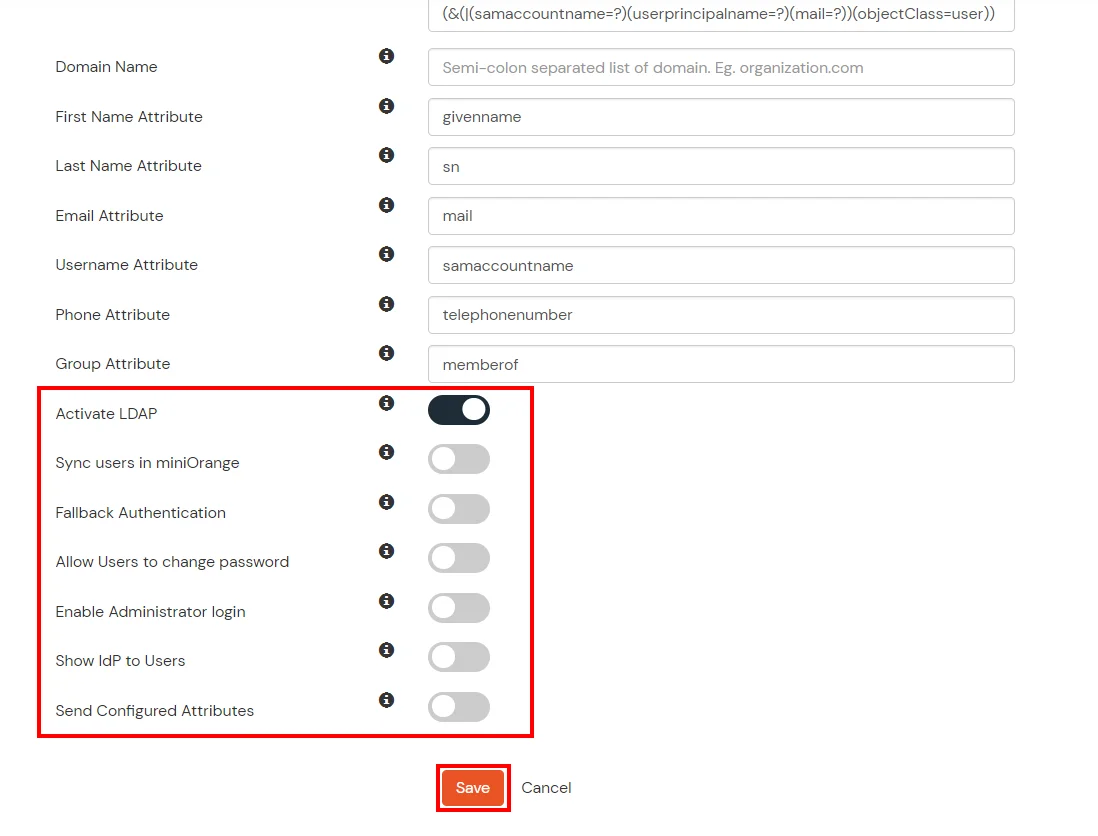
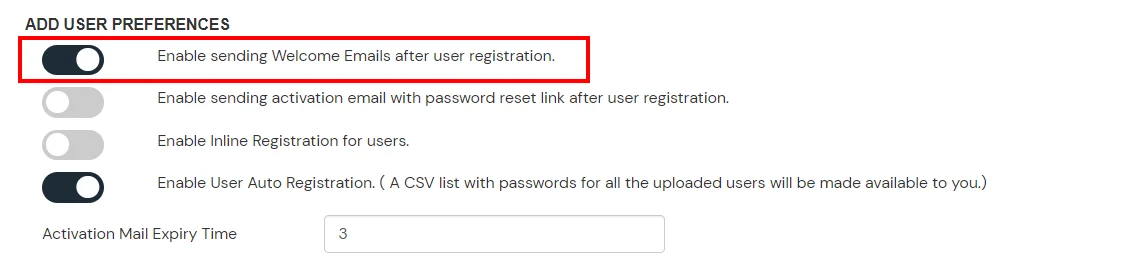
Here's the list of the attributes and what it does when we enable it. You can enable/disable accordingly.
| Attribute | Description |
|---|---|
| Activate LDAP | All user authentications will be done with LDAP credentials if you Activate it |
| Sync users in miniOrange | Users will be created in miniOrange after authentication with LDAP |
| Fallback Authentication | If LDAP credentials fail then user will be authenticated through miniOrange |
| Allow users to change password | This allows your users to change their password. It updates the new credentials in your LDAP server |
| Enable administrator login | On enabling this, your miniOrange Administrator login authenticates using your LDAP server |
| Show IdP to users | If you enable this option, this IdP will be visible to users |
| Send Configured Attributes | If you enable this option, then only the attributes configured below will be sent in attributes at the time of login |
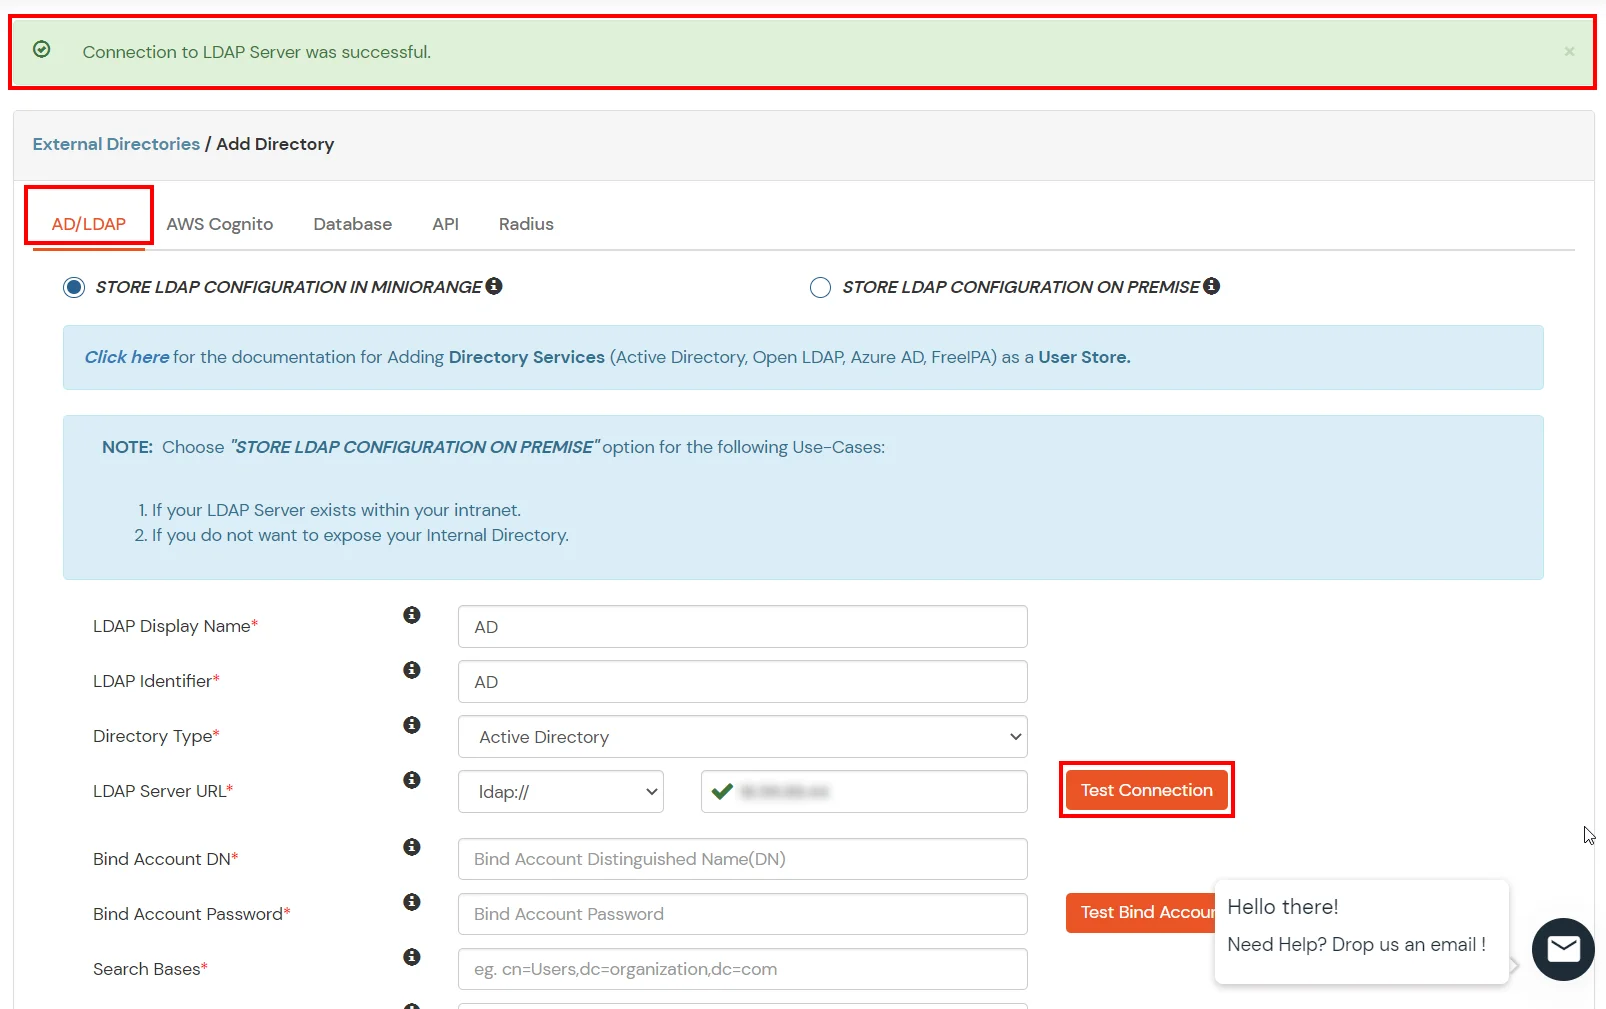
Refer our guide to setup LDAPS on windows server.

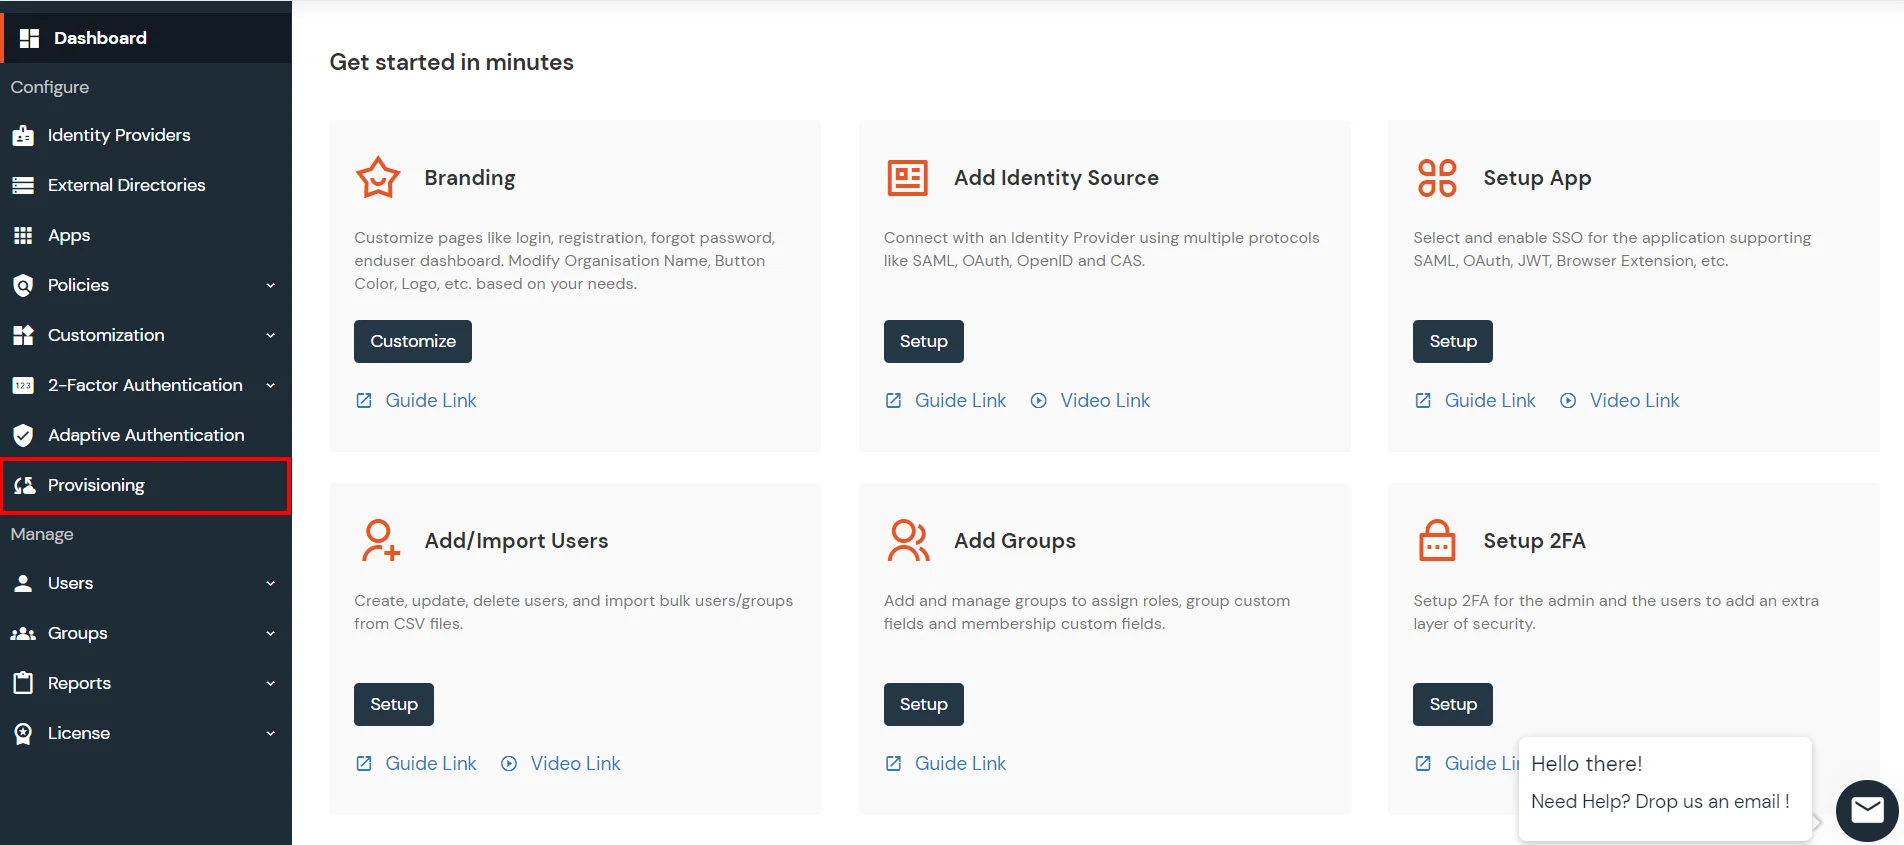
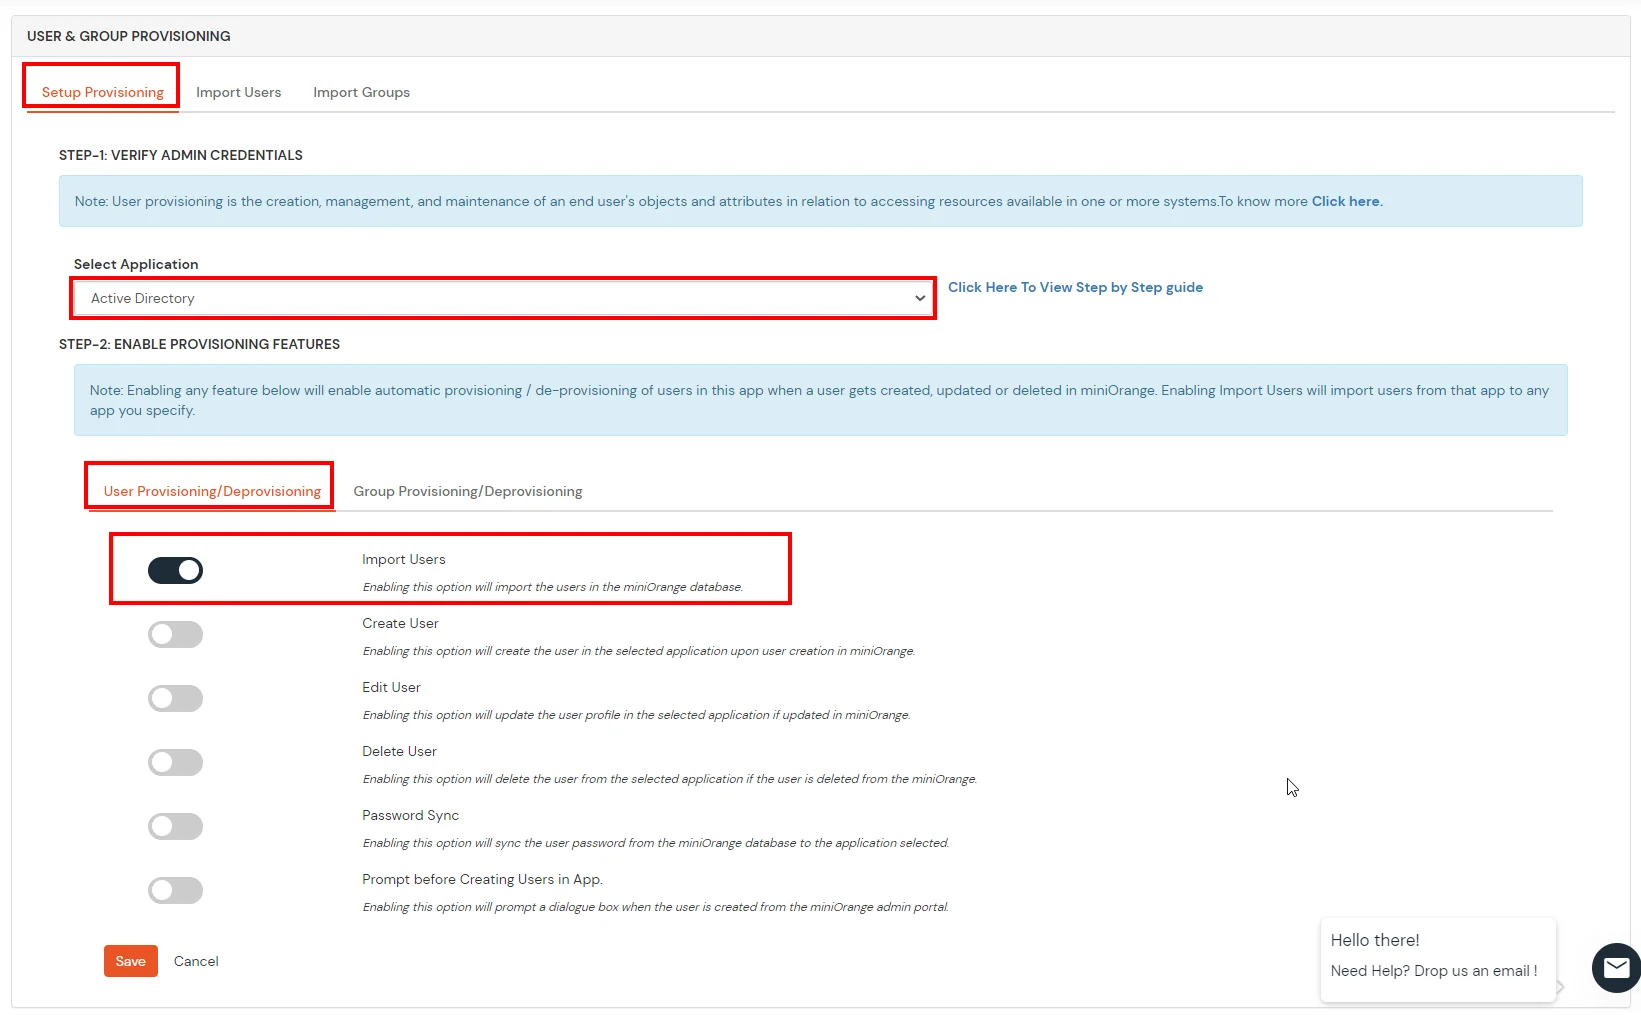
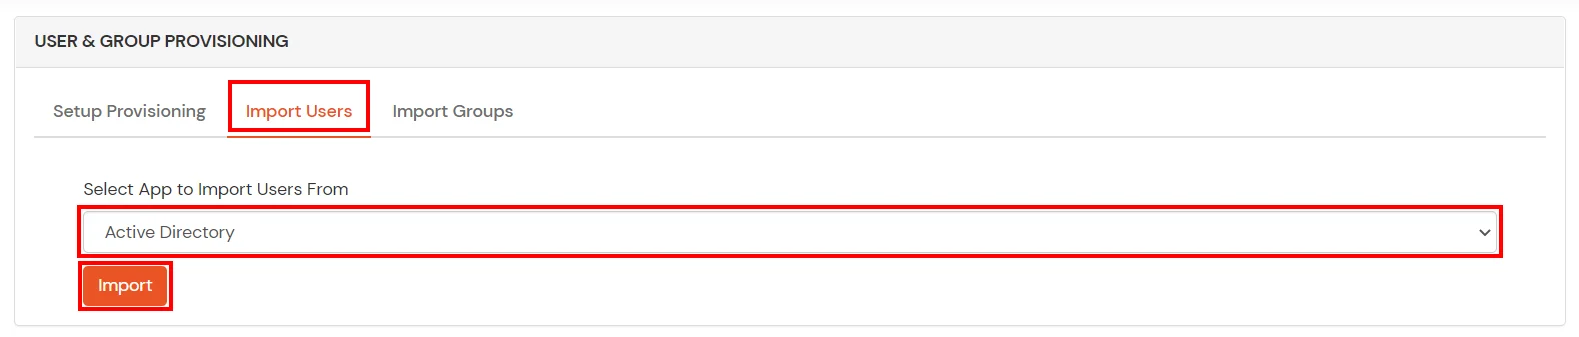
miniOrange integrates with various external user sources such as directories, identity providers, and etc.
Contact us or email us at idpsupport@xecurify.com and we'll help you setting it up in no time.
A. Restricting access to Outlook with IP Blocking
You can use adaptive authentication with Outlook Single Sign-On (SSO) to improve the security and functionality of Single Sign-On. You can allow a IP Address in certain range for SSO or you can deny it based your requirements and you can also challenge the user to verify his authenticity. Adaptive authentication manages the user authentication bases on different factors such as Device ID, Location, Time of Access, IP Address and many more.
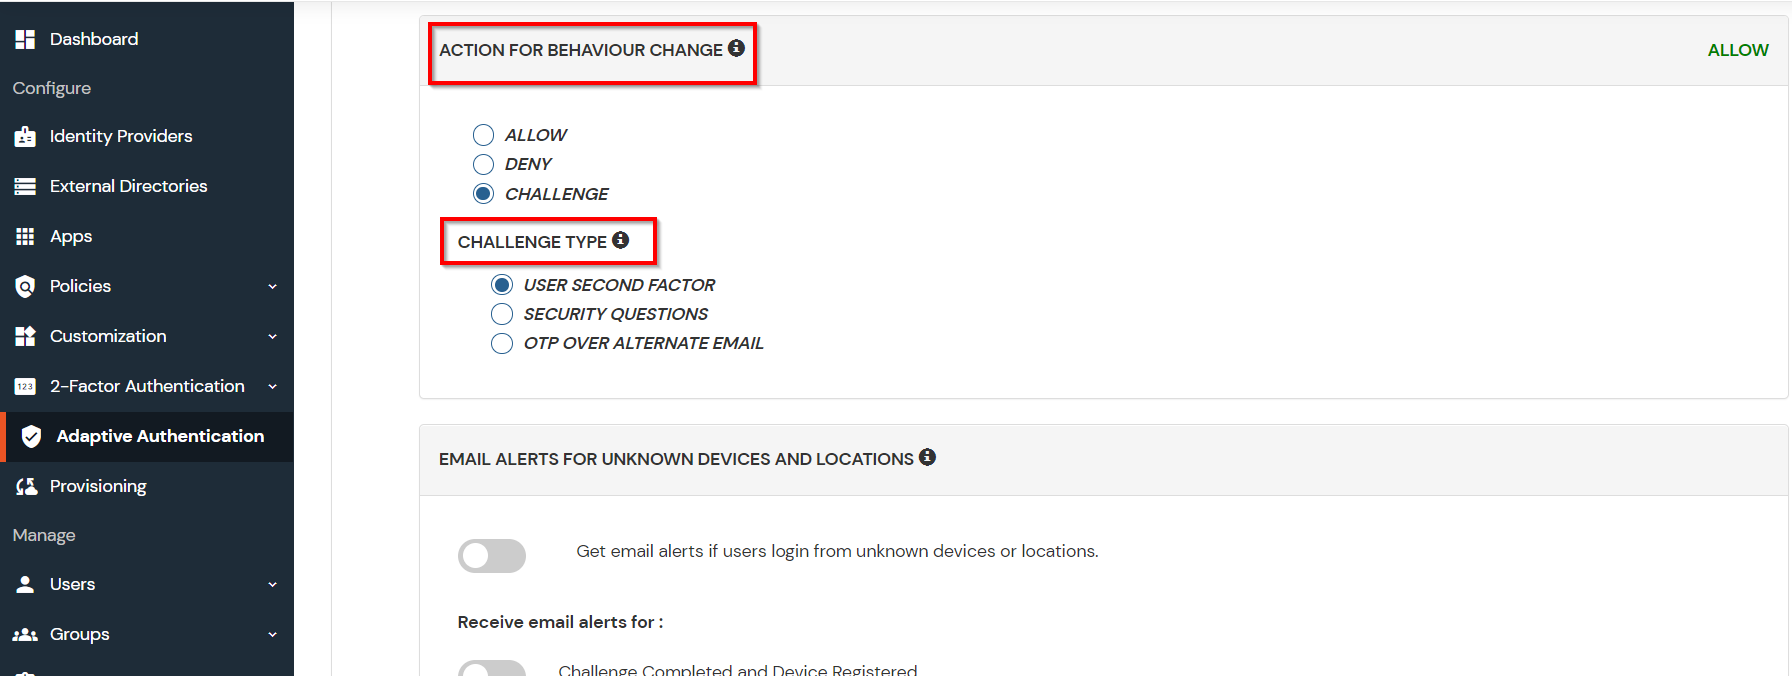
You can configure Adaptive Authentication with IP Blocking in following way: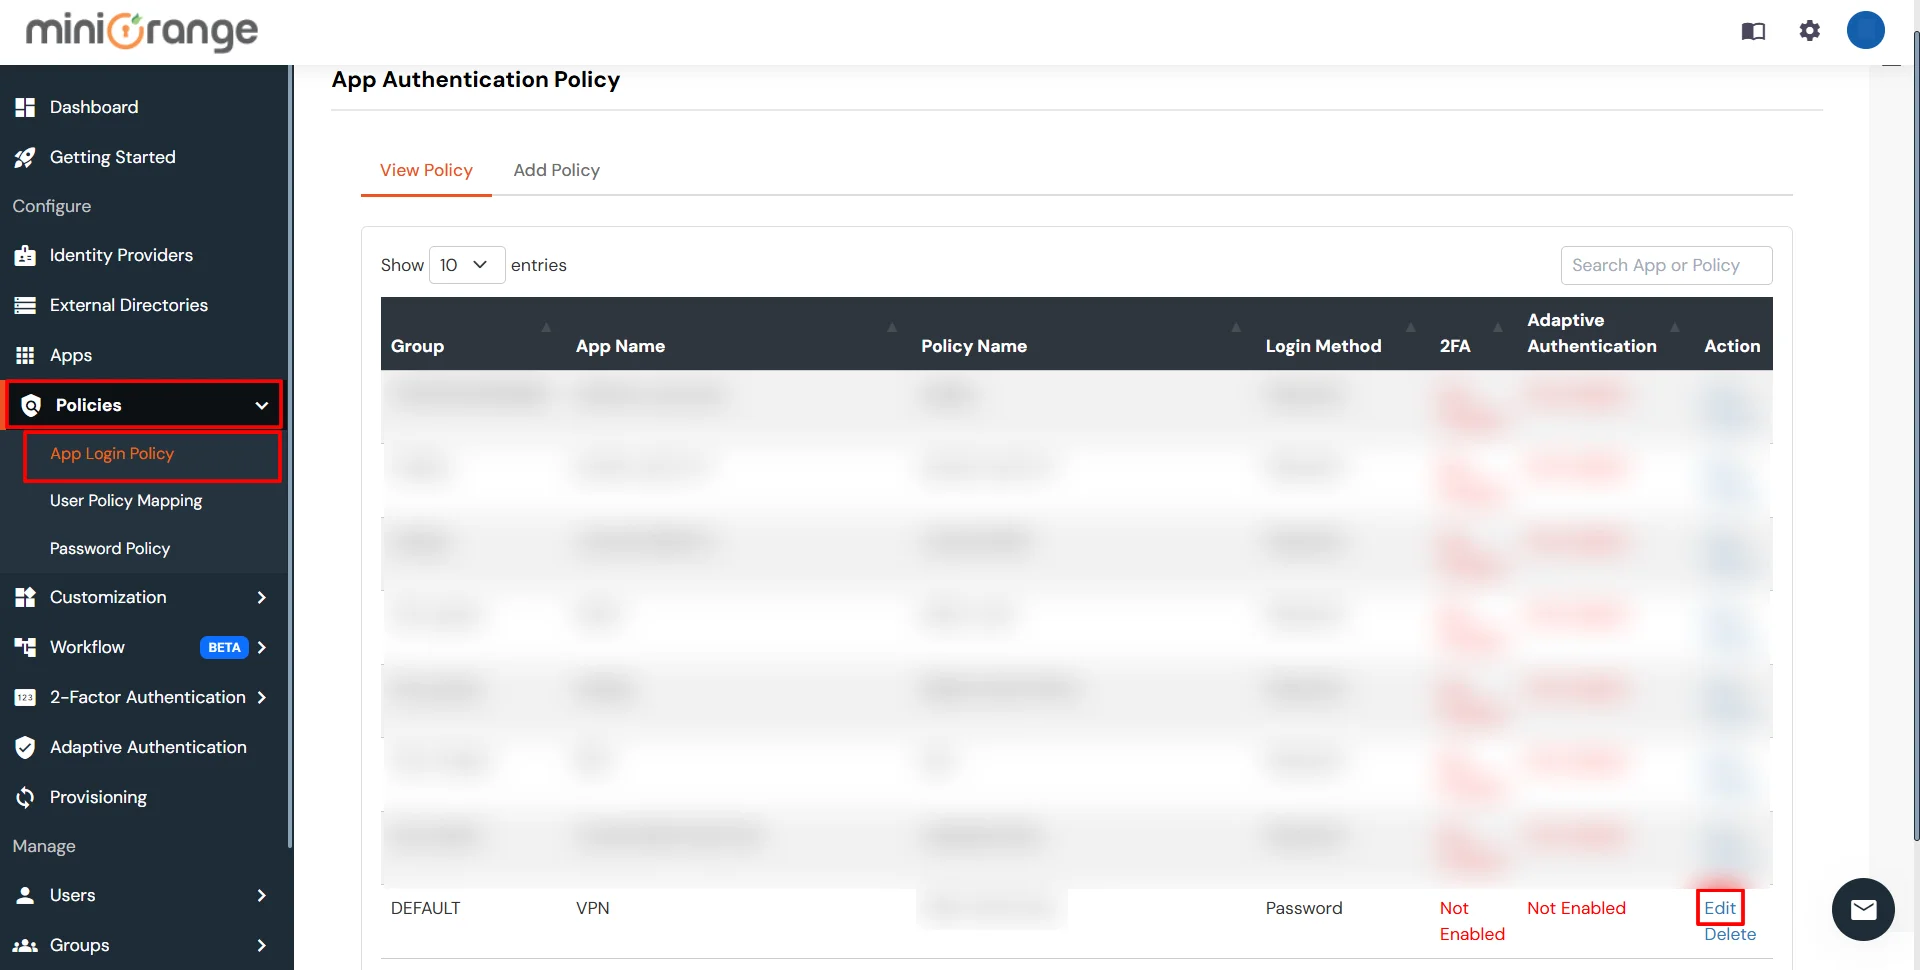
| Attribute | Description |
|---|---|
| Allow | Allow user to authenticate and use services if Adaptive authentication condition is true. |
| Challenge | Challenge users with one of the three methods mentioned below for verifying user authenticity. |
| Deny | Deny user authentications and access to services if Adaptive authentication condition is true. |
| Attribute | Description |
|---|---|
| User second Factor | The User needs to authenticate using the second factor he has opted or assigned for such as |
| KBA (Knowledge-based authentication) | The System will ask user for 2 of 3 questions he has configured in his Self Service Console. Only after right answer to both questions user is allowed to proceed further. |
| OTP over Alternate Email | User will receive a OTP on the alternate email he has configured threw Self Service Console. Once user provides the correct OTP he is allowed to proceed further. |

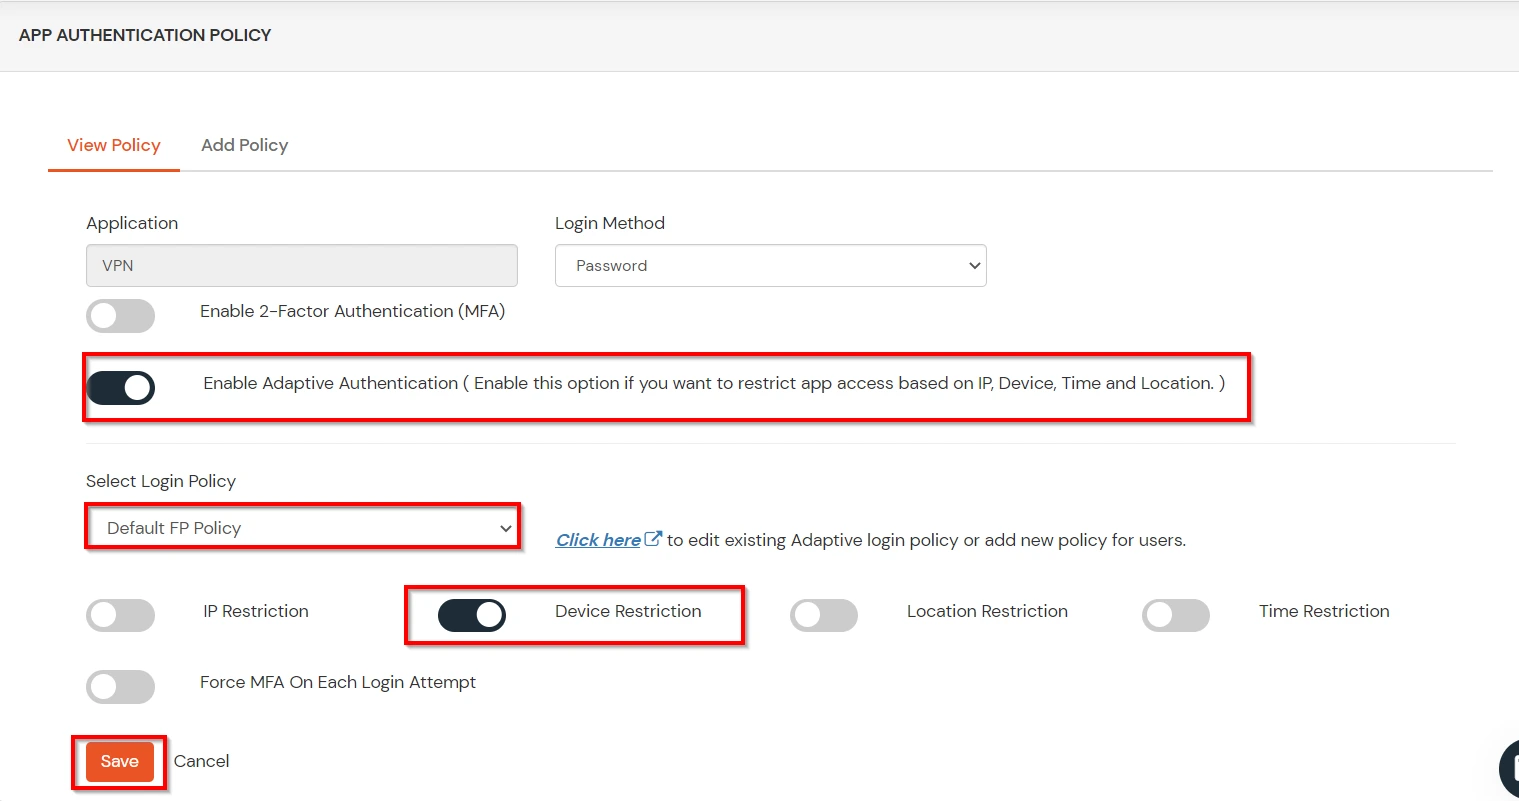
B. Adaptive Authentication with Limiting number of devices.
Using Adaptive Authentication you can also restrict the number of devices the end user can access the Services on. You can allow end users to access services on a fixed no. of devices. The end users will be able to access services provided by us on this fixed no. of devices.
You can configure Adaptive Authentication with Device Restriction in following way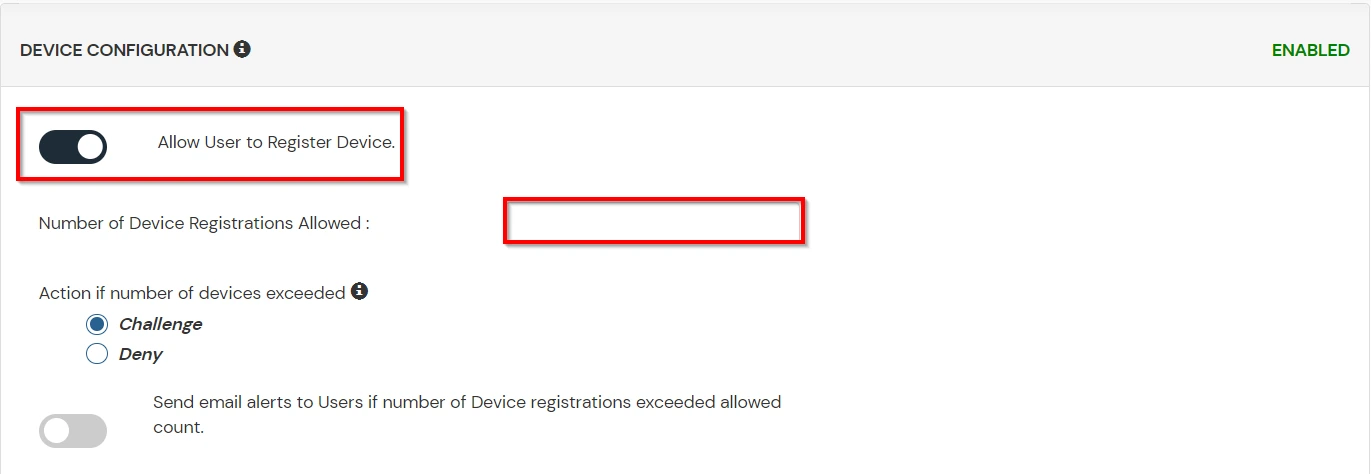
C. Add Adaptive Authentication policy to Outlook.
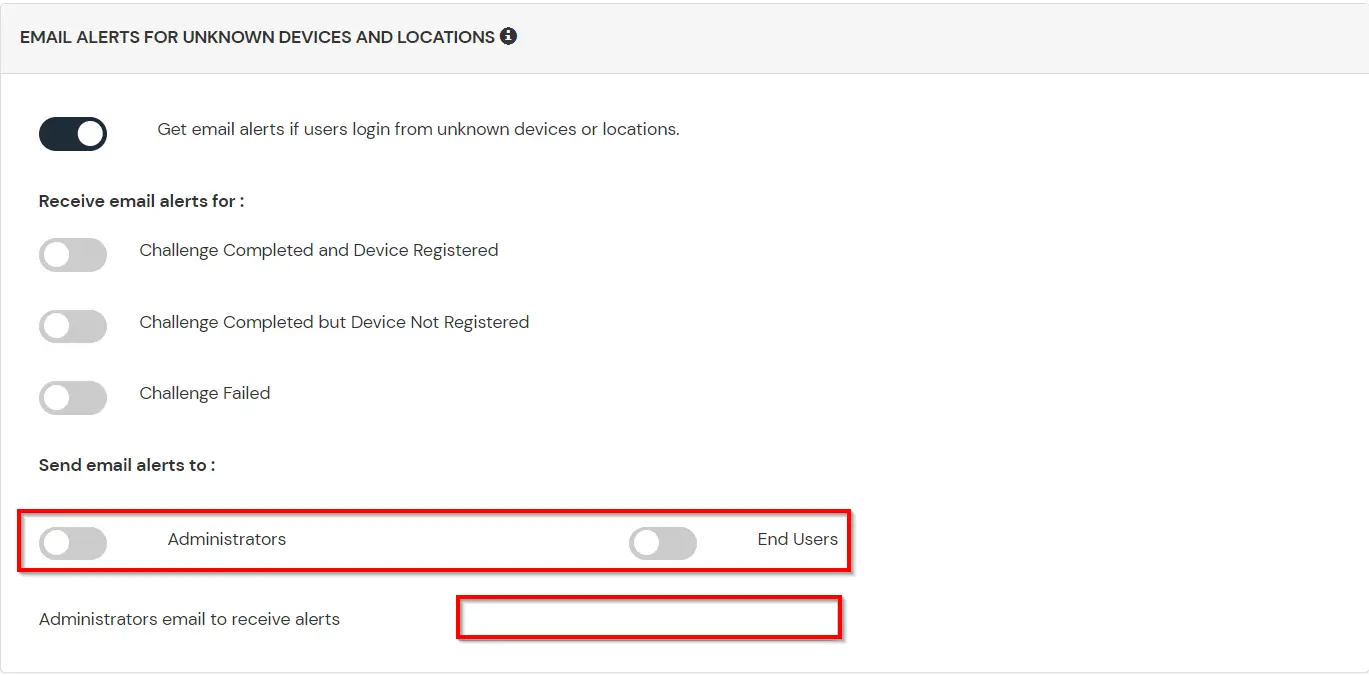
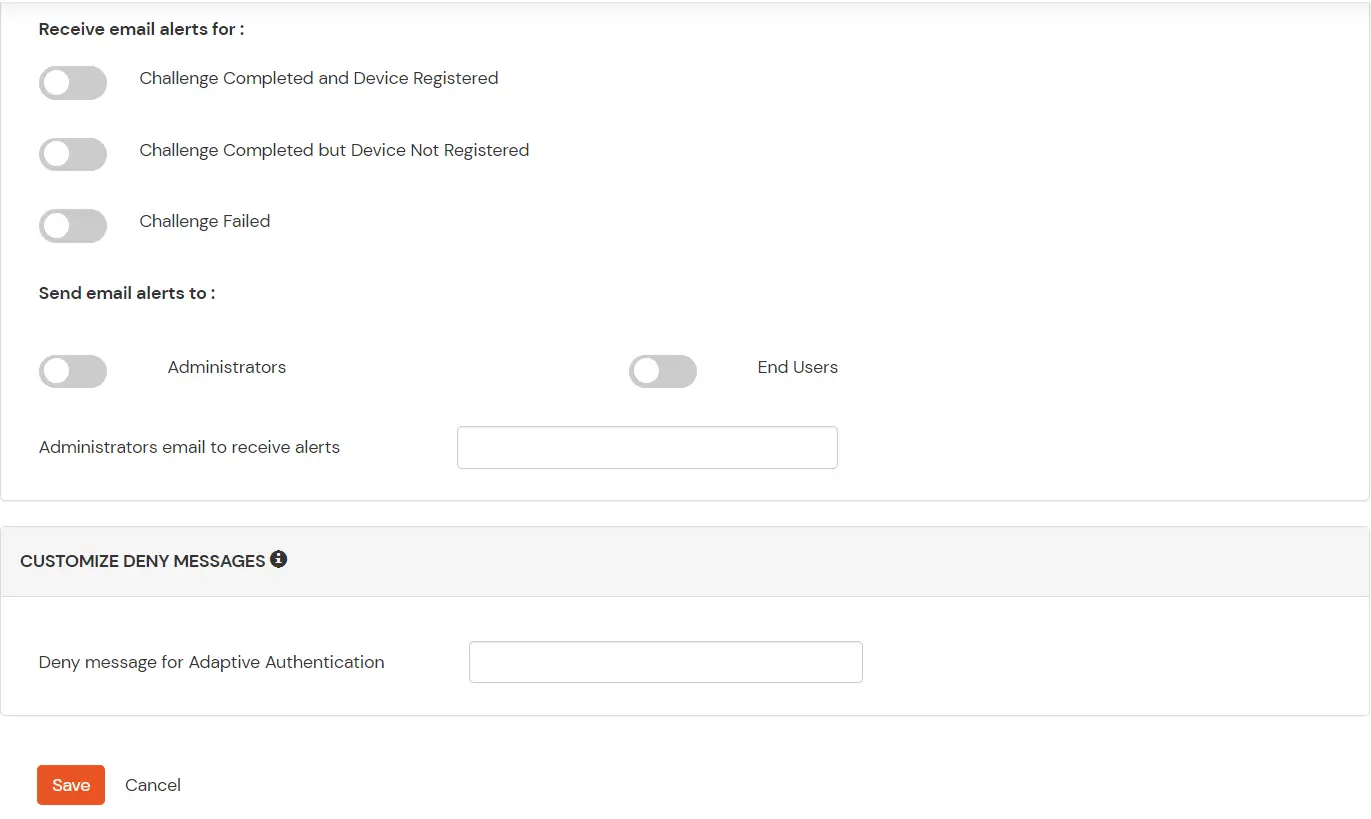
D.Notification and Alert Message.
This section handles the notifications and alerts related to Adaptive Authentication.It provides the following options :
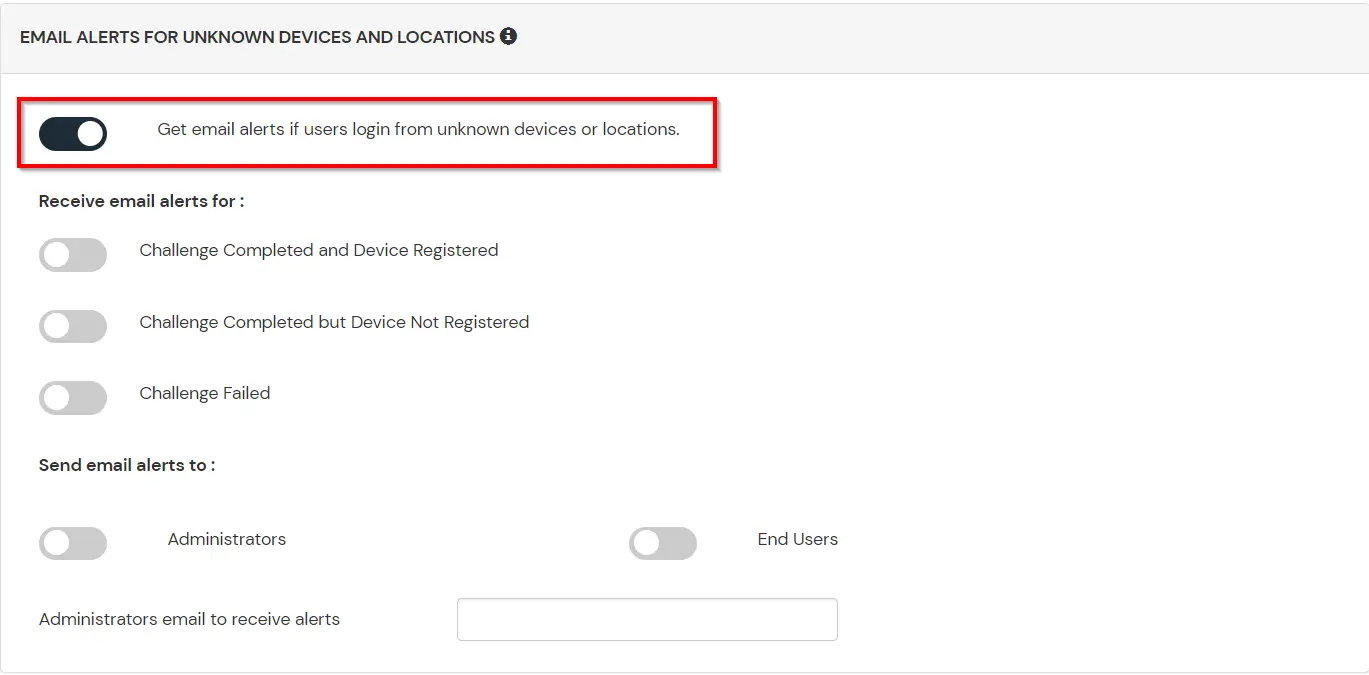
| Option | Description |
|---|---|
| Challenge Completed and Device Registered | Enabling this option allows you to send an email alert when an end-user completes a challenge and registers a device. |
| Challenge Completed but Device Not Registered | Enabling this option allows you to send an email alert when an end-user completes a challenge but do not registers the device. |
| Challenge Failed | Enabling this option allows you to send an email alert when an end-user fails to complete the challenge. |

Get-OwaVirtualDirectory | Set-OwaVirtualDirectory -AdfsAuthentication $false
        -BasicAuthentication $false -DigestAuthentication $false -FormsAuthentication $true
        -WindowsAuthentication $false -OAuthAuthentication $false
Get-EcpVirtualDirectory | Set-EcpVirtualDirectory -AdfsAuthentication $false
-BasicAuthentication $false -DigestAuthentication $false -FormsAuthentication $true
-WindowsAuthentication $false# Restart w3svc and was
net stop was /y
net start w3svc

Our Other Identity & Access Management Products