Hello there!
Need Help? We are right here!
Need Help? We are right here!
Search Results:
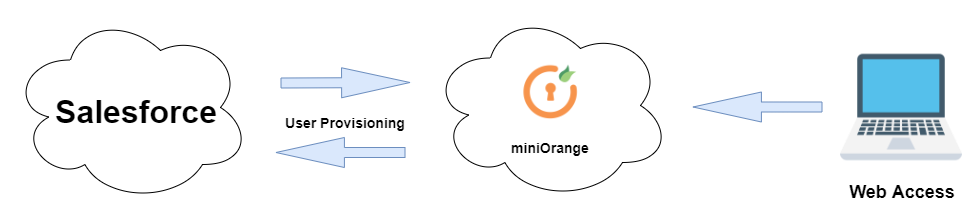
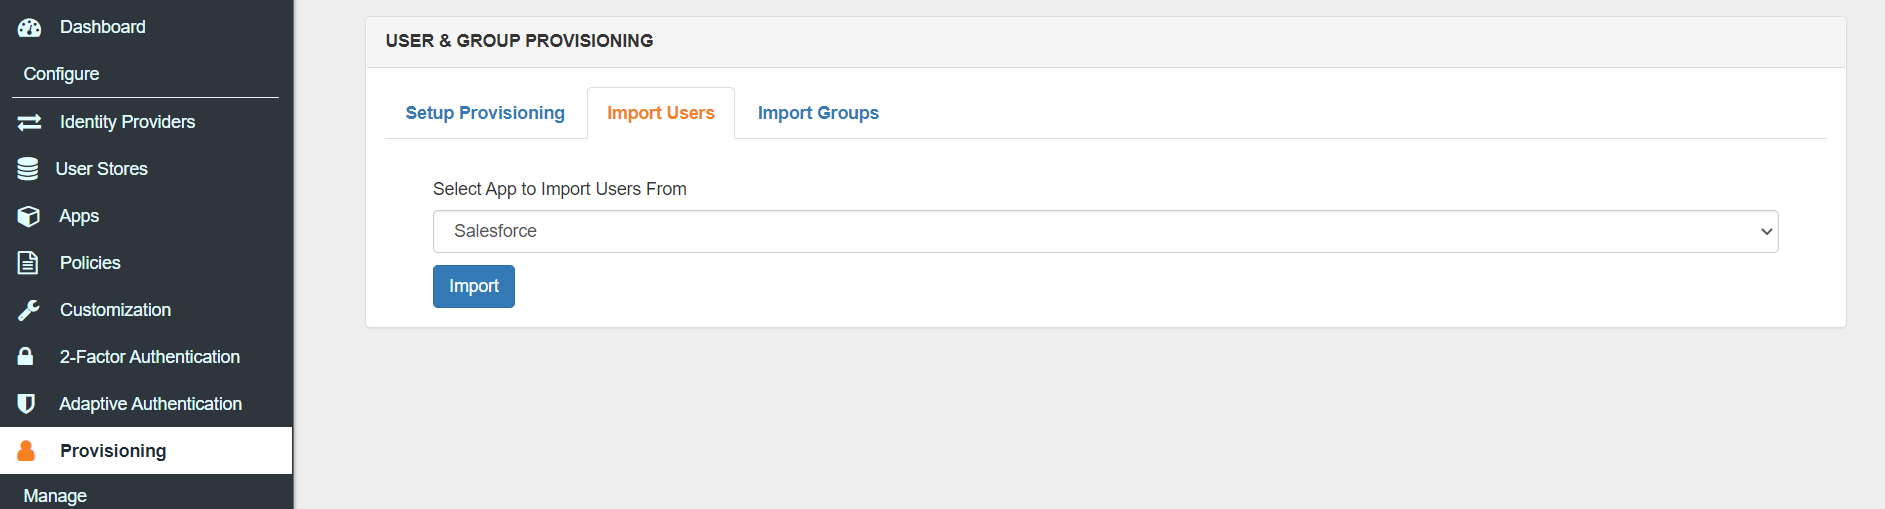
×The Salesforce User Provisioning and De-Provisioning feature offered by miniOrange allows for seamless integration between Salesforce and other applications/platforms. This user provisioning flow Salesforce identity to be used as a digital identity, allowing them to access different applications and accounts with ease. Also it is bi-directional, meaning that it allows for both the import of external user accounts into Salesforce and the export of Salesforce user accounts to external applications.
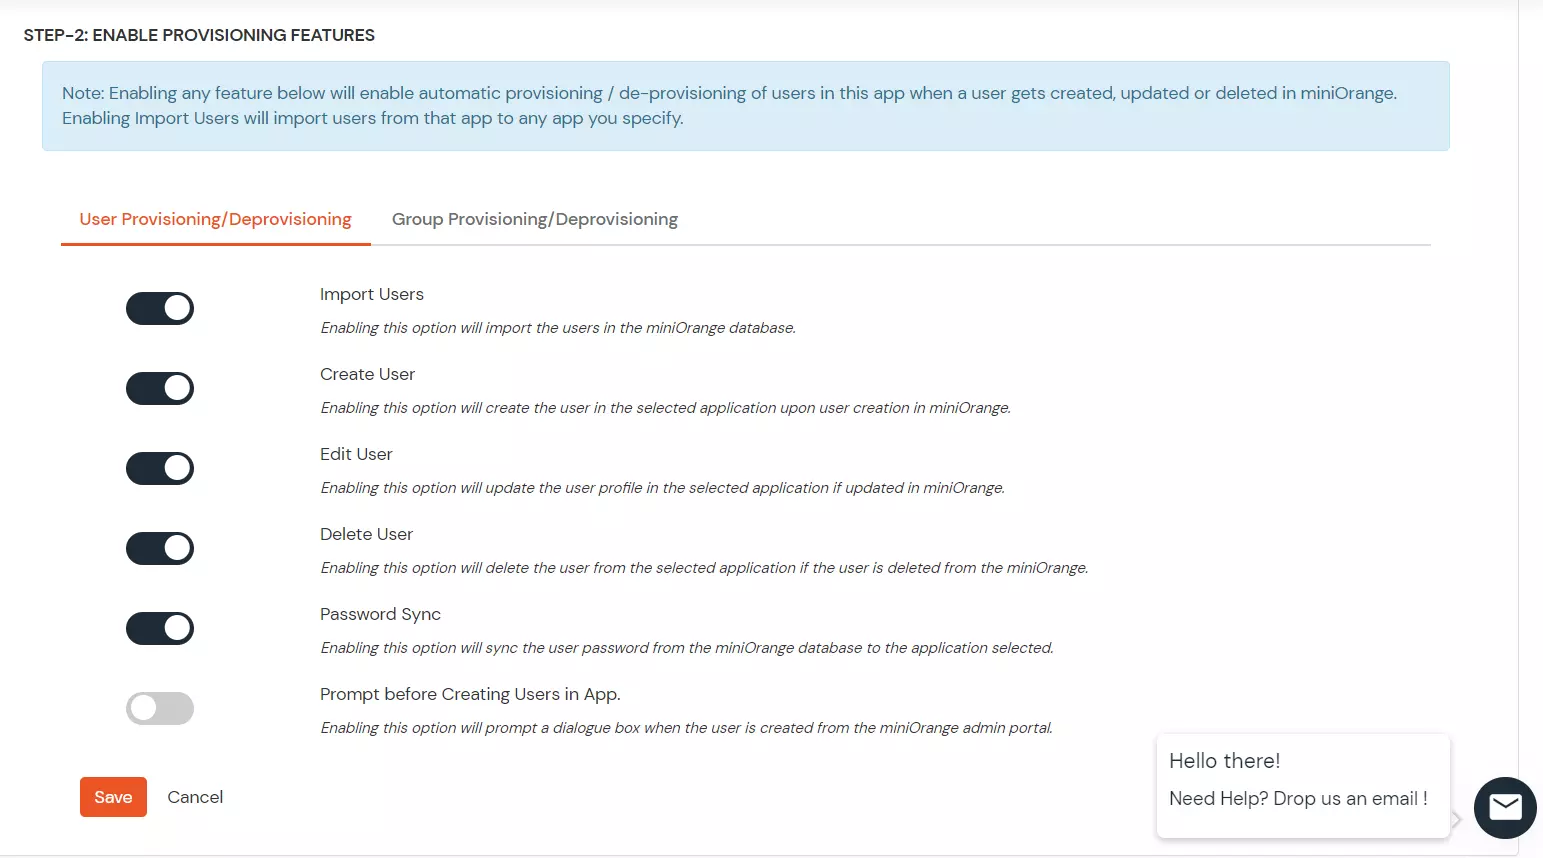
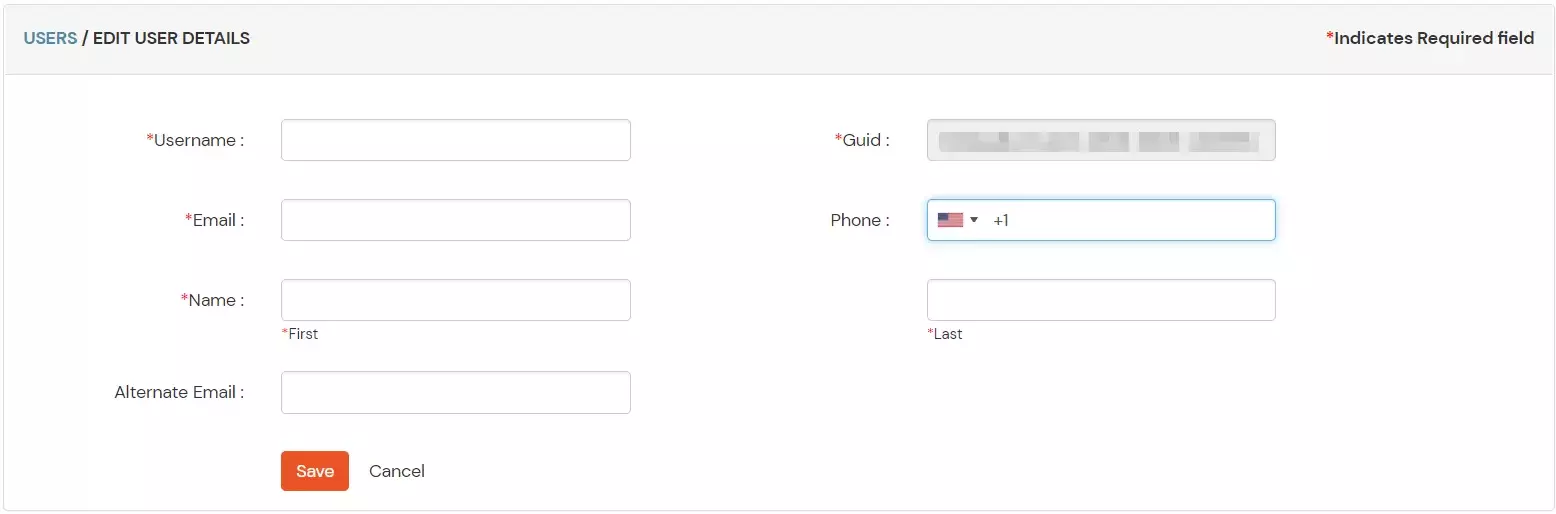
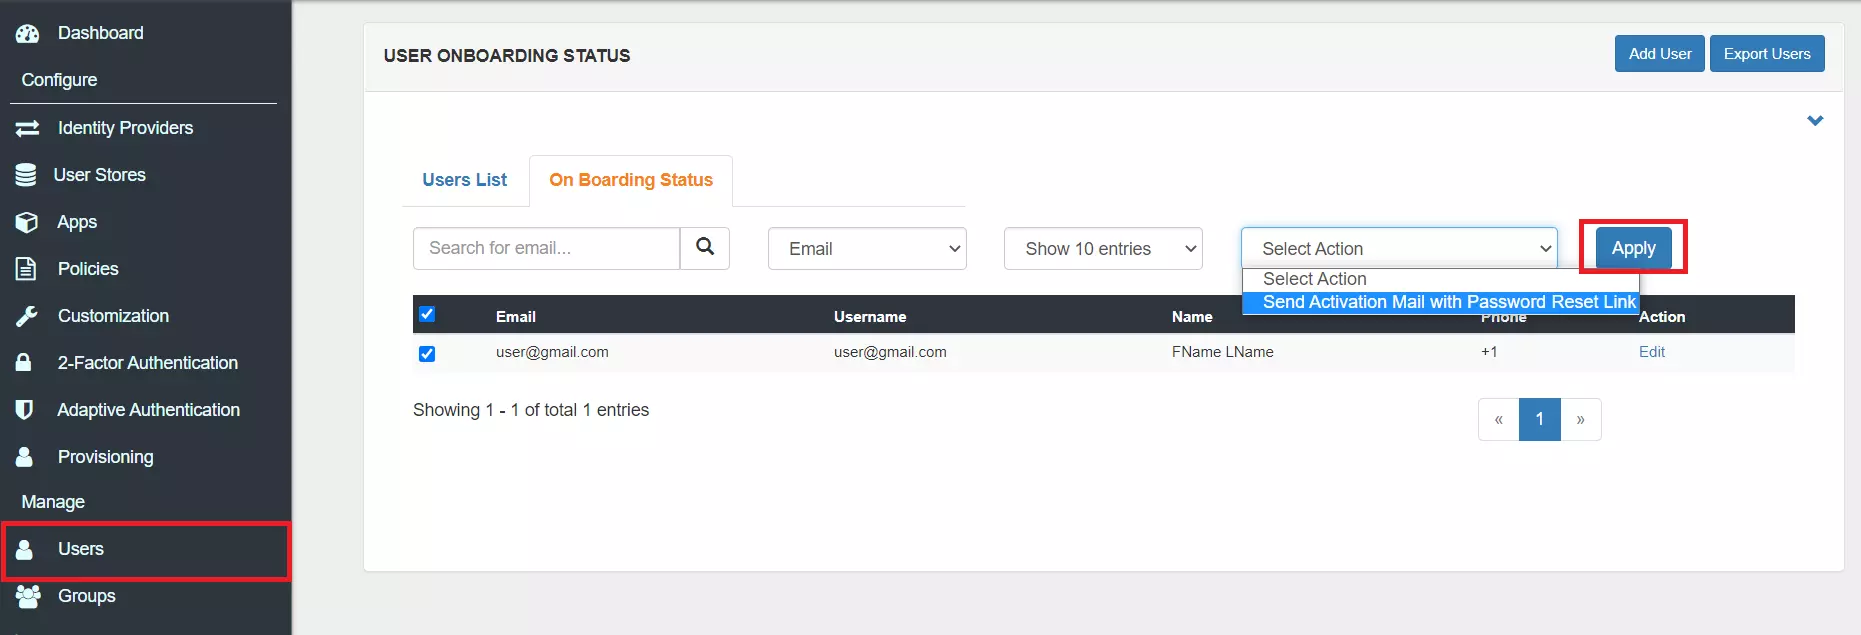
The feature offered by miniOrange allows for the automated creation, reading, and updating of user accounts for new or existing users. It also enables the removal of accounts for deactivated users, and syncs user information such as name, attributes, group name, and other associated data available through account and access management. This allows for efficient management of access for big teams, as all user information is centralized in Salesforce. The provisioning and de-provisioning feature also grant or prohibits access based on the organization's needs.
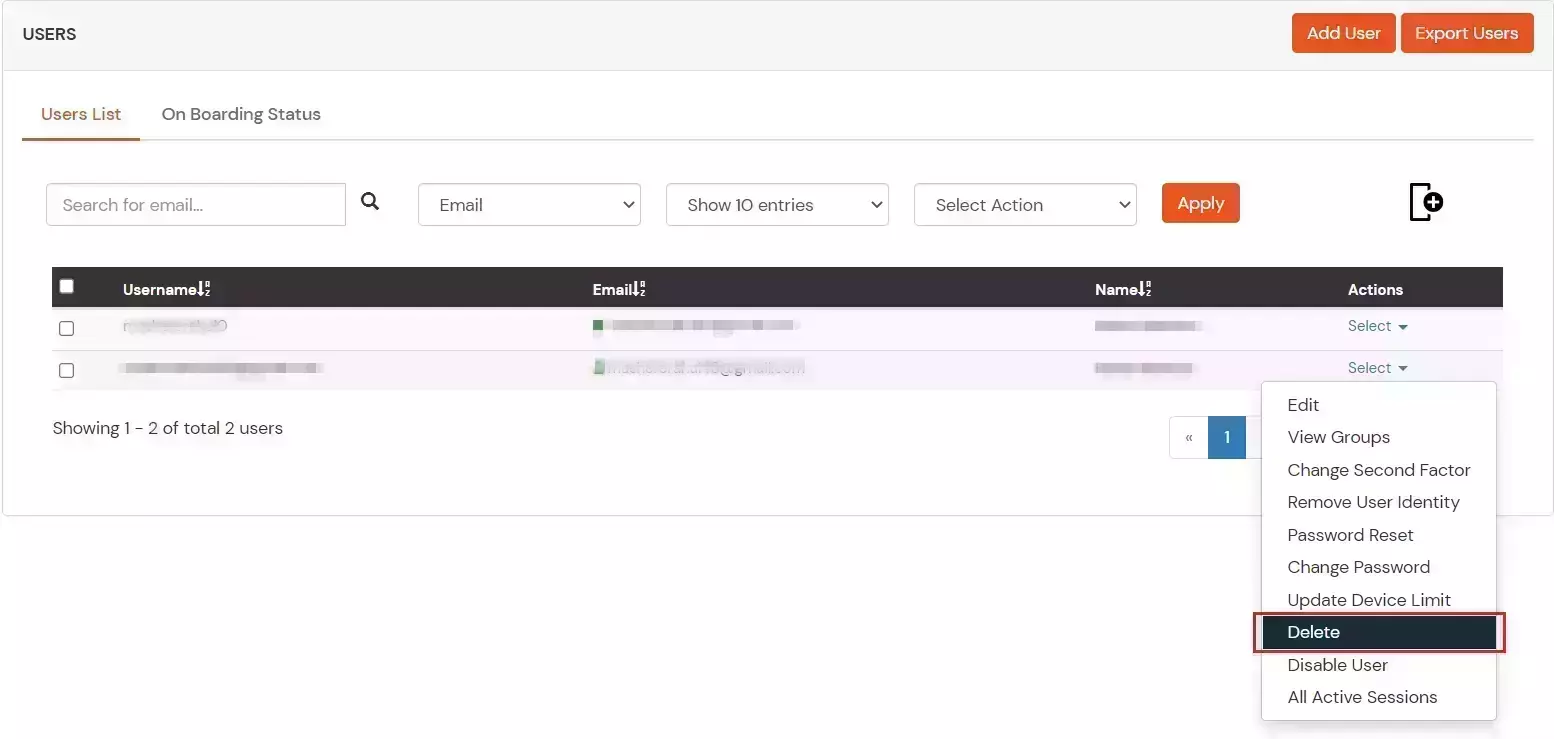
The De-Provisioning feature plays a crucial role in user access management. It swiftly removes user access from multiple applications and network systems when an employee departs or changes roles within the company.
SCIM (System for Cross-domain Identity Management) is an open standard that automates user provisioning. Acting as a communication medium between an Identity Provider (IDP)and a Service Provider (SP), SCIM facilitates the exchange of user identity information.
SCIM provides a defined schema for representing users and groups, and a REST API to run CRUD operations on those user and group resources.
With the SCIM protocol, user data is stored in a consistent way and can be shared with different applications. Since data is transferred automatically, complex exchanges are simplified and the risk of error is reduced. SCIM API and SCIM Provisioning play a crucial role in streamlining user provisioning processes and maintaining data integrity.
miniOrange provides solutions for all scenarios of provisioning, which includes AD Integration, LDAP Integration and automated provisioning for all External Applications such as Office 365, Google Workspace, Workday, etc
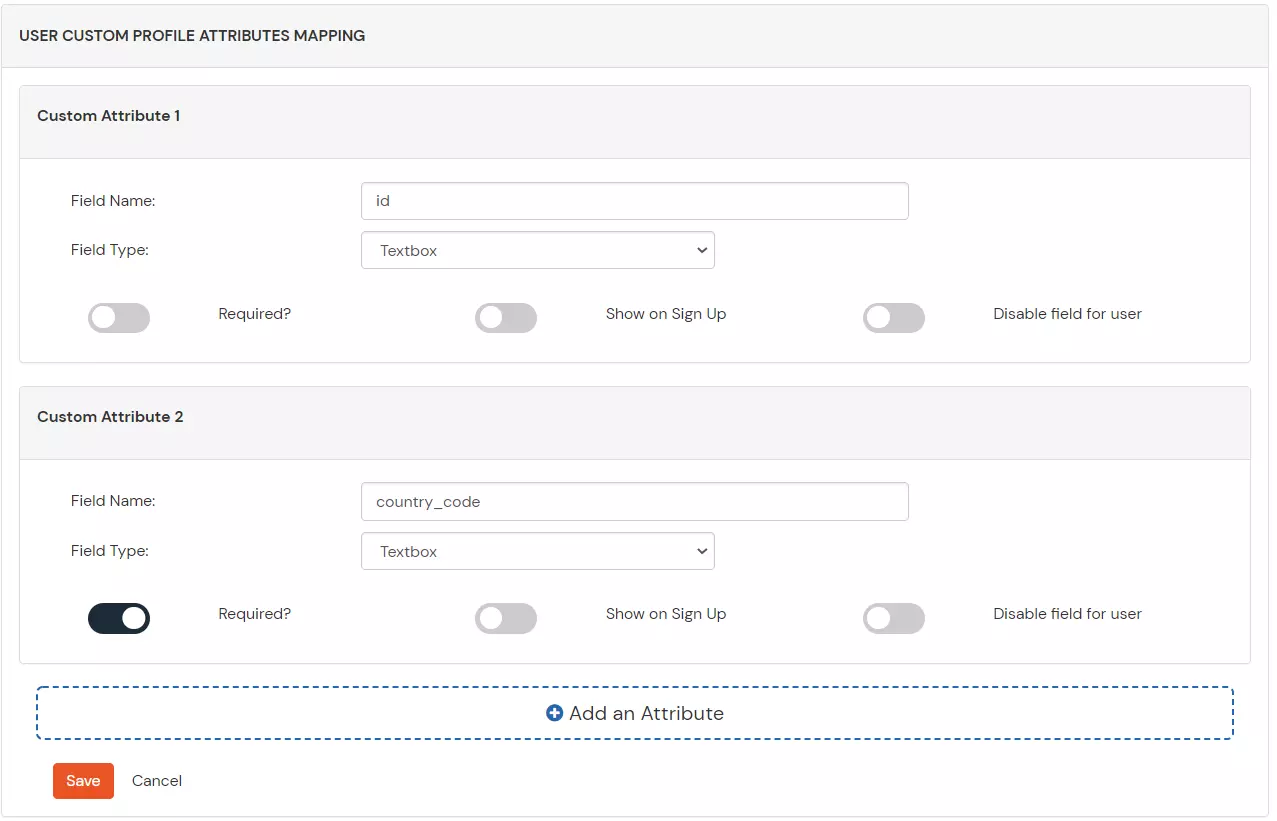
| Salesforce Attributes | miniOrange Attributes | |
|---|---|---|
| LastName | DEFAULT USER PROFILE ATTRIBUTE | Last Name |
| Company | CUSTOM USER PROFILE ATTRIBUTE | Custom Attribute 1 |


Our Other Identity & Access Management Products