Thinkific SSO using Microsoft Entra ID as IDP
miniOrange's Thinkific SSO solution lets you enable secure and seamless SSO for Thinkific using Microsoft Entra ID as your active directory. Users can authenticate themselves using their existing credentials which are stored in Microsoft Entra ID and log in to Thinkific using the Single Sign-On (SSO) solution provided by miniOrange. The solution is easy to setup and configure and it can be deployed within minutes.
Connect with External Source of Users
miniOrange provides user authentication from various external sources, which can be Directories (like ADFS, Microsoft Active Directory, Azure AD, OpenLDAP, Google, AWS Cognito etc), Identity Providers (like Shibboleth, Ping, Okta, OneLogin, KeyCloak), Databases (like MySQL, Maria DB, PostgreSQL) and many more.
Prerequisites
Follow the step-by-step Guide given below for Thinkific Single Sign-On (SSO) using Microsoft Entra ID as IDP
1. Configure Microsoft Entra ID as IDP
1.a. Configuring miniOrange as Service Provider (SP) in Microsoft Entra ID
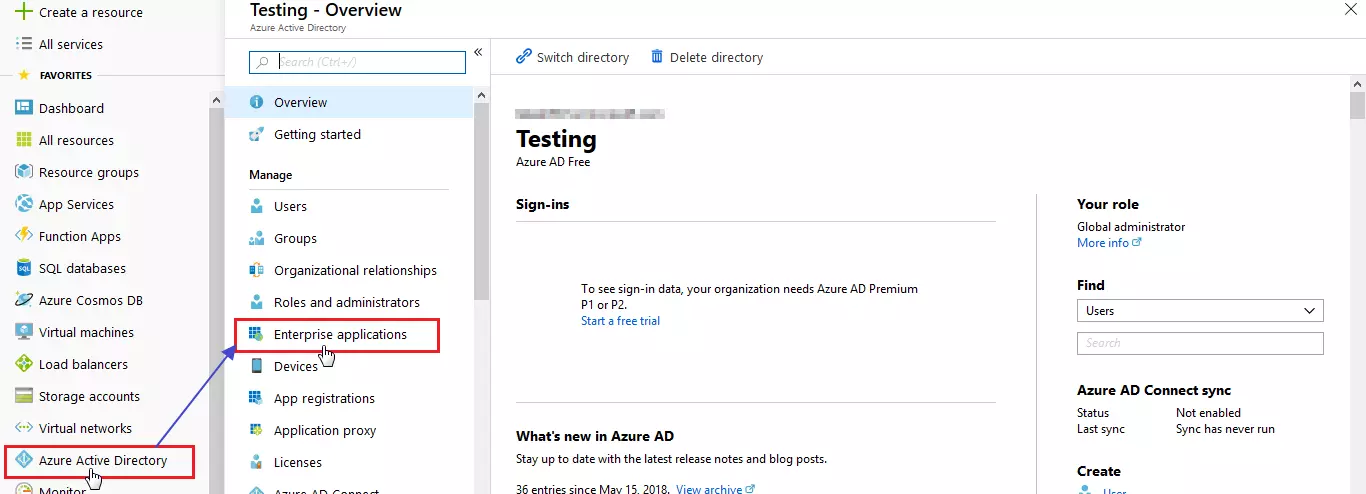
- Log in to Microsoft Entra ID Portal.
- Select Microsoft Entra ID (Azure Active Directory) ⇒ Enterprise Applications.
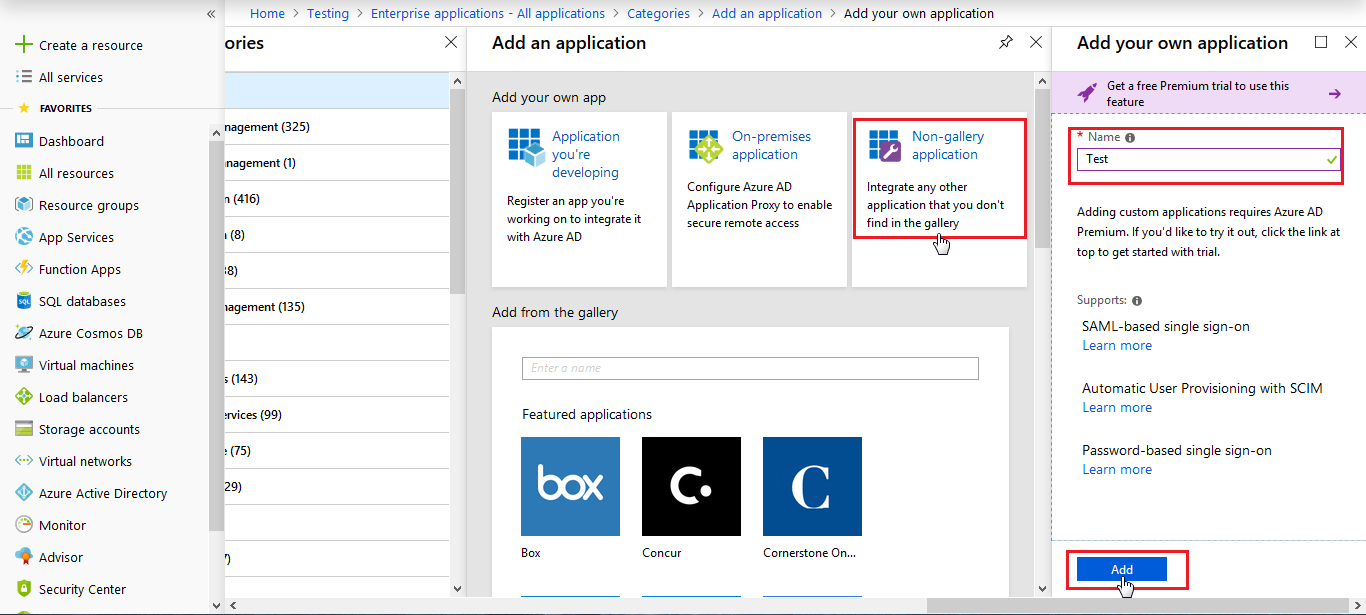
- Click on New Application.
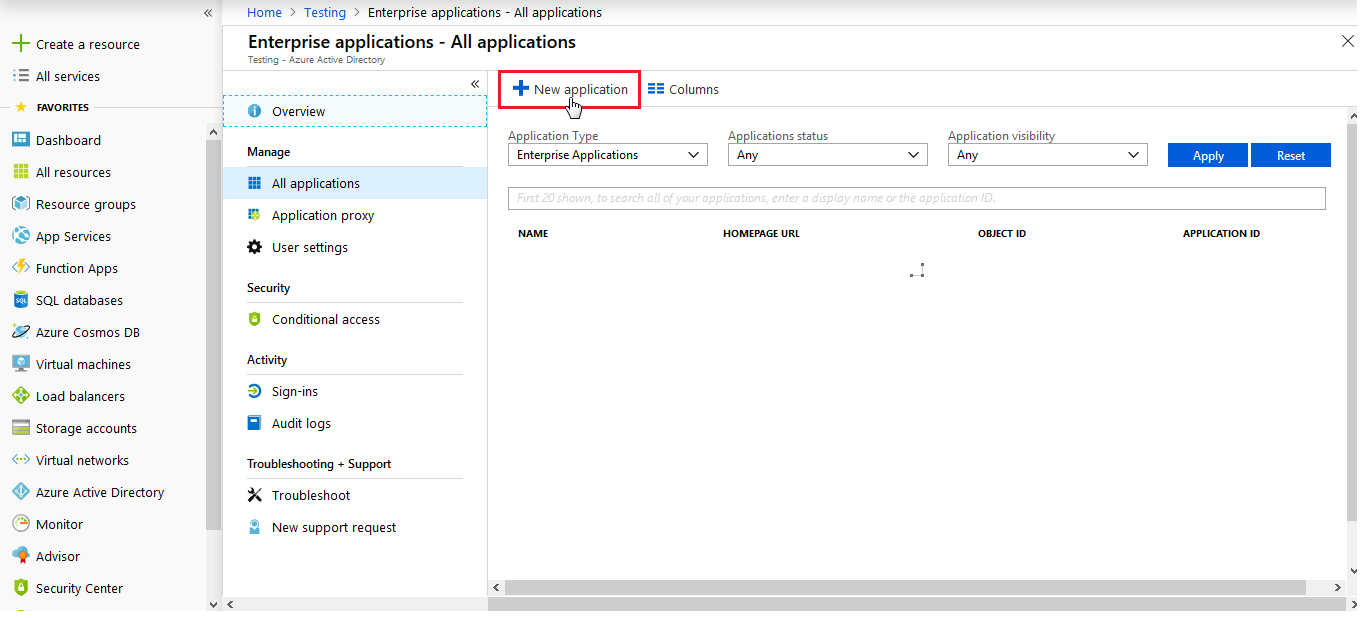
- Click on Non-gallery application section and enter the name for your app and click on Add button.
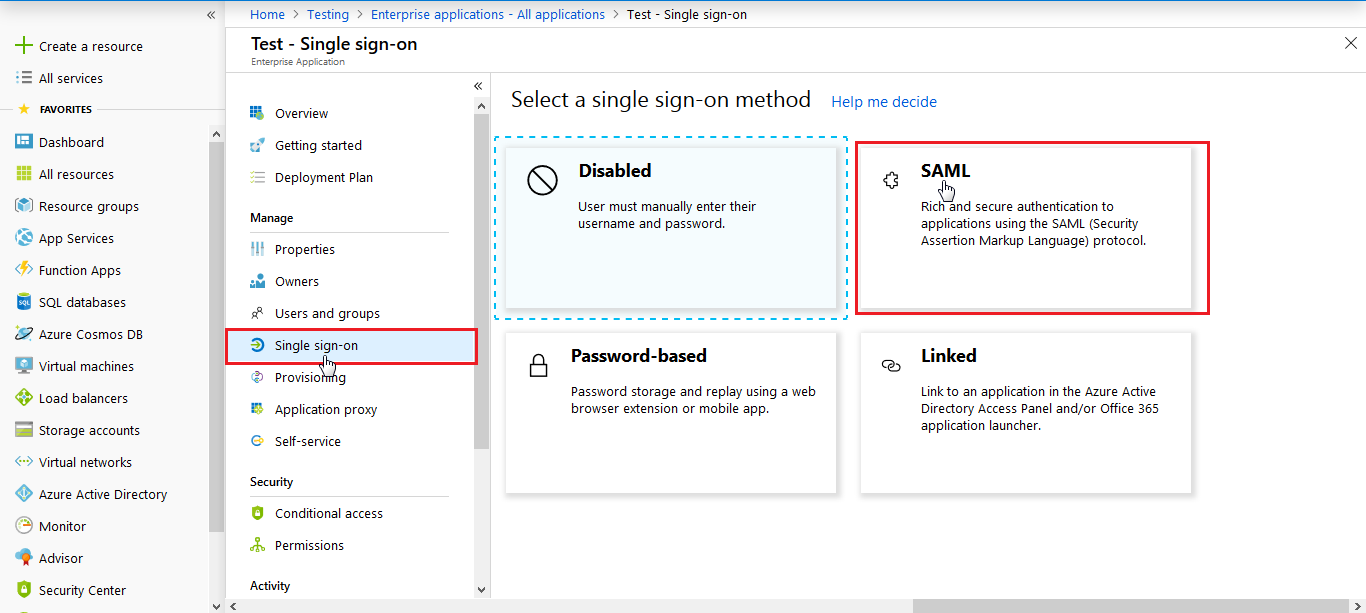
- Click on Single sign-on from the application's left-hand navigation menu. The next screen presents the options for configuring single sign-on. Click on SAML.
- Go to miniOrange Dashboard in the left navigation menu. Click on Add External IdP.
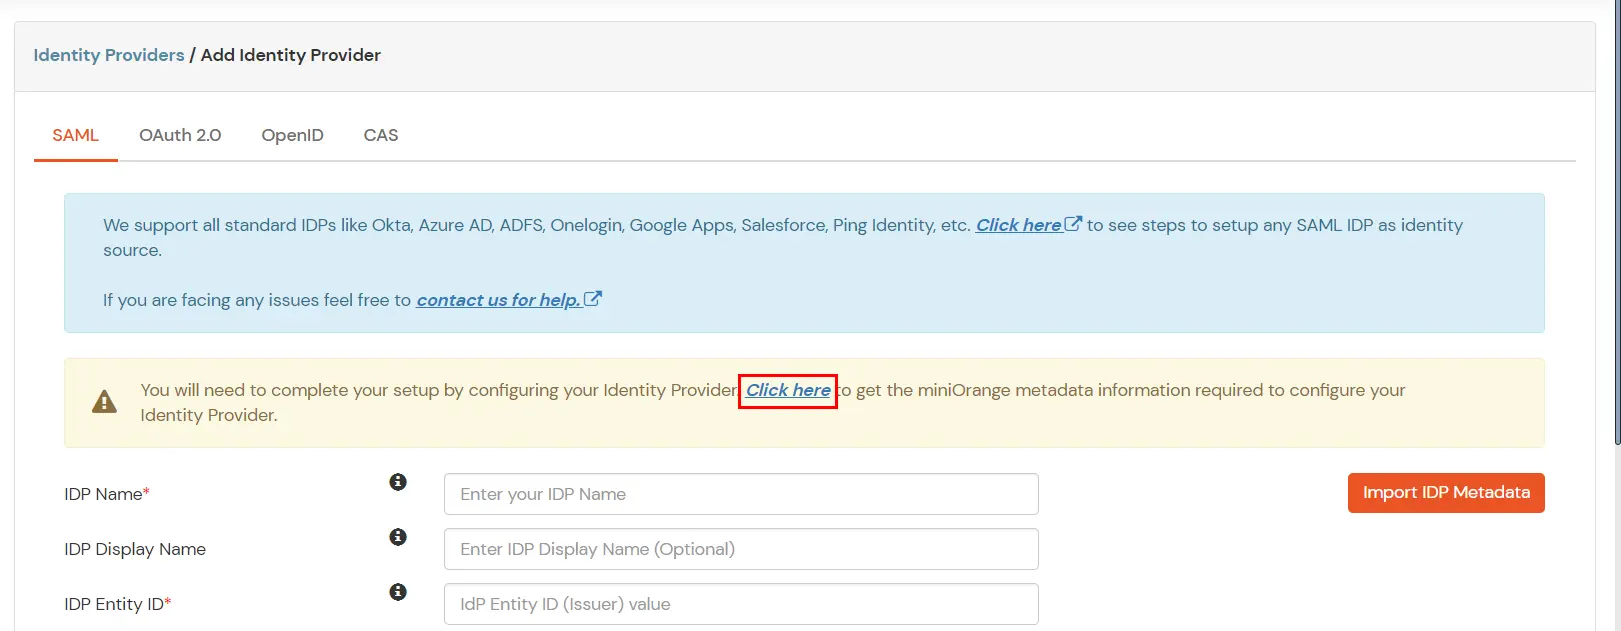
- Now click on the Click here link to get miniorange metadata as shown in Screen below.
- Here you will see 2 options, if you are going to initiate SSO from the Application copy the metadata details related to miniOrange from the SP - Initiated SSO section otherwise go for the metadata details from the IDP - Initiated section.
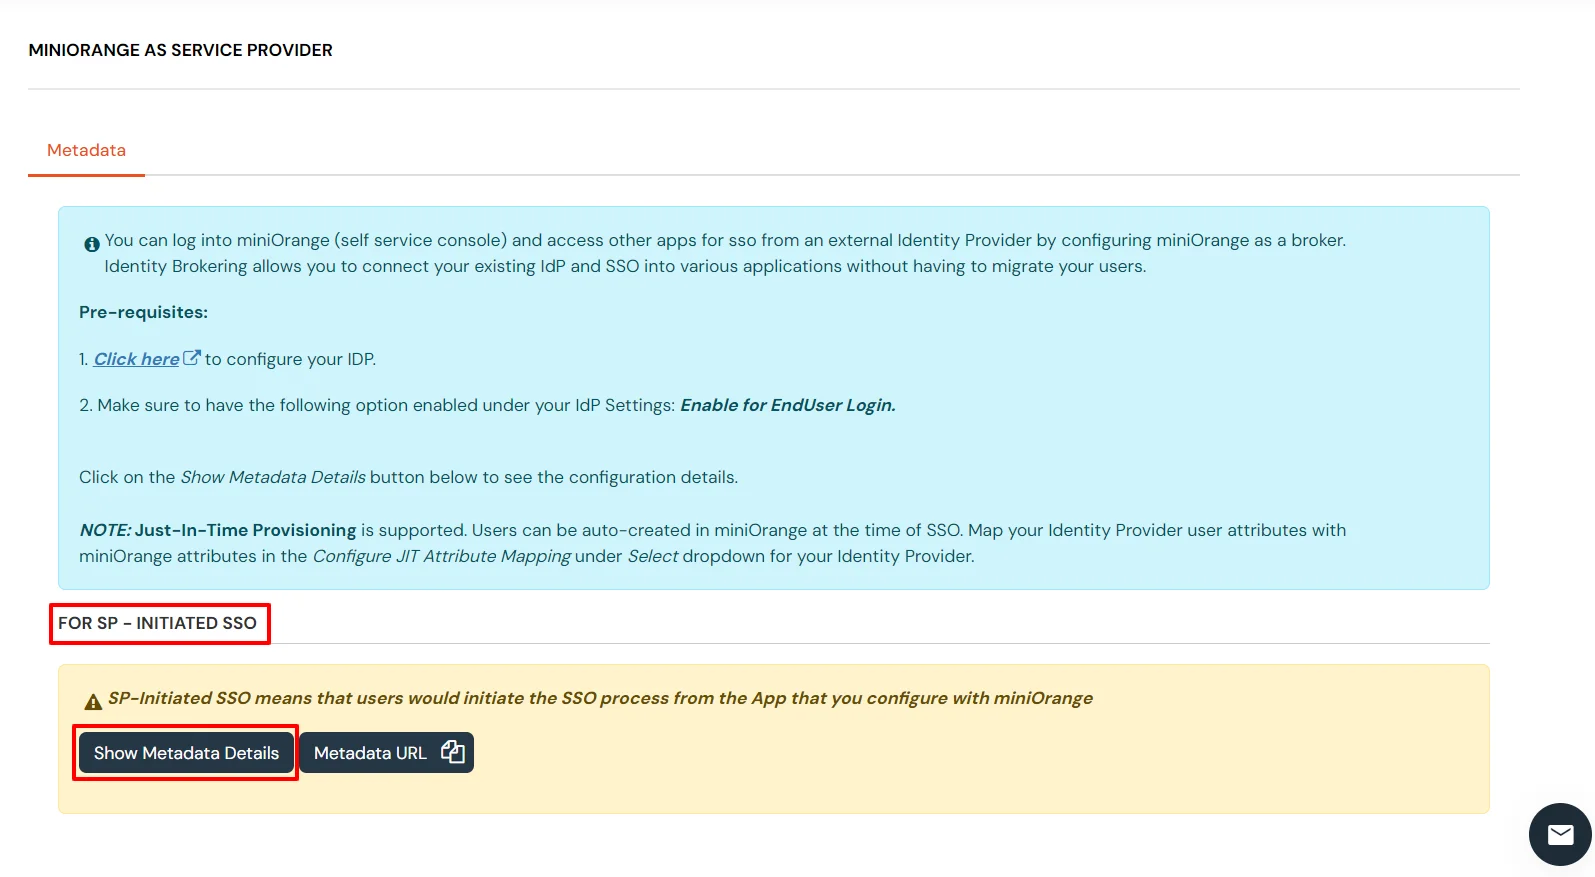
- For Basic SAML configuration you need to get the Entity ID, ACS URL, and the Single Logout URL from miniOrange. You will be able to find the necessary details here.
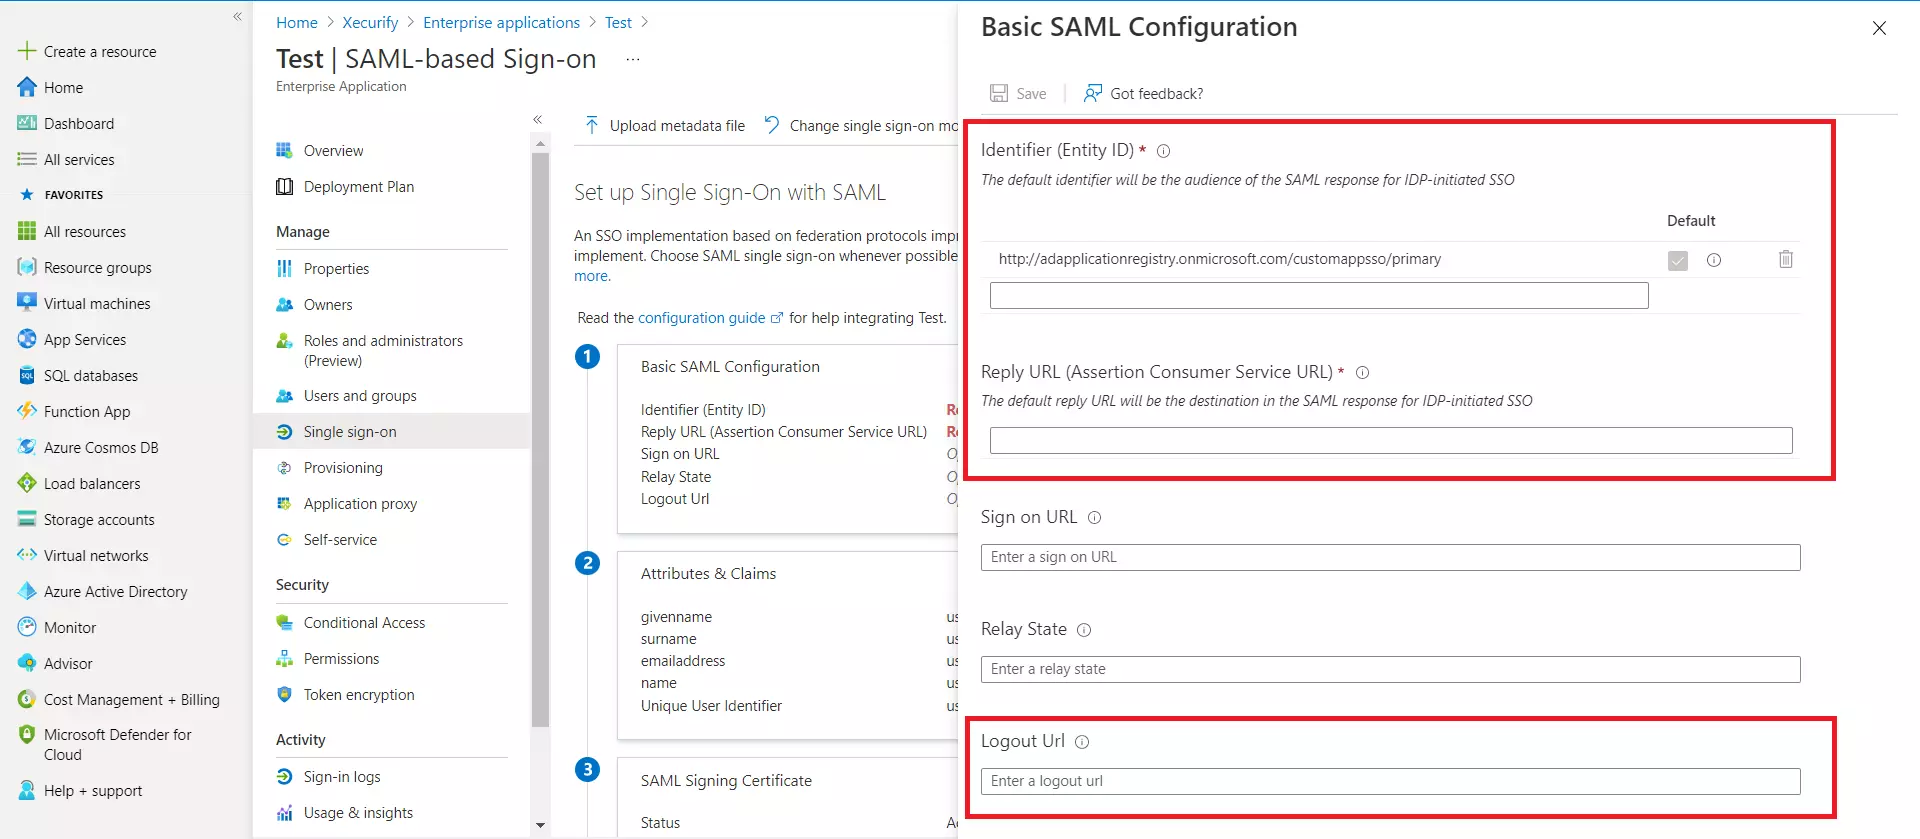
- Enter the values in basic SAML configuration as shown in below screen
| Identifier (Entity ID) |
Entity ID or Issuer copied from the miniOrange metadata section mentioned in the previous step. |
| Reply URL (Assertion Consumer Service URL) |
ACS URL copied from the miniOrange metadata section mentioned in the previous step. |
| Logout URL |
Single Logout URL copied from the miniOrange metadata section mentioned in the previous step. |
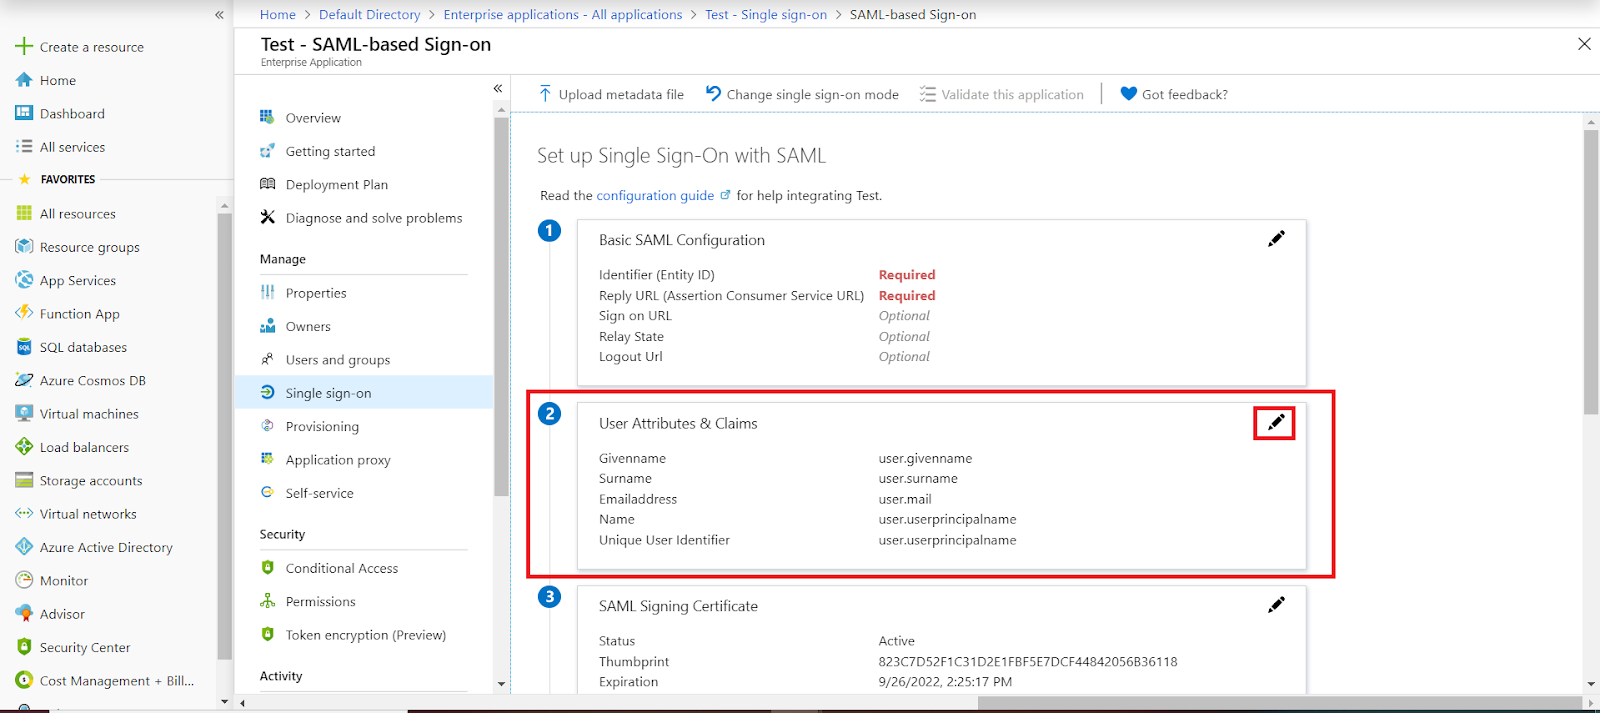
- By default, the following Attributes will be sent in the SAML token. You can view or edit the claims sent in the SAML token to the application under the Attributes tab.
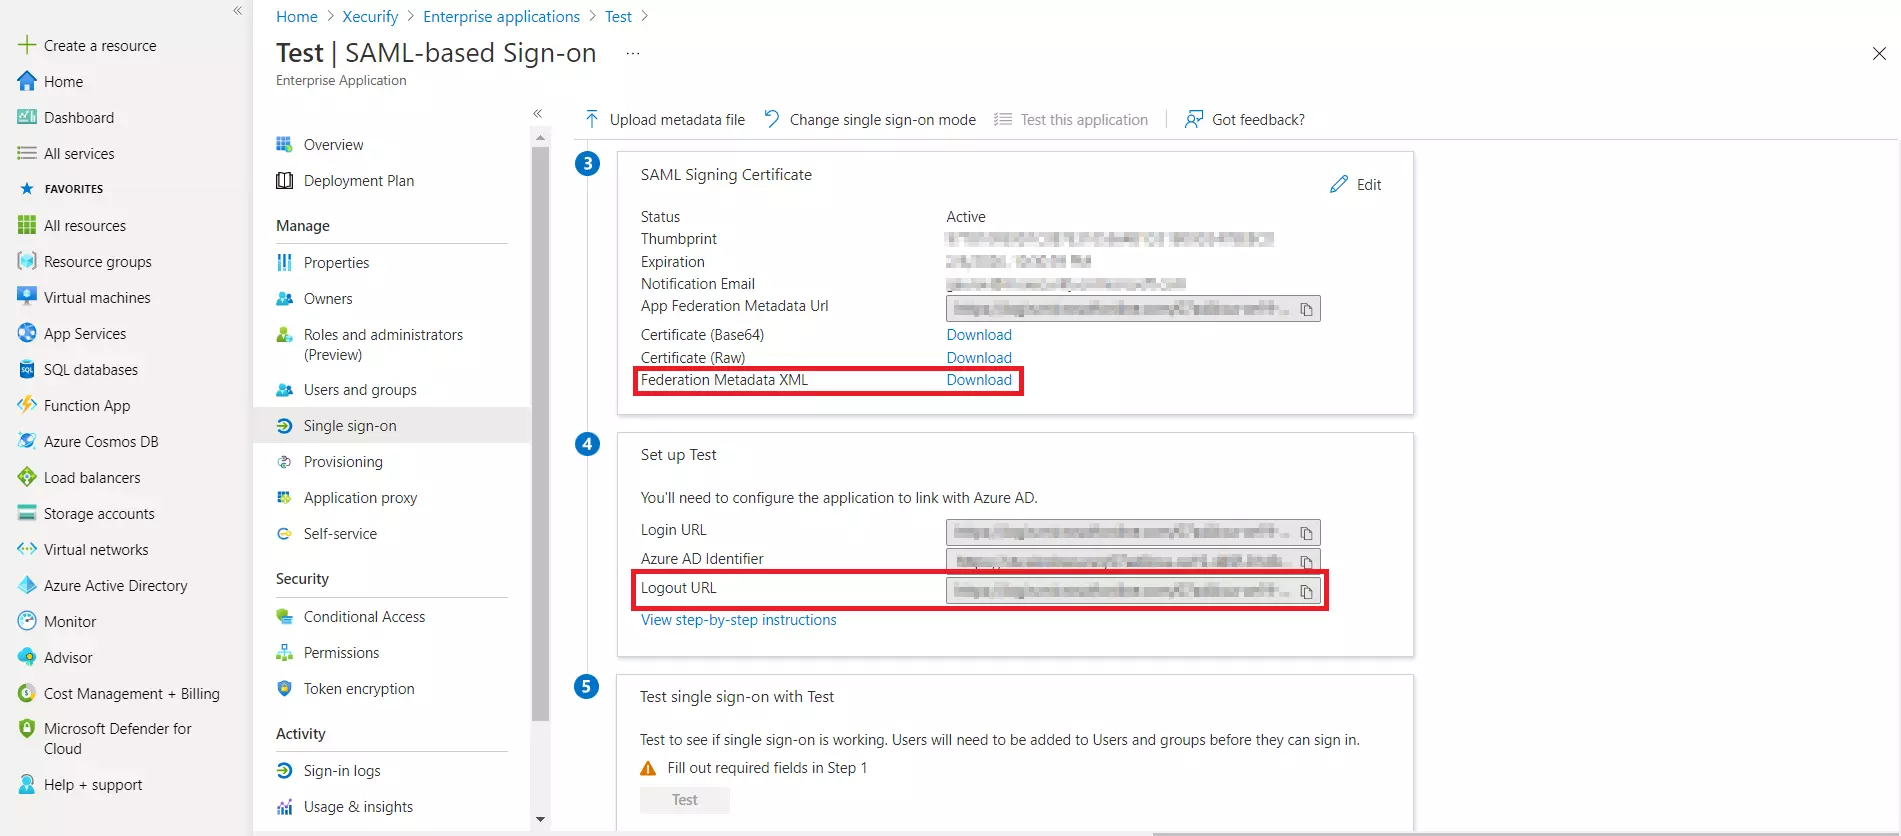
- Download Federation Metadata xml, and copy the Logout URL as well. This will be used while configuring the Microsoft Entra ID as IDP in Step 1.b.
1.b. User/Group Assignment
- Assign users and groups to your SAML application.
- As a security control, Microsoft Entra ID will not issue a token allowing a user to sign in to the application unless Microsoft Entra ID has granted access to the user. Users may be granted access directly, or through group membership.
- Click on Users and groups from the applications left-hand navigation menu. The next screen presents the options for assigning the users/groups to the application.

- After clicking on Add user, Select Users and groups in the Add Assignment screen.
- The next screen presents the option for selecting user or invite an external user. Select the appropriate user and click on the Select button.
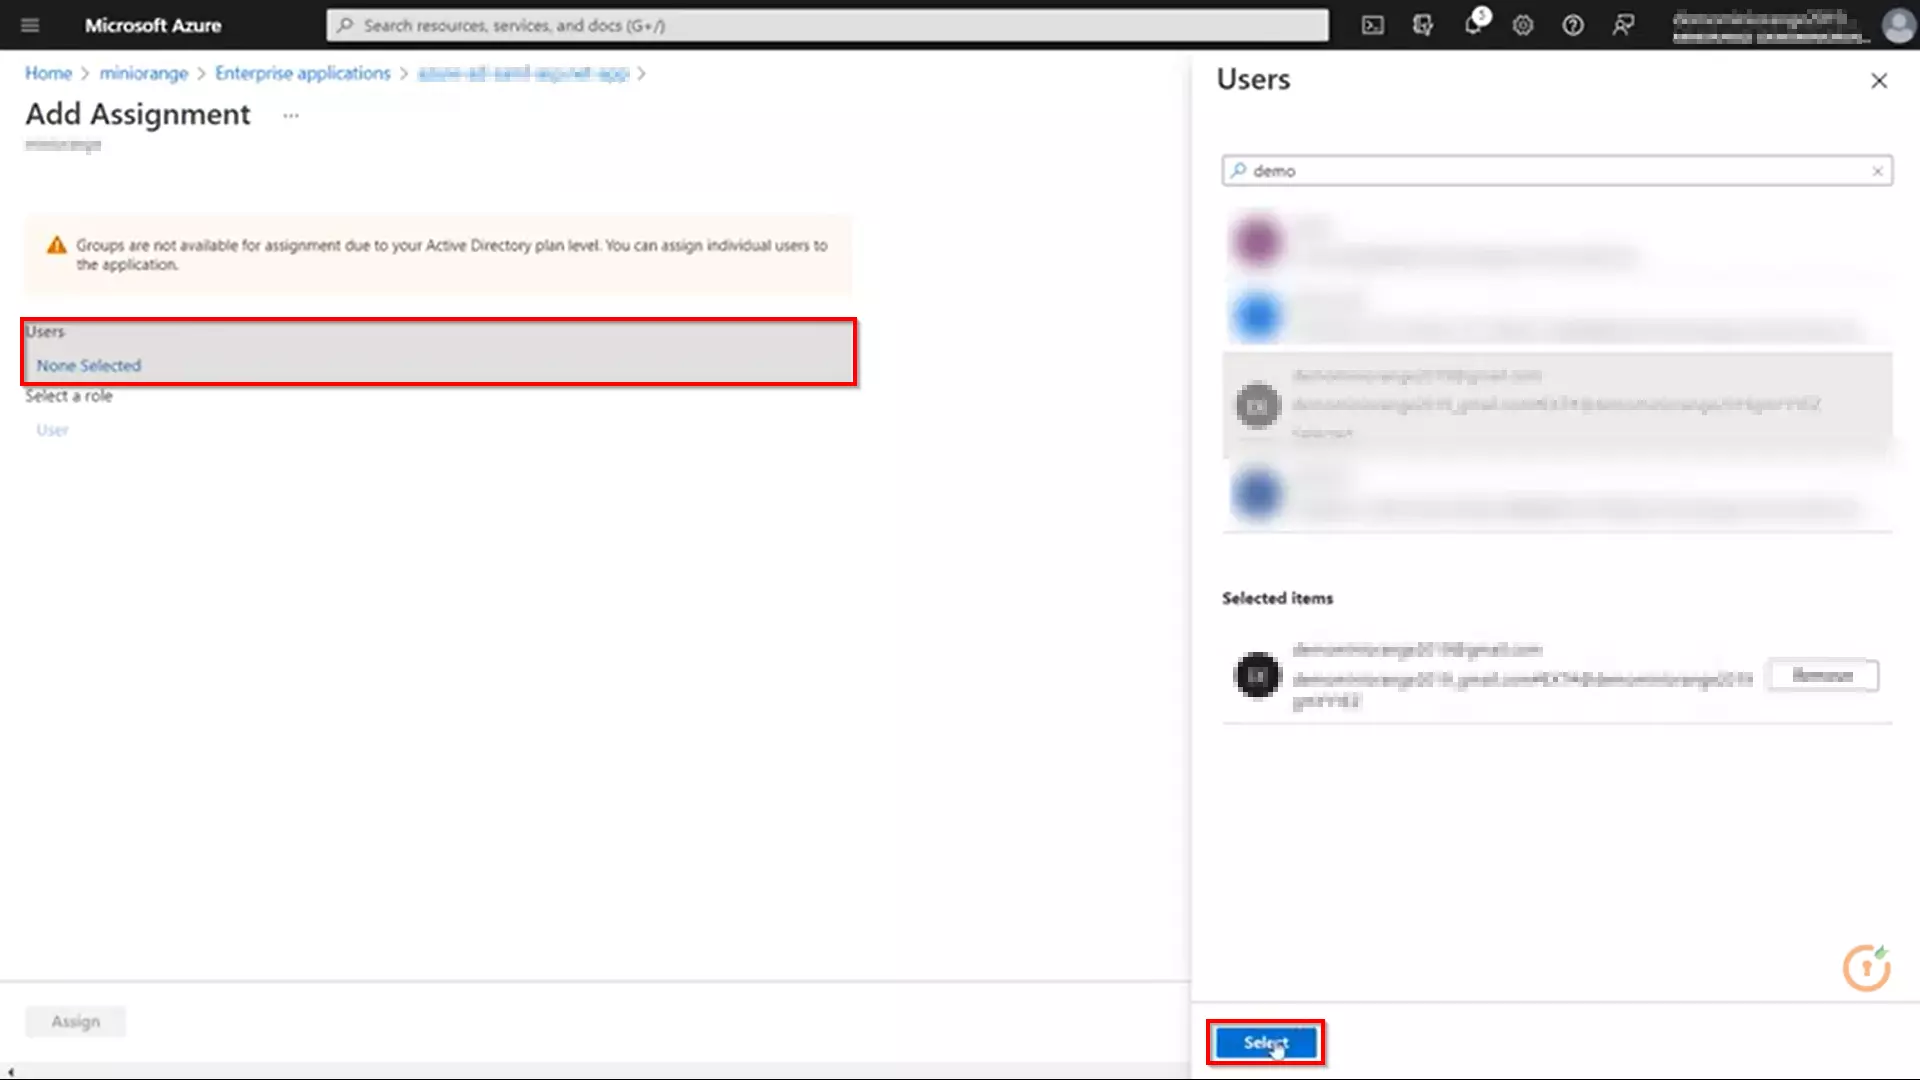
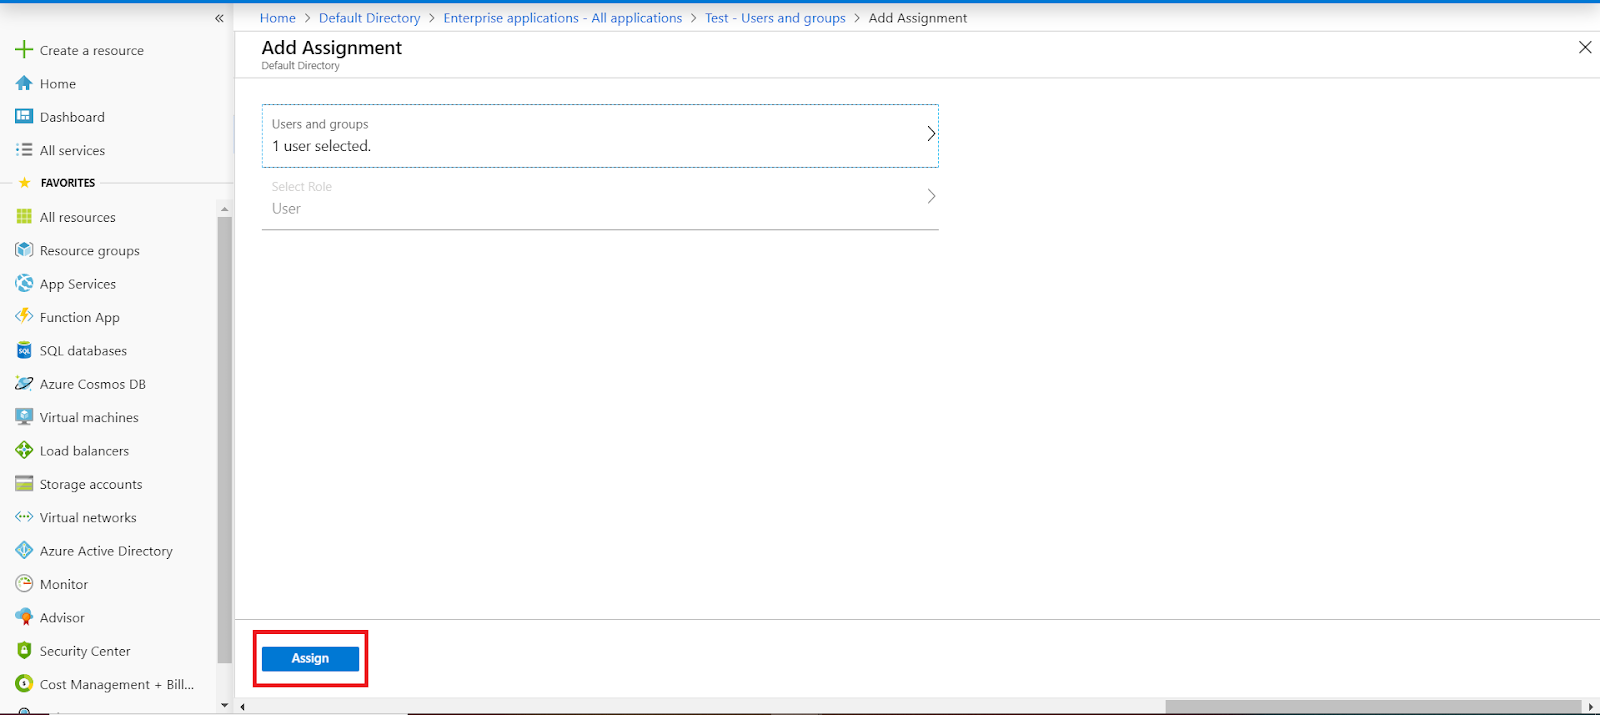
- Here, you can also assign a role to this user under Select Role section.
Finally, click on Assign button to assign that user or group to the SAML application.
1.c. Configure Microsoft Entra ID as Identity Provider (IDP) in miniOrange
- Go to miniOrange Admin Console.
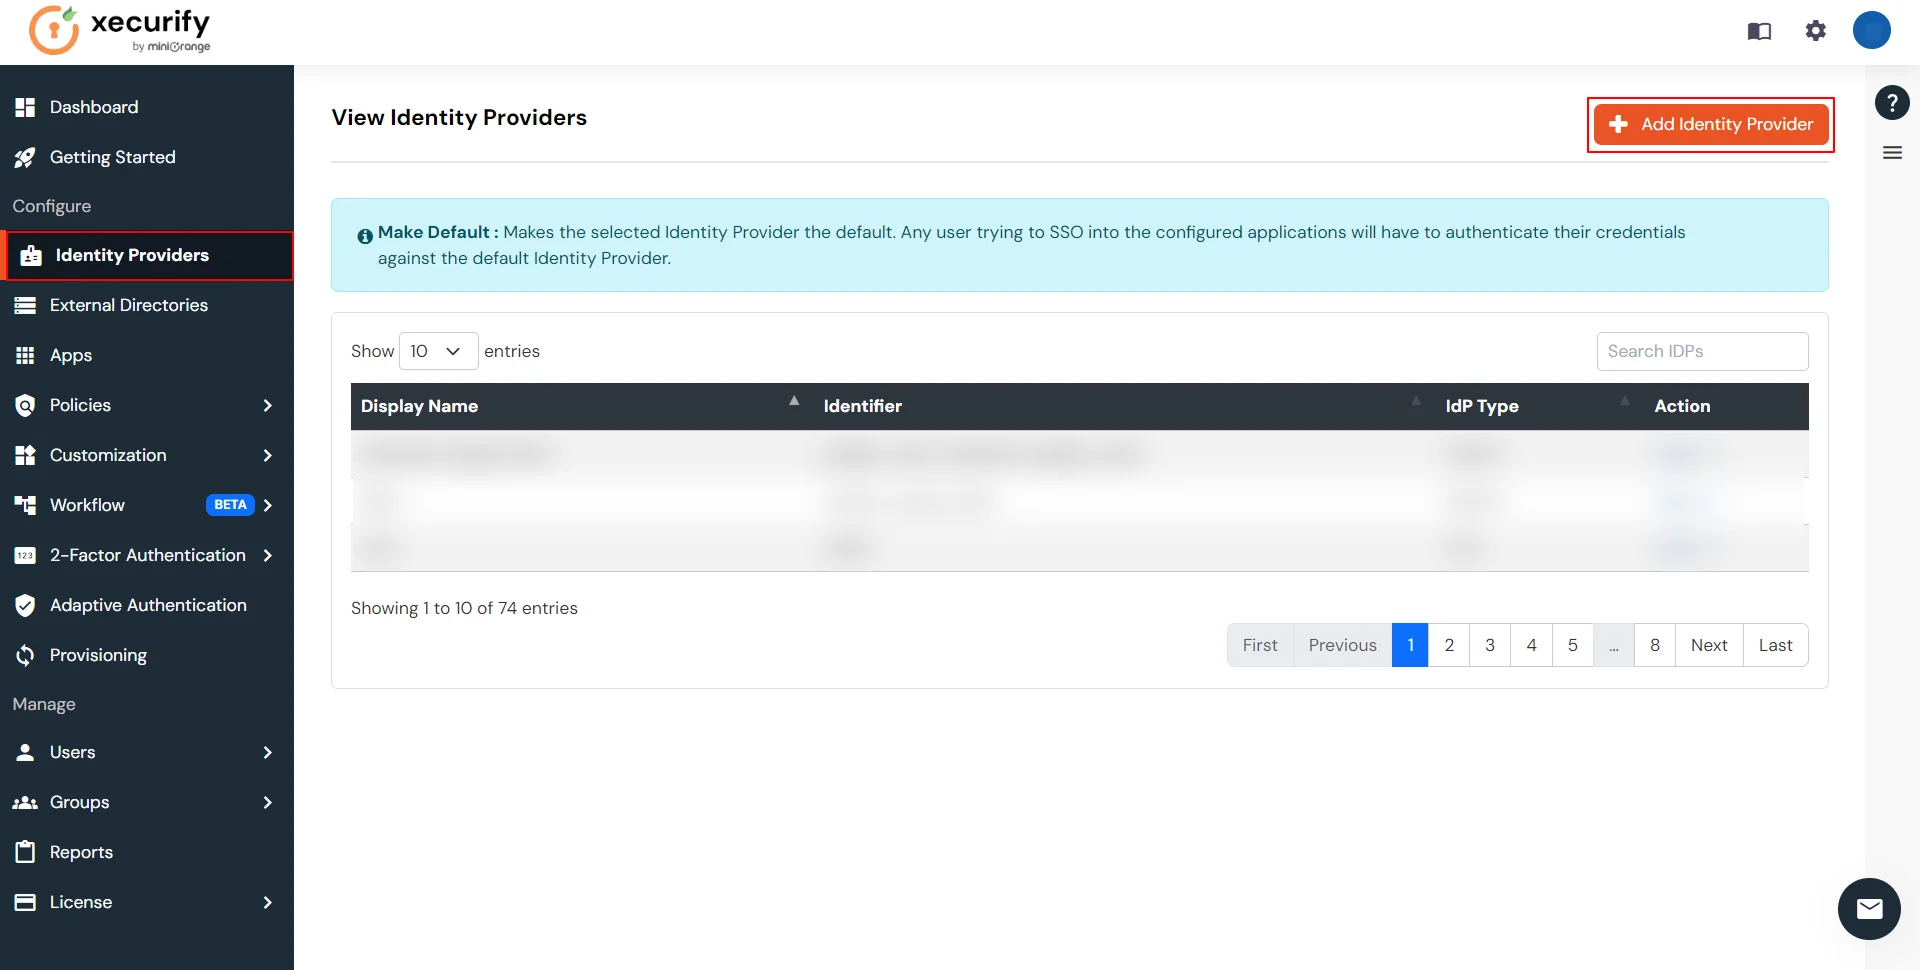
- From the left navigation bar select Identity Provider
- Click on Add Identity Provider button.

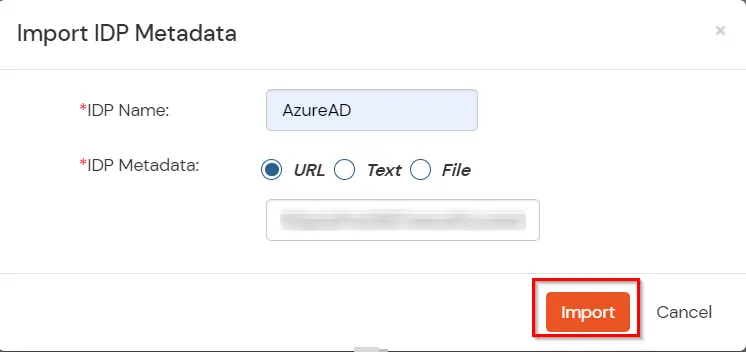
- Select SAML. Click on Import IDP metadata.
- Choose appropriate IDP name. Browse for the file downloaded in step 1.a.
- Click on Import.
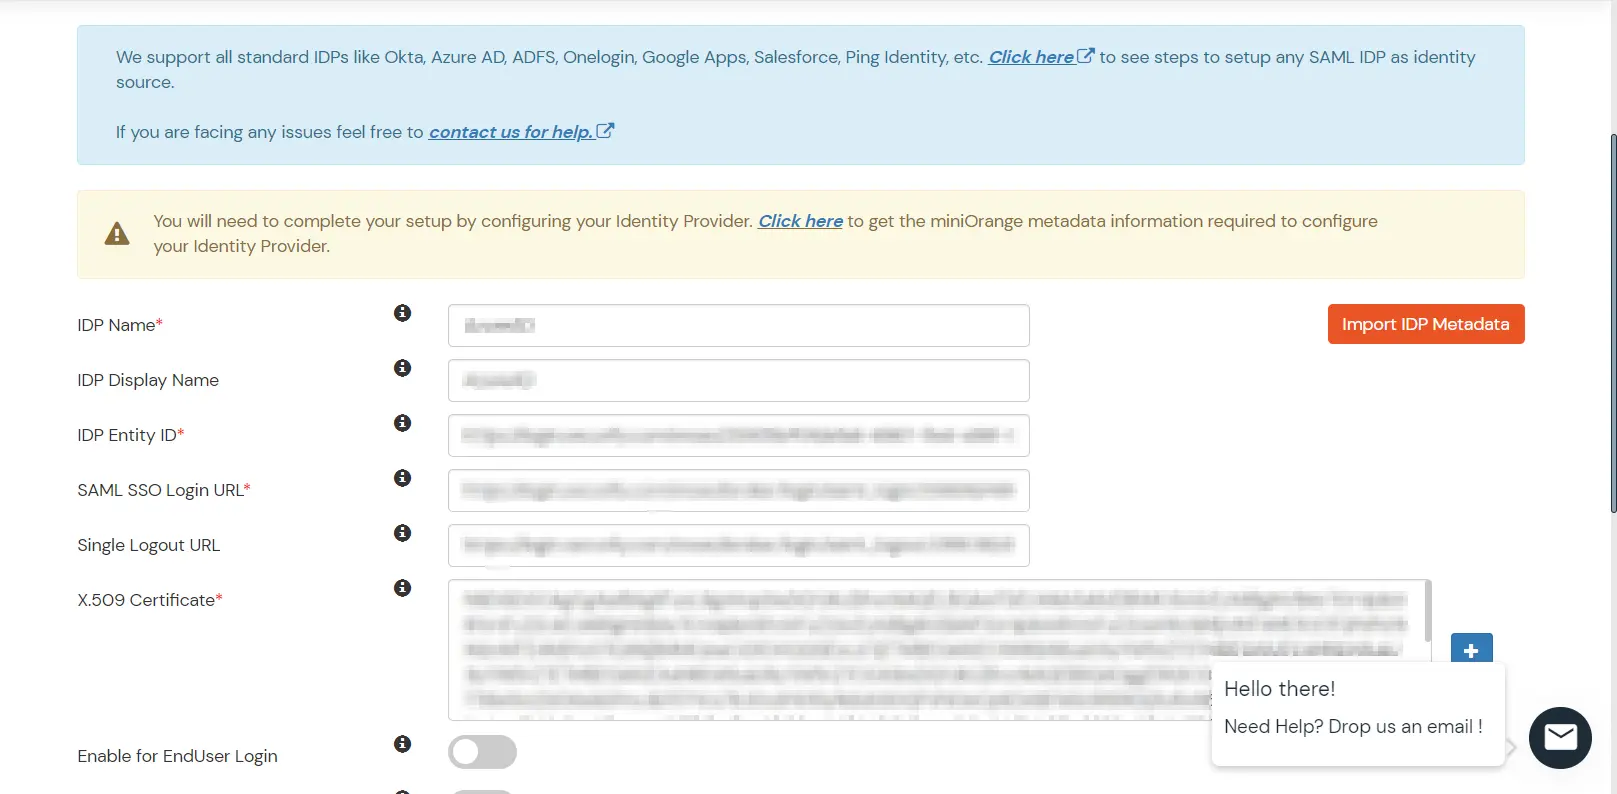
- As shown below the, IDP Entity ID, SAML SSO Login URL and x.509 Certificate will be auto filled via the imported metadata file. You can also enter the Logout URL copied from Microsoft Entra ID in the Single Logout URL field.
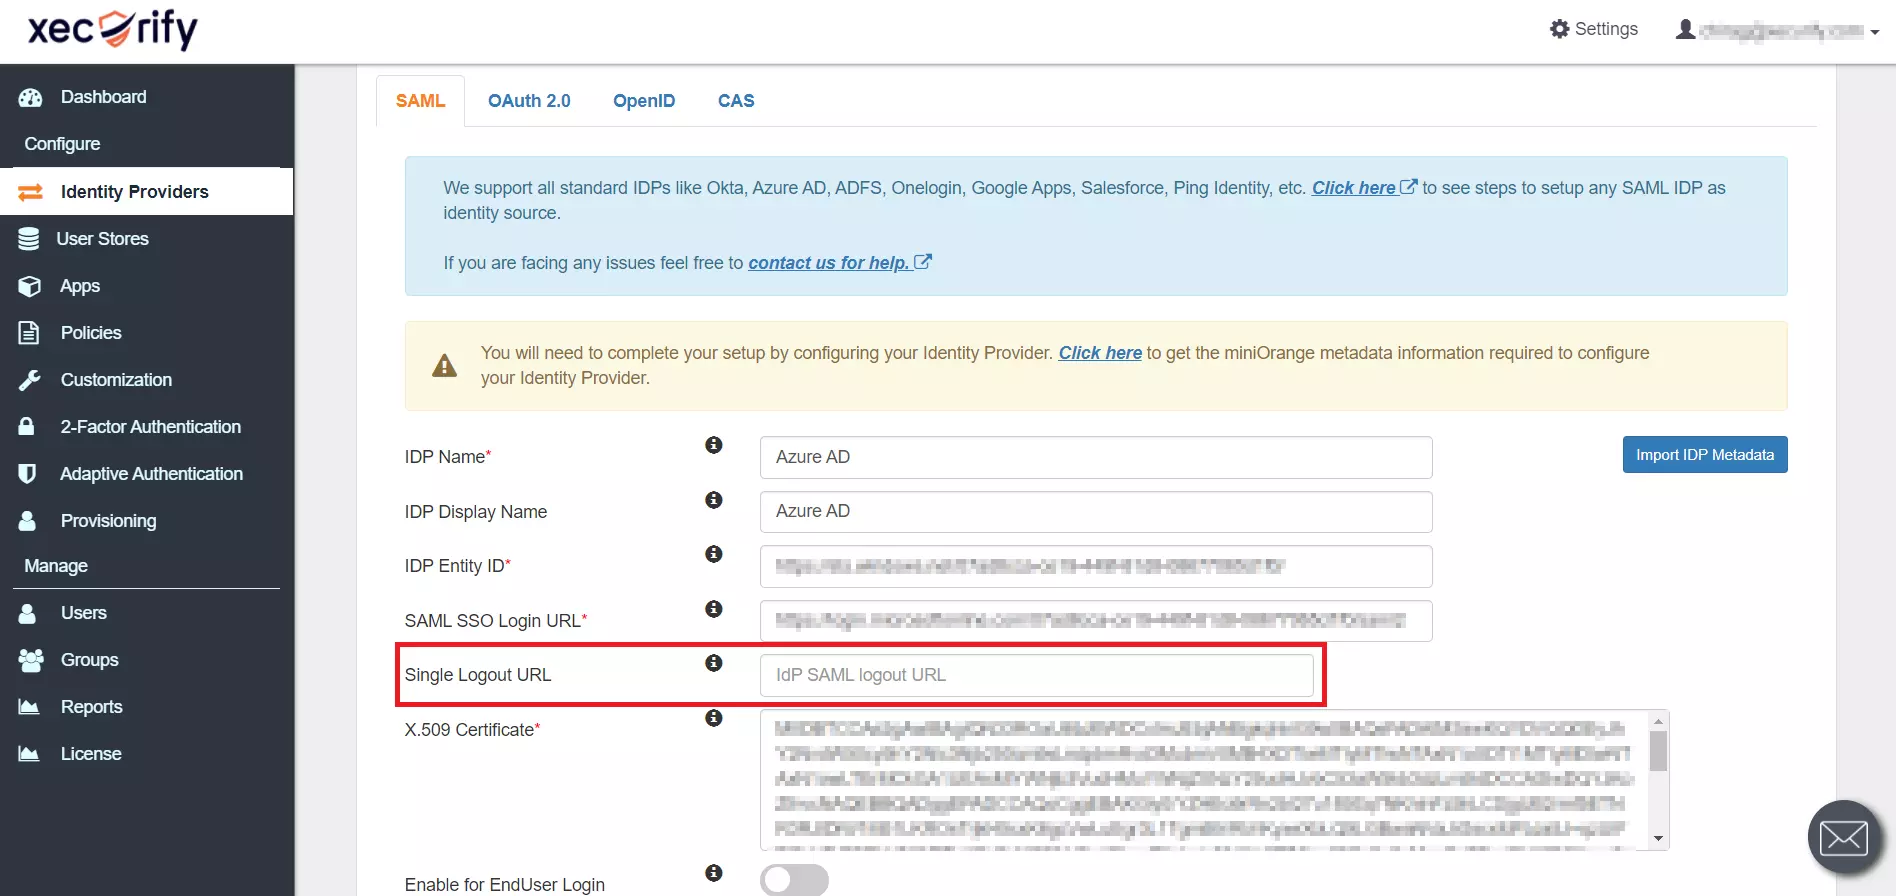
- Few other optional features that can be enabled are listed below:
| Domain Mapping |
Enable to redirect domain specific user to a specific IDP |
| Show IdP to Users |
Enable this option if you wish to show this IDP as a button on the login page. Eg : Login with Microsoft Entra ID. |
| Send Configured Attributes |
Enable this option if you wish to send user attributes from the IDP to WebFlow while SSO. |
- Click on Save.
1.d. Test IDP Connection
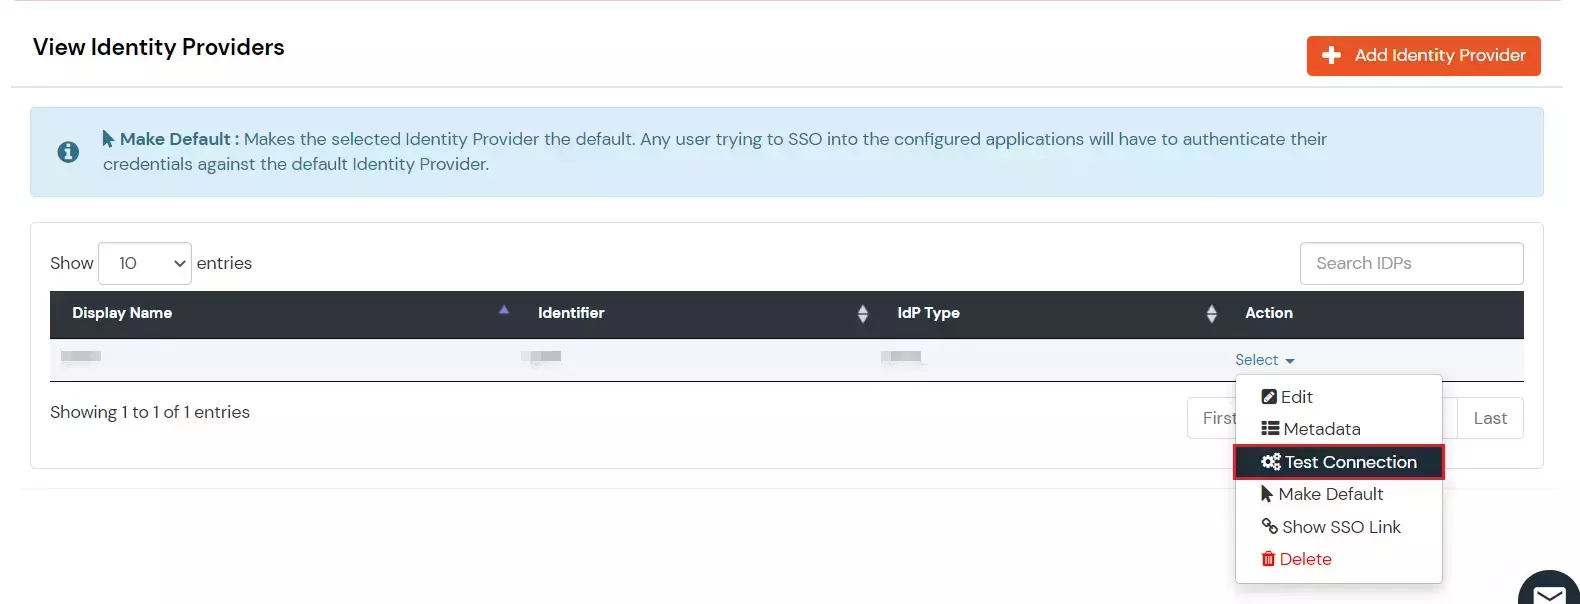
- Go to Identity Providers tab.
- Click on Select>>Test Connection option against the Identity Provider you configured.
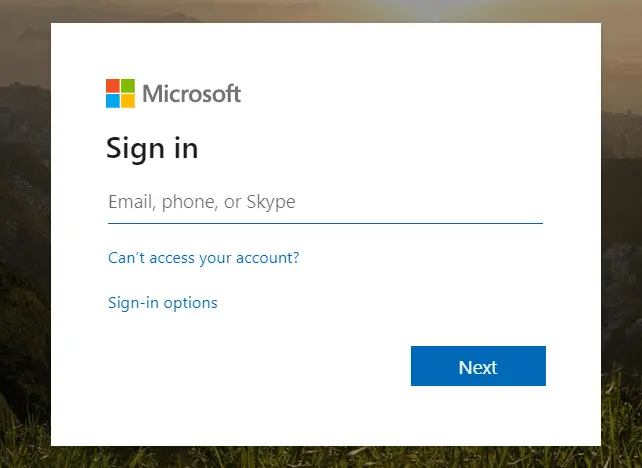
- On entering valid Microsoft Entra ID credentials you will see a pop-up window which as shown in below screen.
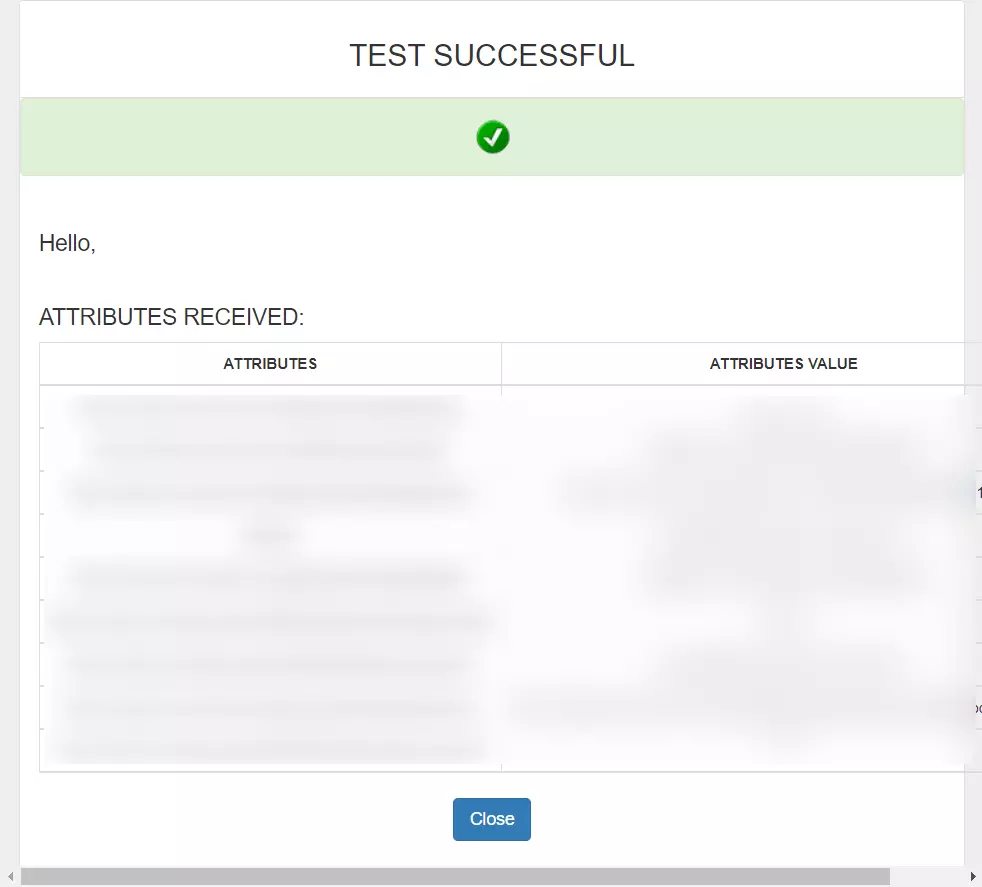
- Hence your configuration of Microsoft Entra ID as IDP in miniOrange is successfully completed.
2. Setup Thinkific as SP
- Login to miniOrange Admin Console.
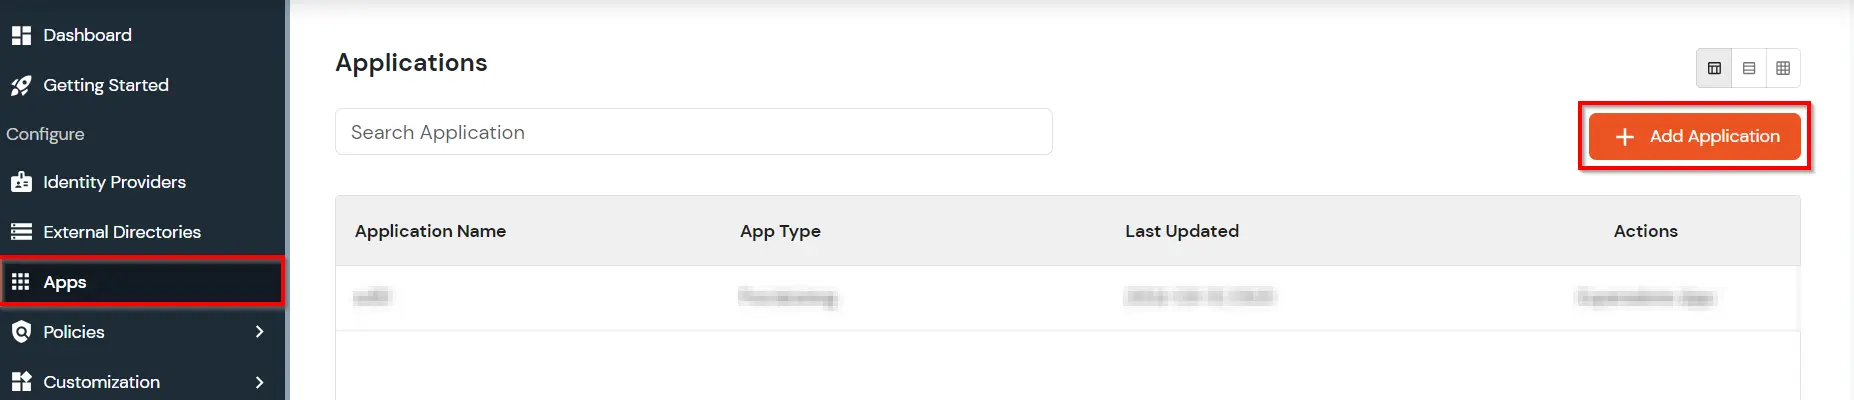
- Go to Apps Click on Add Application button.
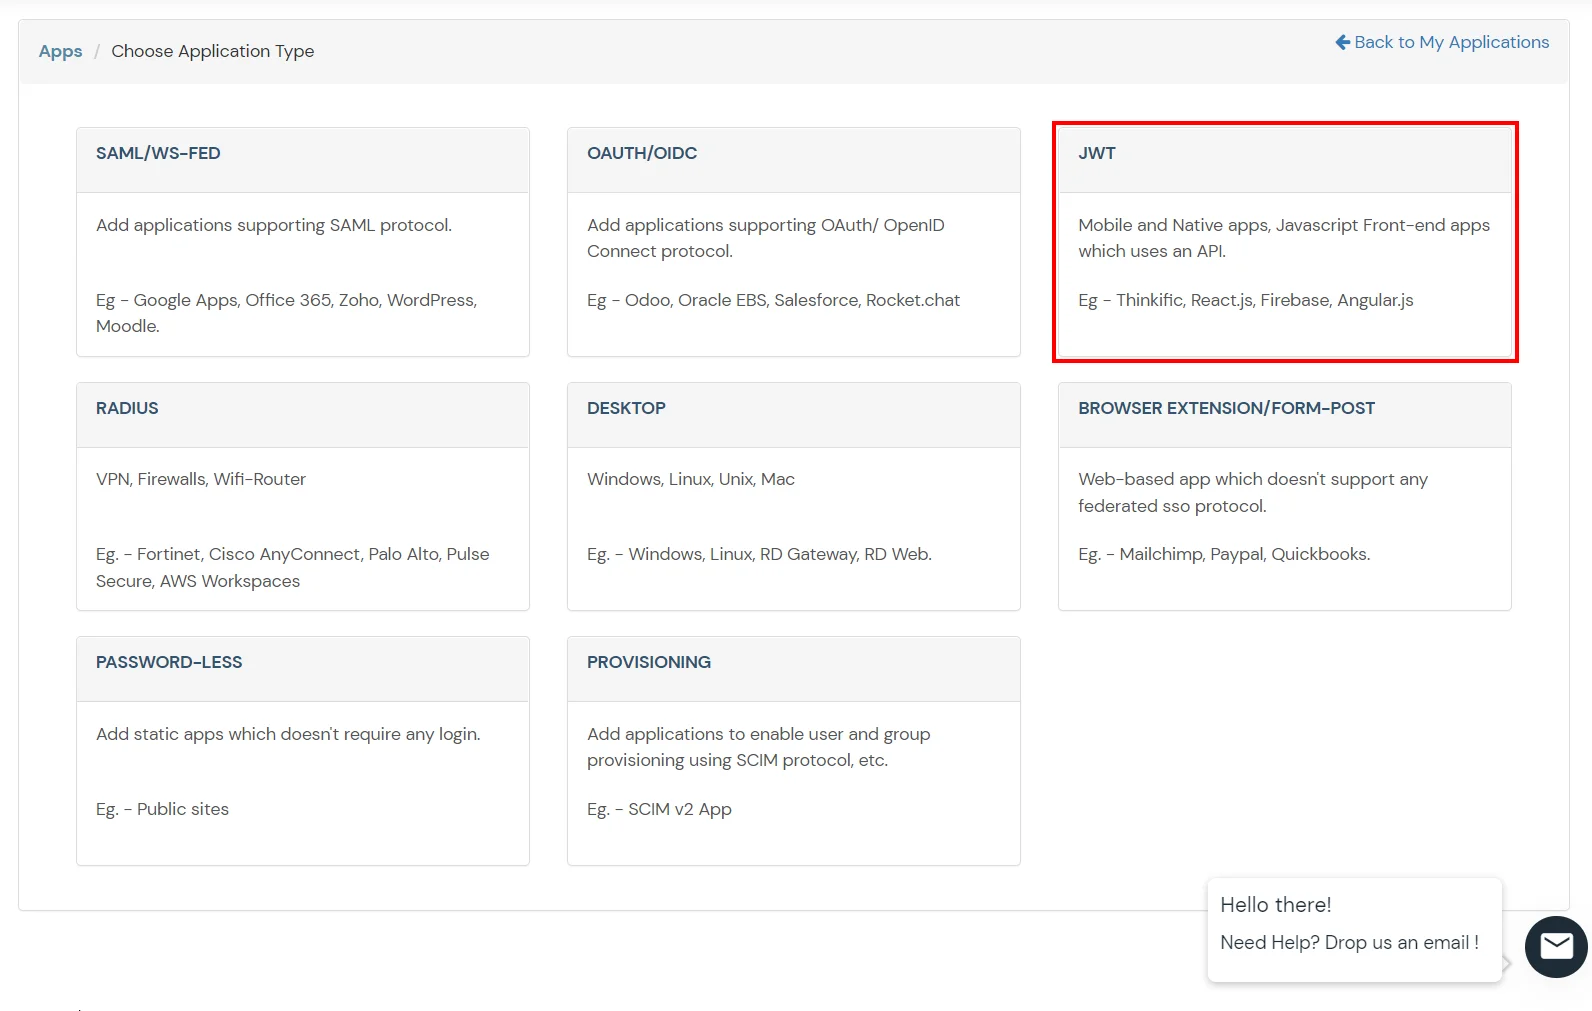
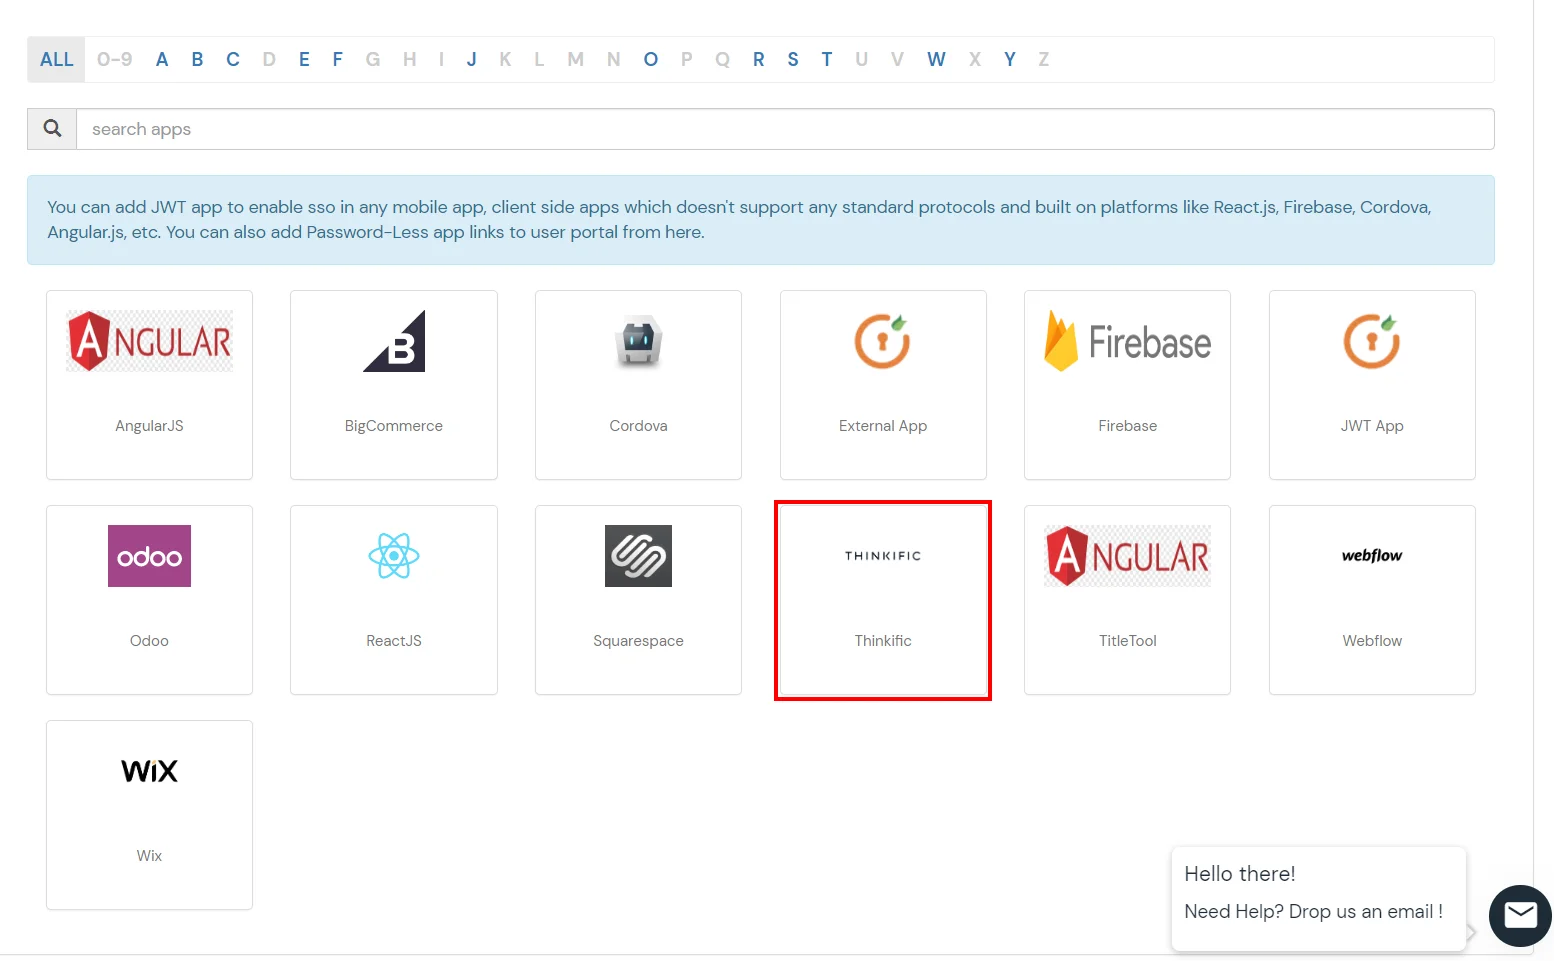
- Select JWT App.Click on Thinkific.
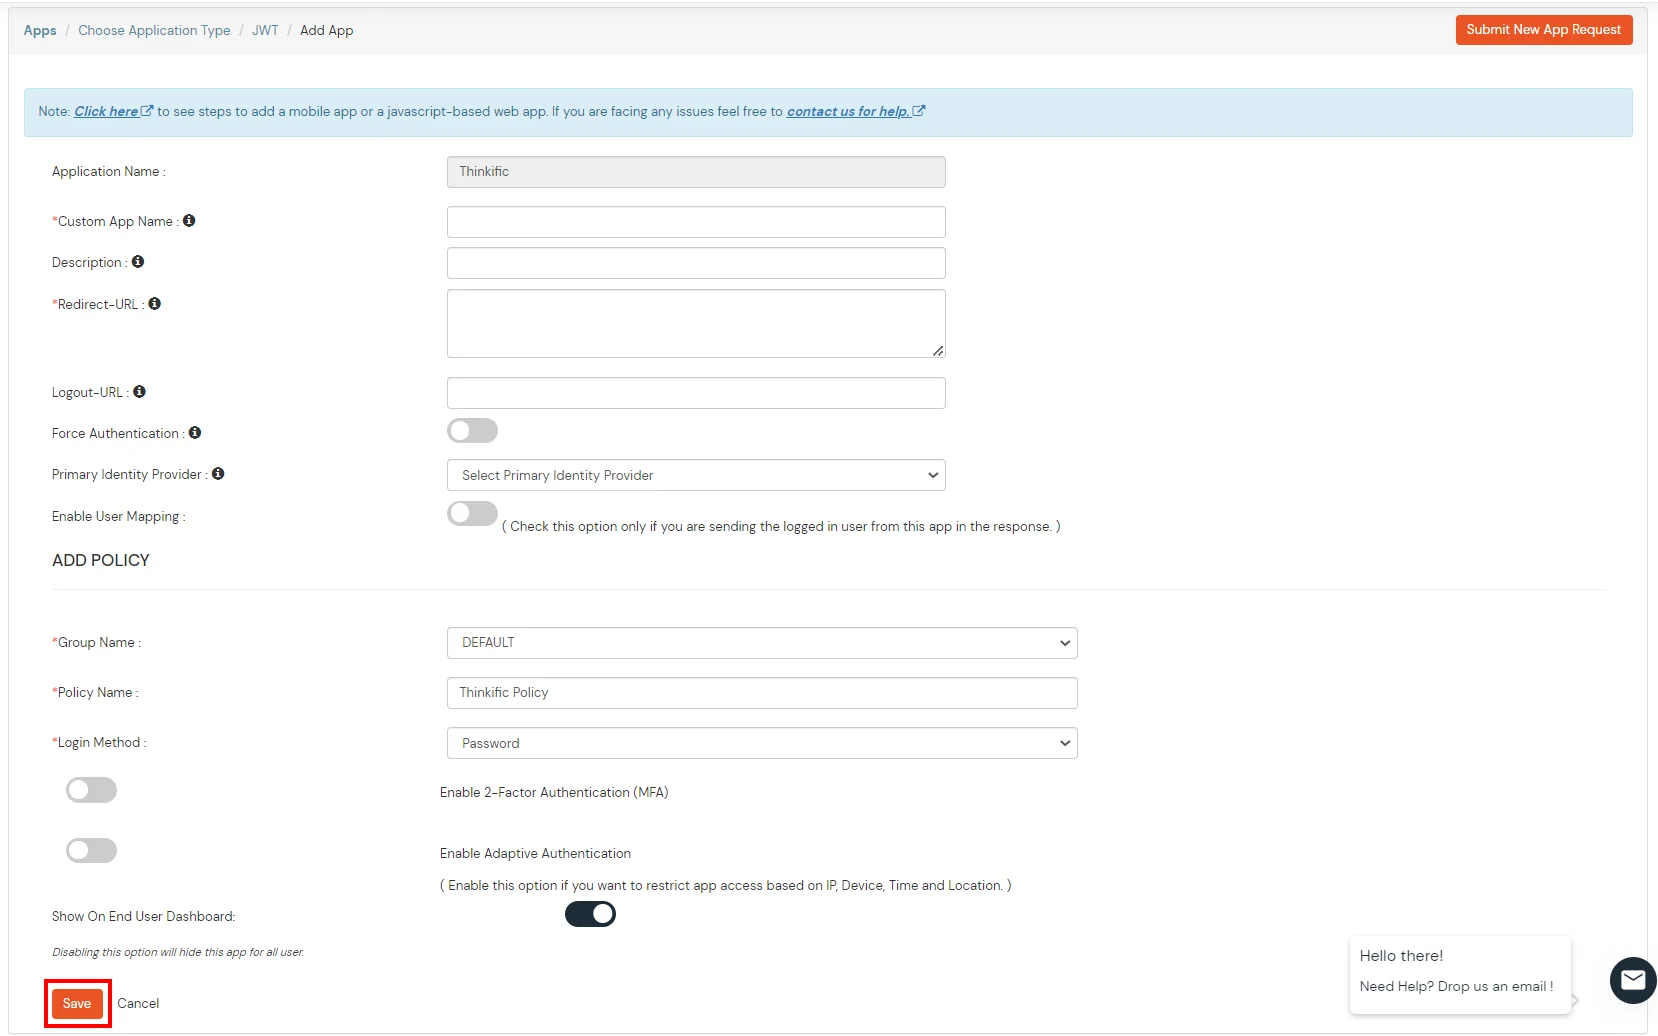
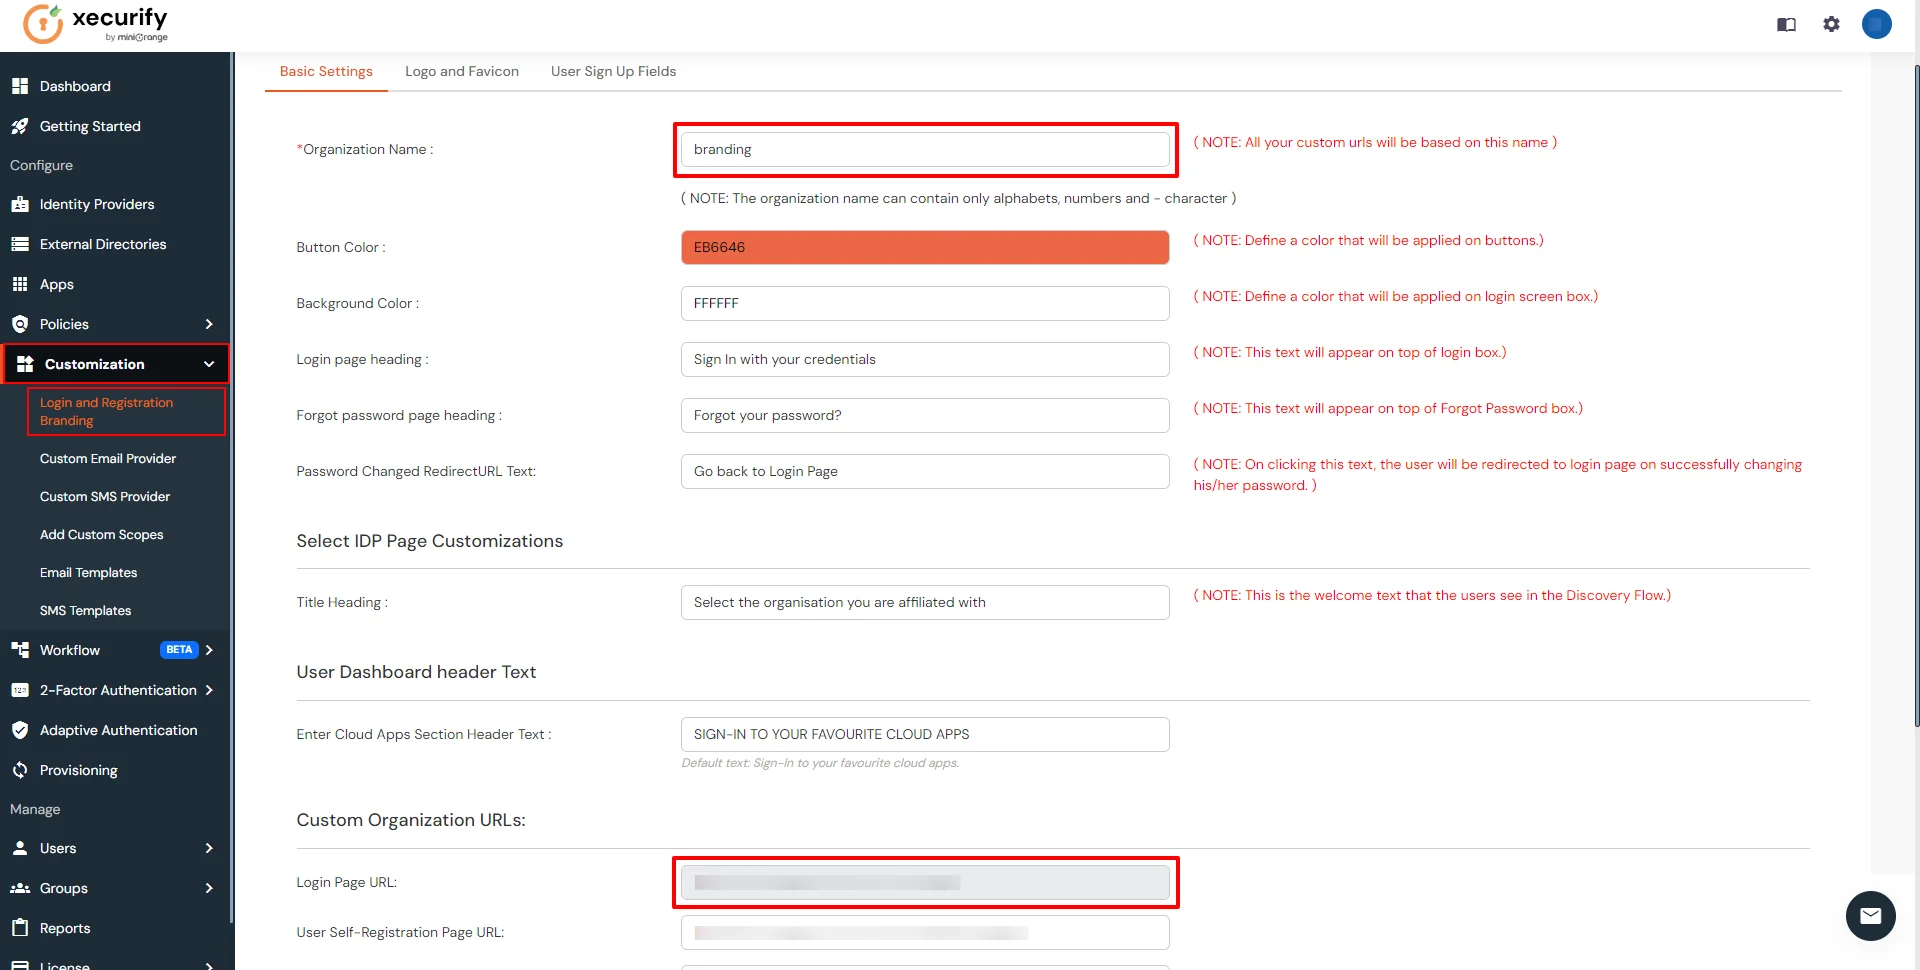
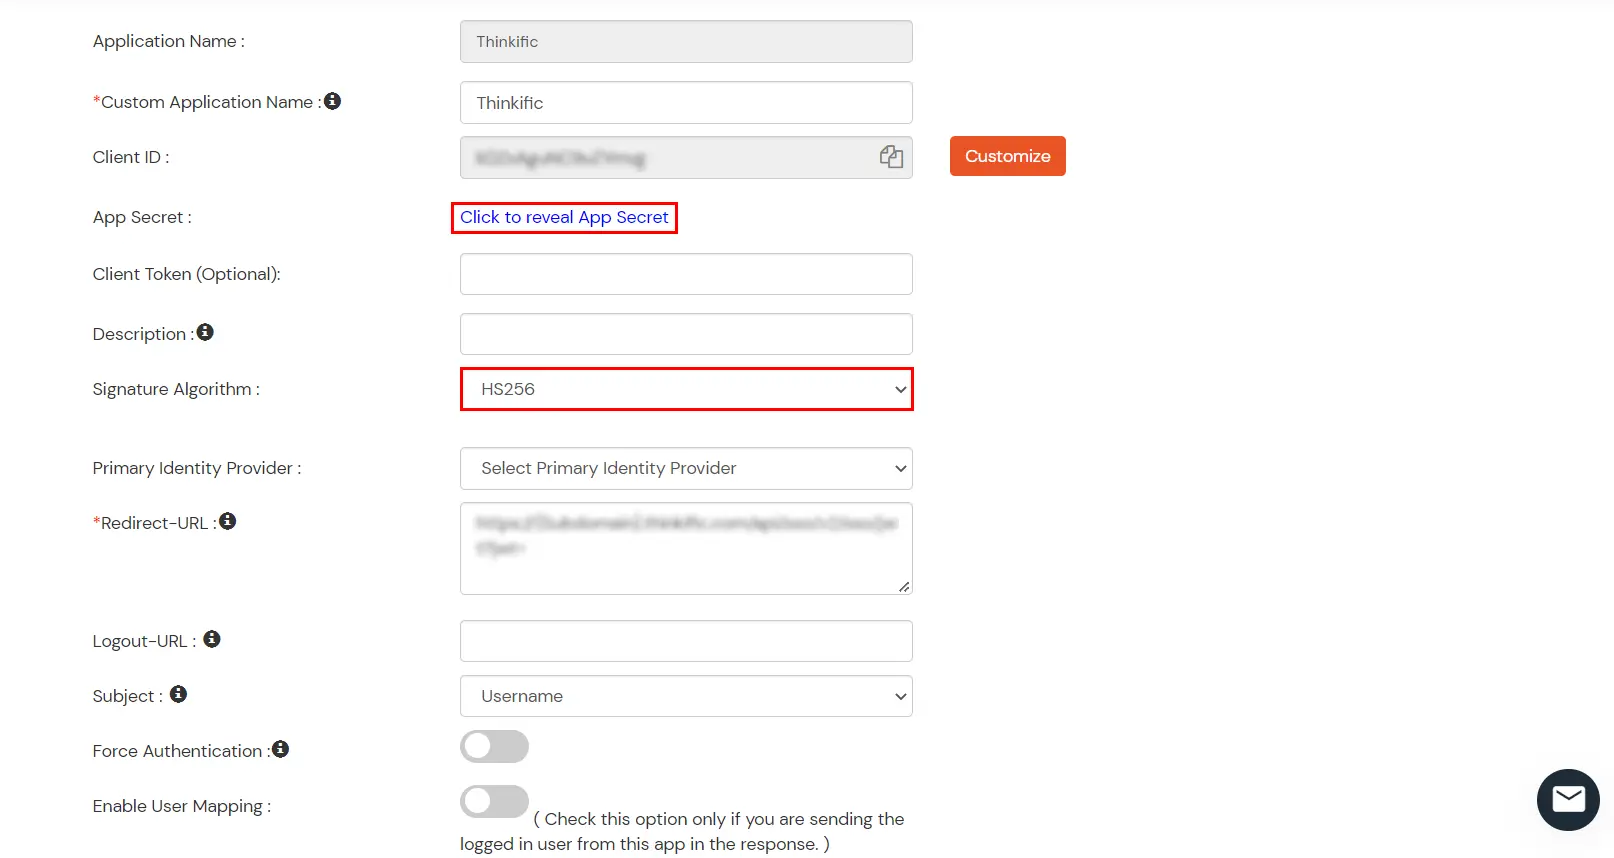
- In Add Apps tab enter the values and click on Save.
|
Custom Application Name
|
Choose appropriate name according to your choice. |
|
Description
|
Add appropriate description according to your choice. |
|
Redirect-URL
|
https://{Subdomain}.thinkific.com/api/sso/v2/sso/jwt?jwt= |
- To configure App secret go to Edit against your configured app, Apps>>Select your app>>Edit
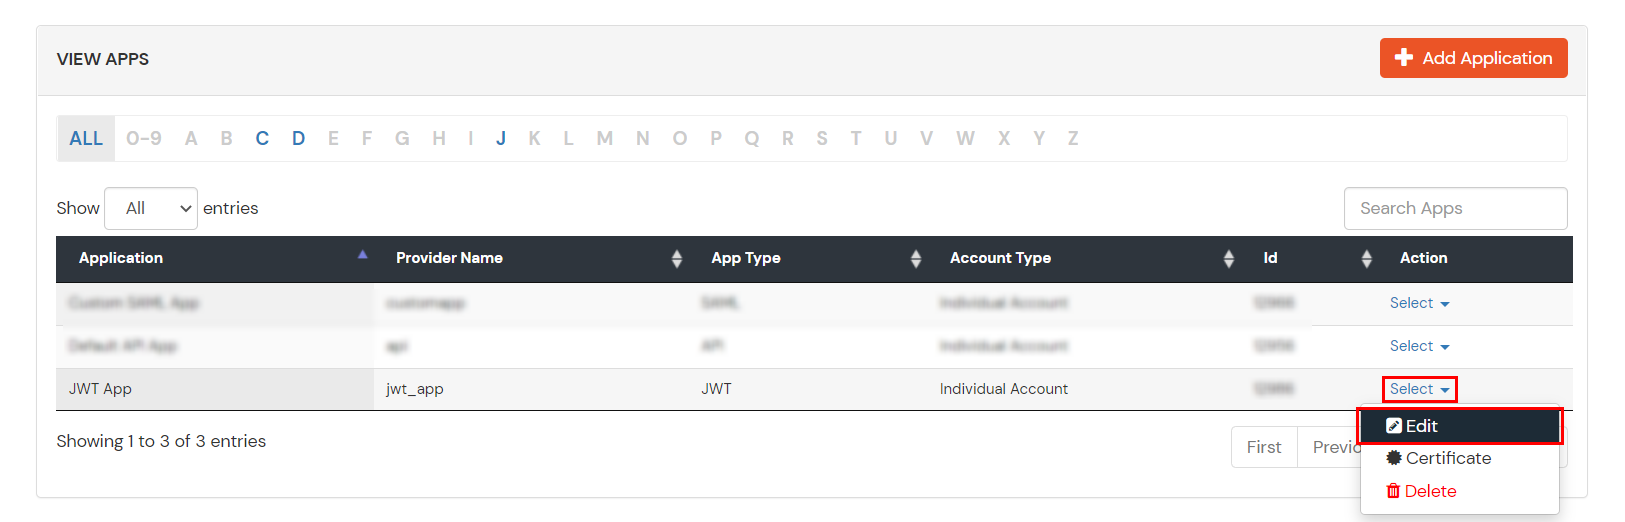
|
App Secret
|
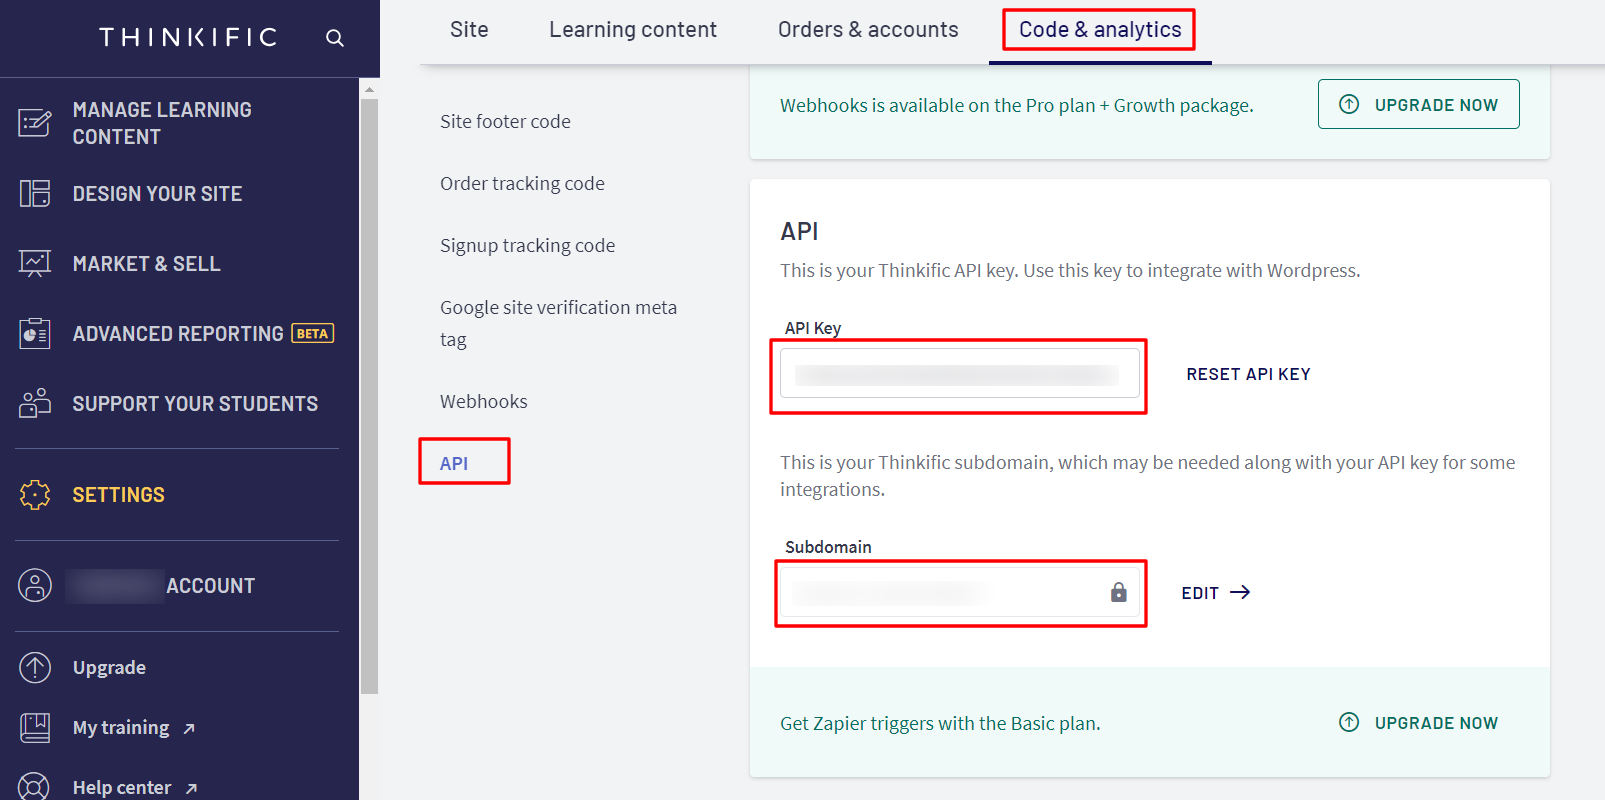
The API key fetched from Thinkific dashboard |
|
Signature Algorithm
|
Choose HS256 |
- Click on Save
- Now, You can access Thinkific Account Using IDP credentials through the Single-sign-on URL as shown in image above.
3. Test SSO Configuration
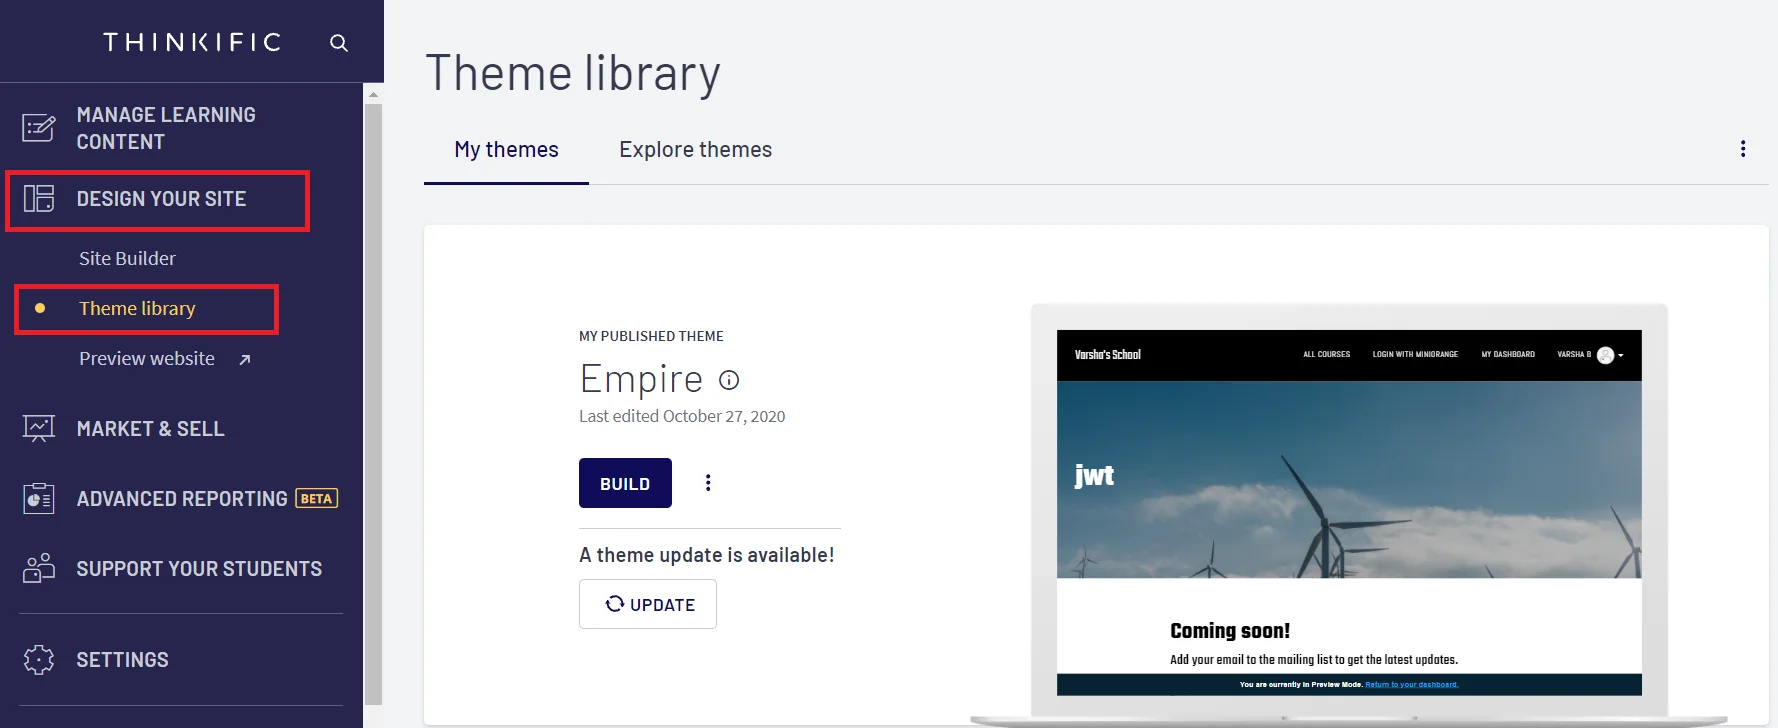
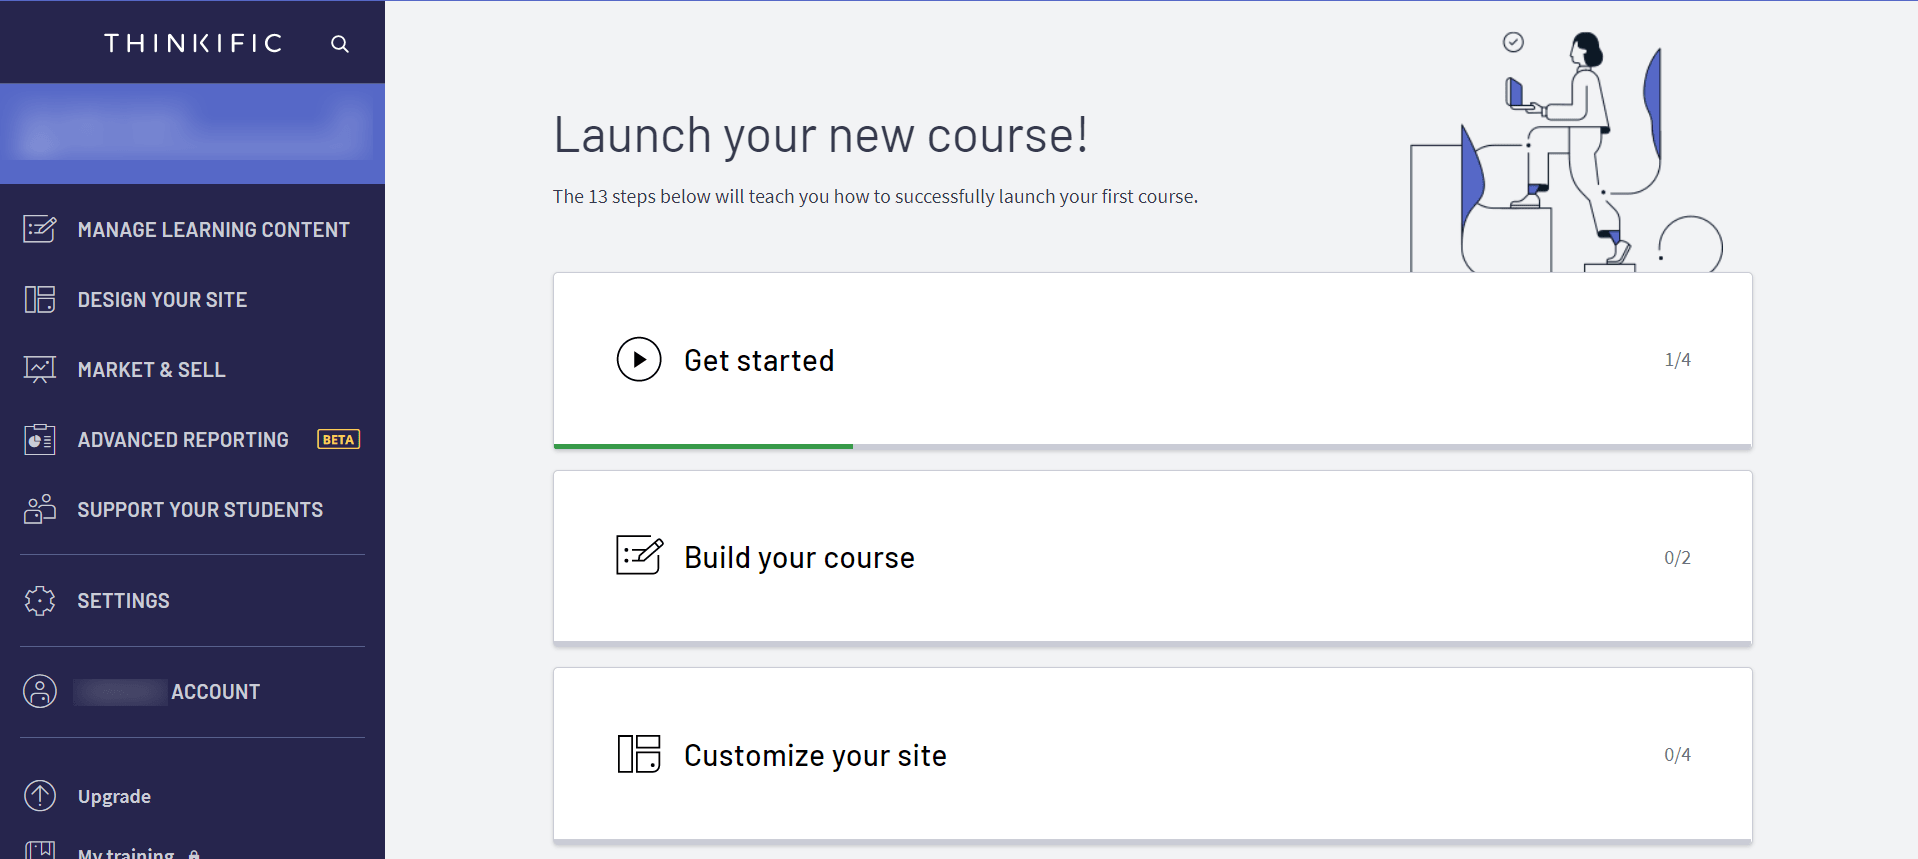
- Login to your Thinkific account.
- On the Dashboard, Click on Design your site-> Theme library option.
- Click on Three Dots as shown in the below image and select EDIT CODE option from dropdown.
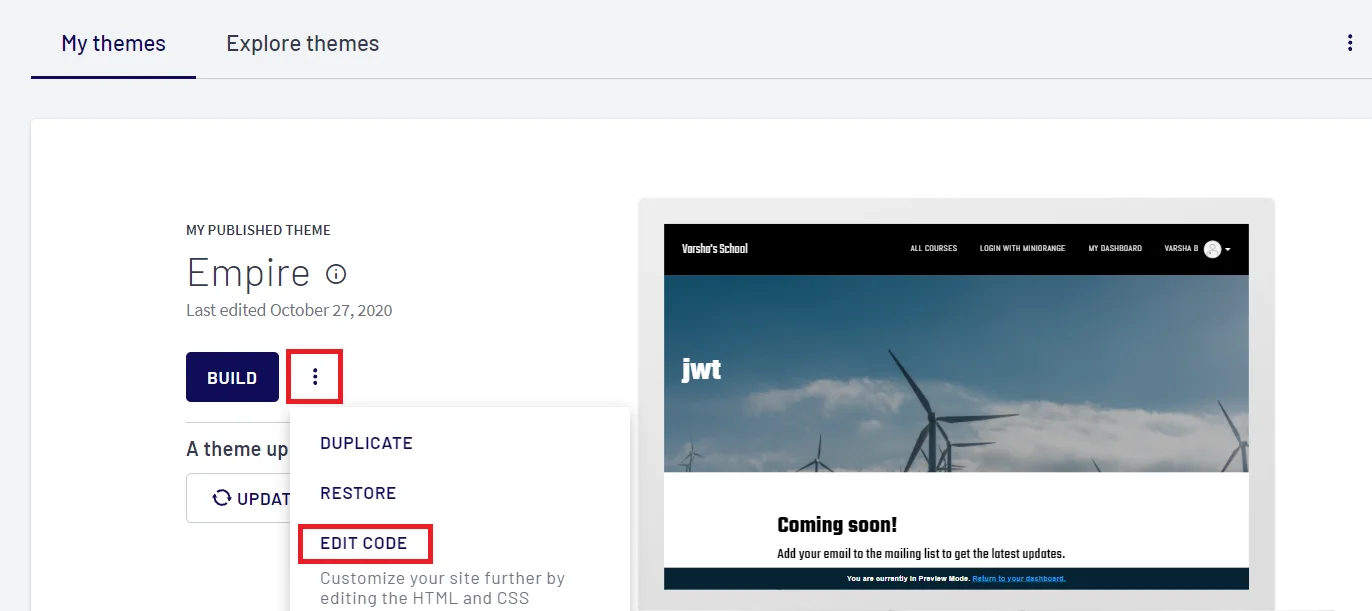
- Now, click on the Snippets link and search for meta_tag option and click on it.
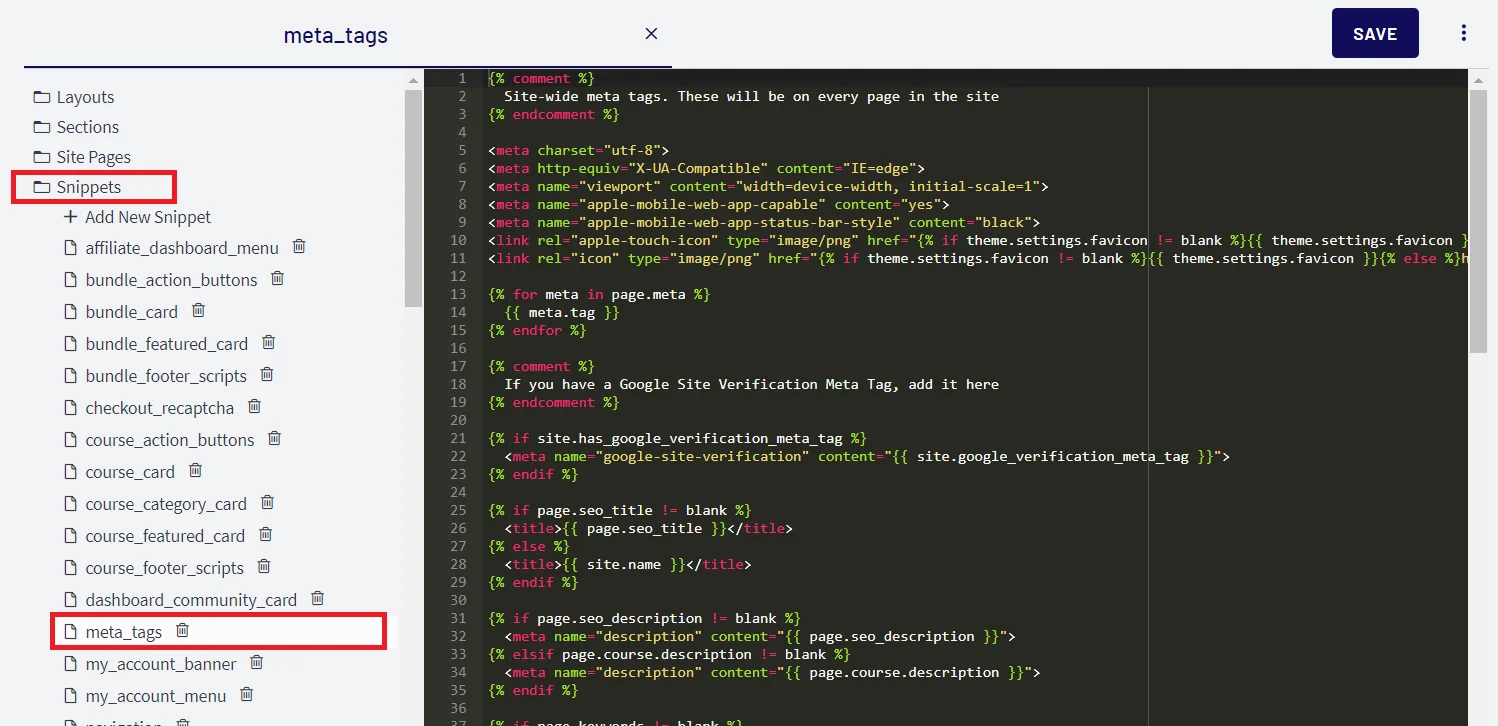
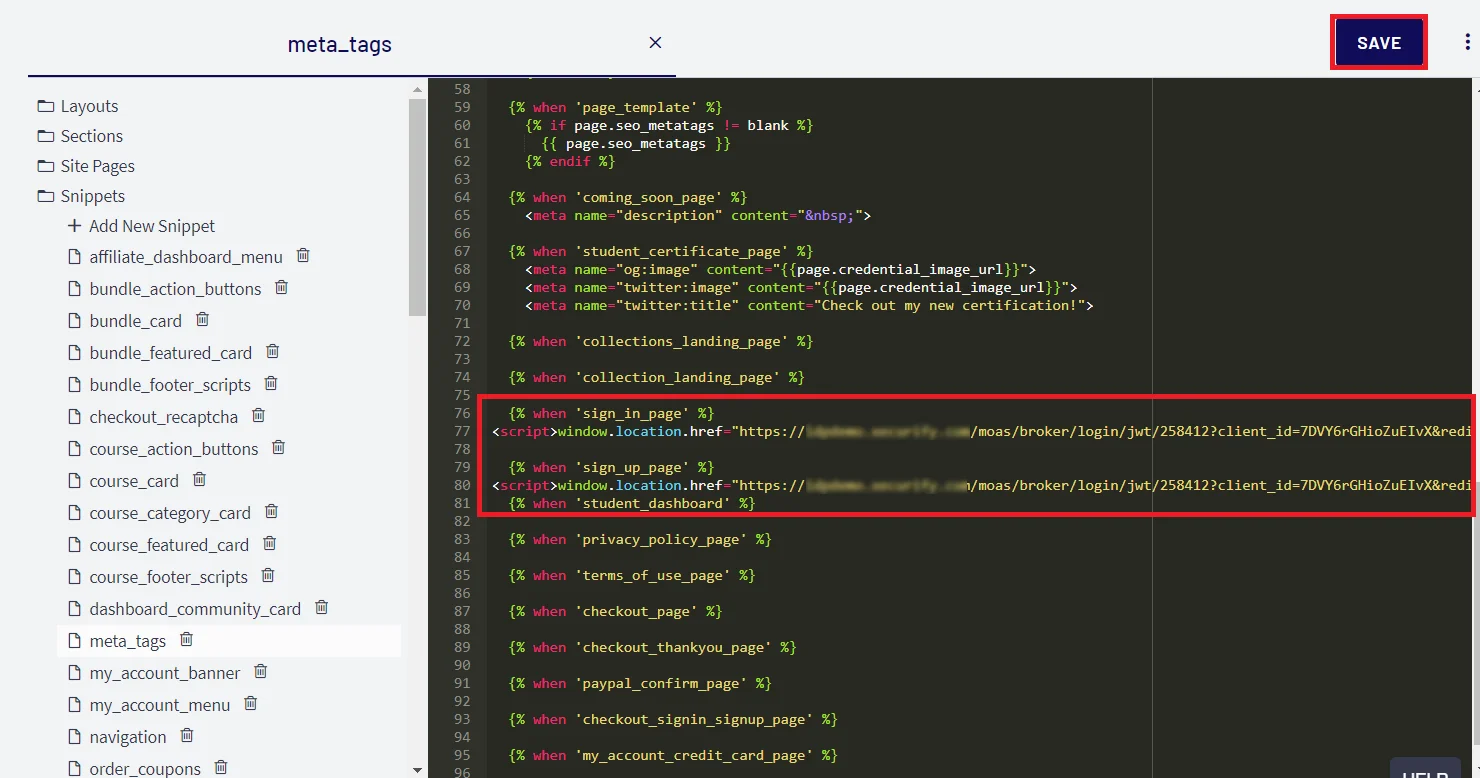
- Add Single Sign-On URL in the below format as shown in the image, (you will get this url from step 1) and click on Save button.

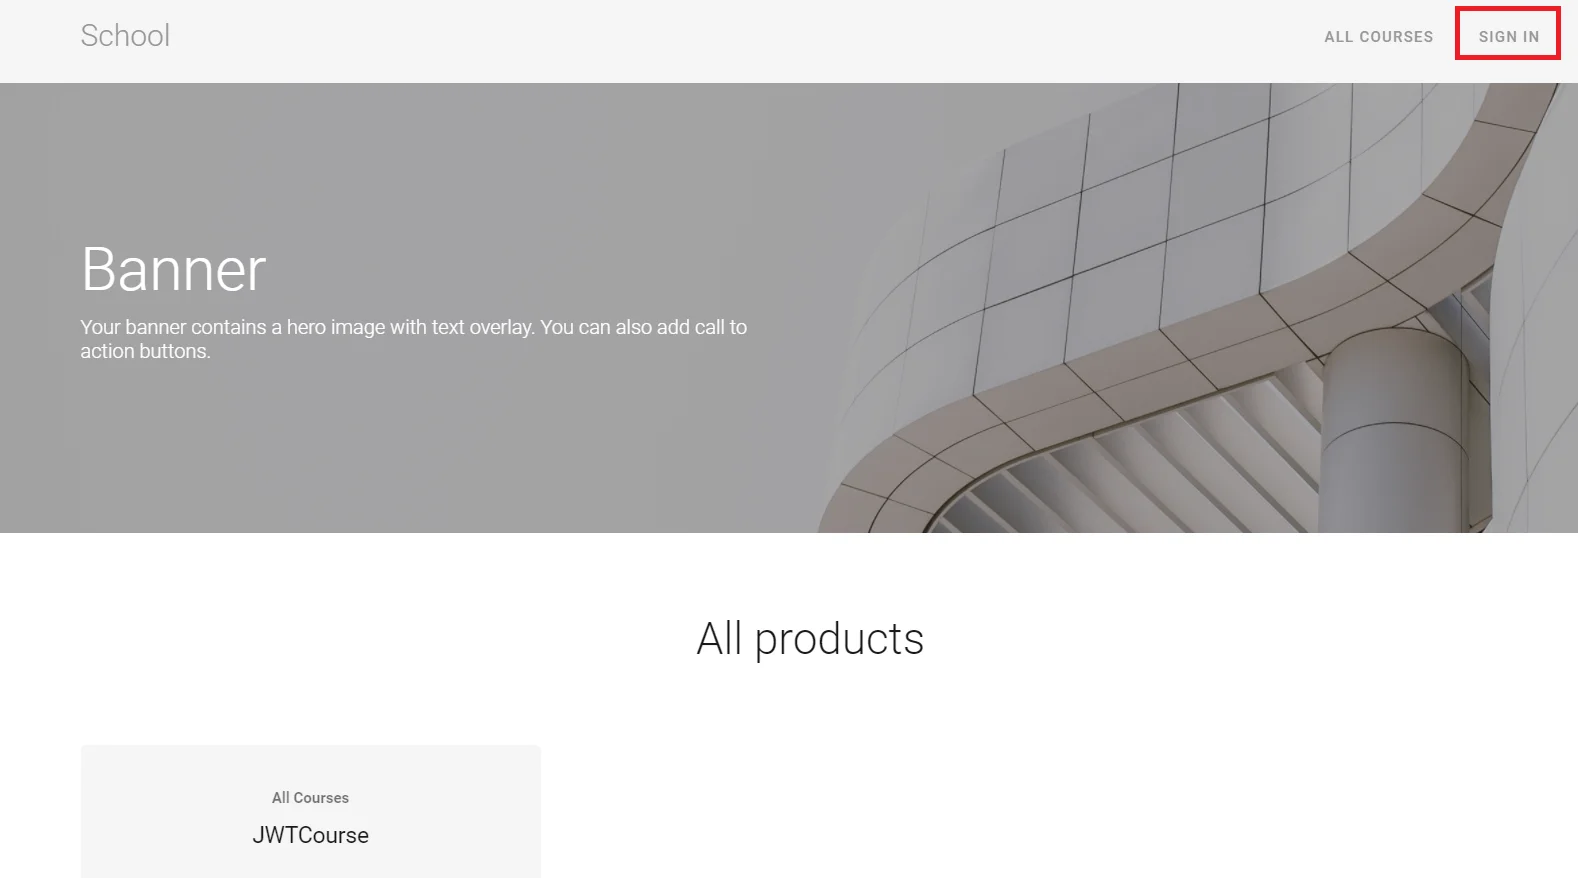
- Go to your Thinkific URL, click on SIGN IN button which will redirect you to miniOrange IdP Sign On Page.
- On accessing the Single sign-On URL, you will be asked for Microsoft Entra ID credentials.
- On entering the valid credentials, you will be successfully logged into Thinkific.
- Log into myapplications.microsoft.com using your credentials.
- Search for the app which you created earlier.
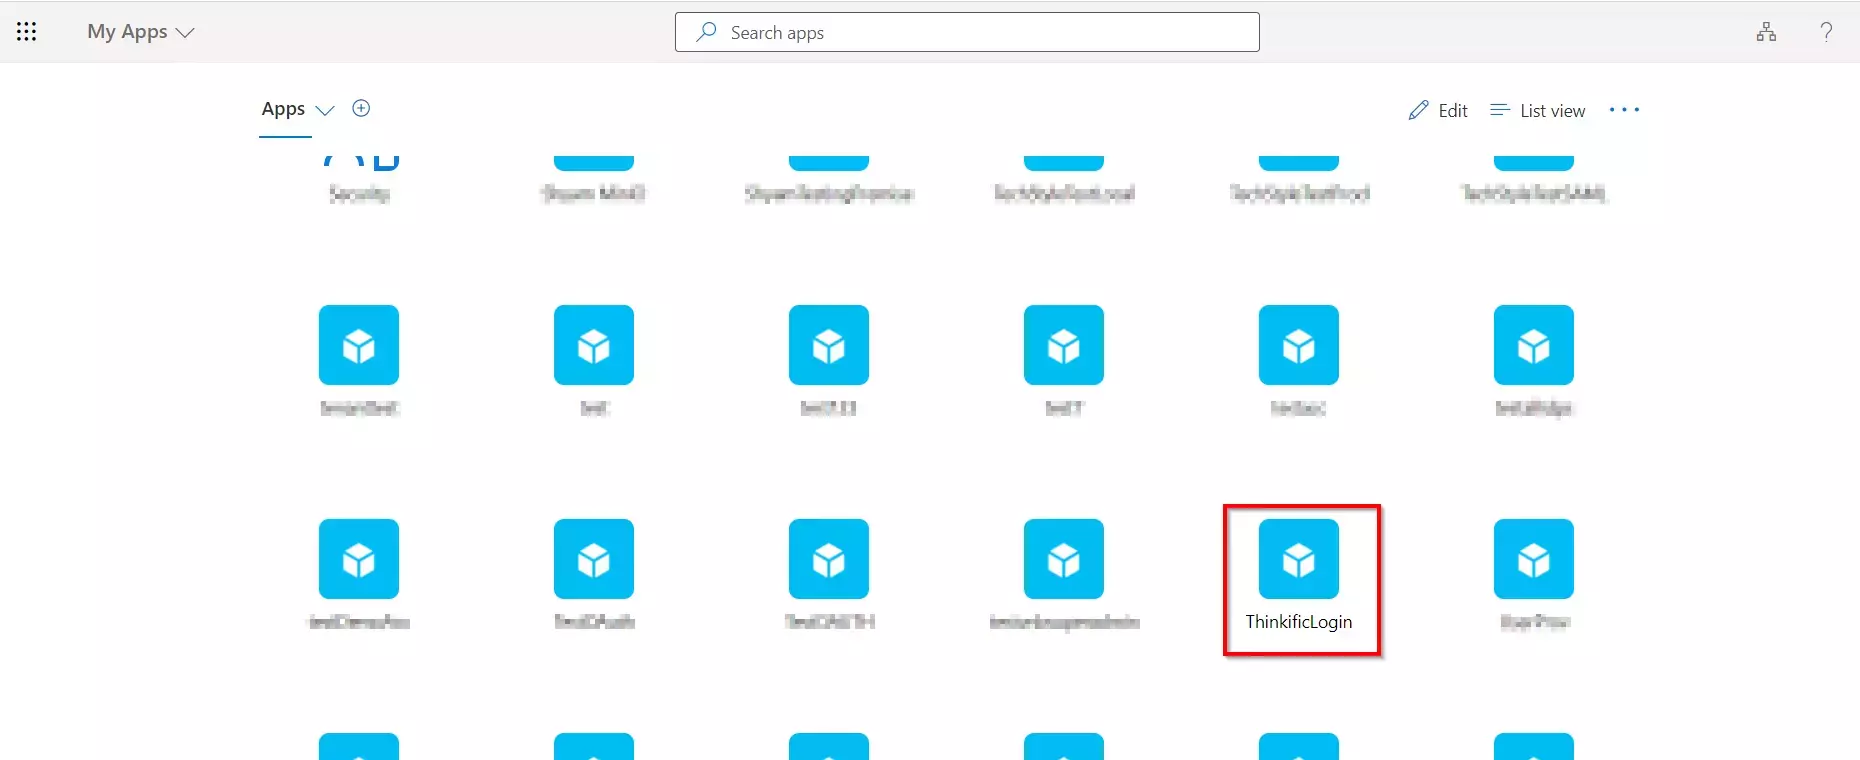
- You will be successfully logged into Thinkific.
External References