How to secure your
Shopify Non-Plus stores using CASB
Secure your Shopify Non-Plus stores with the miniOrange CASB solution to protect your store against
unauthorized user access by enabling dynamic security restrictions, deep visibility, active threat
detection, and granular access controls. In this guide, we will see how you can configure Shopify CASB
for your Non-Plus stores.
Step
1: Sign up with miniOrange CASB
- Sign in to the Cloud Access Security Broker (CASB) with your email and
password. (Don’t have an account? No worries, click here to create a new
account)
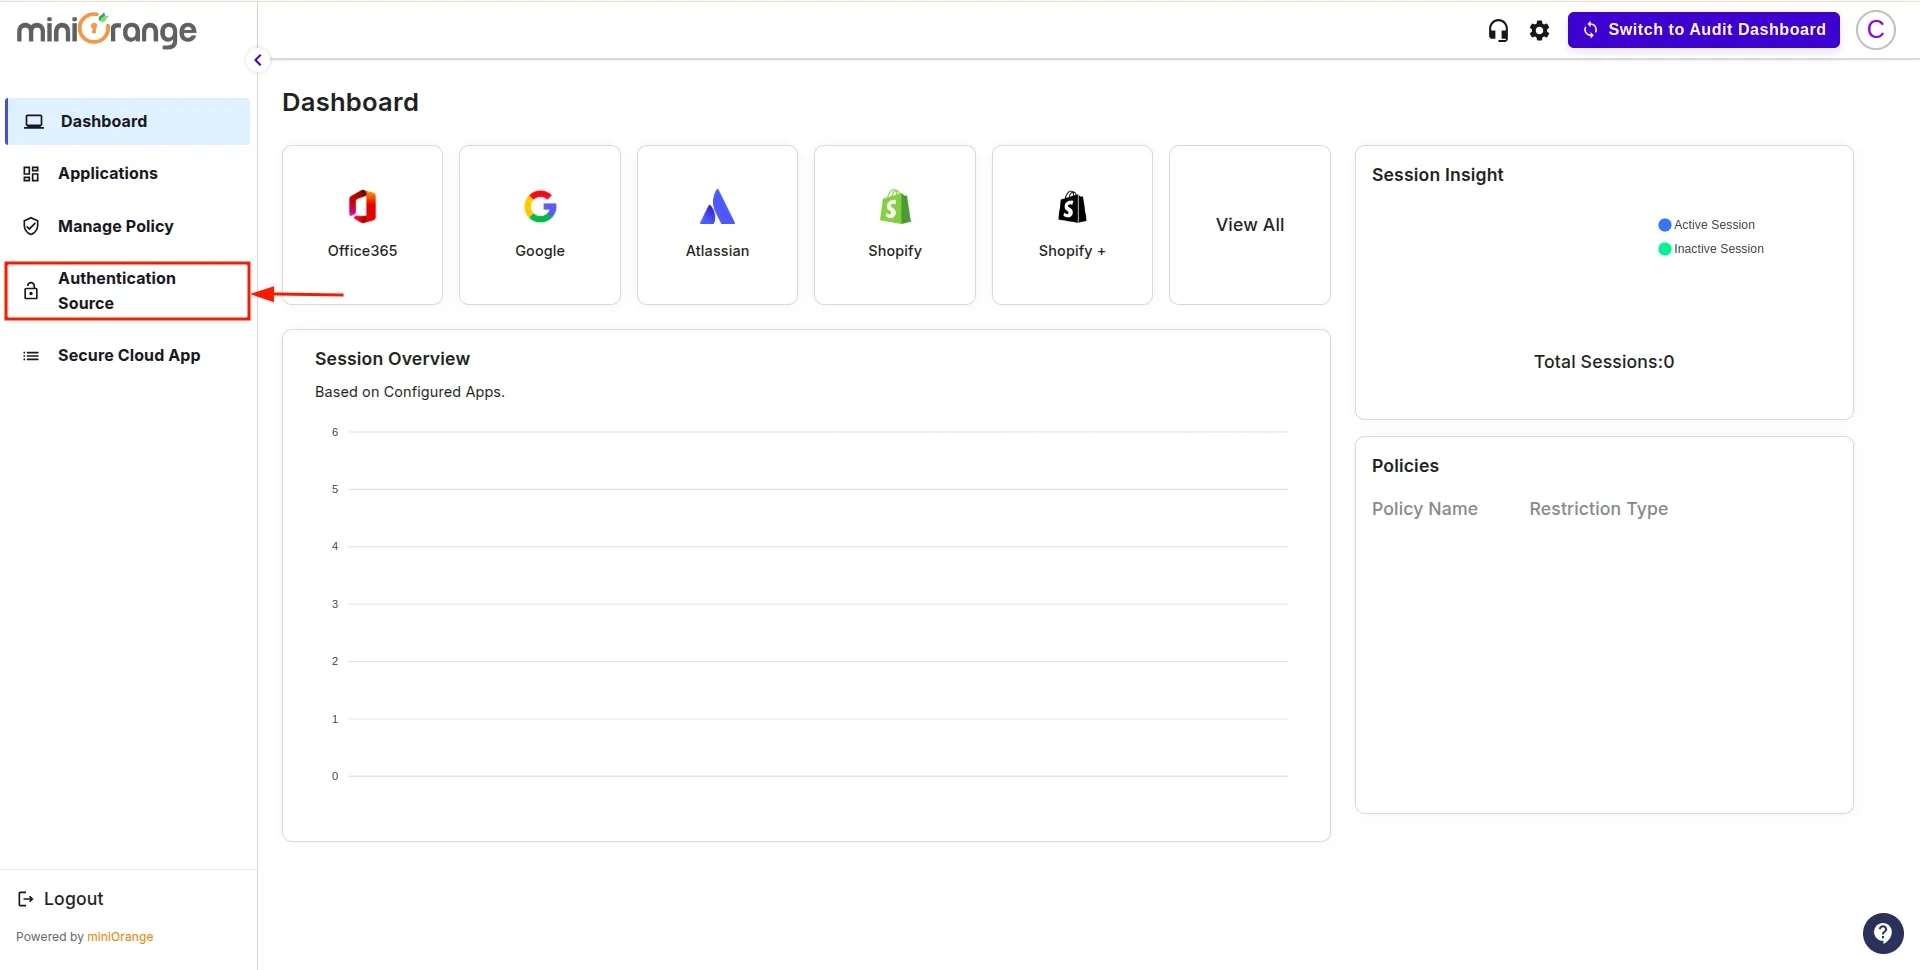
- After signing in, navigate to the Authentication Source in the left sidebar.
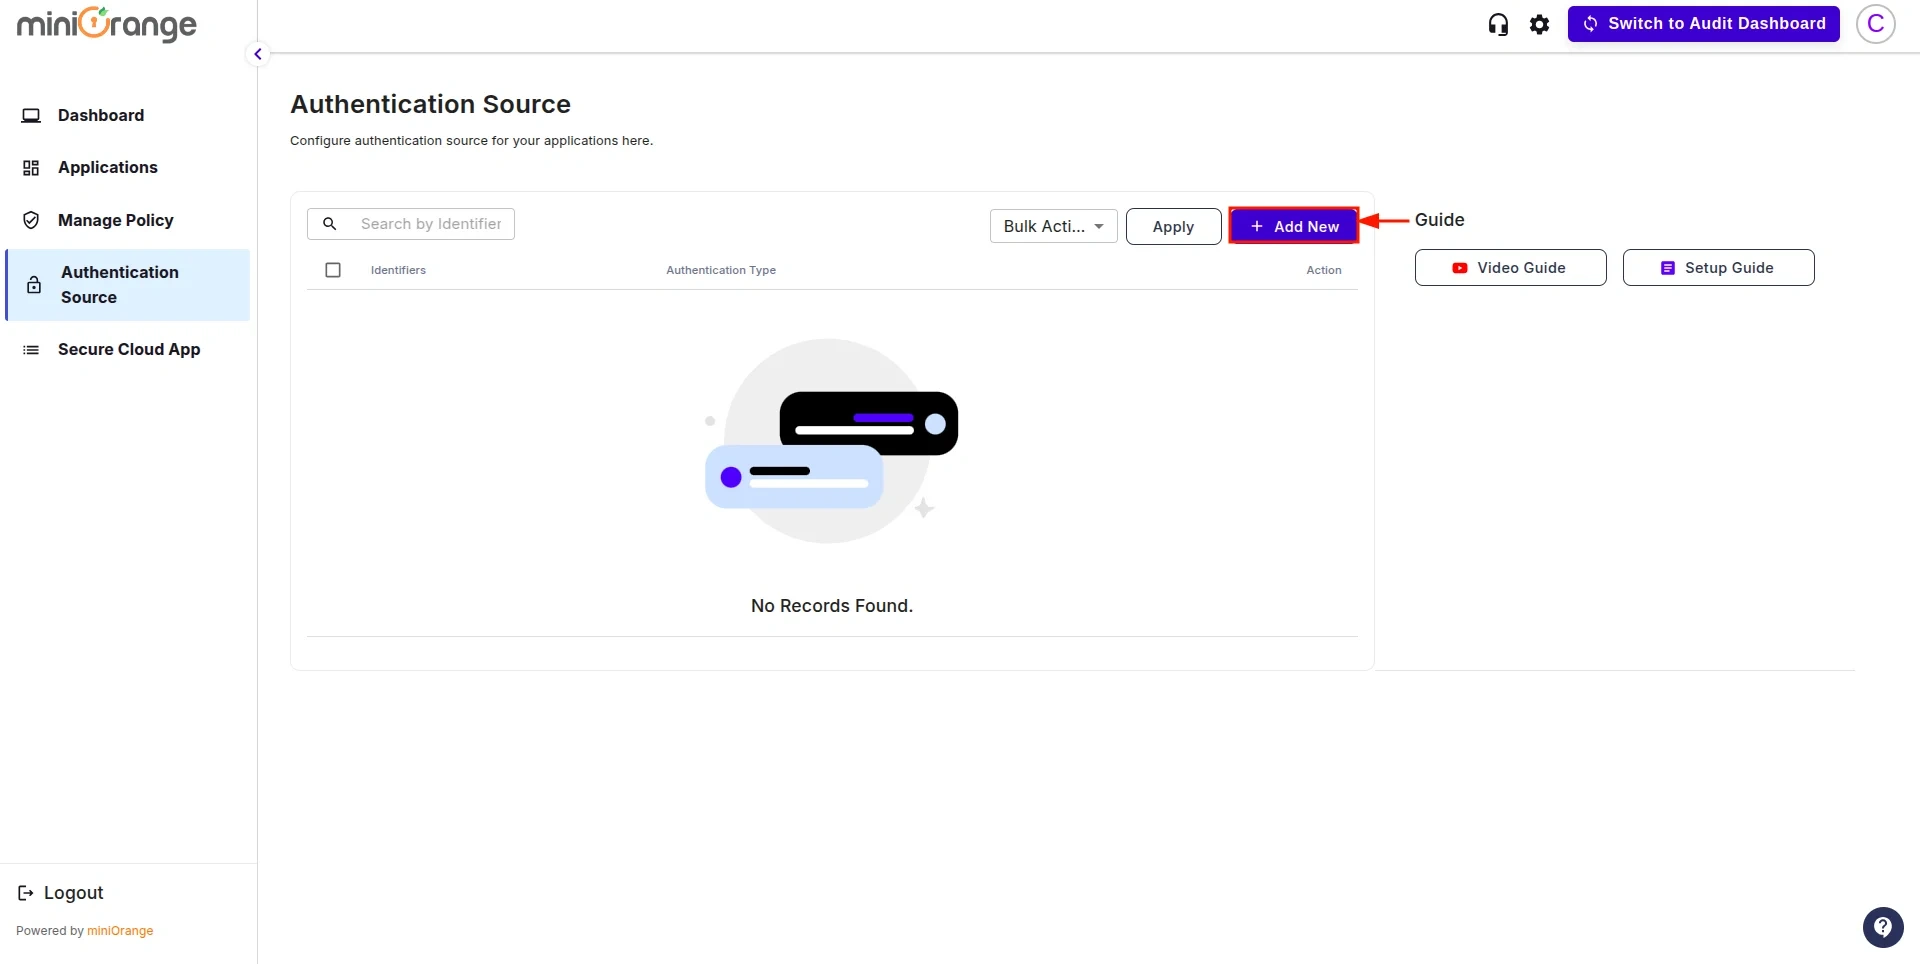
- You will see the list of all existing authentication sources configured in the CASB dashboard.
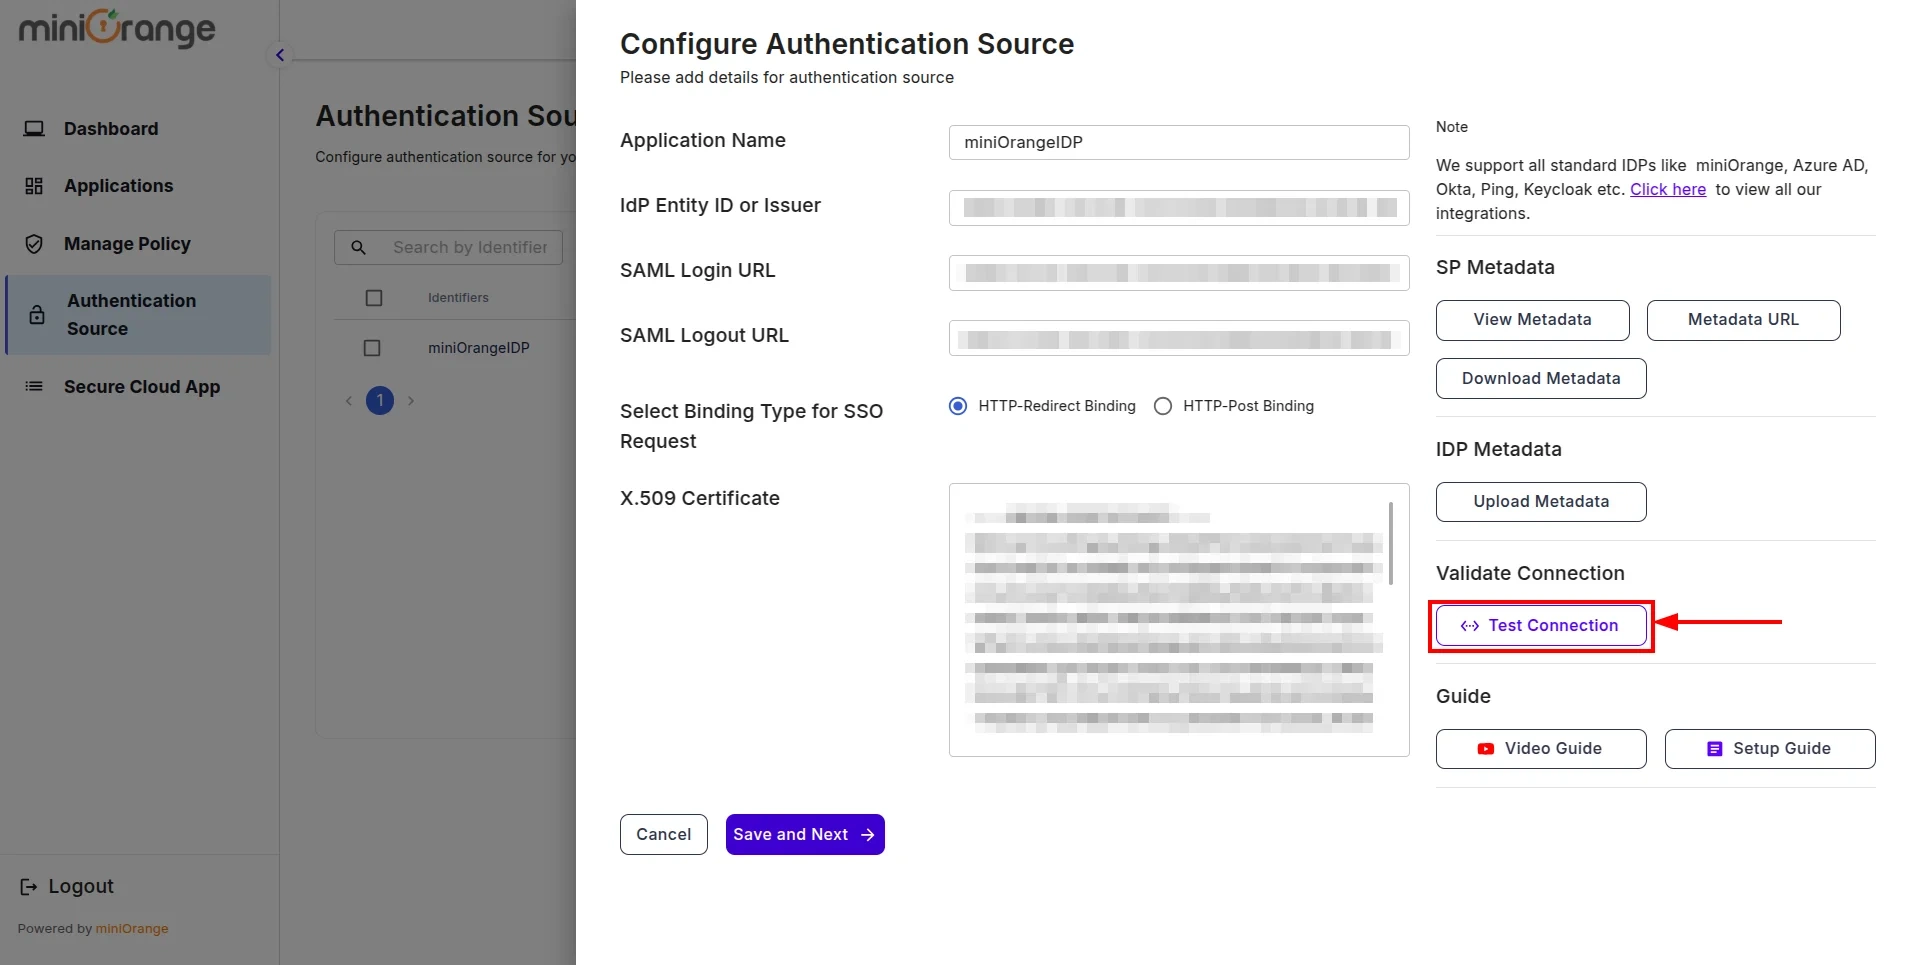
Click on Add New to create a new one.
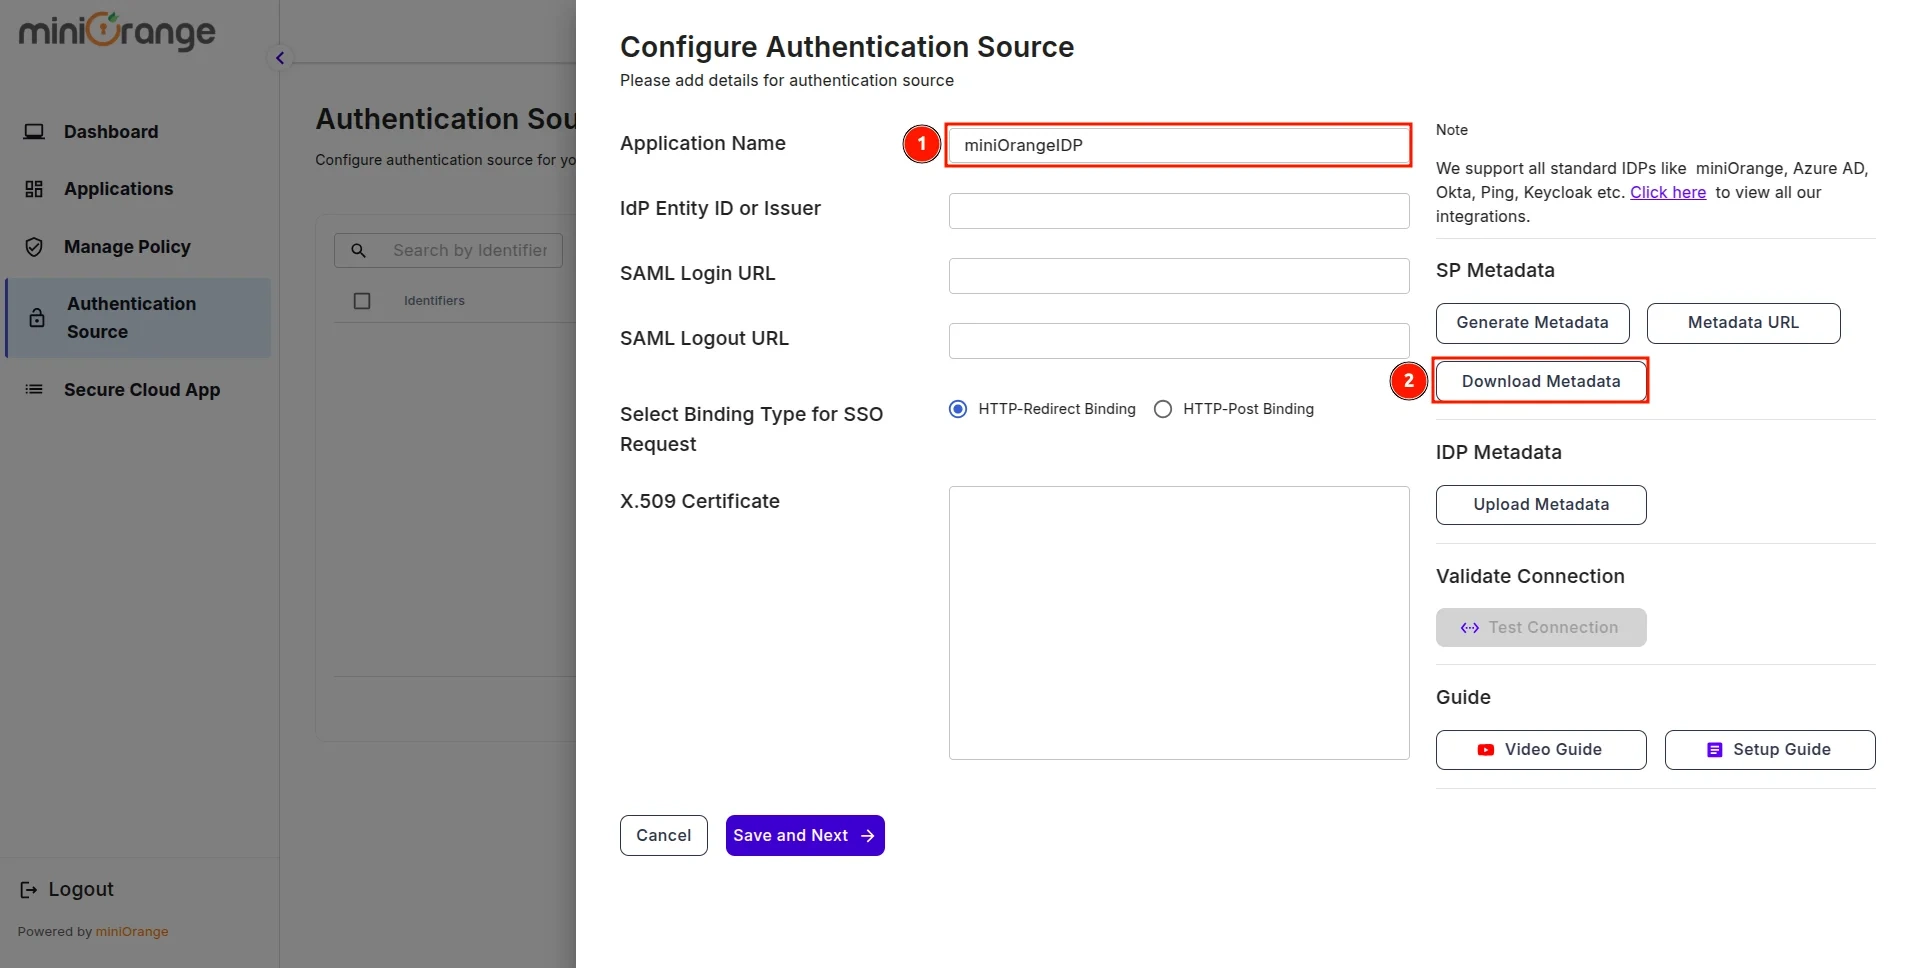
- This will open the configuration screen for the Authentication Source. Enter
the Authentication Source Name and click Download Metadata.
Step
2: Configure your Identity Provider
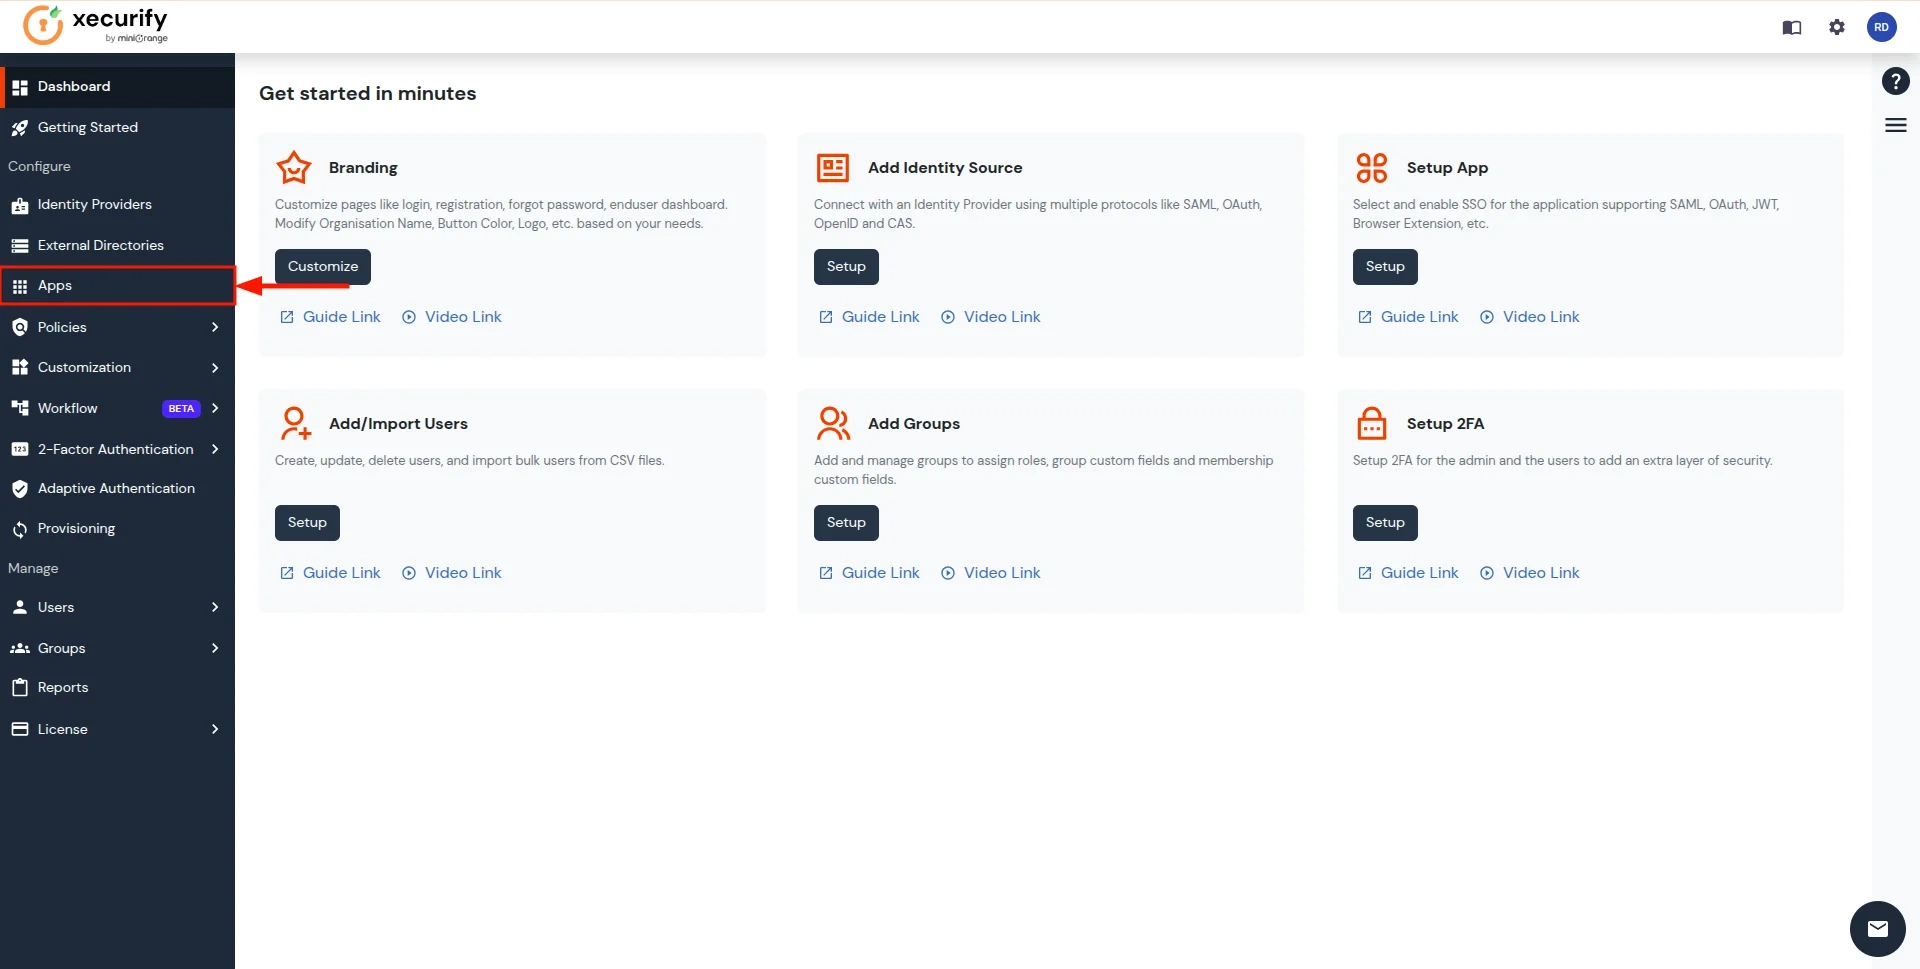
- Sign in to miniOrange IAM and navigate to the Apps section.
(In this guide, we are using miniOrange as the IDP, but you can contact us at
uemsupport@xecurify.com
to set up your preferred IDP.)
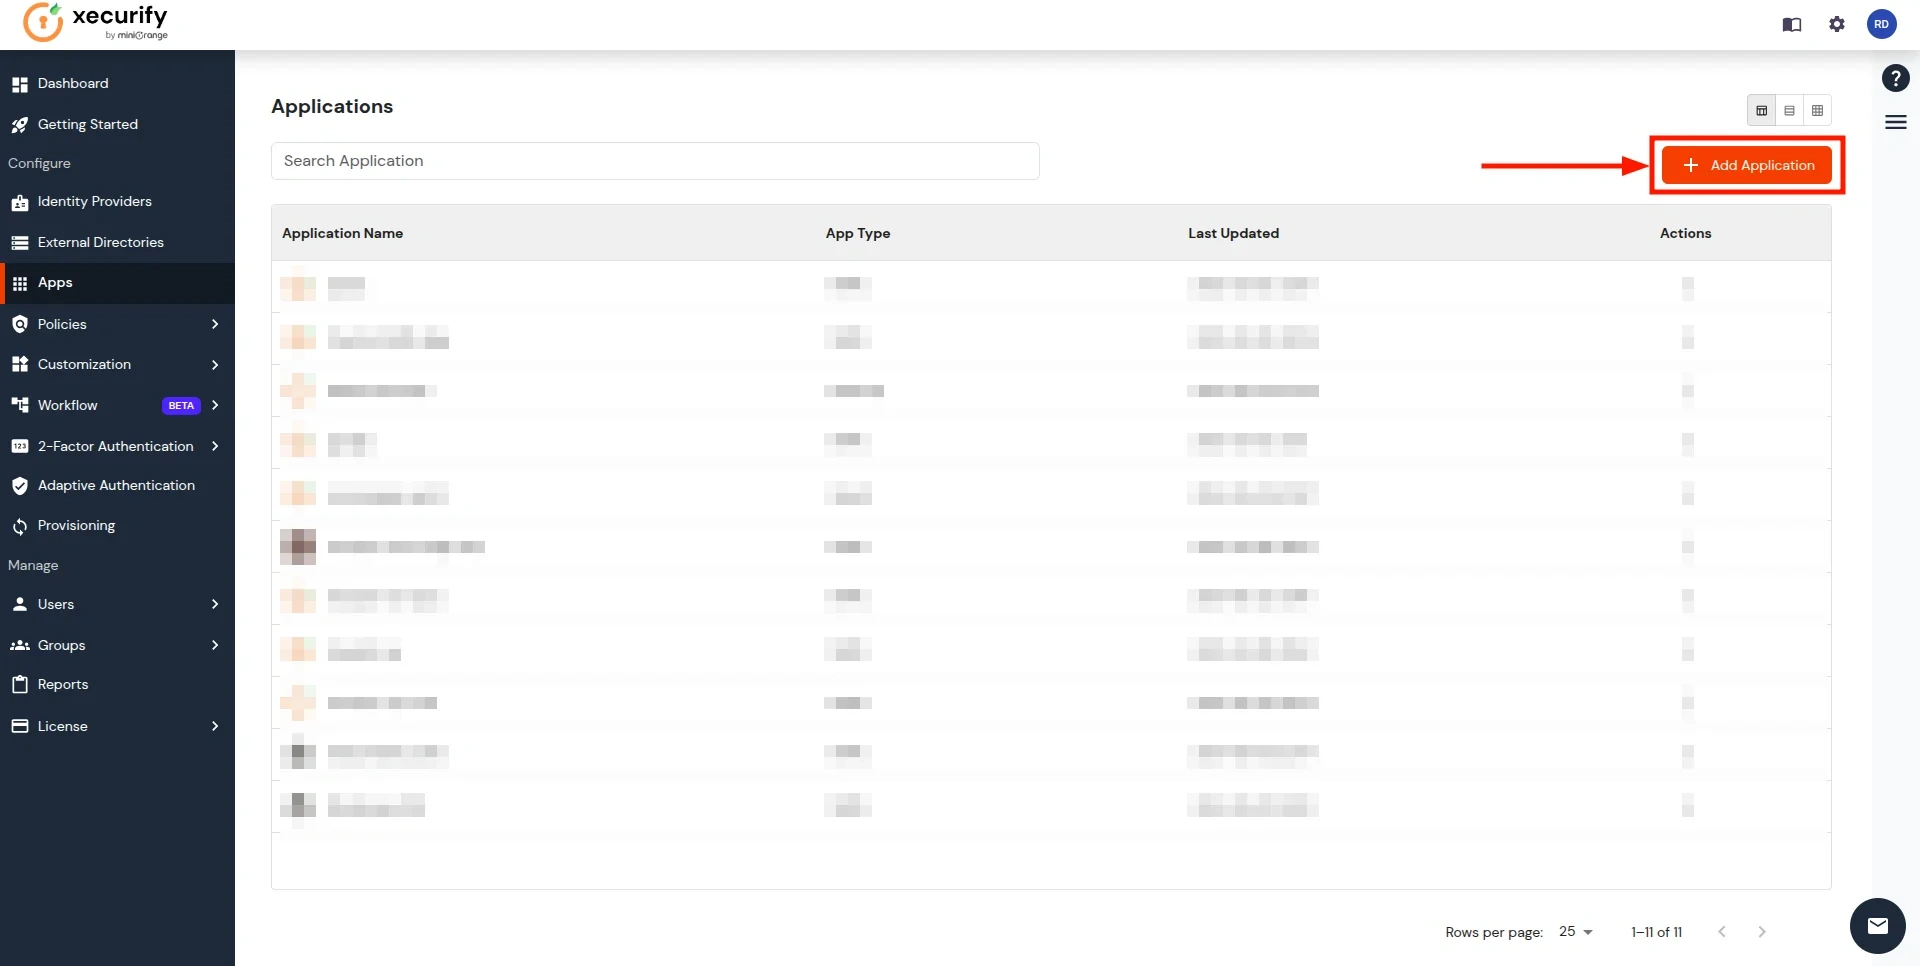
- Click on the Add Application button.
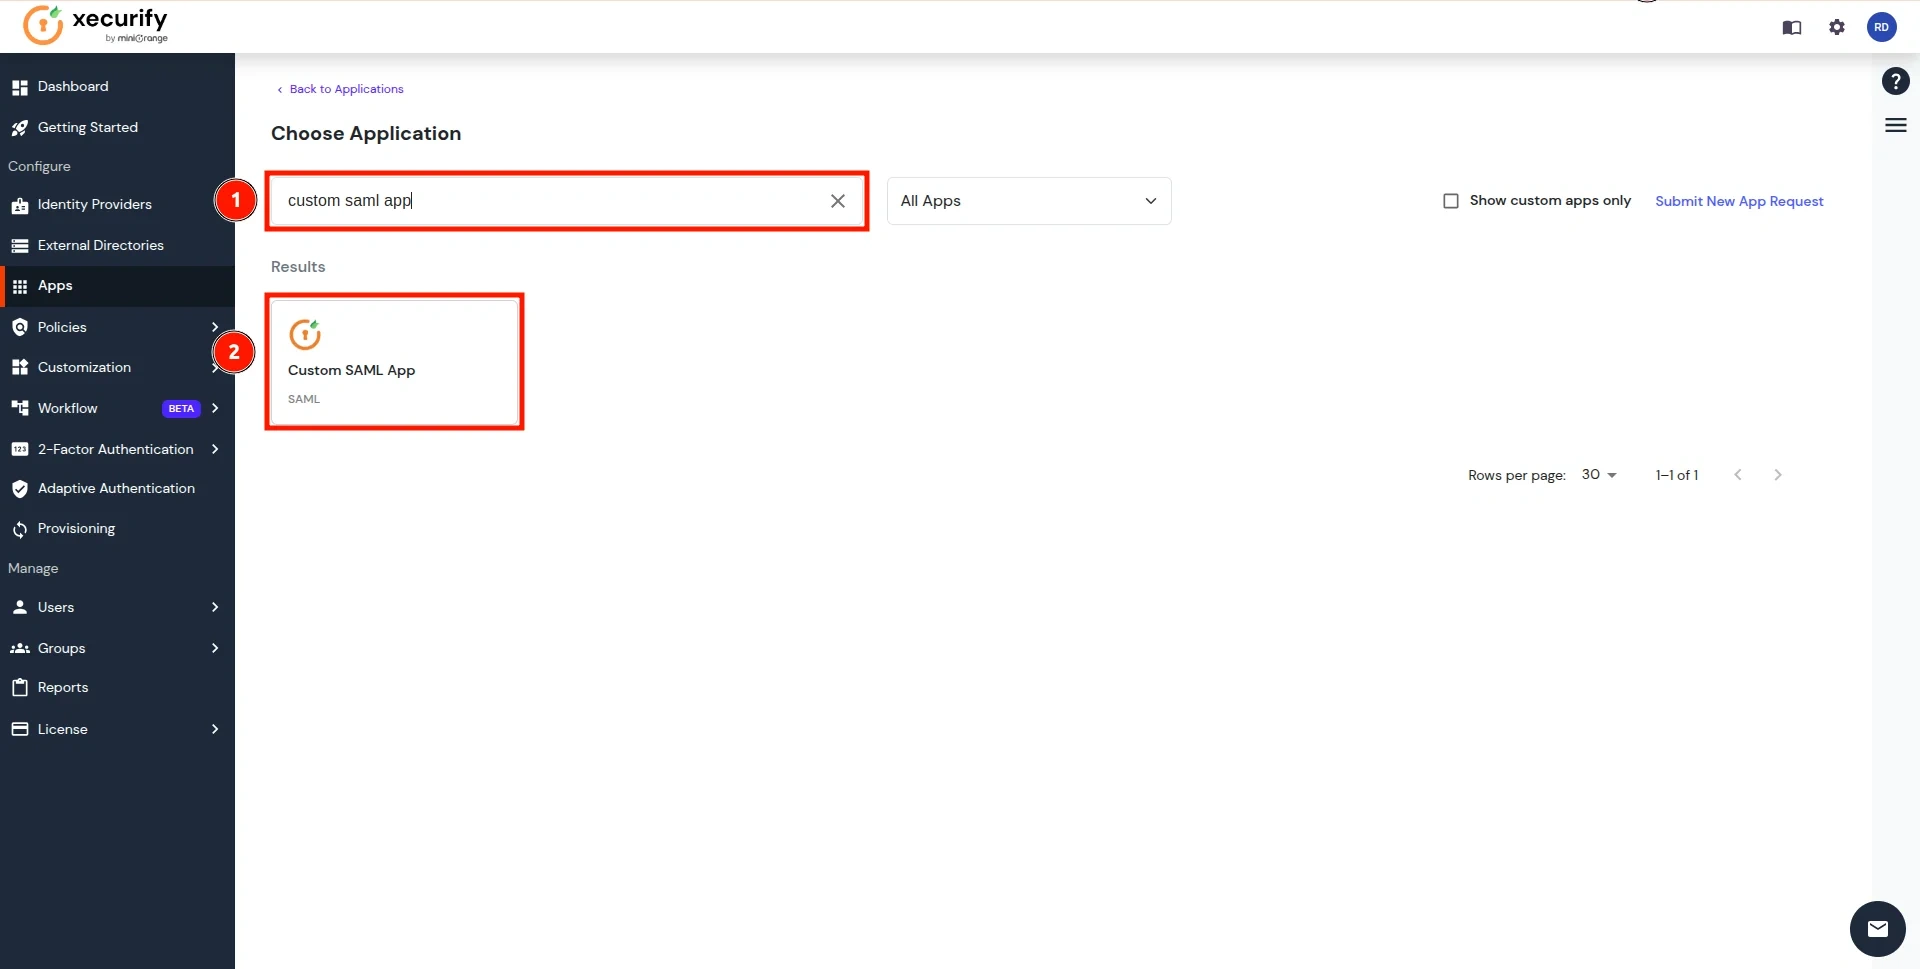
- Search for the Custom SAML App in the search box and click on it.
- Click on the Import SP Metadata button in the right corner.
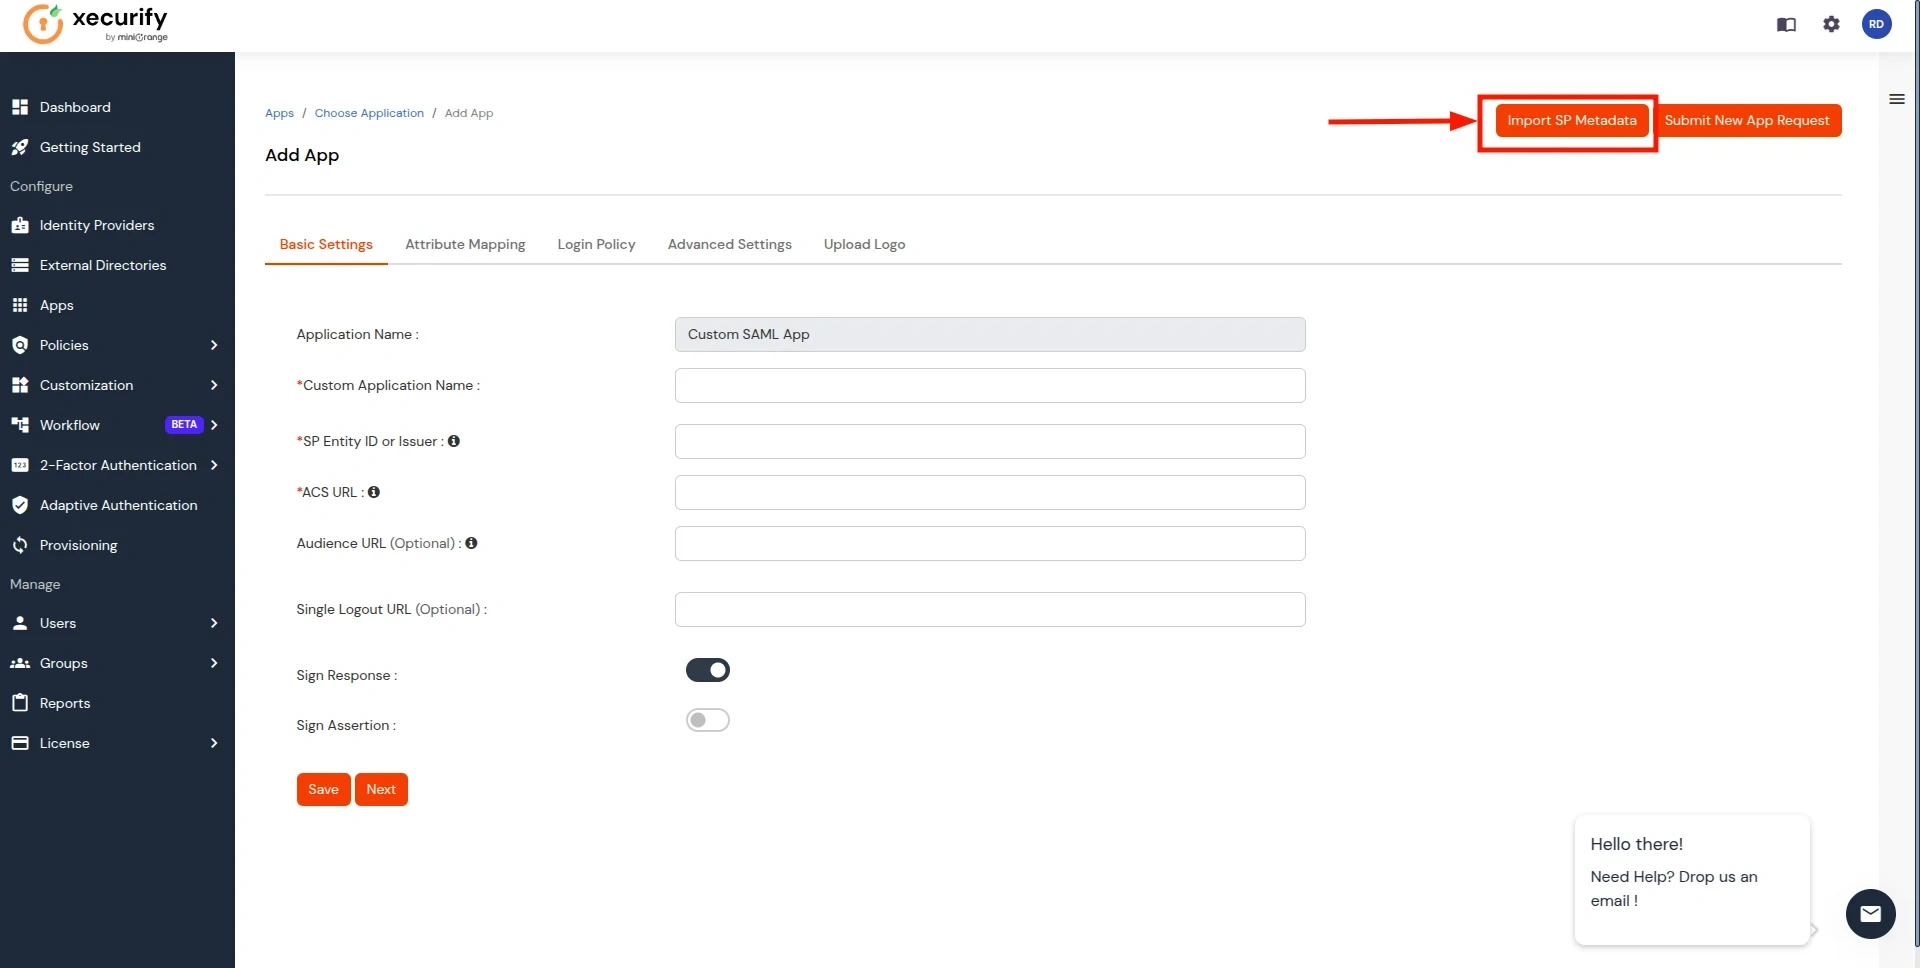
- Add the App Name, and select the file option in SP Metadata. Next, click on the Choose File button. Select the file downloaded in Step 1 and click on Import Button.
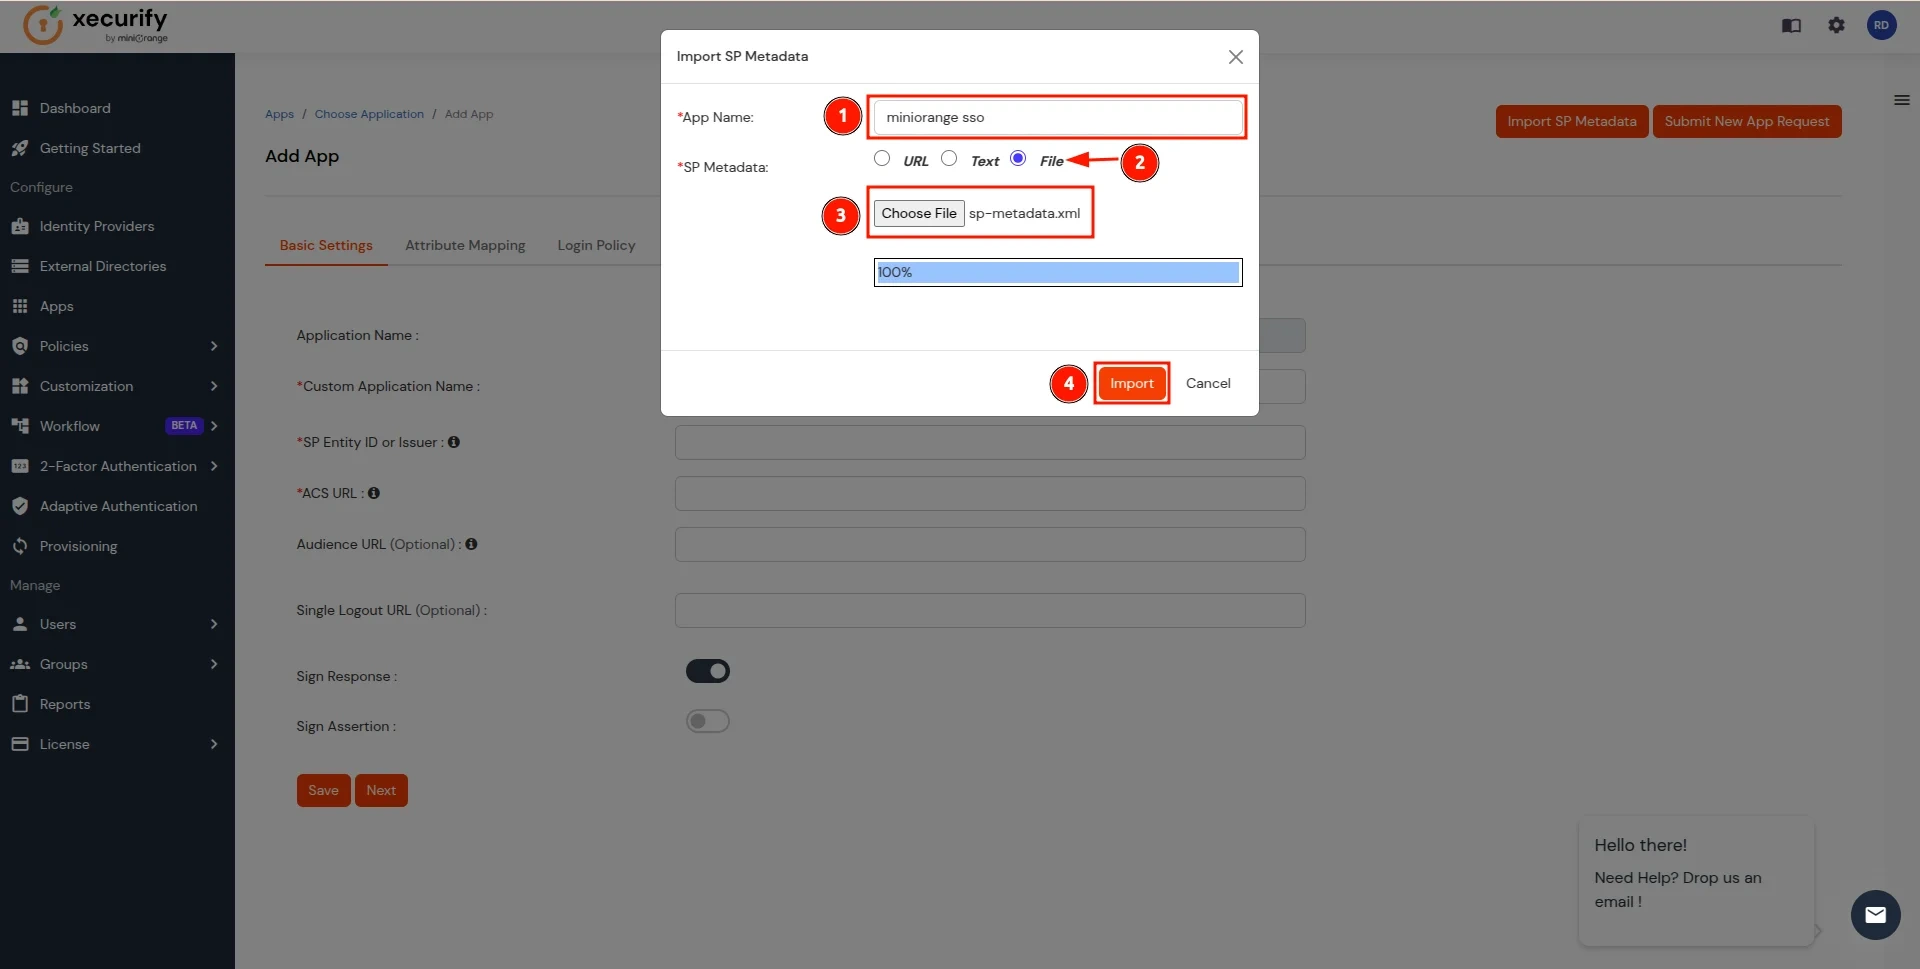
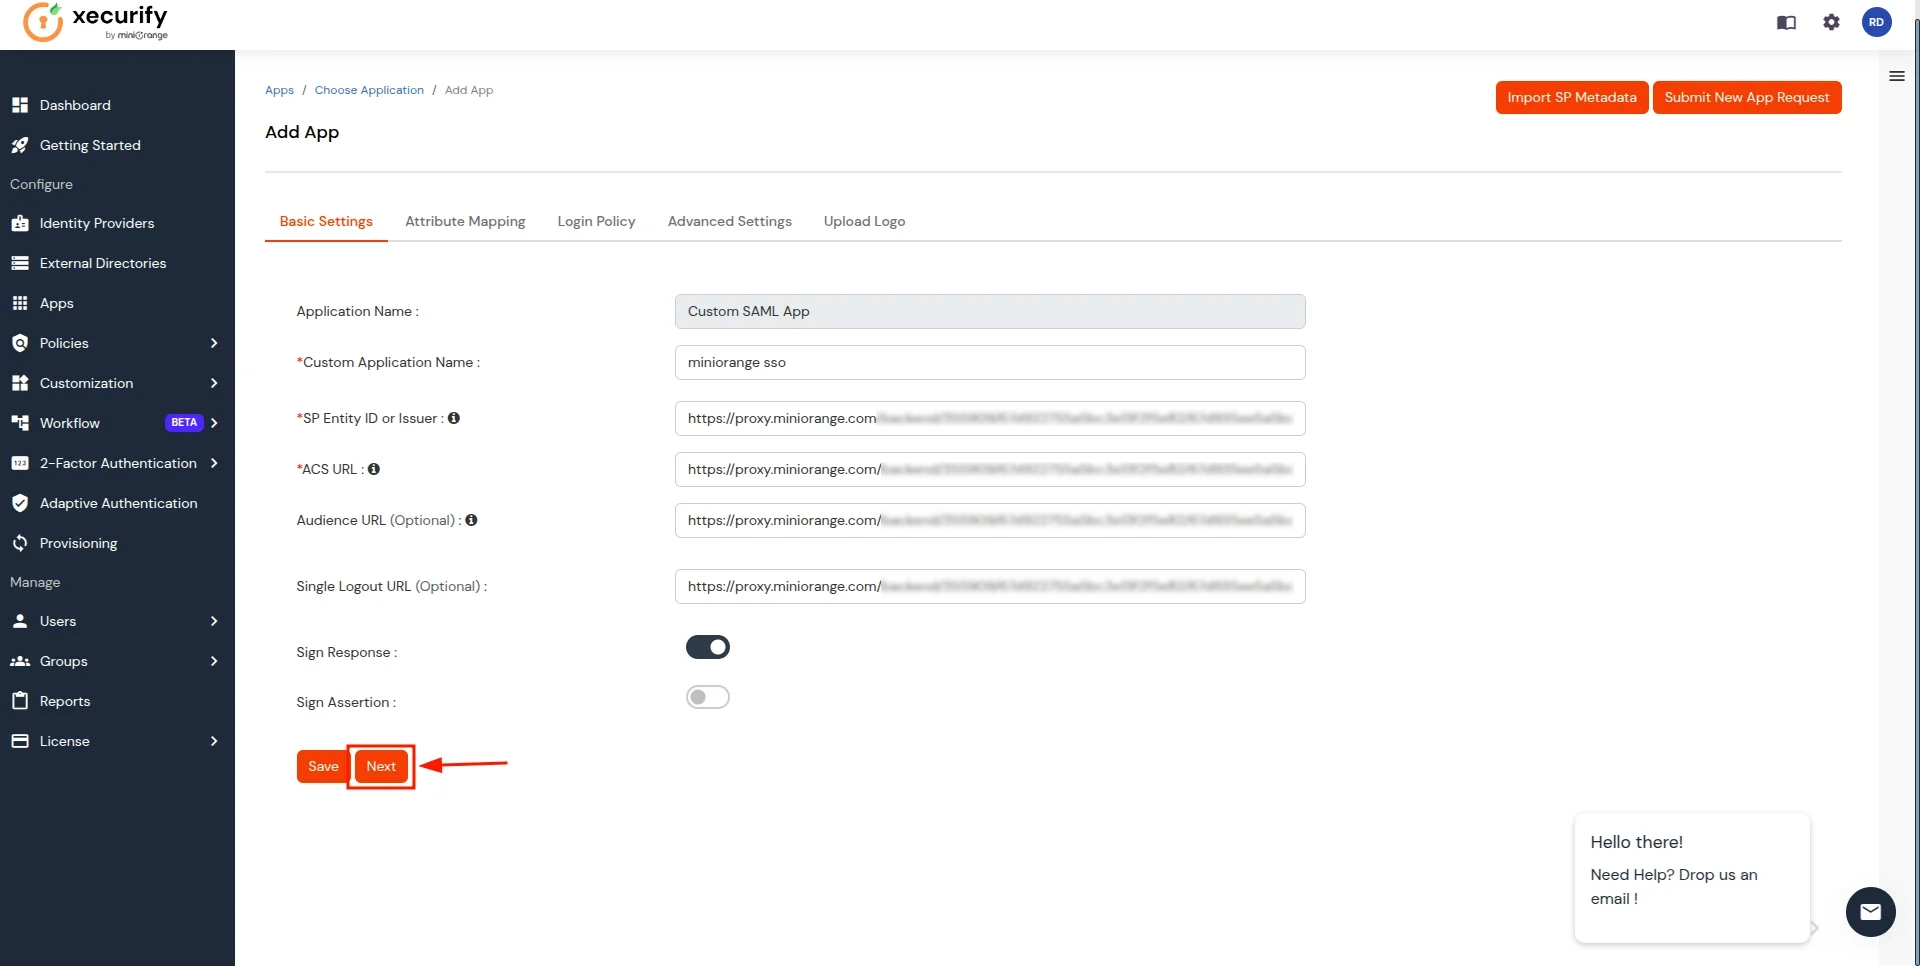
- Click on Next Button.
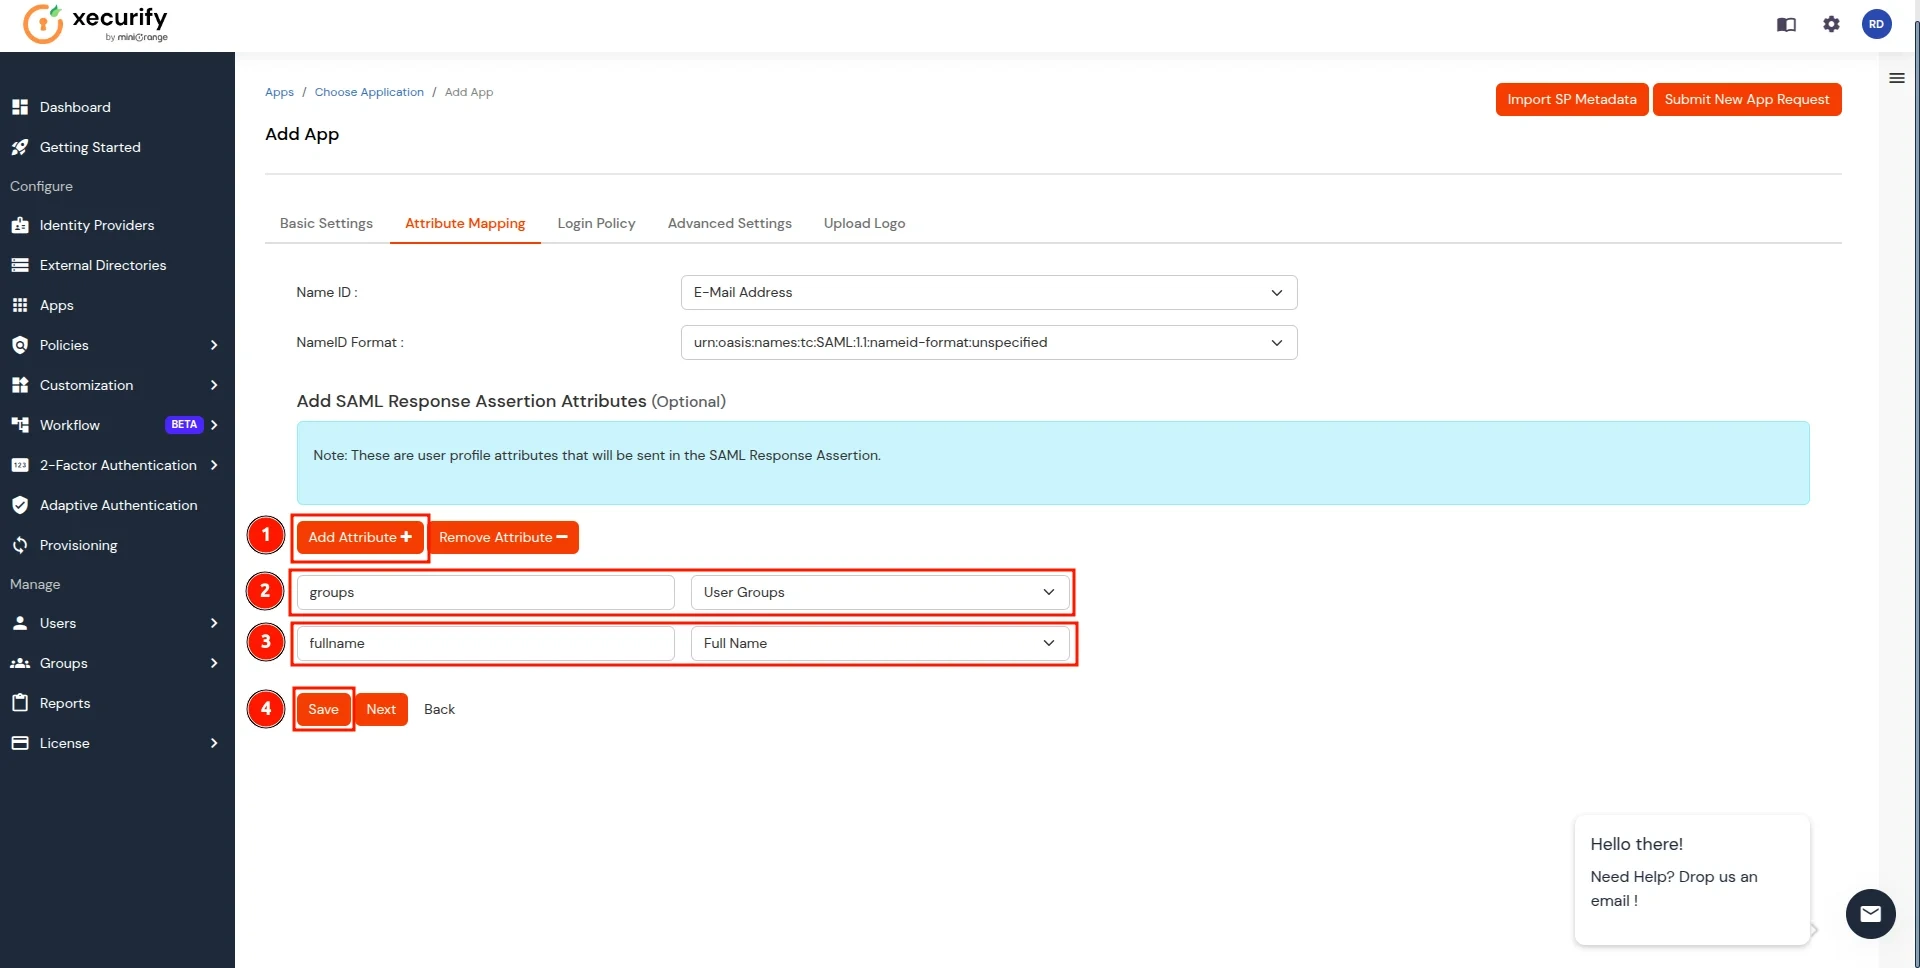
- In the Attribute Mapping section, follow these steps:
- Click on the Add Attribute button.
- Enter groups as the Attribute Name and select User Groups as the Attribute Value.
- Add another attribute by clicking Add Attribute again.
- Enter fullname as the Attribute Name and select Full Name as the Attribute Value.
- Click on the Save button to apply the changes.
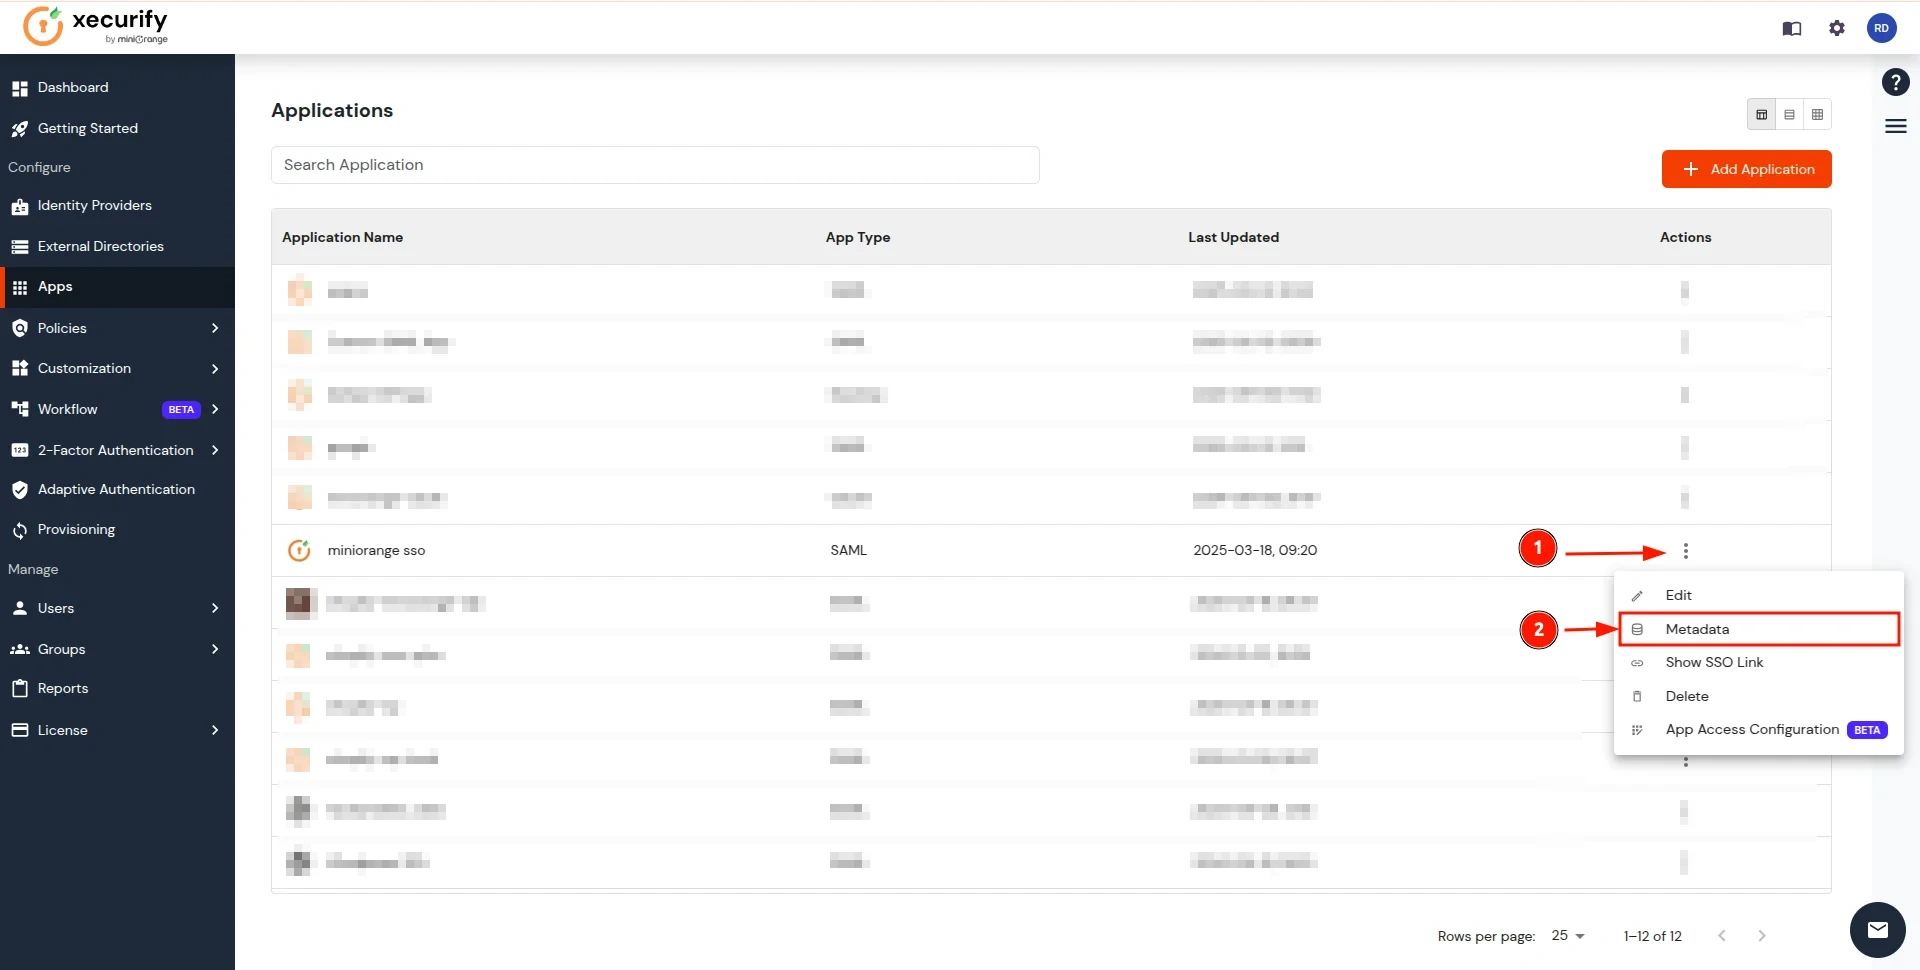
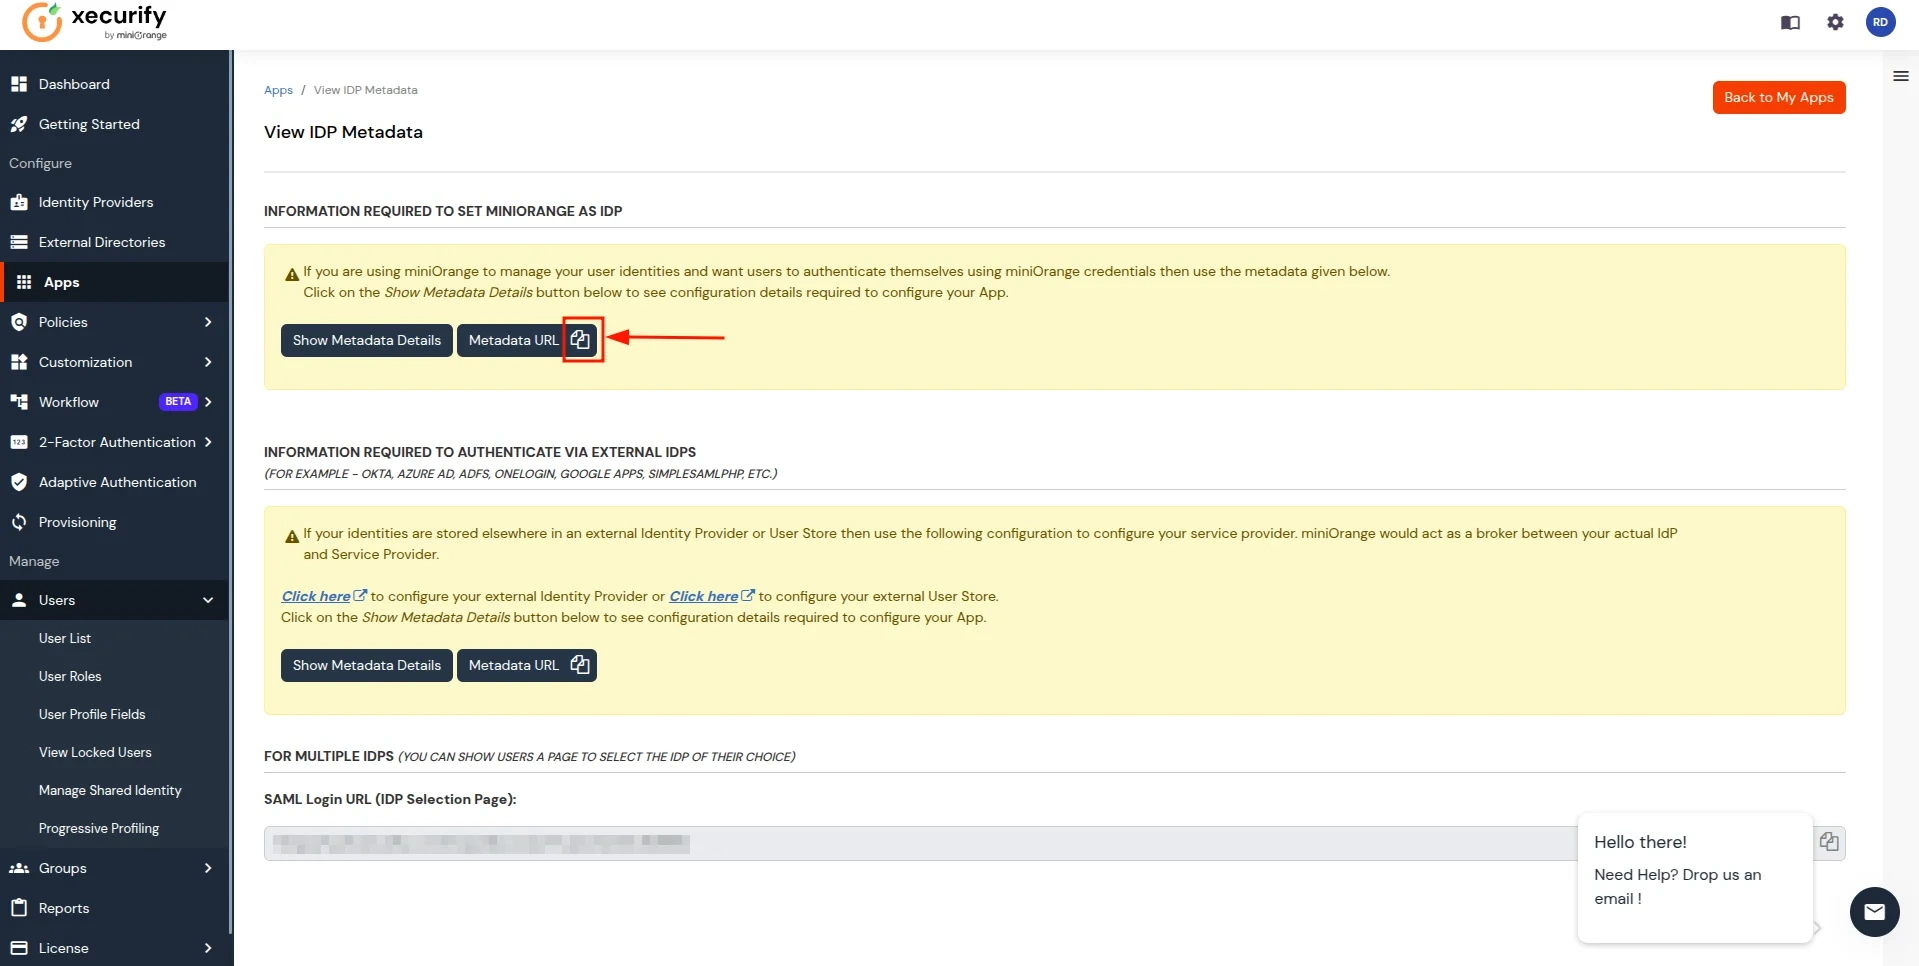
- Now you will be redirected to the Applications screen. Click on the three dots action tab for the newly created application and select the Metadata option.
- In the View IDP Metadata section, click on the copy to clipboard next to the Metadata URL to copy it.
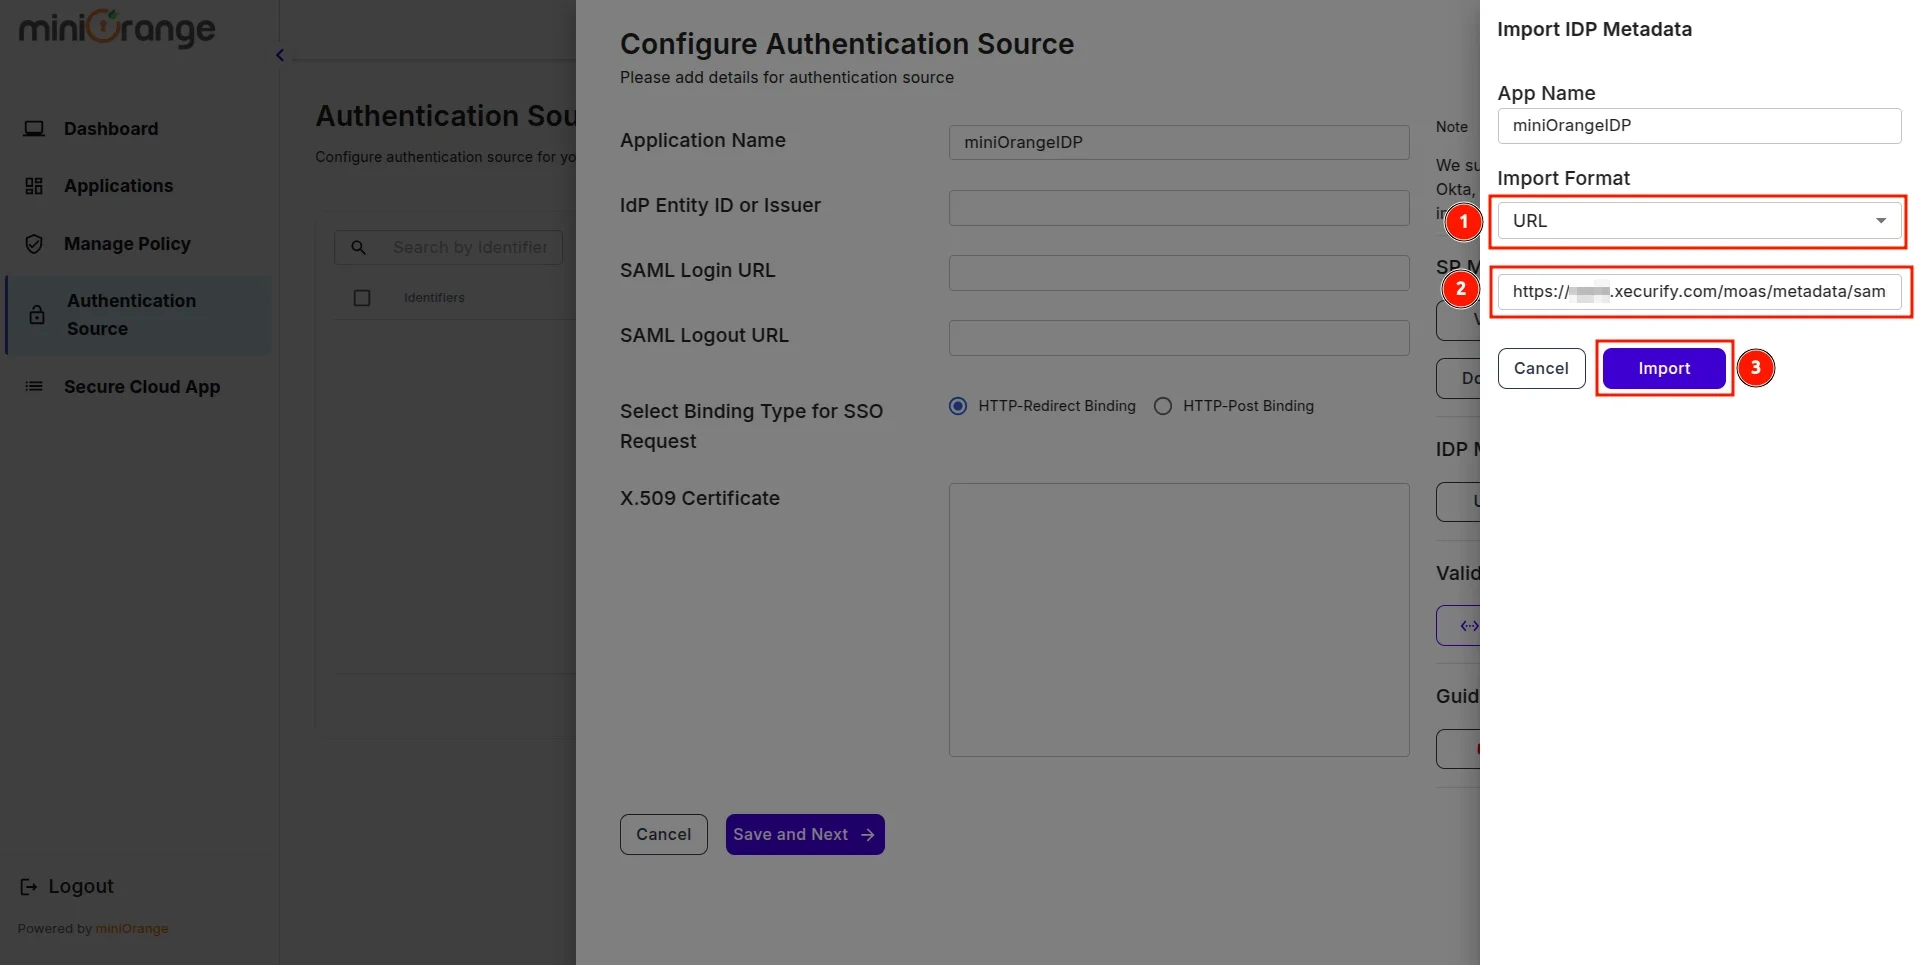
- Return to the CASB Dashboard tab, in the Configure Authentication Source section, locate the IDP Metadata section, and click on Upload Metadata.

- In Import IDP Metadata, select Import Format as URL, add IDP Metadata url copied from miniOrange IDP, and click the Import button.
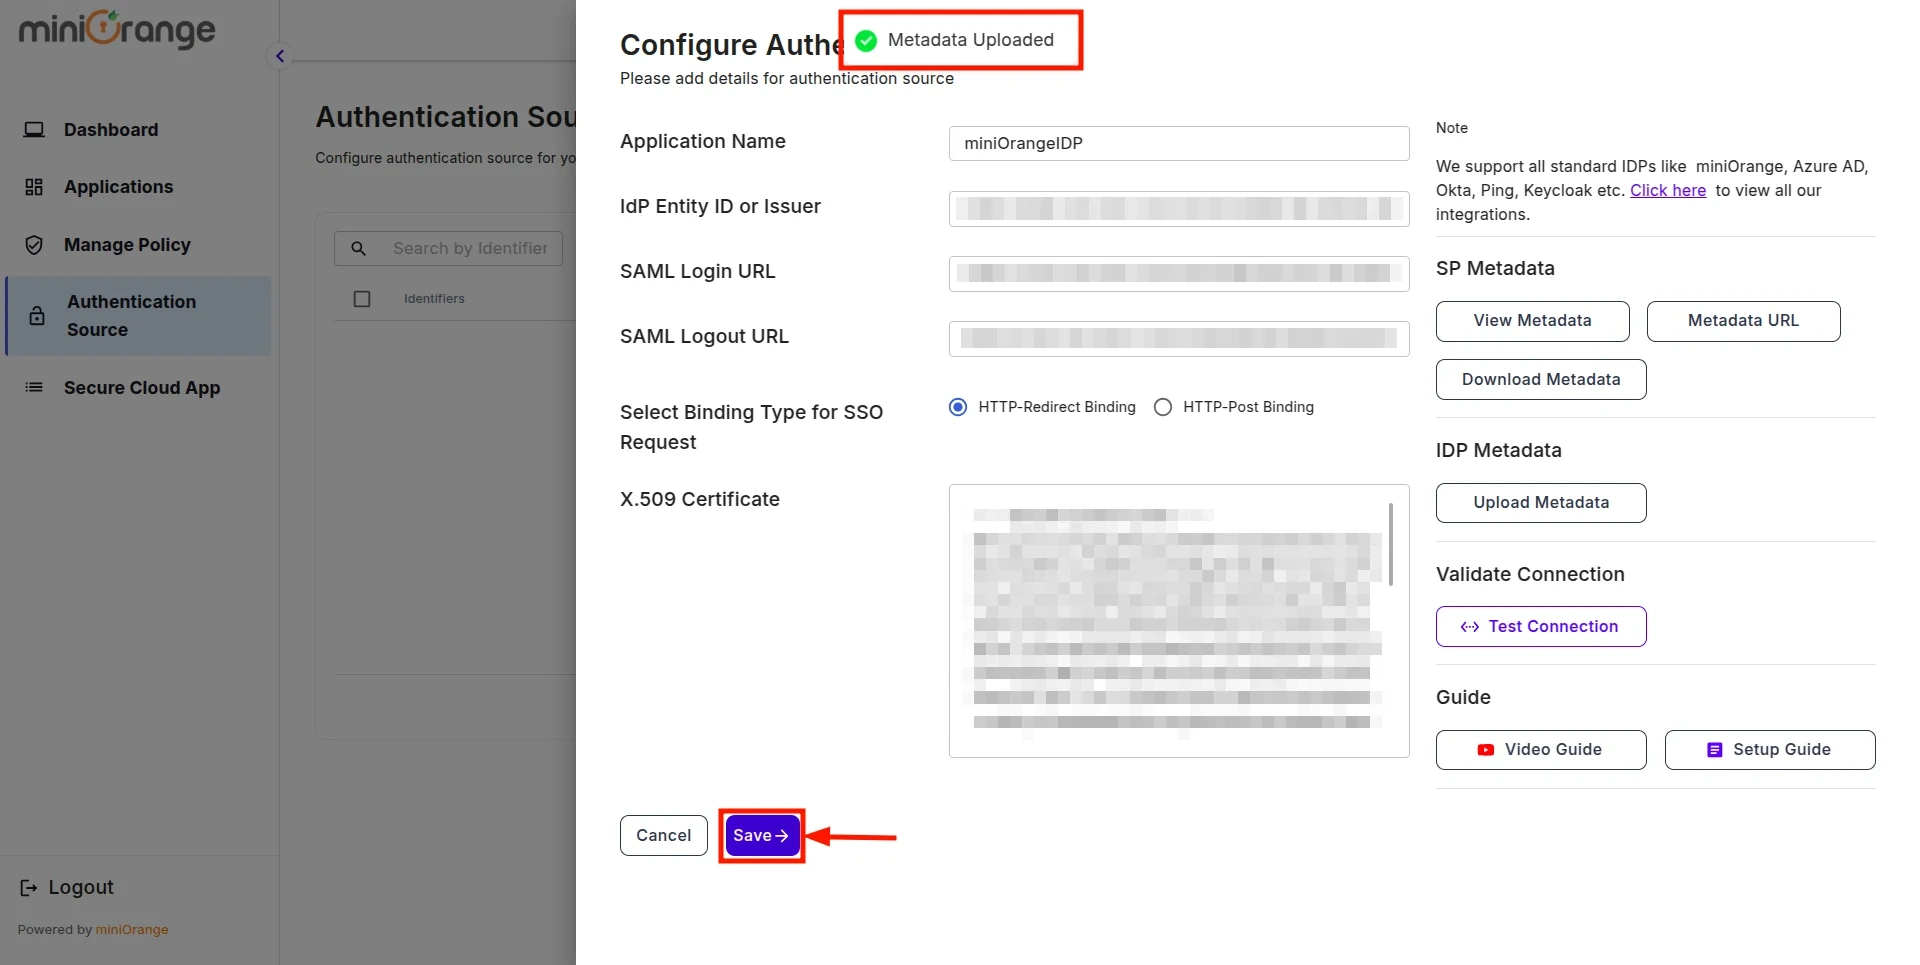
- A prompt will appear confirming that the metadata has been uploaded successfully. Click Save to finalize the configuration.
- Now, return to miniOrange IDP, click on the Users tab in the navigation menu on the left and select User List.

- In the Add User page, add the user's personal details like Email, Username, First Name, Last Name, Phone and Password and click on the Create User Button.
(To add multiple users, use Bulk User Registration feature)

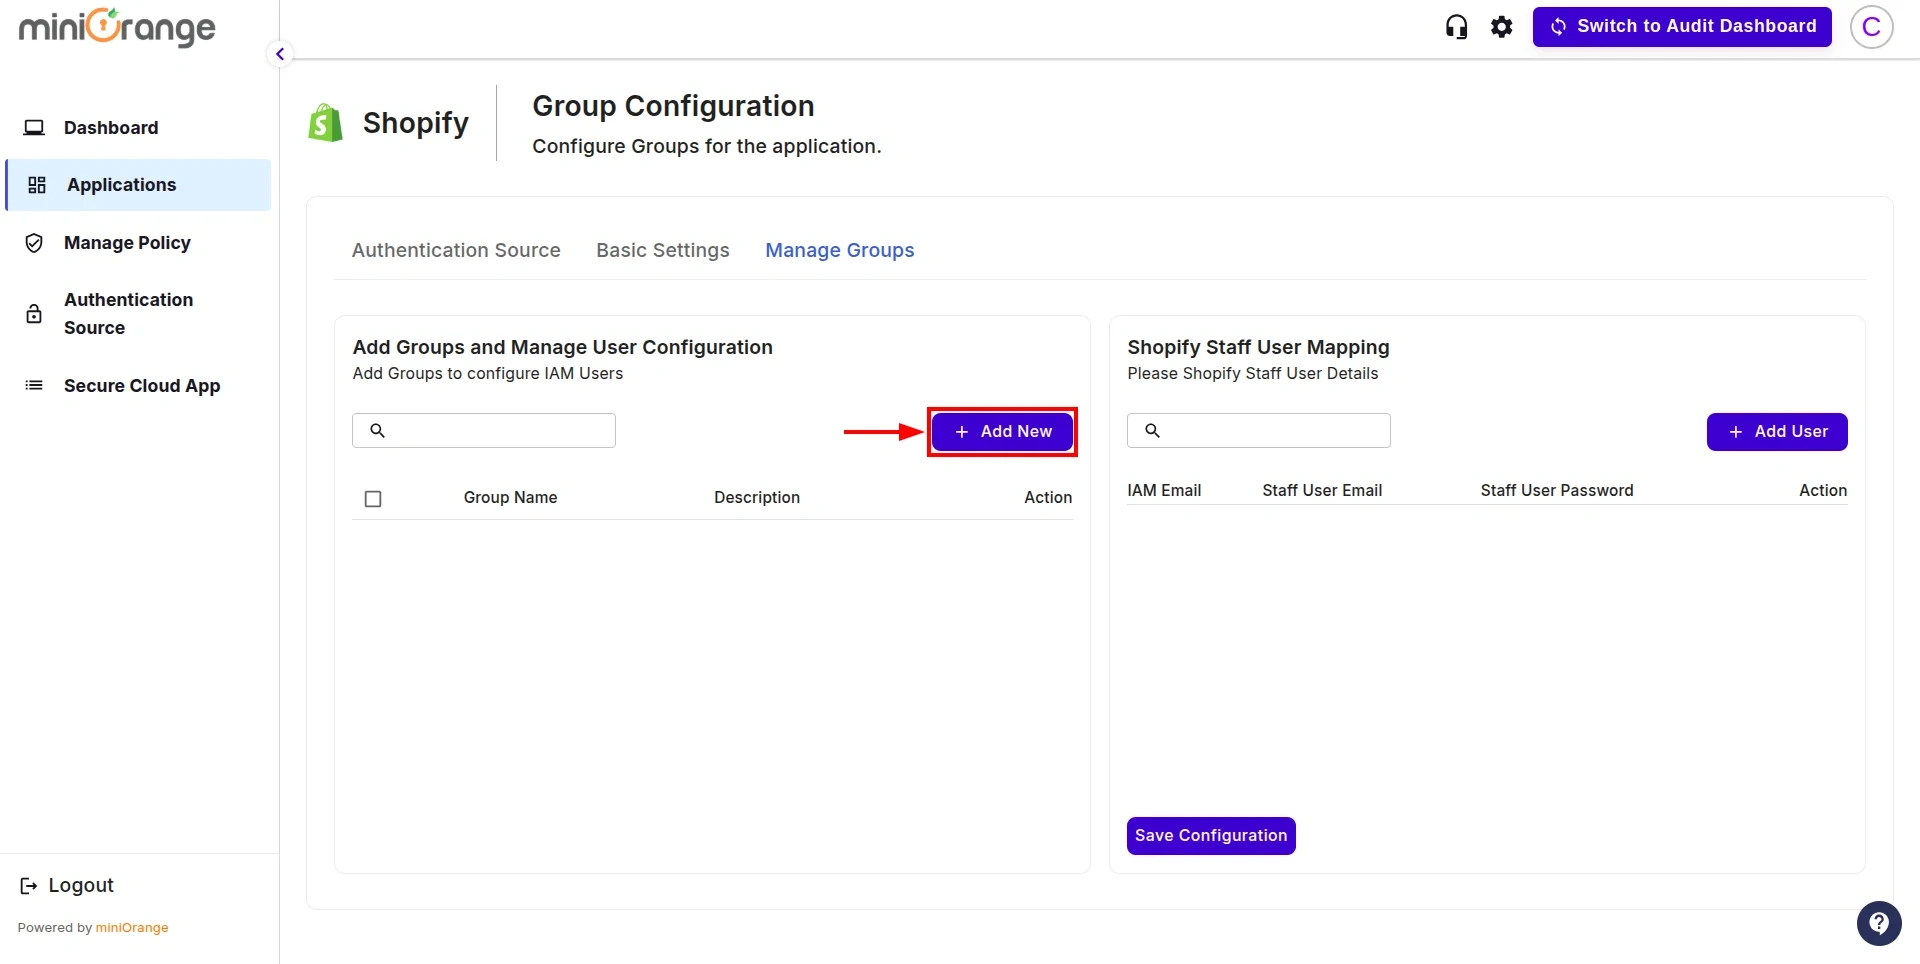
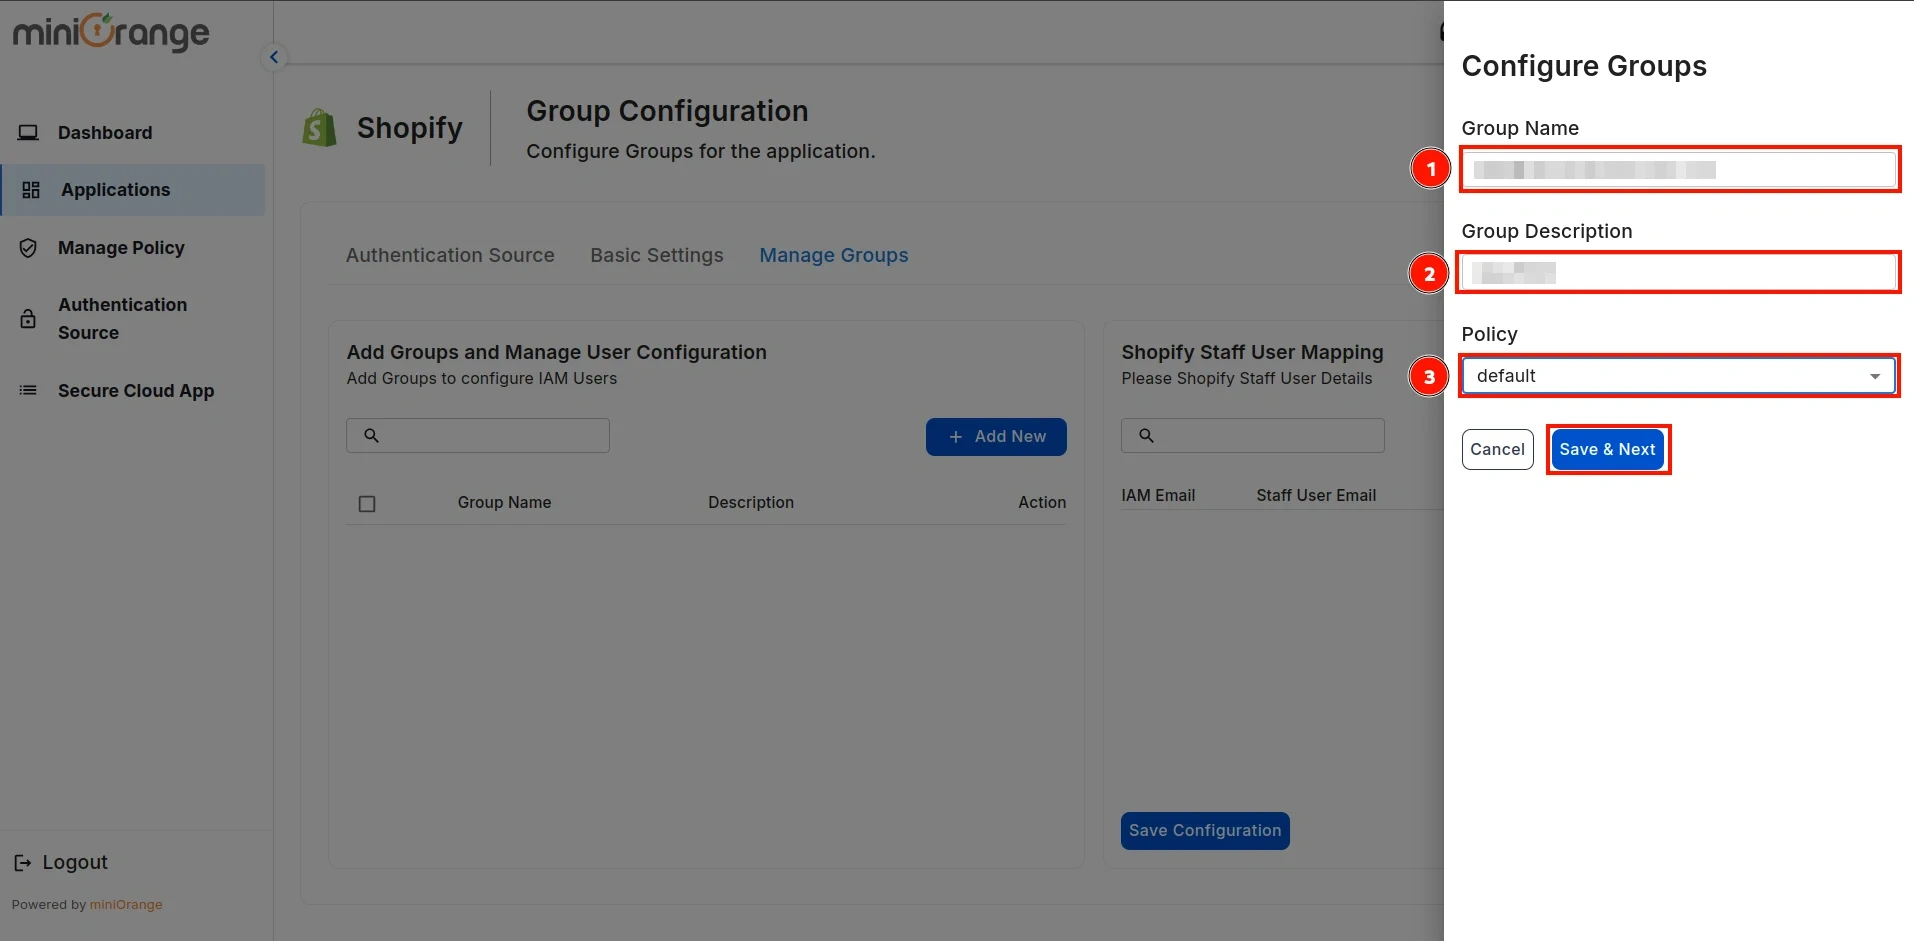
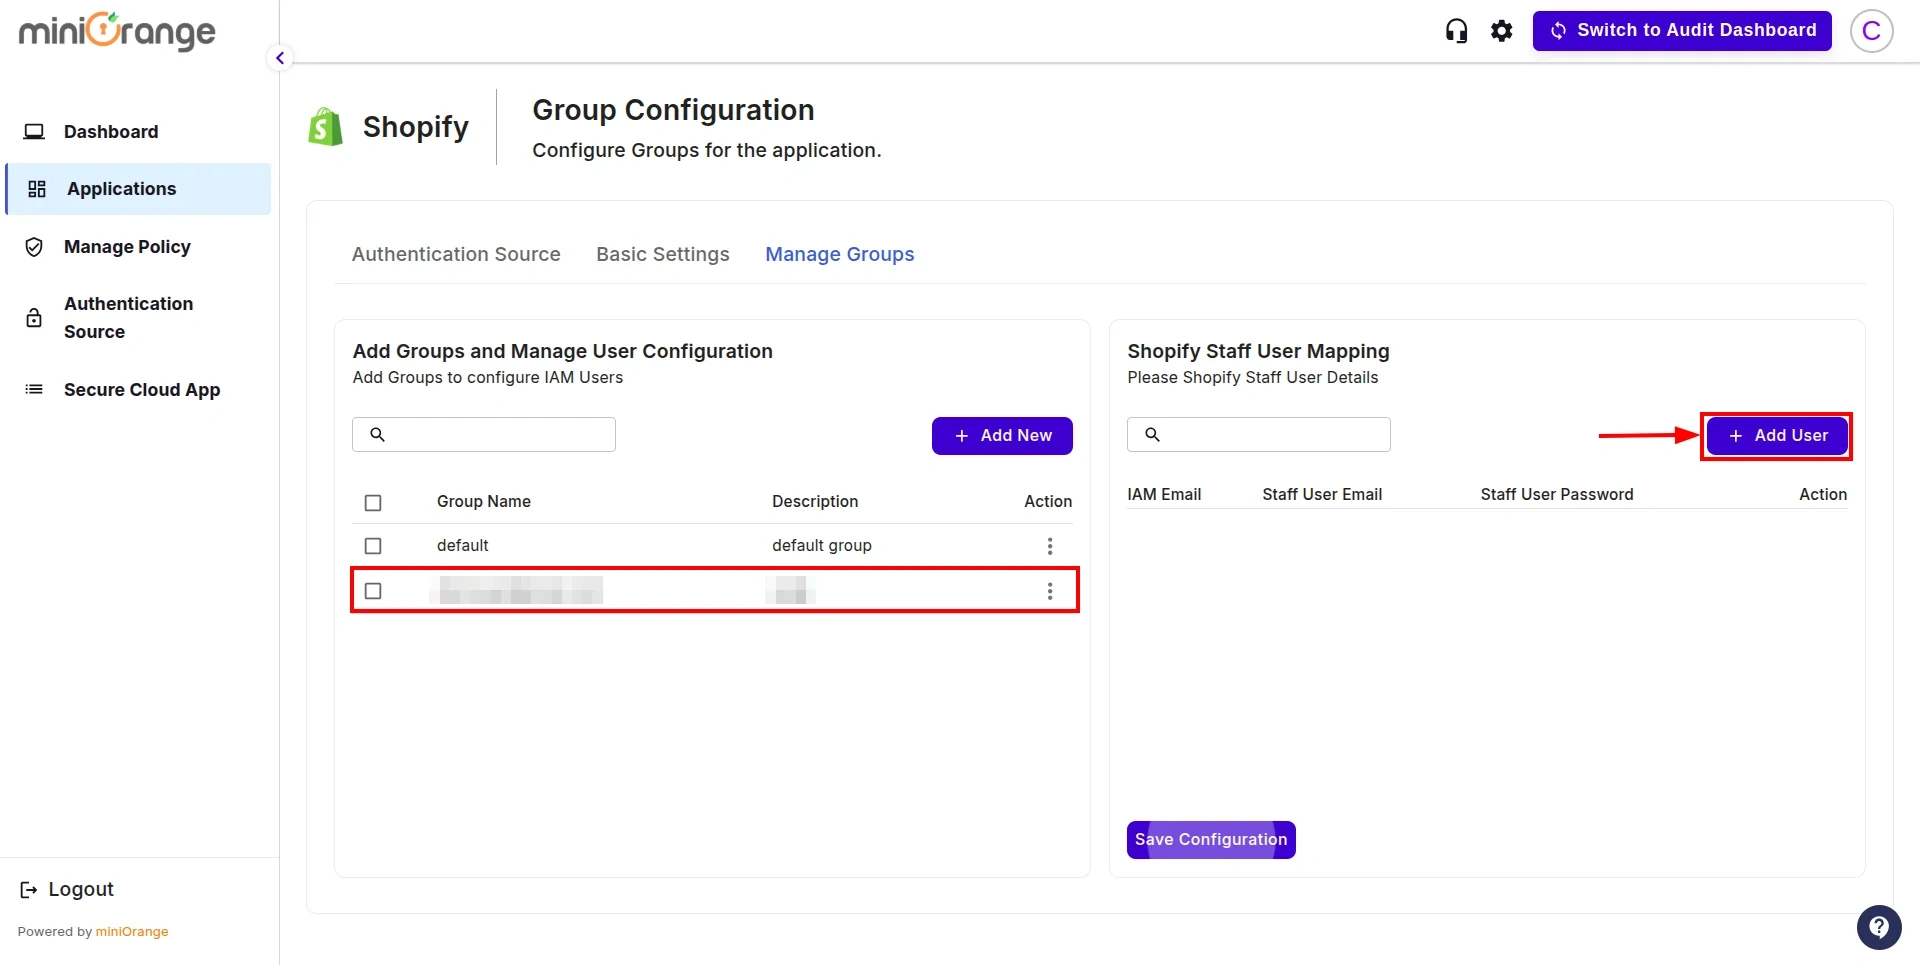
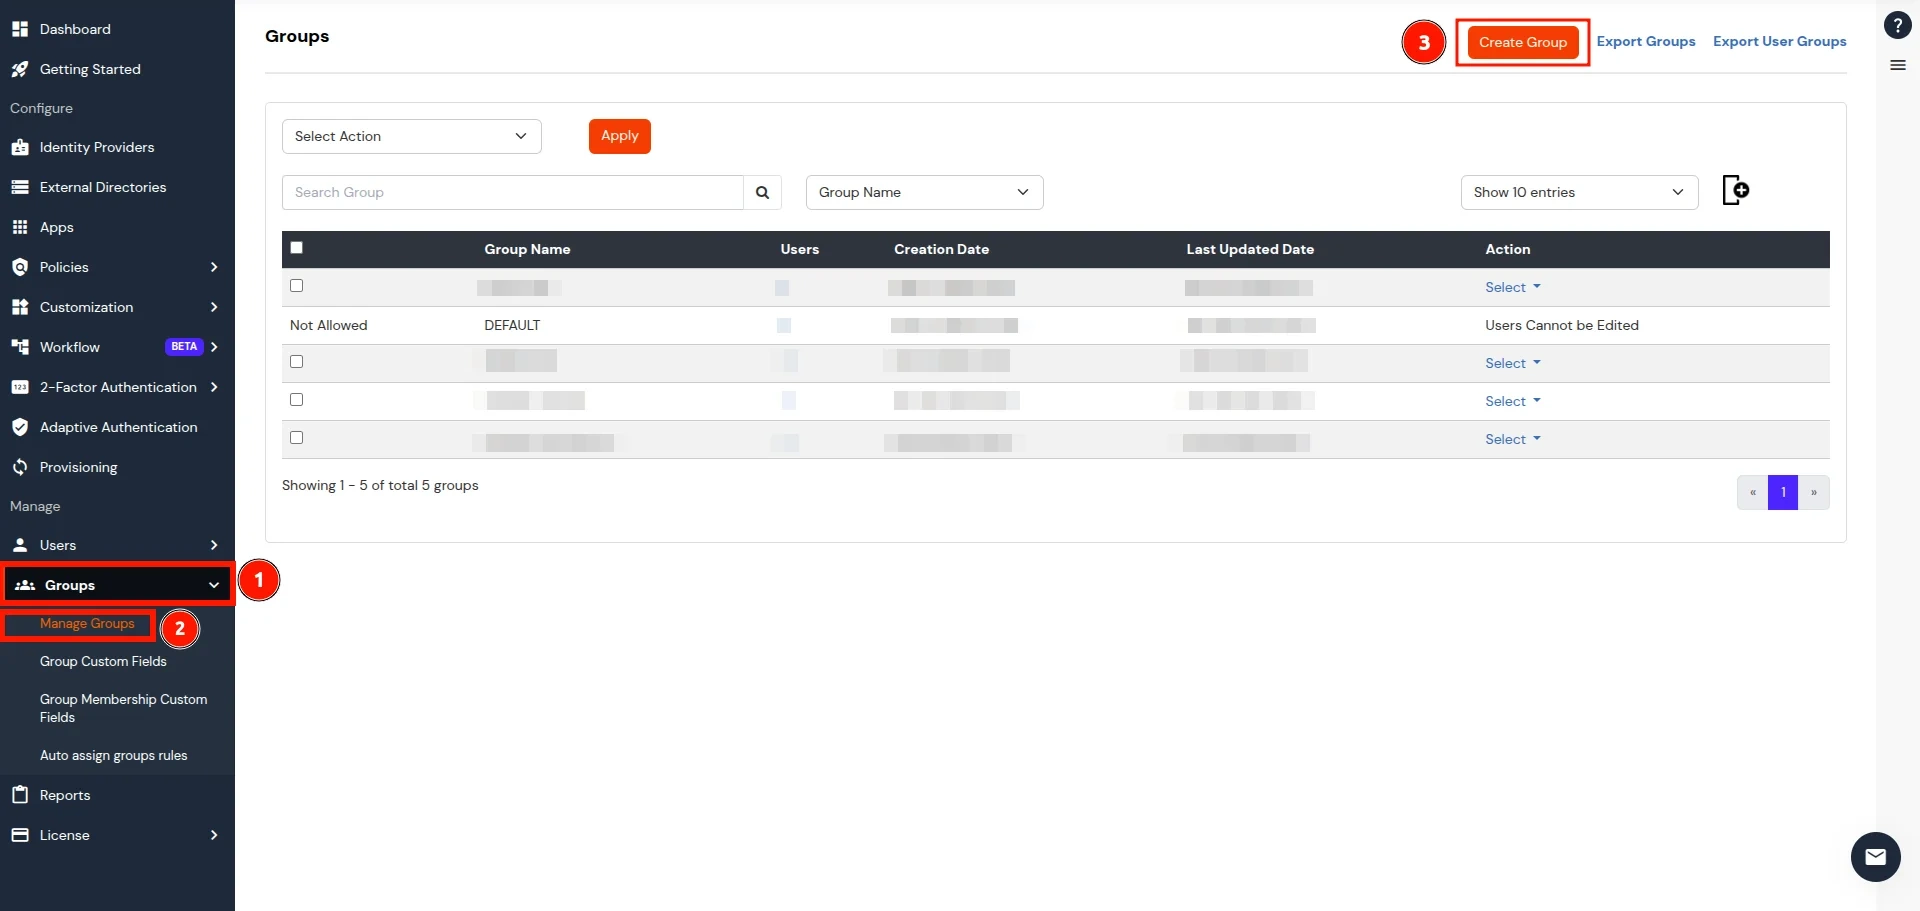
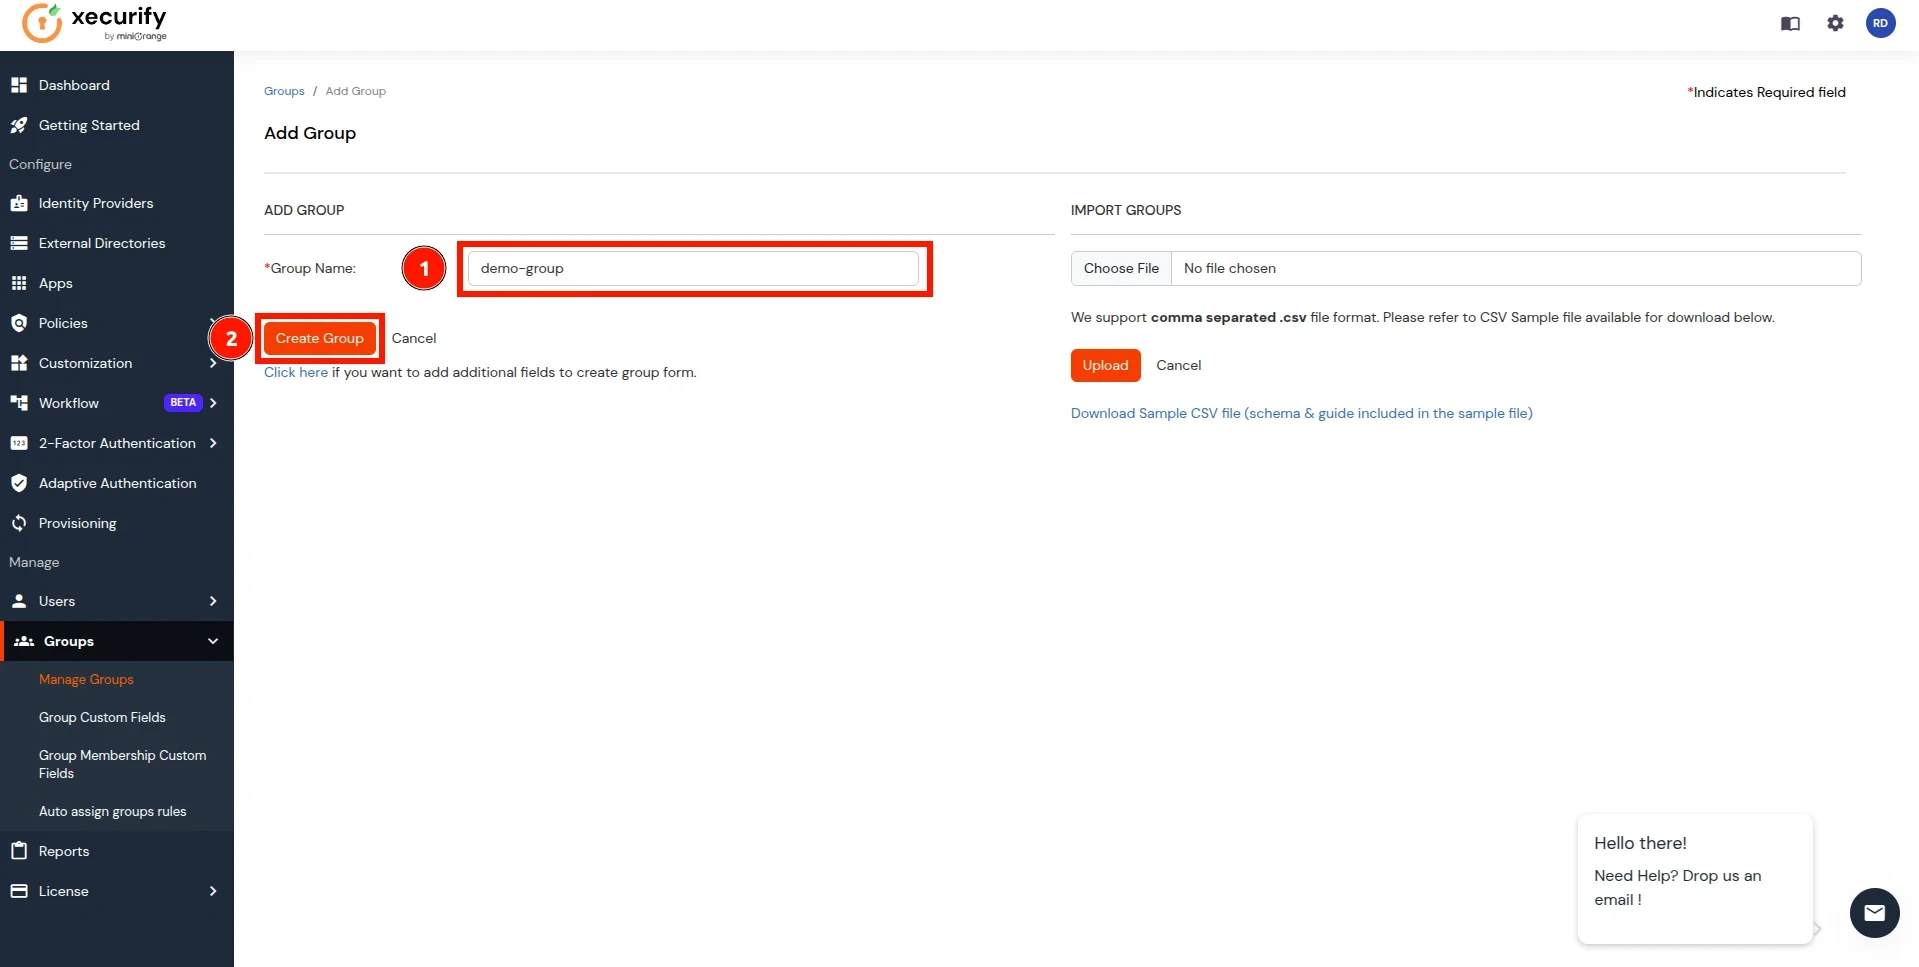
- Now go to the Groups tab, select Manage Groups, and click on the Create Group button.
- In the Add Group section, enter a name for the group in the Group Name field and click on the Create Group button.
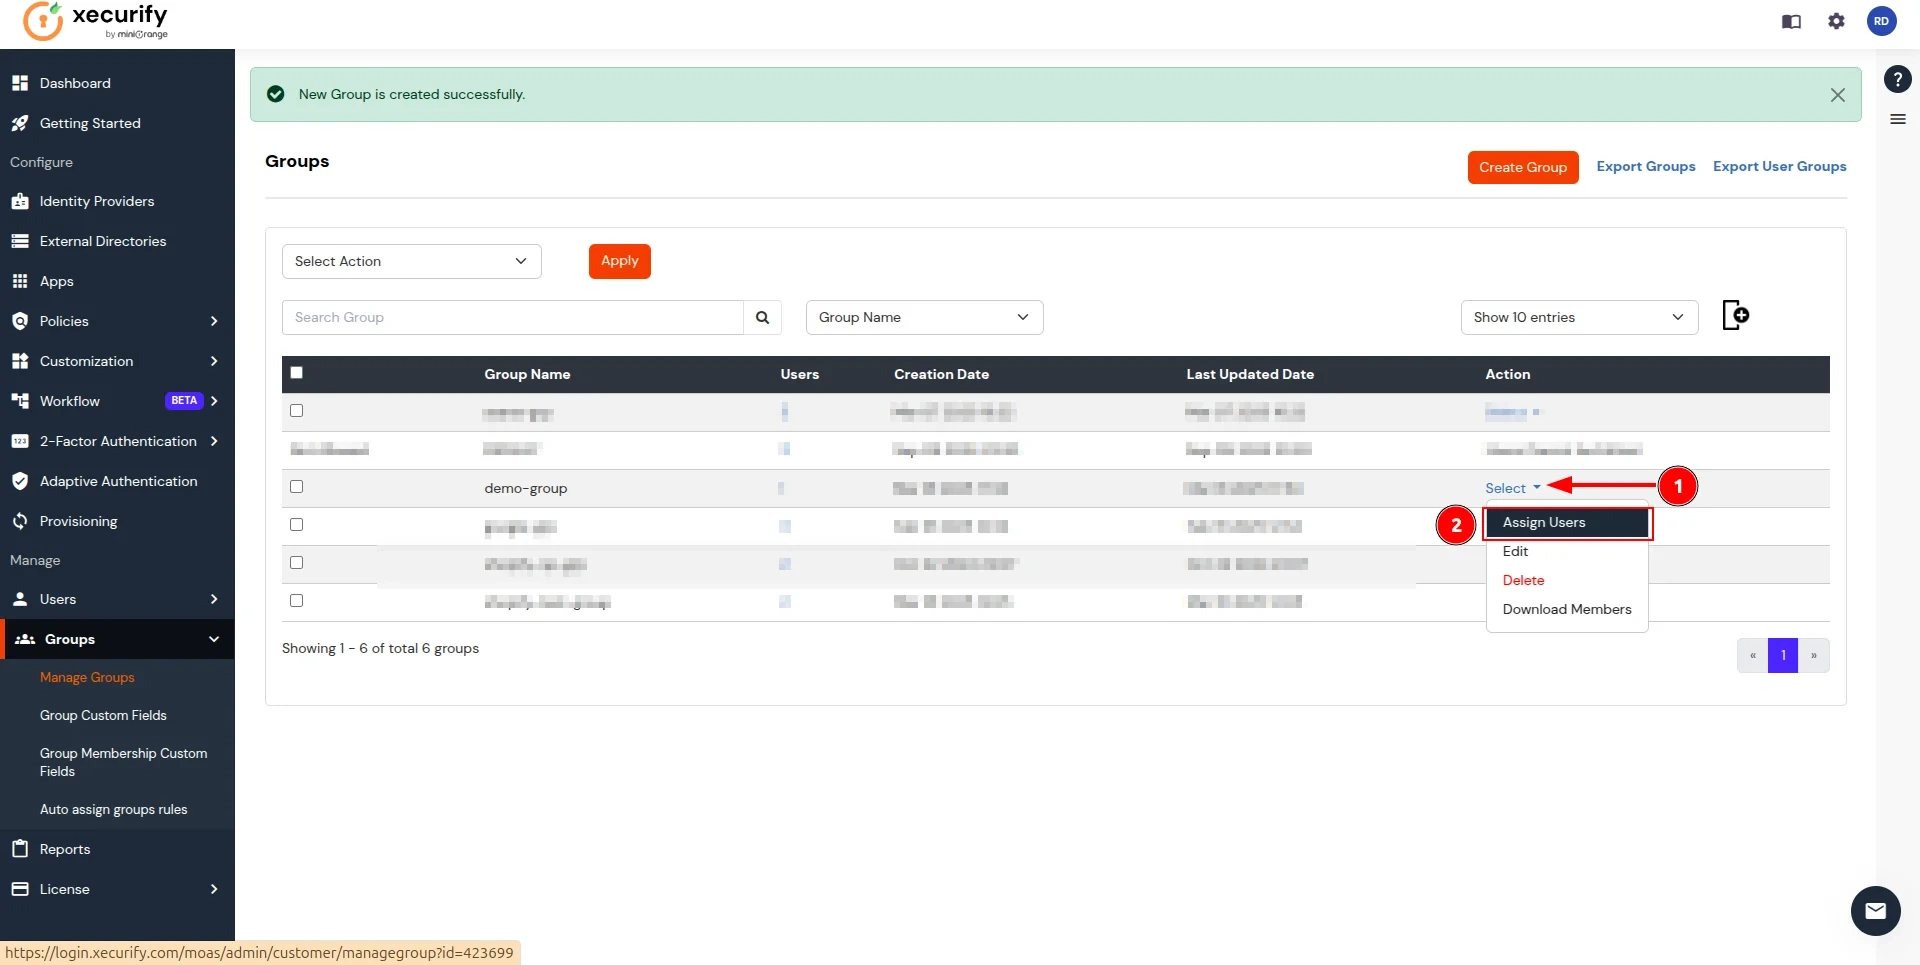
- In Groups listing, search for the newly created group and click on the select button next to it. Click on Assign Users option in the dropdown.
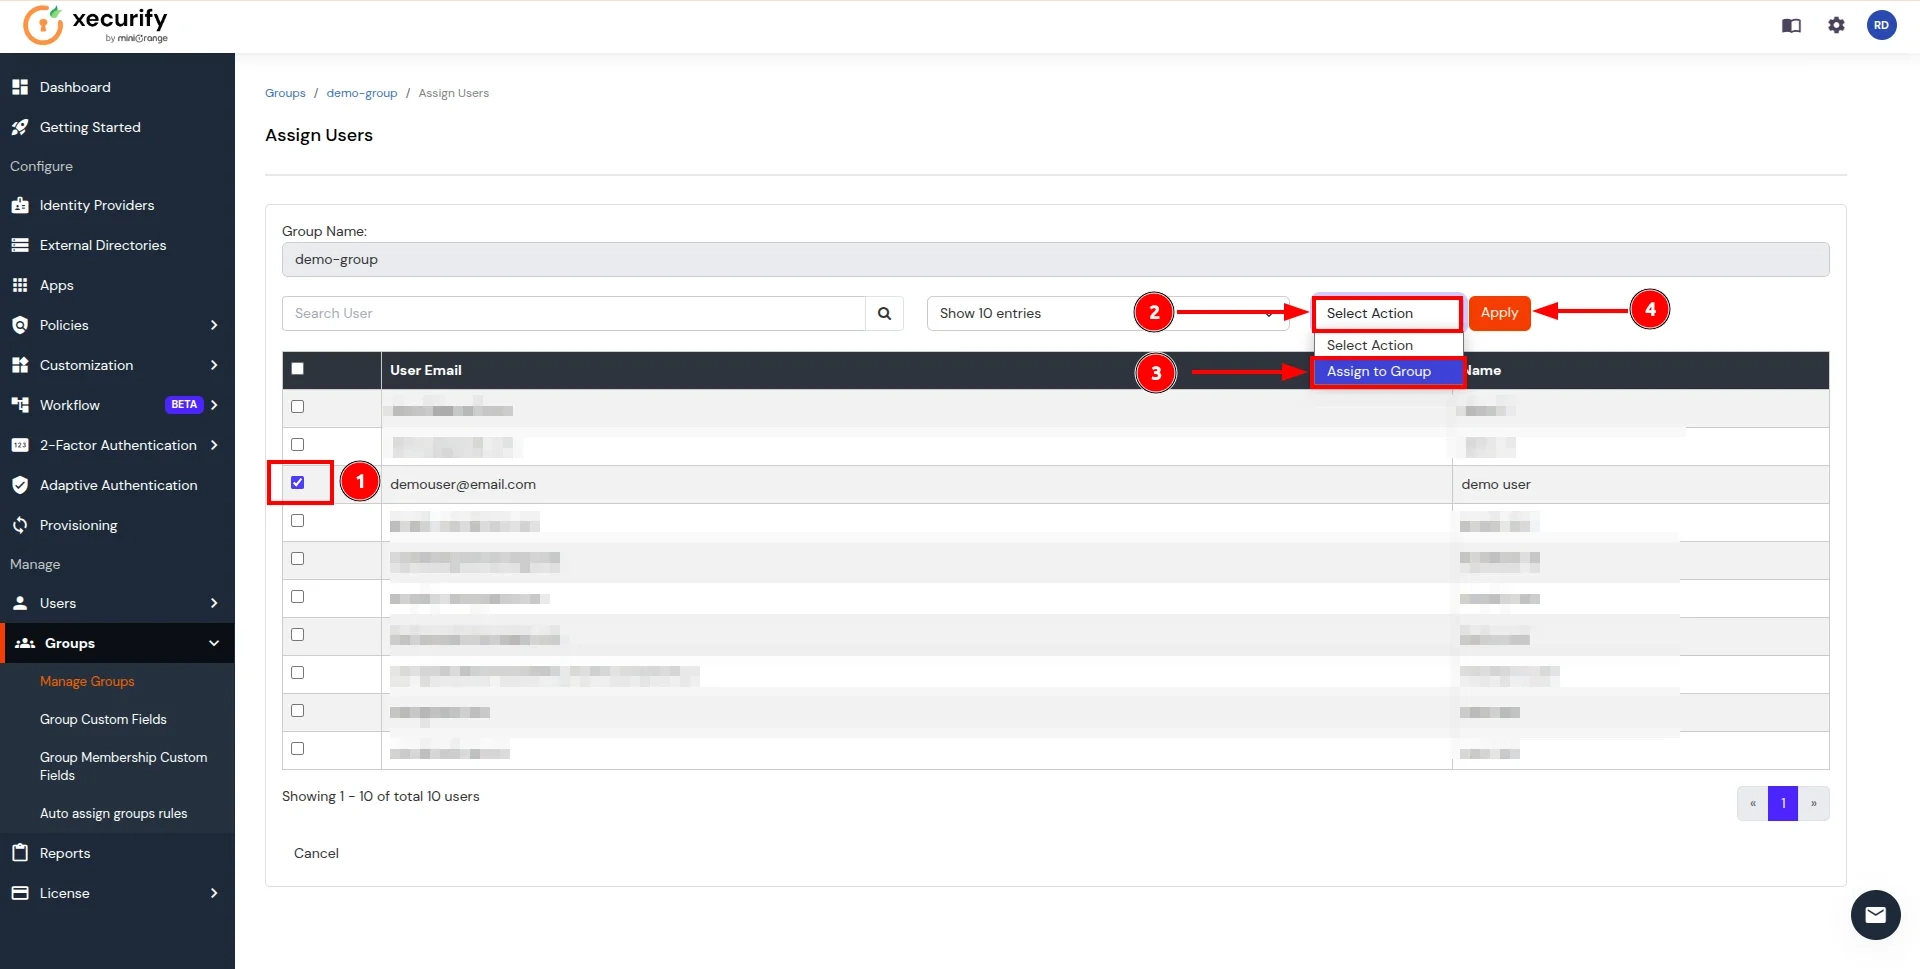
- On the Assign Users page, follow these steps:
- Select the users you want to add to the group.
- Click on the Select Action button and choose Assign to group.
- Click Apply to add users to the group.
- Now, return to the CASB Dashboard and click on Edit in the action button for the Authentication Source.
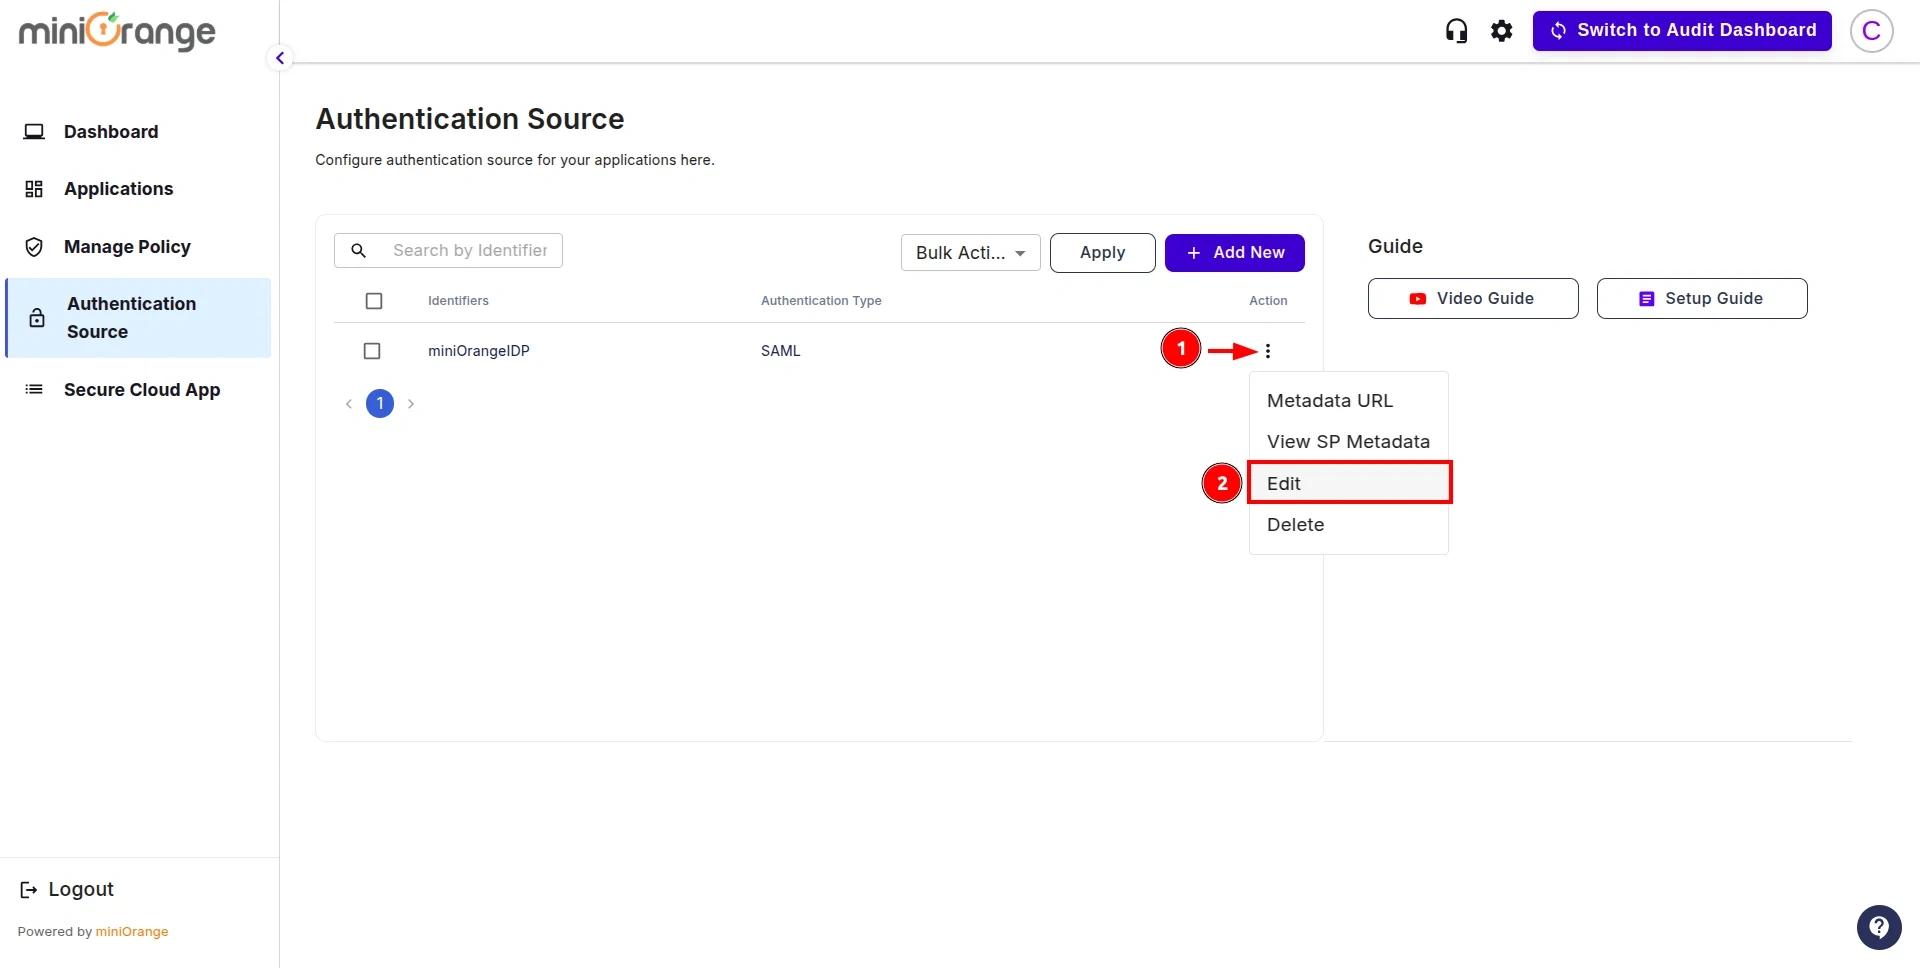
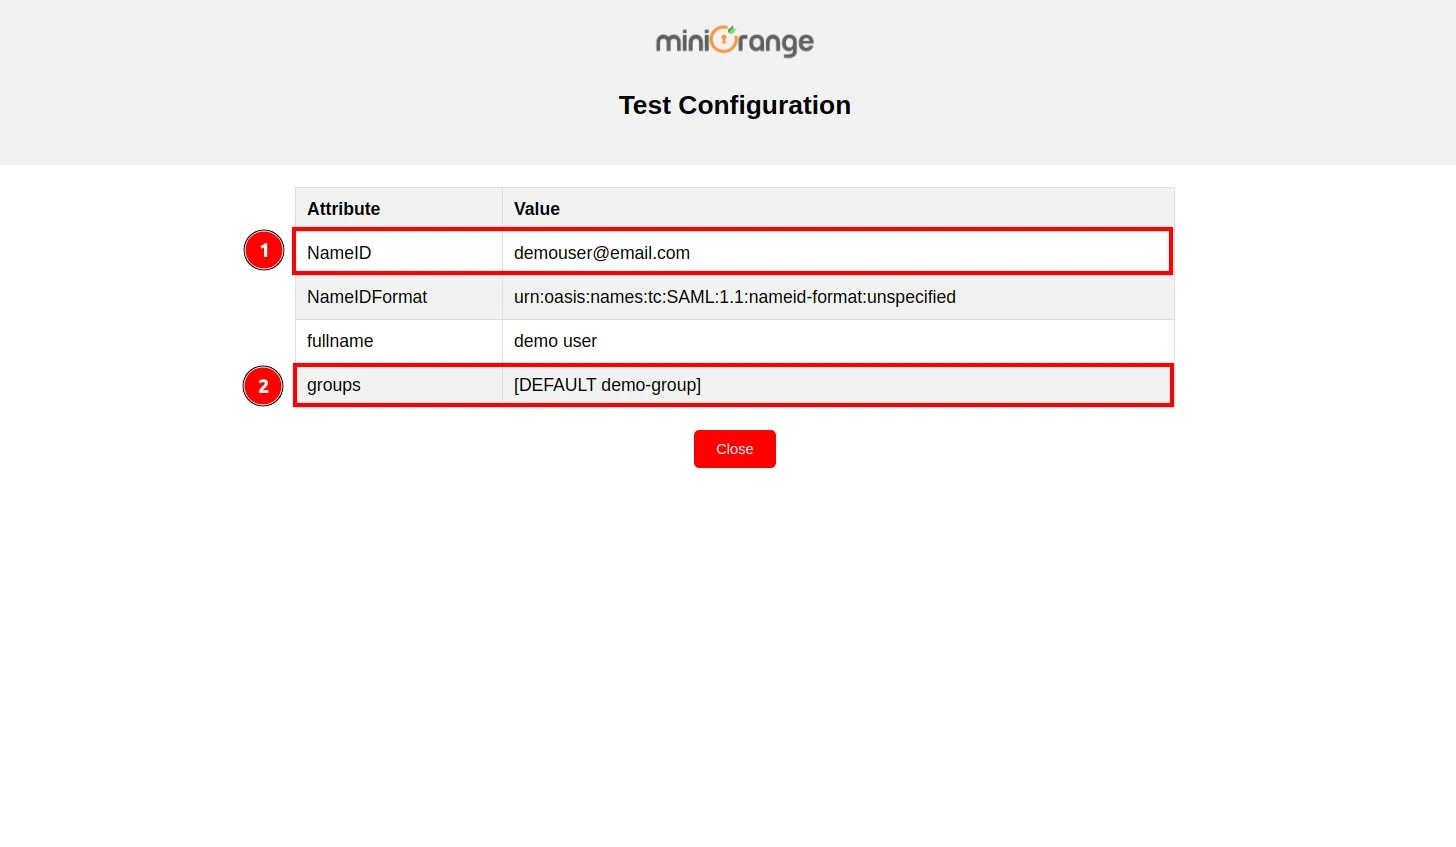
- Click on the Test Connection button.
- You will be redirected to the miniOrange IDP Sign-In screen. Enter the credentials for the user added in the previous steps.
- After successful authentication, you will see a screen displaying Test Connection Details. On the left side, you will find attribute keys, and on the right side, their corresponding values. The values marked 1 and 2 will be used in later configuration steps for one-to-one or many-to-one mappings.
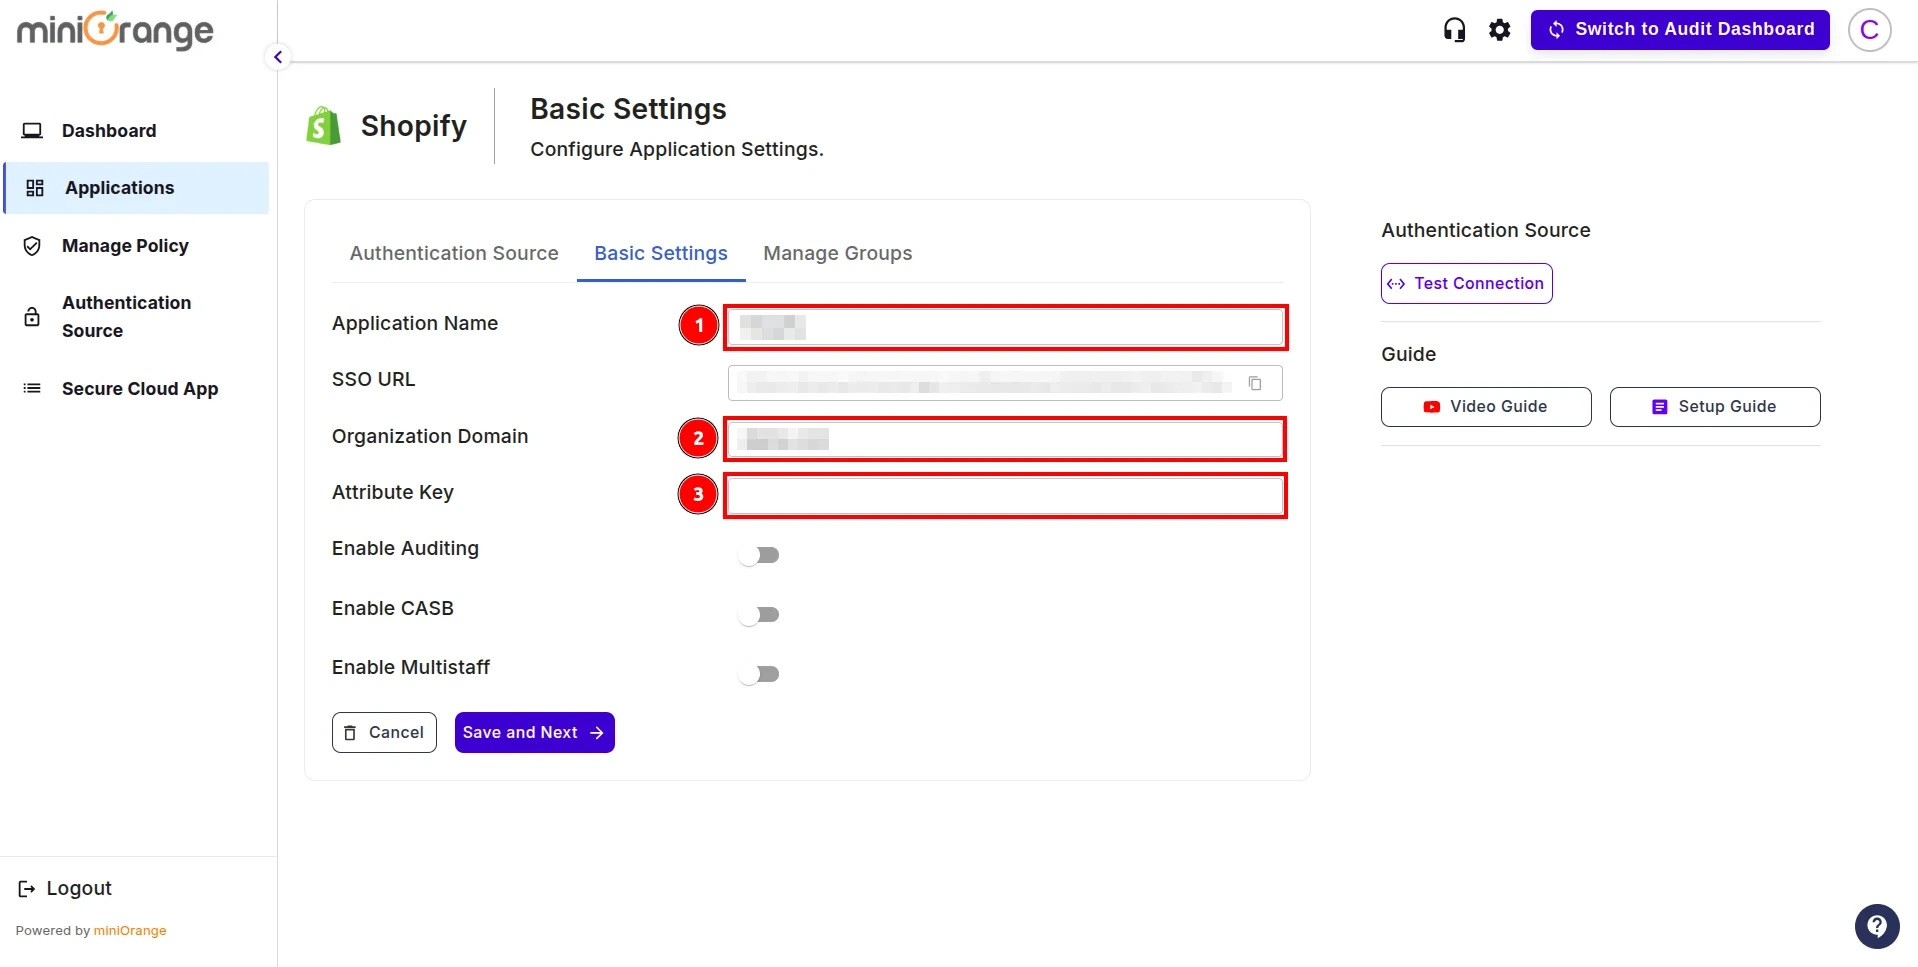
Step 3: Configure Shopify App in CASB
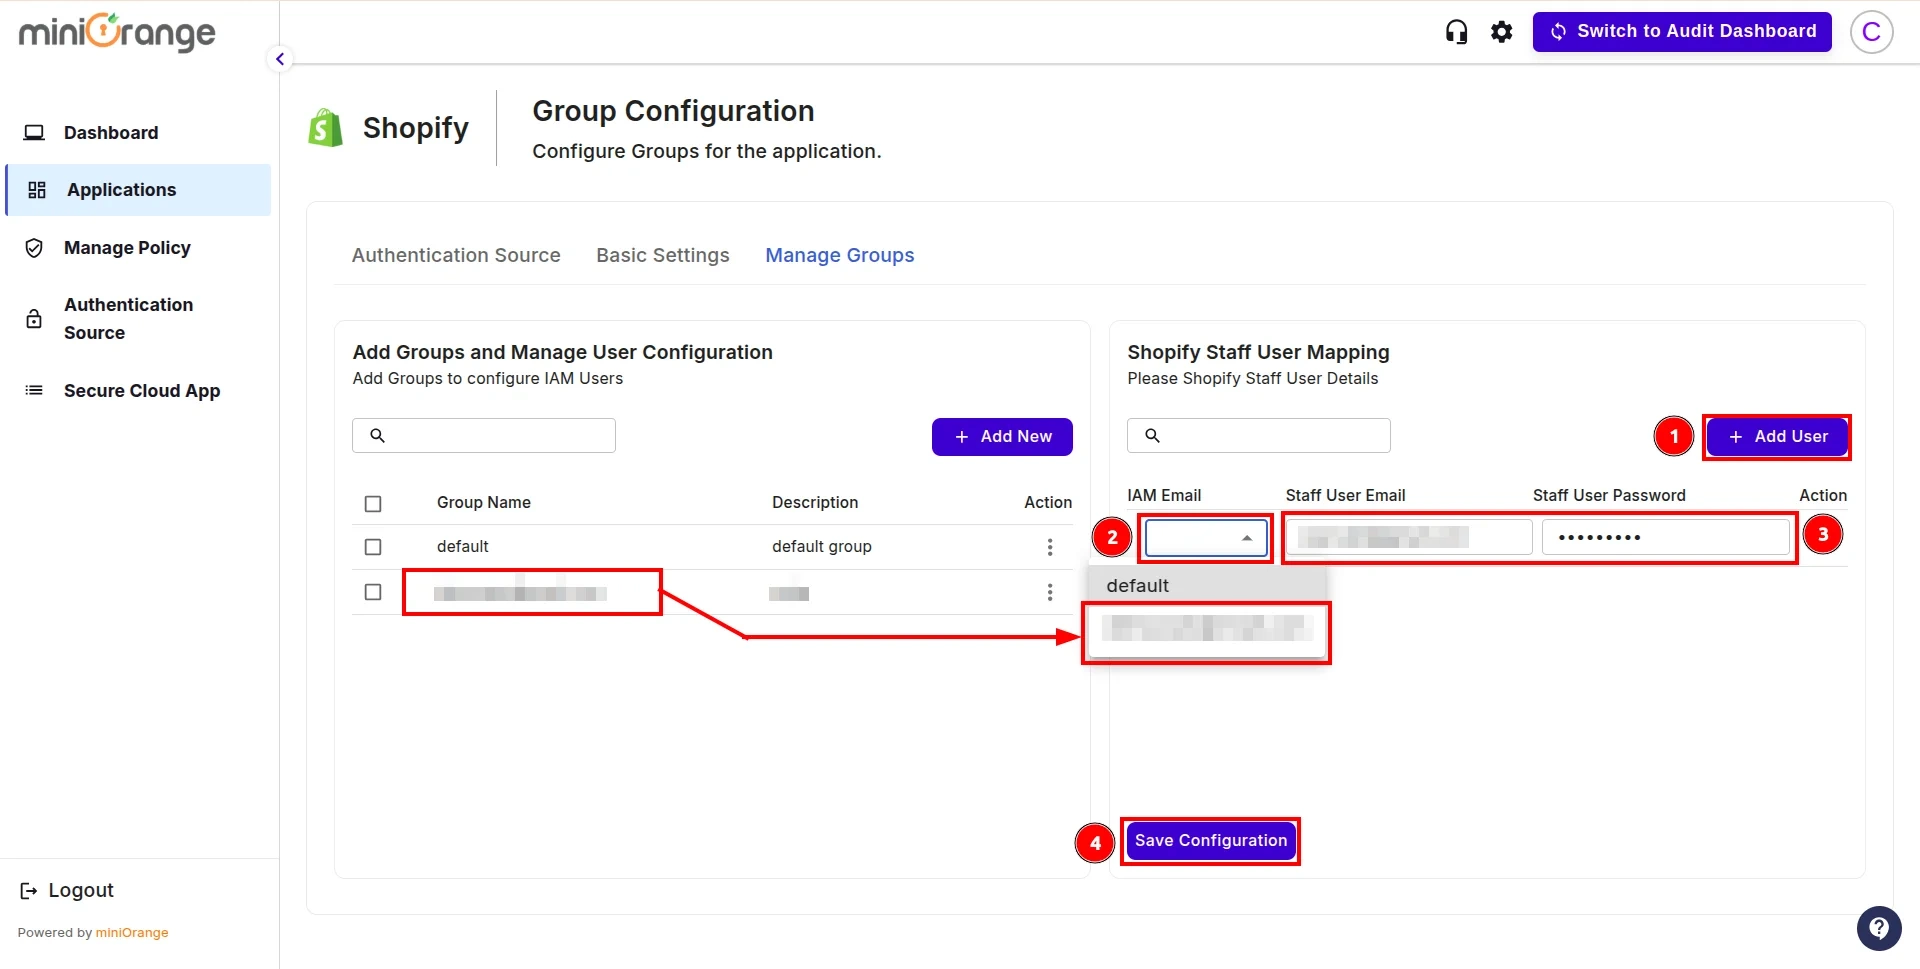
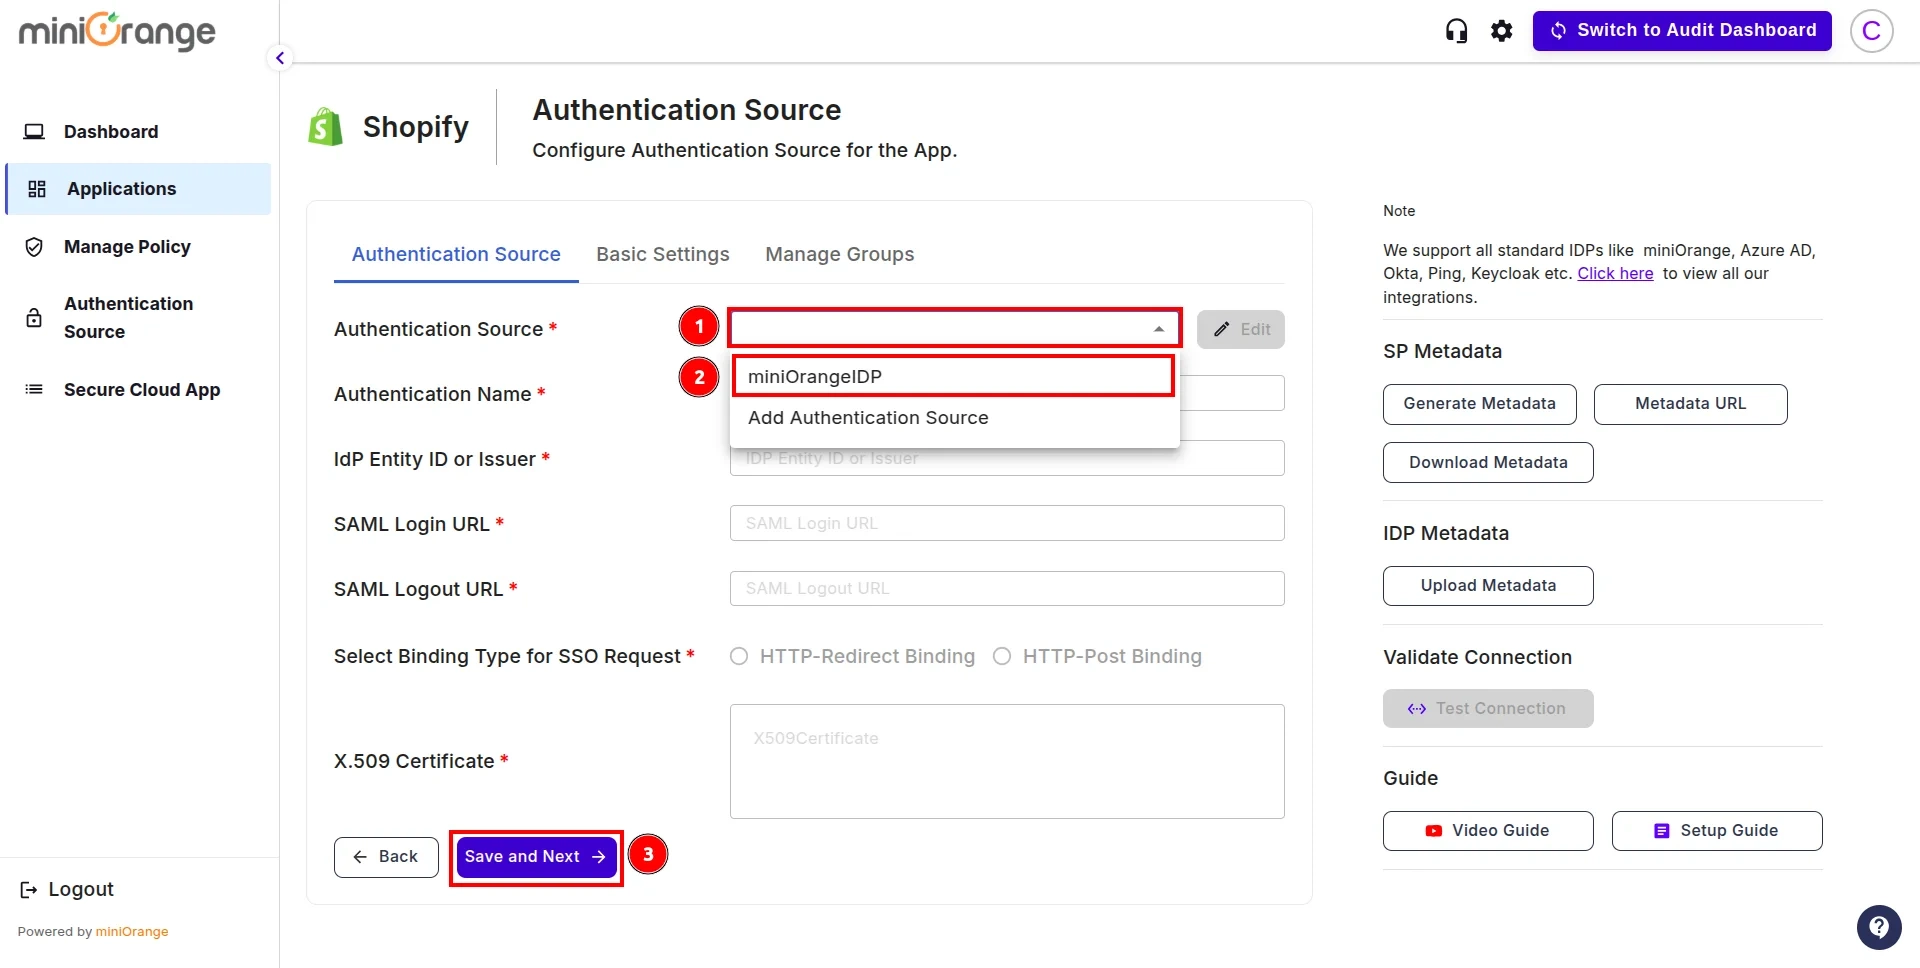
- Now , navigate to the Applications section from the sidebar, go to Shopify, and click on Configure.

- In this section, open the Authentication Source dropdown, select the authentication source you created earlier, and click Save and Next.
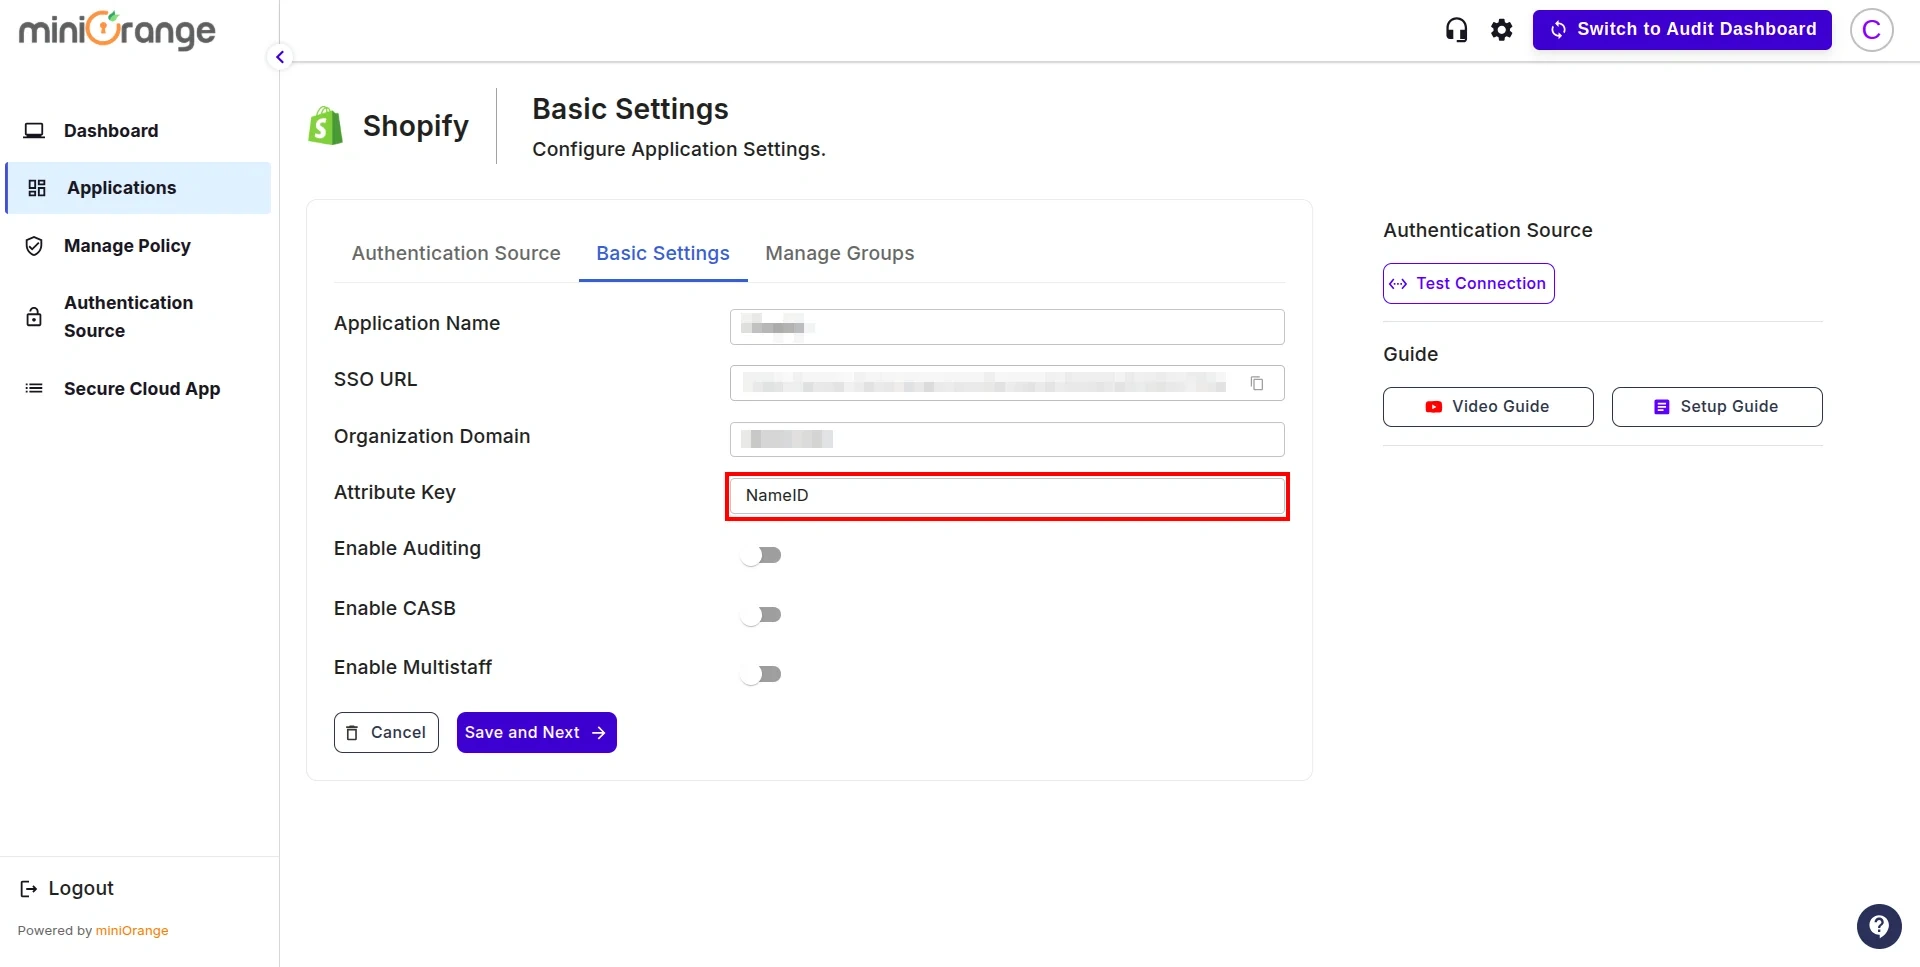
- Enter the Application Name and your Store Domain. For the Attribute Key, refer to the values from Step 2.
- In the next step, you have two options:
1. One-to-One Mappings: Choose this option if you want to map a single user from your IAM (Identity and Access Management) system to a single Shopify store admin user.
This ensures that only the designated IAM user has access to the Shopify admin account.
2. Many-to-One Mappings: Choose this option if you need to map multiple IAM users to a single Shopify store admin user.
This is useful when multiple team members need to share the same Shopify admin account while maintaining authentication through IAM.
-
One-to-One Mappings
-
Many-to-One Mappings
One to One Mappings :
- For One-to-One Mapping, enter the Attribute Key’s Name for the email address from the first field as shown in Step 2.
Many to One Mappings :
- For Many-to-One Mapping, enter the Attribute Key’s Name for group identifier from the first field as shown in Step 2.

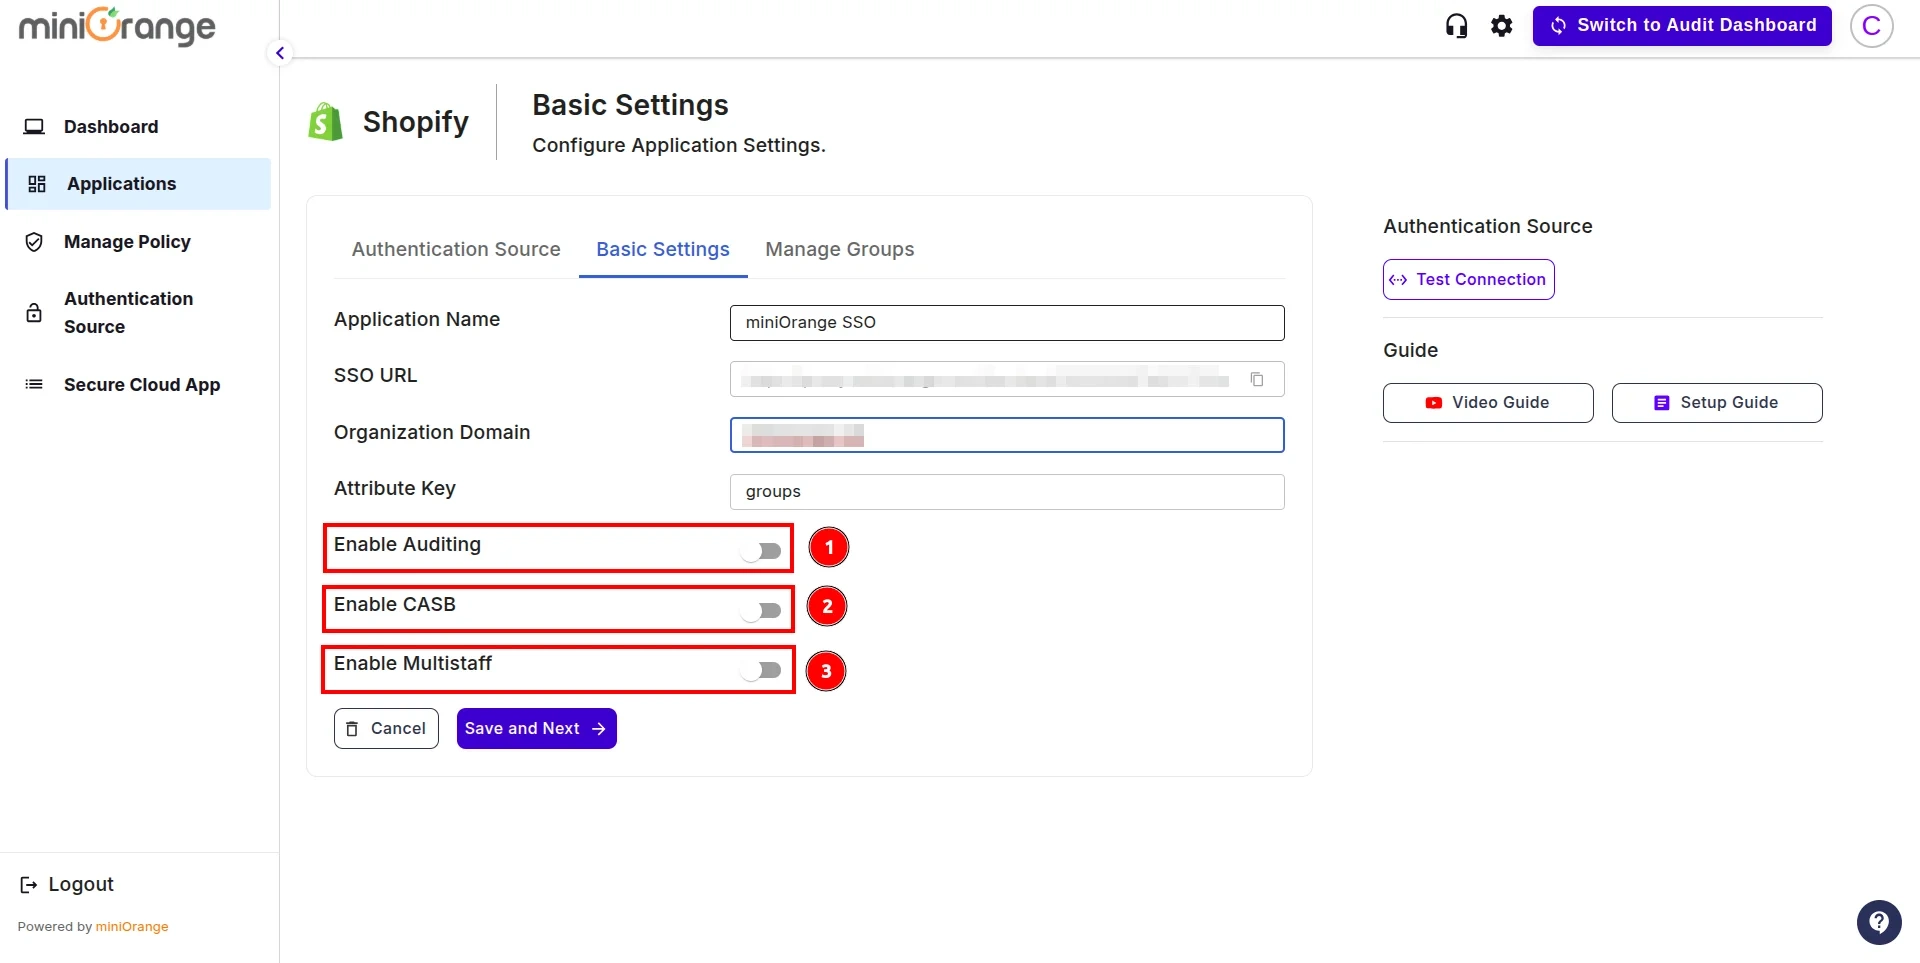
- Follow the guidelines below for the configurations and click Save:
- Enable CASB: Turn this on if you want to enforce restriction policies on your Shopify Store Admin.
- Enable Auditing: Enable this option to track policy breaches in the Shopify Store Admin
(Note: CASB must be enabled for this feature to work).
- Enable Multistaff: Activate this if you are using Many-to-Many Mappings, allowing multiple IAM users to be mapped to multiple Shopify store admin accounts.
Step 4: User based mapping
- In the next configuration step, you will map users based on one of the following options:
-
One-to-One Mappings
-
Many-to-One Mappings
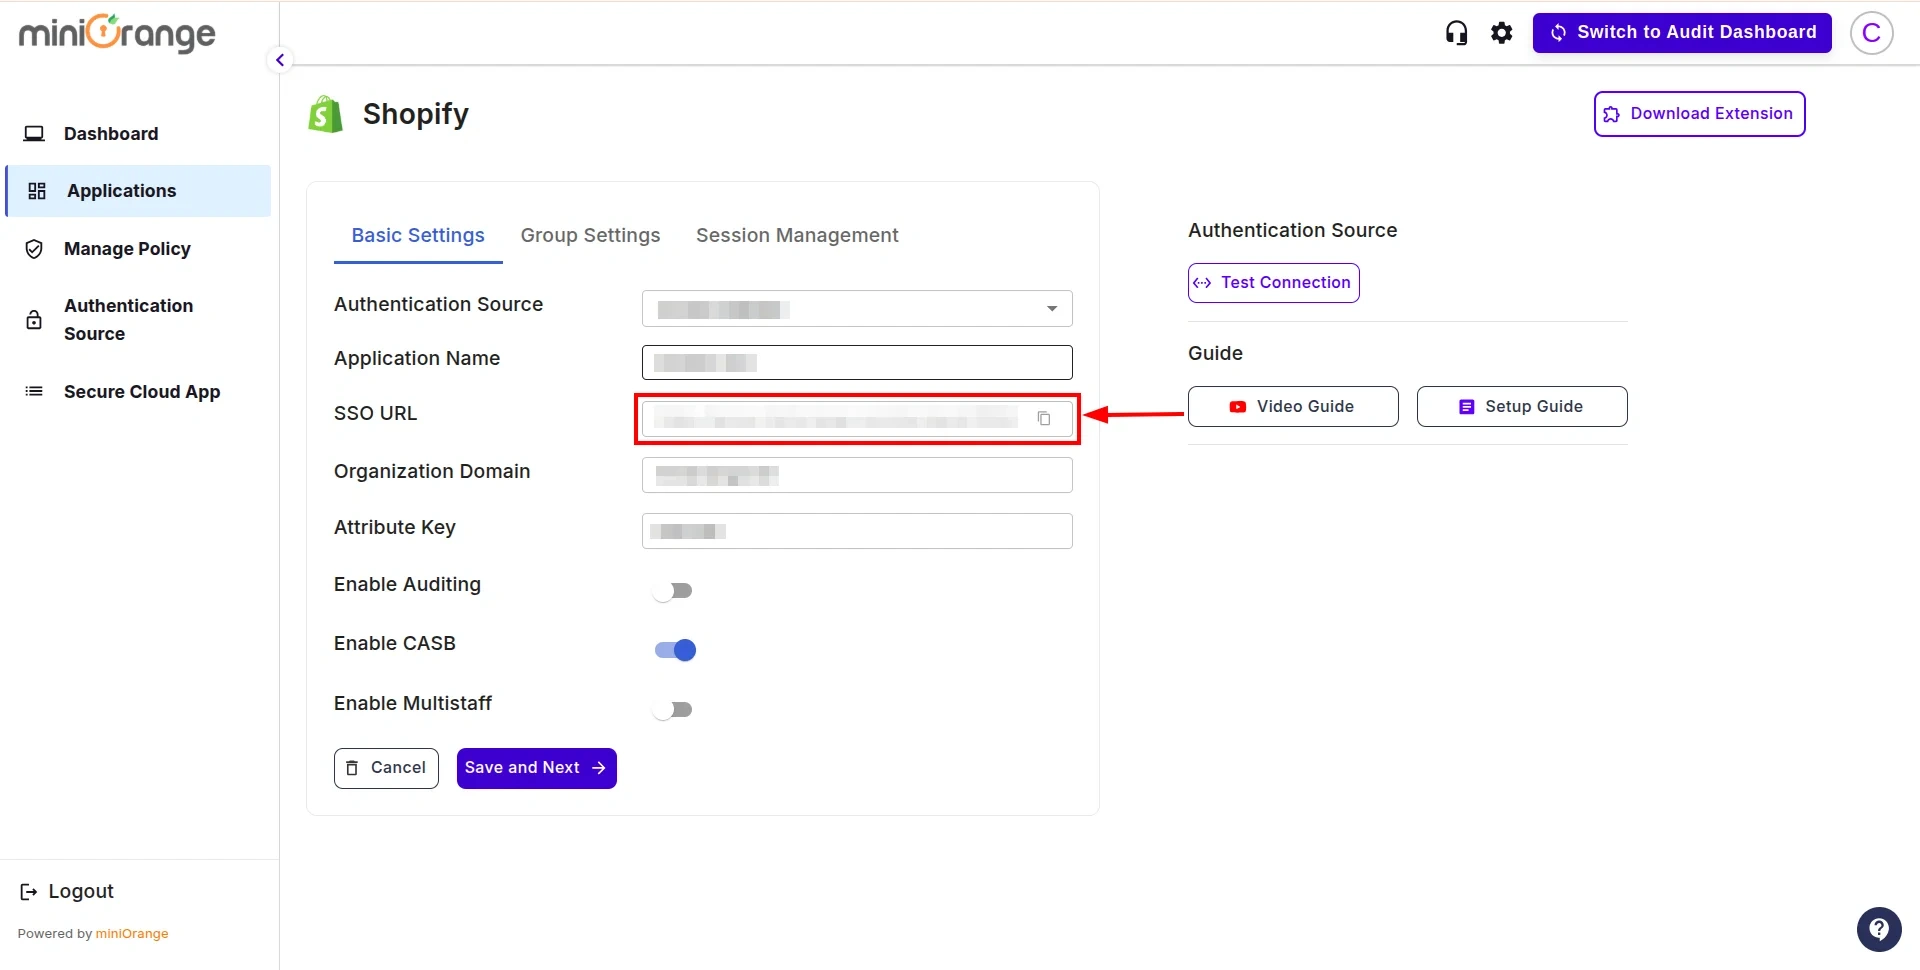
- Now that the Single Sign-On (SSO) configuration on the Admin side is complete, you will need the SSO URL, as shown in the image. This URL must be configured in the miniOrange CASB extension.
- Now, we will proceed with the User Onboarding Process. Follow this guide to complete the setup.
Not able to configure or test Shopify Non-Plus Admin SSO with your Identity Provider?
For this, you need to Contact us or email us at uemsupport@xecurify.com and we'll help you setting it up in no time.
External References
miniOrange CASB offers a wide variety of security features with flexible scalability, all available at the most affordable price to all types of businesses. Start by signing up now!