Setup Shopify Non-Plus Admin SSO with Microsoft Entra ID (Azure AD) as IDP
In this guide, you'll learn how to set up SSO into your Shopify Non-Plus admin using Microsoft Entra ID (Azure AD) Credentials. Get deep visibility, dynamic access restrictions, active threat detection, and granular access control on your Shopify store. Our Shopify CASB Solution allows you to secure your Shopify Admin by configuring IP Restrictions, Device Restrictions, and Country Restrictions features. Implementing Shopify SSO with Microsoft Entra allows users to access Shopify using their Entra ID credentials while maintaining strict security controls.
Note: If you want to set up Shopify SSO with Microsoft Entra ID for your Shopify stores, follow the instructions in this setup guide.
Step 1: Sign up with miniOrange CASB Dashboard
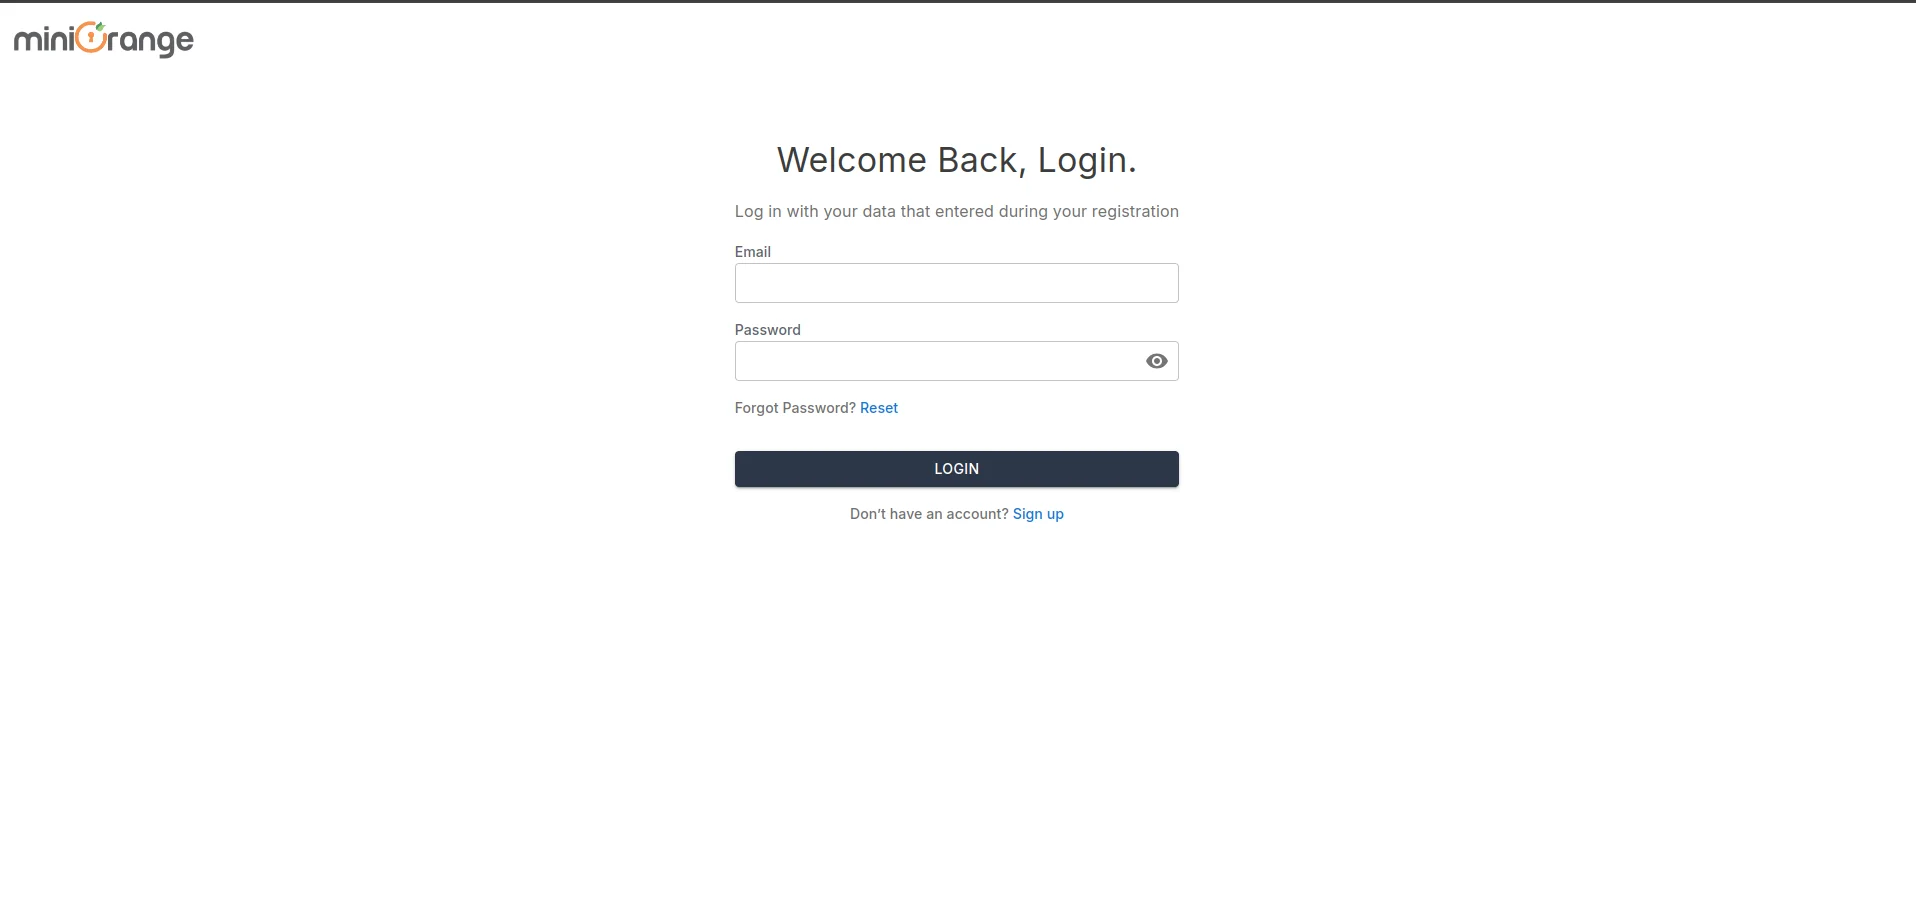
- Log in to the Cloud Access Security Broker (CASB) with your email and password.
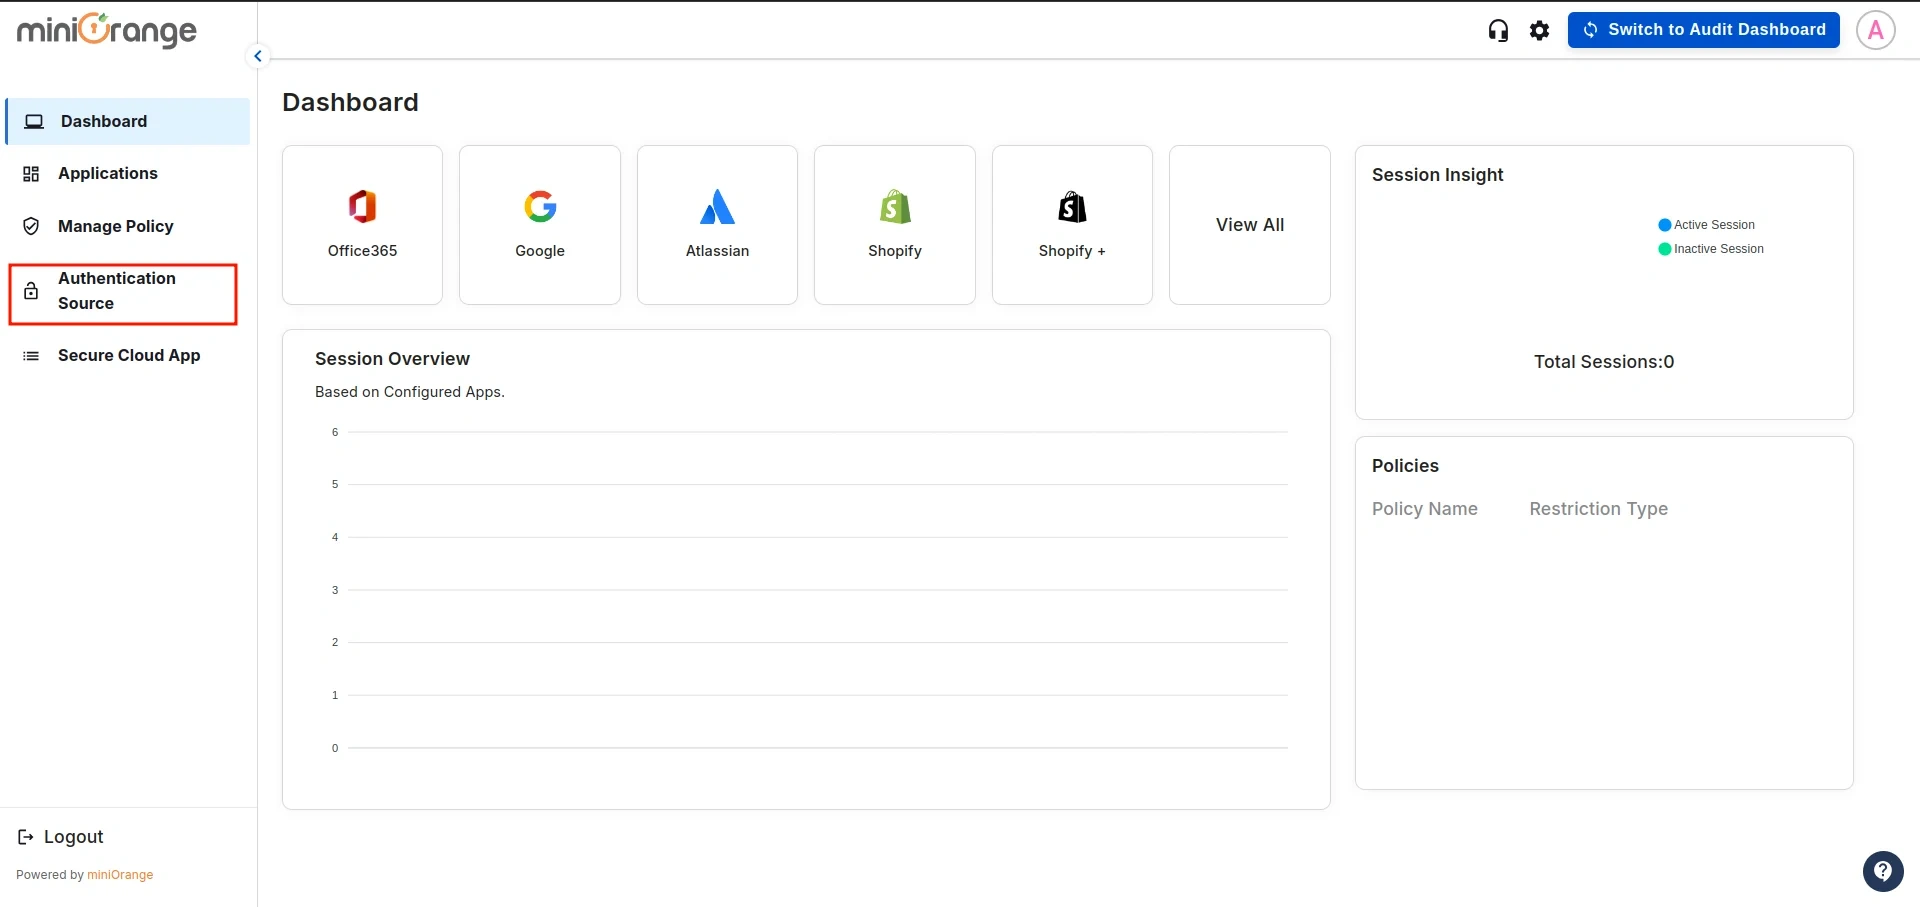
- After logging in, navigate to the Authentication Source in the left sidebar.
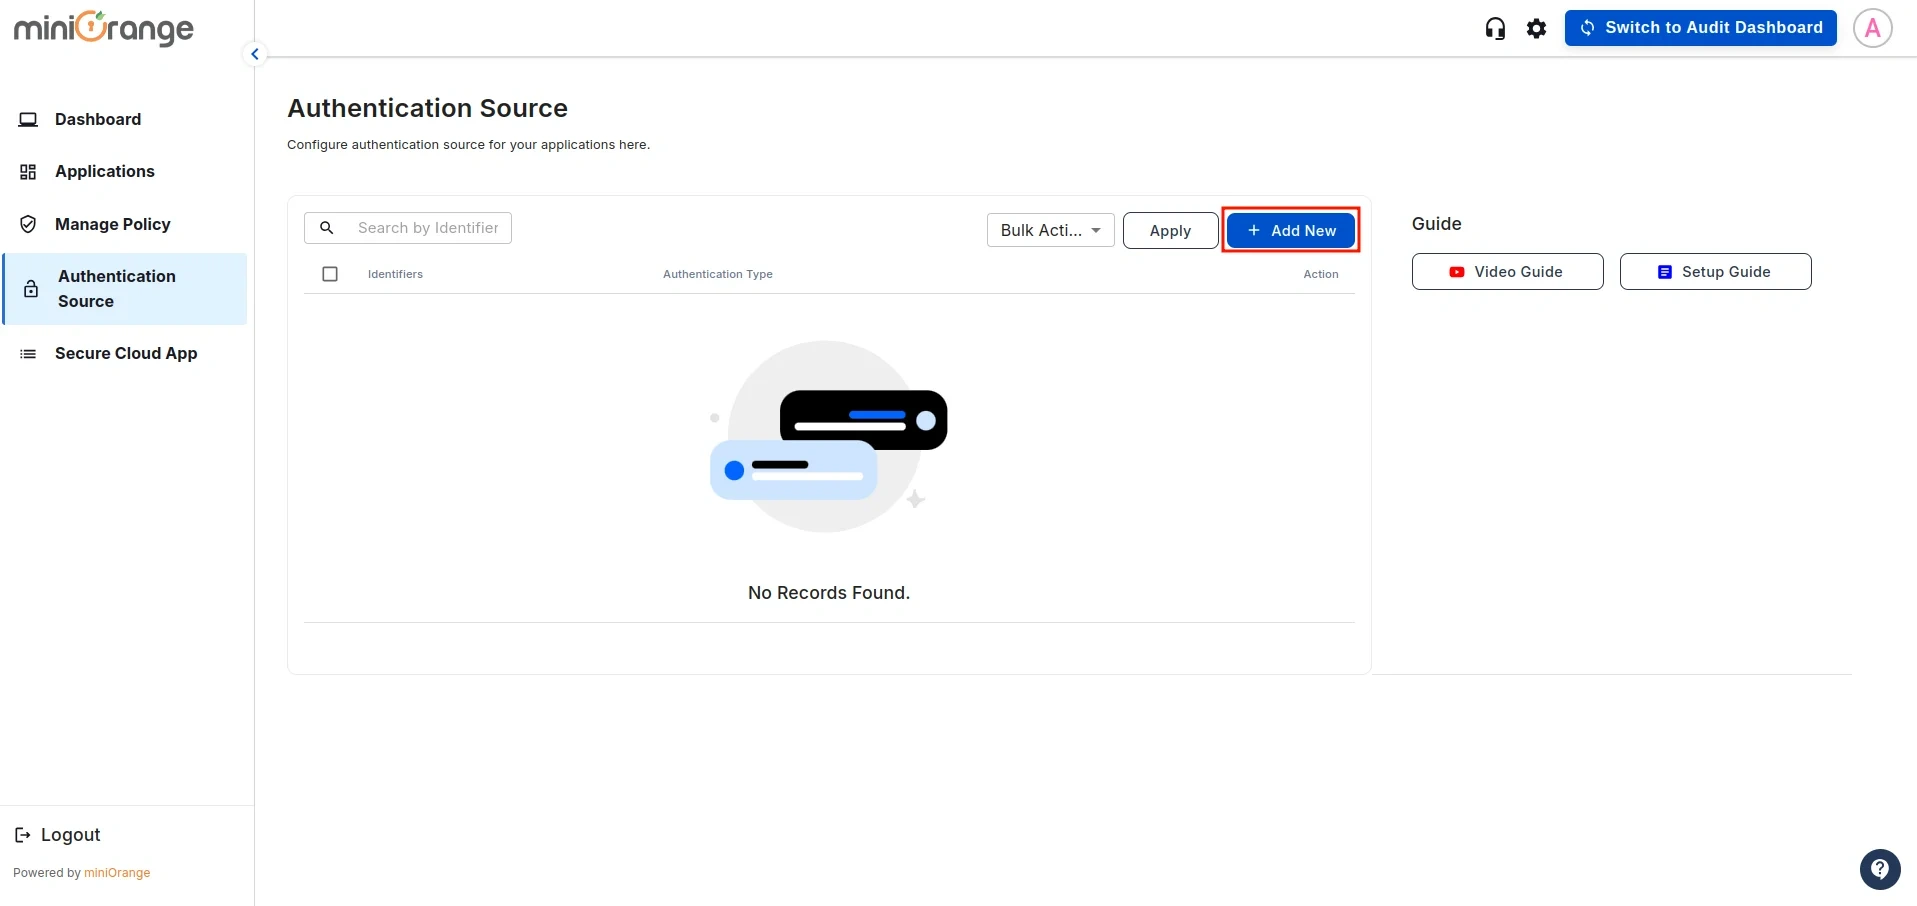
- This will display a list of all existing authentication sources configured in the CASB dashboard. Click on Add New to create a new one.
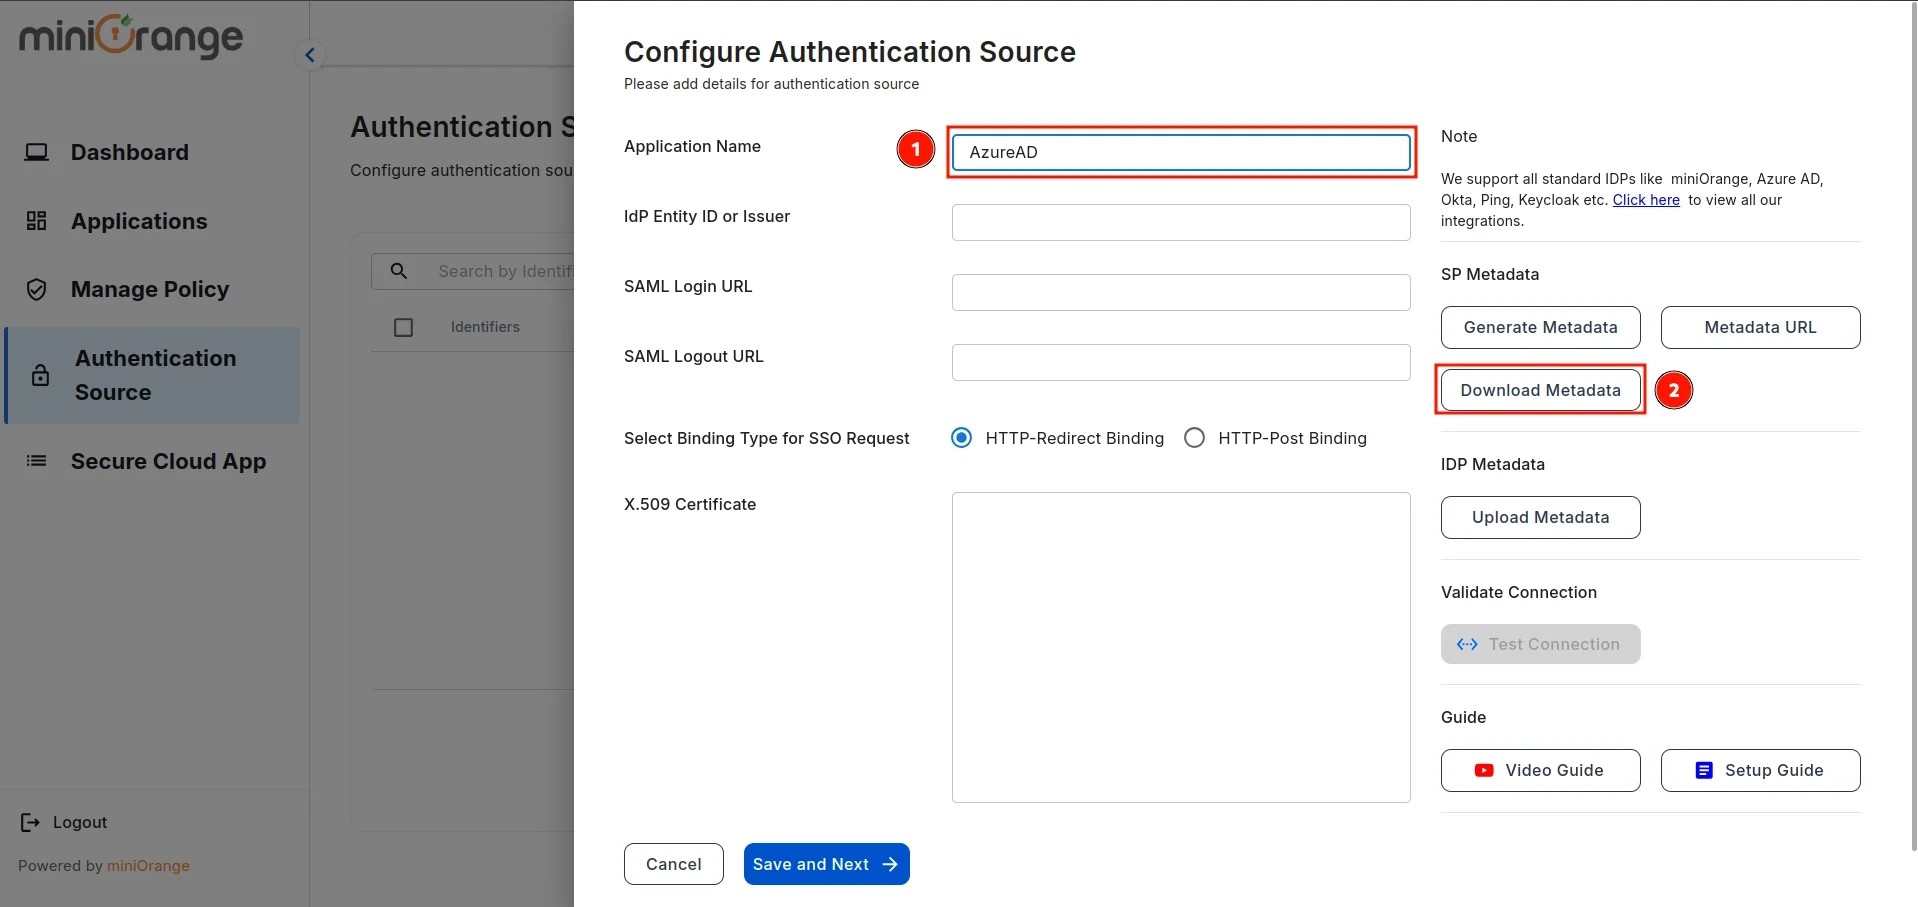
- This will open the configuration screen for the Authentication Source. Enter the Authentication Source Name and click Download Metadata.
Step 2: Setup Microsoft Entra ID (Azure AD) as IDP
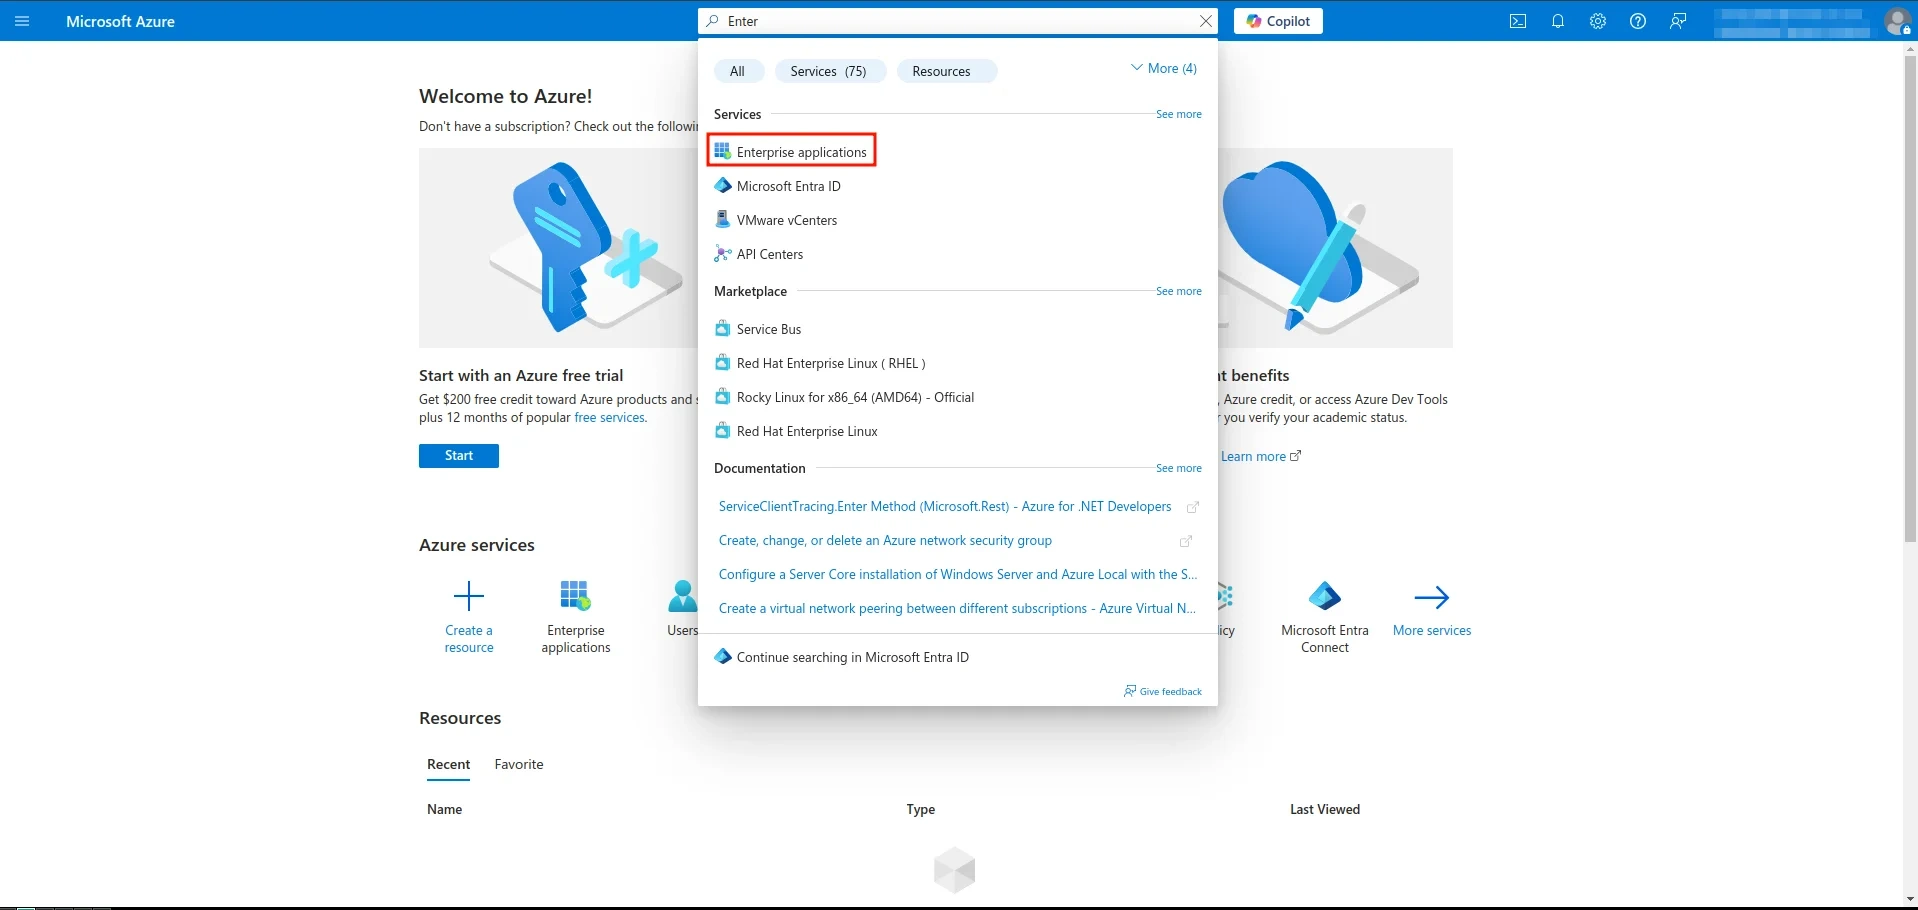
- Sign in to Microsoft Entra ID (Azure AD) and search for Enterprise Applications, as shown below.
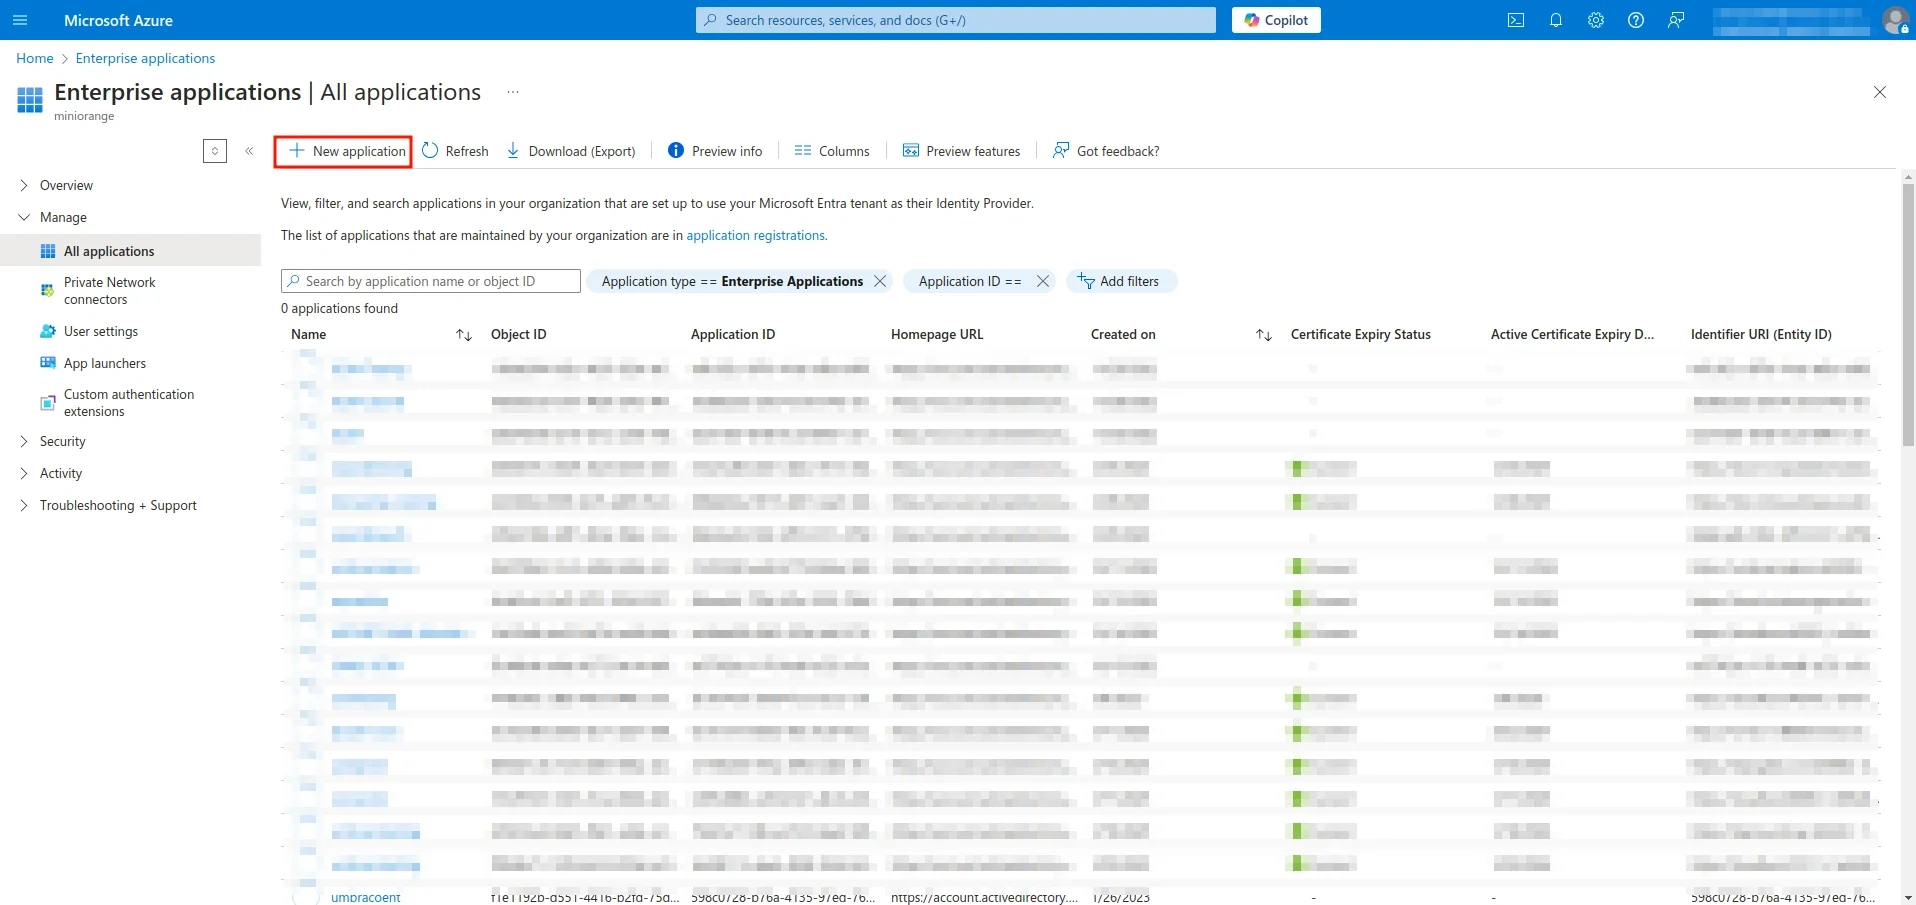
- Click on the New Application button.
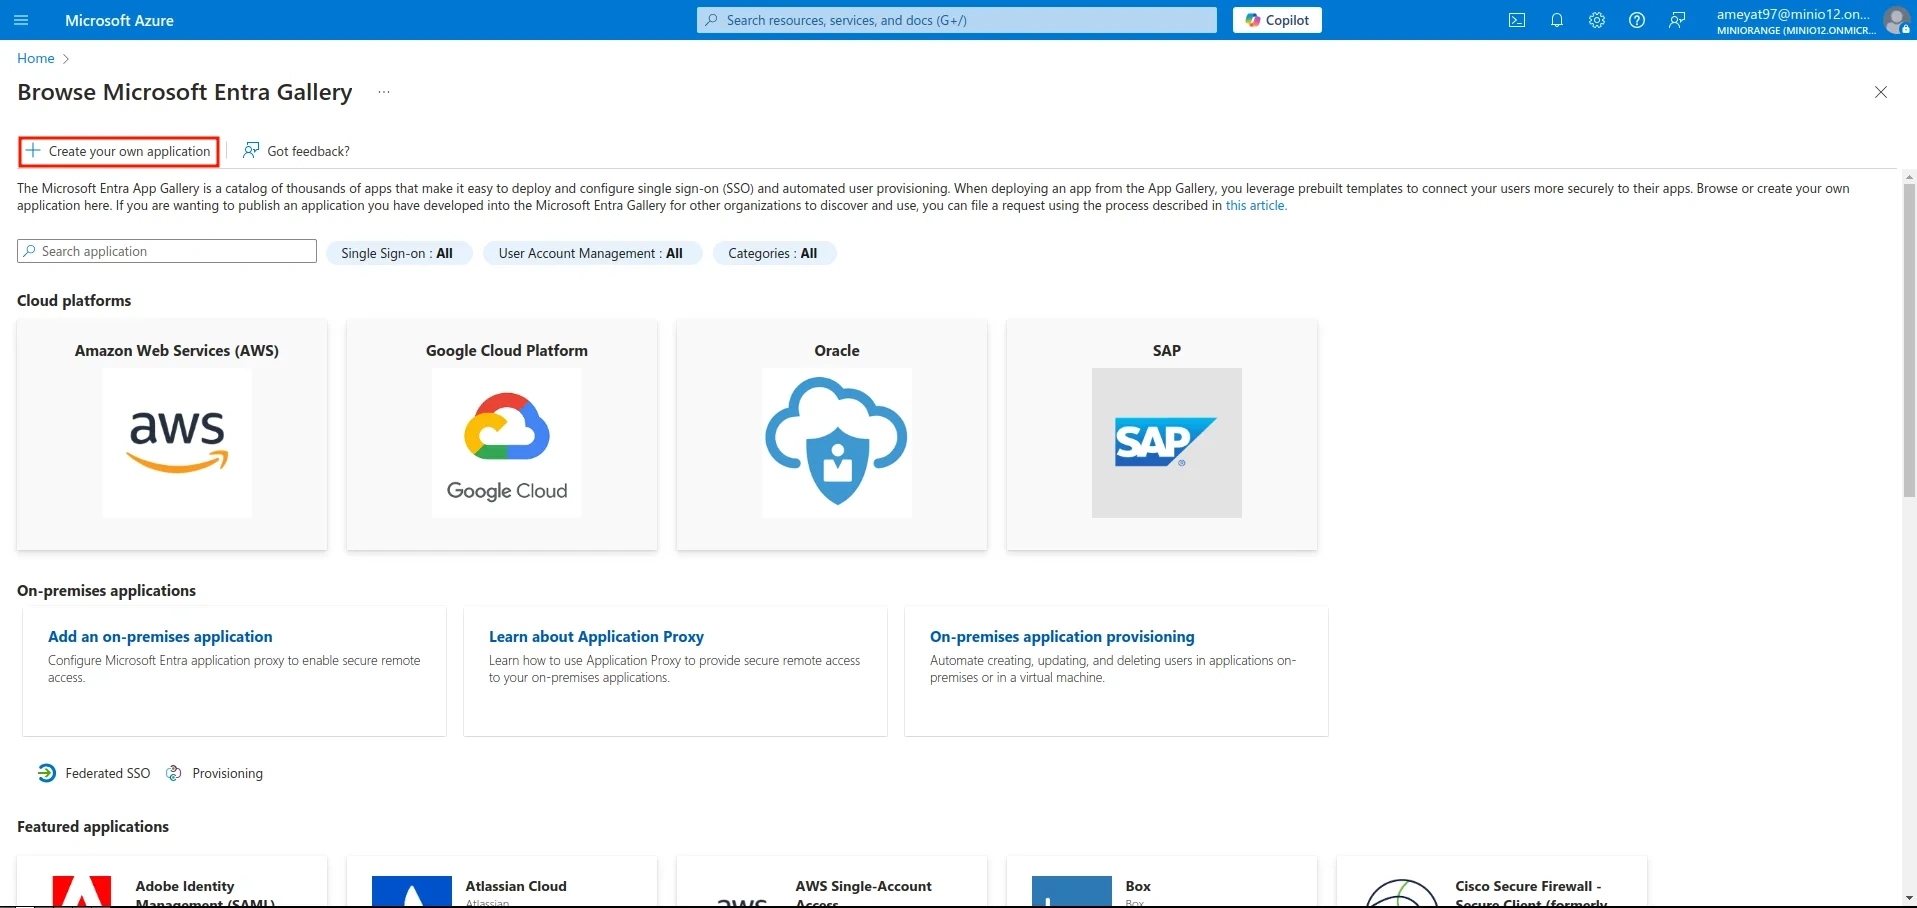
- Click on the Create your own application button.
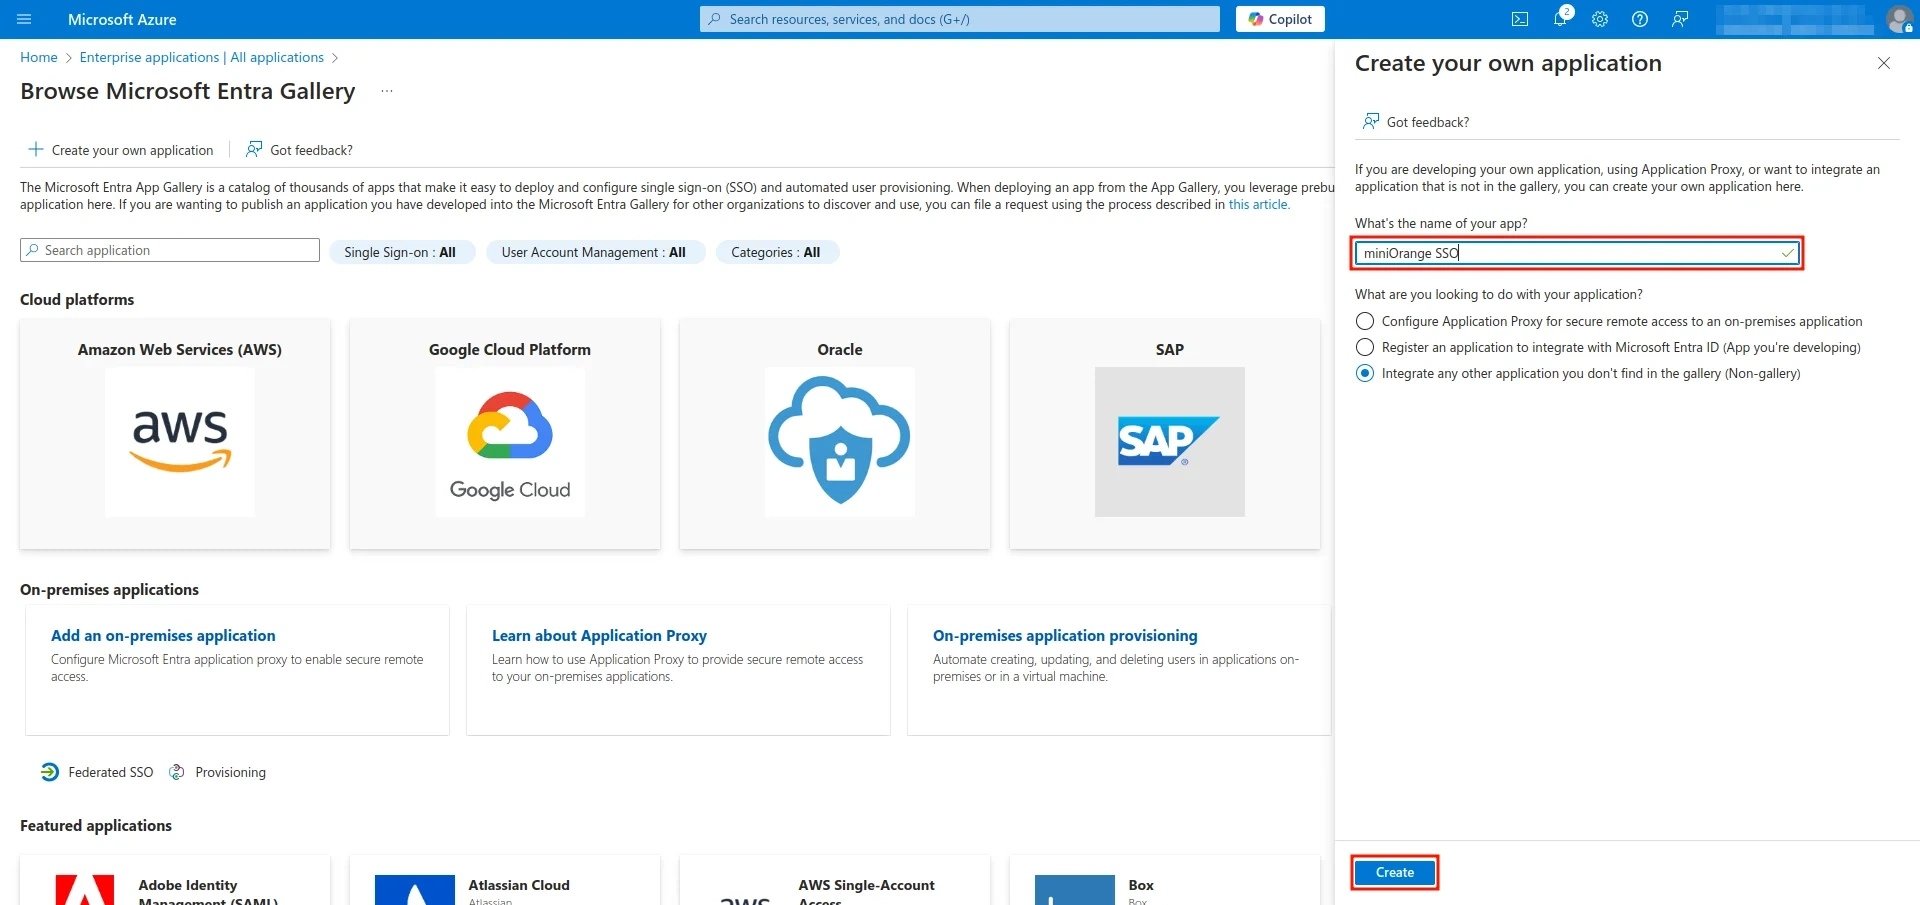
- This will open the configuration menu. Enter a name for your application and click the Create button.
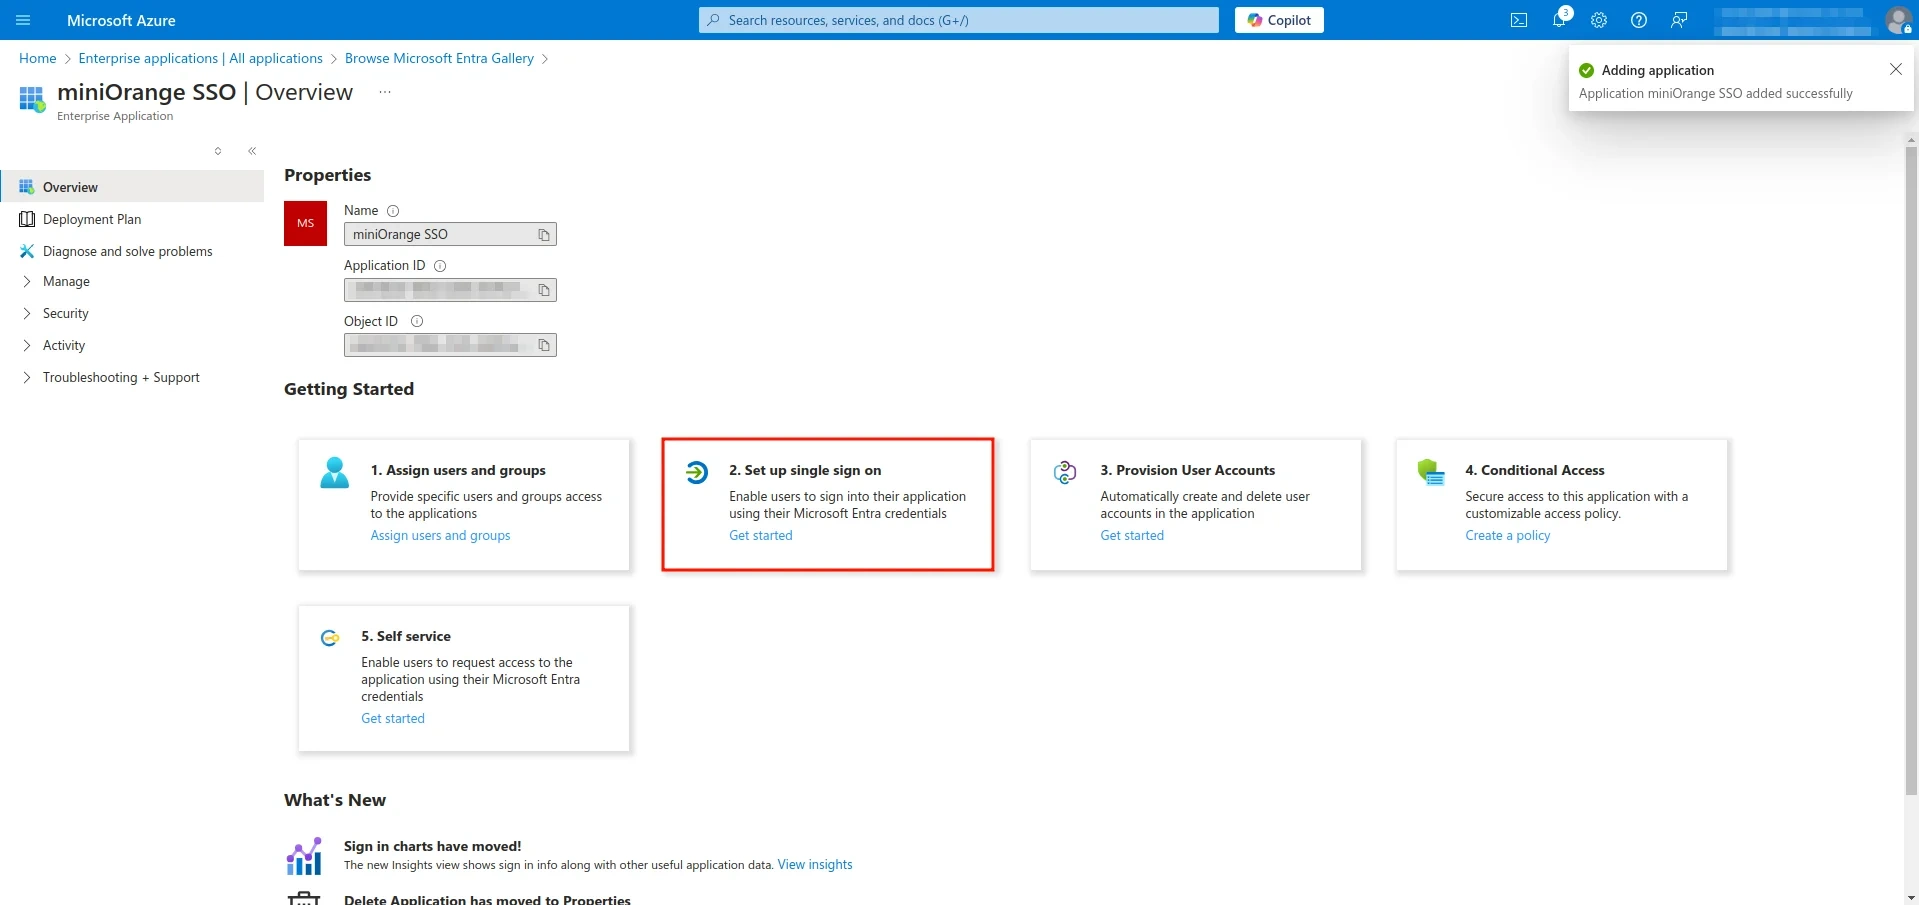
- Once the application is successfully created, you will be redirected to this screen. Click on the Set up single sign-on button.
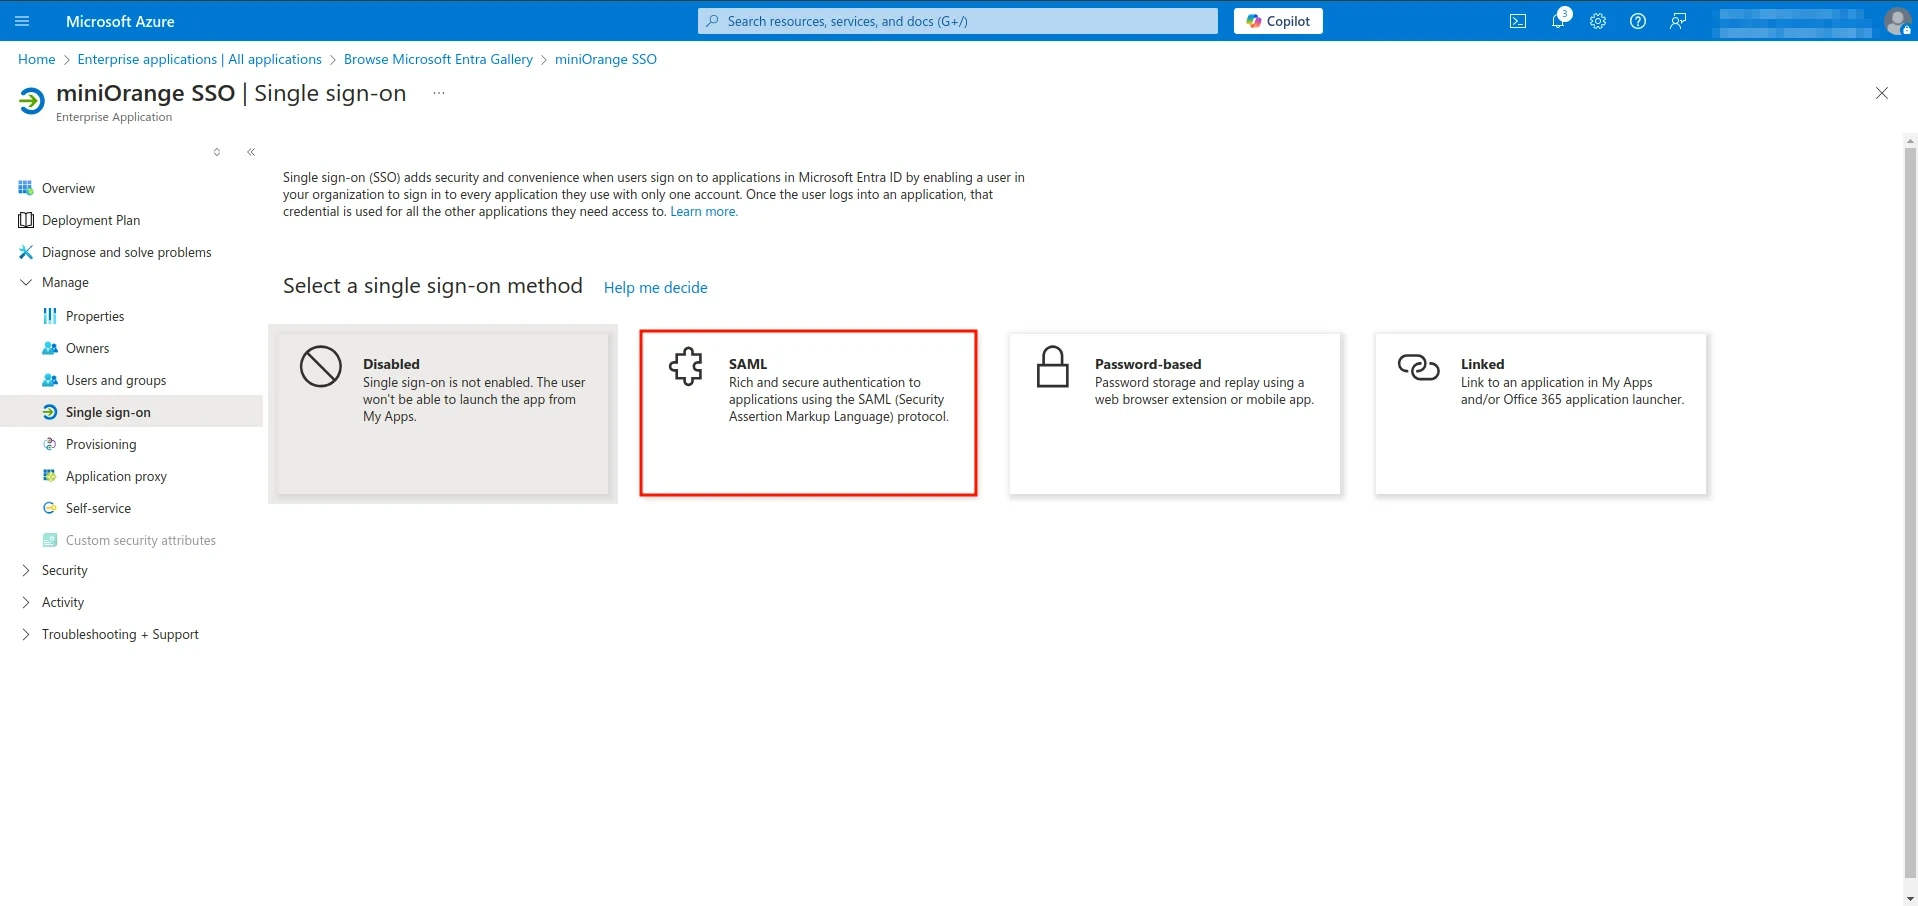
- On the next screen, select the SAML option.
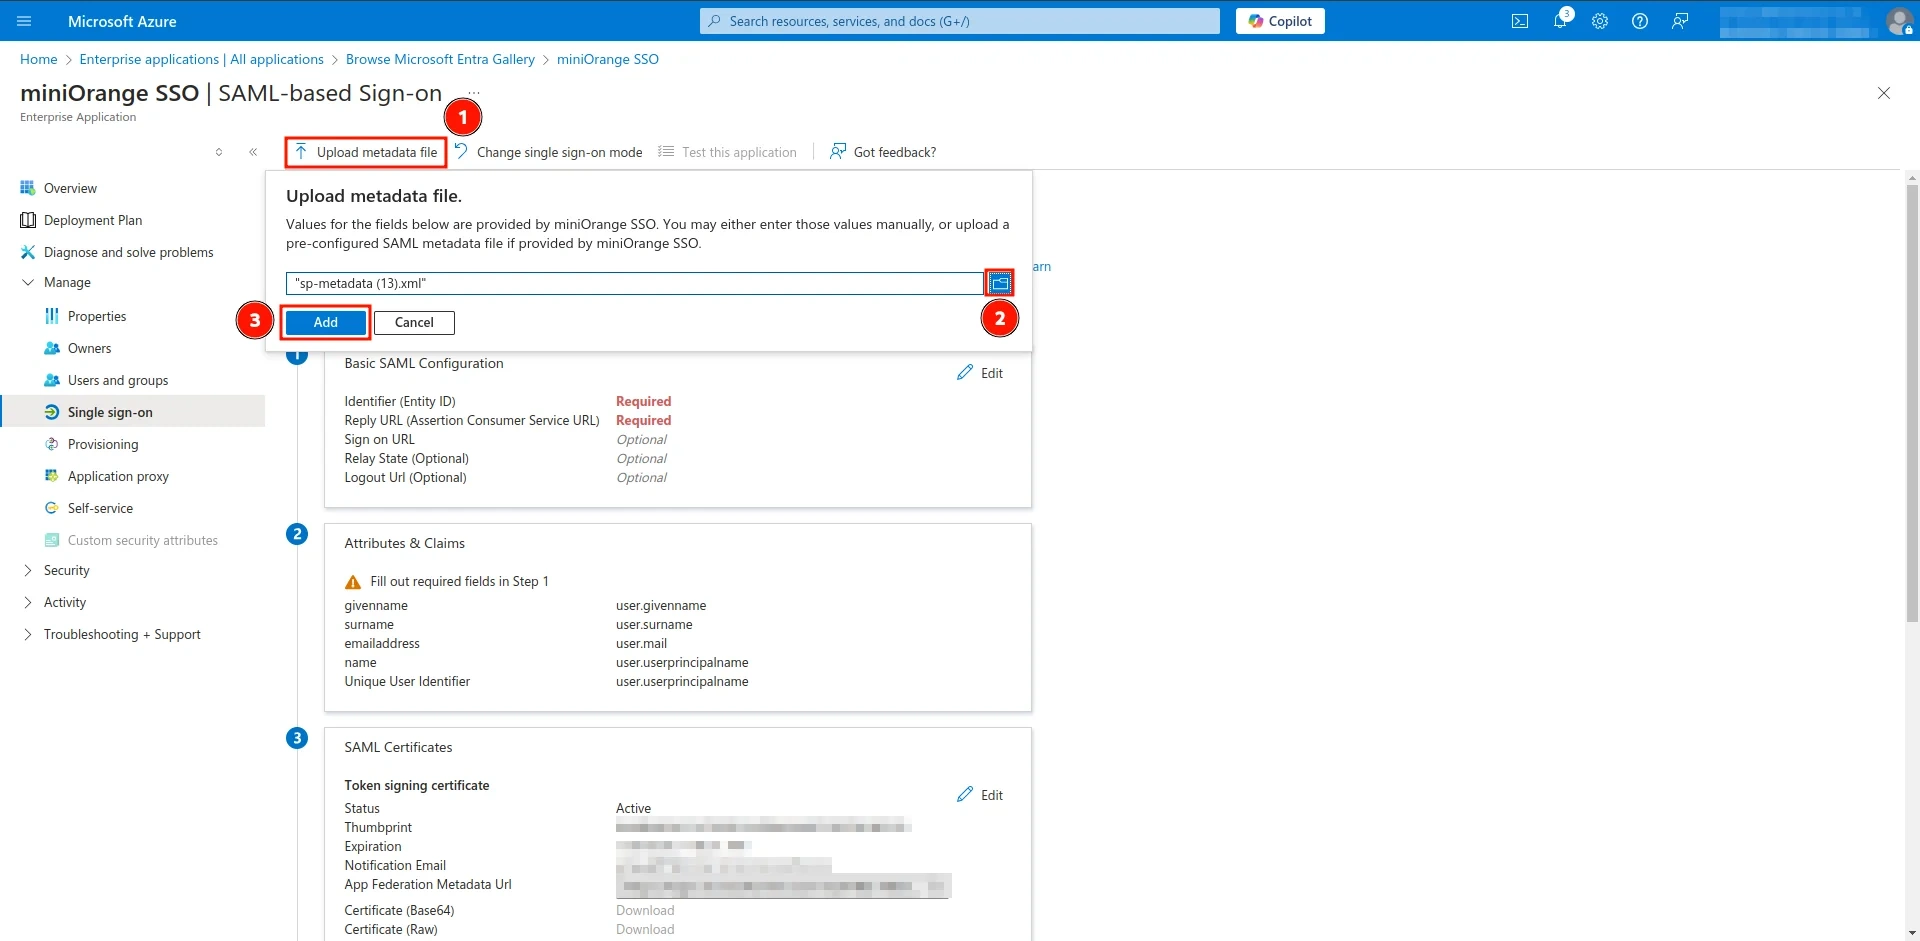
- Here, you will find an Upload Metadata option, as shown in the image. Click on it and upload the file you downloaded in Step 1.
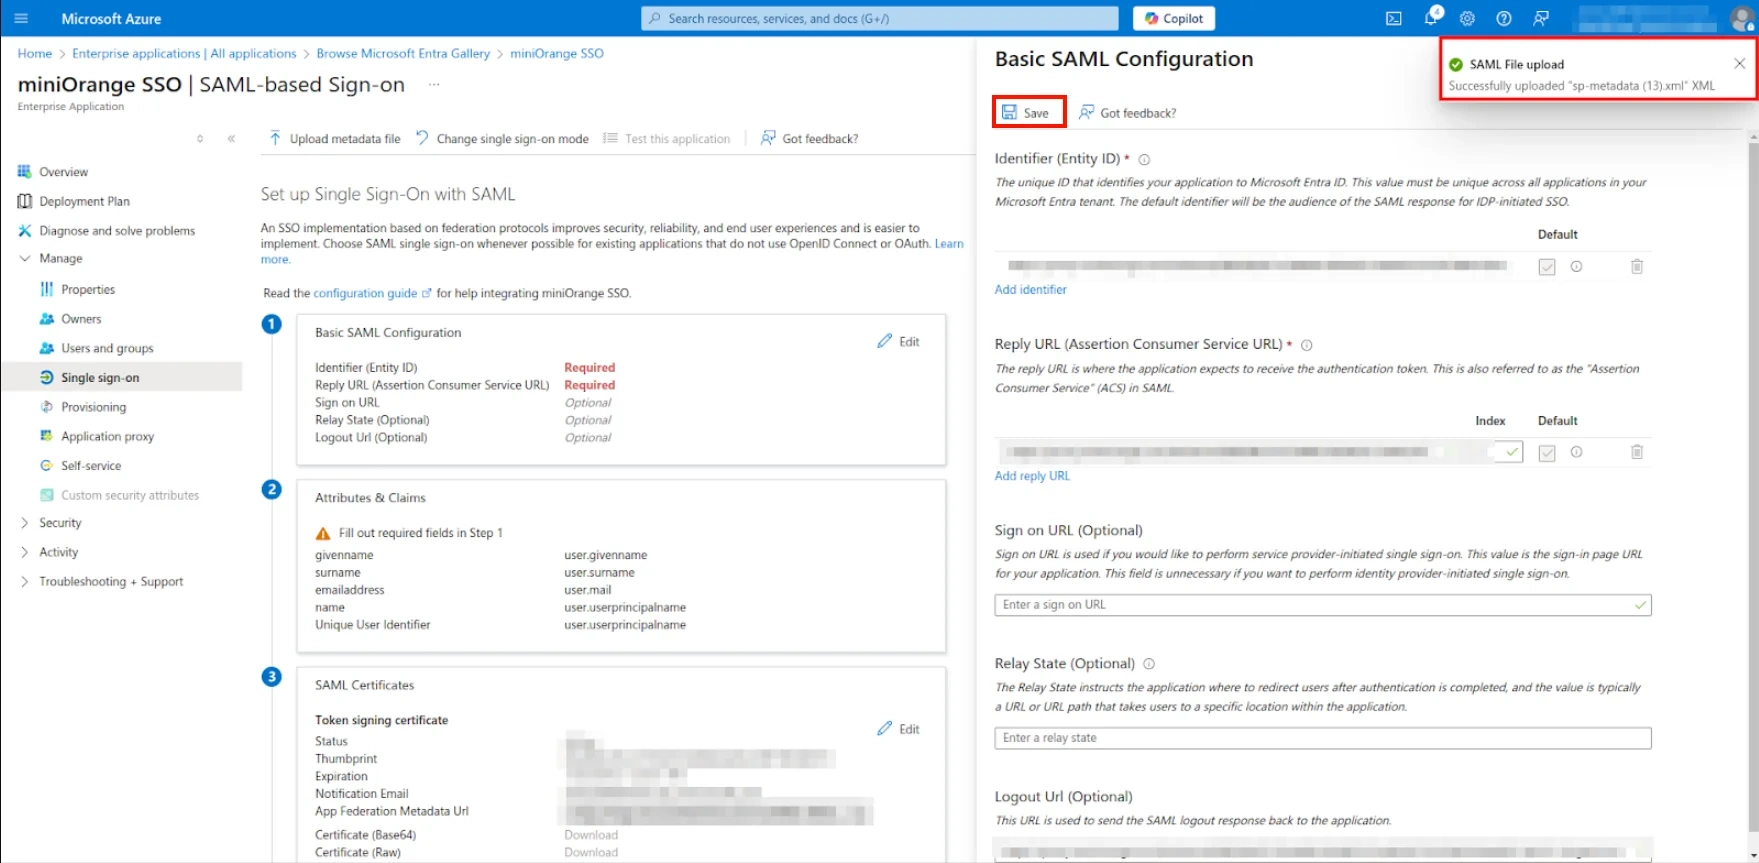
- After the file is successfully uploaded, you will see a confirmation screen stating that your IDP configurations for SAML have been imported successfully. Click the Save button to finalize the settings.
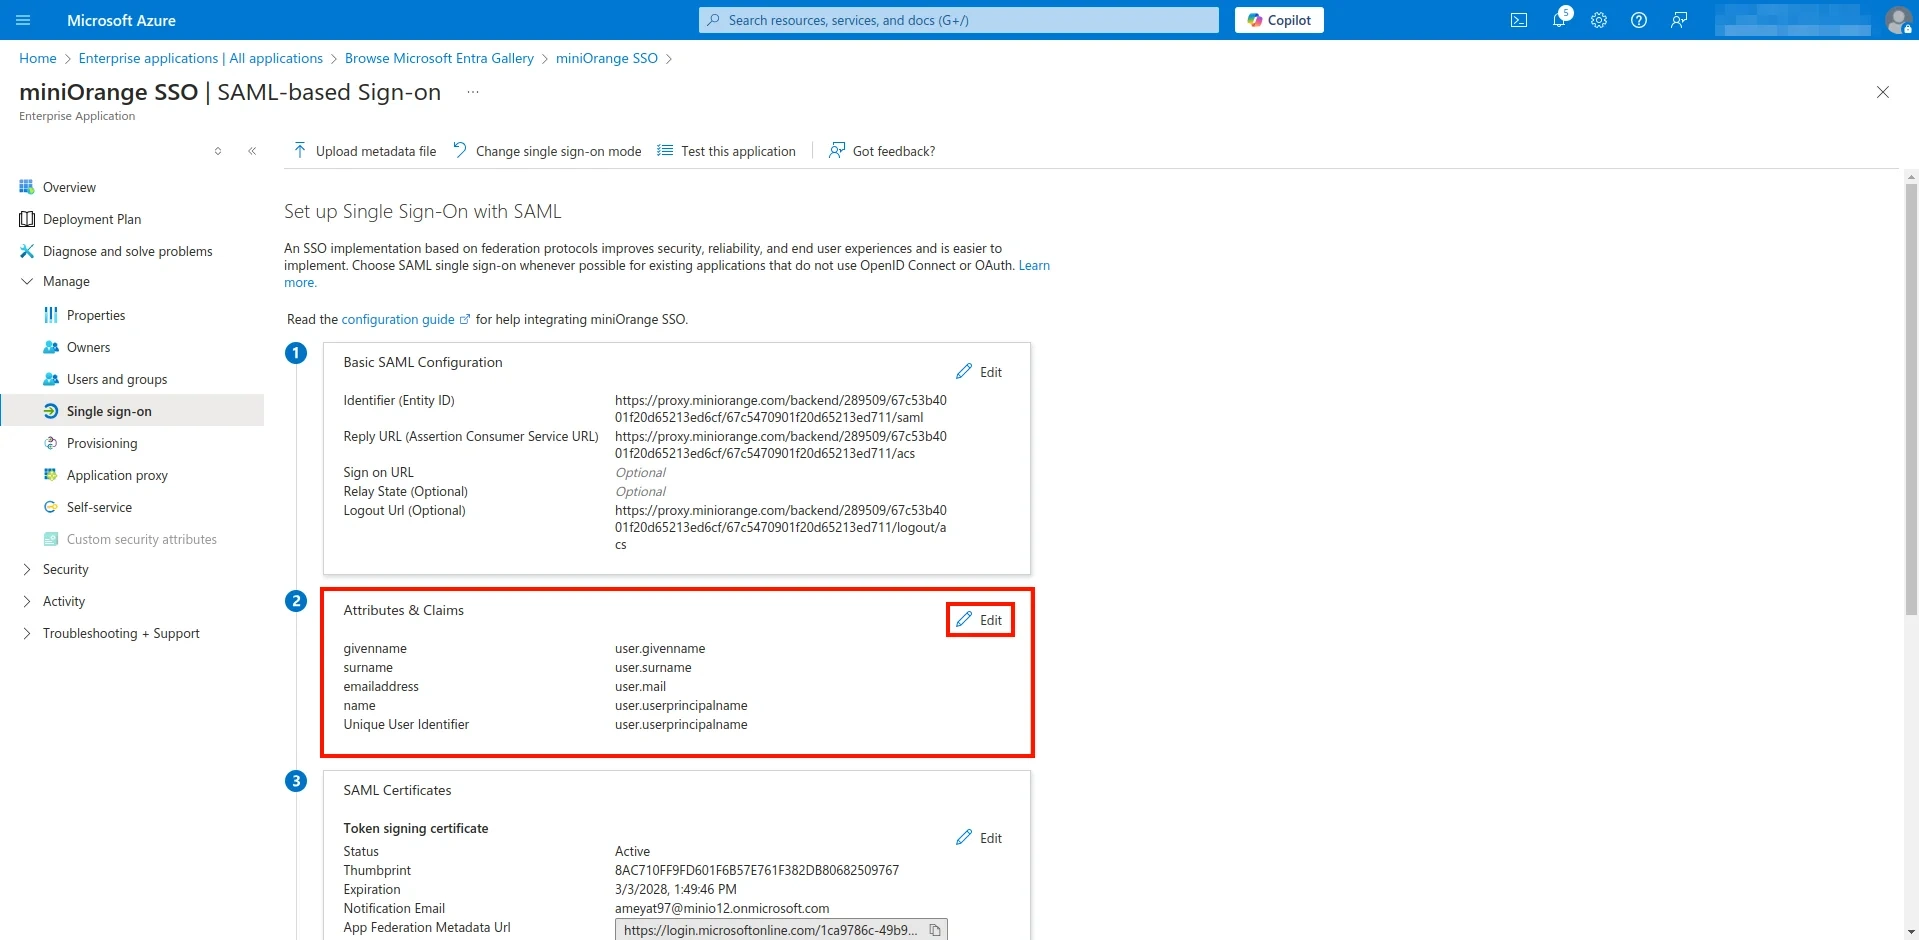
- Now, navigate to the Attributes & Claims section and click on Edit.
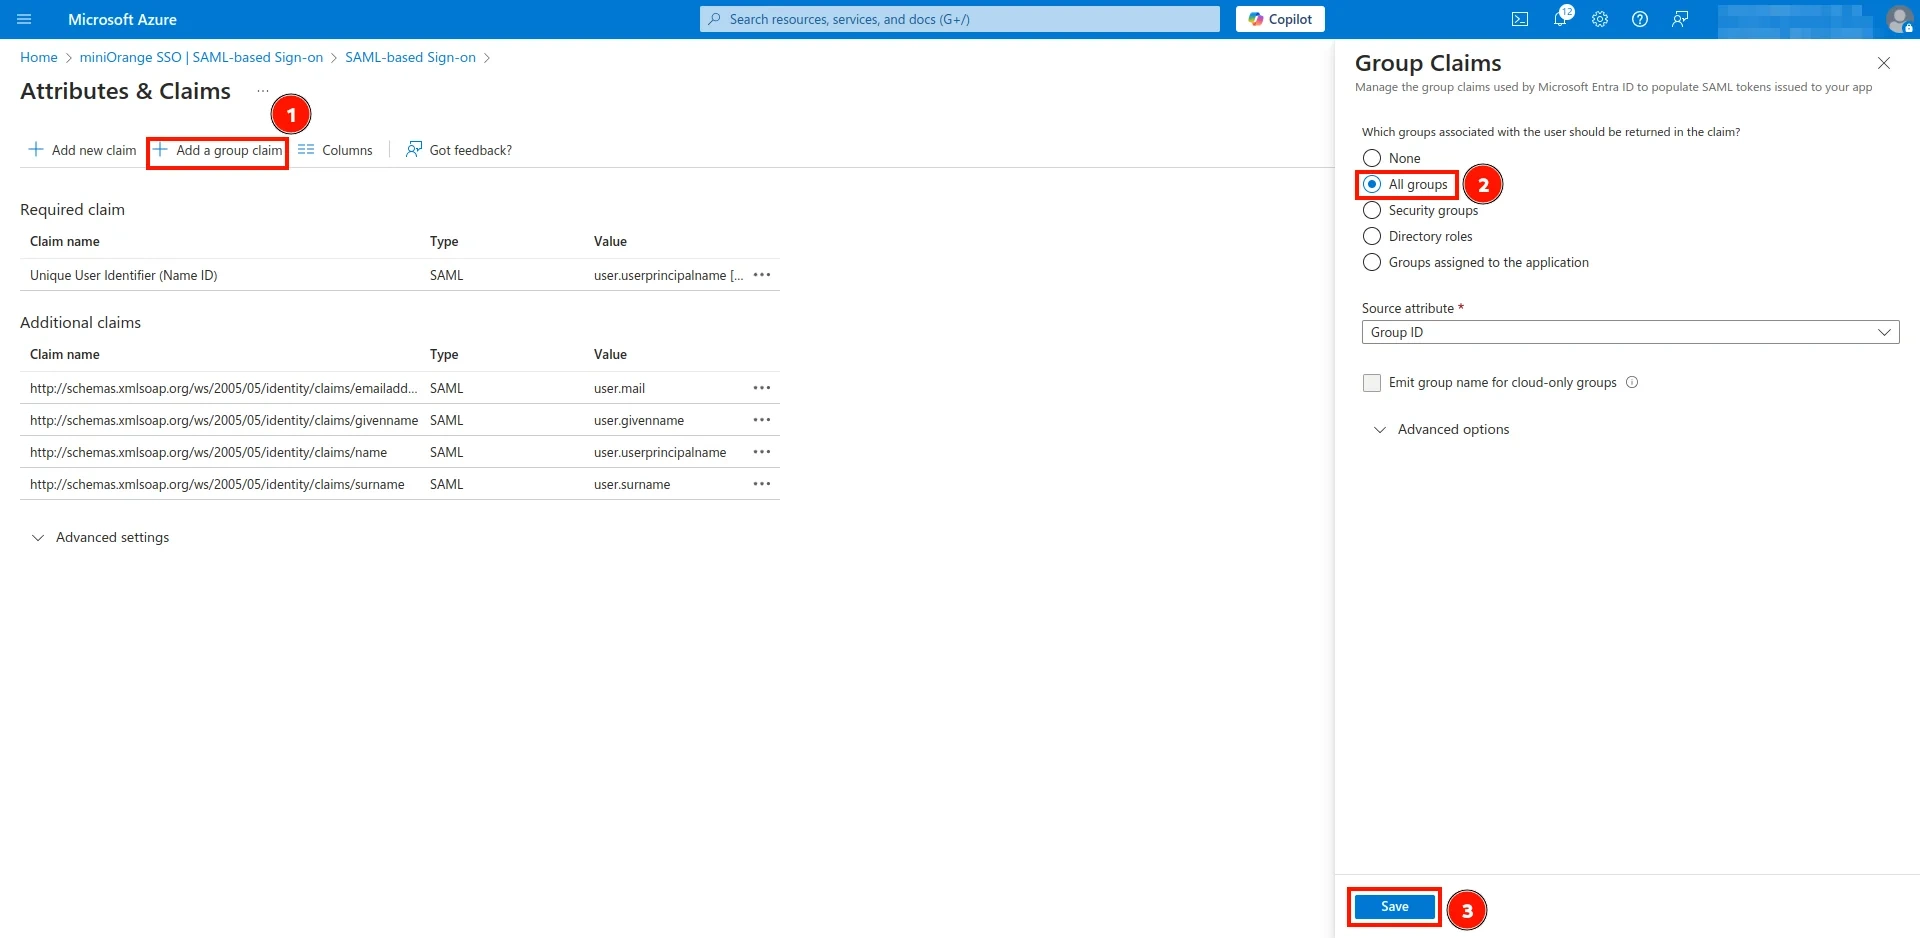
- Click on the Add a Group Claim option. A window will appear—select All Groups and then click Save.
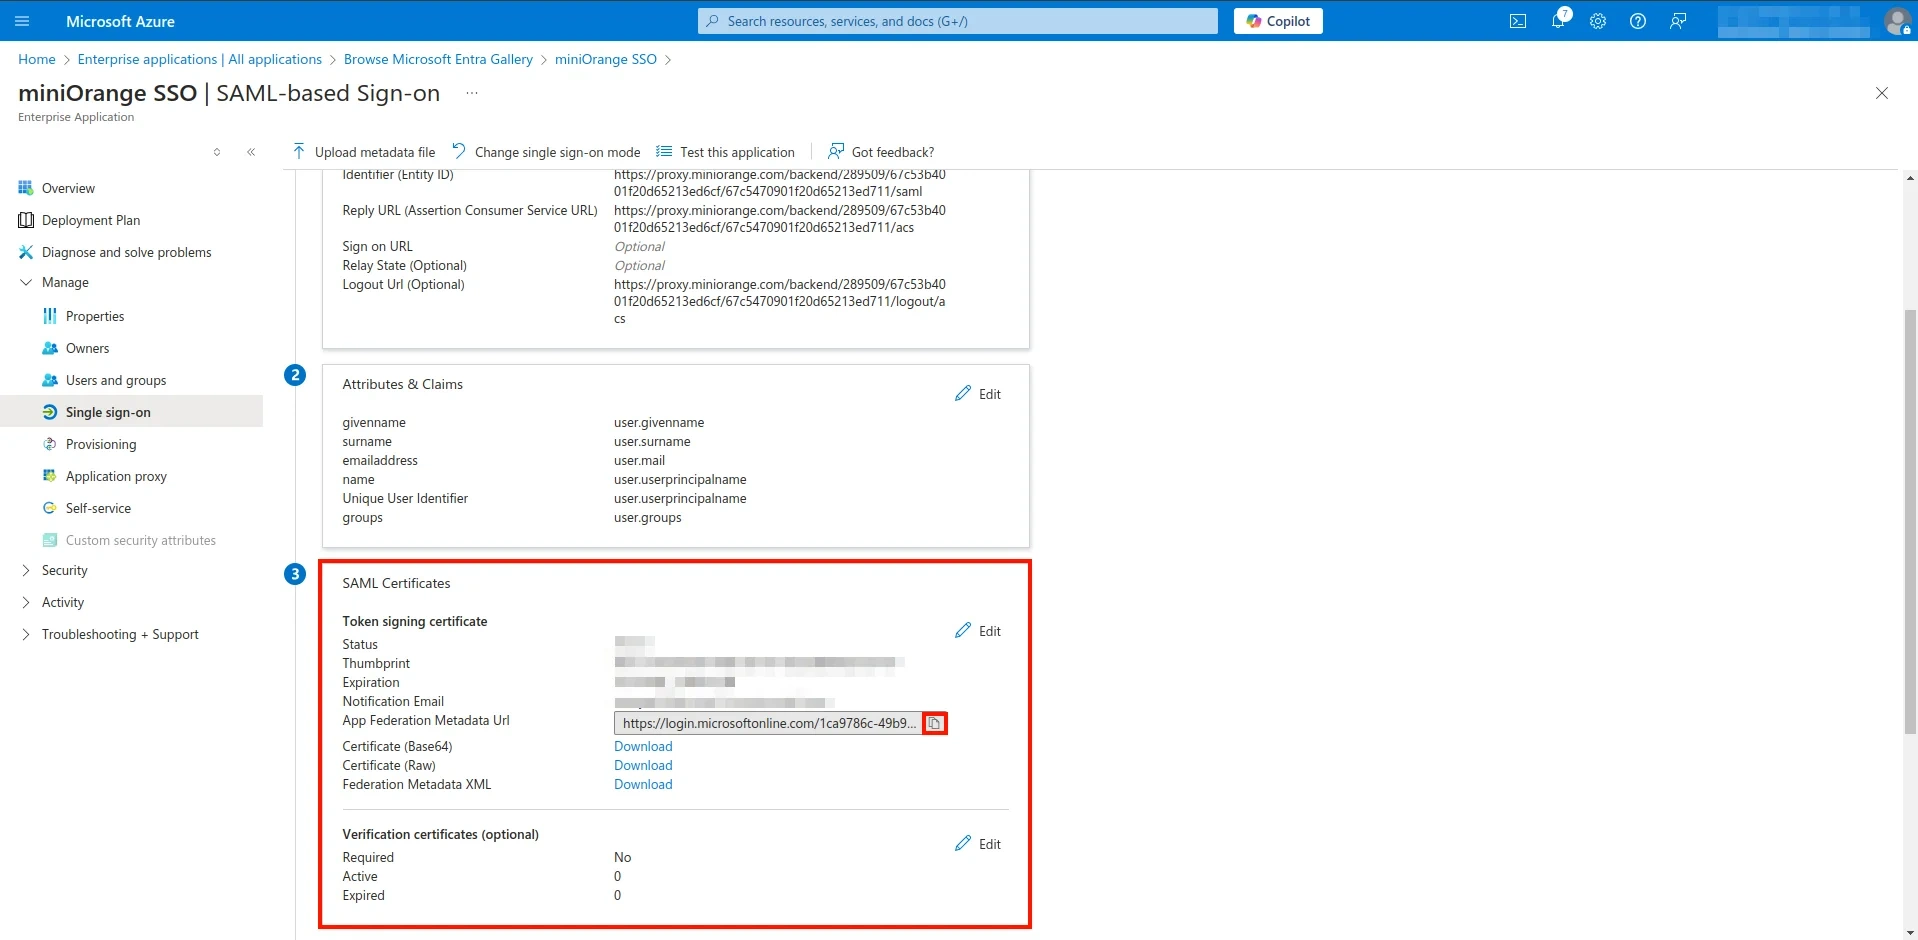
- Now, return to the Single Sign-On Configuration screen and copy the App Federation Metadata URL, as shown in the image.
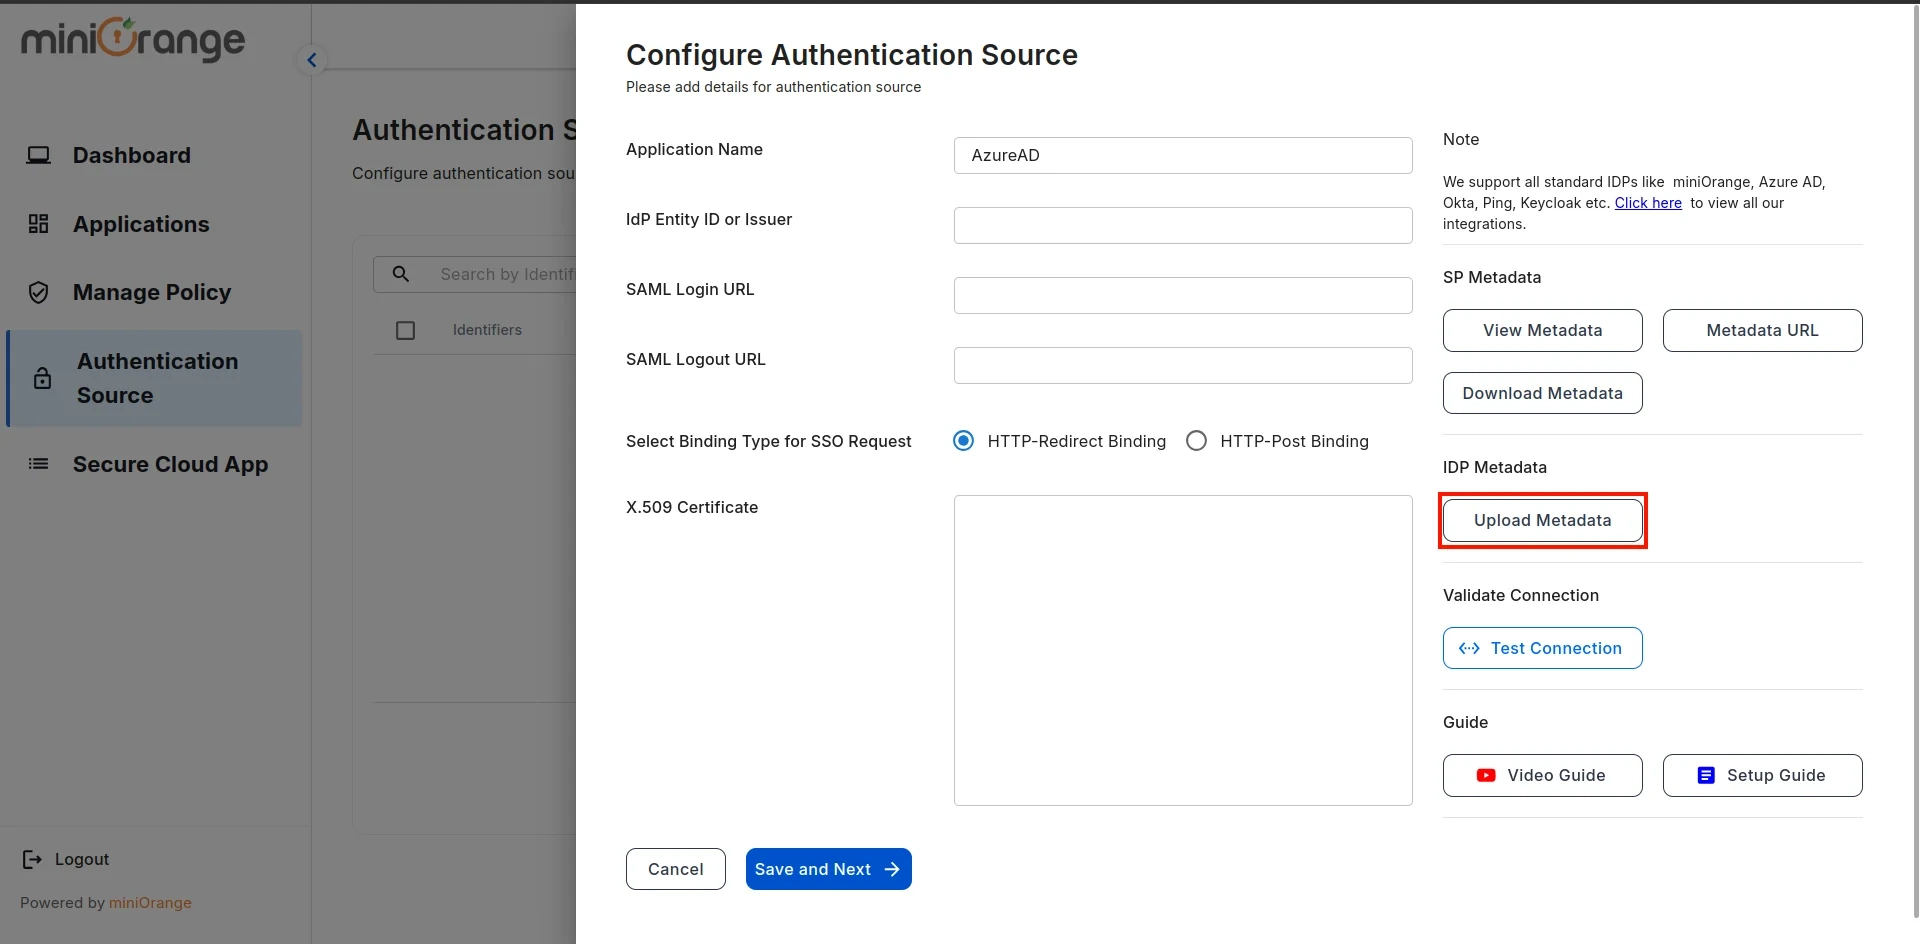
- Return to the CASB Dashboard on the Authentication screen, as shown in Step 1, and click on the Upload Metadata option.
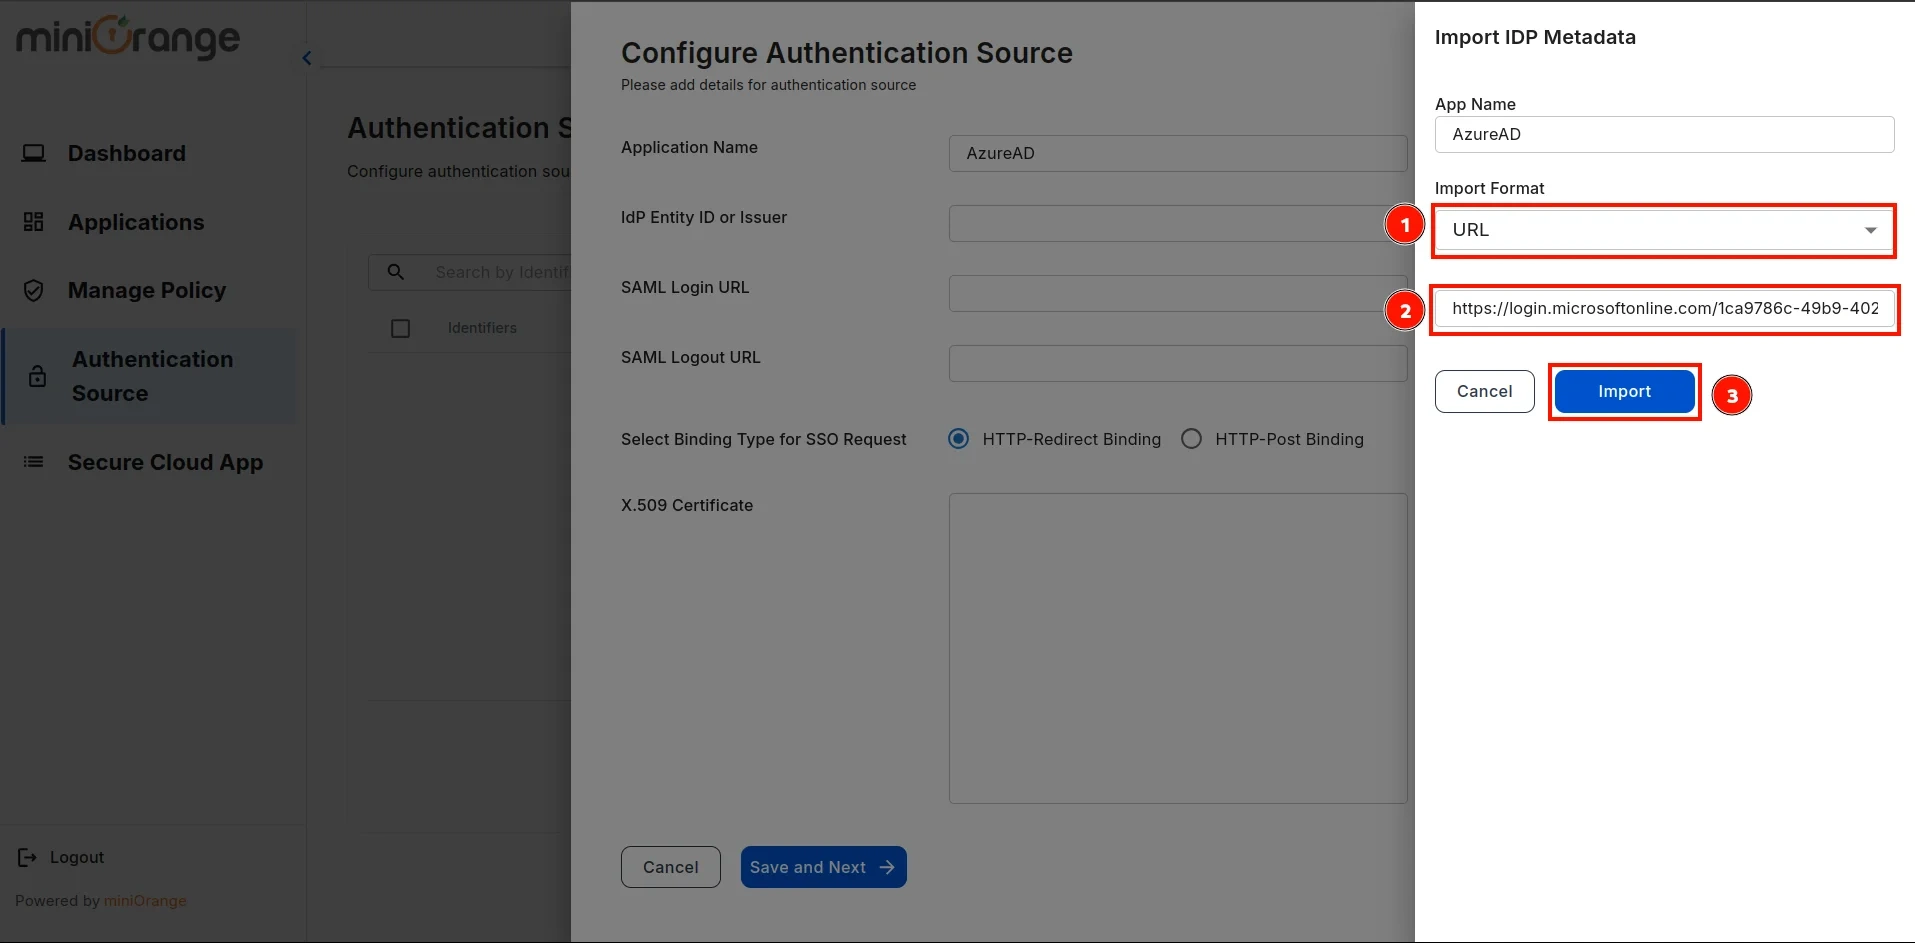
- Select Import Format as URL, paste the URL copied from Azure AD, and click Import.
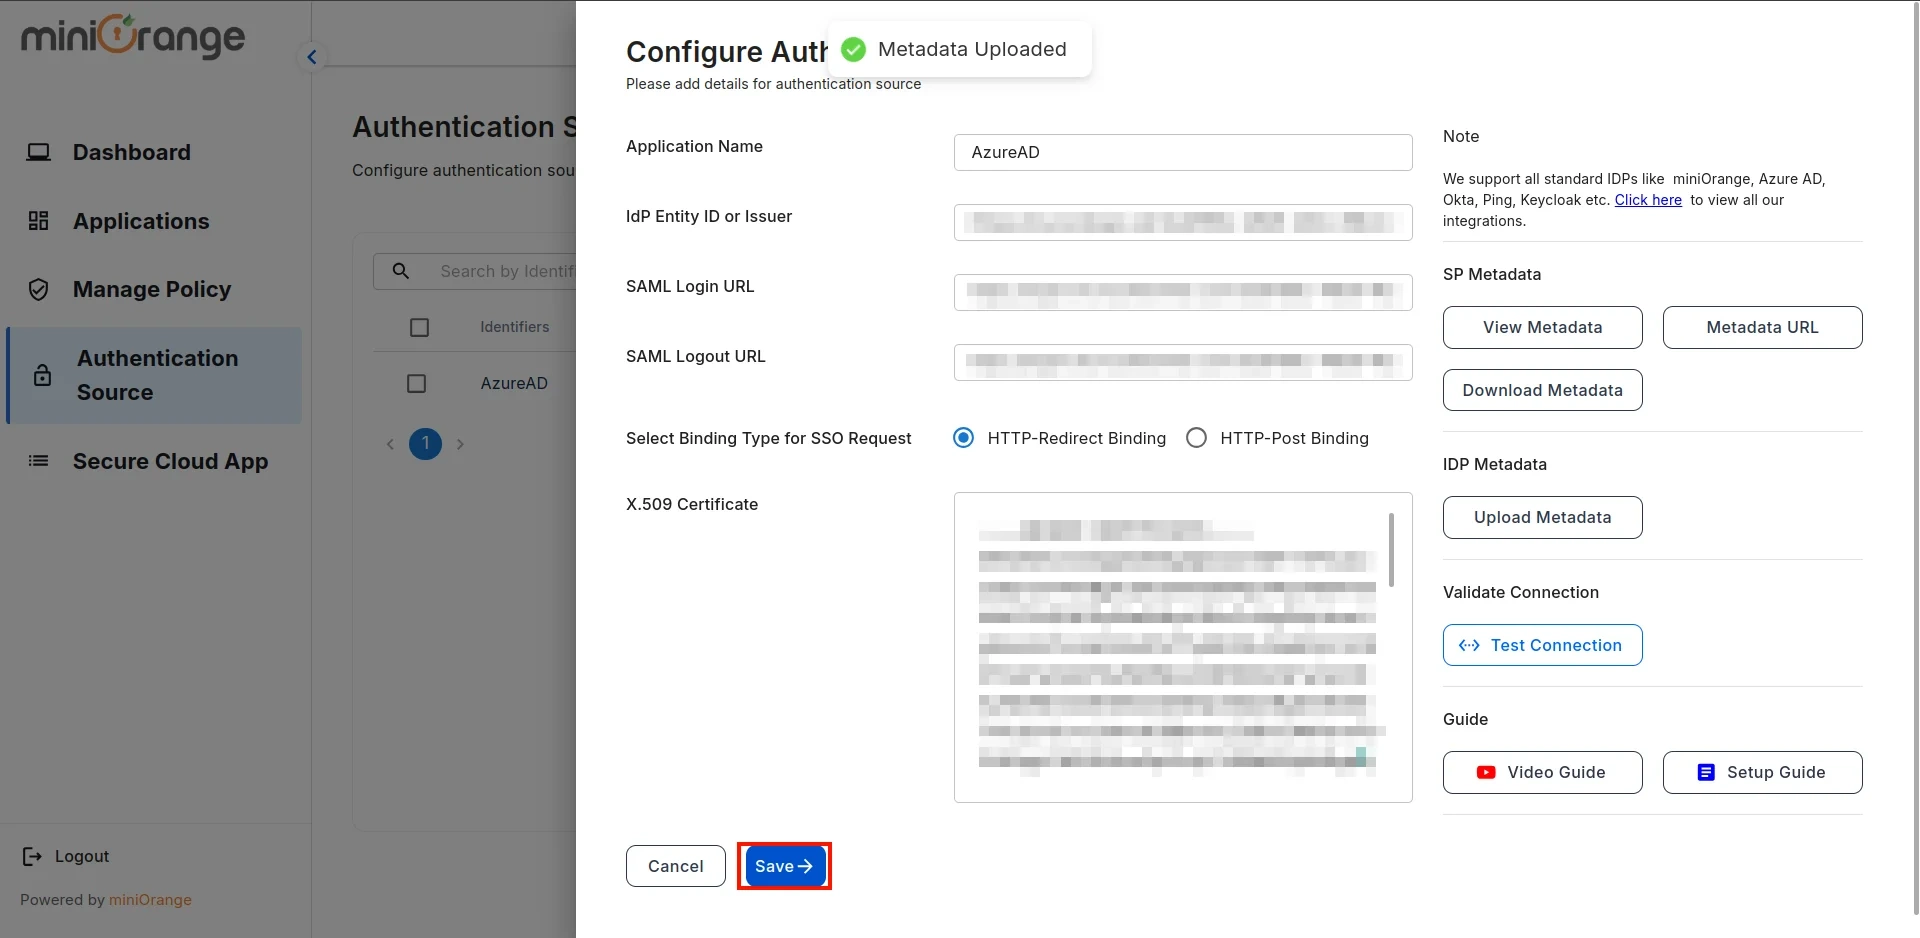
- A prompt will appear confirming that the metadata has been uploaded successfully. Click Save to finalize the configuration.
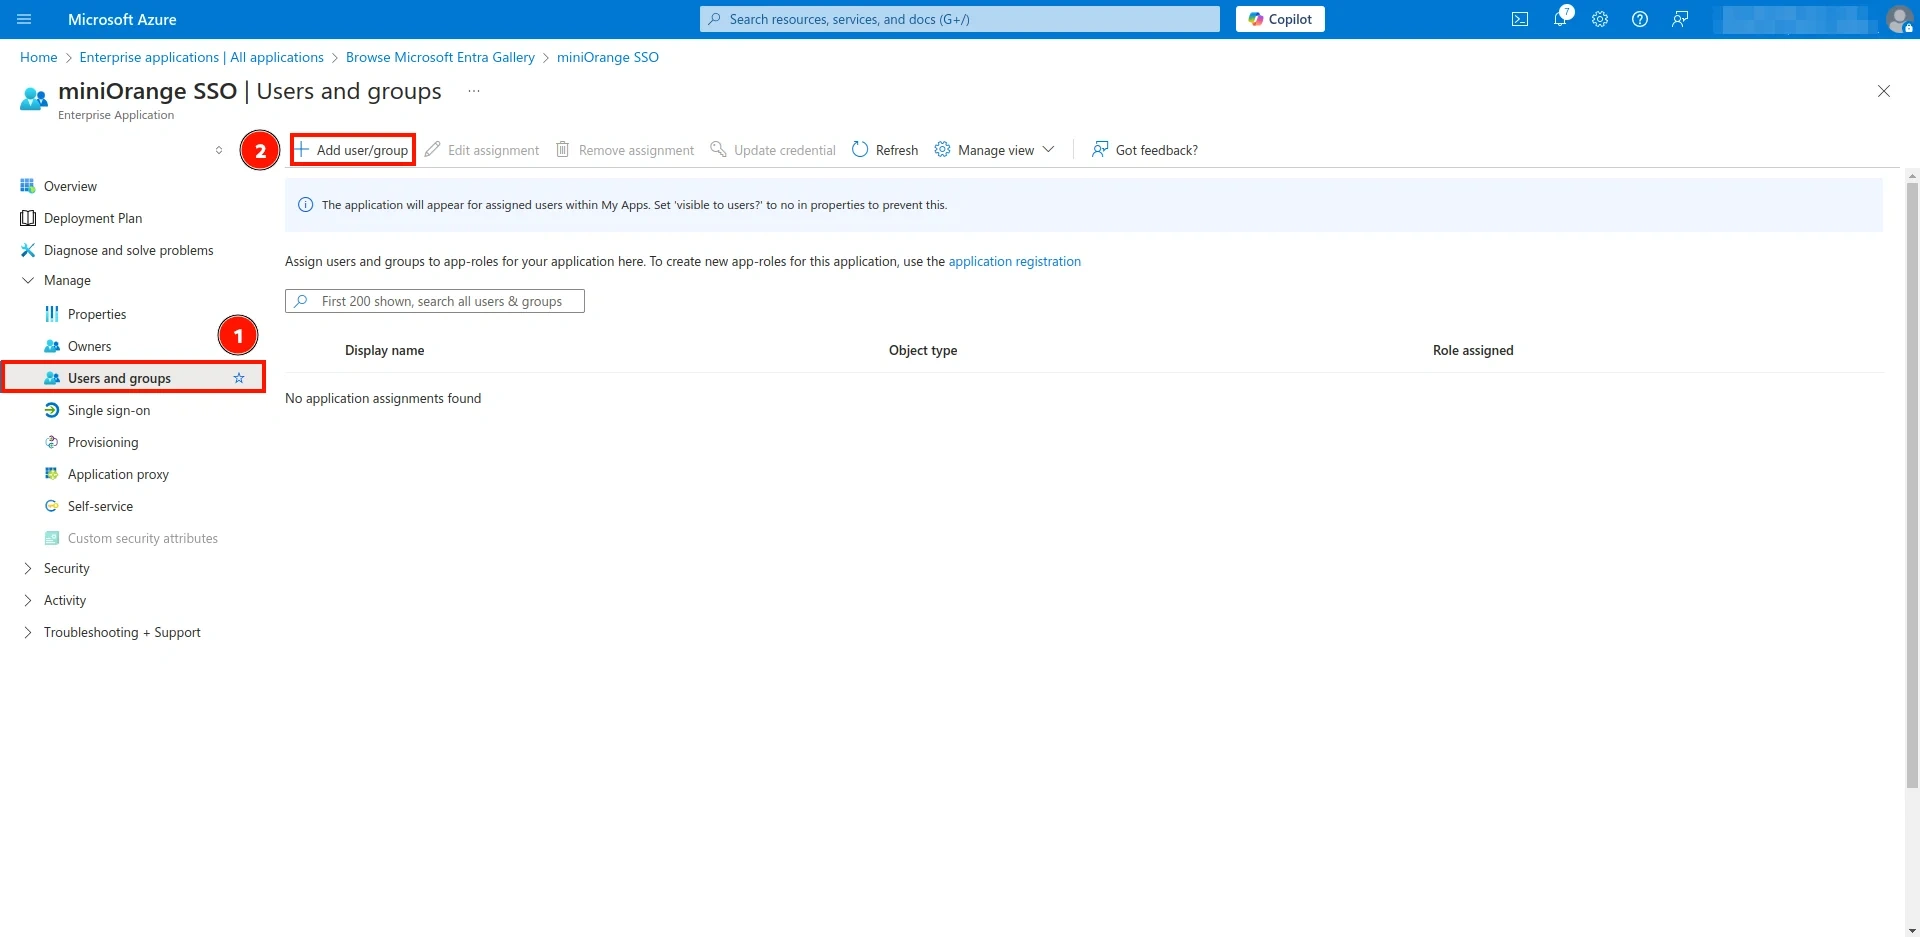
- Now, return to Azure, navigate to the Users and Groups section, and click on Add User/Group.
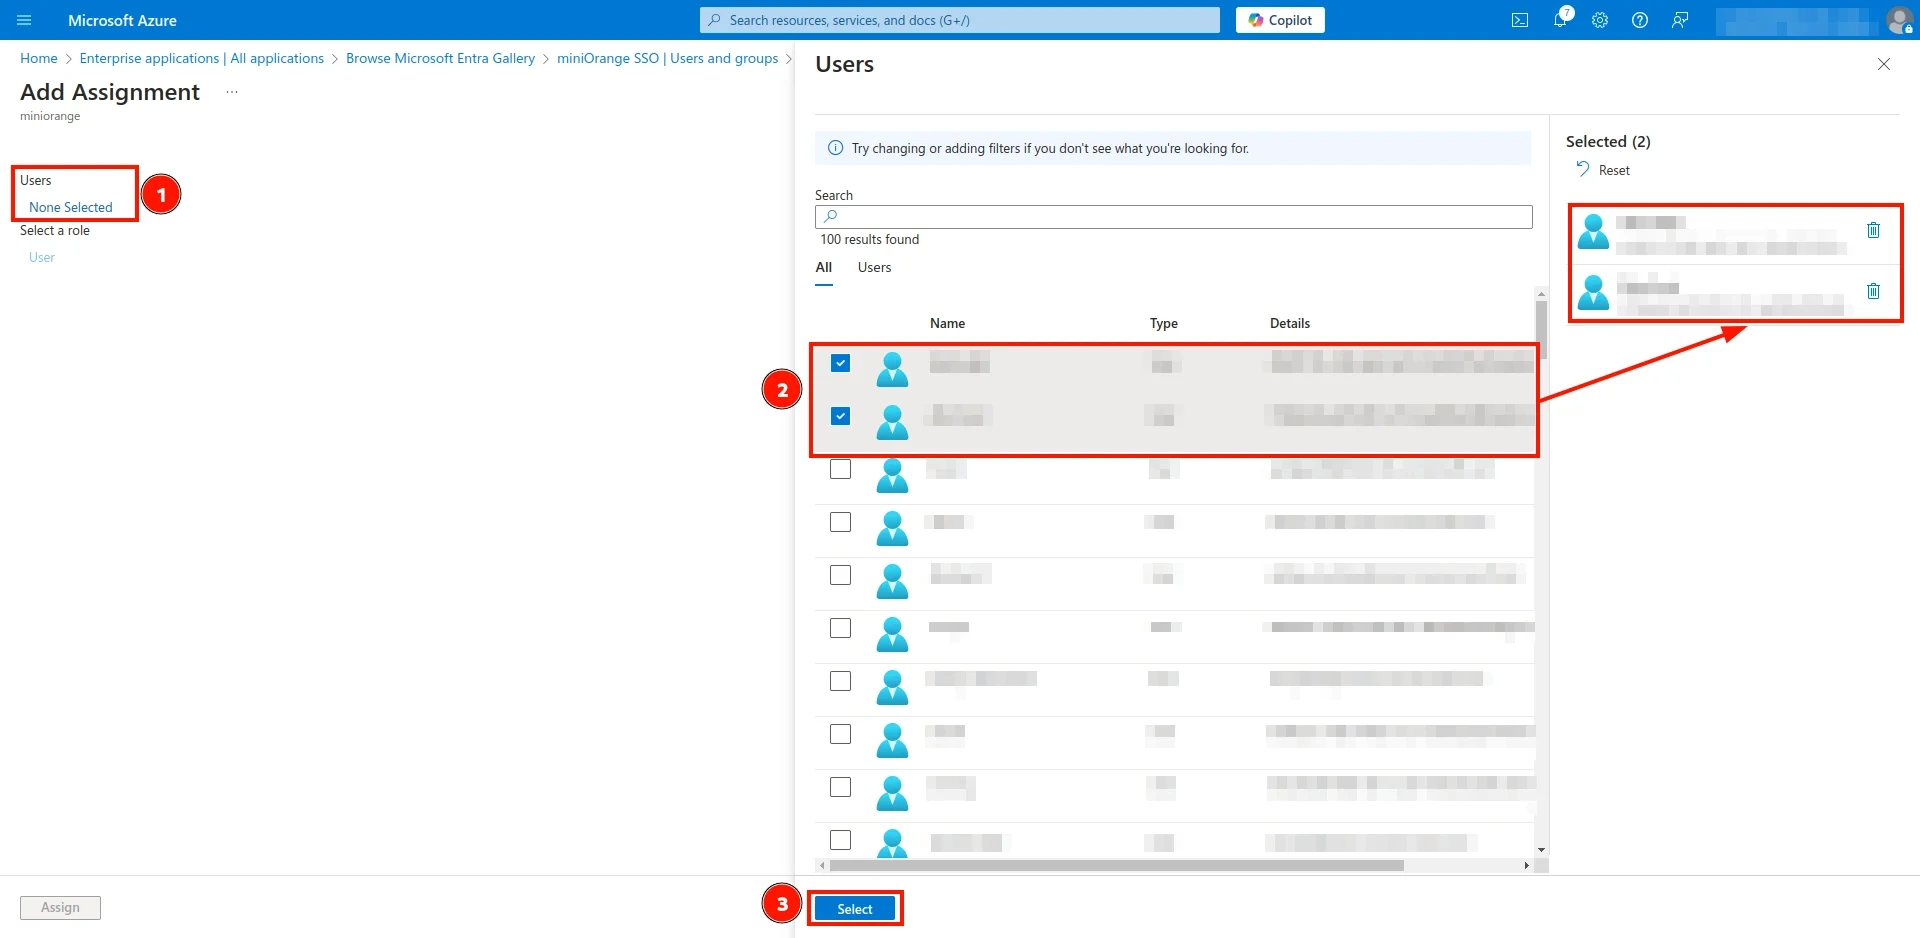
- Click on Users, as shown in the image, then select the users from the list. The selected users will appear on the right side. Finally, click Save.
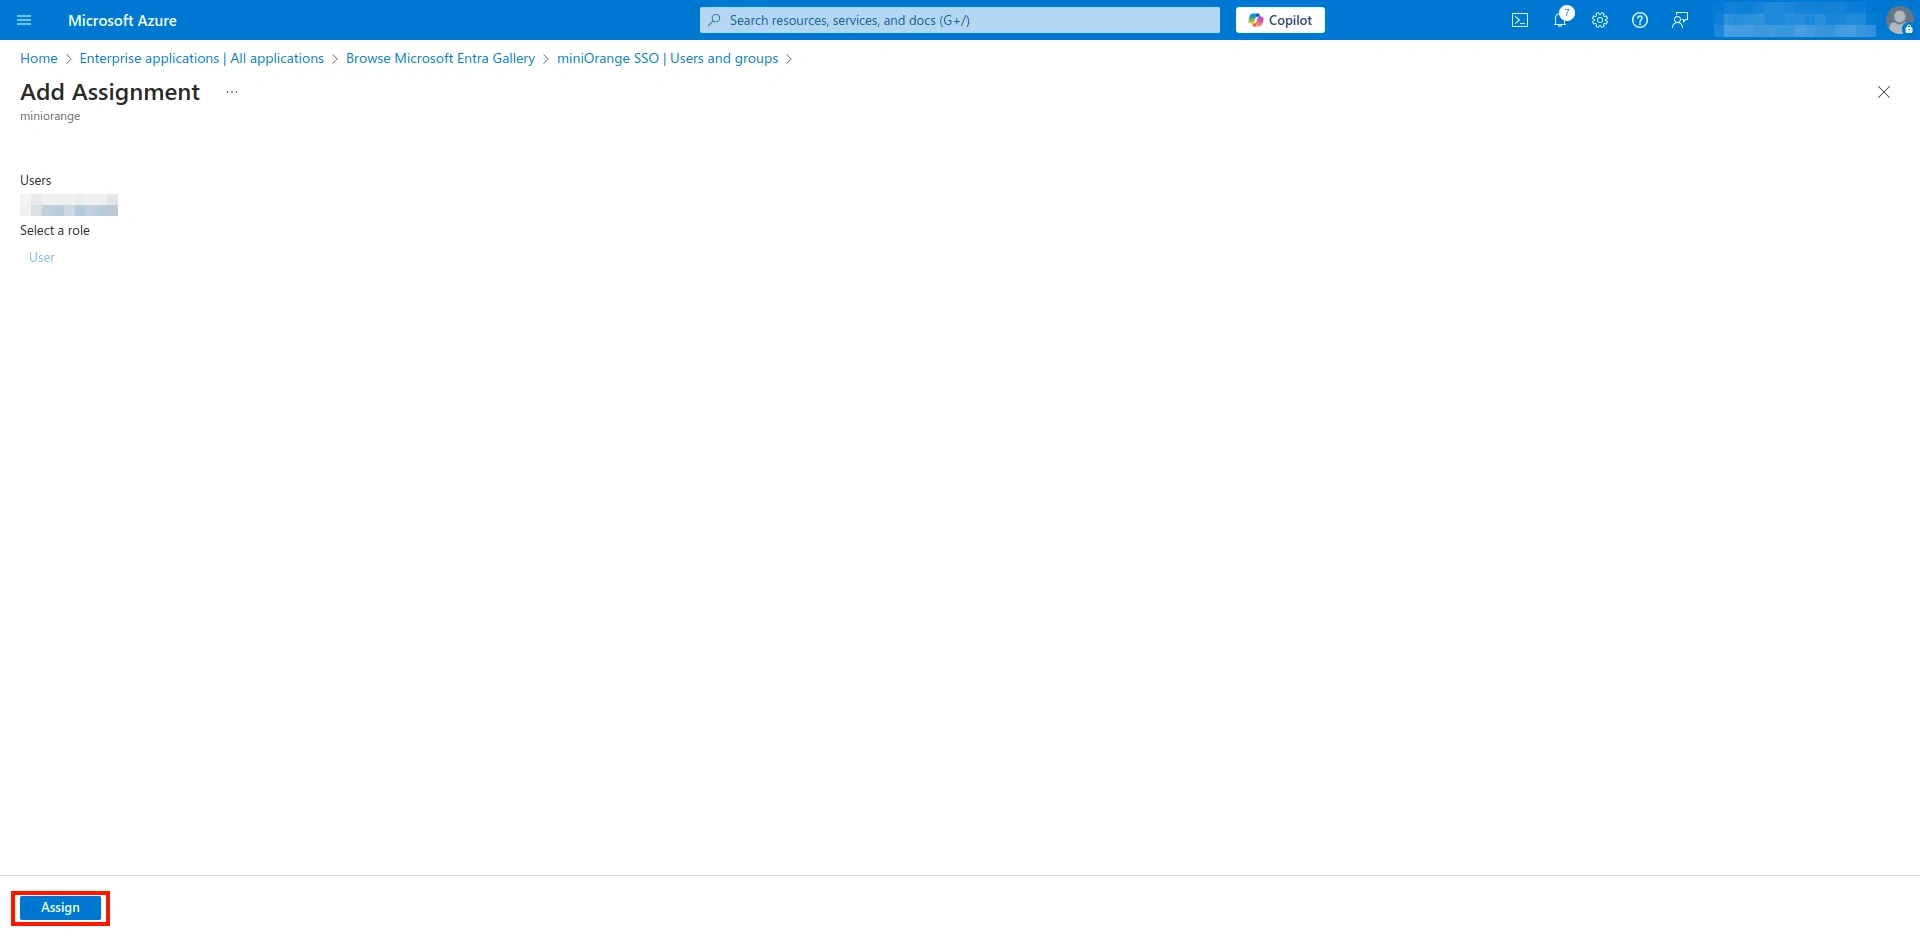
- Once the users are selected, click the Assign button at the bottom left corner.
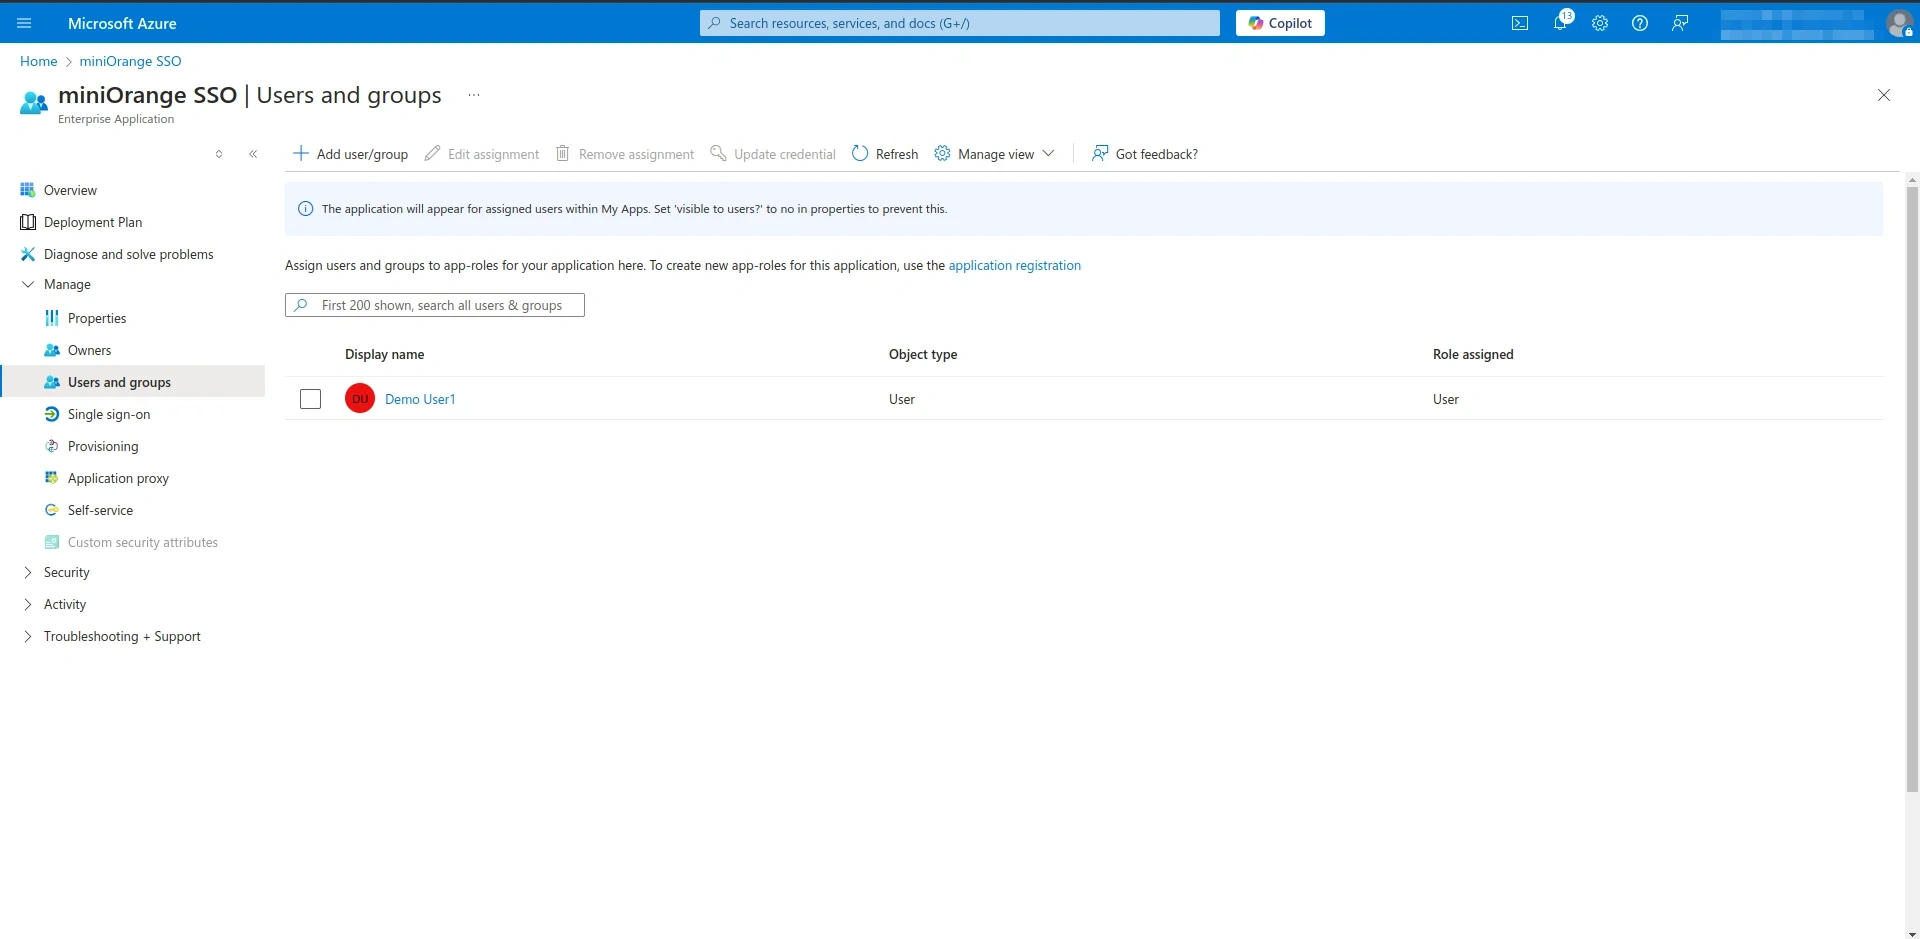
- The selected users for this application will now be displayed as shown below.
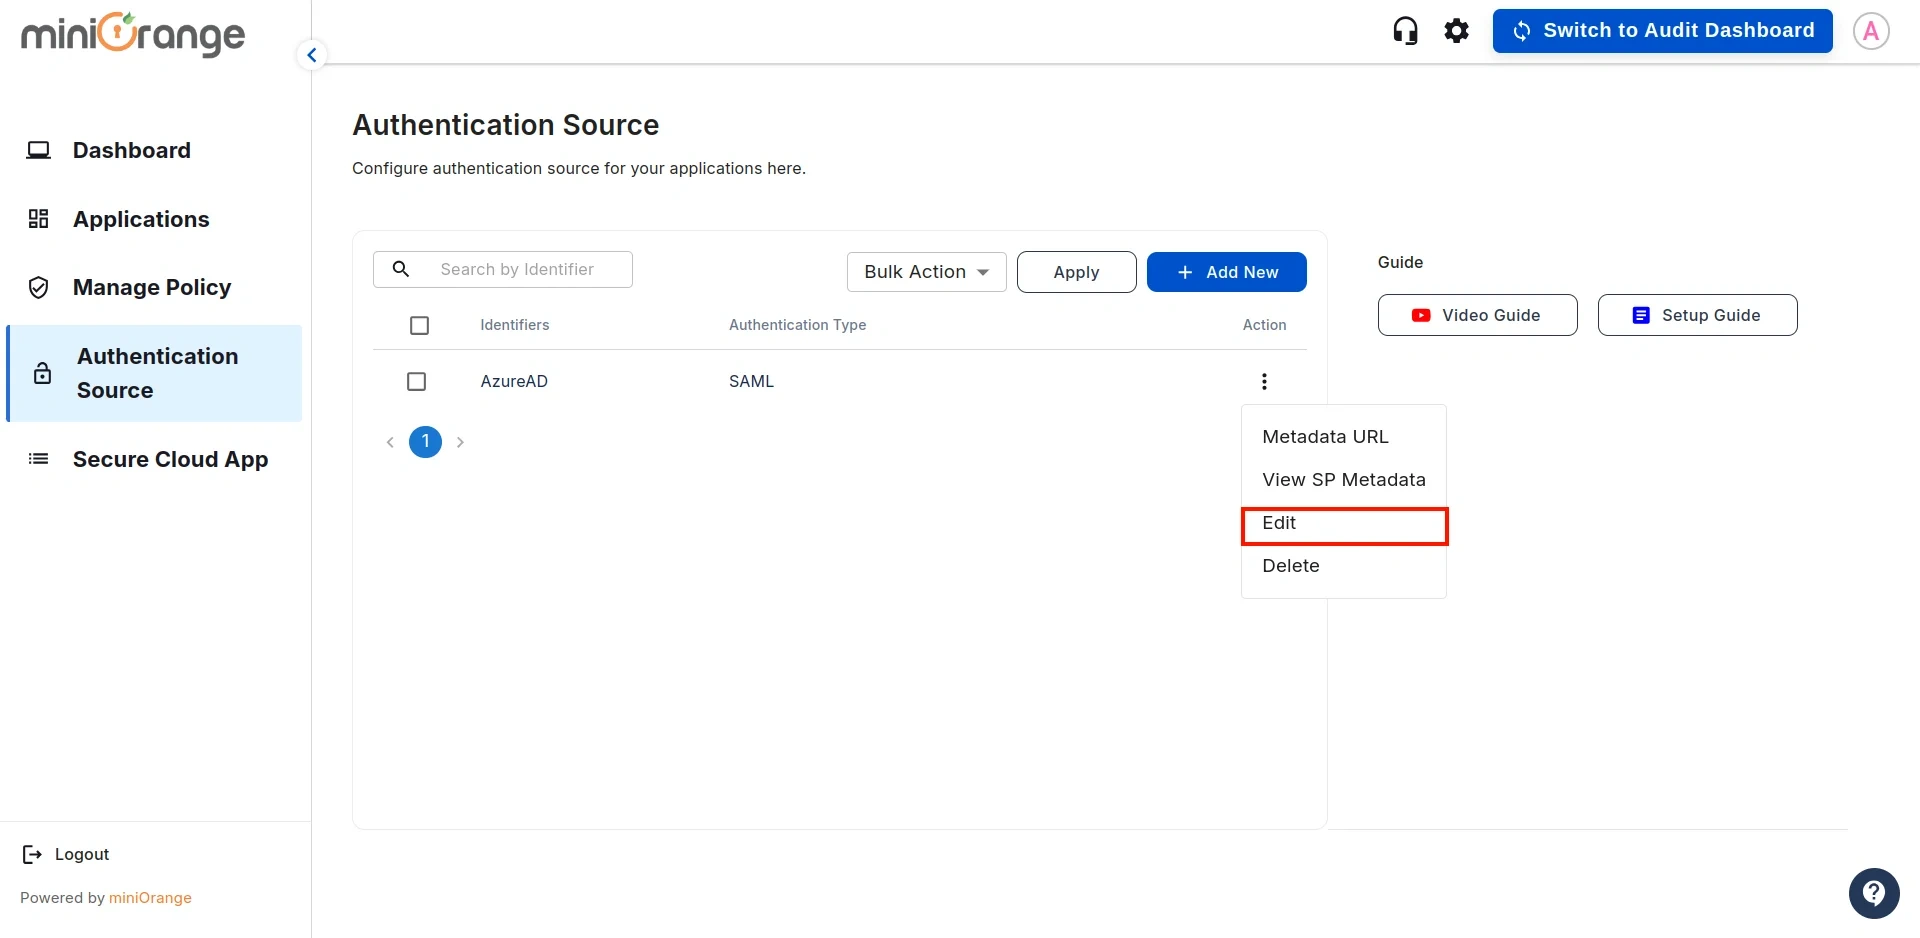
- Now, return to the CASB Dashboard and click on Edit Application.
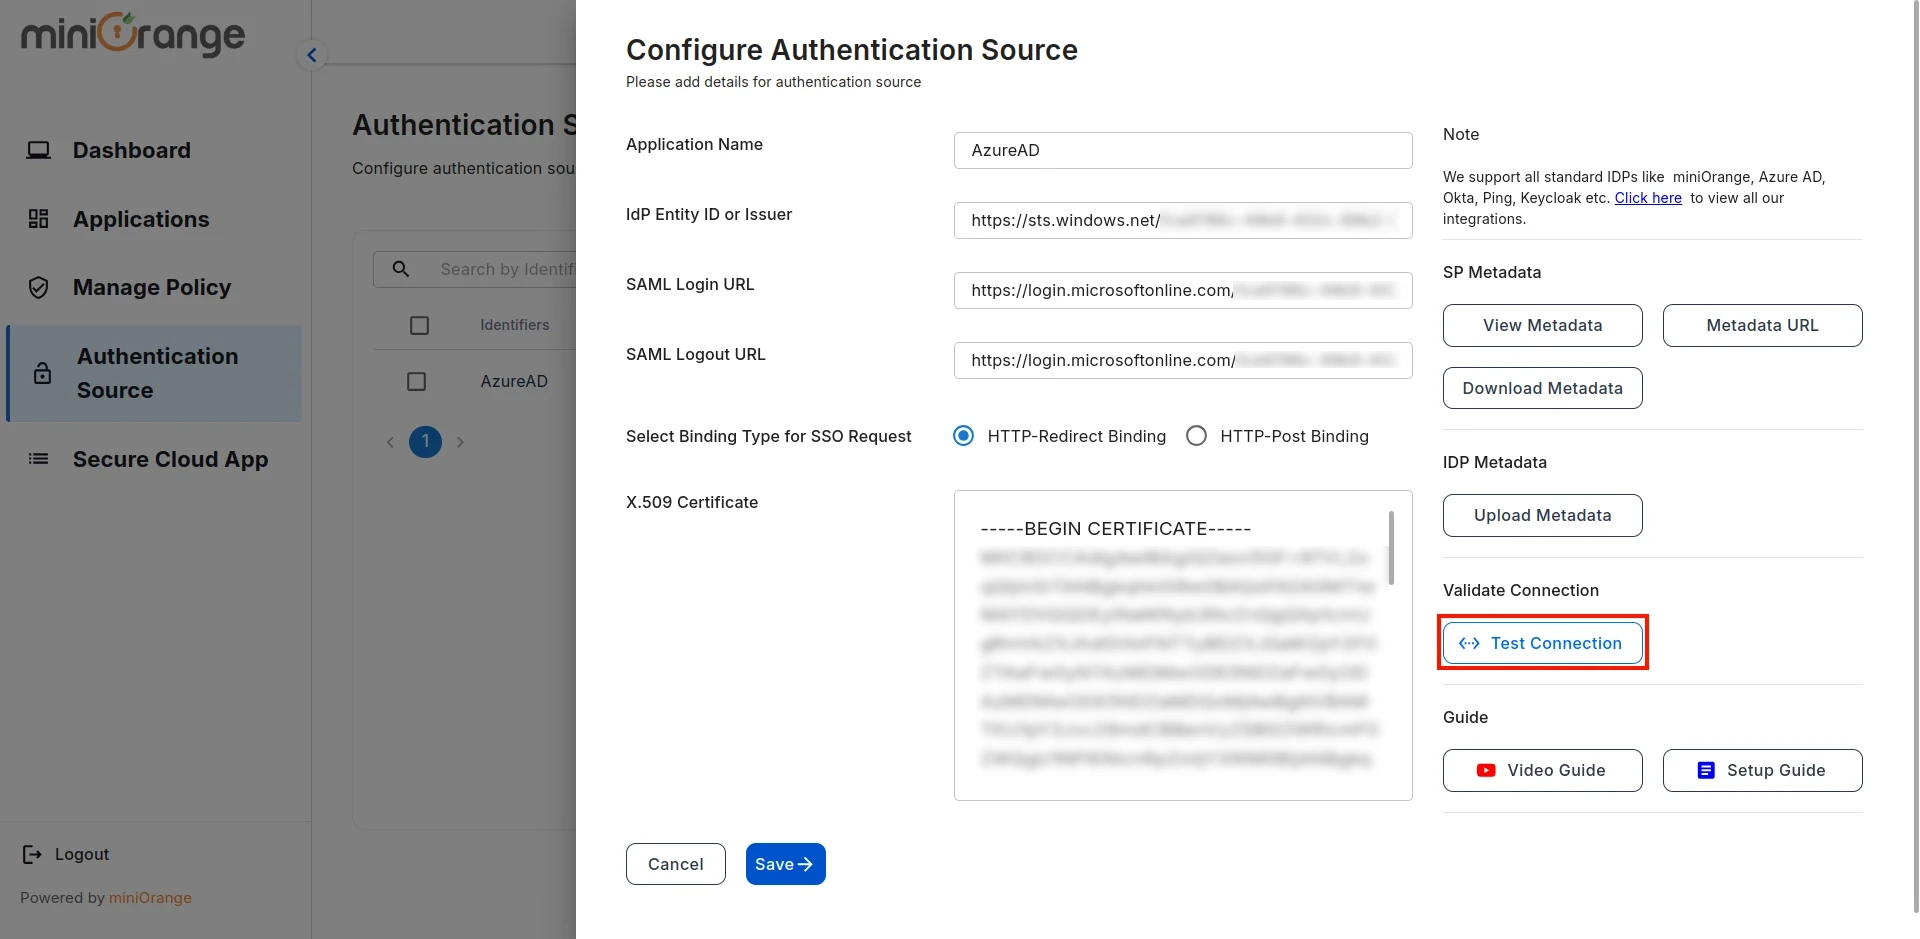
- Click on the Test Connection button, as shown below.
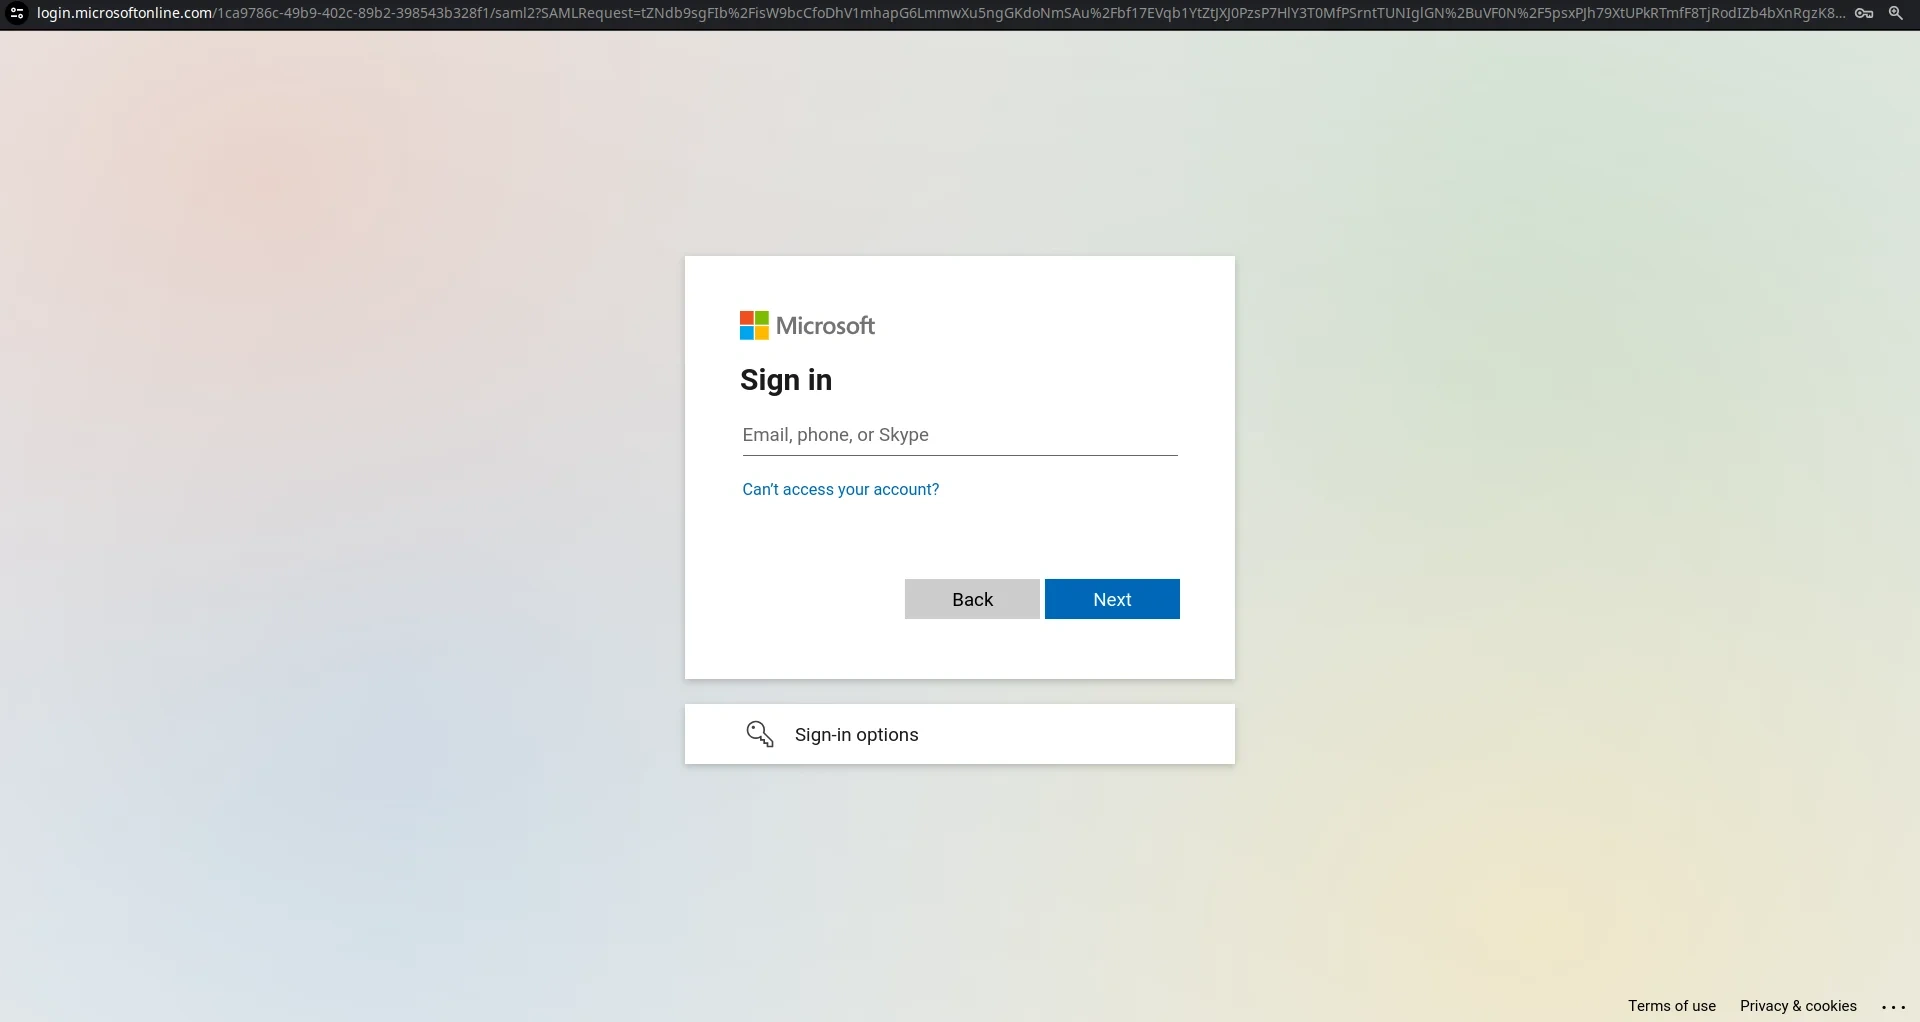
- You will be redirected to the Azure Sign-In screen. Enter the credentials for the user added in the previous steps.
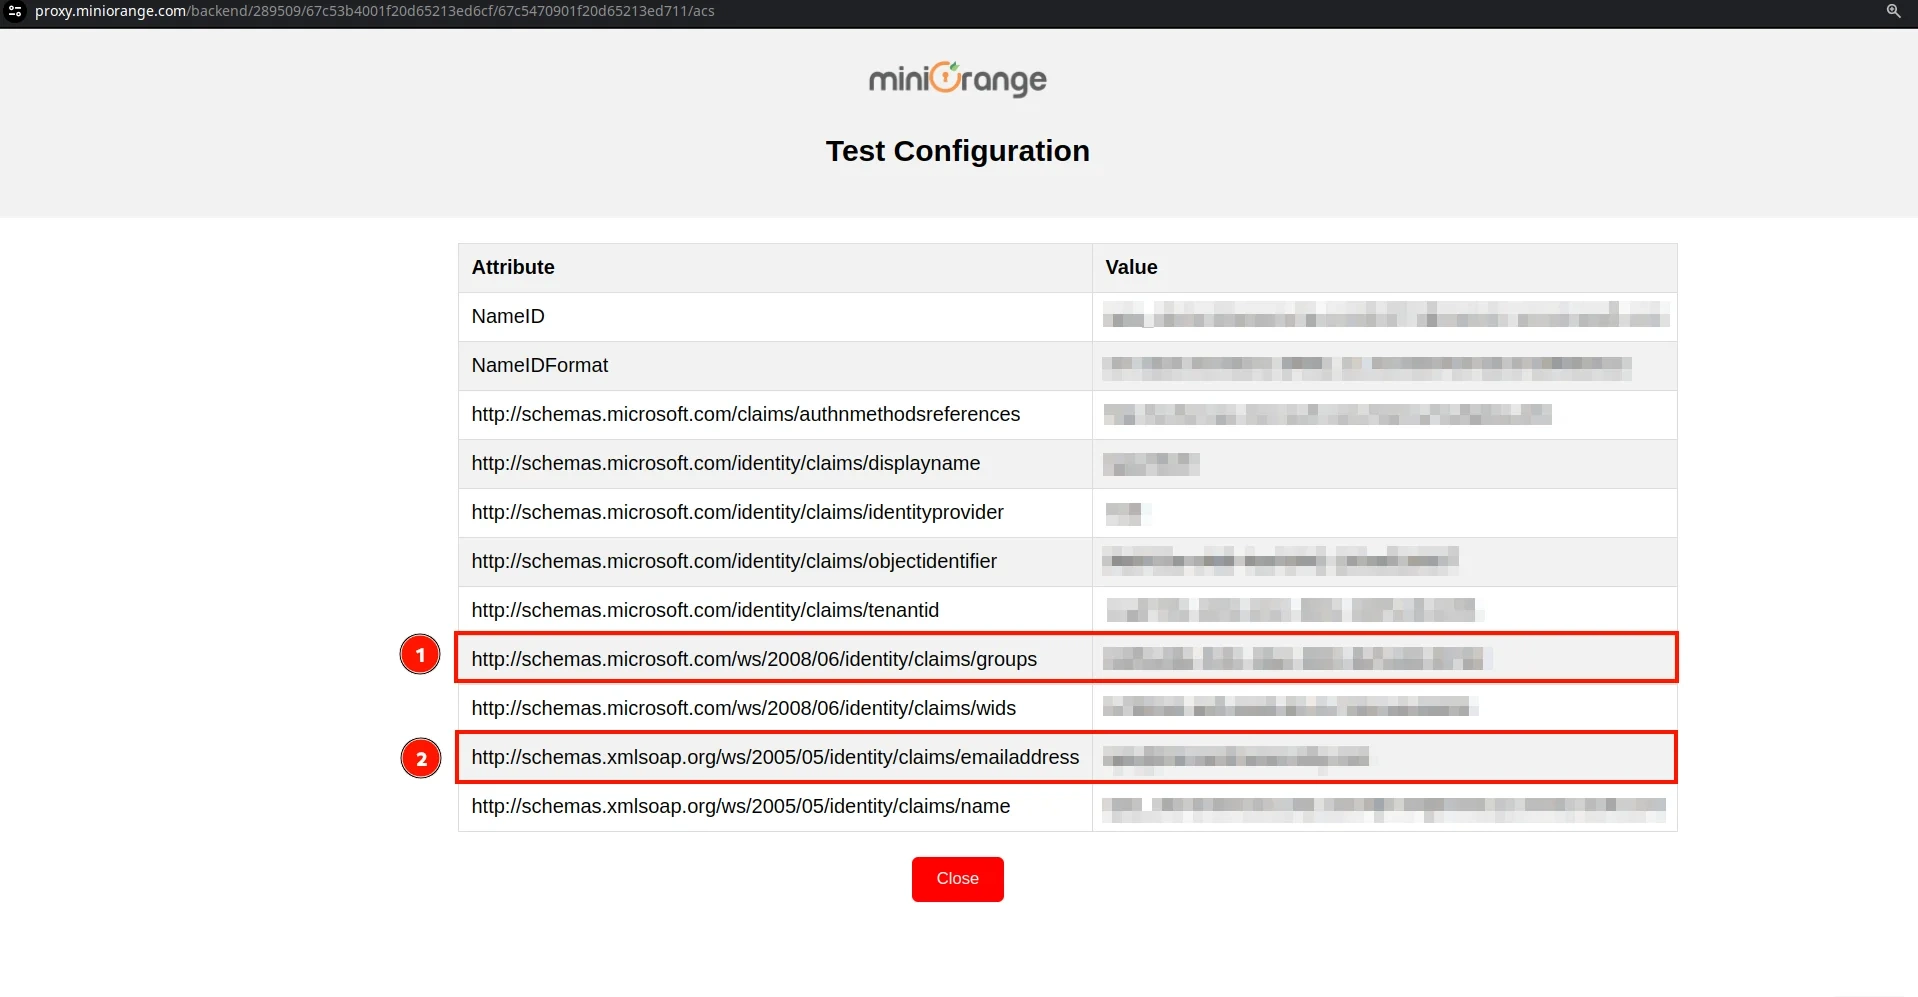
- After successful authentication, you will see a screen displaying Test Connection Details. On the left side, you will find attribute keys, and on the right side, their corresponding values. The values marked 1 and 2 will be used in later configuration steps for one-to-one or many-to-one mappings.
Step 3: Configure Shopify App in CASB
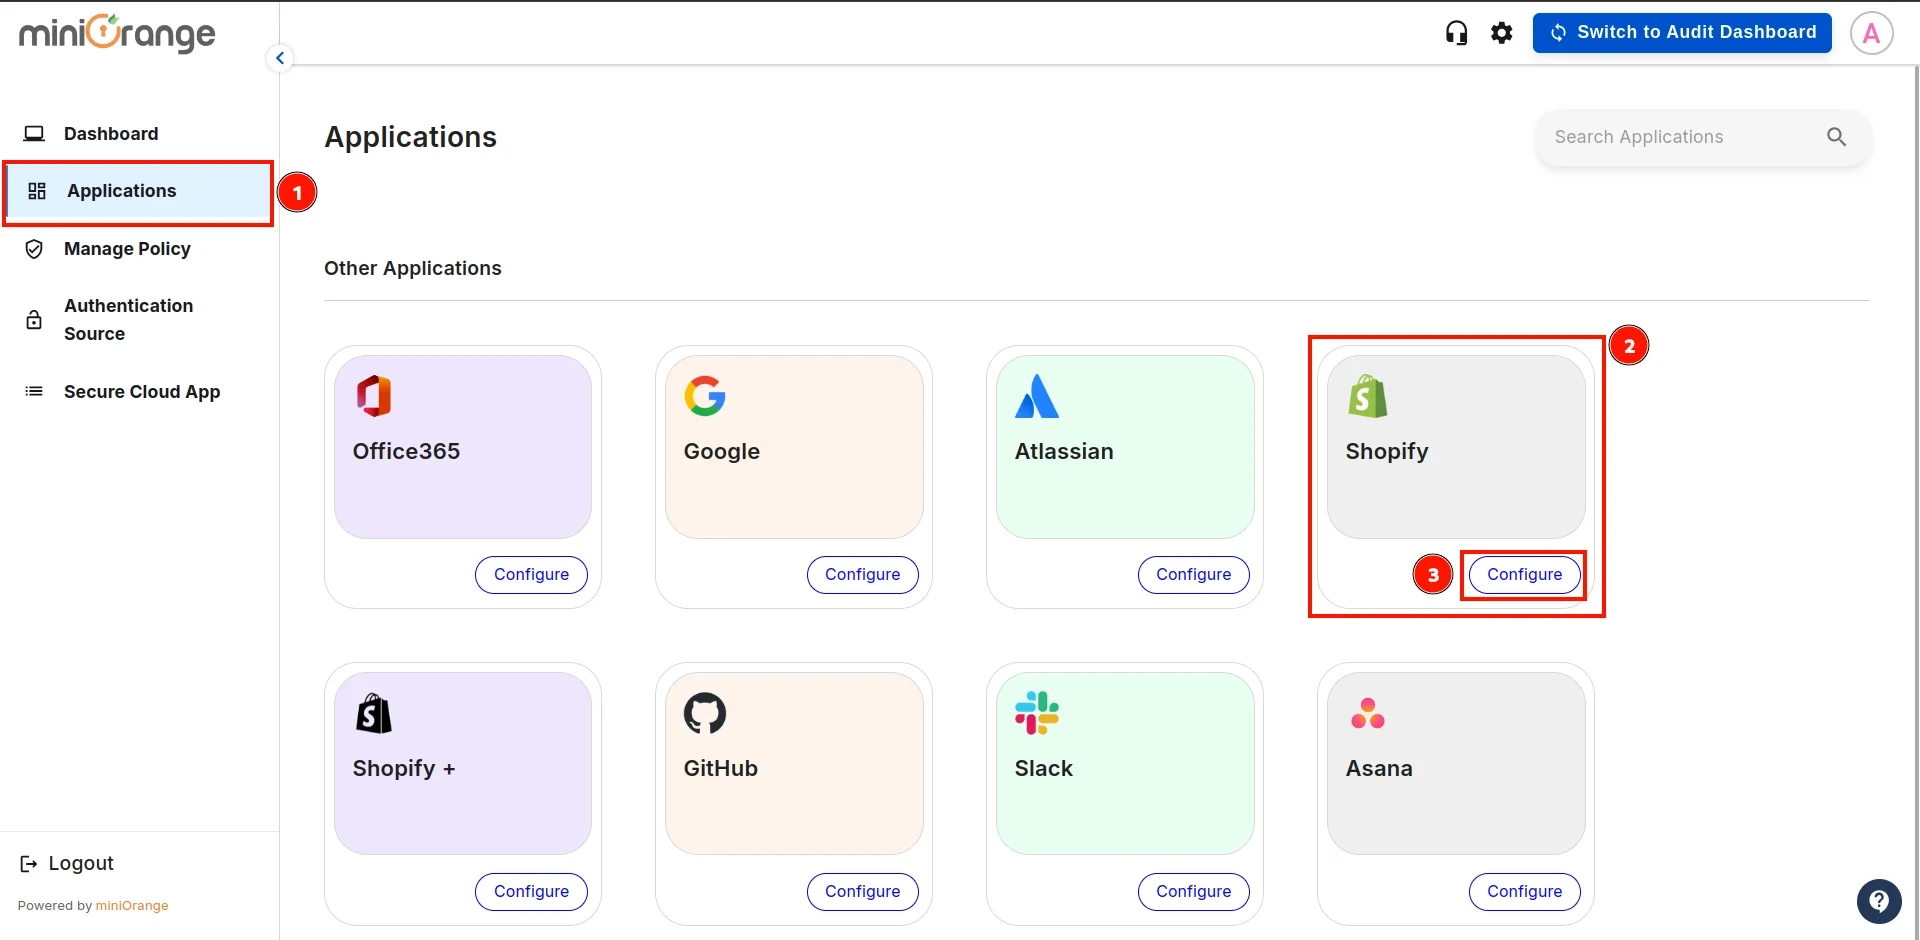
- Now , navigate to the Applications section from the sidebar, go to Shopify, and click on Configure.
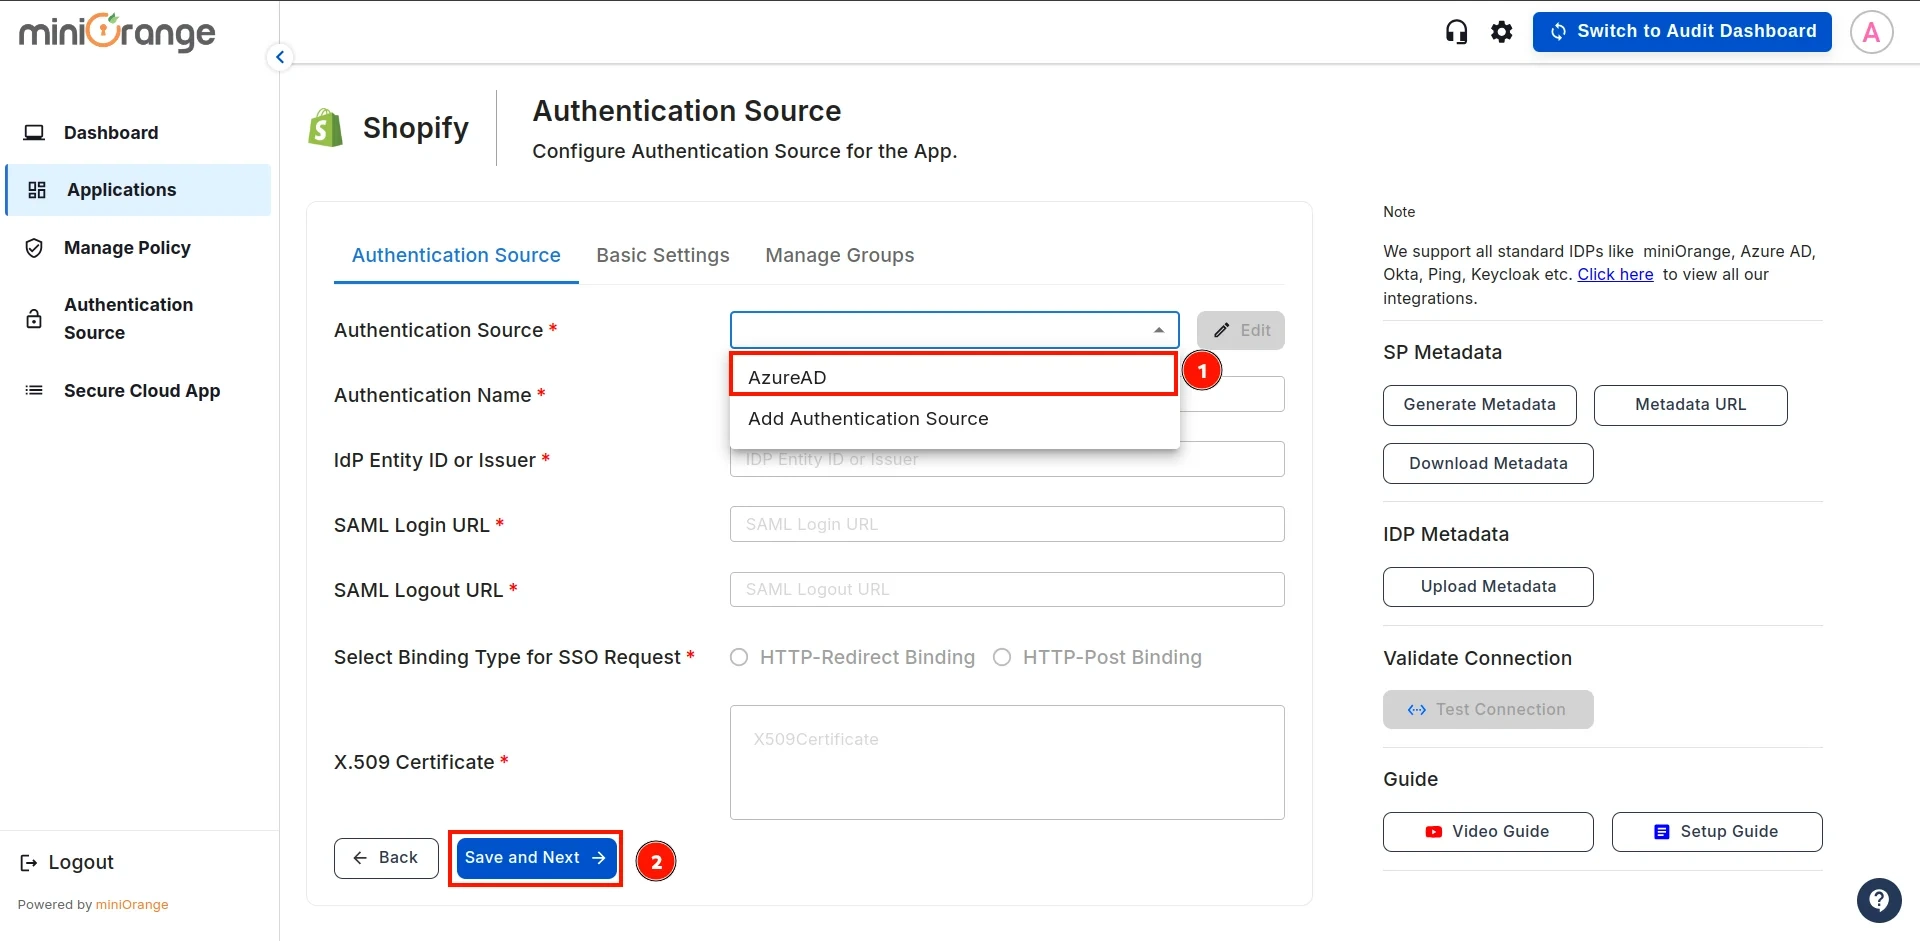
- In this section, open the Authentication Source dropdown, select the authentication source you created earlier, and click Save and Next.
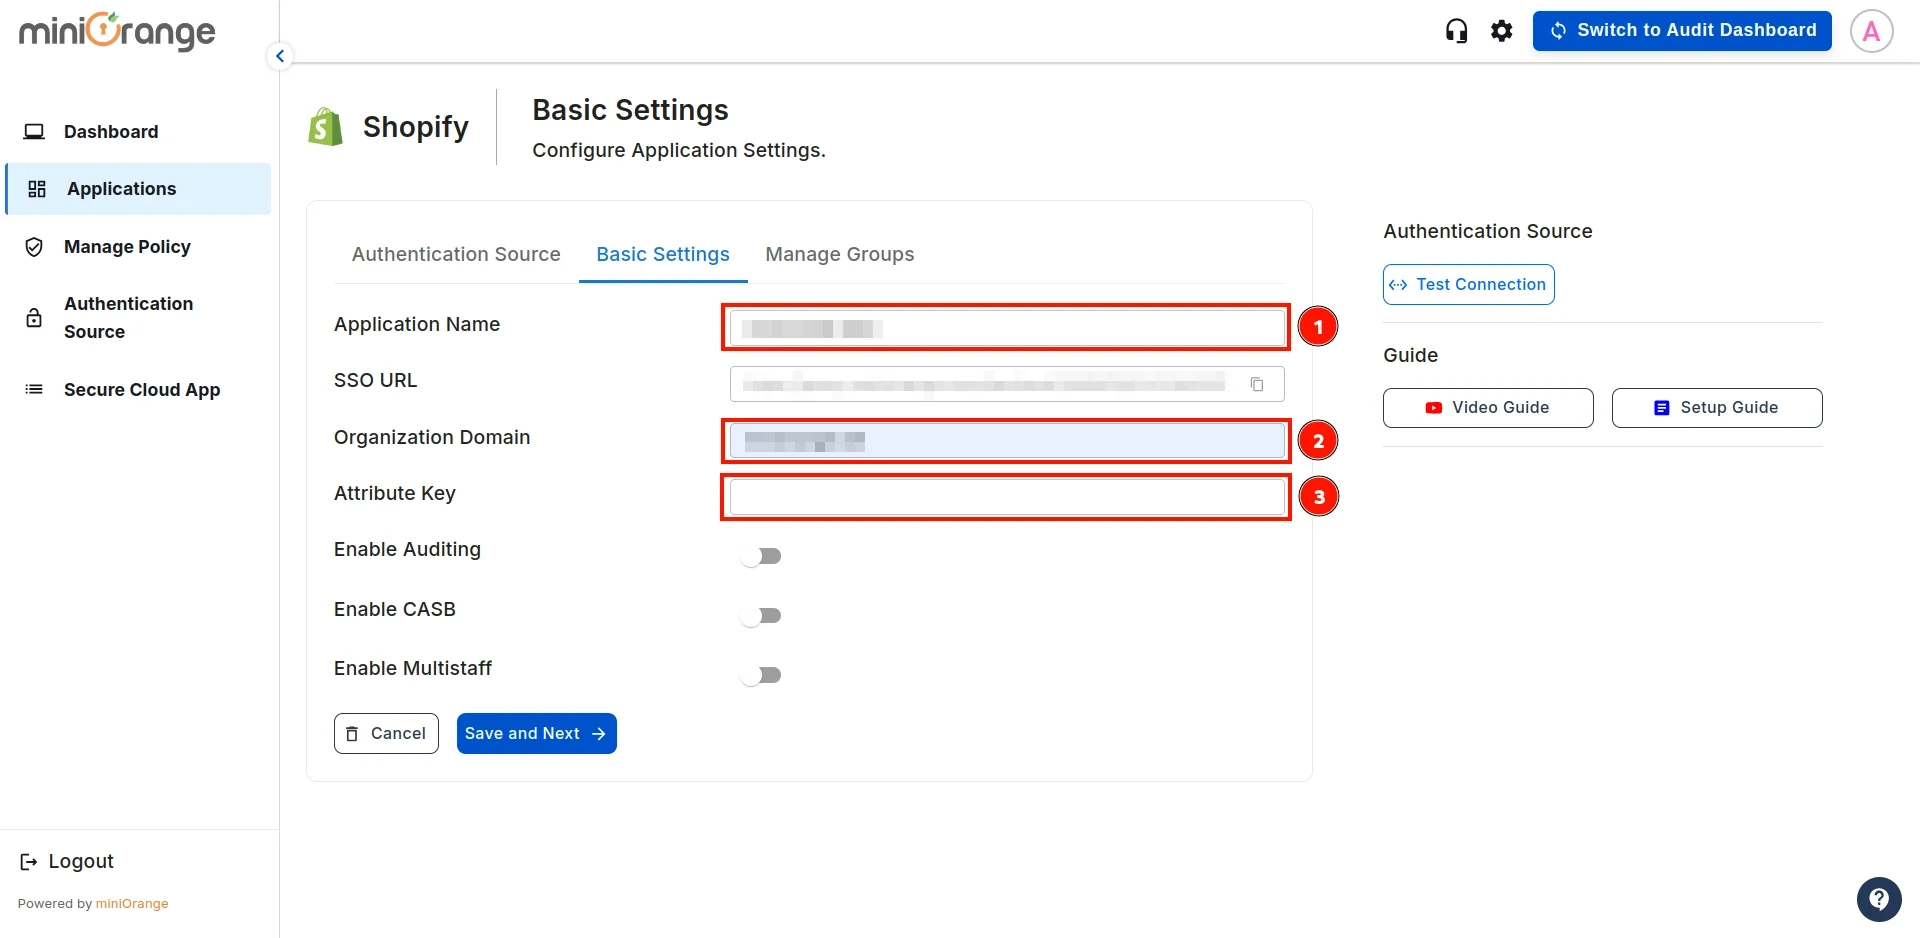
- Enter the Application Name and your Store Domain. For the Attribute Key, refer to the values from Step 2.
- In the next step, you have two options:
1. One-to-One Mappings: Choose this option if you want to map a single user from your IAM (Identity and Access Management) system to a single Shopify store admin user.
This ensures that only the designated IAM user has access to the Shopify admin account.
2. Many-to-One Mappings: Choose this option if you need to map multiple IAM users to a single Shopify store admin user.
This is useful when multiple team members need to share the same Shopify admin account while maintaining authentication through IAM.
-
One-to-One Mappings
-
Many-to-One Mappings
One to One Mappings :
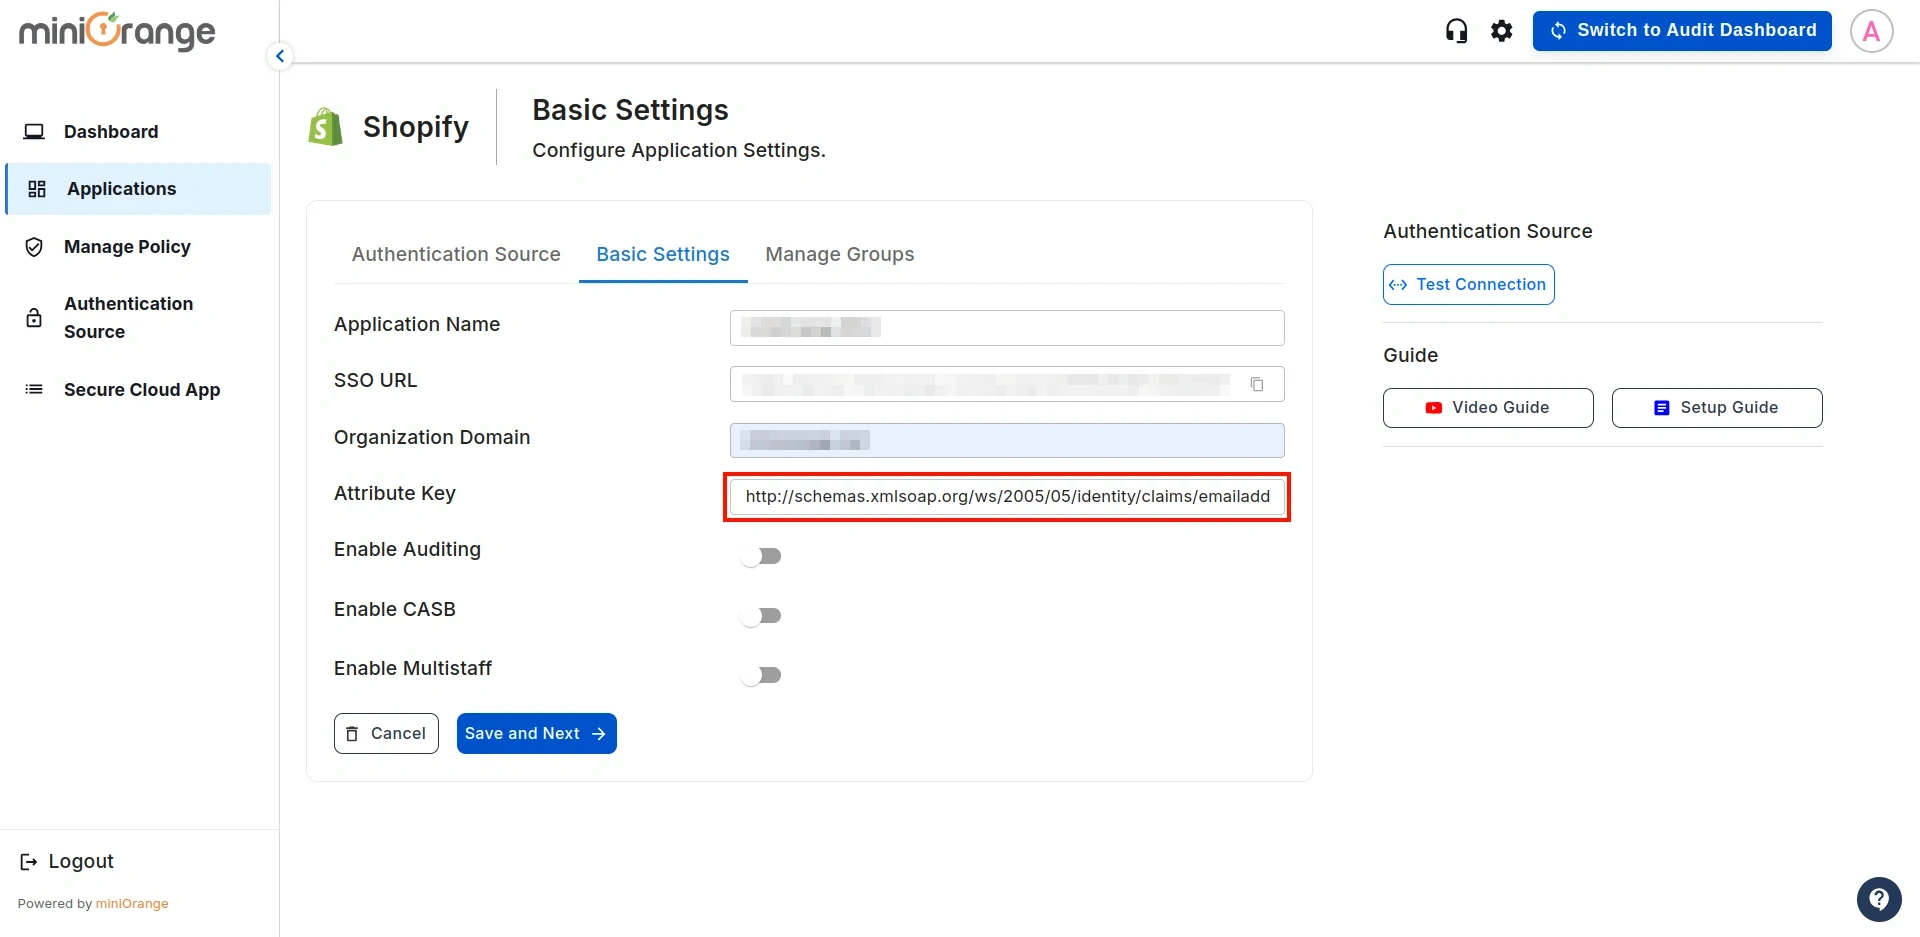
- For One-to-One Mapping, enter the Attribute Key’s Name for the email address from the second field as shown in Step 2.
Many to One Mappings :
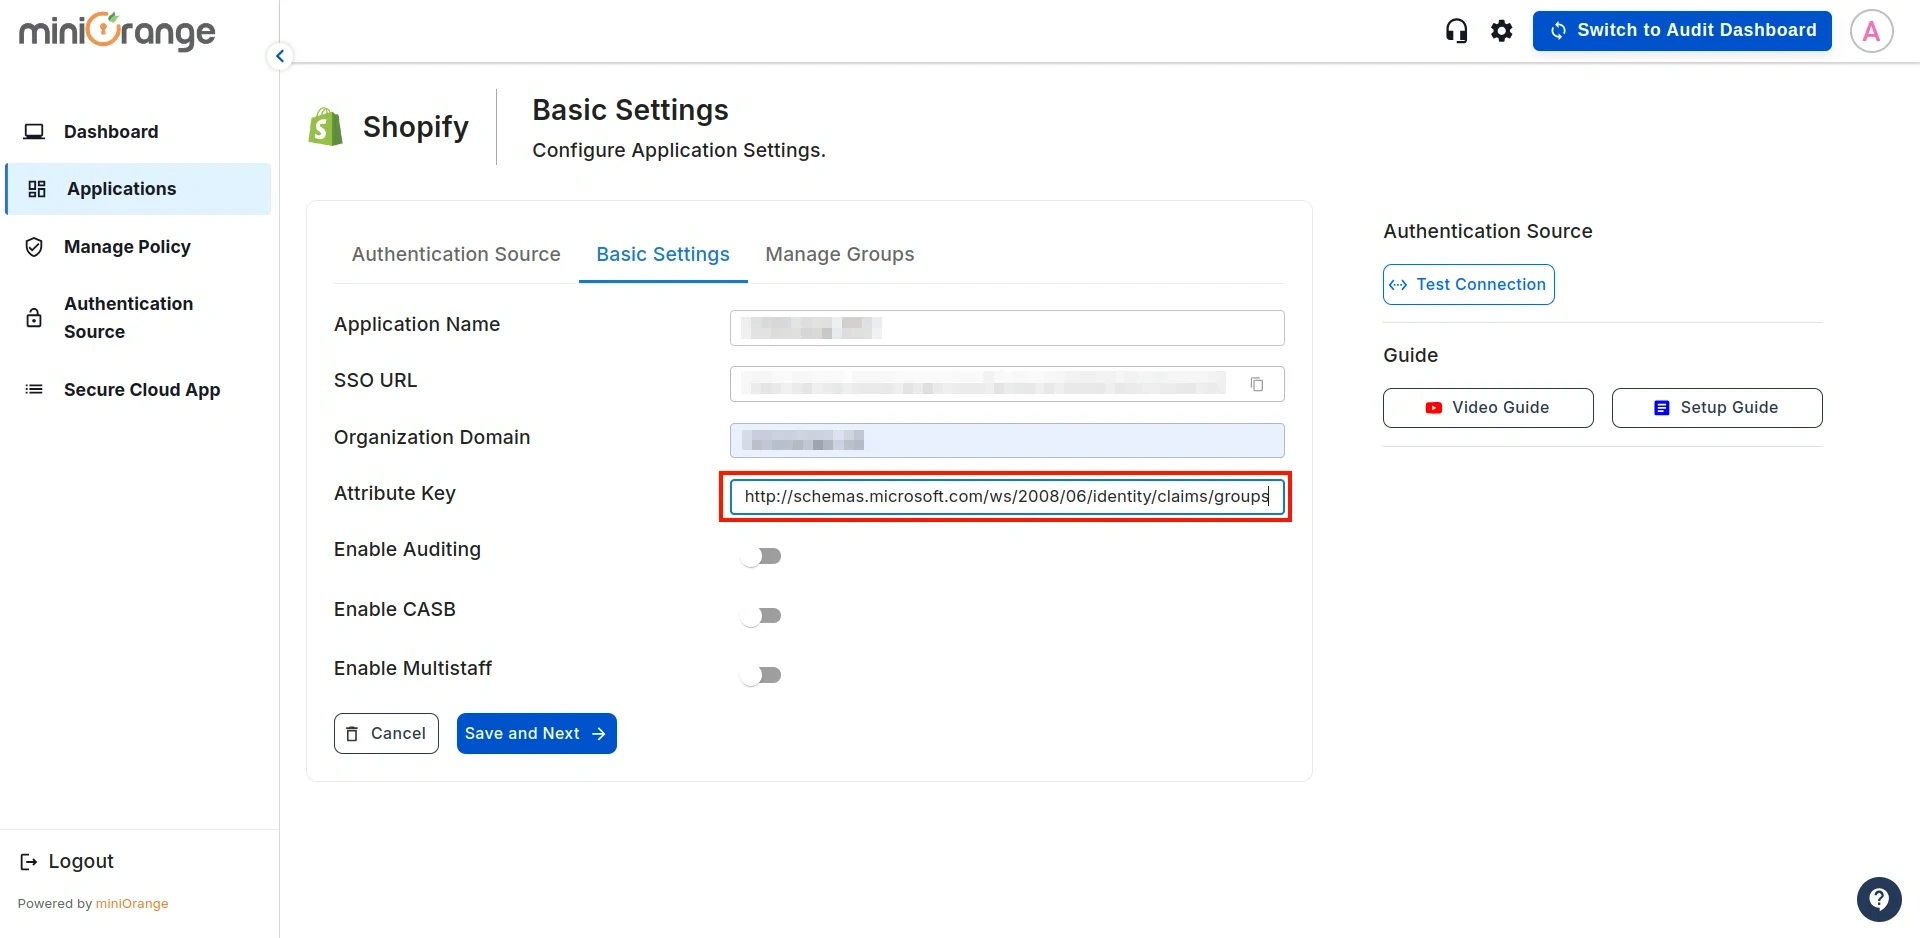
- For Many-to-One Mapping, enter the Attribute Key’s Name for group identifier from the first field as shown in Step 2.
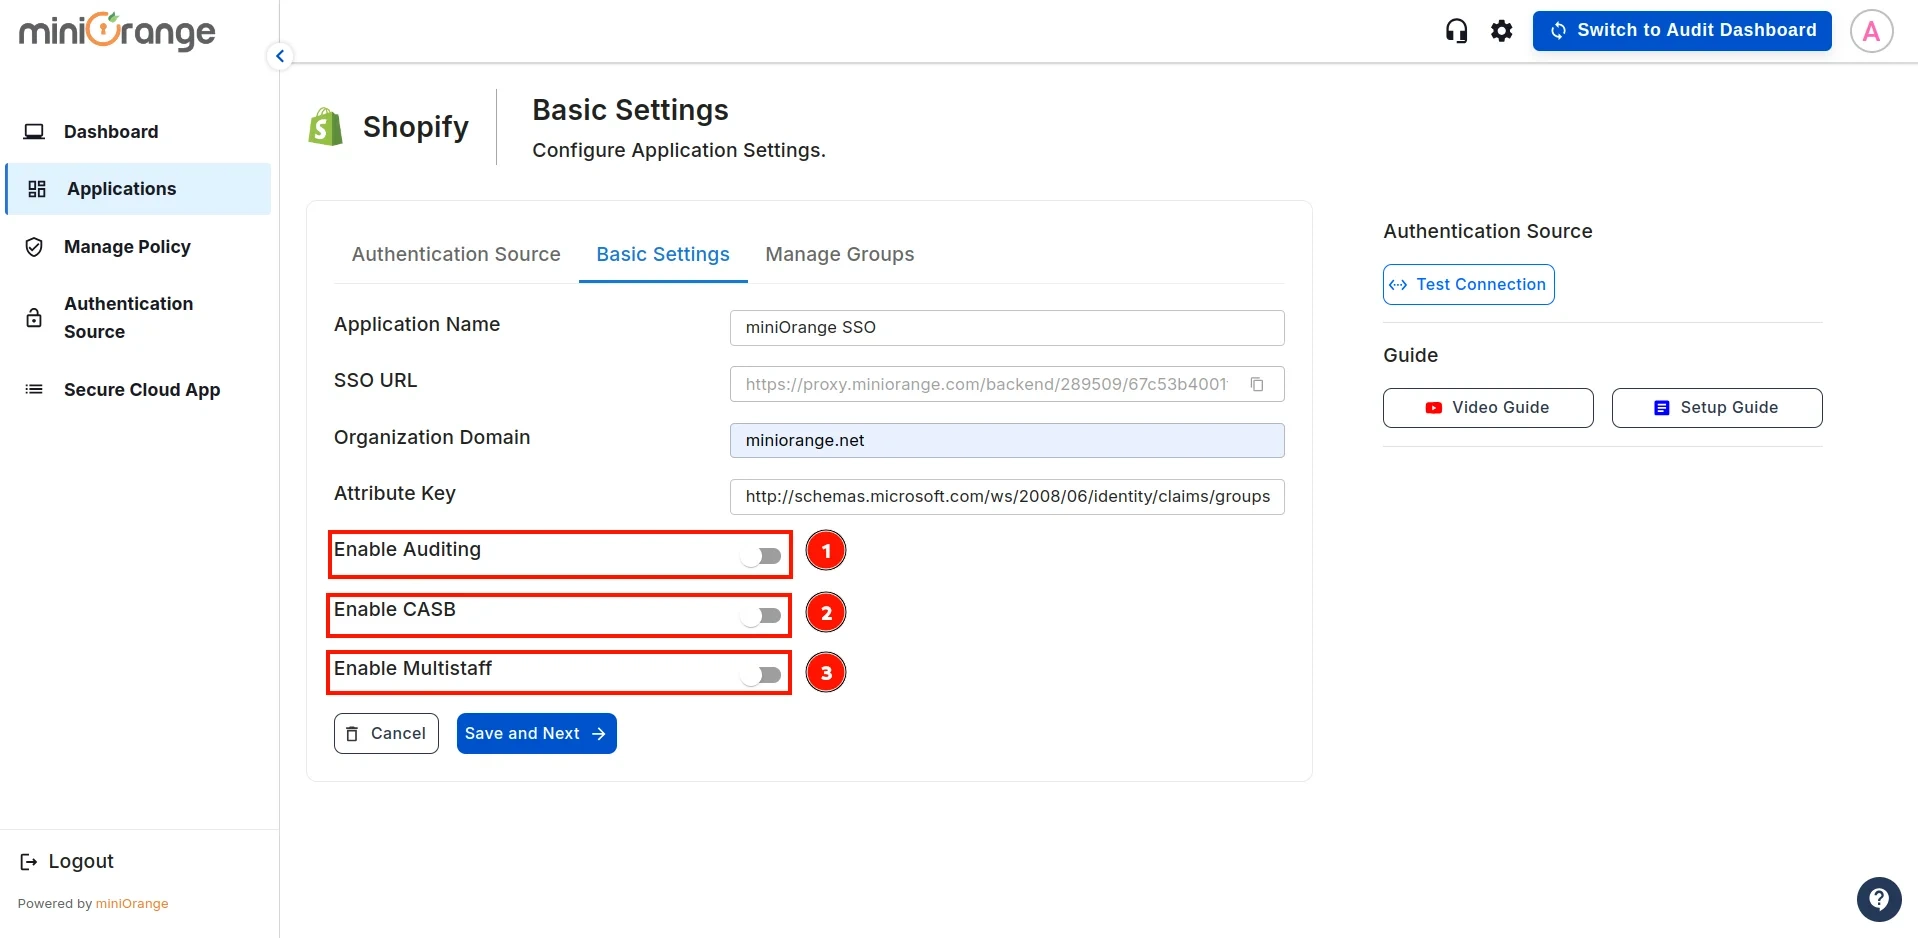
- Follow the guidelines below for the configurations and click Save:
- Enable CASB: Turn this on if you want to enforce restriction policies on your Shopify Store Admin.
- Enable Auditing: Enable this option to track policy breaches in the Shopify Store Admin (this requires CASB to be enabled).
- Enable Multistaff: Activate this if you are using Many-to-Many Mappings.
Step 4: User based mapping
- In the next configuration step, you will map users based on one of the following options:
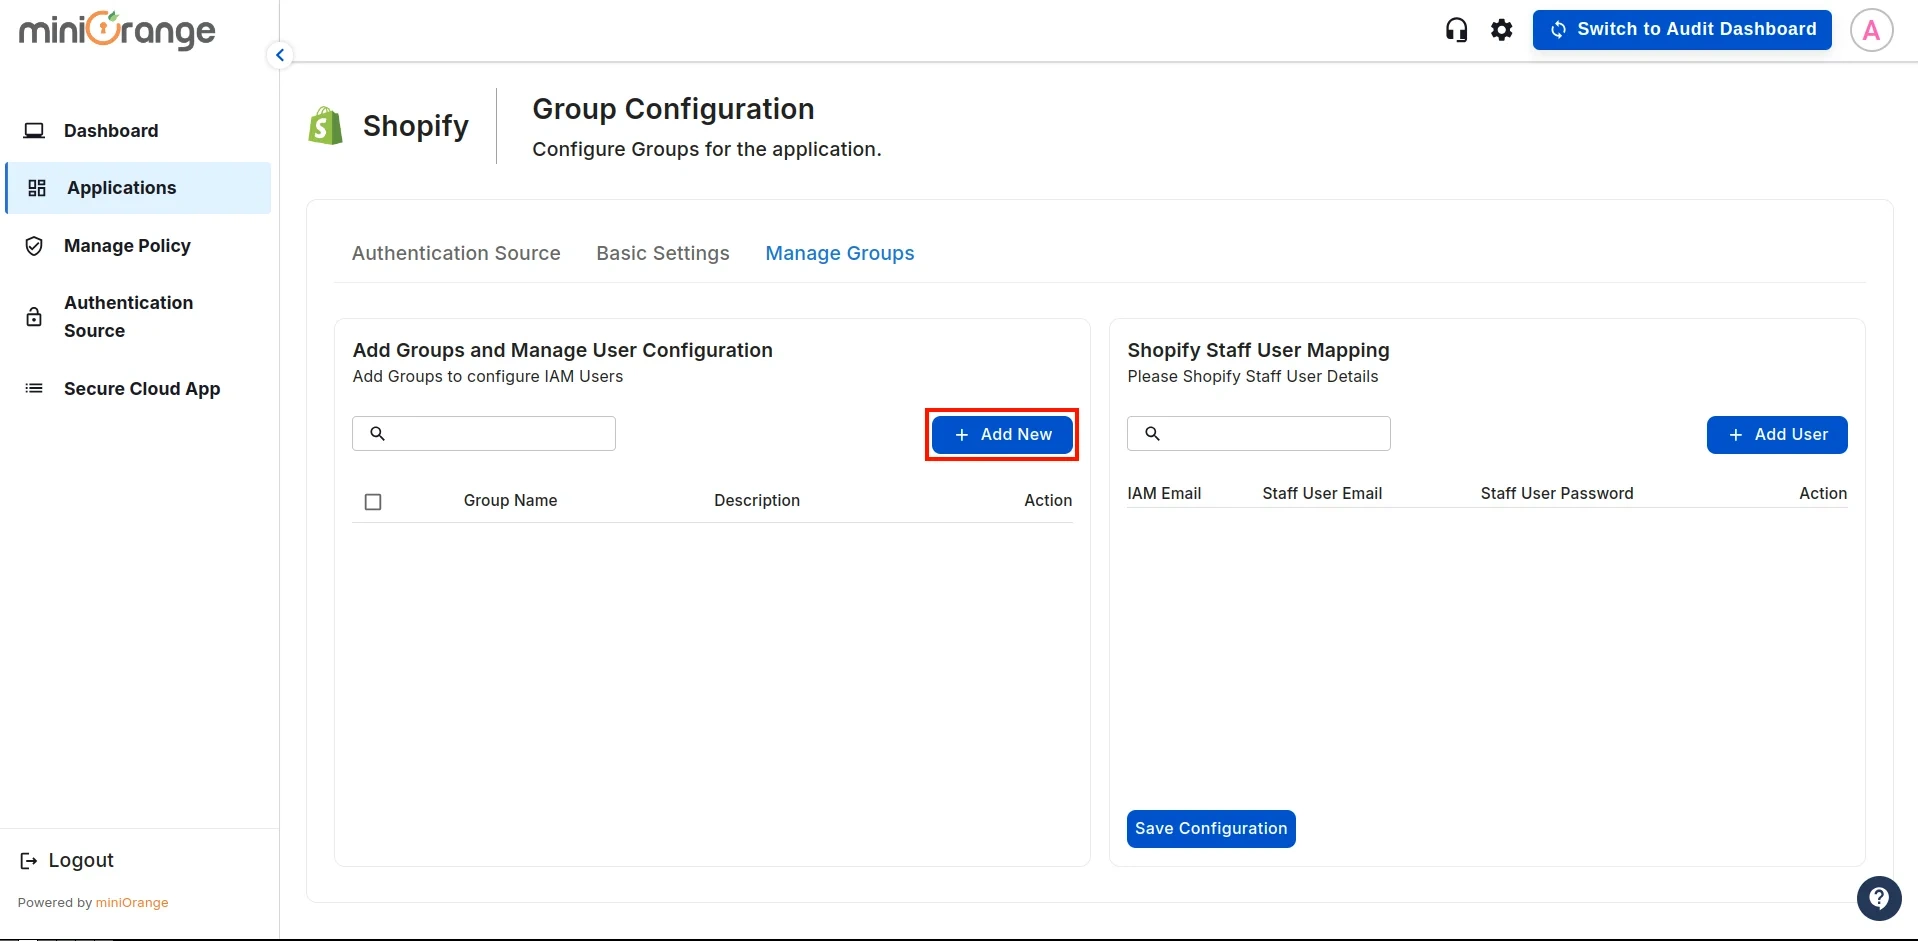
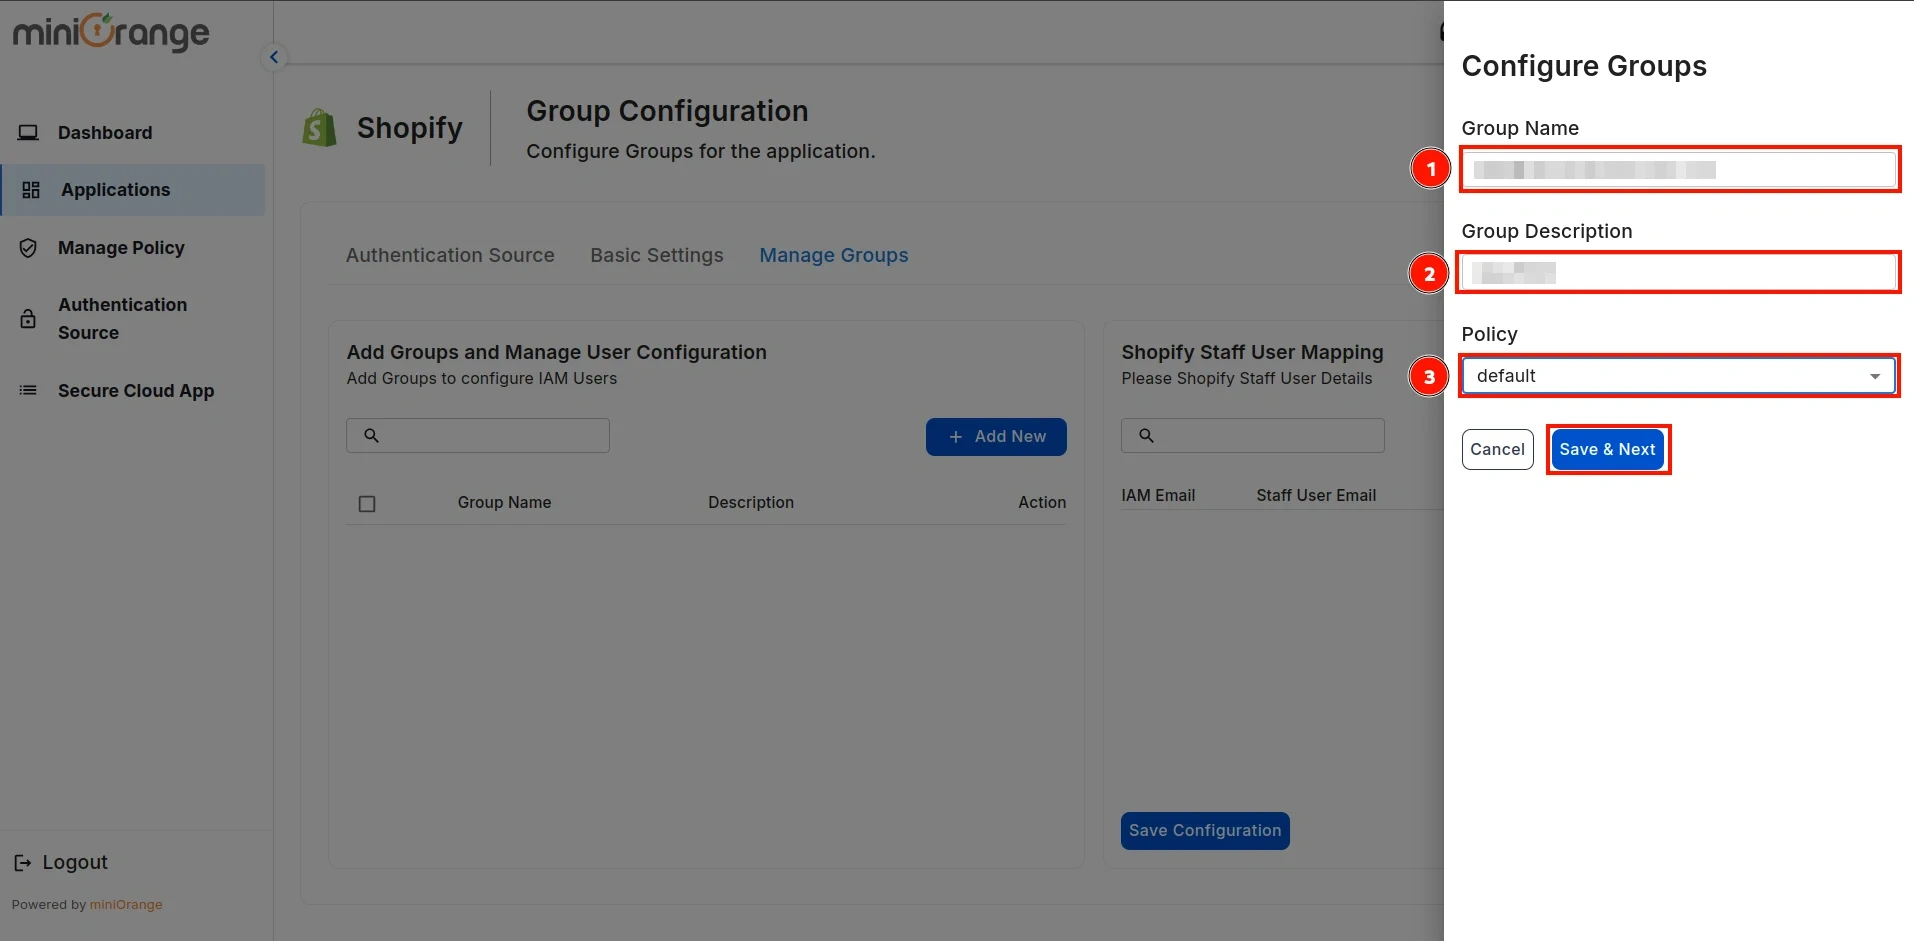
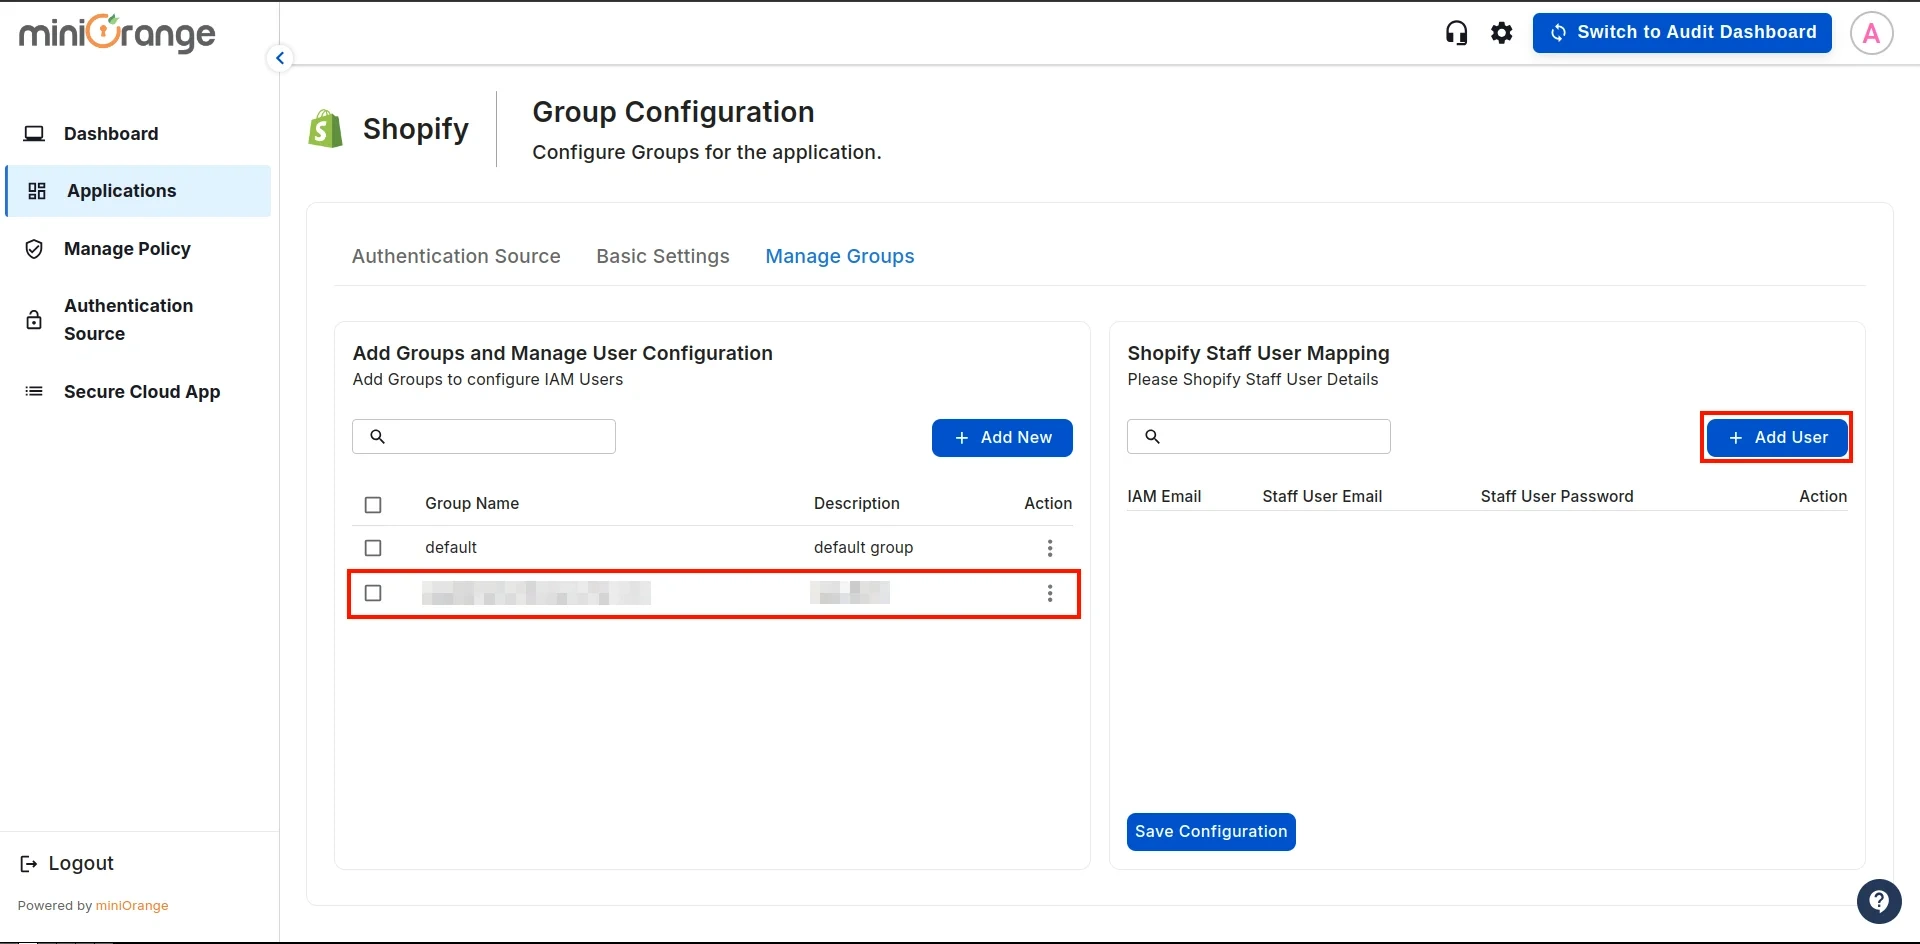
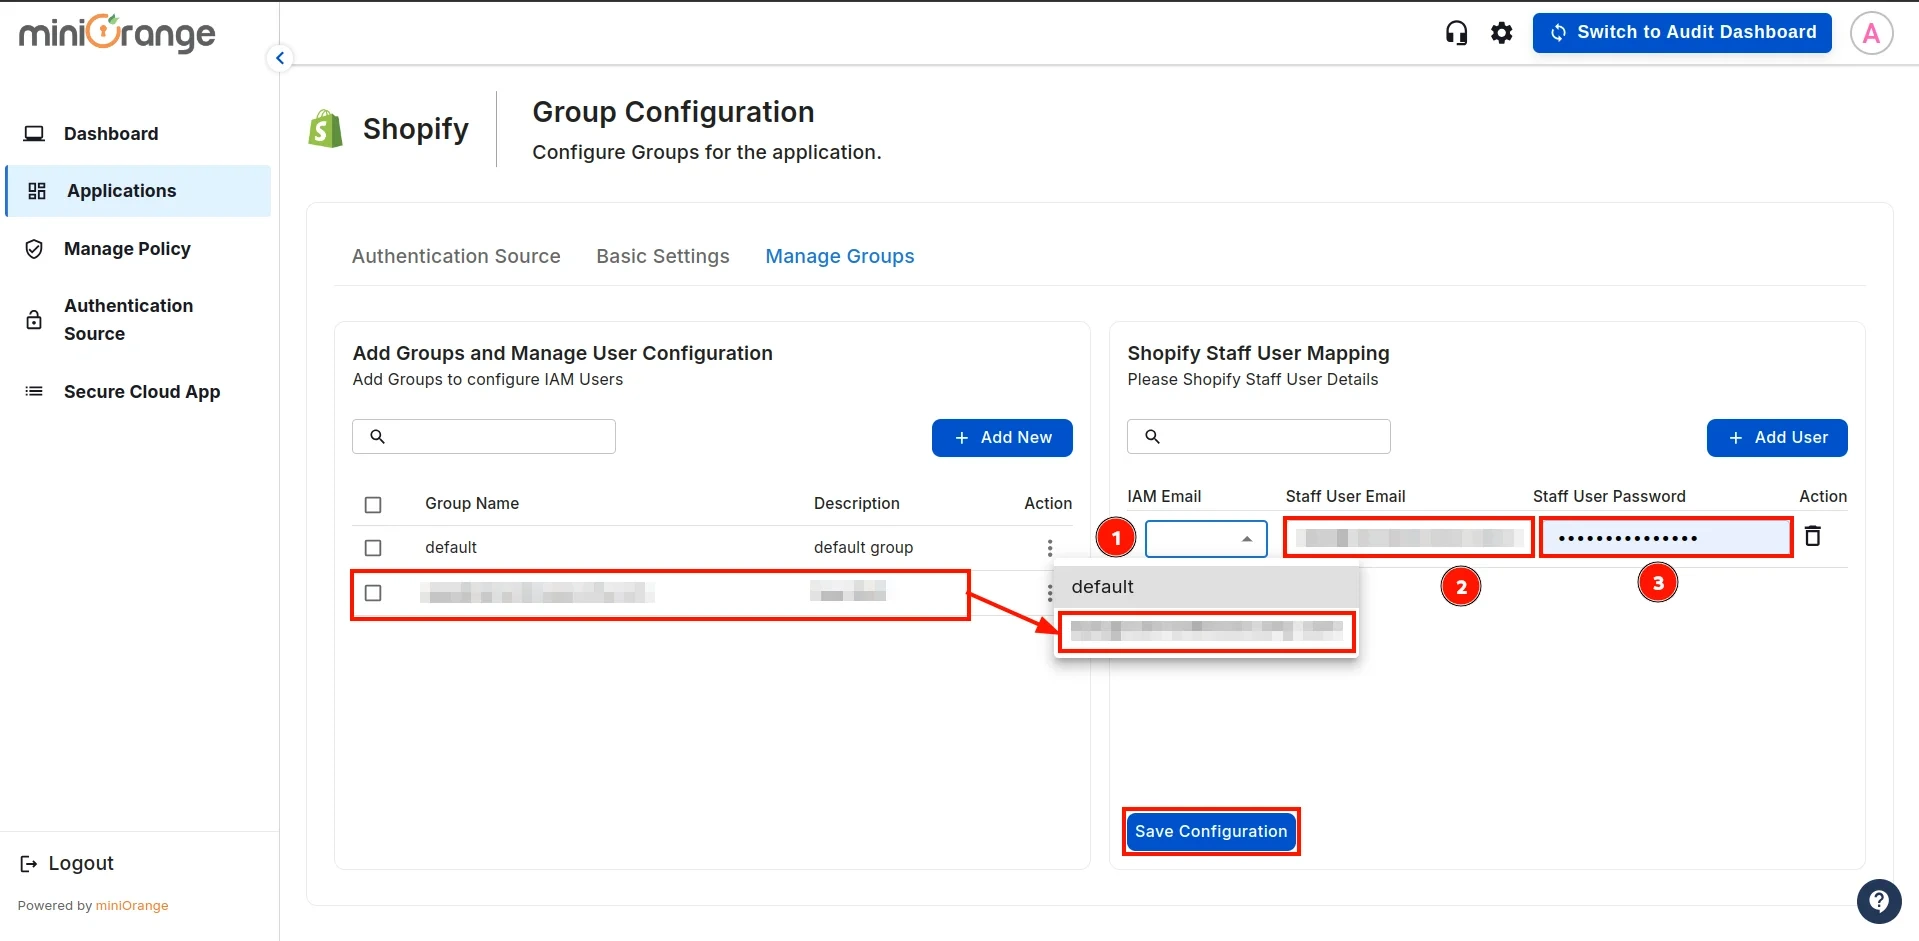
-
One-to-One Mappings
-
Many-to-One Mappings
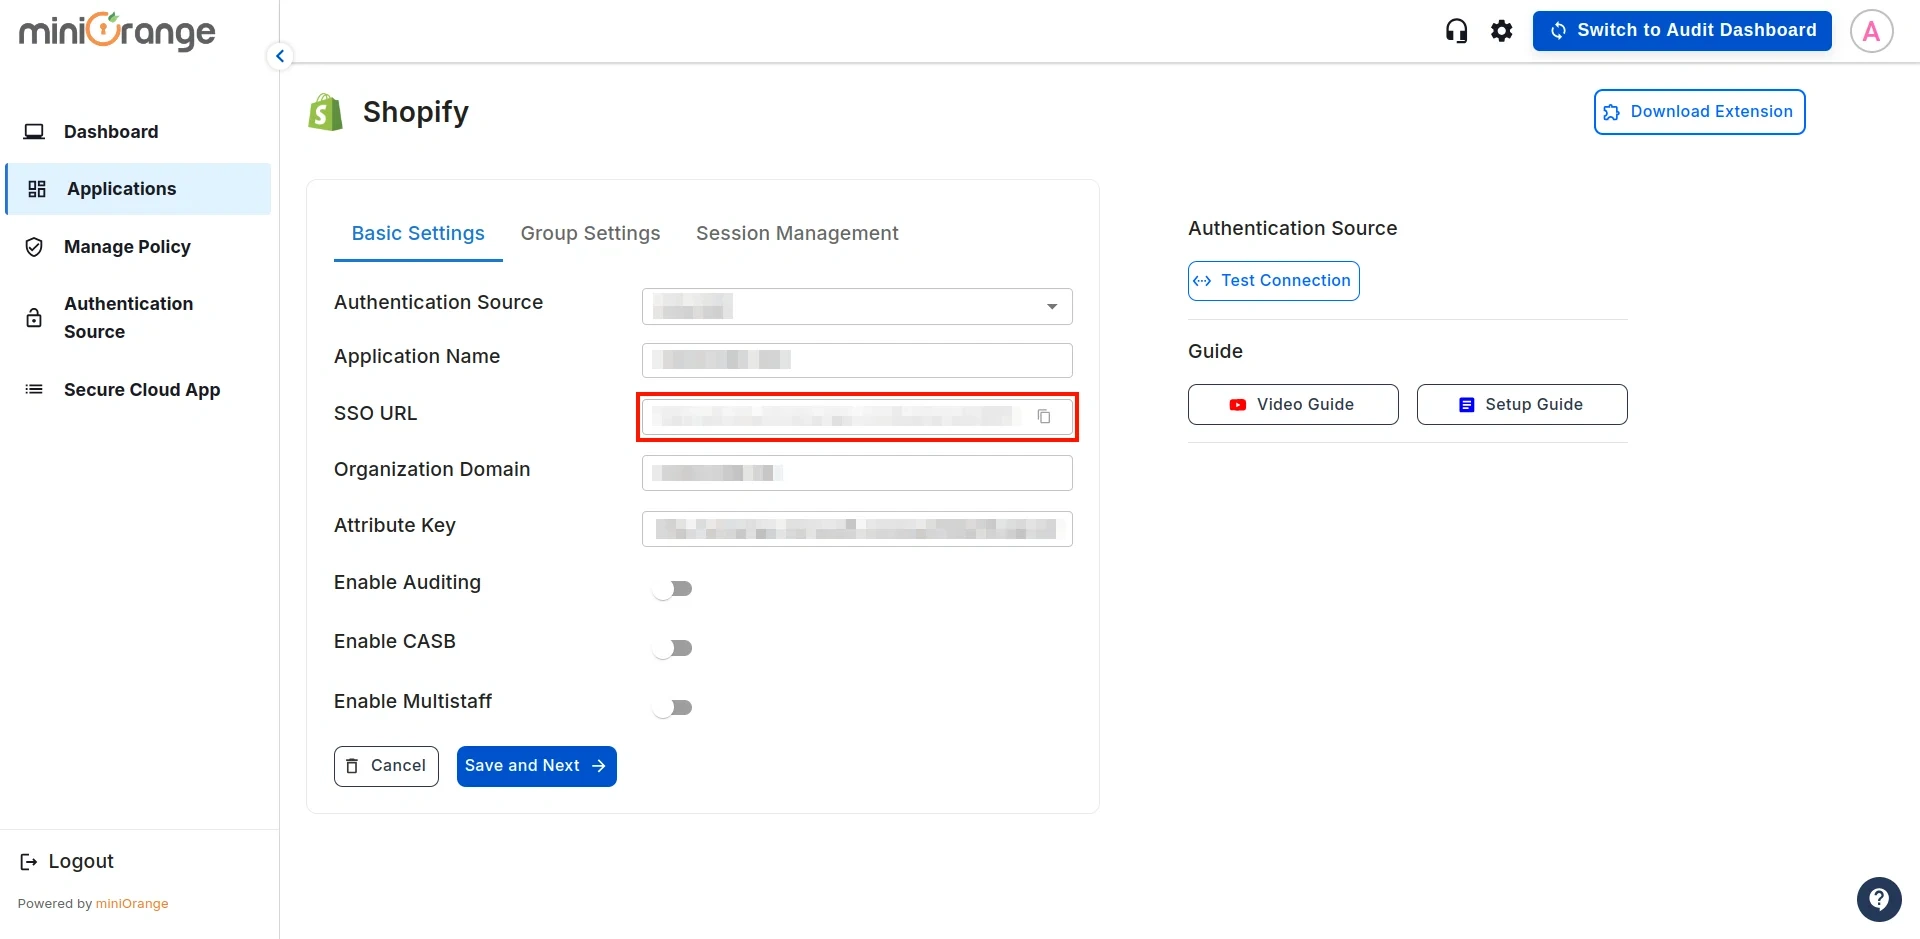
- Now that the Single Sign-On (SSO) configuration on the Admin side is complete, you will need the SSO URL, as shown in the image. This URL must be configured in the miniOrange CASB extension.
- Now, we will proceed with the User Onboarding Process. Follow this guide to complete the setup.
Not able to configure or test Shopify Non-Plus Admin SSO using Microsoft Entra ID (Azure AD)?
For this, you need to Contact us or email us at uemsupport@xecurify.com and we'll help you setting it up in no time.
External References
Single Sign-On (SSO) for Shopify End Users
If you want to use Shopify SSO with Microsoft Entra for end users or consumers, then you can enable it to streamline login access. Set up secure authentication for your store using this comprehensive guide - Configure Shopify SSO with Entra ID.
miniOrange CASB offers a wide variety of security features with flexible scalability, all available at the most affordable price to all types of businesses. Start by signing up now!


