How to restrict access to Google Apps & Services using miniOrange CASB
Restricting access to Google apps and services helps protect sensitive business information, maintain data privacy, and prevent unauthorized users from accessing your digital workspace. In this guide, we’ll show you the step-by-step process to implement a miniOrange CASB to restrict access to your favorite Google apps and services.
Step 1: Sign up with miniOrange CASB
Step 2: Selecting Google Apps & Services
- After logging in, you should be taken to the miniOrange dashboard page. Locate the "Google" tab and select the "Add App" option to select the apps & services you want to restrict.

- Select the Add Authentication Source option from the drop-down menu.

- Mention an Authentication name for the authentication source, and click on Generate Metadata.
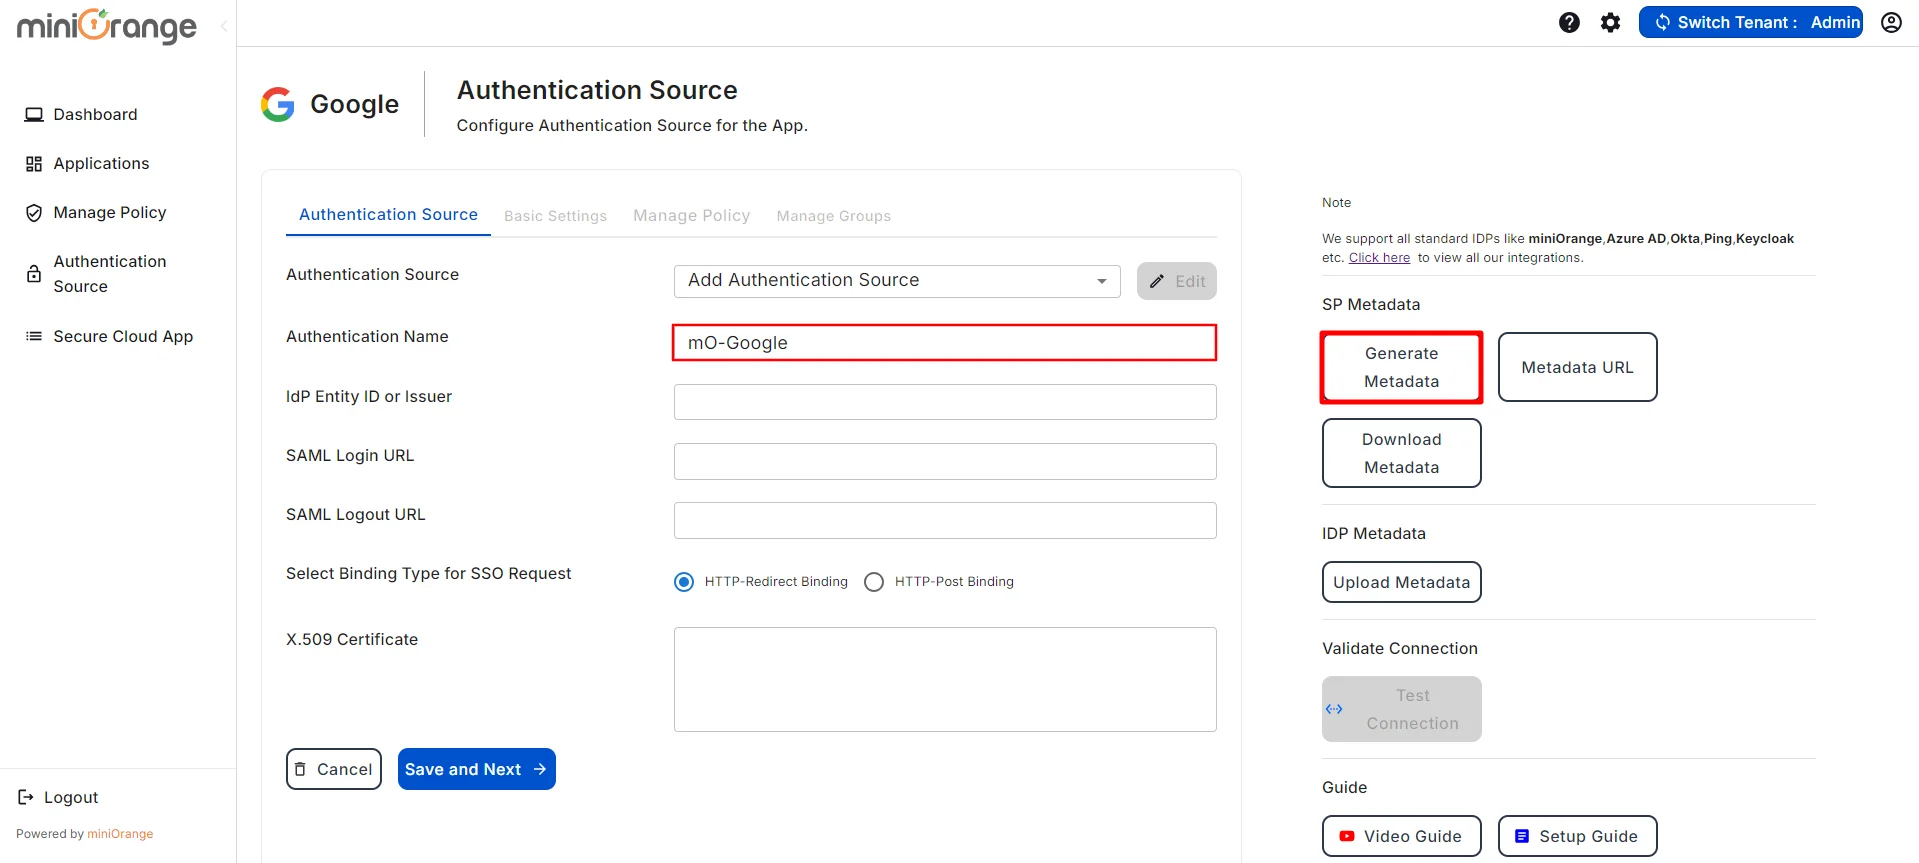
- After clicking on Generate Metadata, you will get the metadata details, as shown in the image below. Use this data to configure the SAML application in your Identity Provider (IDP) like Keycloak, Okta, Entra ID (Azure AD), miniorange and more.

- If you would like to view the metadata details again, then you can click on the View Metadata button.
- Now, Enter the remaining details like the IDP Entity ID, SAML Login URL, SAML Logout URL, and X509 Certificate which you will find in your Identity Provider metadata. Once done, Choose the Binding Type for SSO Request as required. You will find this information in the IDP metadata. However, if you are not sure, please select the HTTP-Redirect Binding as the default configuration.

- Click the Save & Next button once you have filled out all the details.
- You have now successfully configured SAML Authentication with miniOrange CASB.
Step 3: Configuring SAML SSO in Google Admin Console
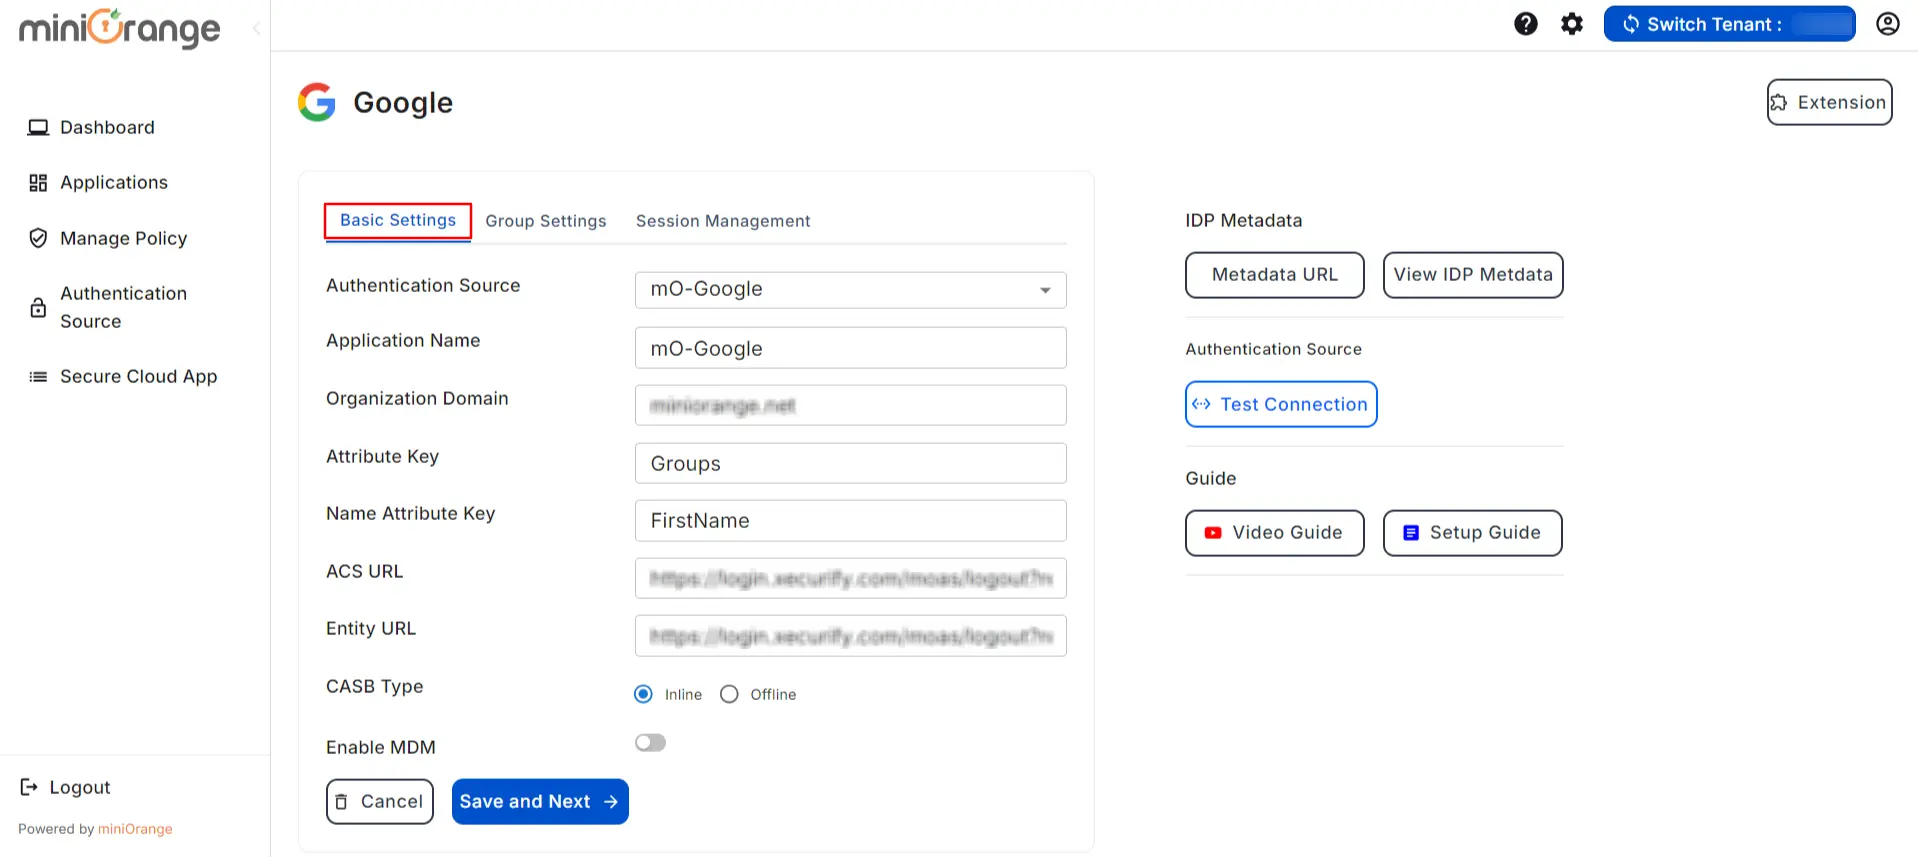
- Now, You are redirected to Basic Settings section.
- Fill in the following details to configure the Google Application:
| Organization Name: |
Enter the name of your organization. |
| Organization Domain: |
Enter the domain of your organization on Google. (Ex: example.com) |
| Attribute Key: |
Enter the Group Attribute Key for the SSO app, which you have configured in the IDP under the SAML attributes section. |
| Name Attribute Key: |
Enter the attribute name like fname,Lname etc. |
| Enter ACS URL: |
You can get the Google ACS URL from the Google admin panel. |
| Enter Entity URL: |
You can get the Google Entity URL from the Google admin panel. |
| CASB Type |
Select CASB type as Inline or Offline |
| Enable MDM |
If you want to configure MDM on your device, enable it |

- For ACS URL and Entity URL you need to first configure Google Admin Authentication using the below steps.
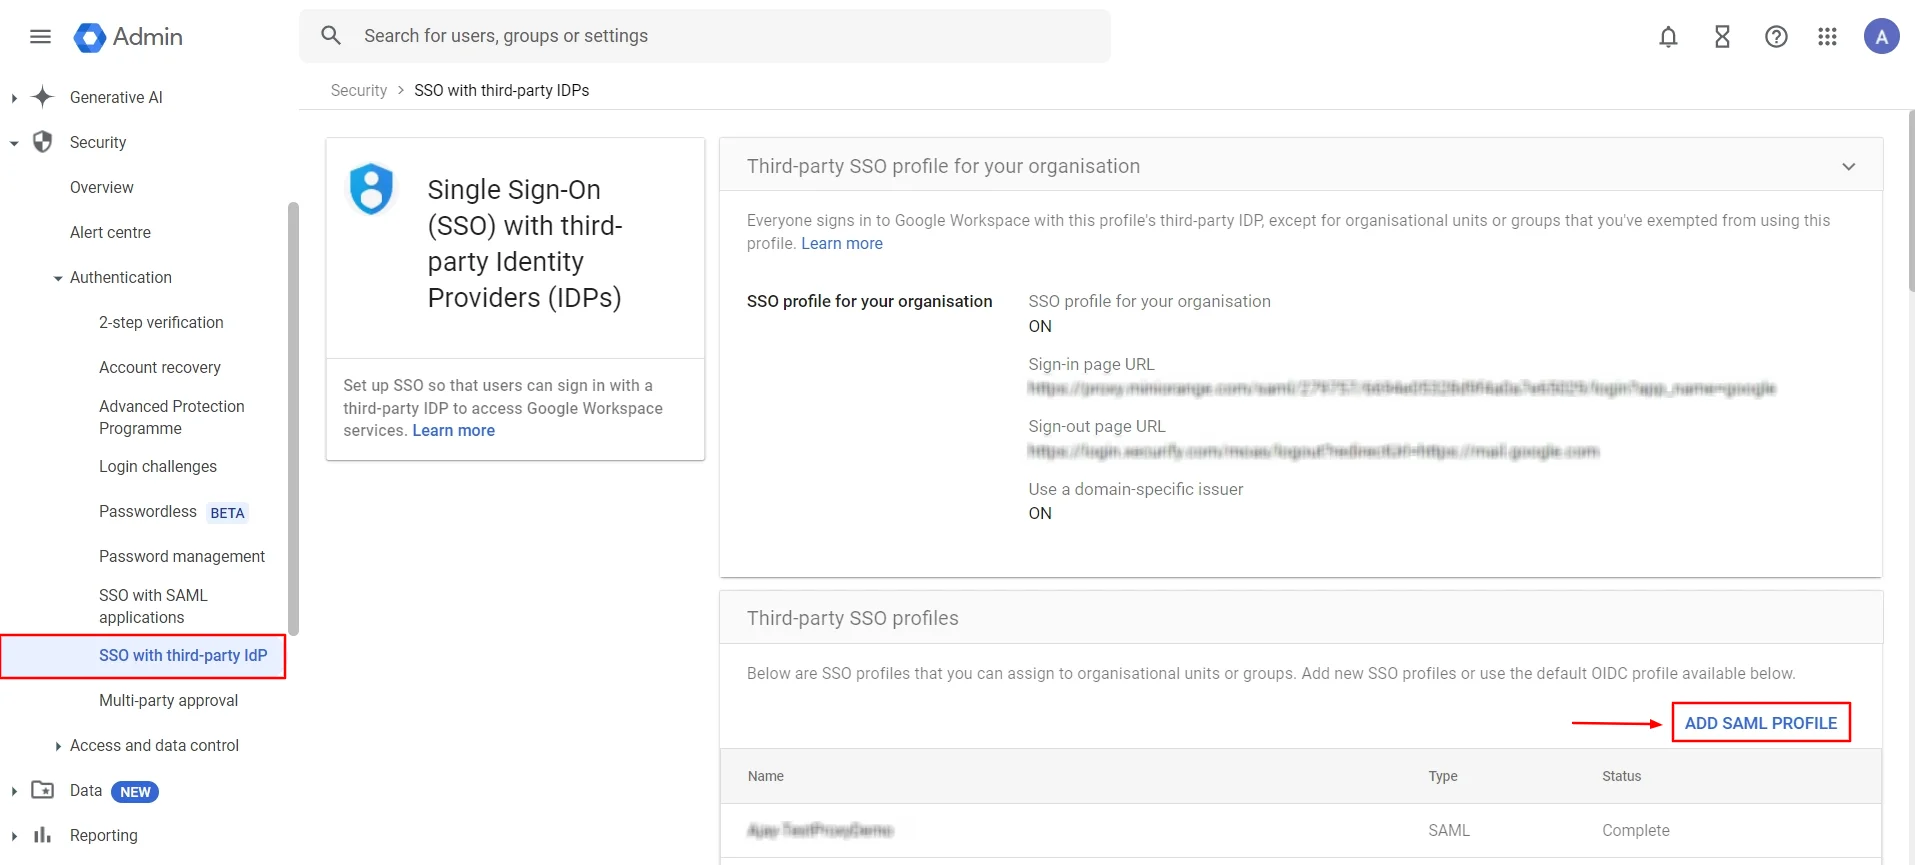
- Firstly, Login to your Google Admin Dashboard.

- On the left side, below the menu icon (☰), click on Home () ⤏ Security () ⤏ Authentication ⤏ SSO with third-party IDP.

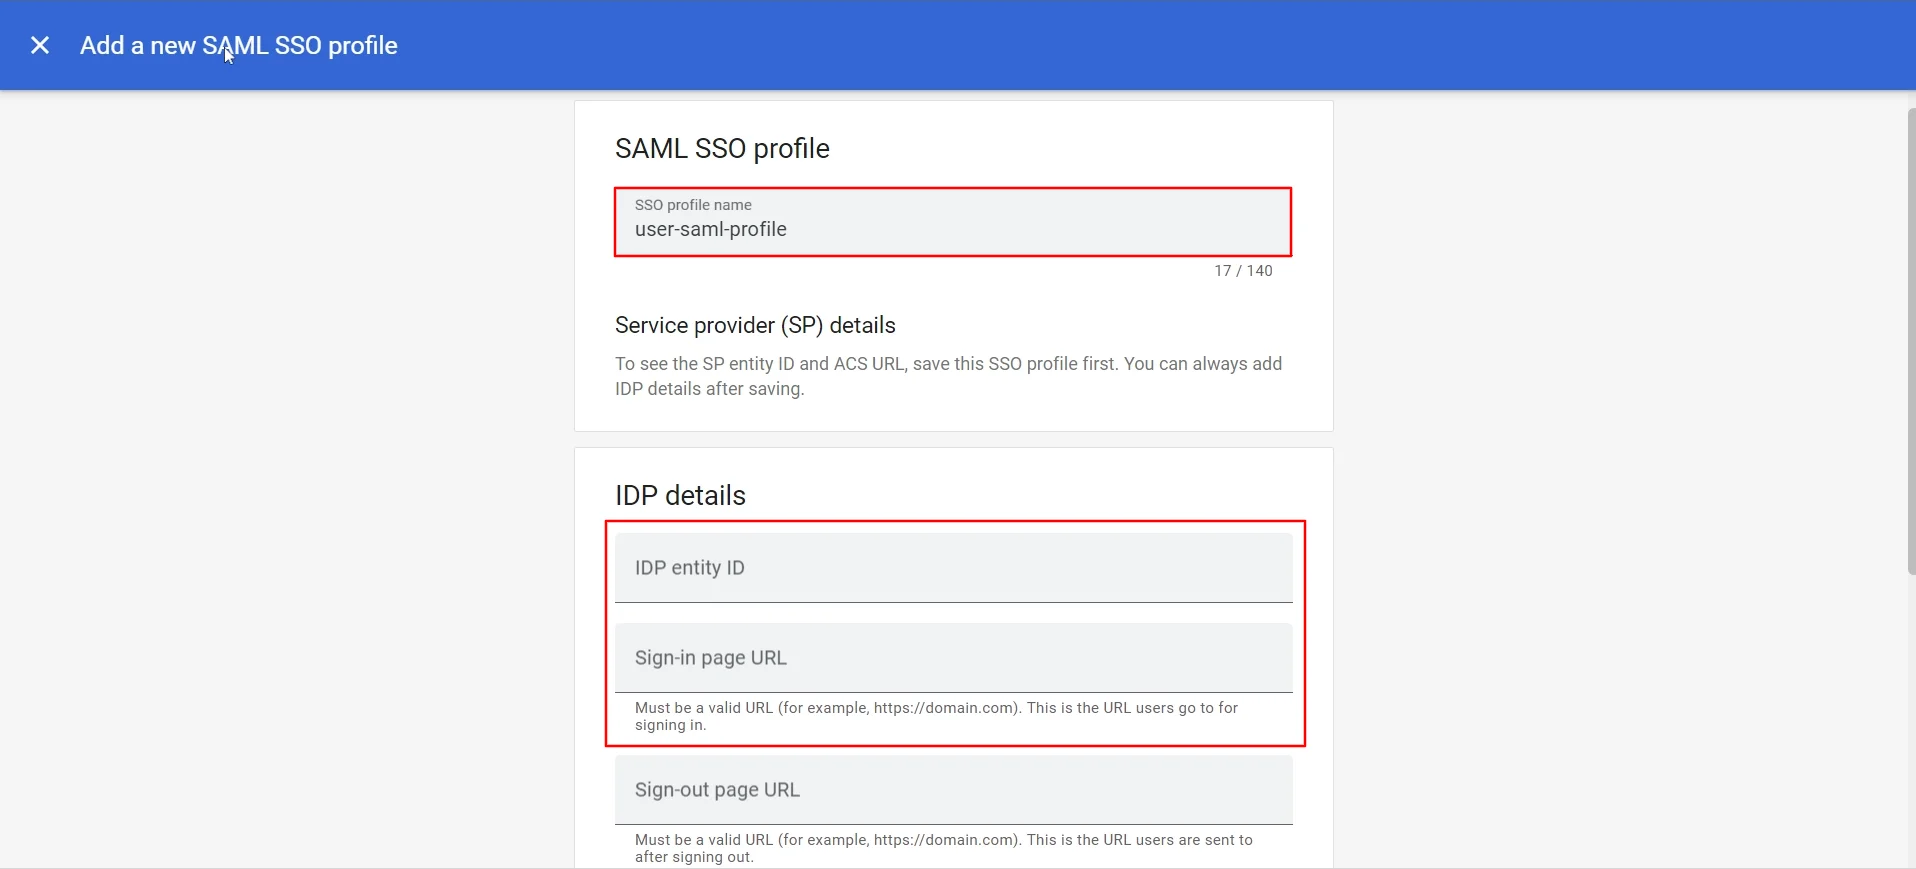
- Now, click on ADD SAML PROFILE to create a new SAML profile.
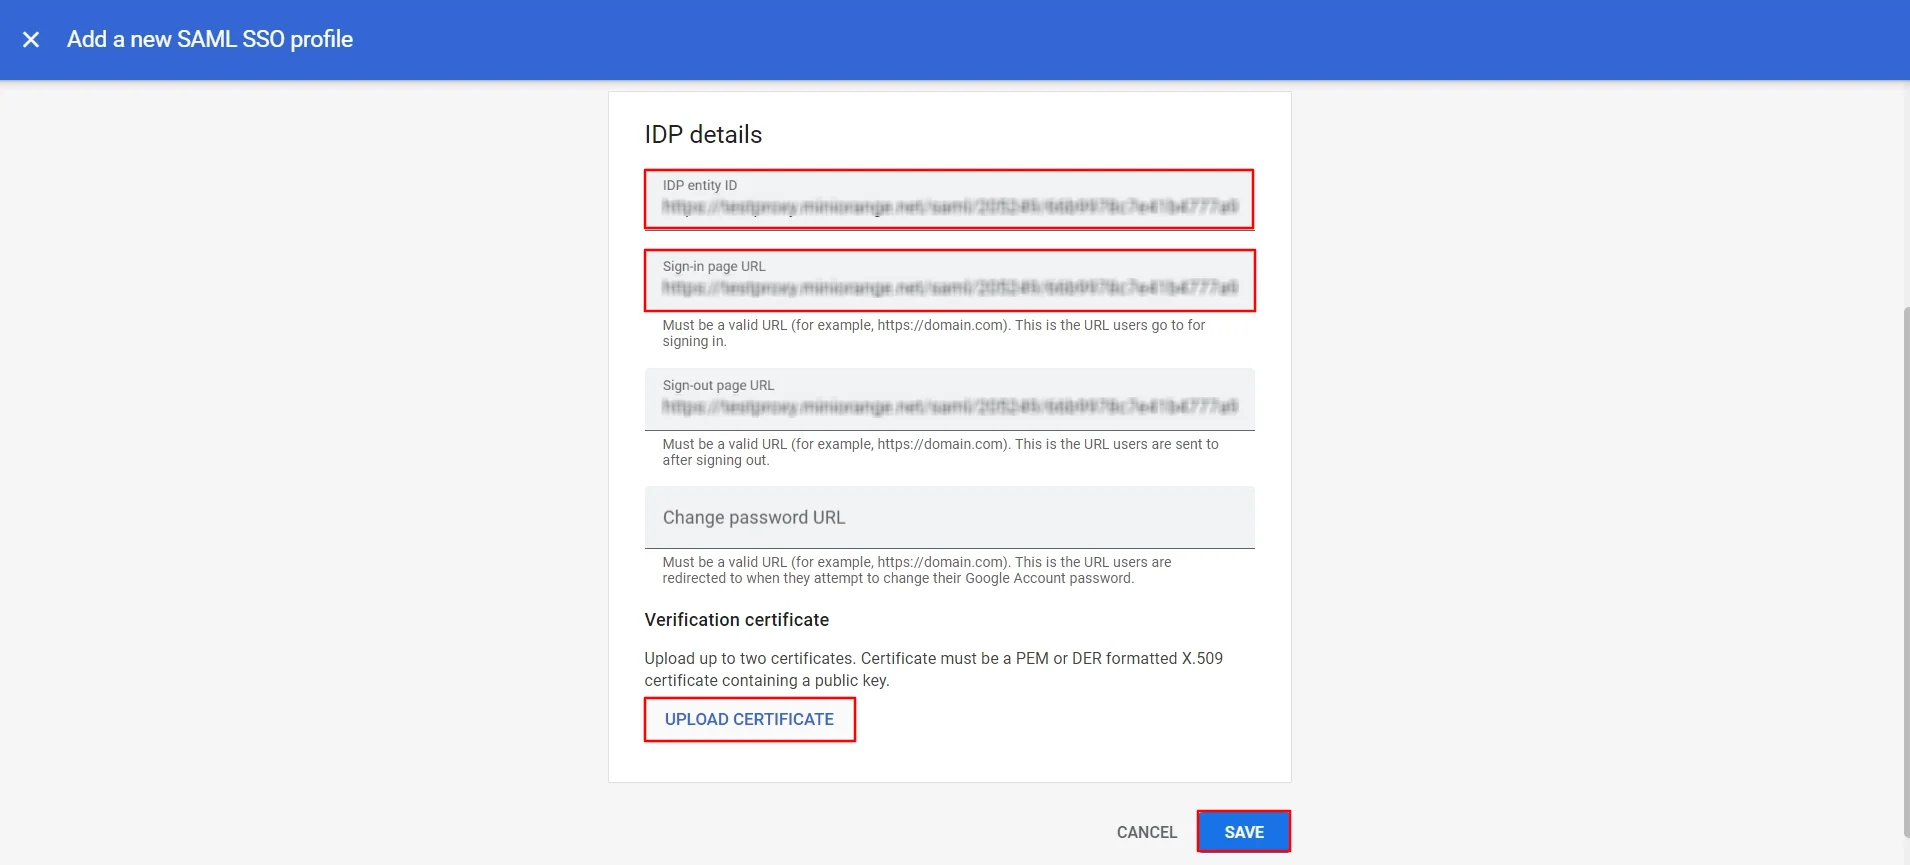
- Enter SSO profile name and fill in IDP entity ID and Sign-in page URL from IDP metadata.
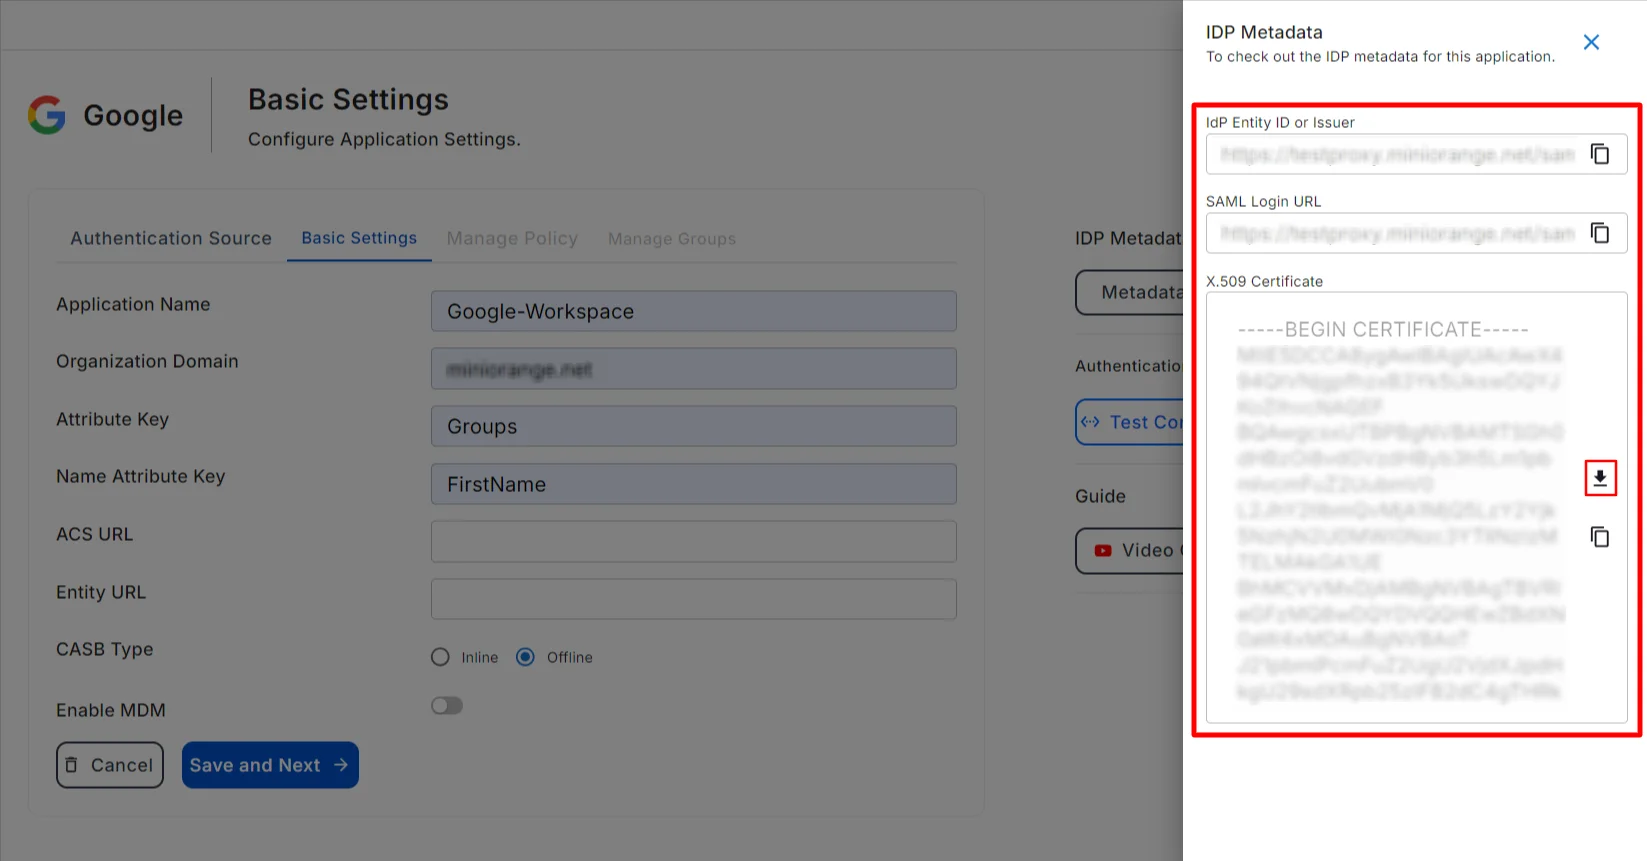
- Go to CASB basic settings screen and click on View IDP Metadata to find IDP entity ID and Sign-in page URL. You can also Download the X.509 Certificate from here.
- Copy and paste the IDP entity ID and Sign-in page URL and attach the X.509 Certificate in Upload Certificate and click on Save button.
- Set up SSO to allow all existing users to access Google Workspace services through third-party identity providers.
- Click on the Edit Button highlighted in the red box in the image below.

- After clicking on the edit icon, a menu will be displayed, as shown below.

- Select the checkbox “Set up SSO with third-party identity provider”.
- Fill in the details on the Sign-in page URL (i.e., the Sign-in page URL is the SAML login URL that you have in the IDP metadata).
- Now, click on the “REPLACE CERTIFICATE” button, which will open a window to upload the certificate. Upload the X.509 Certificate that you have in the IDP metadata.
- Once done with these steps, click on the SAVE button to update the configuration.
- Set up Single Sign-On (SSO) to allow existing users within an organization to individually access Google Workspace services through third-party identity providers.
- On the left side, Click on Directory ⤏ Organisational units ⤏ Create organisational unit as shown below.
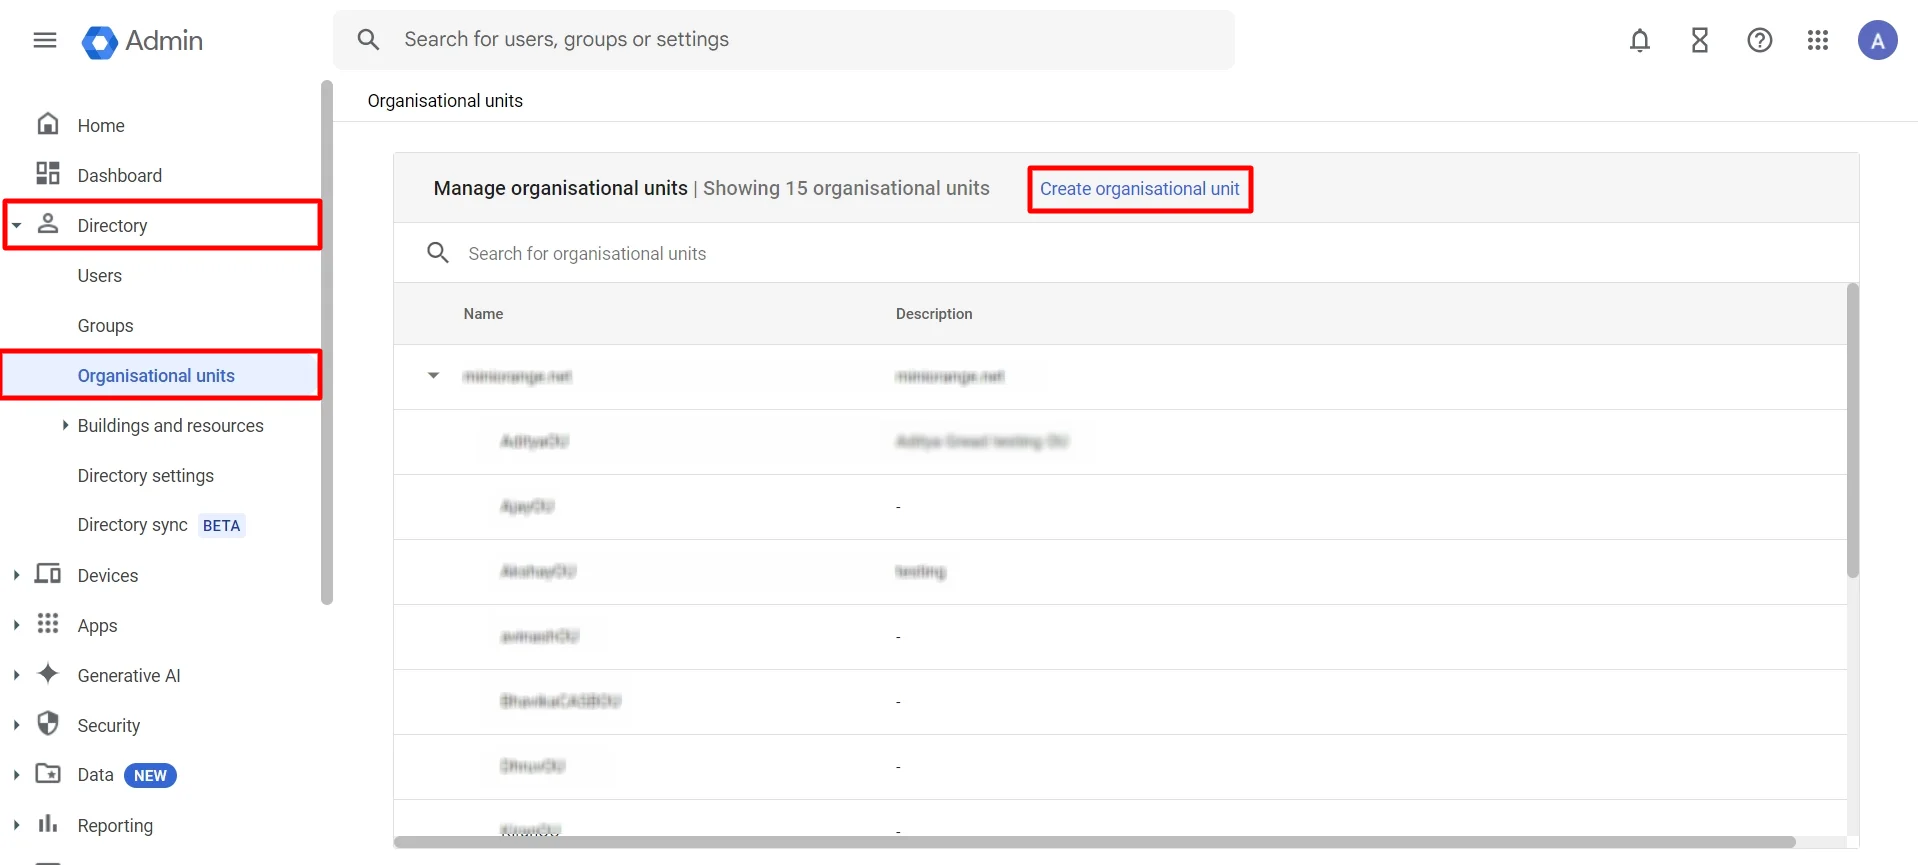
- Next, click on Create organisational unit. You will get a pop-up to add a name of organisational unit and description to identify it. Once done, click on CREATE button.

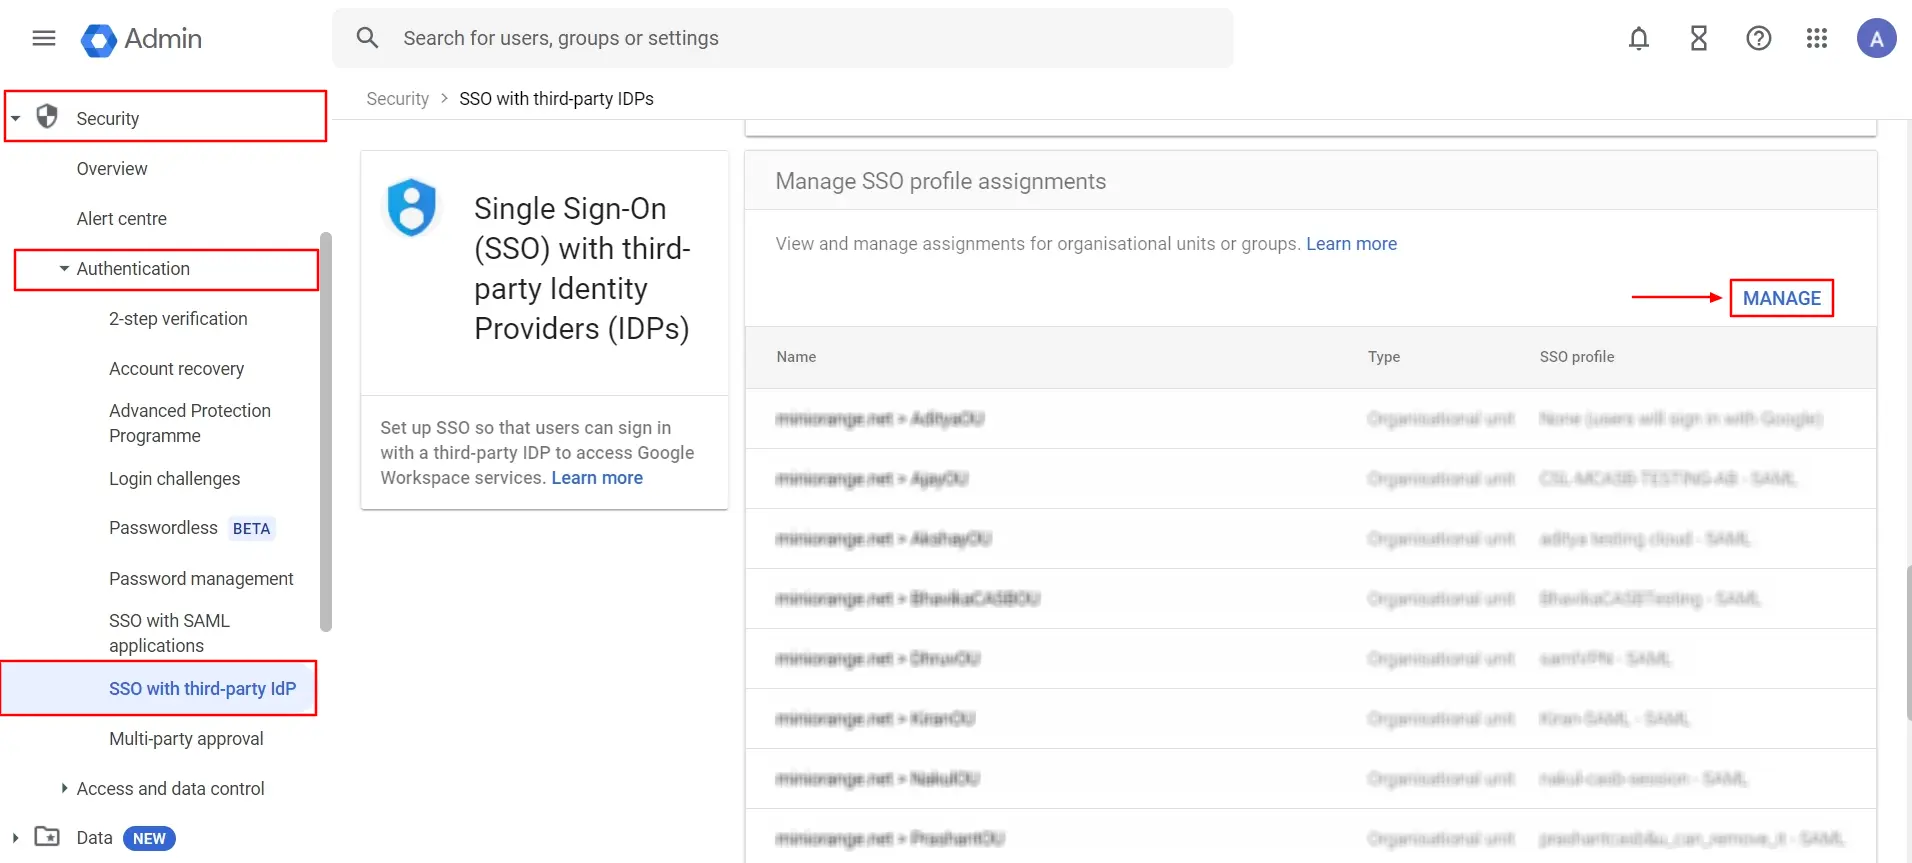
- Now, on the left side, click on Security () ⤏ Authentication ⤏ SSO with third-party IDP ⤏ MANAGE button.
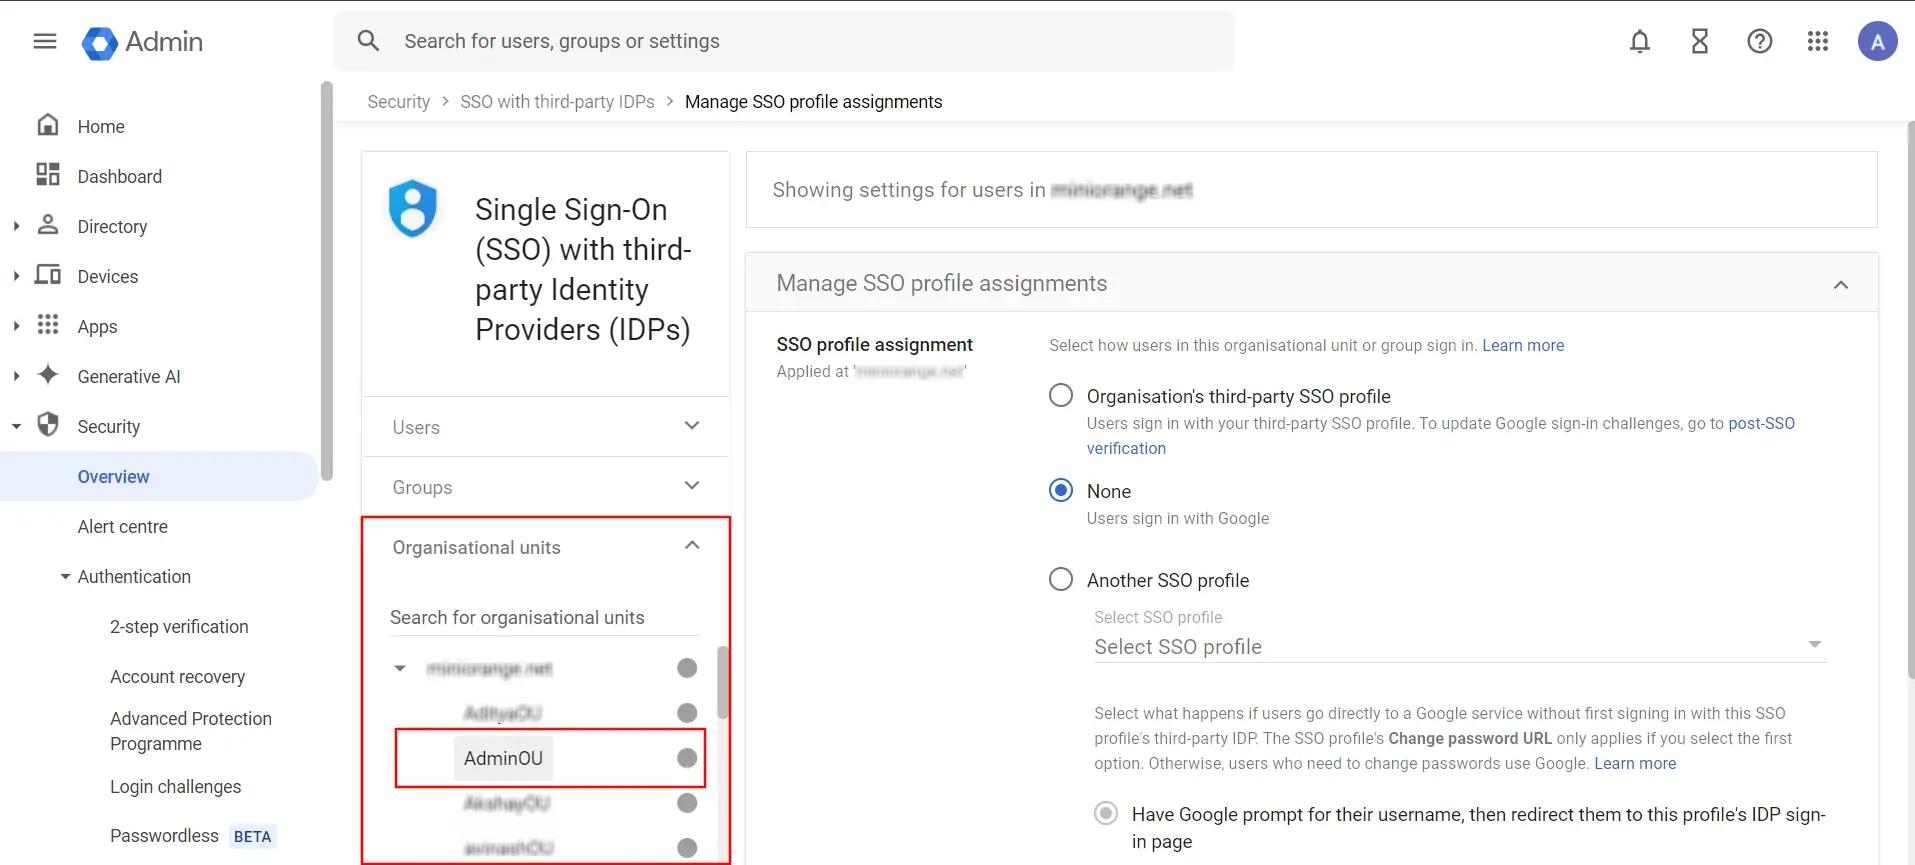
- Select the Organisational unit that you created.
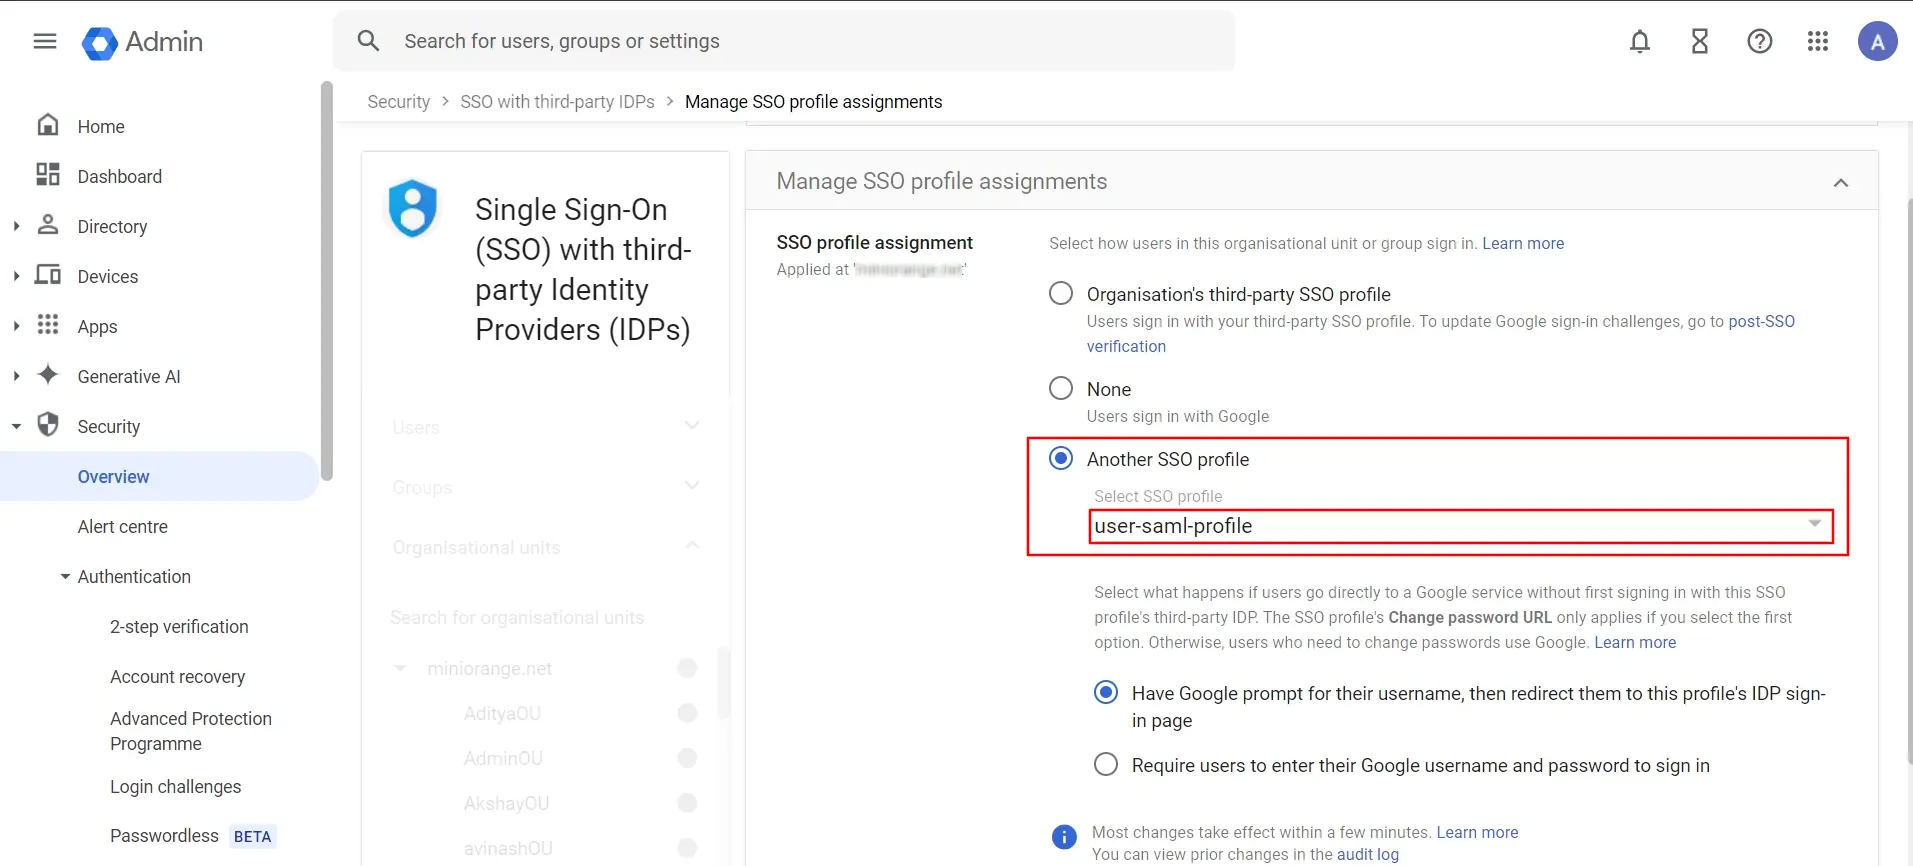
- Click on Another SSO profile option and choose SAML SSO profile from dropdown which you created above.
- Select the created user from SSO with third-party IDP section and copy the ACS URL and Entity URL as shown below.
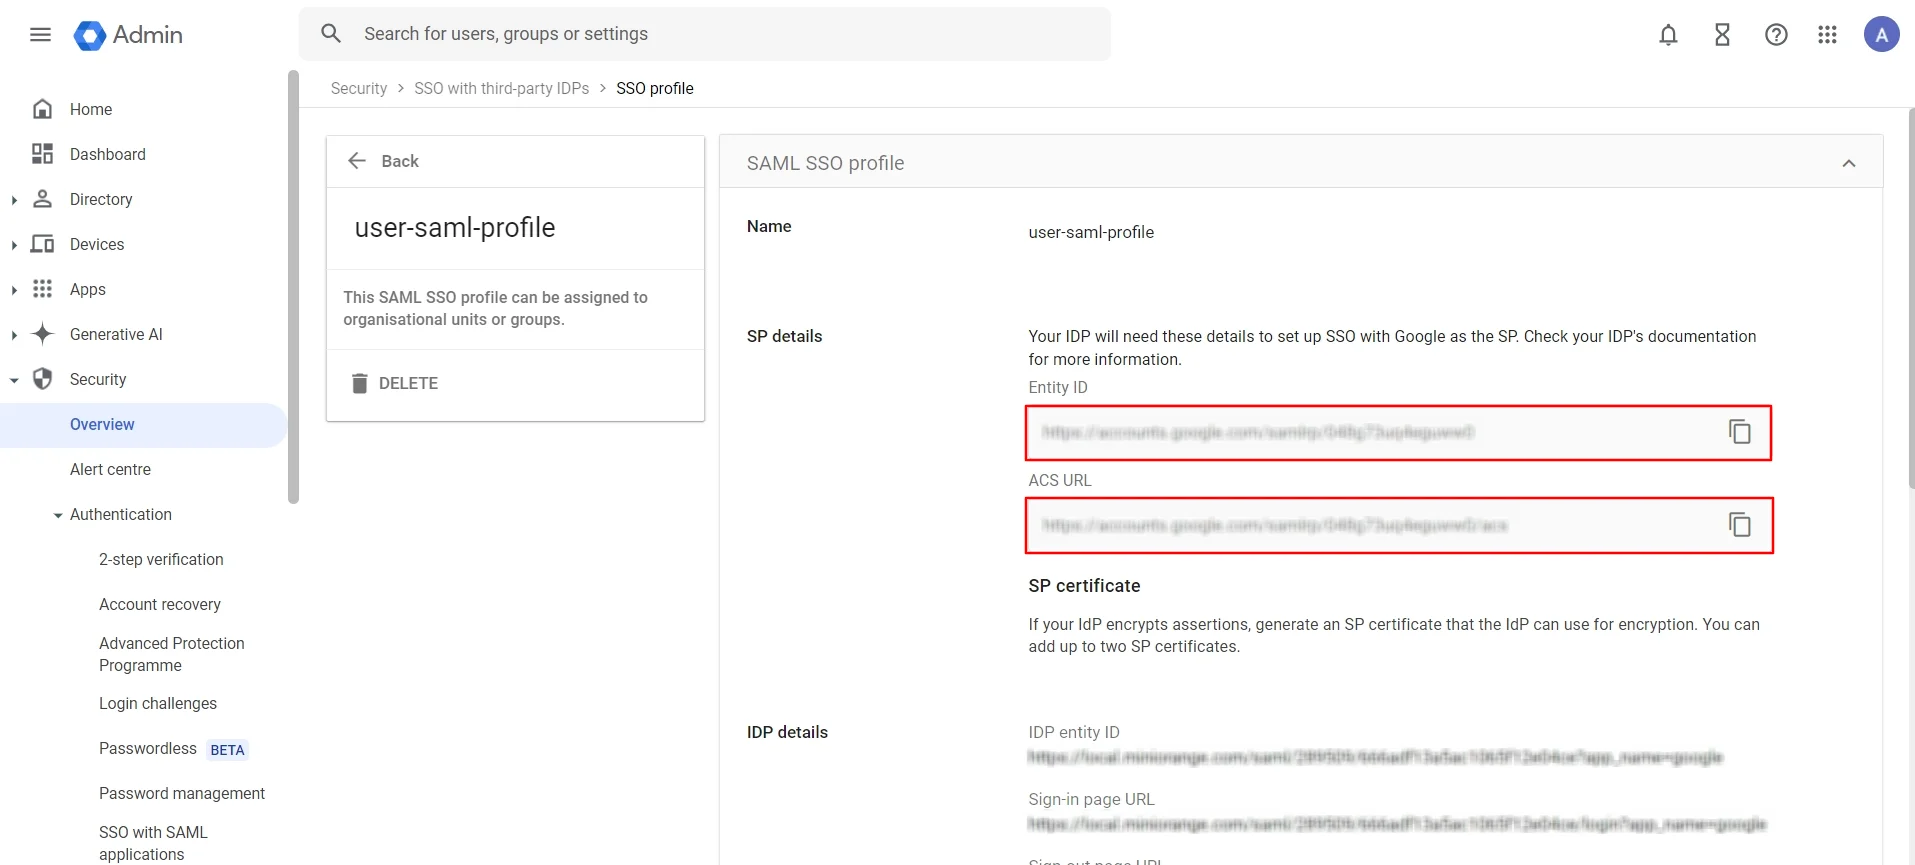
- Paste it on ACS URL and Entity URL in Basic Settings section.
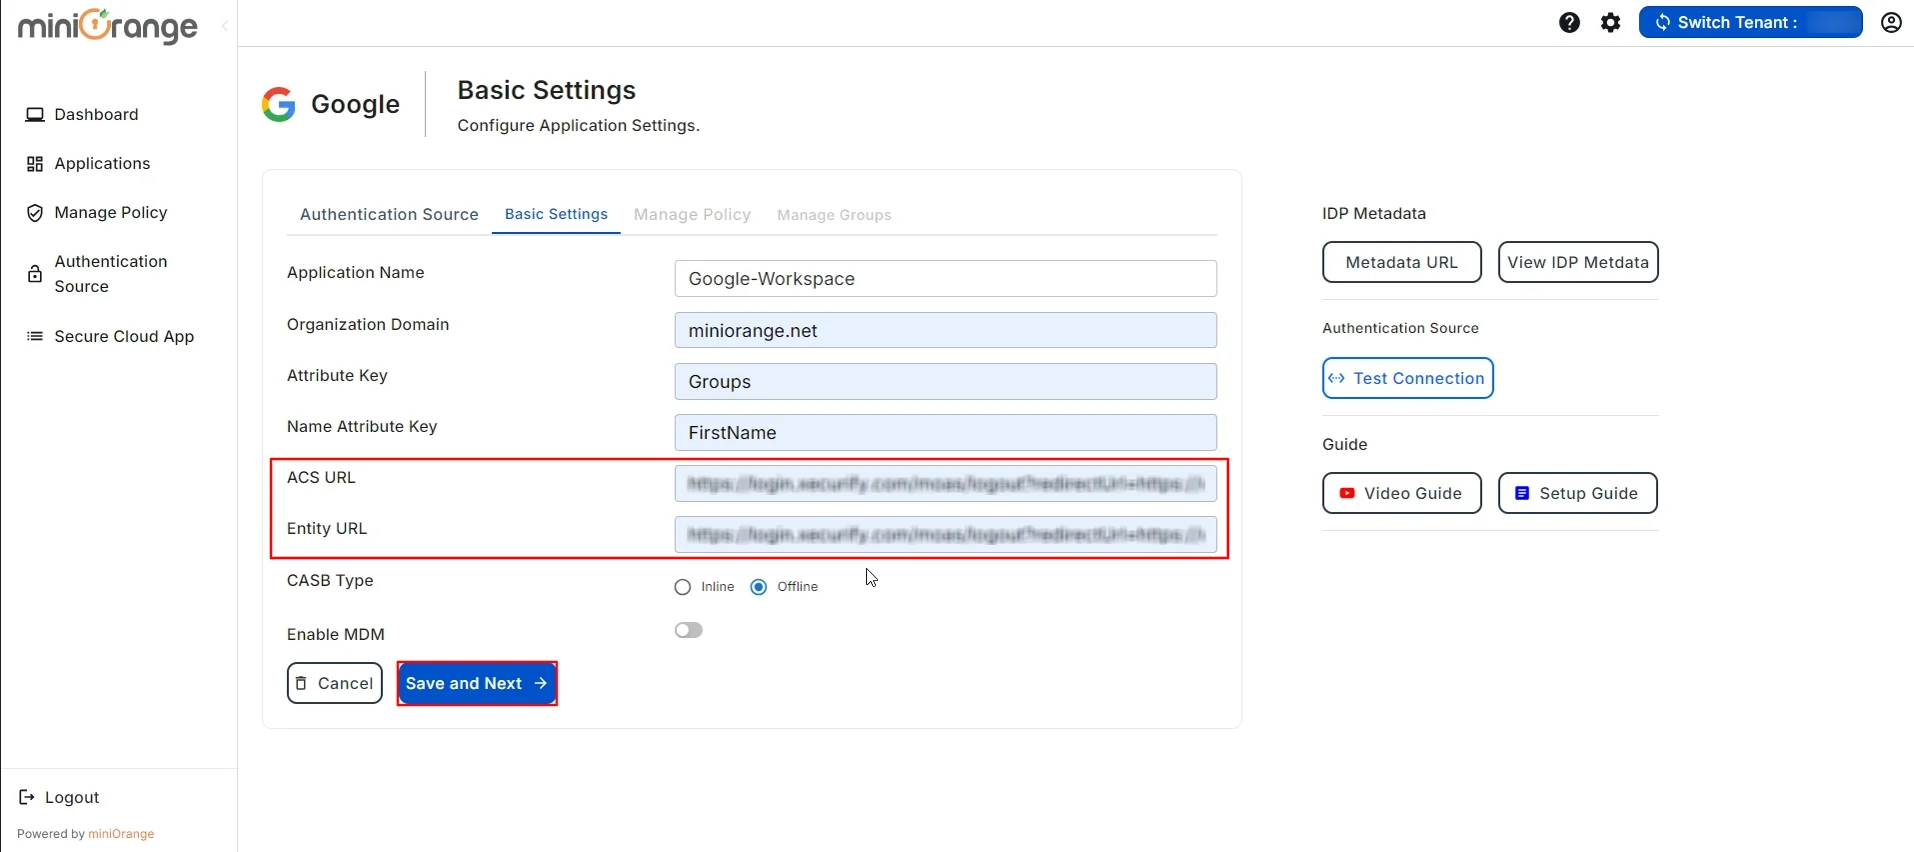
- Once done with these steps, click on the Save and Next button to update the configuration.
- You have successfully created the SAML SSO with Third Party IDPs!
Step 4: Configuring Policies
-
Network Restriction
-
Time Based Restriction
-
File Based Restrictions
-
Device Restriction
1. IP Configuration
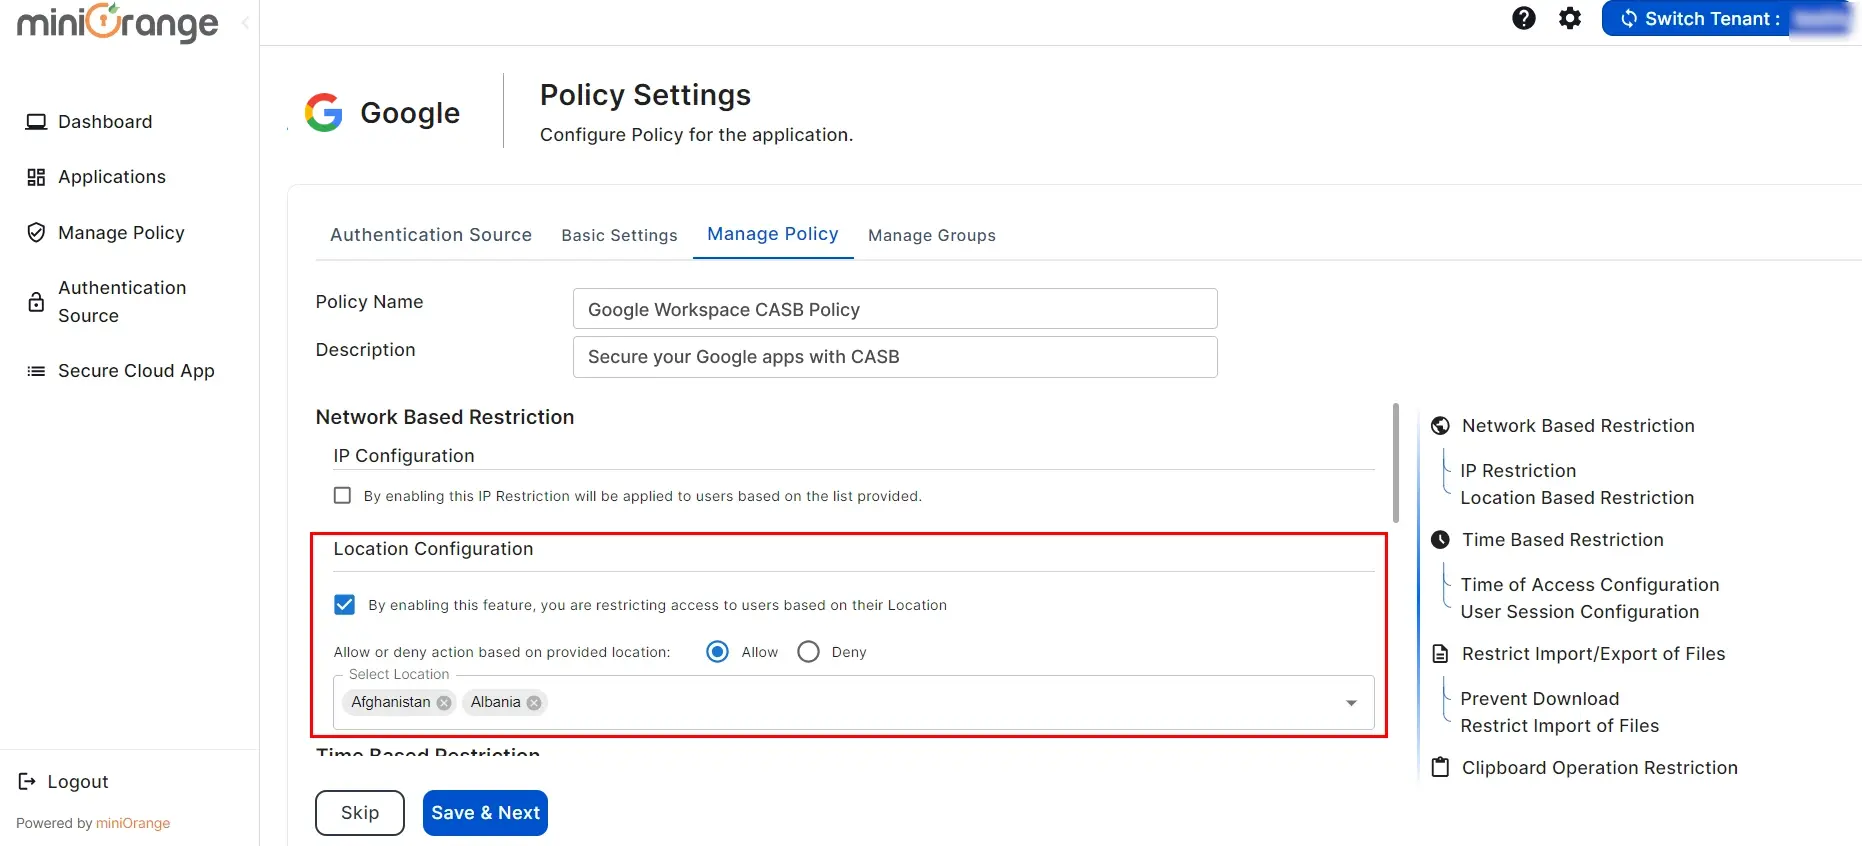
2. Location Configuration
1. Time of Access Configuration
- Click on Checkbox for “Enable Time of Access Configuration” as shown in the image below.
- By enabling this feature, you will apply time restrictions to users based on the configured settings and specified timings.
1) Select Allow or Deny to permit or restrict user access during the selected time slot.
2) Select the user's timezone.
3) Select the start and end times for the time-based restriction.

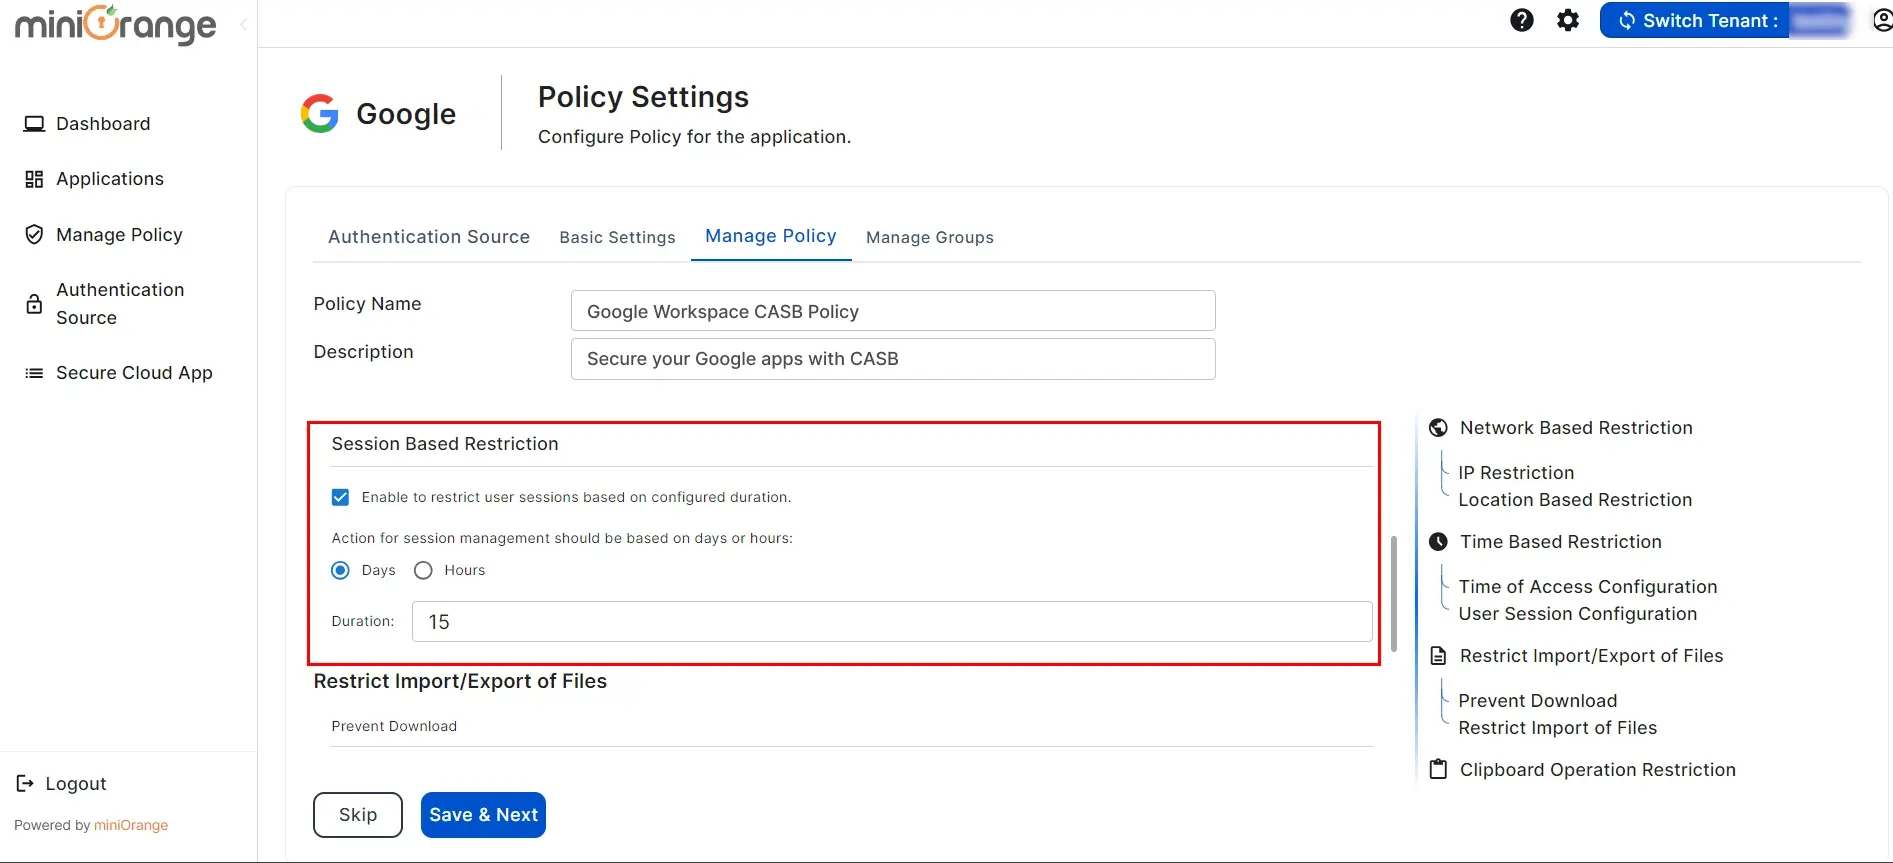
2. Session Based Restriction
1. Prevent Download
- Click on Checkbox for “Enable Prevent Download” as shown in the image below.
- By enabling this feature, you are restricting access to download. Currently this feature is only applicable for Google Docs and Google Drive. Downloading and sharing will be restricted from the apps or groups on which you apply this policy.

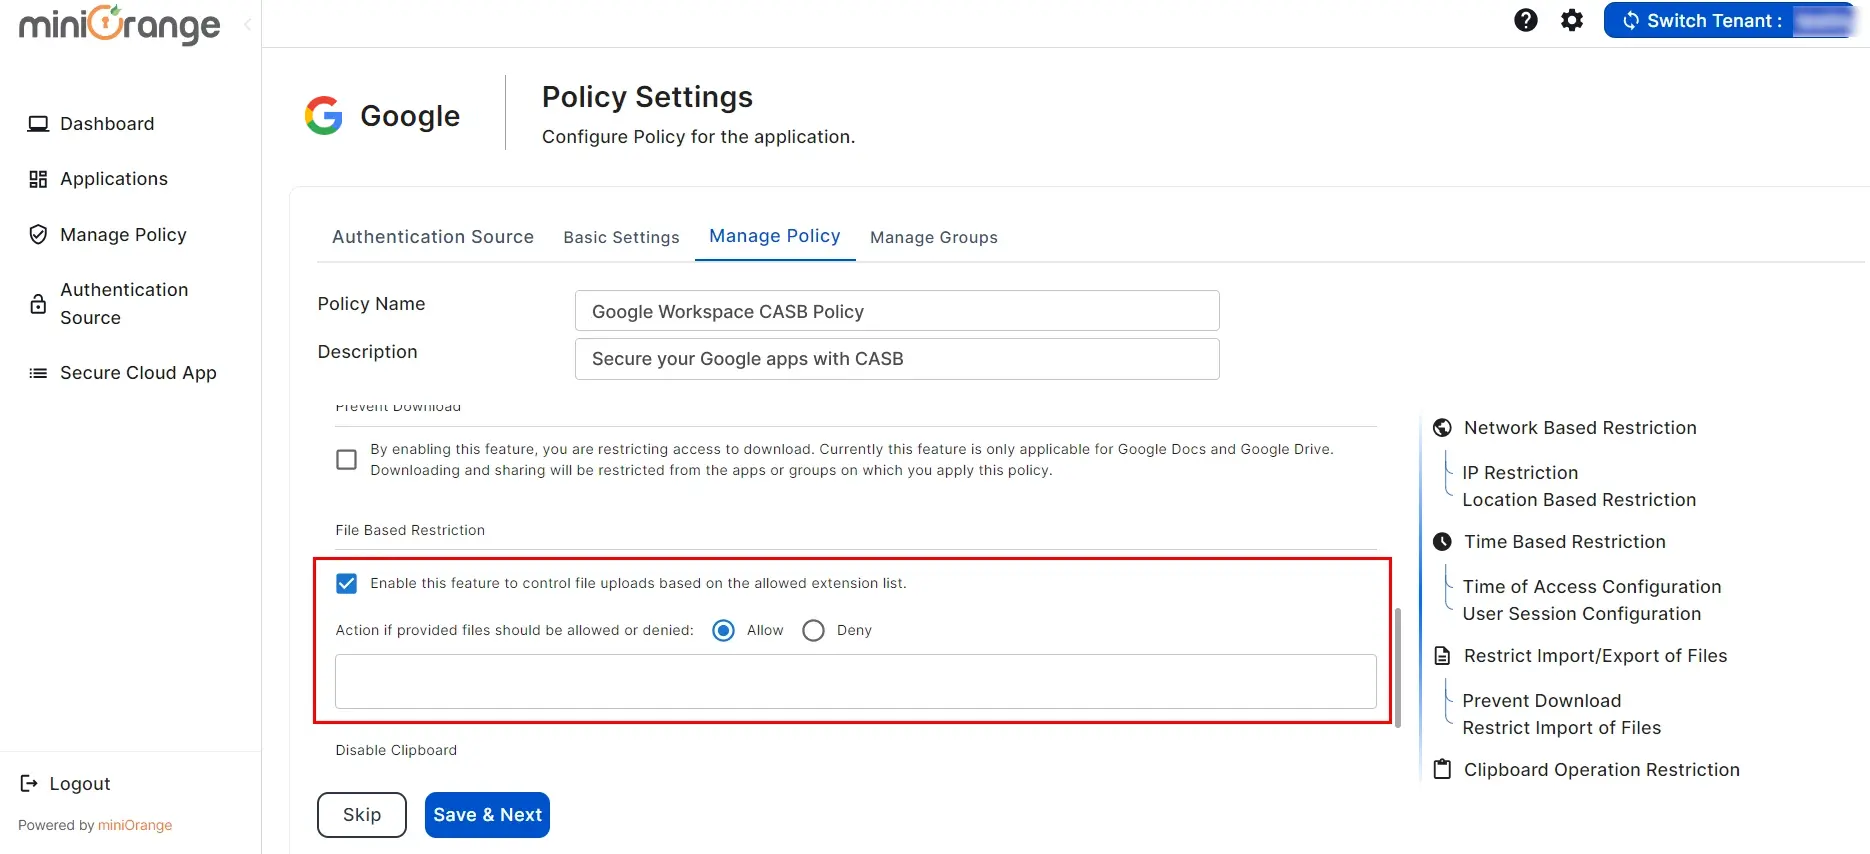
2. File Based Restriction
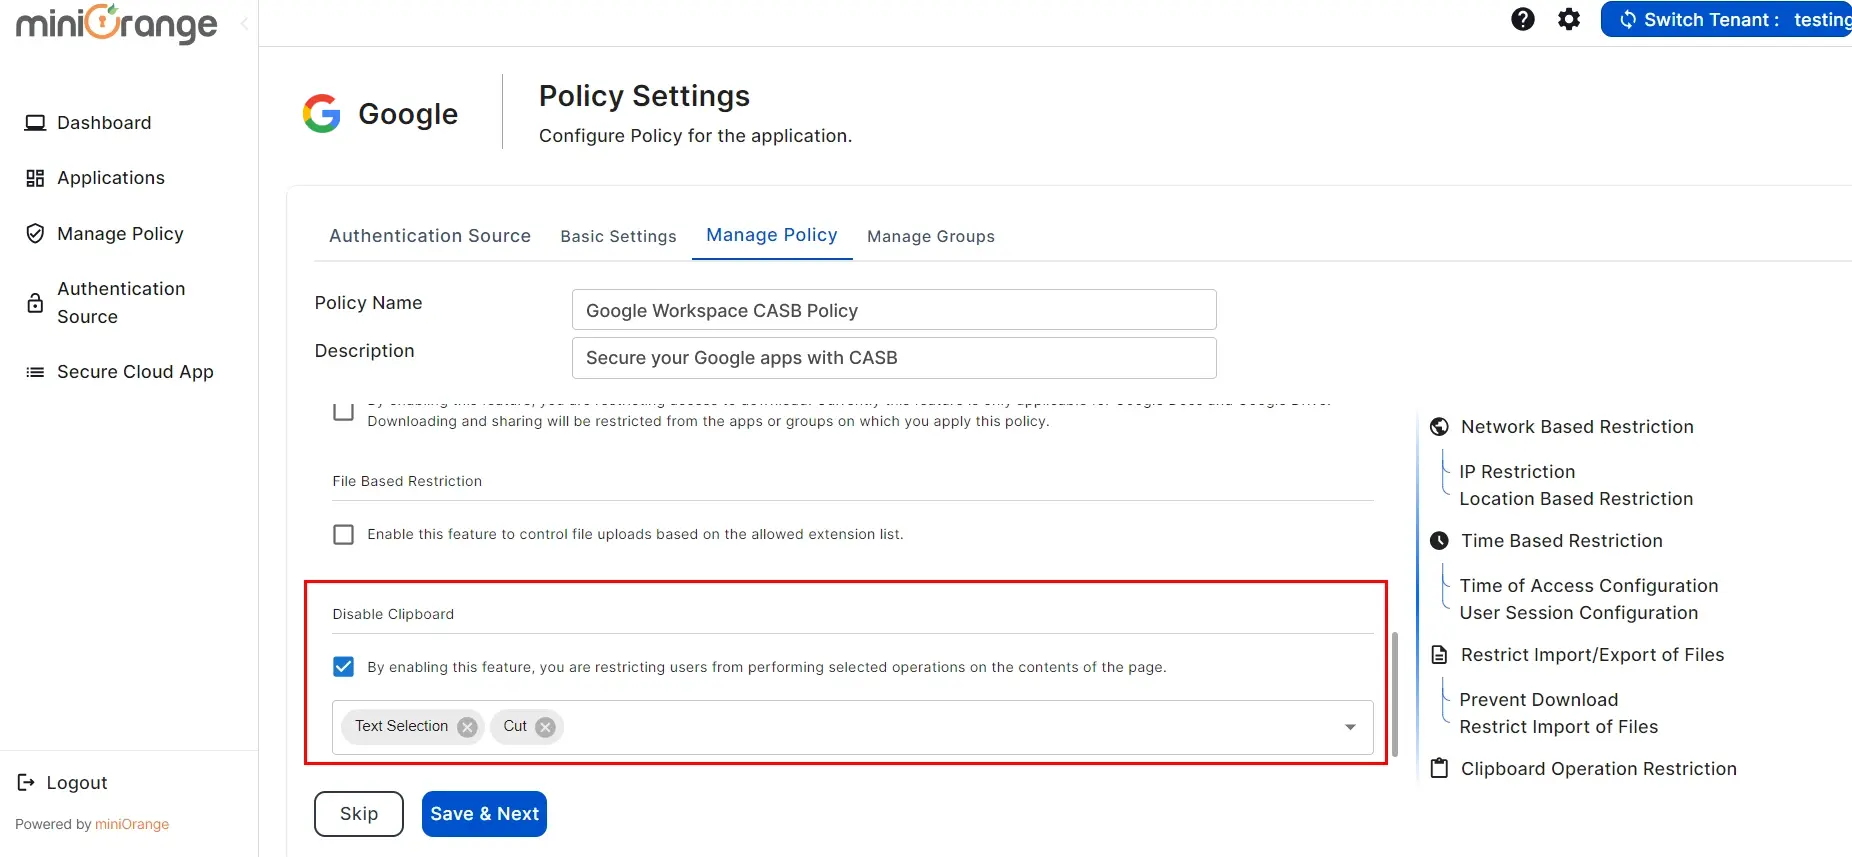
3. Enable Disable Copy
- Click on the "Enable Disable copy" checkbox.
- By enabling this feature, you are restricting users from copying the contents of the page.
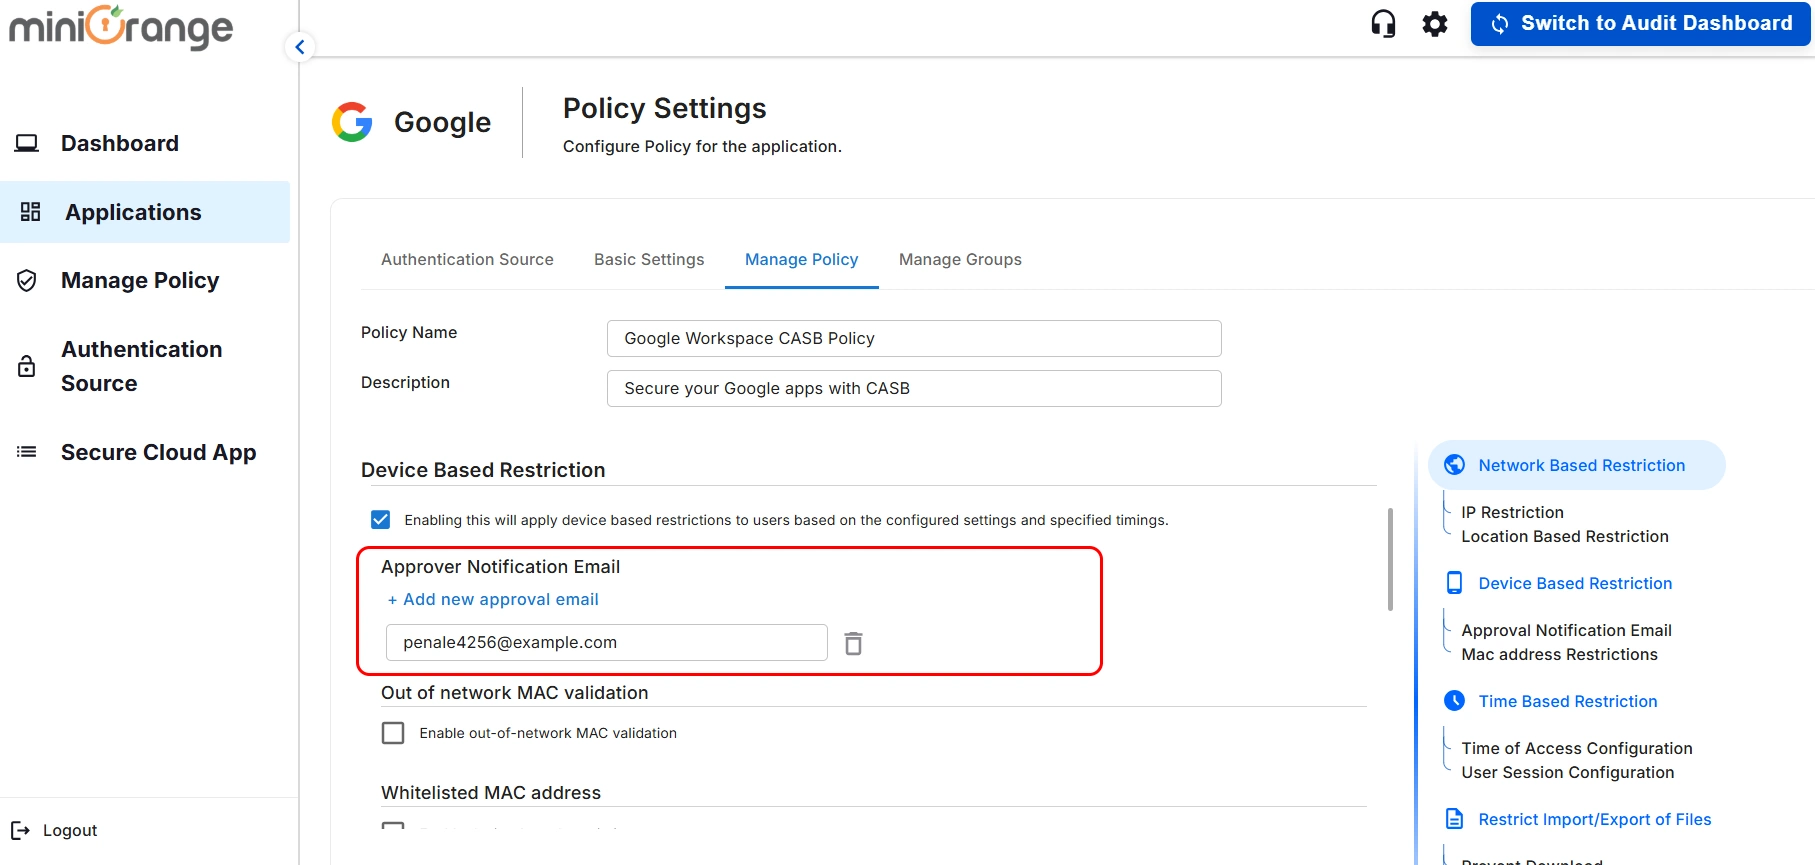
- Enable the “Device-Based Restriction” checkbox to monitor and control the users access in real time
based on their system's MAC address.
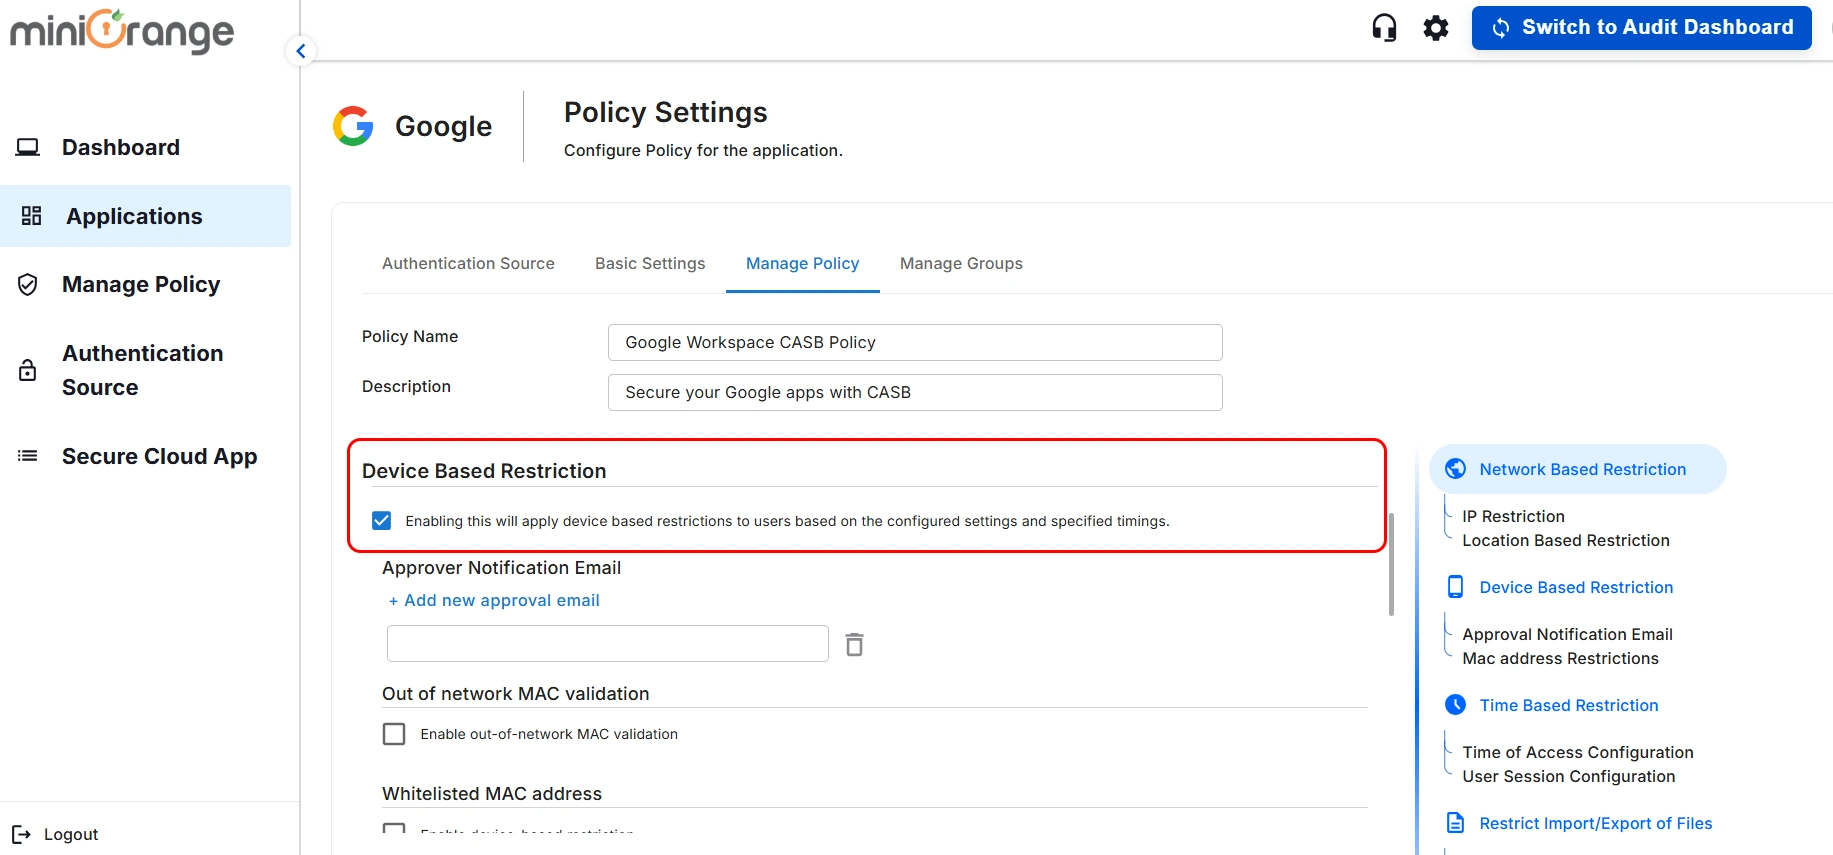
- Once enabled, you will see the option to configure the feature as shown below.
1. Approver Notification Email
- Add the approver email who will be notified when a new user tries to use the
application and their device is not verified.
- You can add up to 5 approver emails to receive the notifications by clicking on Add
new approval email option.
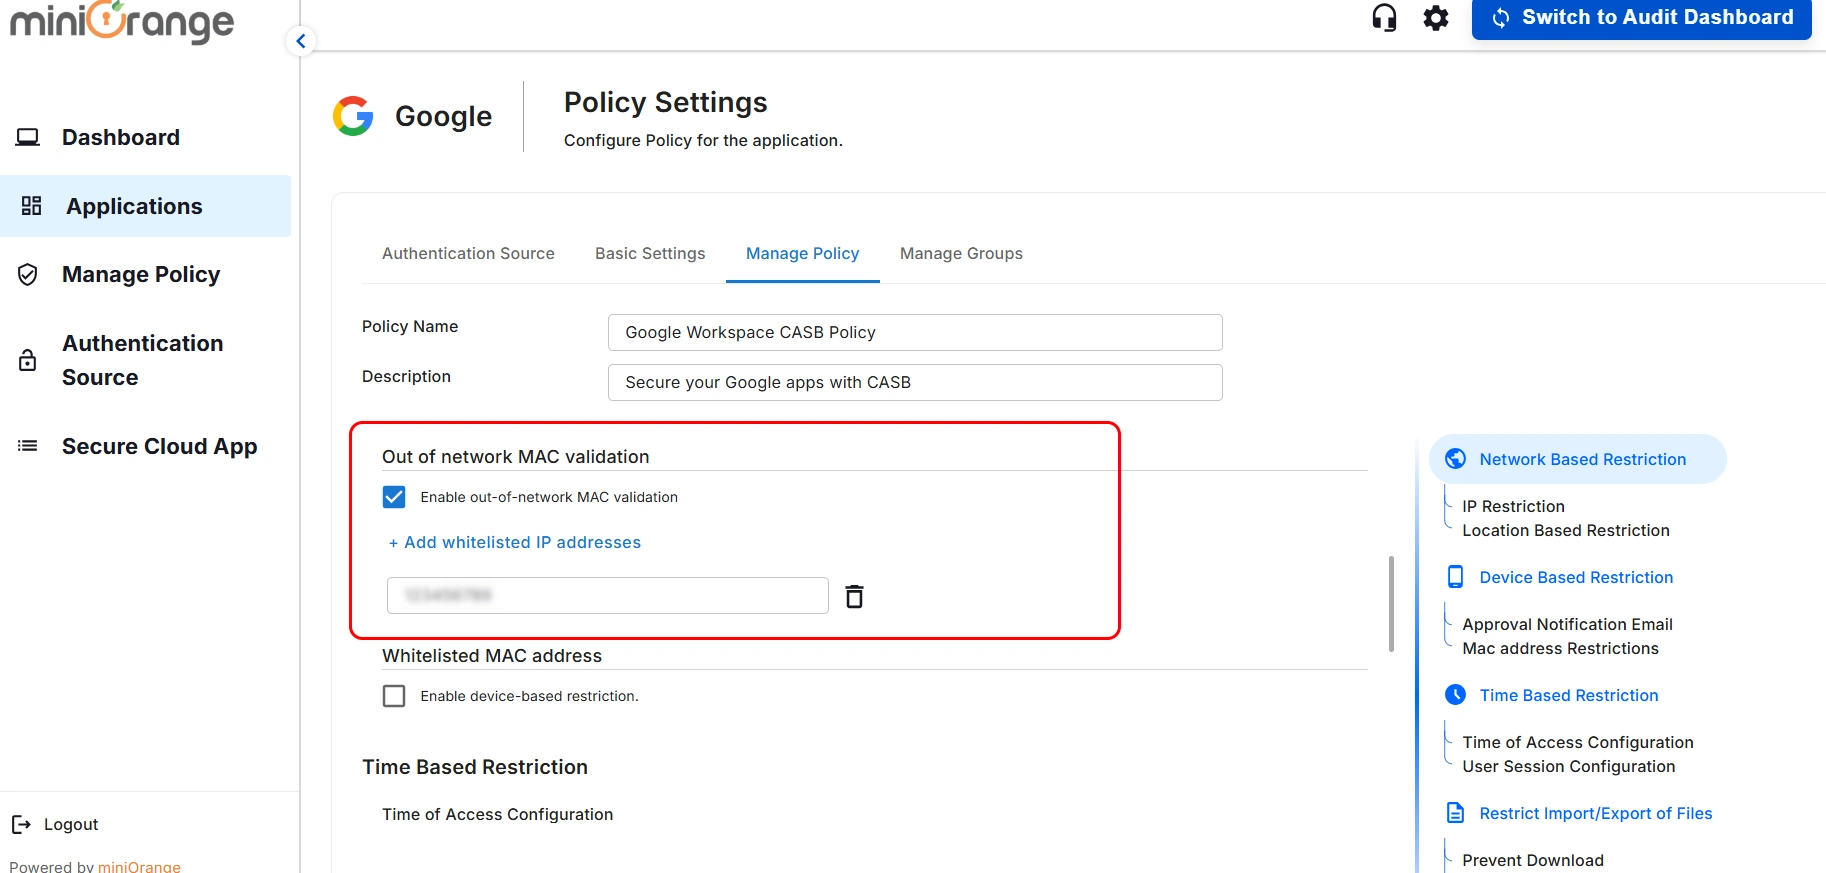
2. Out of Network MAC Validation
- Enable the Out of network MAC validation checkbox , then click on Add
Whitelisted IP Addresses.
- Once this is done, MAC validation will no longer prompt for devices inside the IP address range. If a device moves outside of this network, its access will be revoked.
Note: If users still require access, they can re-login and submit an approval
request to their administrator.
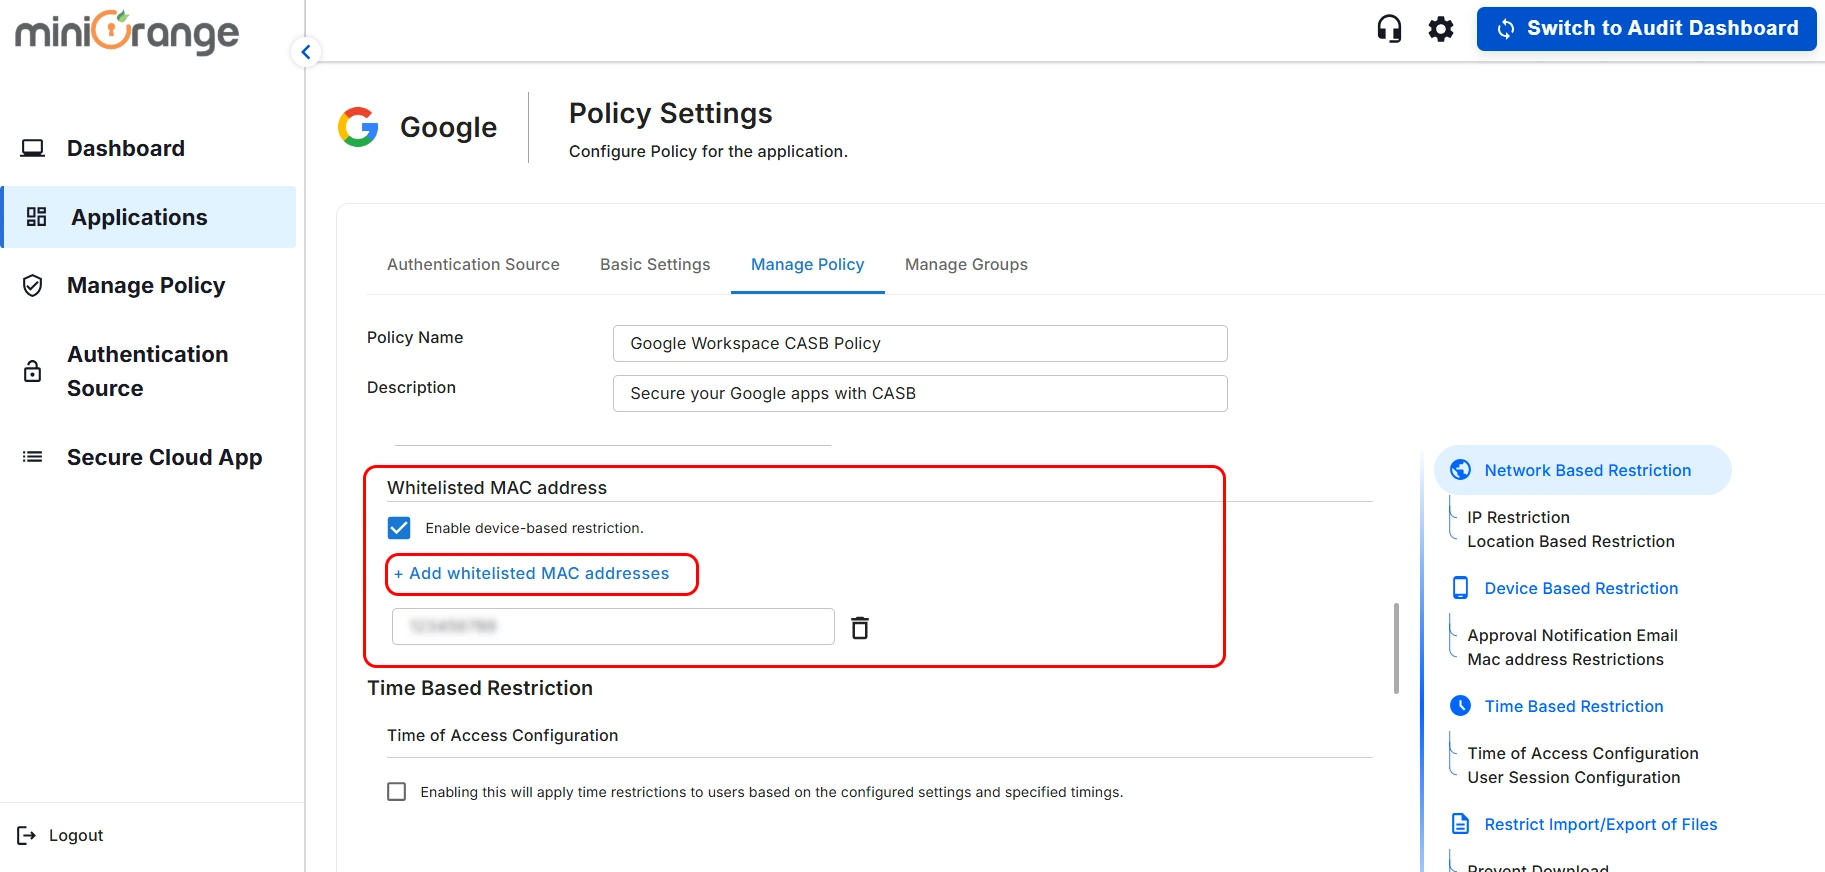
3. Whitelisted MAC Address
- Enable the Whitelisted MAC Address checkbox, then click Add Whitelisted MAC
Addresses.
- This will allow you to define whitelisted devices without prompting for MAC address
validation. Additionally, these devices will be exempt from the Device Restriction Policy.
- Once, done with all the configurations click on Save and Next button.
Step 5: Configuring Groups
- You should be taken to the Manage Groups screen. Enter the Name and Description for group (It should be the same as the name of the group that you have configured in the IDP). Select the Policy from the drop-down menu.

- Now, let’s give permissions for applications for the group:
a) No App Restriction for Group: There will be no restrictions on the application for the group.
b) App Restriction for Group: The restrictions will be applied over the apps based on the policy that you have configured for the group.
c) Disable App for Group: The application becomes inaccessible from anywhere for the entire group.
d) Custom App Restriction for Group: You can apply an application-specific custom application restriction policy to an application that overpowers the group's restriction policy.
- After successfully configuring all screens, you will be redirected to the edit screen.
Step 6: Edit Screen
- Basic Settings section You can change any configurations if required in the Authentication.
- Suppose you want to configure different authentication sources. In that case, you can simply click on the Authentication Source in the Navigation Bar, where you will be able to add, view & edit authentication sources.
- In Groups Settings section You can add and configure groups on this screen and view all configured groups.
- Click on Add New and you will get a pop-up for adding a new group and you can configure it using the above mentioned steps.

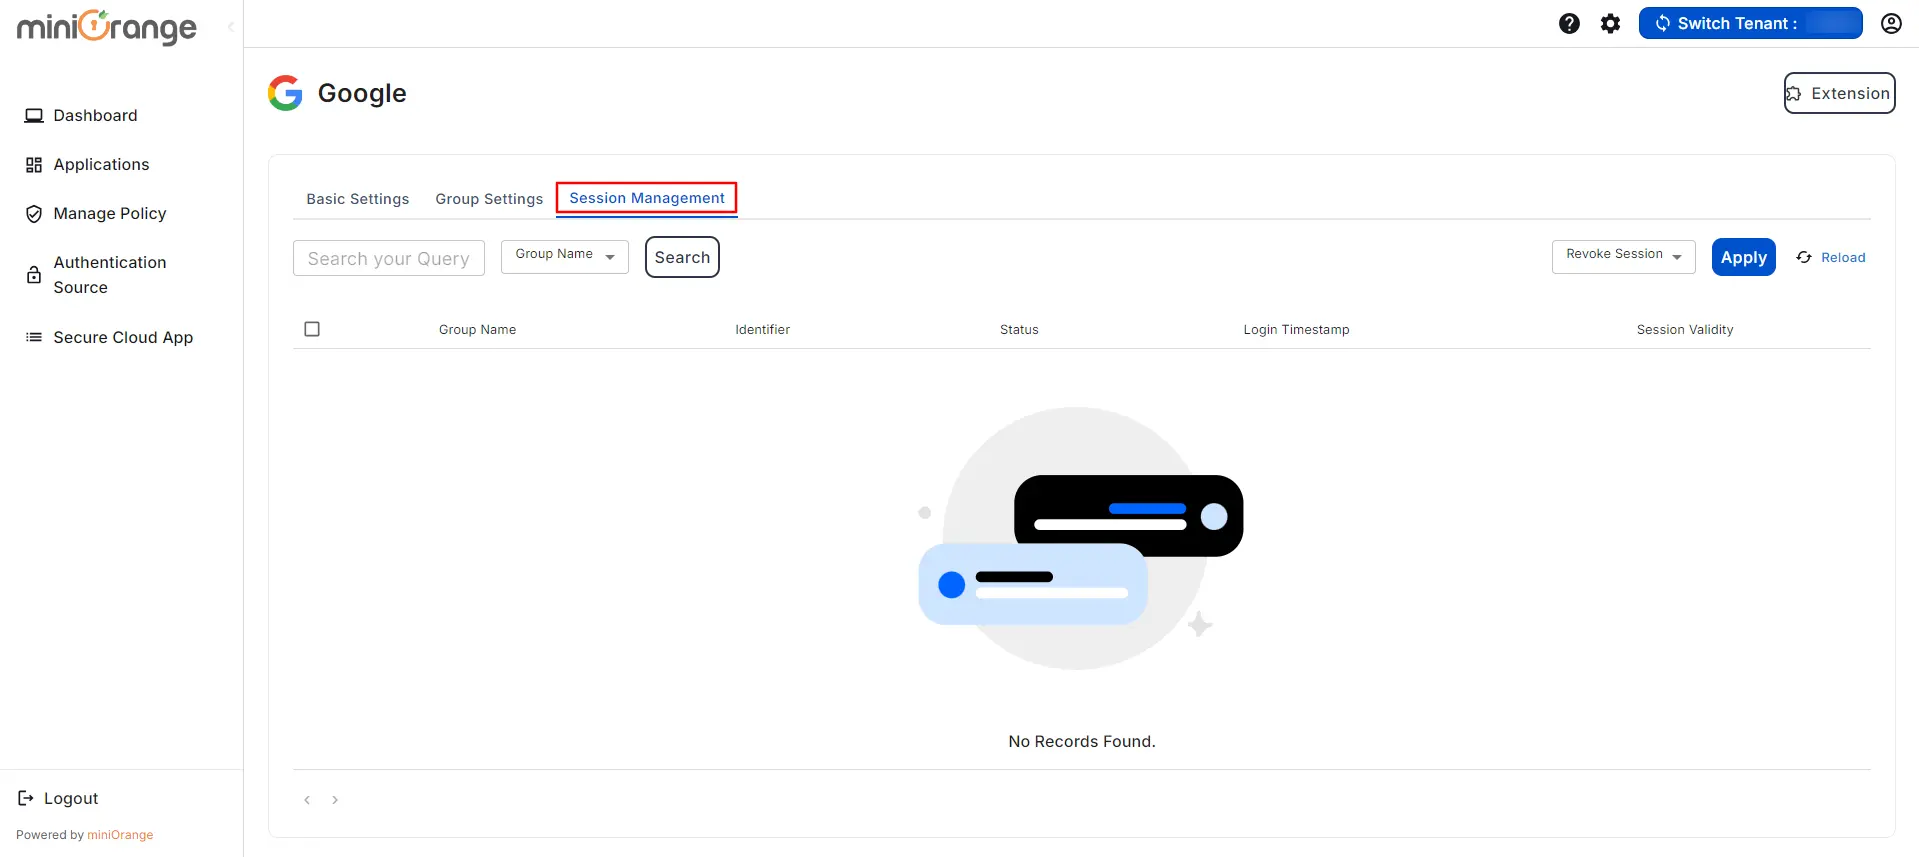
- In the Session Management section, you can see the details of logged-in users' sessions.
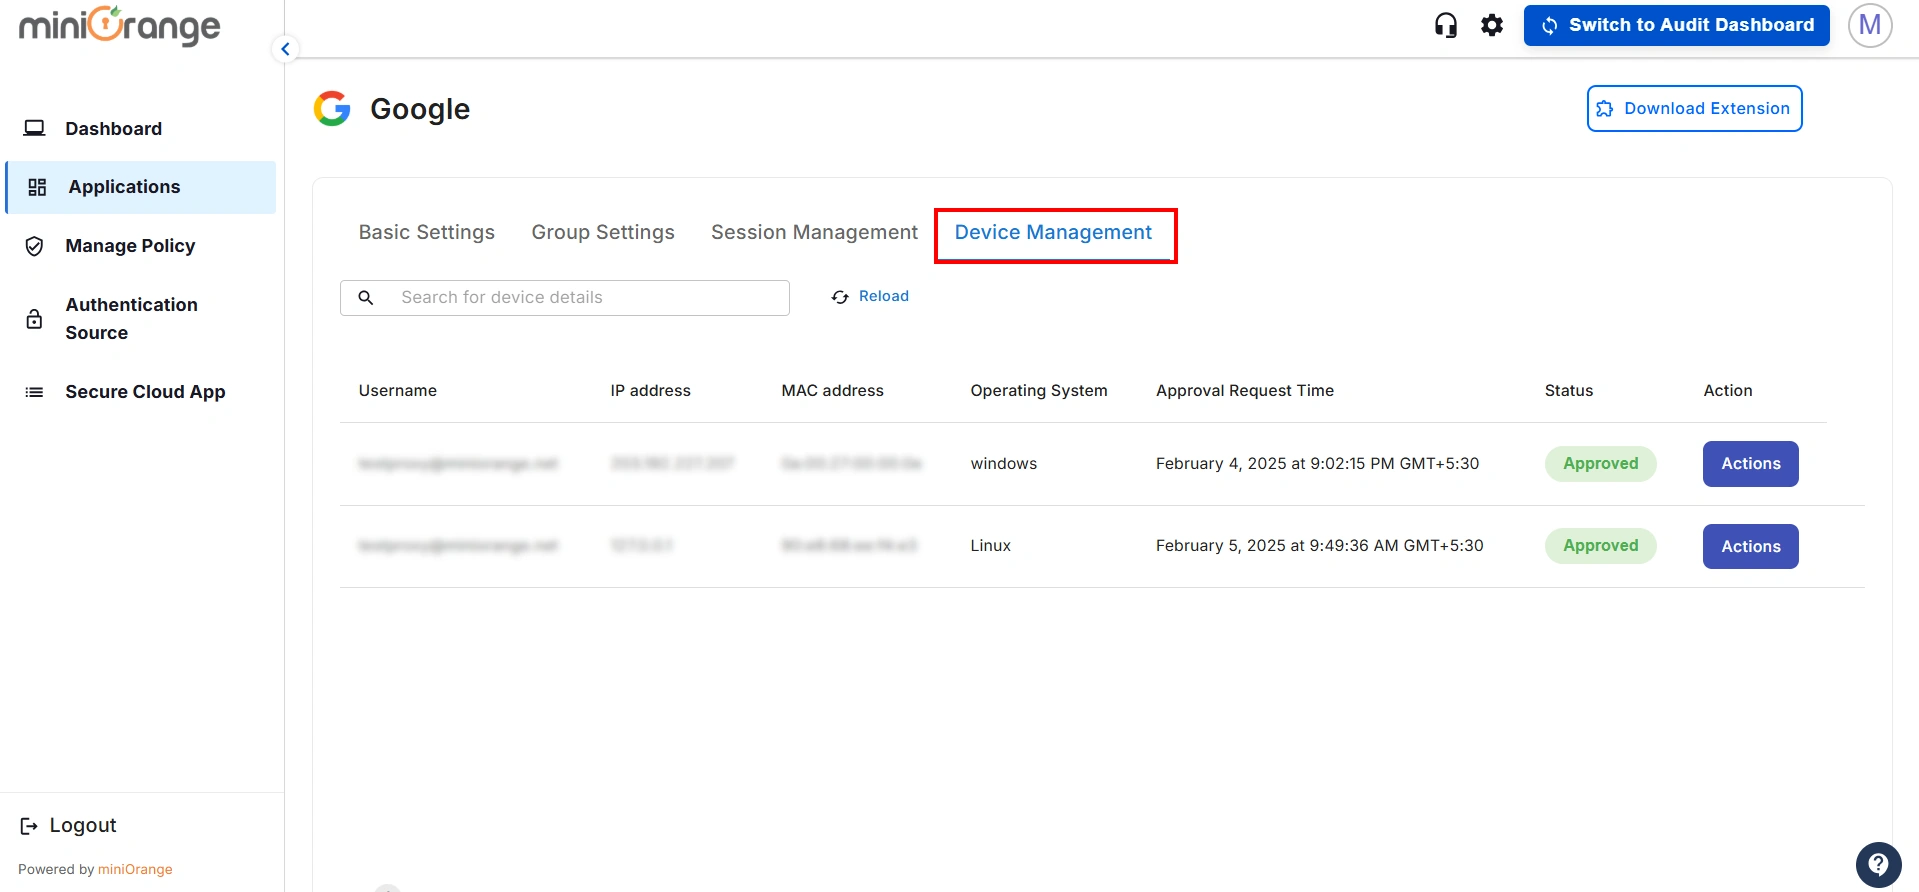
- Using the Device Management feature, an admin can easily approve user devices and revoke sessions as needed. This feature grants the admin option to either permit or deny access to the user device or delete device approval requests altogether.
Note:
To access your applications, you need to set up the miniOrange CASB extension. Click here to follow the steps.
External References
miniOrange CASB offers a wide variety of security features with flexible scalability, all available at the most affordable price to all types of businesses. Start by signing up now!