Genius Provisioning & Deprovisioning
Genius User Provisioning allows to create account in a simplified way and link Genius users' account to their existing or new apps. Genius Provisioning automates user provisioning with their identities.
Provisioning saves time when setting up new users and teams, and also manages access privileges through the user lifecycle. miniOrange can create, read, and update user accounts for new or existing users, remove accounts for deactivated users, and synchronize attributes across multiple user stores.
Provisioning & Deprovisioning Scenarios
miniOrange provides solutions for all scenarios of provisioning, which includes AD Integration, LDAP Integration and automated provisioning for all External Applications such as Office 365, Google Workspace, Genius, etc
Follow the step-by-step guide given below for Genius Provisioning
1. Create Genius Provisioning application
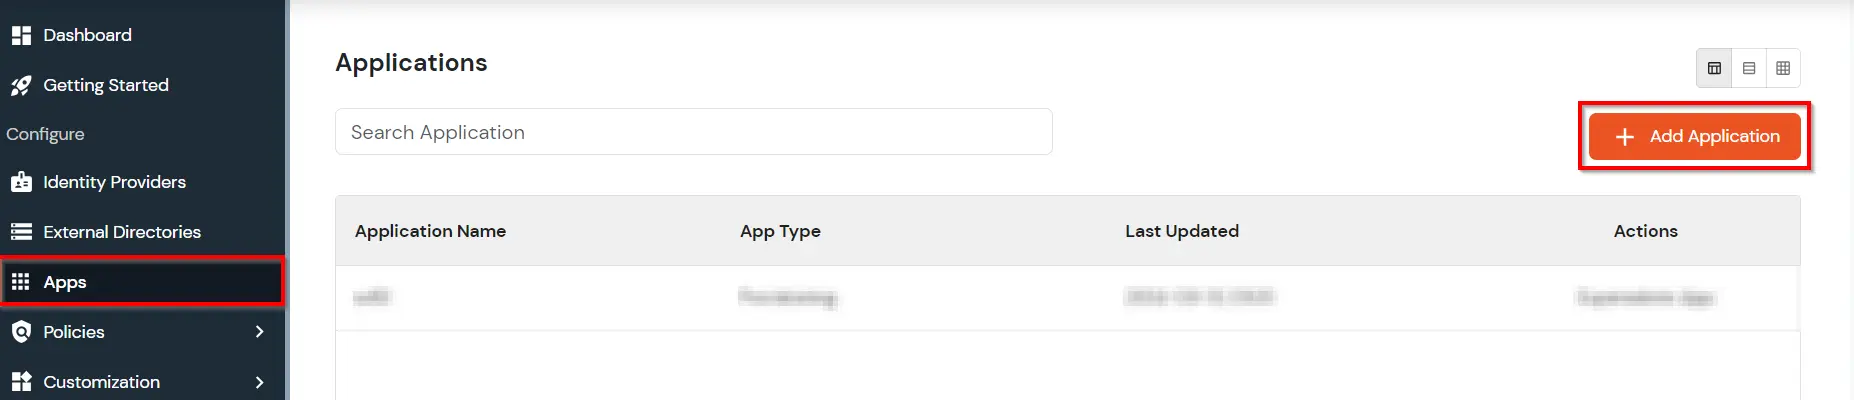
- Click on Apps. It shows a list of all configured applications and option to modify them. Click on Add Application.
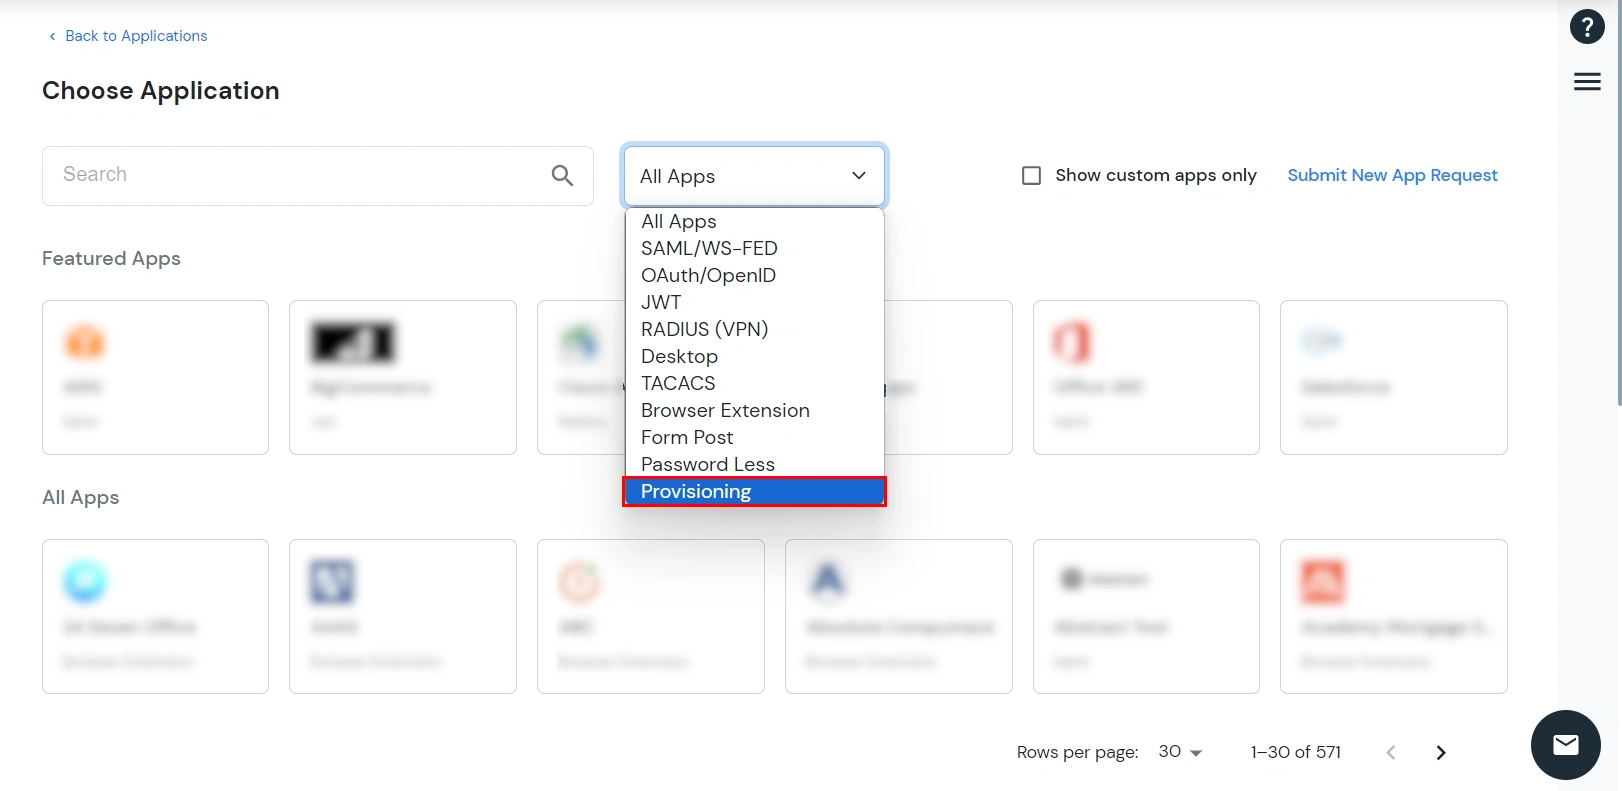
- Under Choose Application, select Provisioning from the All Apps dropdown.
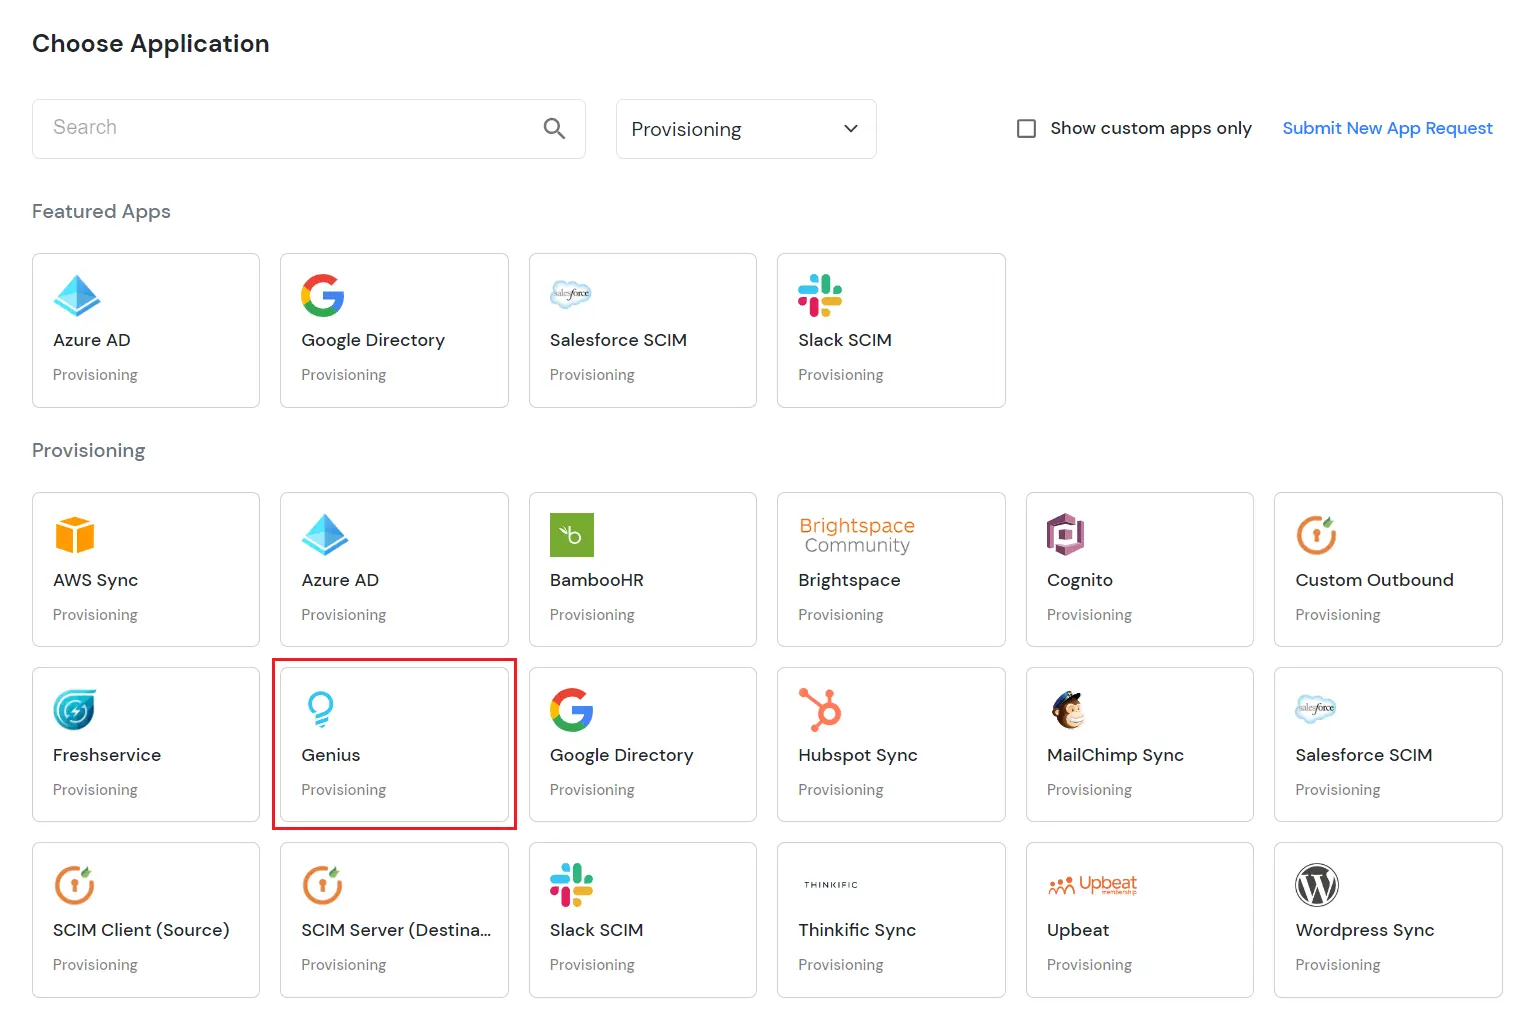
- Select Genius App.
- Configure the application by filling the following fields.
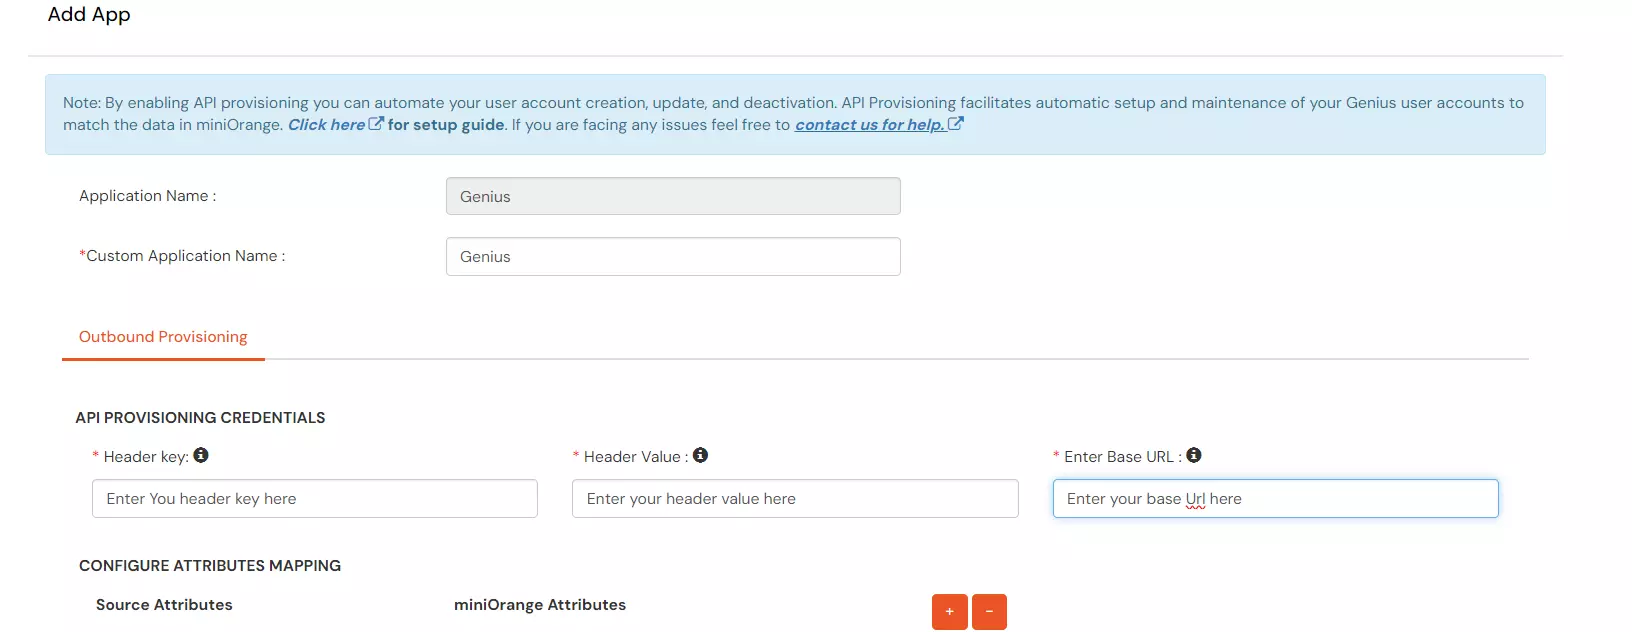
- Enter values in API PROVISIONING CREDENTIALS fields. For reference you can view the table value.
| S.NO |
ATTRIBUTE |
SAMPLE VALUE (Only for Reference) |
| 1 |
Header key |
ApiKey |
| 2 |
Header value |
FE475EE67-RANDOM-4A9E-81FD-EXAMPLE |
| 3 |
Base URL |
https://miniOrange-test.geniussis.com |
- Depending on your choice you can enable provisioning during user creation , updation and deletion.
- Click Save to save Genius app configuration.
- Now you need to create a policy for this application.
2. Create App Policy
- Go to Policies >> App Login Policy from the side menu.
- Click on the Add Policy tab to add a new policy.
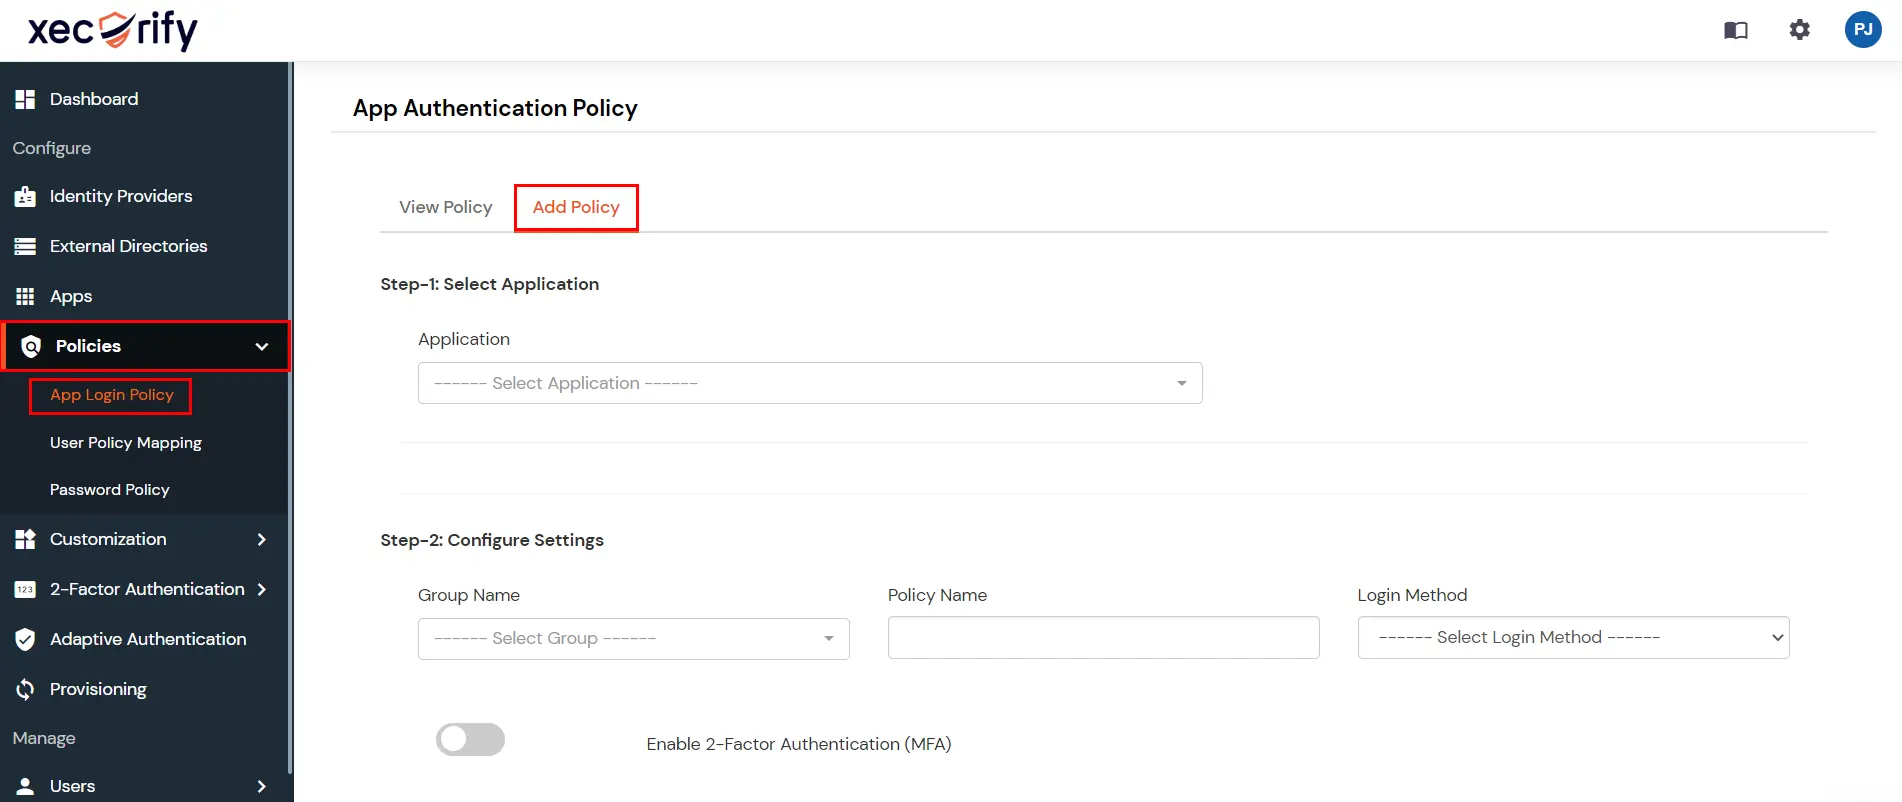
- For the application field, select the application which you created in the above steps.
- For the group field, select the group for which provisioning is to be enabled or simply select the DEFAULT group if provisioning is to be done for all users.
- Provide the policy name. For the login method, select password and click Save.
- Your configuration is now complete.
- Now on assigning user to the group would automatically provisioning the user. However group assignment is not required if it is DEFAULT group.
NOTE : By default miniOrange creates a user in Genius as LEARNER. However if it is required to create a user in Genius of any other role type then a custom attribute is needed.
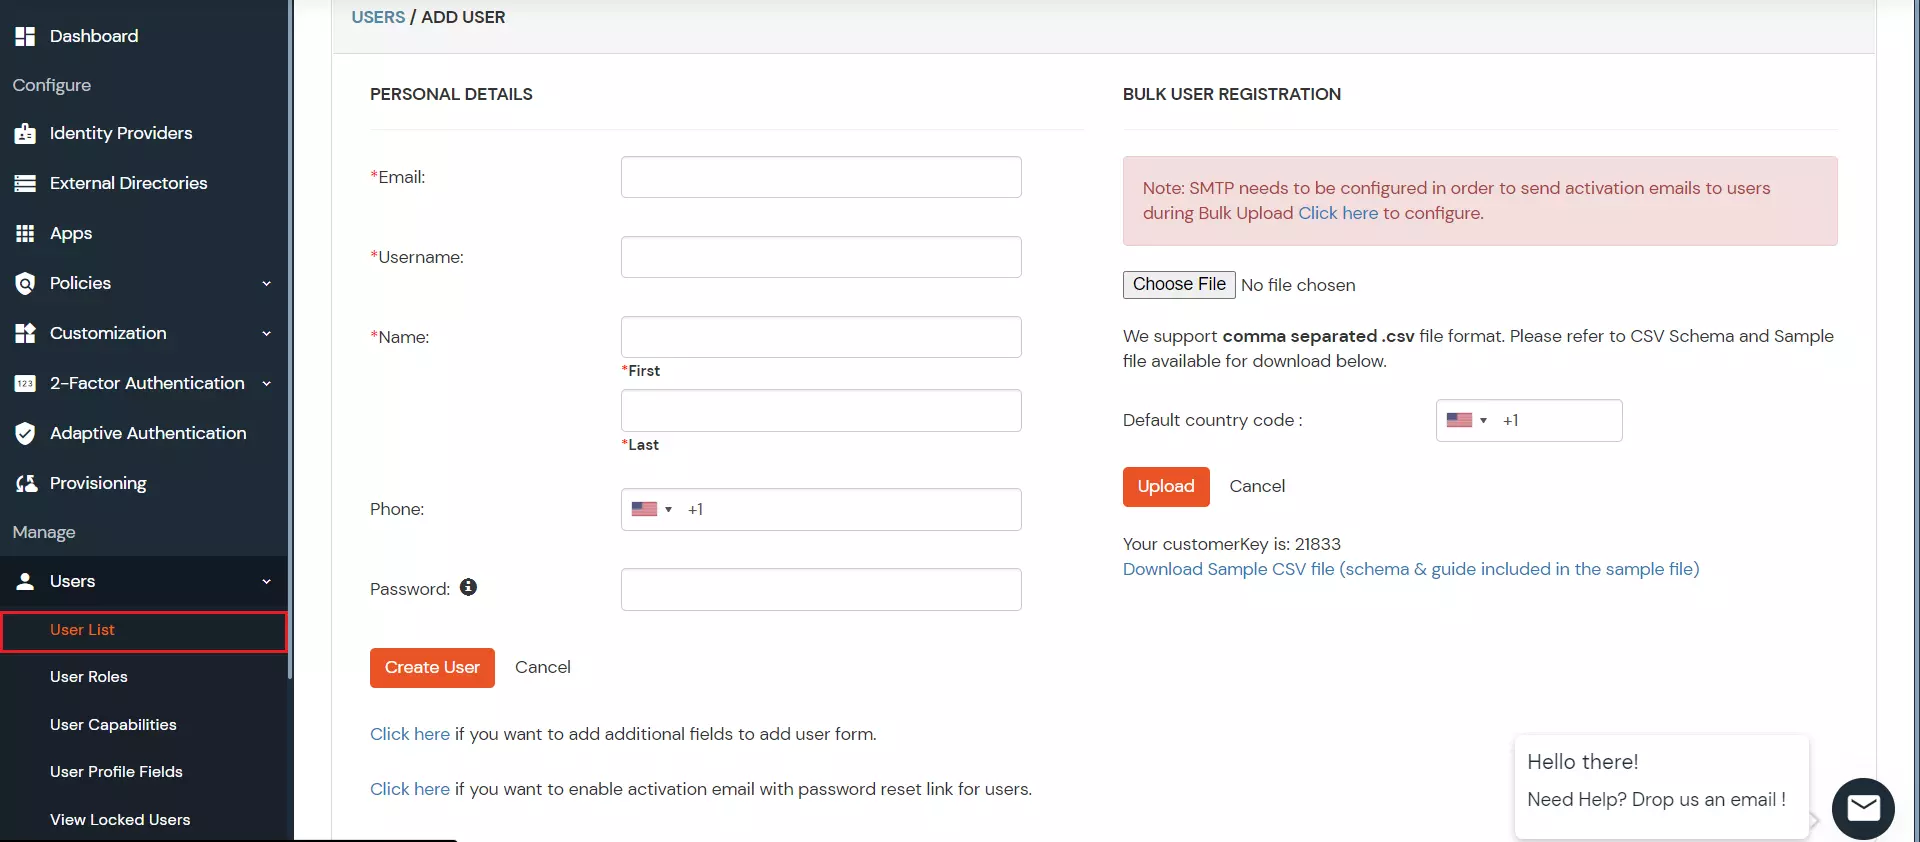
3. Add Users
- Go to Users > Add User.
- Enter the Users Details and the user will be created.
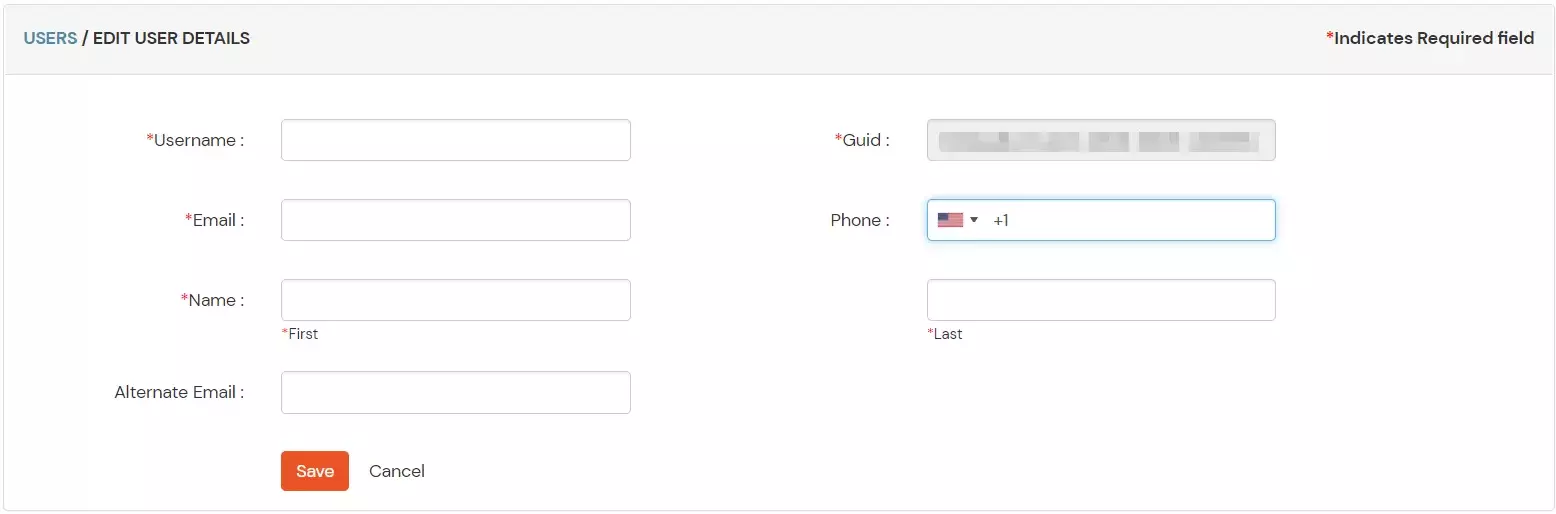
4. Update Users
- To update user profile, Go to Users >> User List.
- Select a particular user and in Actions dropdown select Edit.
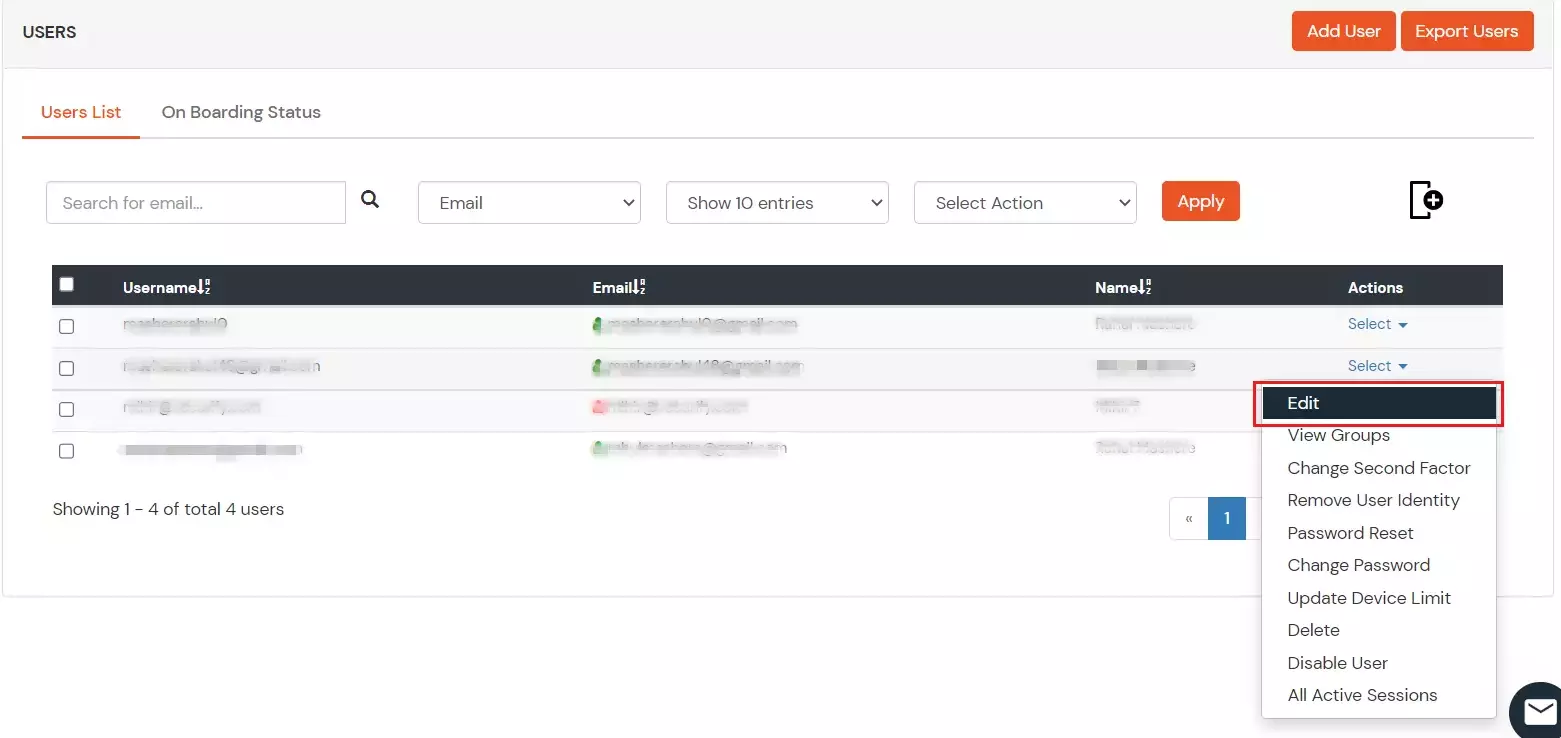
- Fill out user updated information and click on Save button.
5. Delete Users
- To delete user, Go to Users >> User List.
- Select a particular user and in Actions dropdown select Delete.
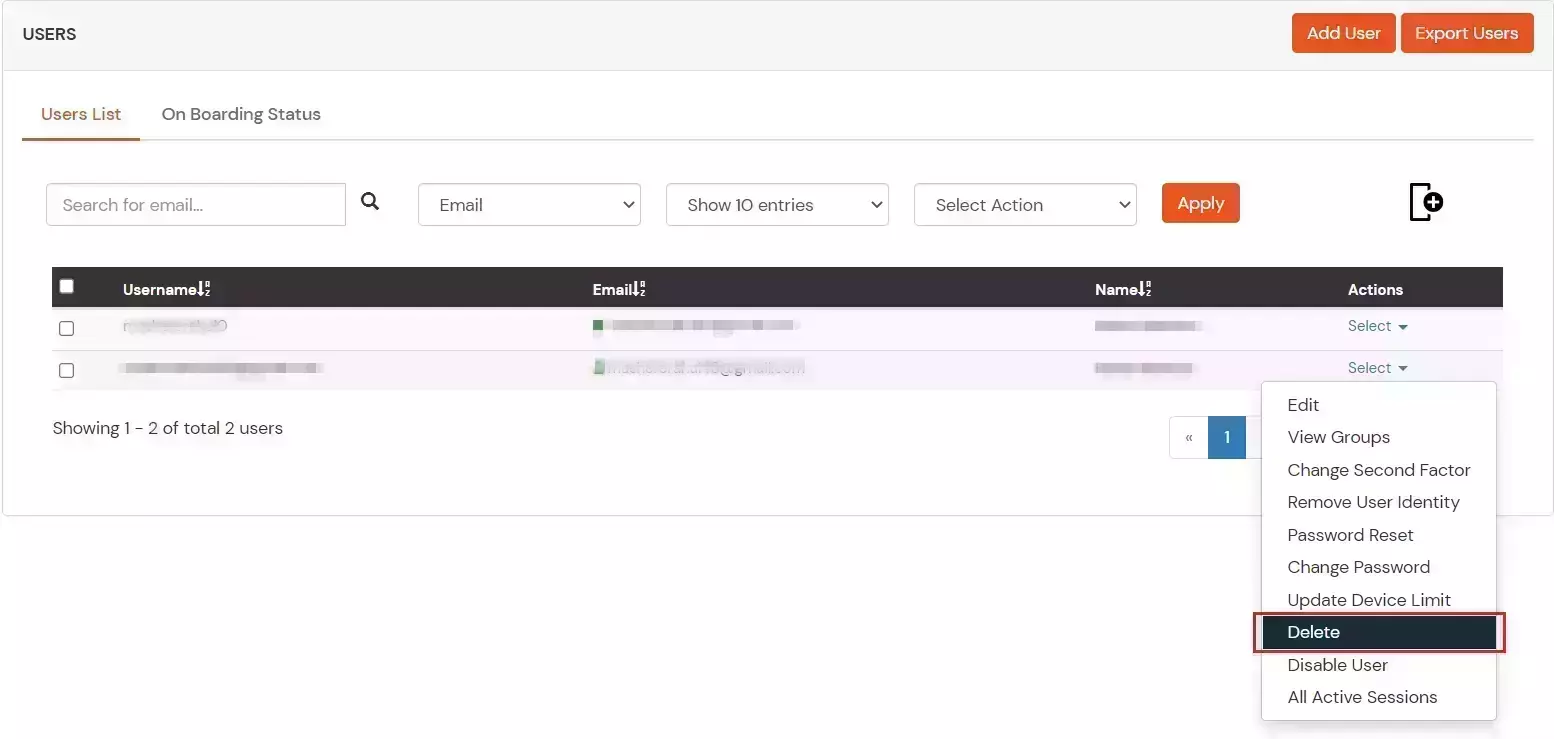
- A pop up will appear in which click on Yes button.

6. Create Custom Attribute
- Go to Users >> User Profile fields.
- Create a new Custom Profile Attribute and give it any name.
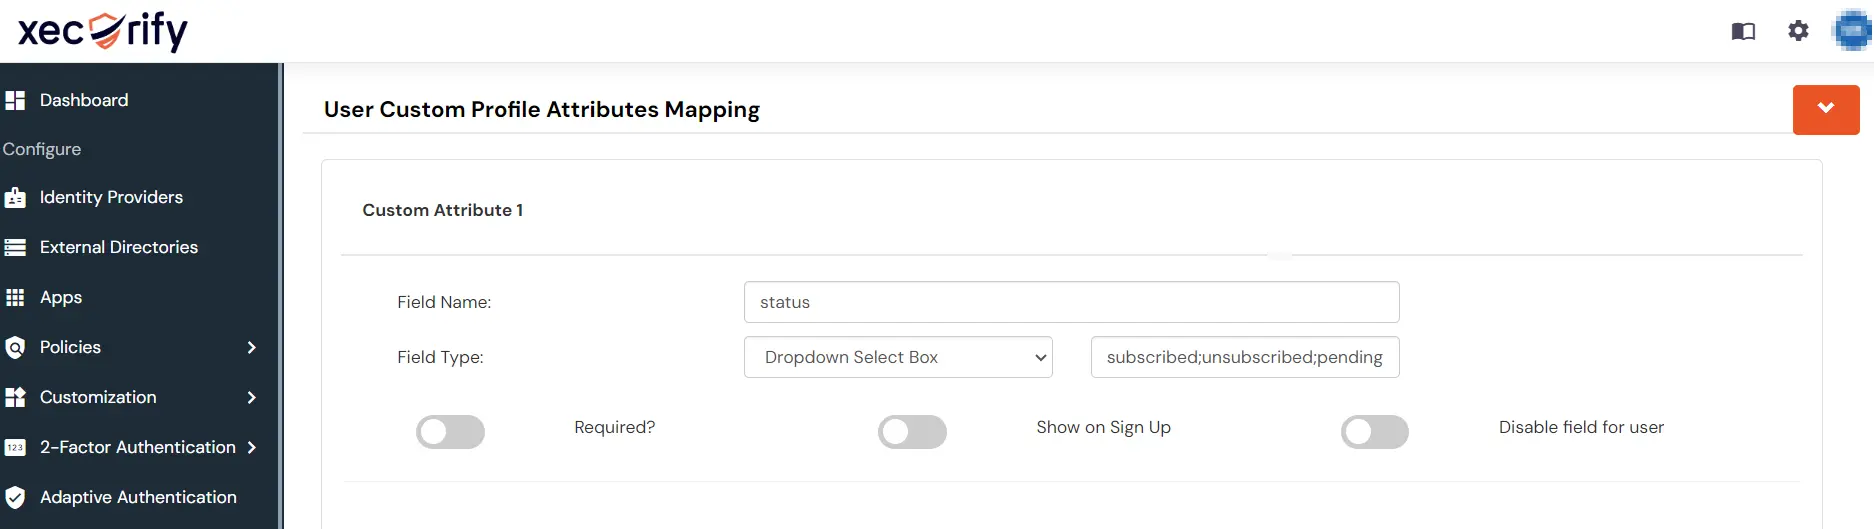
- Give a field name of your choice and select the field type as Dropdown and give the values separated by semicolon.
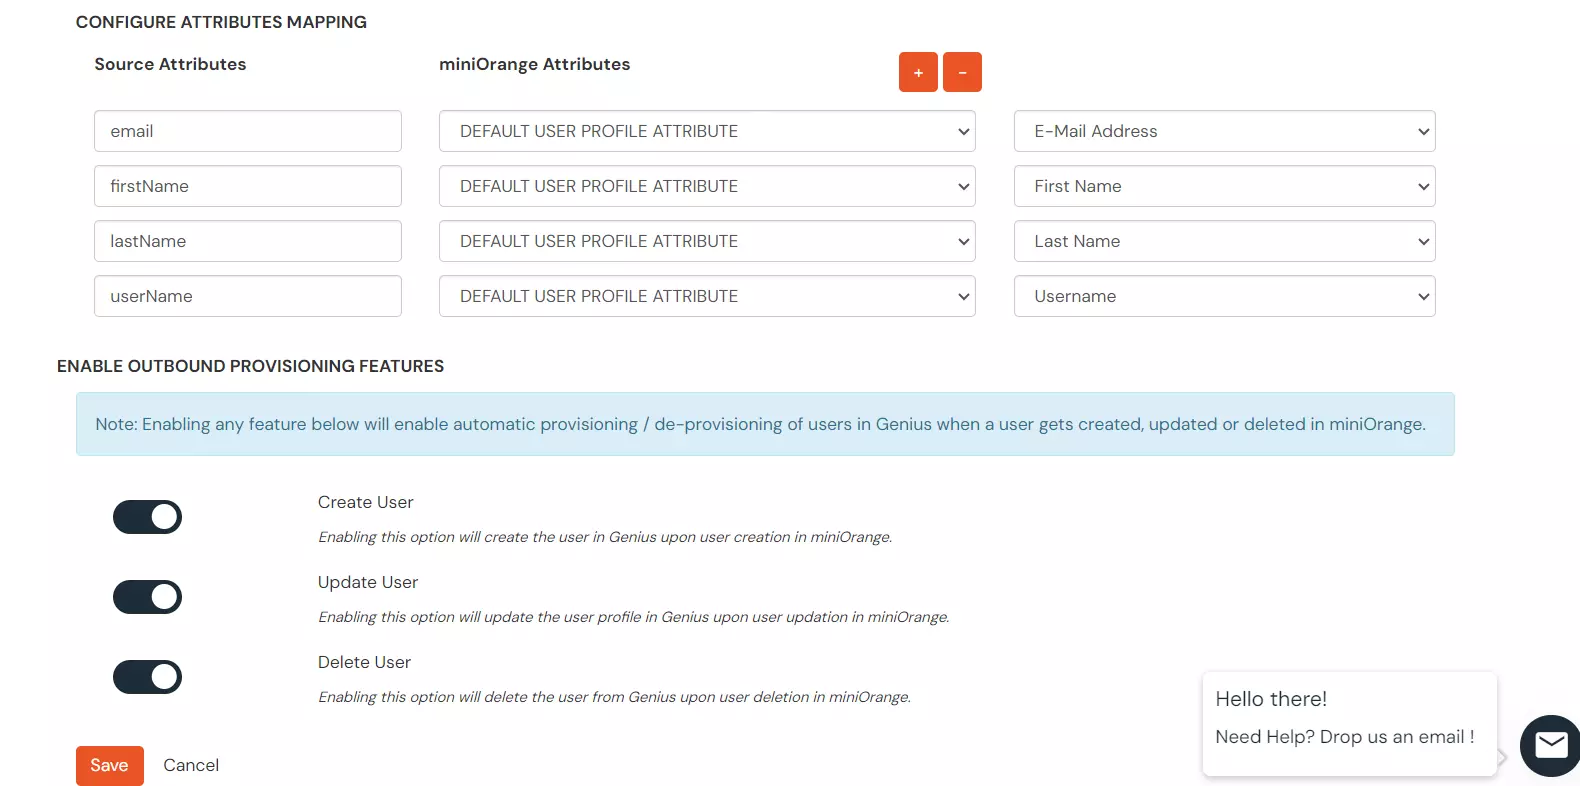
7. Add Custom Attribute to Genius app configuration
- Navigate back to the Genius Application we have created in step 1.
- Click on + to add attributes in Genius application configuration. As shown in image below, roles attribute from Genius is mapped against custom attribute roles_custom_Attribute. Similarly other custom attributes can be mapped.
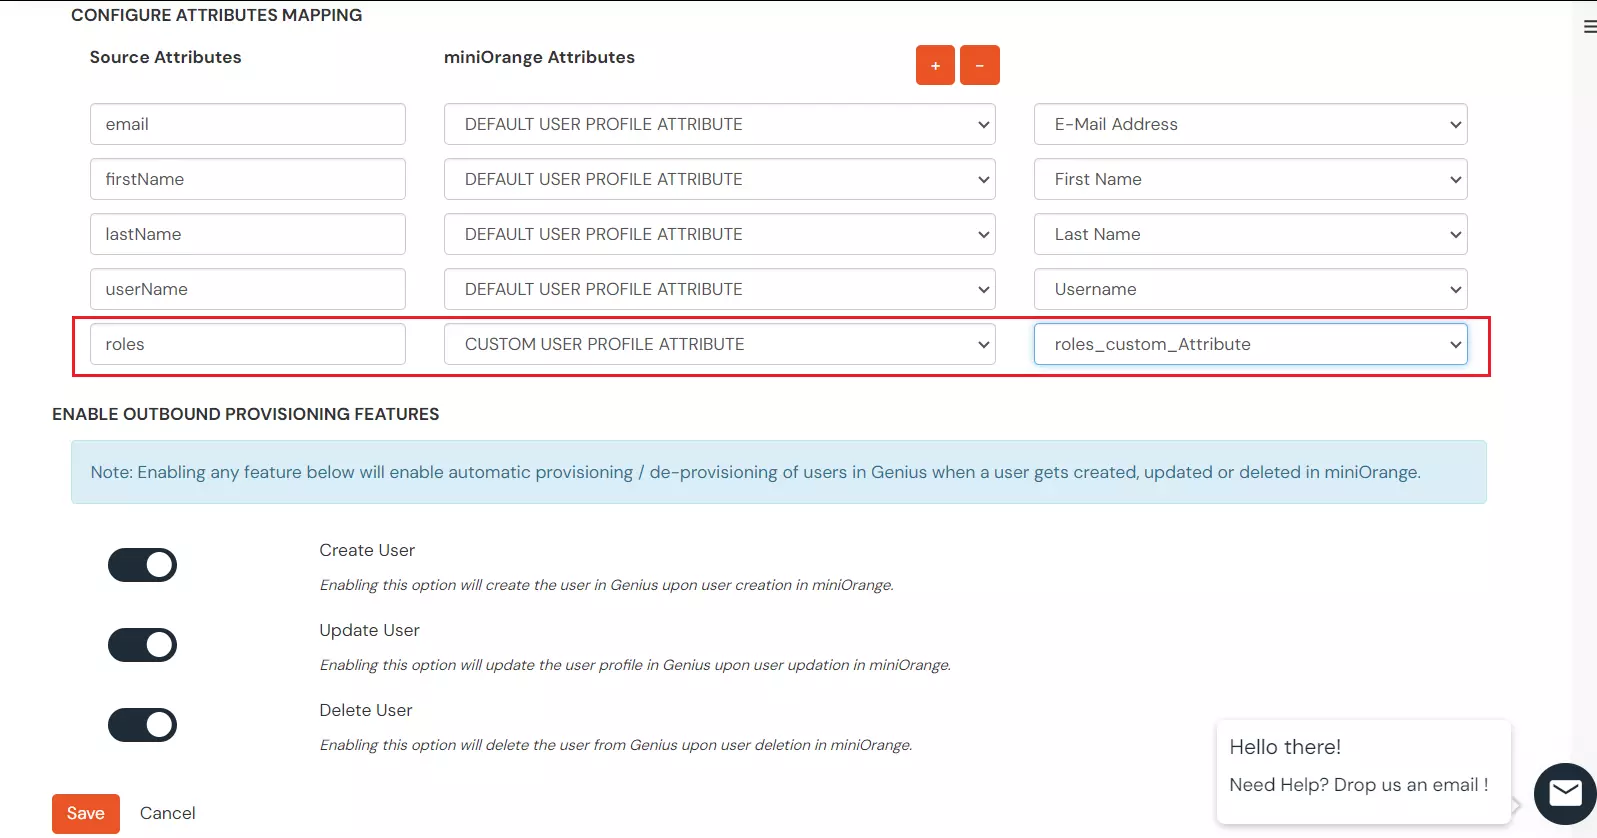
- Click Save after adding all required custom attributes.
View Provisioning Reports
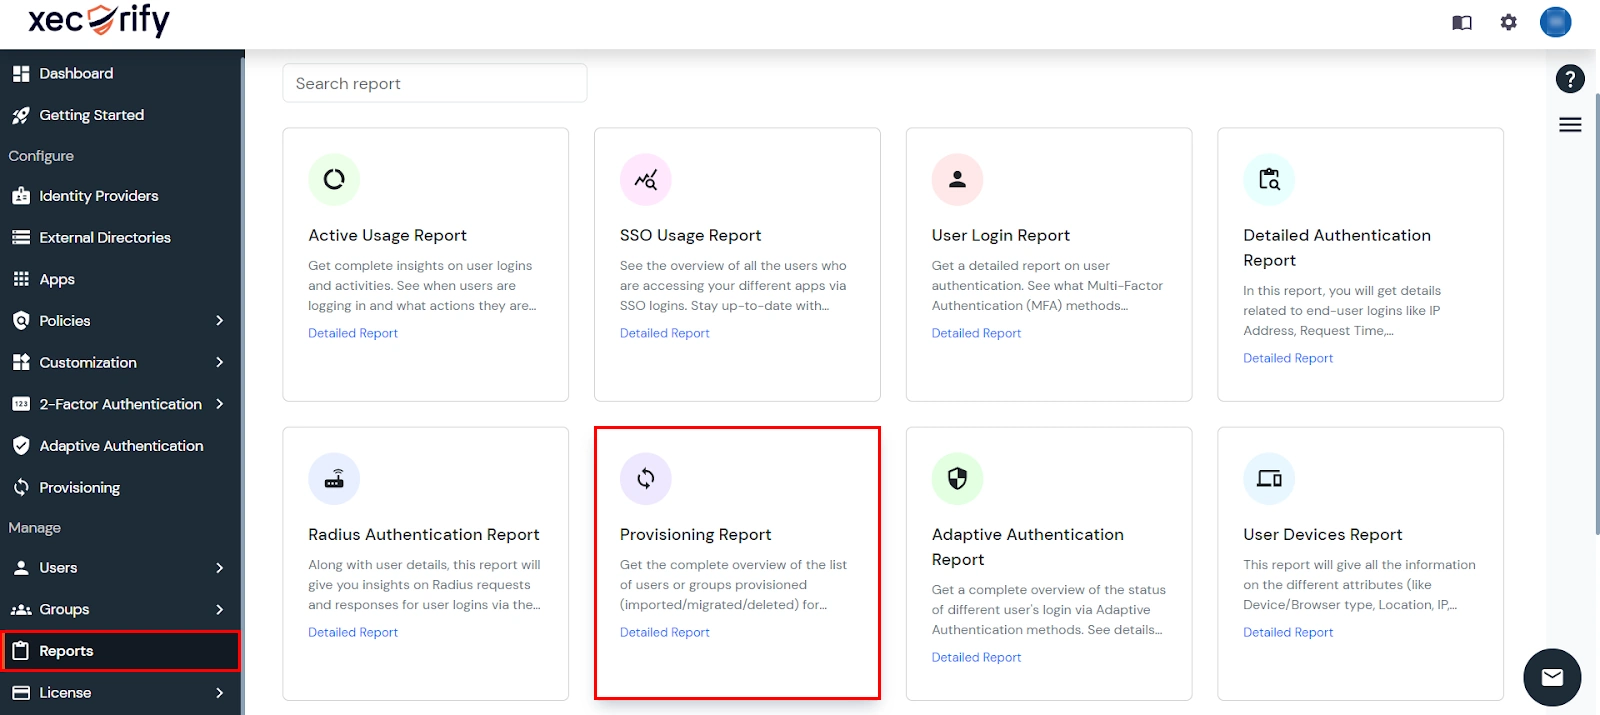
How to access Provisioning Reports?
- Navigate to the Reports in the left-hand navigation pane and select Provisioning Report.
- Filter the reports by specifying Enduser Identifier and Application Name criteria. Additionally, choose the desired timespan for the reports. Once done, click on the Search.
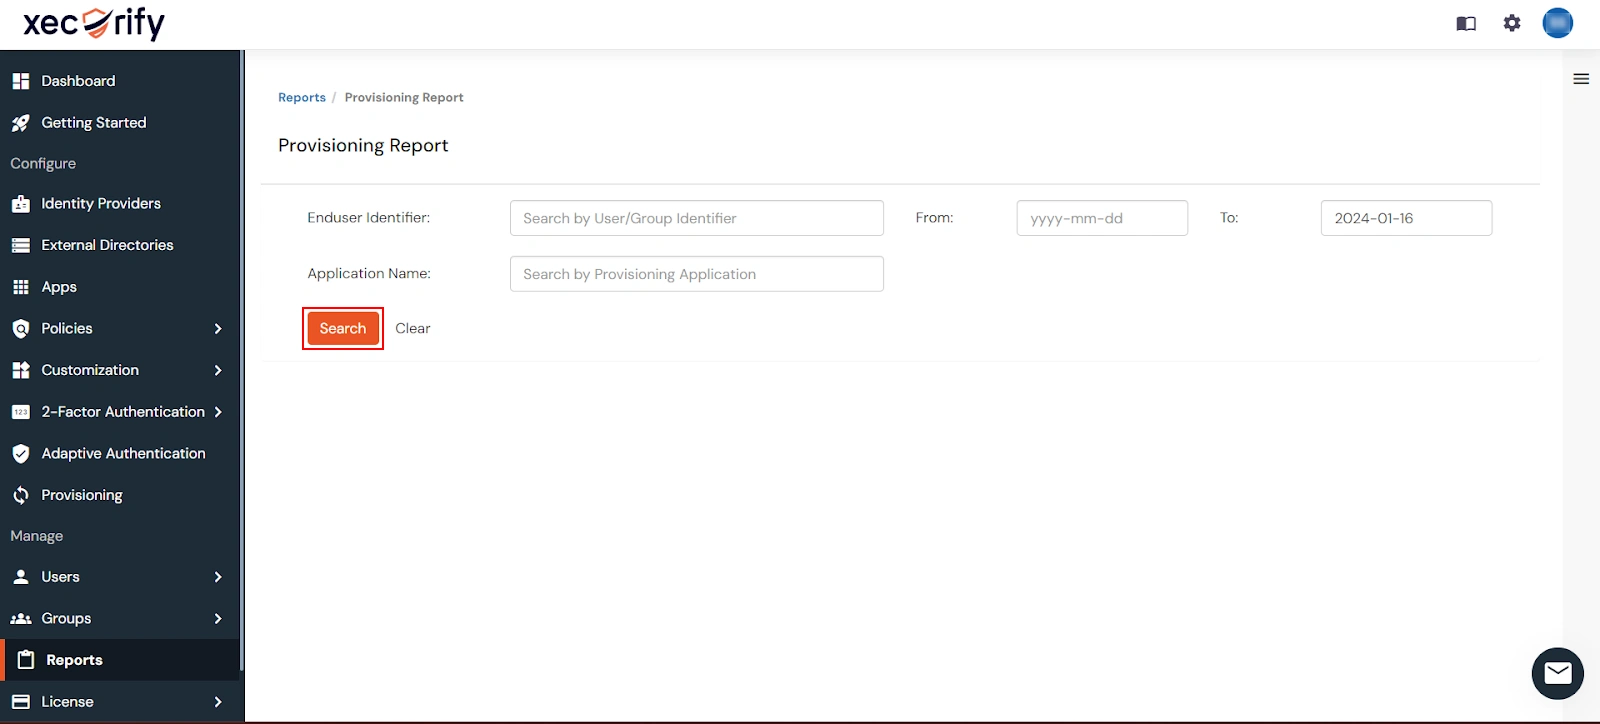
- Alternatively, you can directly click on Search to retrieve all provisioning reports based on time without applying any specific filters.
