Hello there!
Need Help? We are right here!
Need Help? We are right here!
Search Results:
×Configure Salesforce as IDP to Single Sign-On (SSO) into multiple applications by loging using Salesforce as Identity Provider. Here, users can login to all applications (SPs) using their Salesforce login credentials by configuring Salesforce as an Identity Provider (IdP). miniOrange will act as an Identity Broker which forms a trusted connection between IDP and multiple SPs by enabling cross-protocol authentication. This provides easy and secure login access to users by using only one set of login credentials.
miniOrange offers free help through a consultation call with our System Engineers to configure SSO for different apps using Salesforce as IDP in your environment with 30-day free trial.
For this, you need to just send us an email at idpsupport@xecurify.com to book a slot and we'll help you in no time.
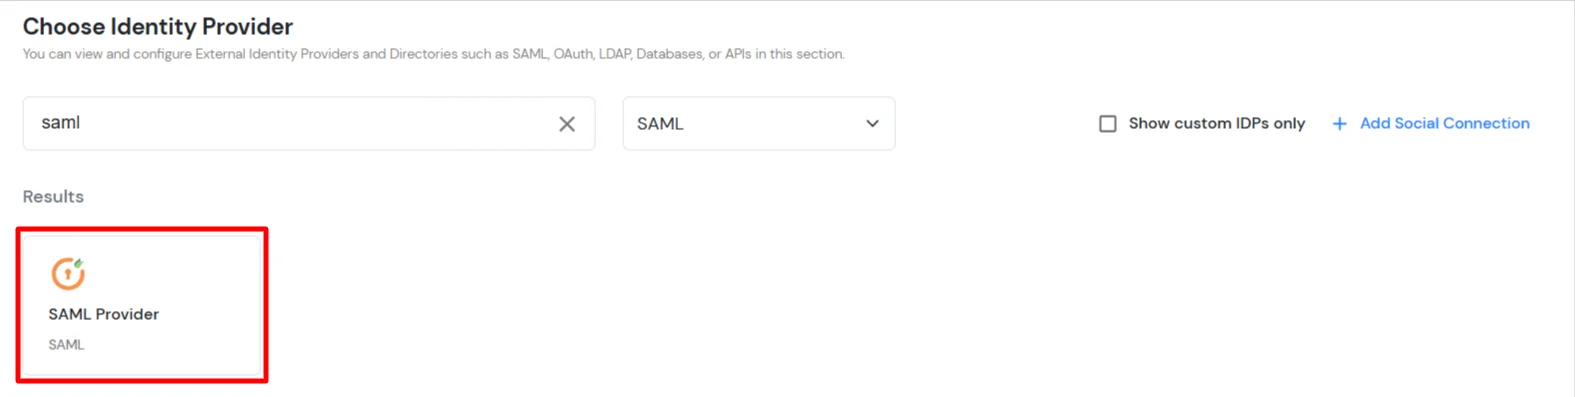
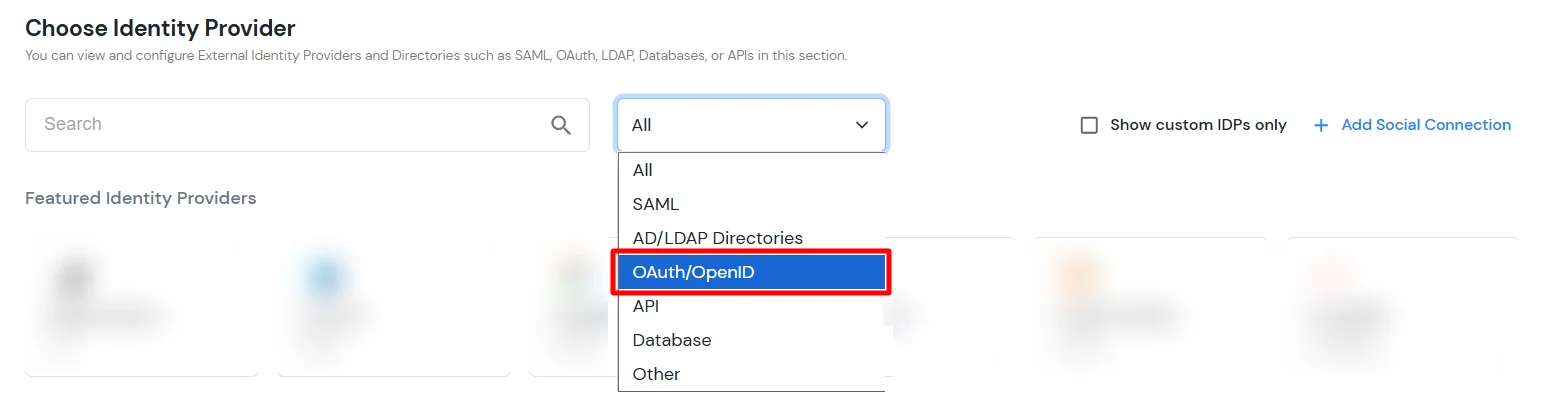
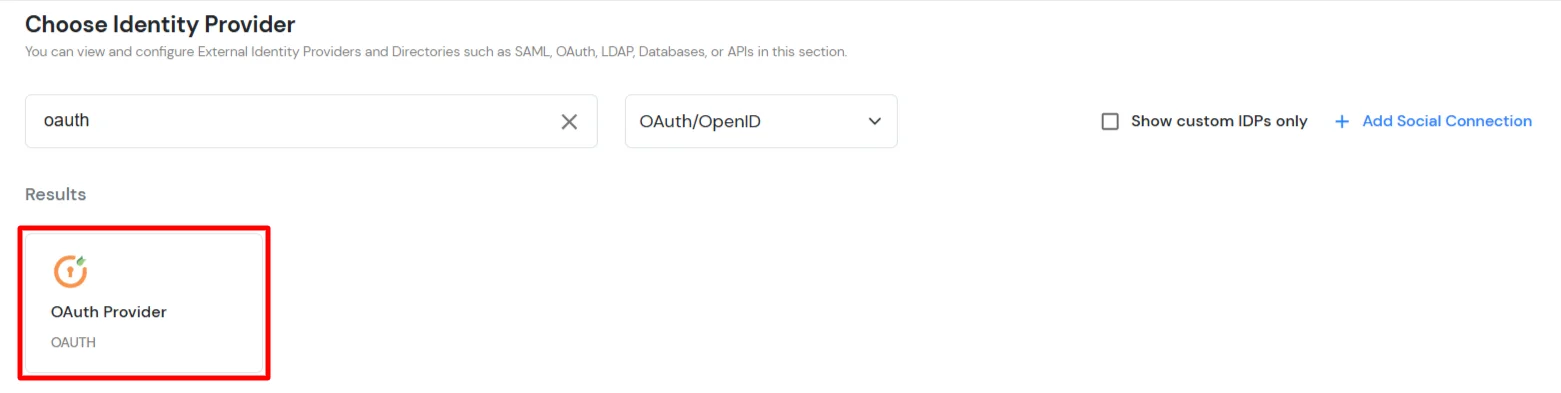
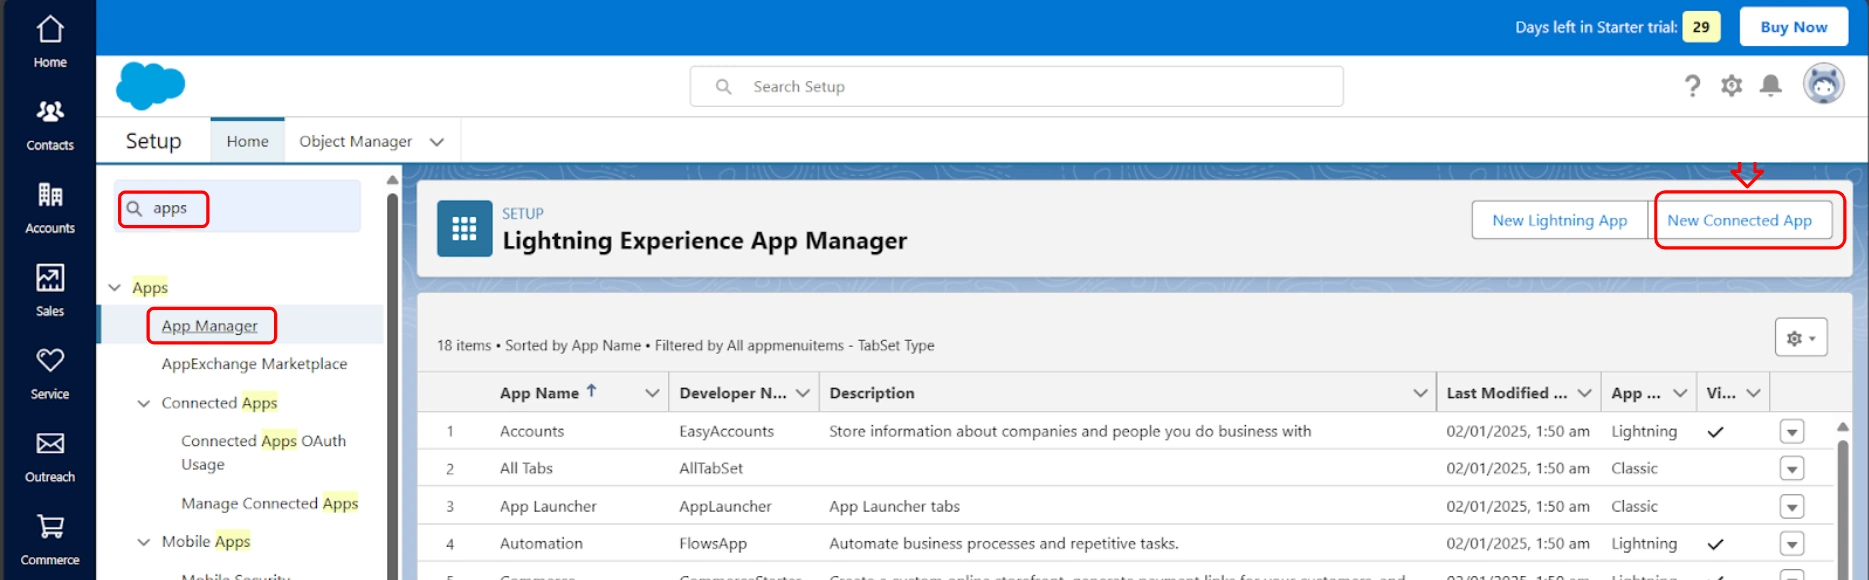
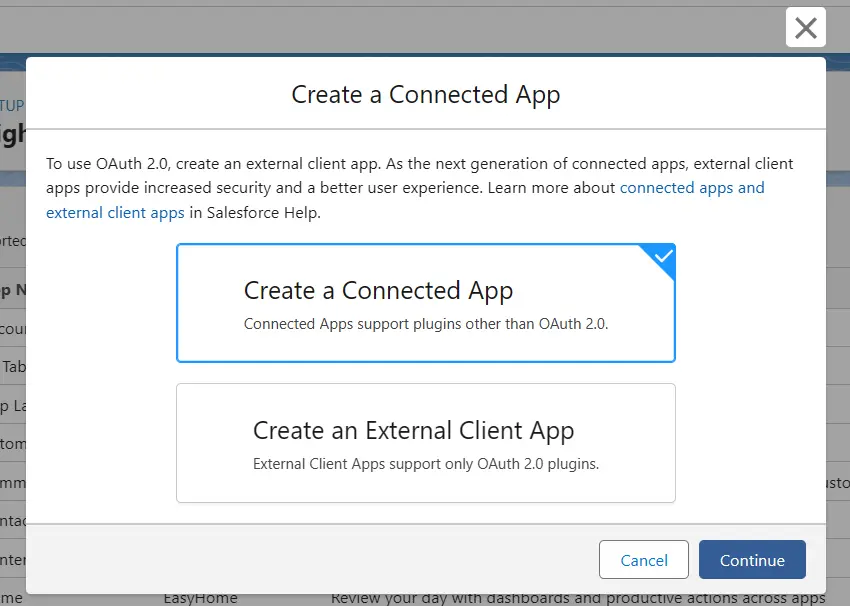
Mentioned below are steps to configure Salesforce as IDP via SAML and OAuth configuration. Follow the steps accordingly based on your requirement (SAML or OAuth).
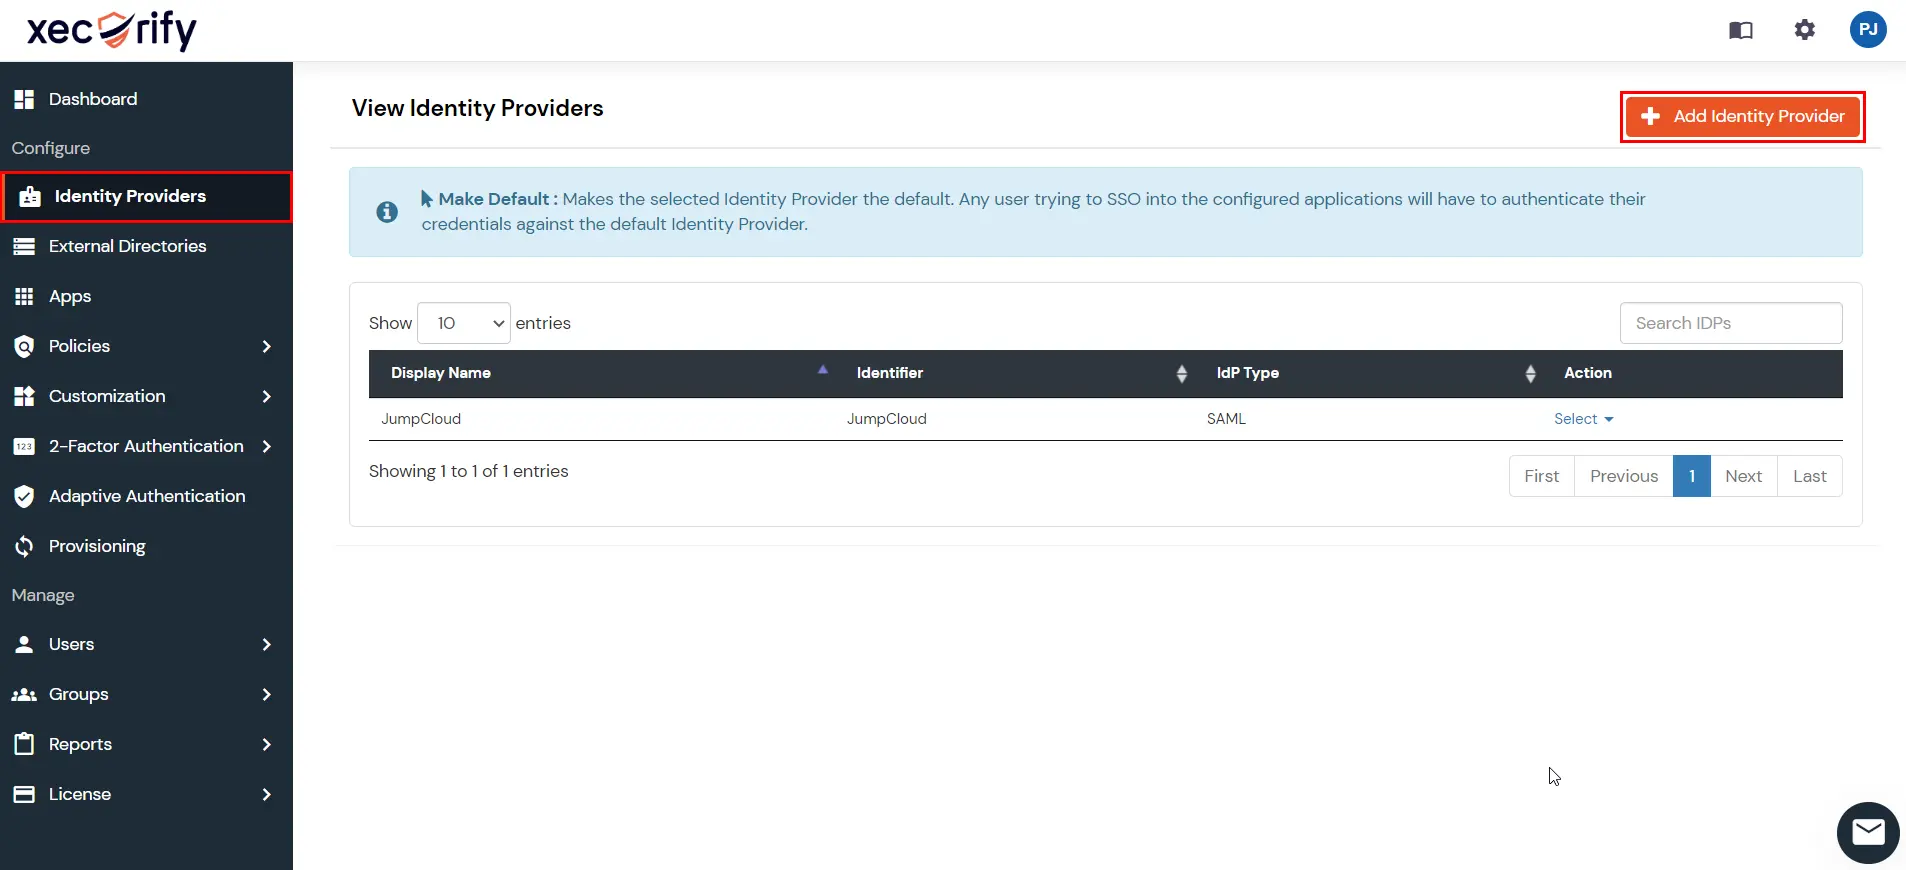
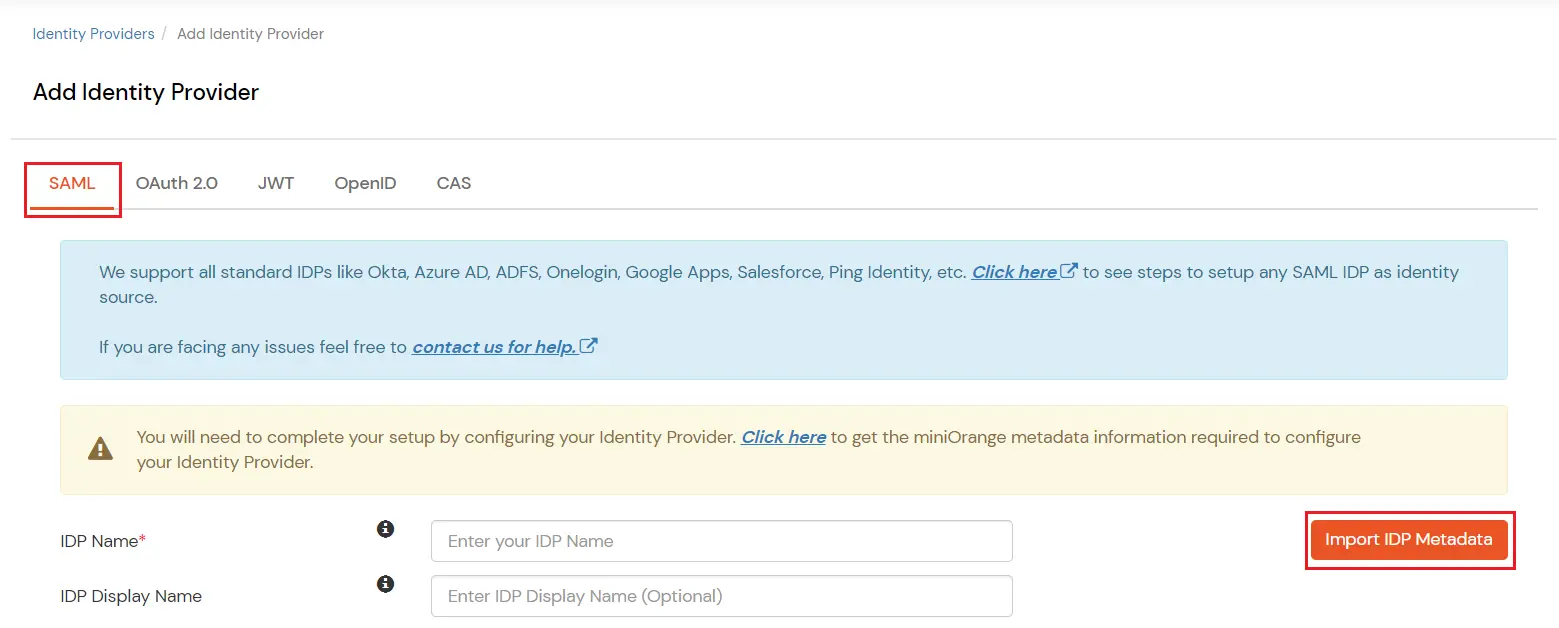
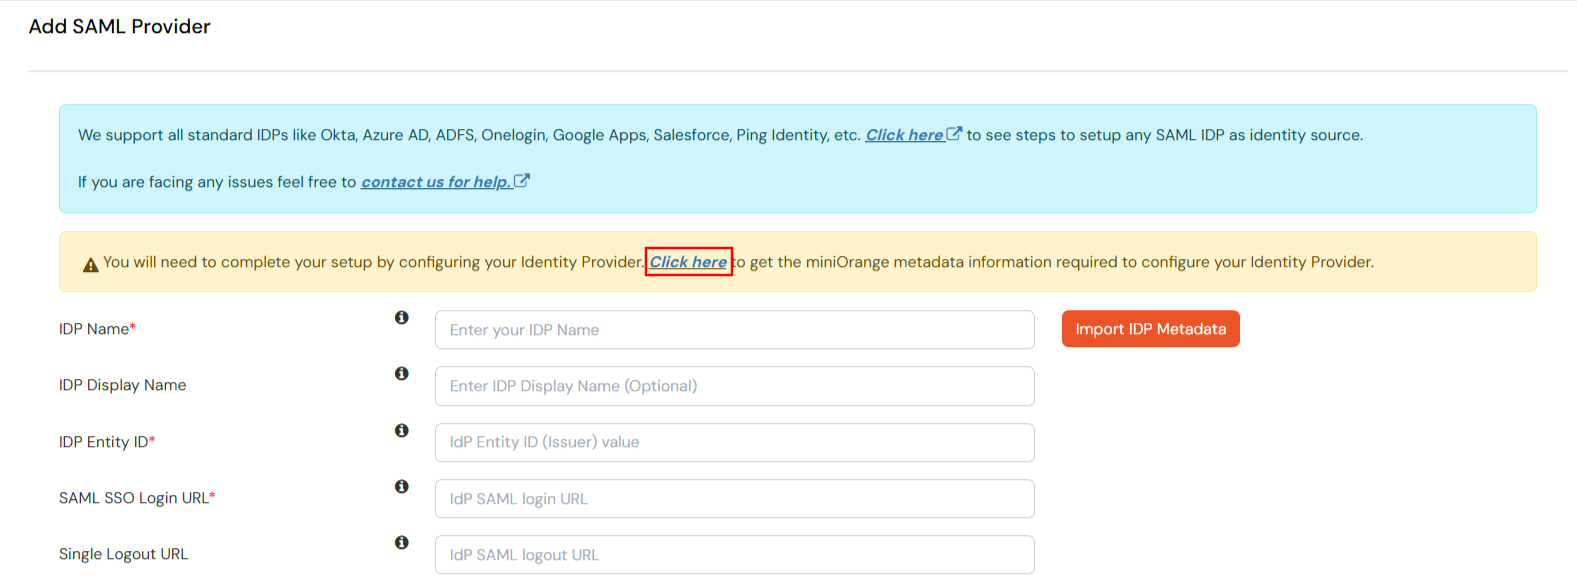
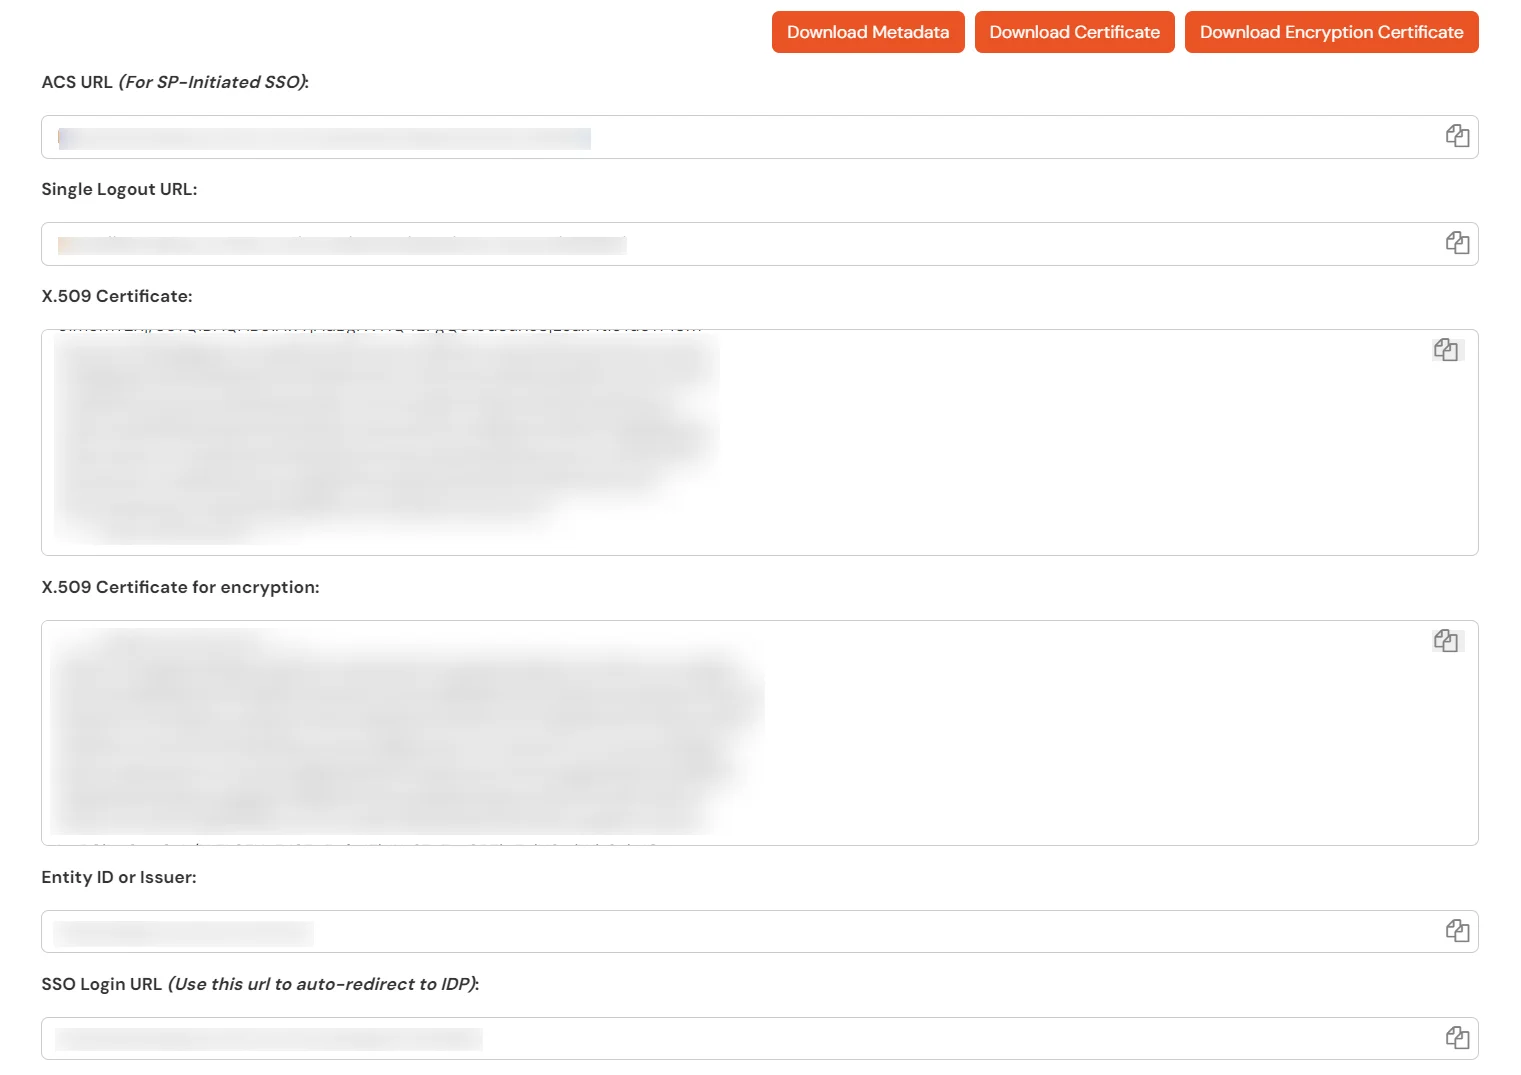
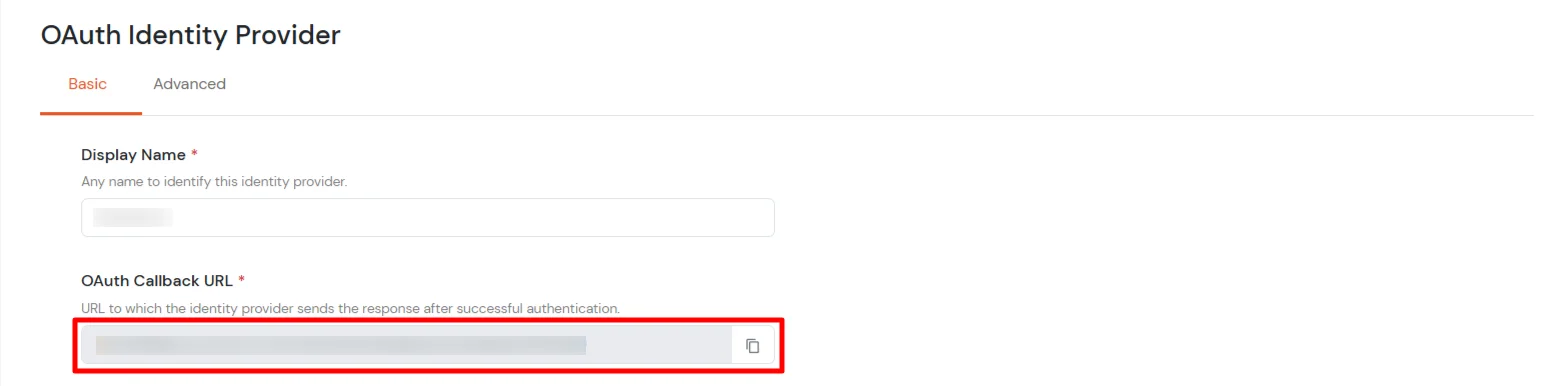


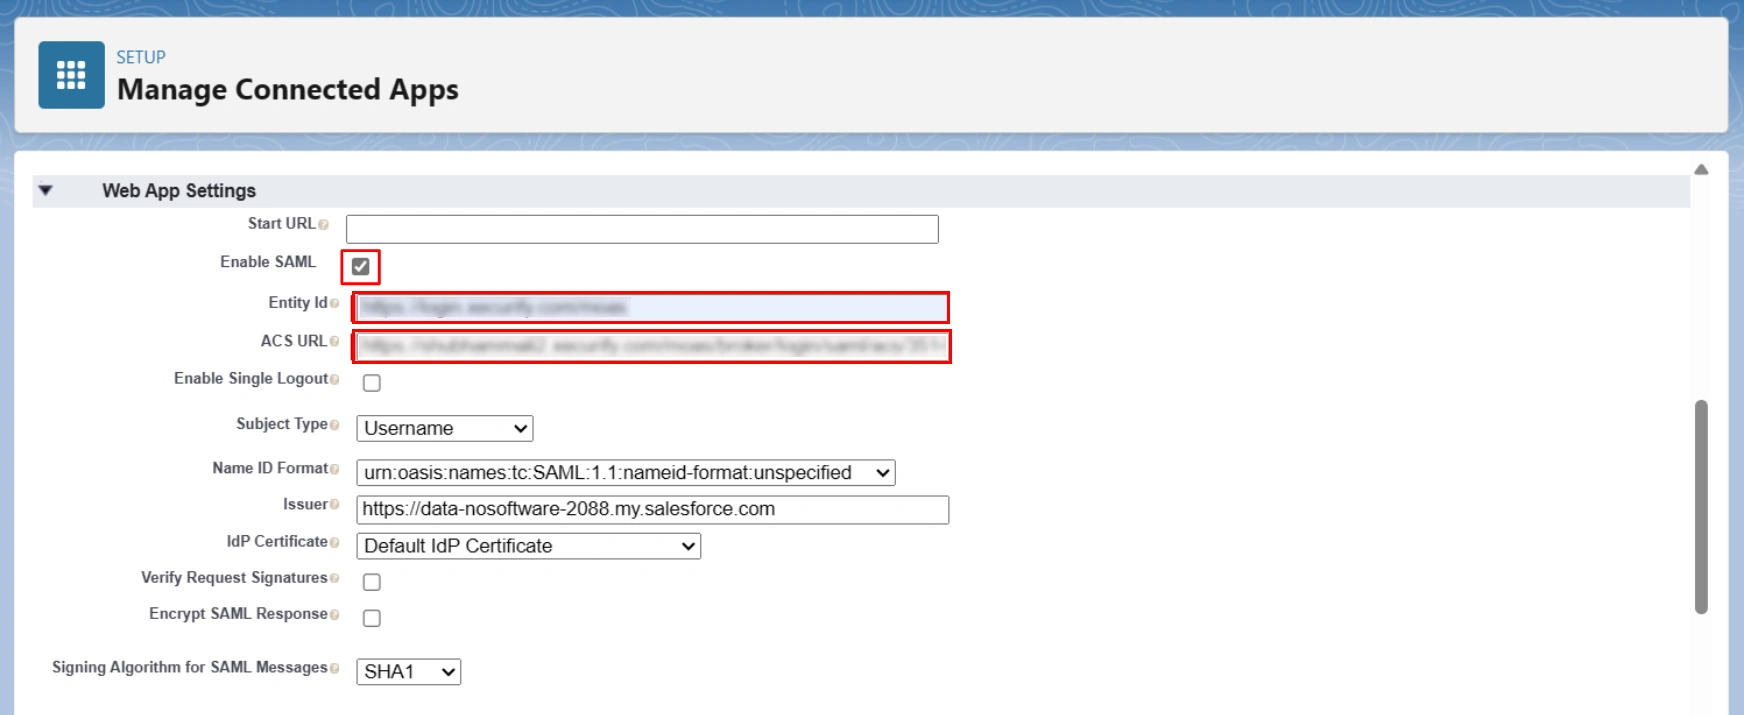
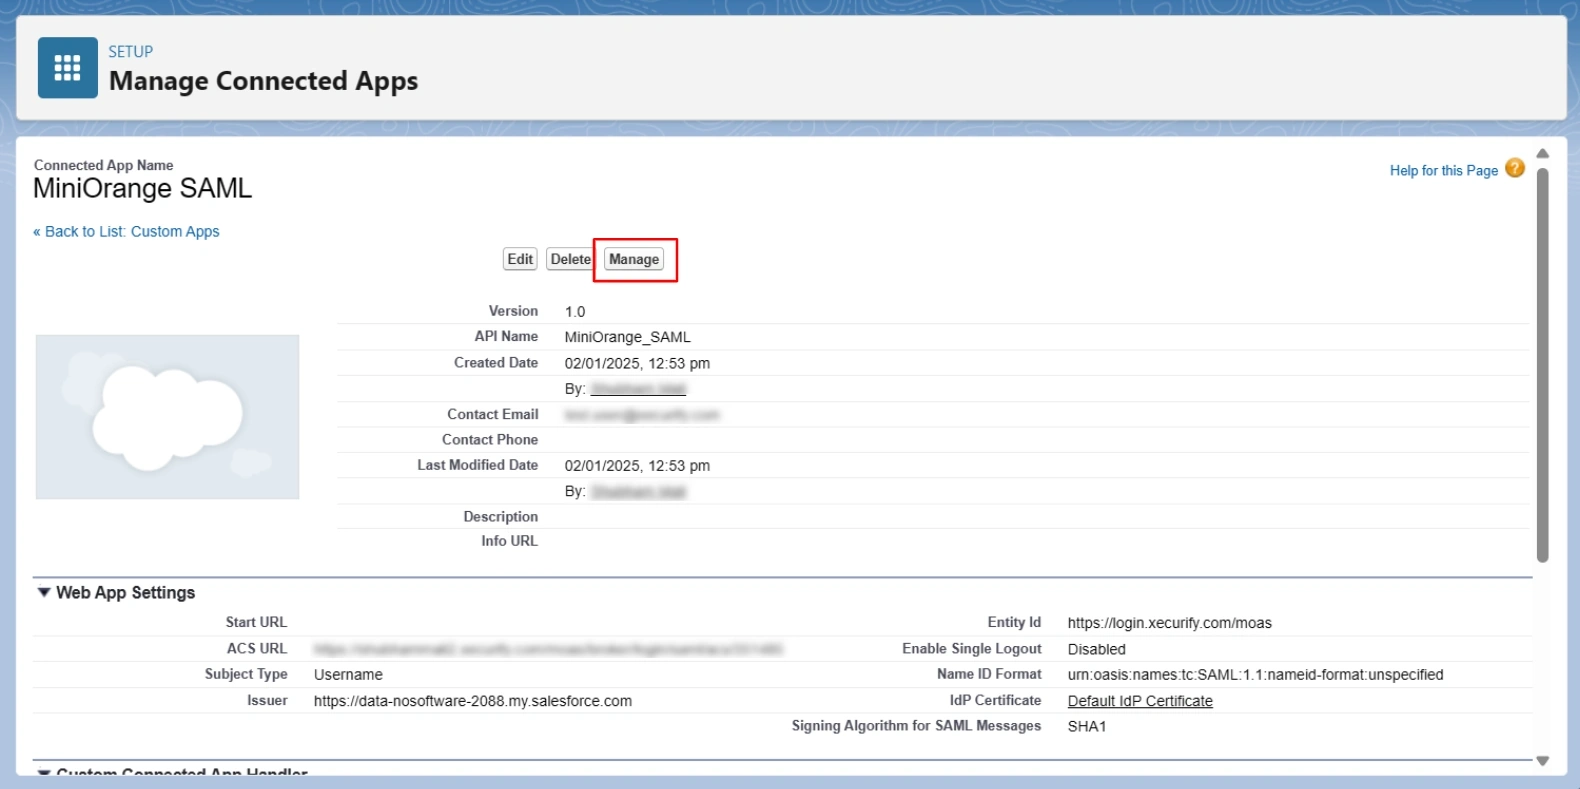
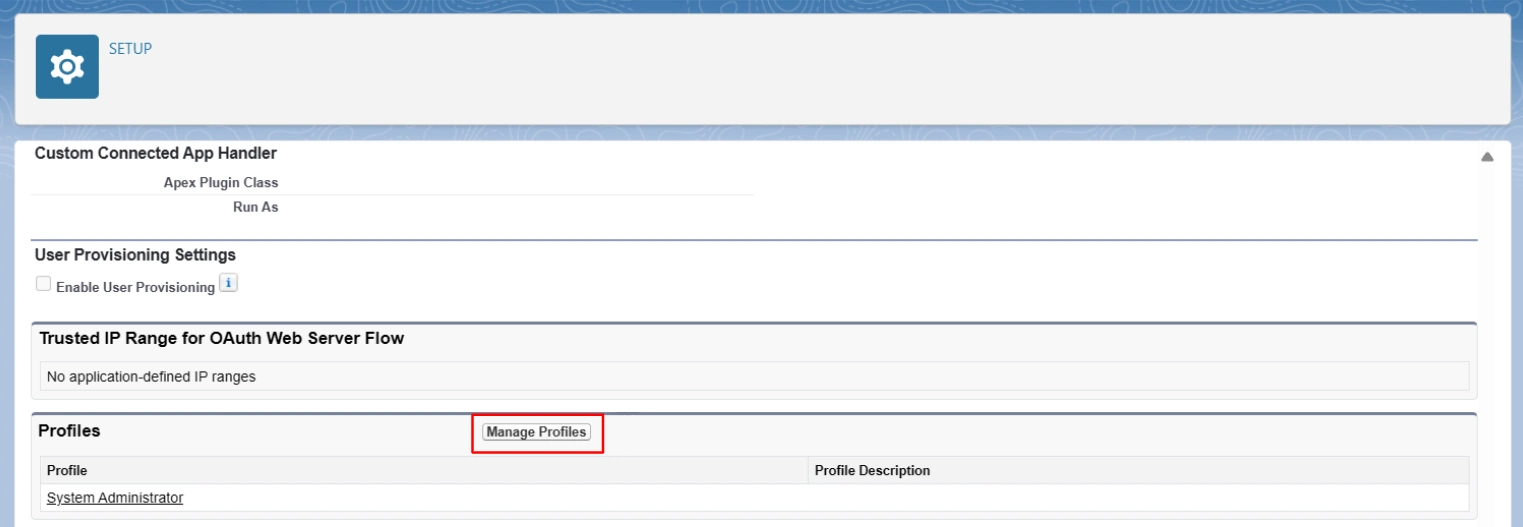


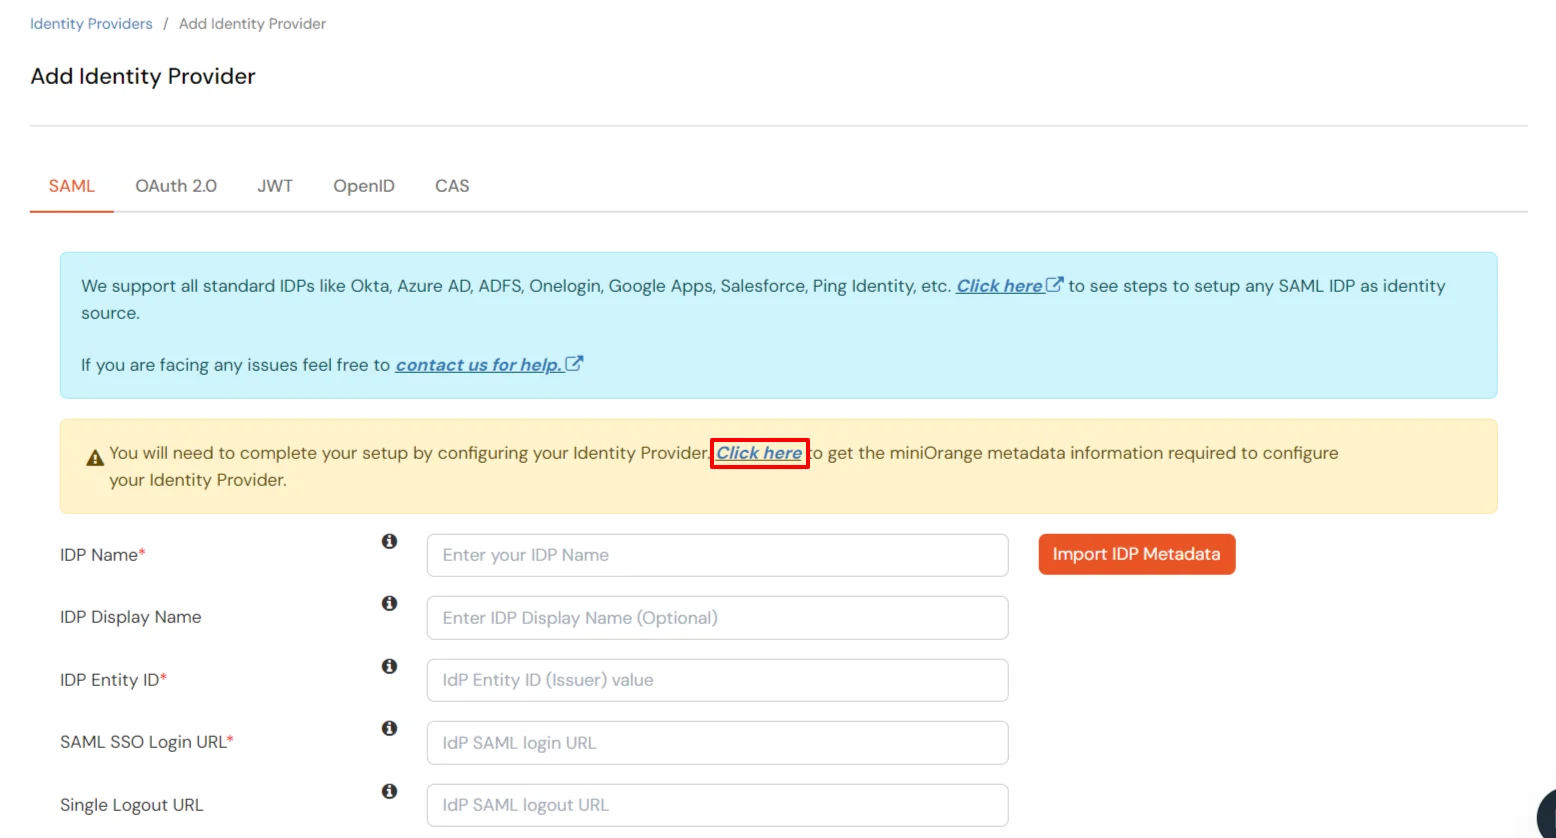
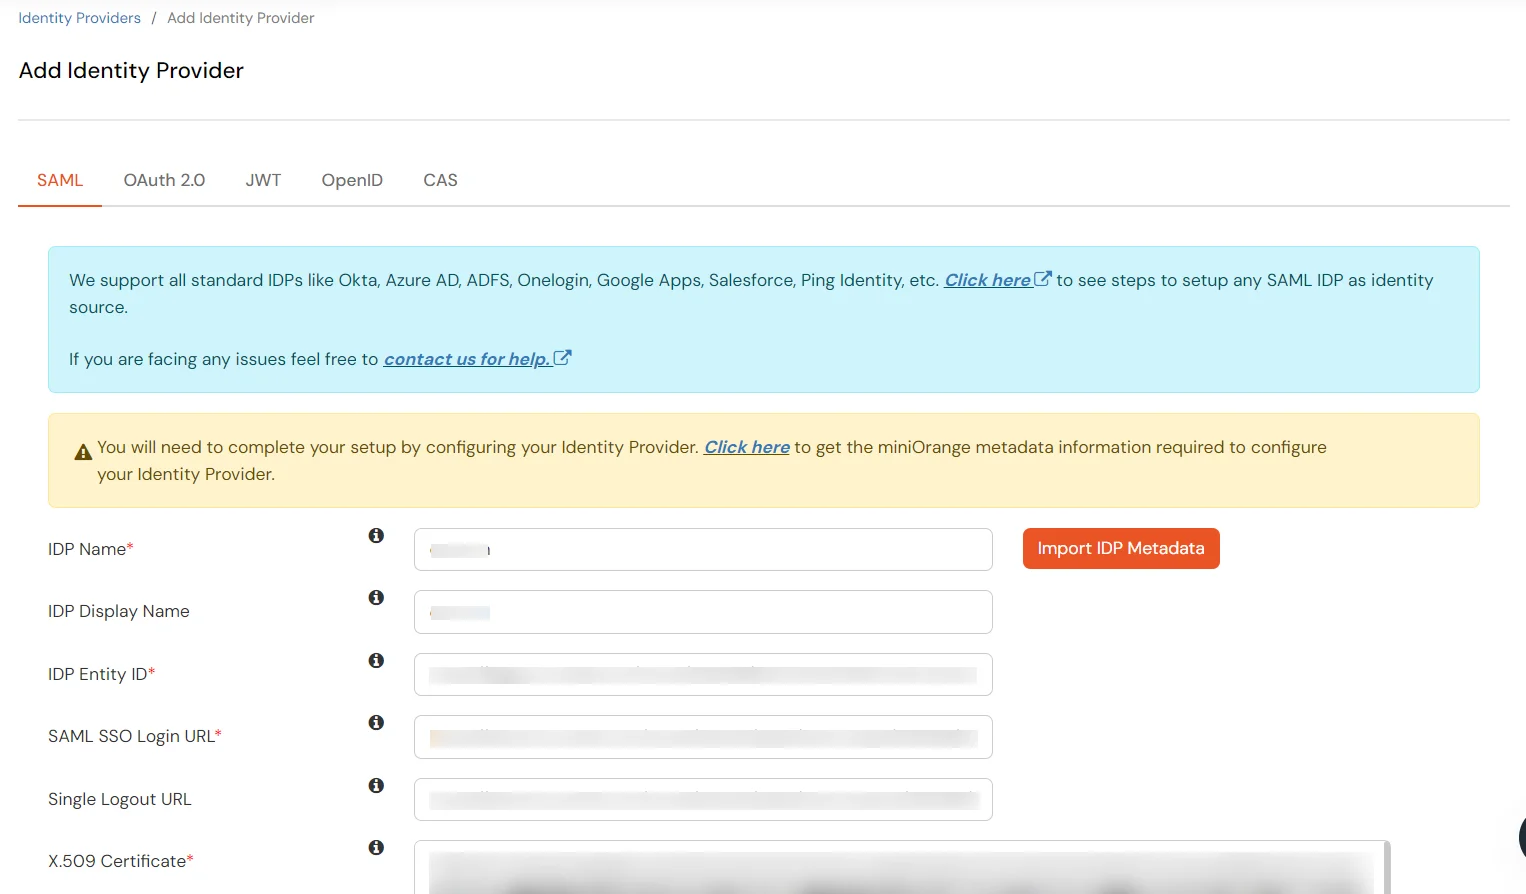
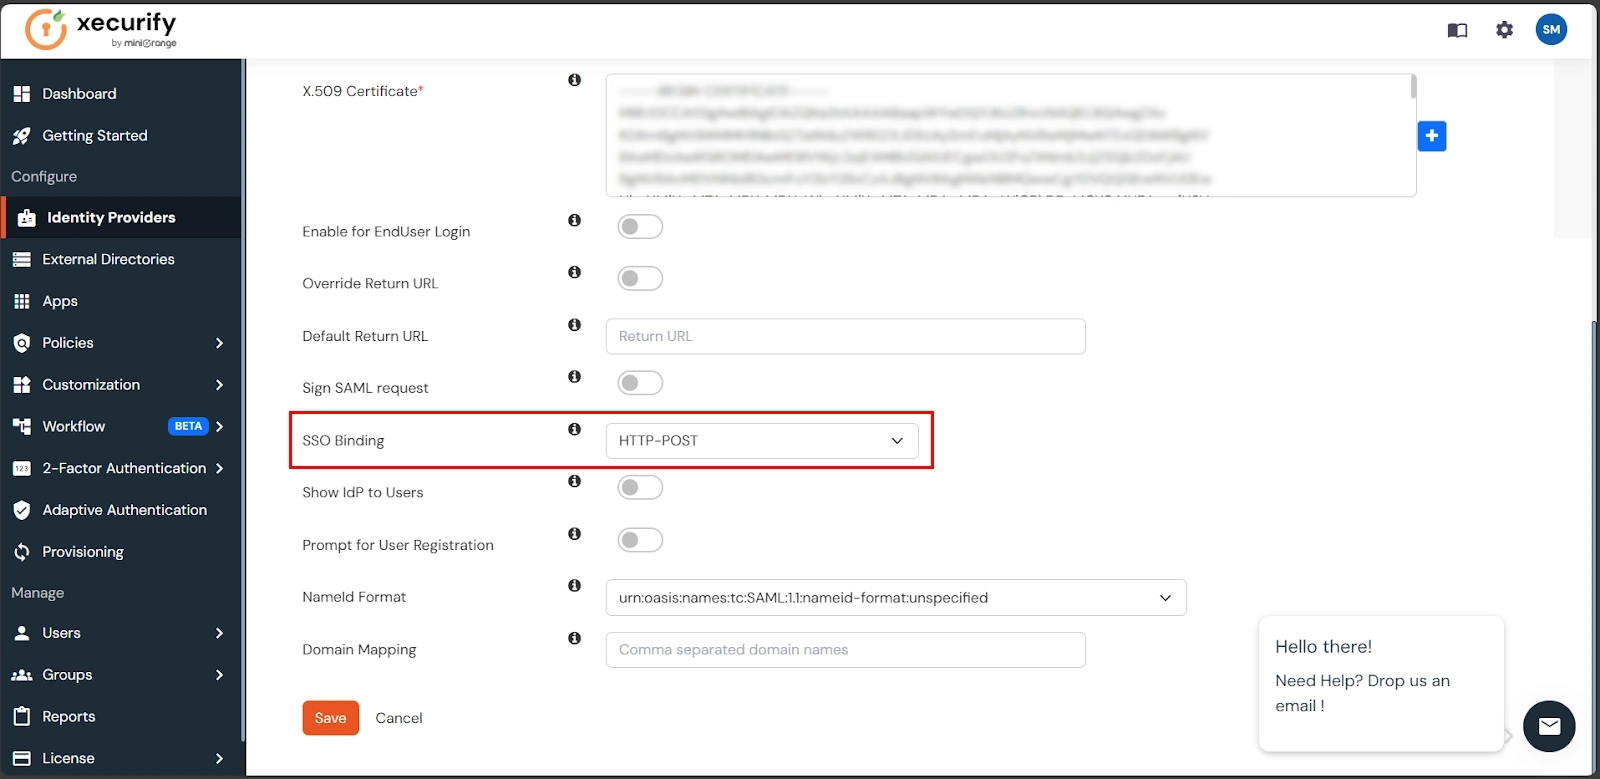
Now we'll complete the miniOrange IDP configuration using the Salesforce metadata obtained from Step 2.

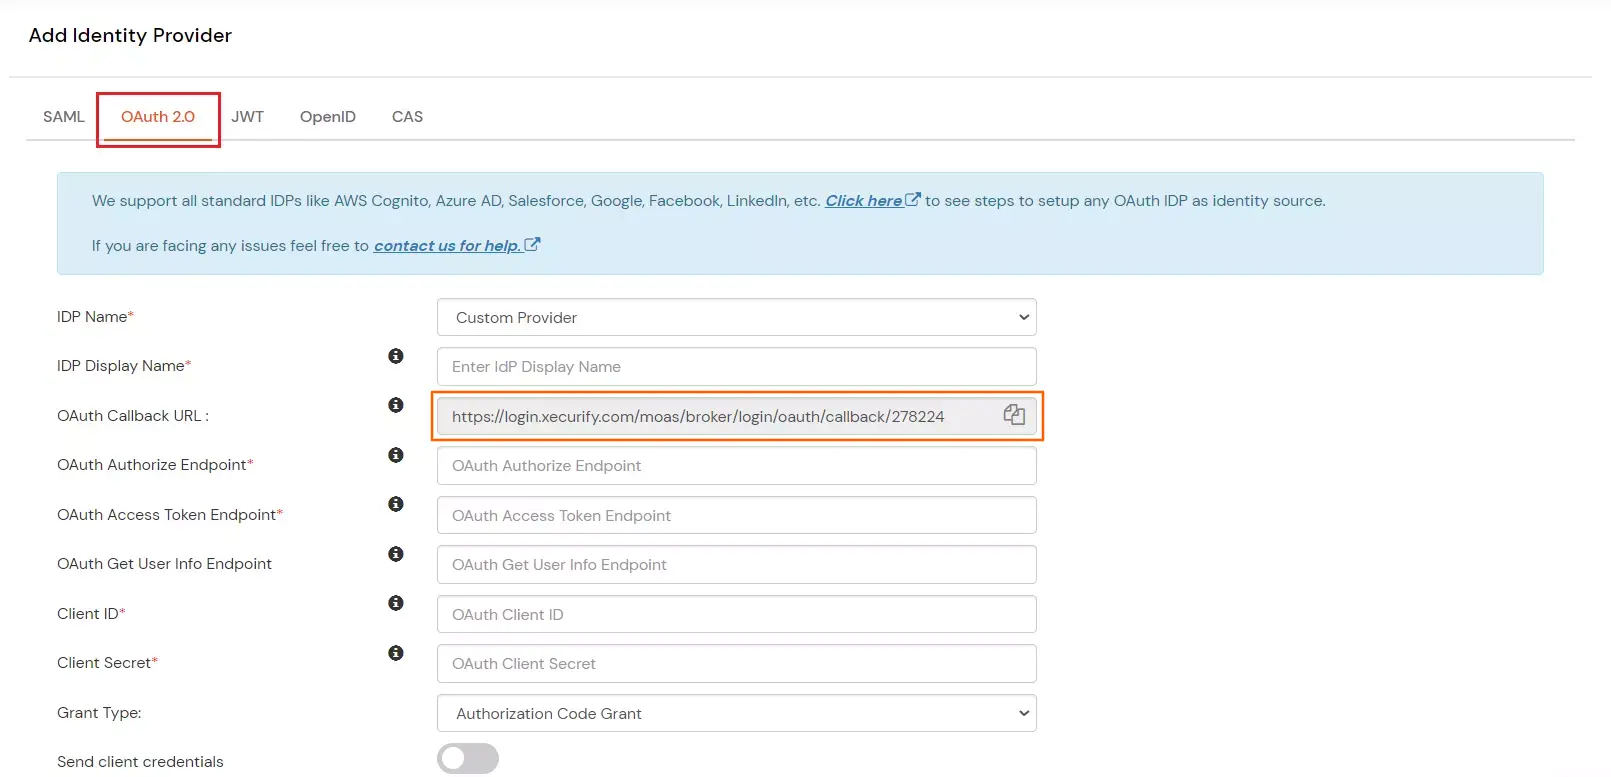
| Display Name | Choose appropriate Name |
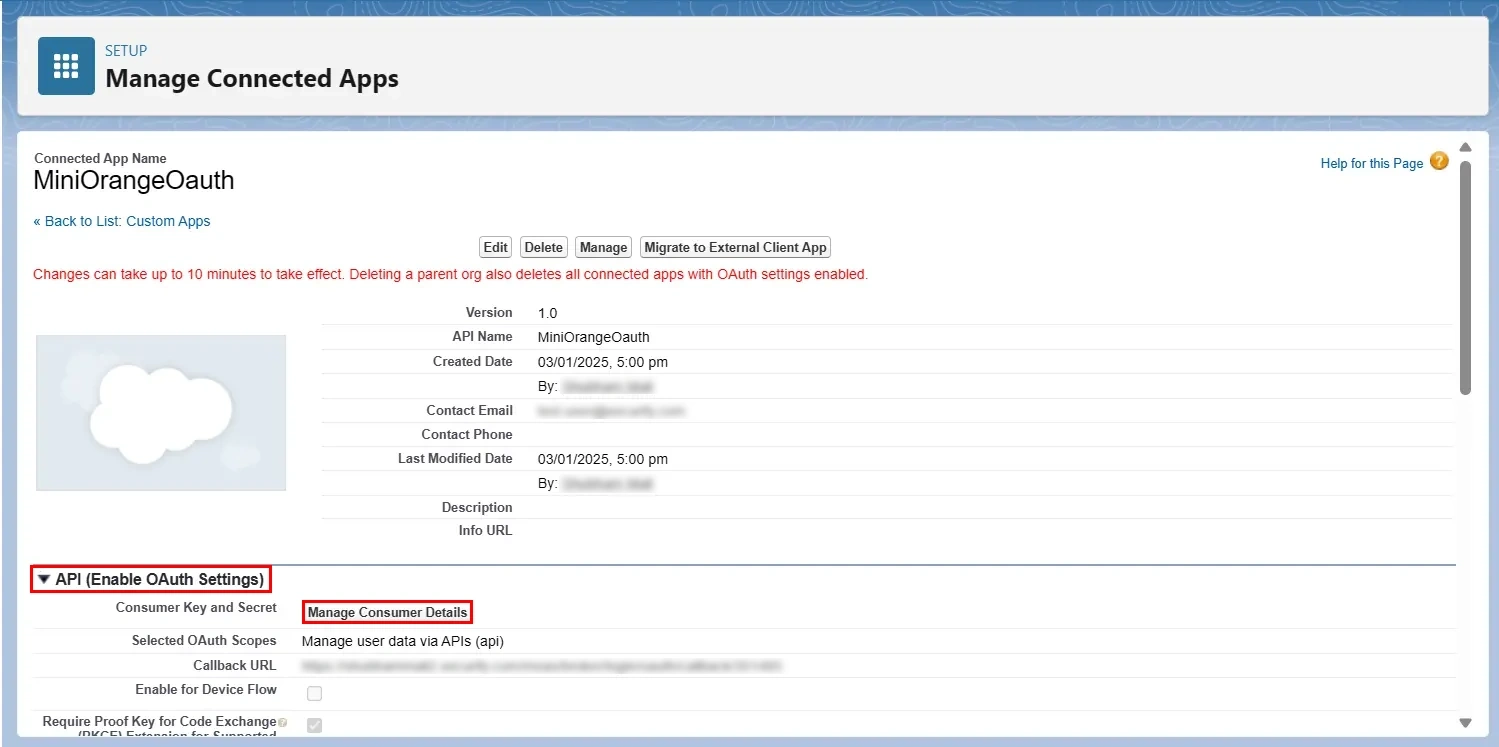
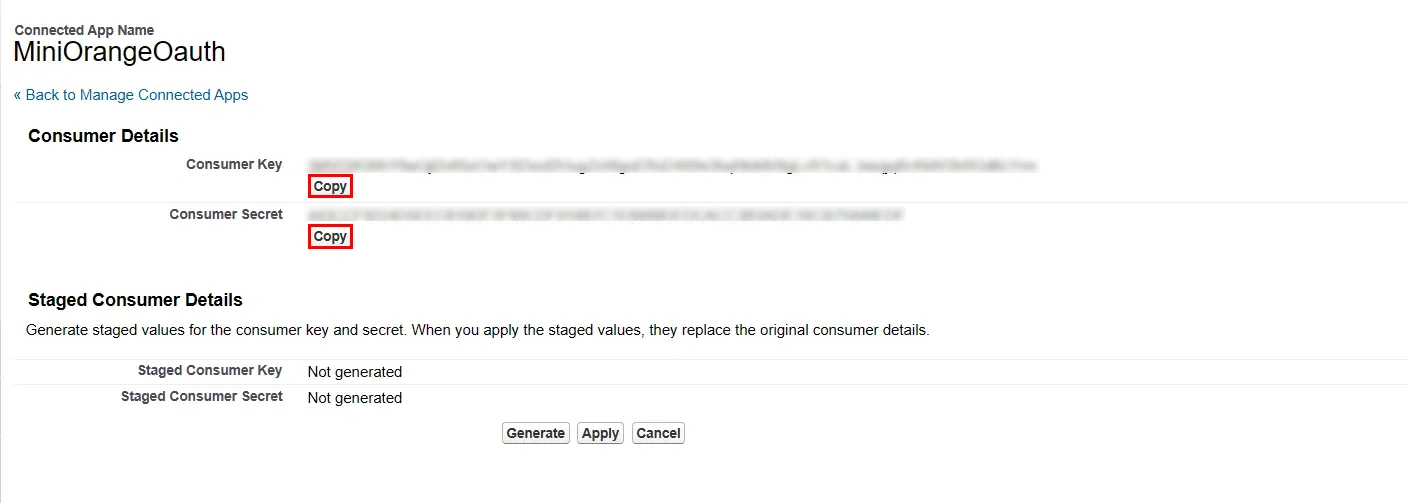
| Client ID | Consumer key from step 2 |
| Client Secret | Consumer secret from step 2 |
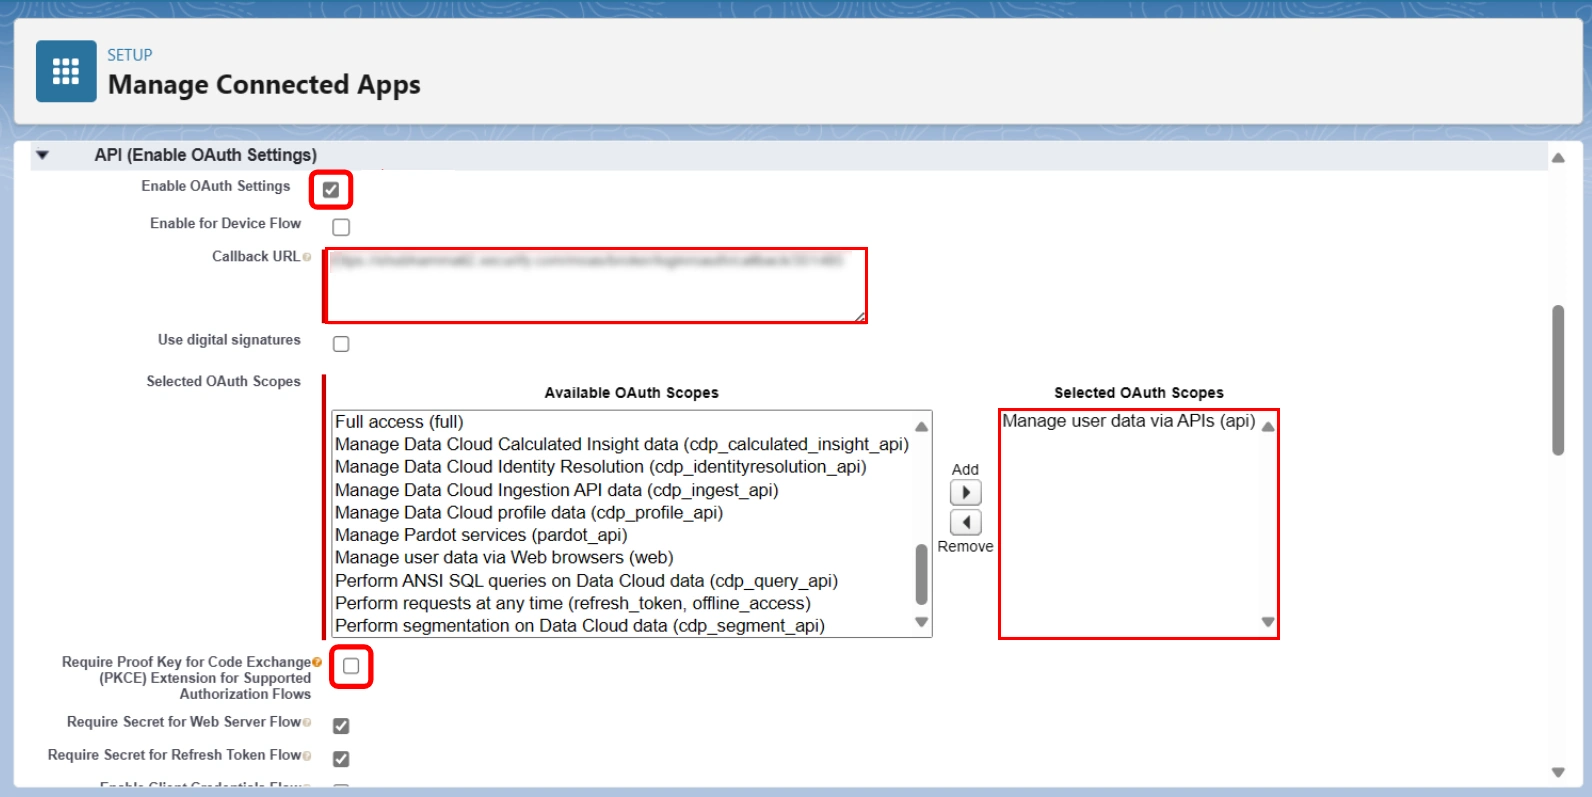
| Scopes | email profile openid |
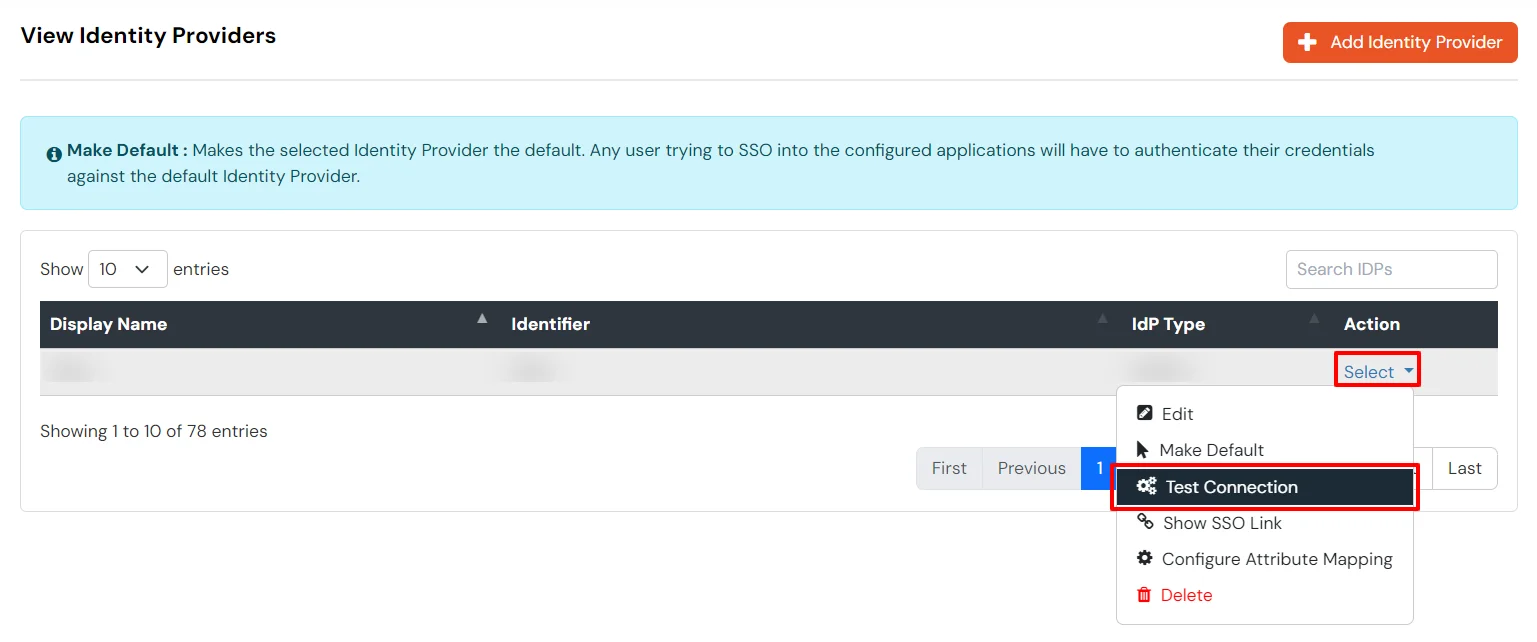
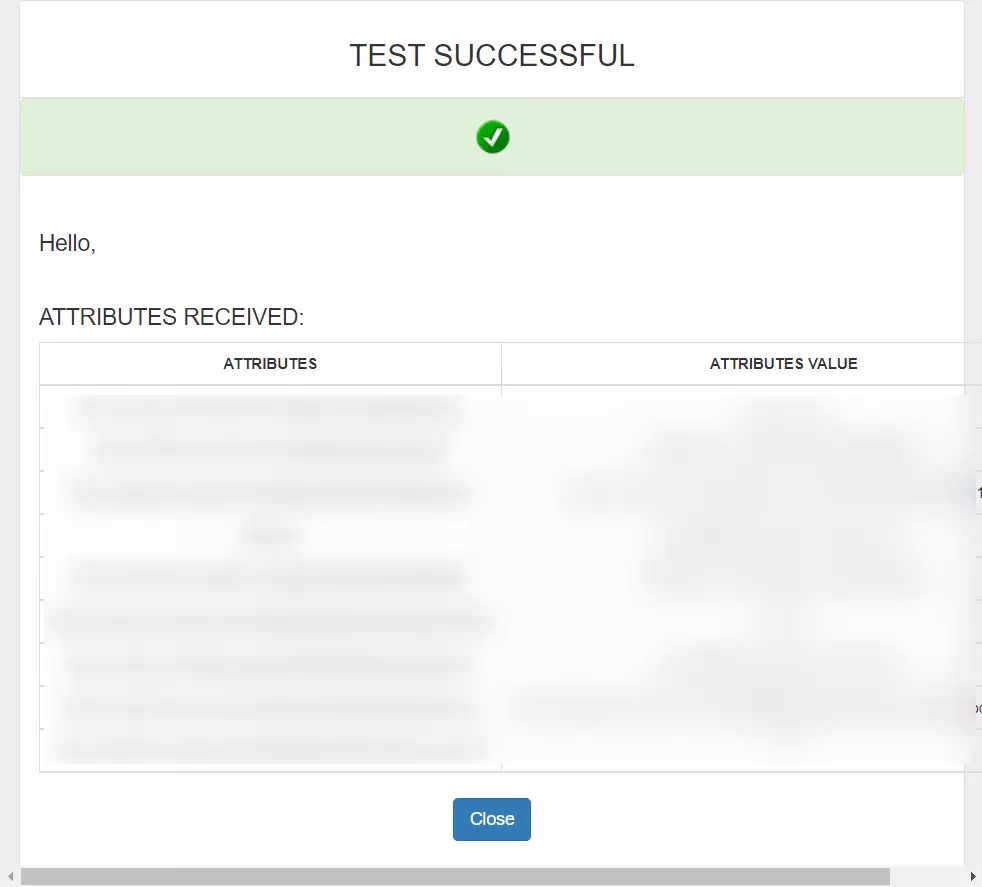
Wait for 10 mins before testing the connection. Changes can take up to 10 minutes to take effect.