Need Help? We are right here!
Need Help? We are right here!
Thanks for your Enquiry. Our team will soon reach out to you.
If you don't hear from us within 24 hours, please feel free to send a follow-up email to info@xecurify.com
Search Results:
×Configure Shibboleth as a Identity Provider (IdP) for Single Sign-On (SSO) into your applications, enabling users to authenticate themselves across multiple applications using their existing Shibboleth credentials without needing to sign in again.
In this setup, Shibboleth acts as the Identity Provider (IdP), miniOrange acts as a broker, and other applications act as Service Providers (SPs). This setup eliminates the need to manage different identities as all information is stored in a unified location - Shibboleth, simplifying the integration process and enhancing overall security.
Additionally, miniOrange's Identity Broker solution facilitates cross-protocol authentication , allowing the user to authenticate using Shibboleth SAML protocol and obtain access to the application, which supports SAML, OAuth and other protocols. This demonstrates how miniOrange Identity brokering enables users to authenticate across different protocols, improving the flexibility and interoperability of SSO solutions.
Follow the easy steps given in this guide to login using Shibboleth.
miniOrange offers free help through a consultation call with our System Engineers to configure SSO for different apps using Shibboleth as IDP in your environment with 30-day free trial.
For this, you need to just send us an email at idpsupport@xecurify.com to book a slot and we'll help you in no time.
Please make sure your organisation branding is already set under Customization >> Login and Registration Branding in the left menu of the dashboard.
eg. idp.encryption.optional = true
    <MetadataProvider xmlns:samlmd="urn:oasis:names:tc:SAML:2.0:metadata"

       id="miniOrangeInLineEntitInlineMetadataProvider" sortKey="1">

         <samlmd:EntityDescriptor ID="entity" entityID="<SP-EntityID/Issuer from SP info tab in plugin.>"

         validUntil="2020-09-06T04:13:32Z">

         <samlmd:SPSSODescriptor AuthnRequestsSigned="false" WantAssertionsSigned="true"

         protocolSupportEnumeration="urn:oasis:names:tc:SAML:2.0:protocol">

           <samlmd:NameIDFormat>

             urn:oasis:names:tc:SAML:1.1:nameid-format:emailAddress

           </samlmd:NameIDFormat>

         <samlmd:AssertionConsumerService Binding="urn:oasis:names:tc:SAML:2.0:bindings:HTTP-POST"

         Location="<ACS (AssertionConsumerService) URL from Step1 of the plugin under IDP Tab.>"

          &nby" xsi:type="sp;index="1" />

         </samlmd:SPSSODescriptor>

         </samlmd:EntityDescriptor>

     </MetadataProvider>
idp.nameid.saml2.default=urn:oasis:names:tc:SAML:1.1:nameid-format:emailAddress
    <!-- SAML 2 NameID Generation -->

    <util:list id="shibboleth.SAML2NameIDGenerators">

      <!--<ref bean="shibboleth.SAML2TransientGenerator" /> -->

      <!-->ref bean="shibboleth.SAML2PersistentGenerator" /> -->

      <bean parent="shibboleth.SAML2AttributeSourcedGenerator"

      p:format="urn:oasis:names:tc:SAML:1.1:nameid-format:emailAddress"

      p:attributeSourceIds="#{ {'email'} }" />

    </util:list>
    <!-- Note: AttributeDefinitionid must be same as what you provided in attributeSourceIds in conf/saml-nameid.xml -->

    <resolver:AttributeDefinitionxsi:type="ad:Simple" id="email" sourceAttributeID="mail">

      <resolver:Dependency ref="ldapConnector" />

      <resolver:AttributeEncoderxsi:type="enc:SAML2String" name="email"  friendlyName="email" />

    </resolver:AttributeDefinition >


    <resolver:DataConnector id="ldapConnector" xsi:type="dc:LDAPDirectory" ldapURL="%{idp.authn.LDAP.ldapURL}"

      baseDN="%{idp.authn.LDAP.baseDN}" principal="%{idp.authn.LDAP.bindDN}"

      principalCredential="%{idp.authn.LDAP.bindDNCredential}">


      <dc:FilterTemplate>

        <!-- Define you User Search Filter here -->

        <![CDATA[   (&(objectclass=*)(cn=$requestContext.principalName))   ]]>

      </dc:FilterTemplate>


      <dc:ReturnAttributes>*</dc:ReturnAttributes>

    </resolver:DataConnector>
    <afp:AttributeFilterPolicy id="ldapAttributes">

    <afp:PolicyRequirementRulexsi:type="basic:ANY"/>

      <afp:AttributeRuleattributeID="email">

        <afp:PermitValueRulexsi:type="basic:ANY"/>

      </afp:AttributeRule>

    </afp:AttributeFilterPolicy>

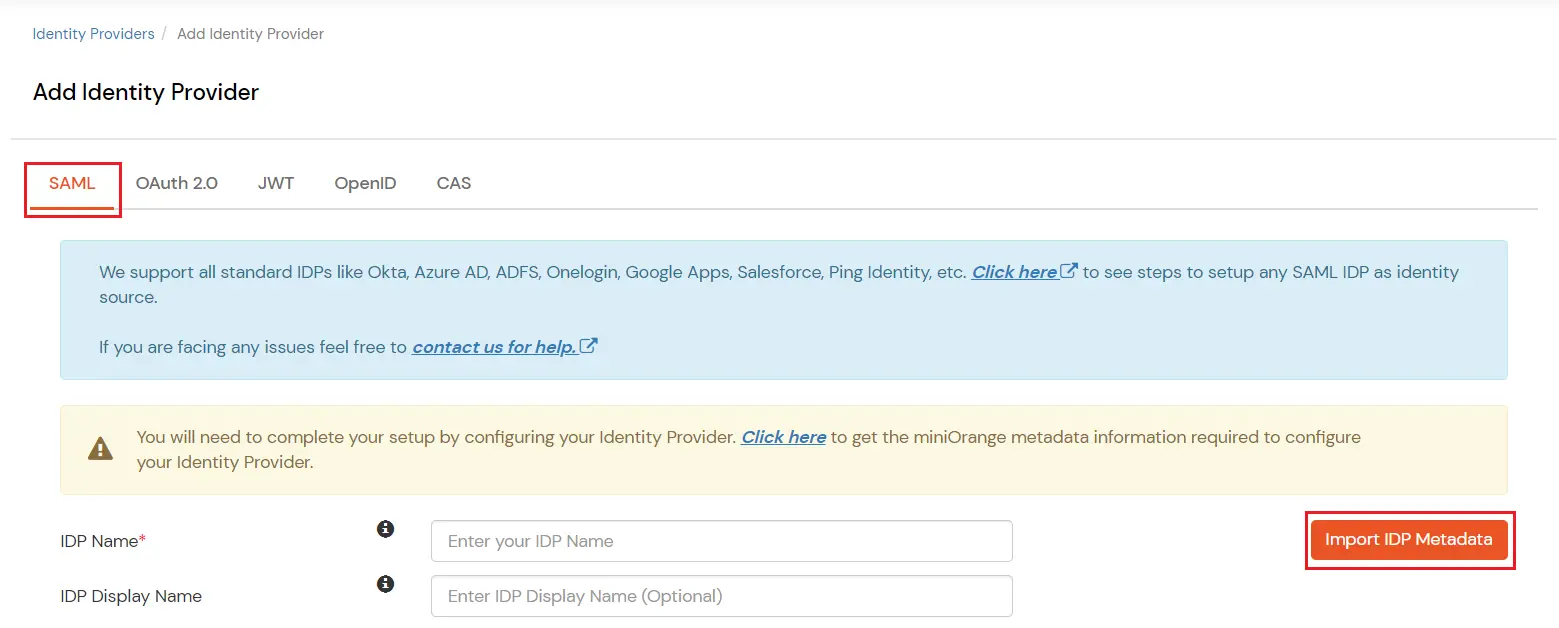
| IDP Entity ID | https://<your_domain>/idp/shibboleth |
| Single Login URL | https://<your_domain>/idp/profile/SAML2/Redirect/SSO |
| Single Logout URL | https://<your_domain>/idp/shibboleth |
| X.509 Certificate | The public key certificate of your Shibboleth server. |
You can follow this guide, if you want to configure SAML/WS-FED, OAuth/OIDC, JWT, Radius etc
miniOrange provides user authentication from various external sources, which can be Directories (like ADFS, Microsoft Active Directory, Microsoft Entra ID, OpenLDAP, Google, AWS Cognito etc), Identity Providers (like Okta, Shibboleth, Ping, OneLogin, KeyCloak), Databases (like MySQL, Maria DB, PostgreSQL) and many more. You can configure your existing directory/user store or add users in miniOrange.
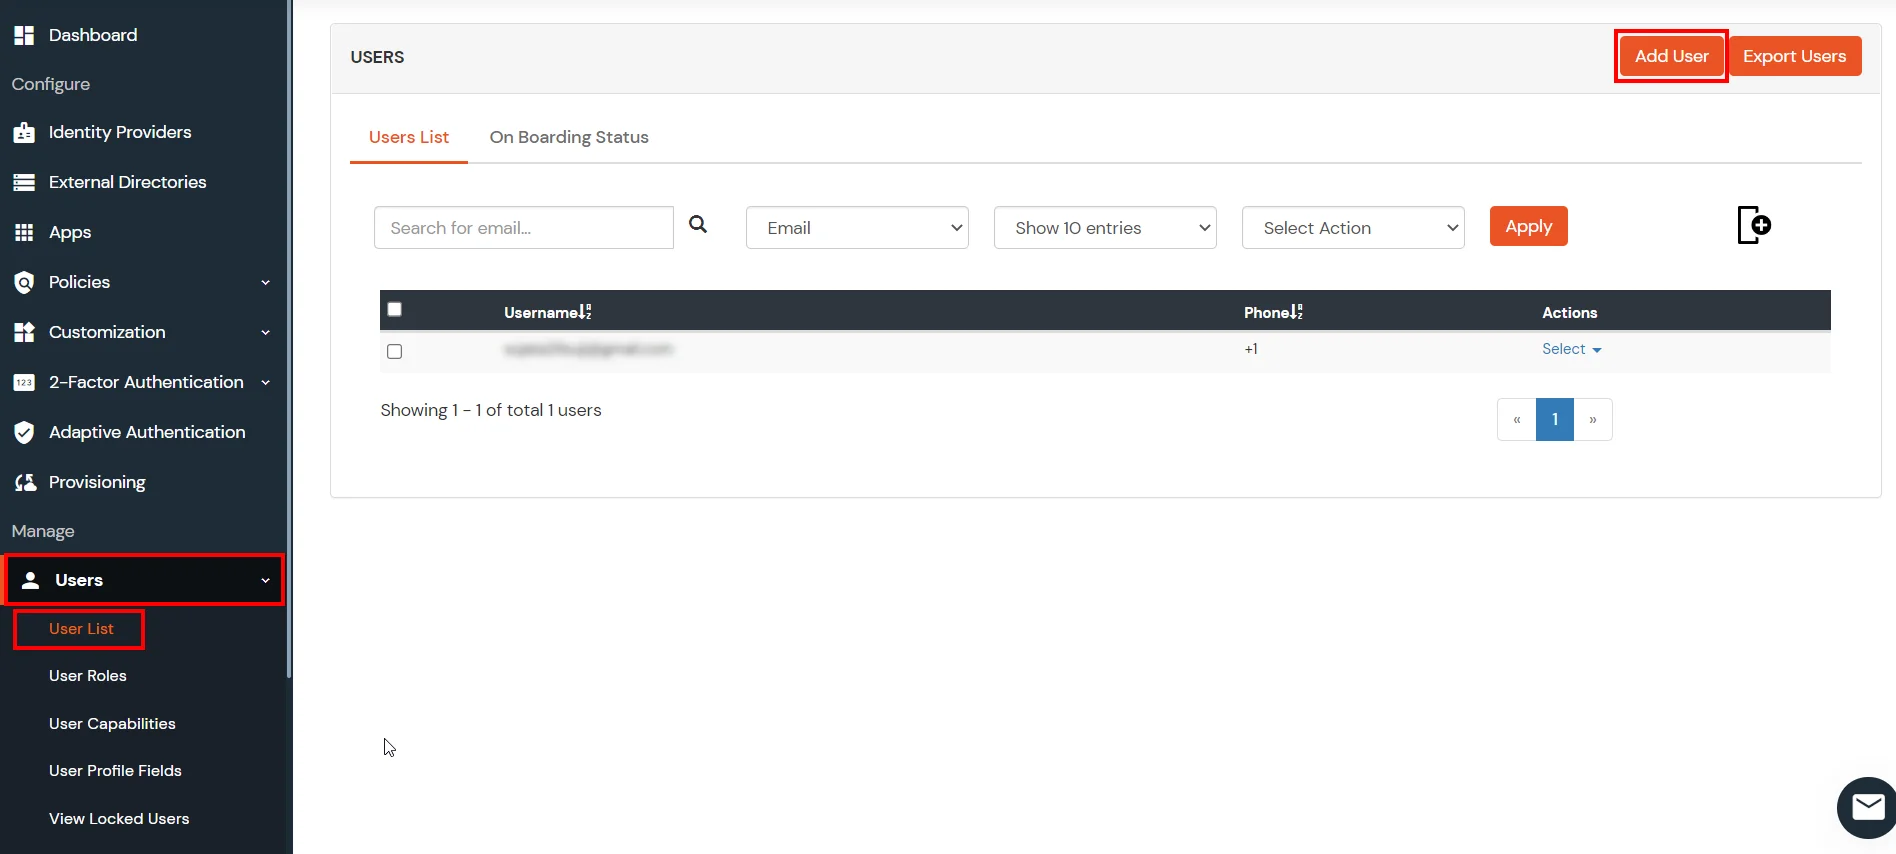
1. Create User in miniOrange
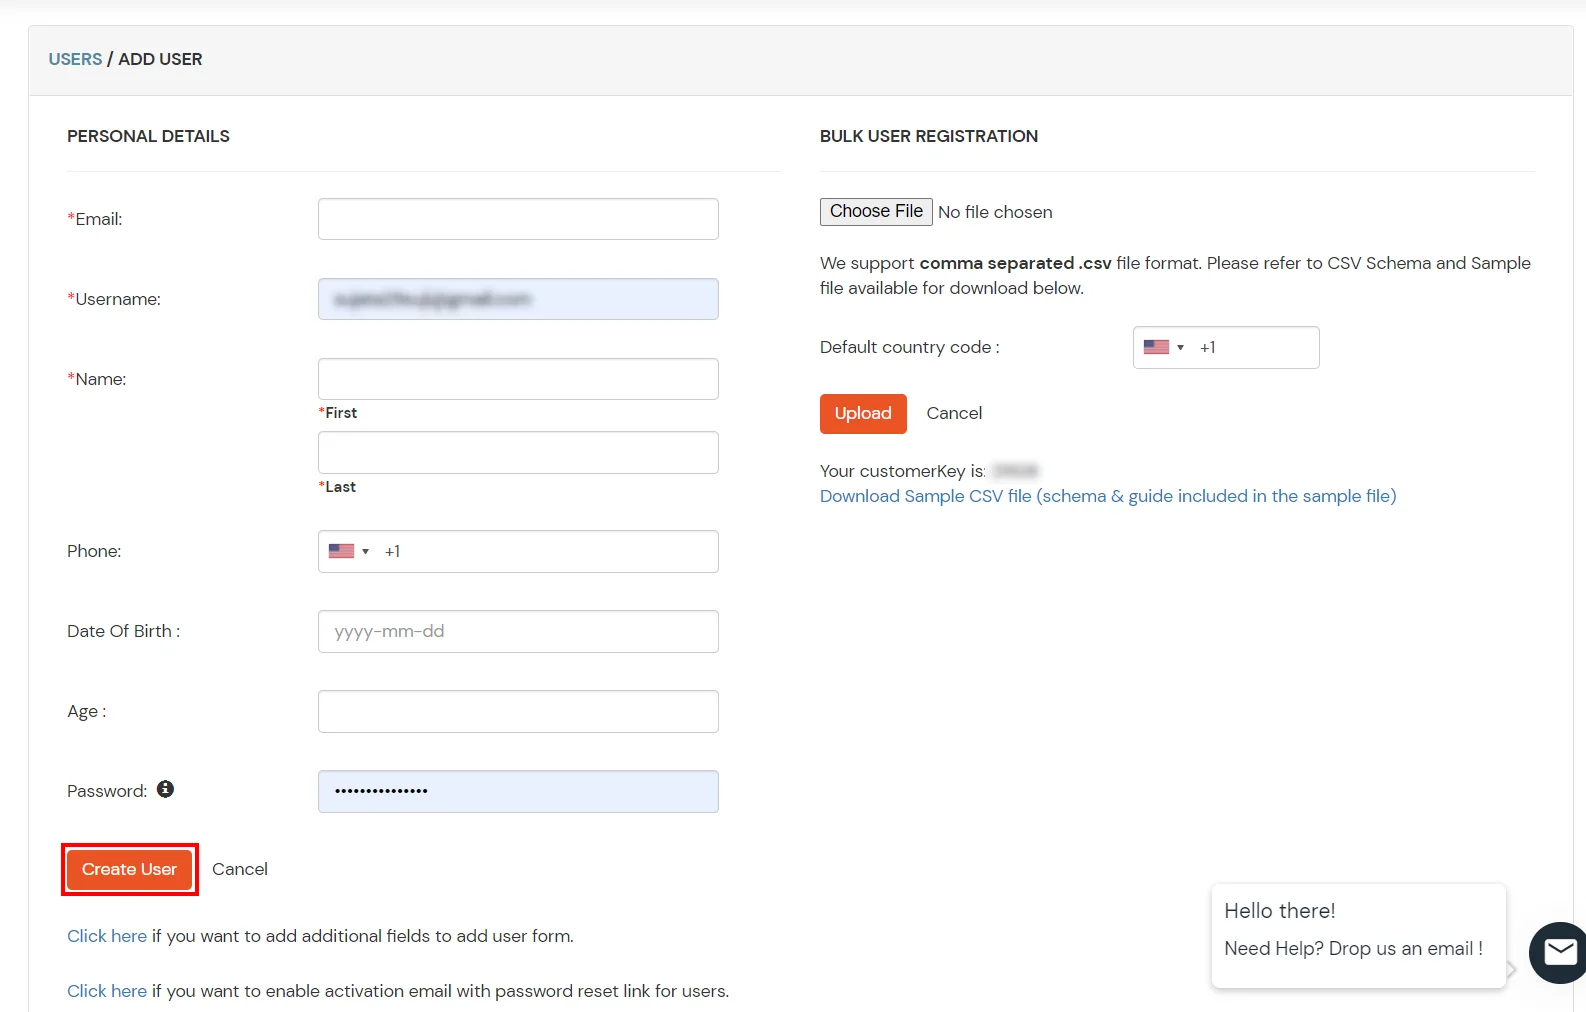
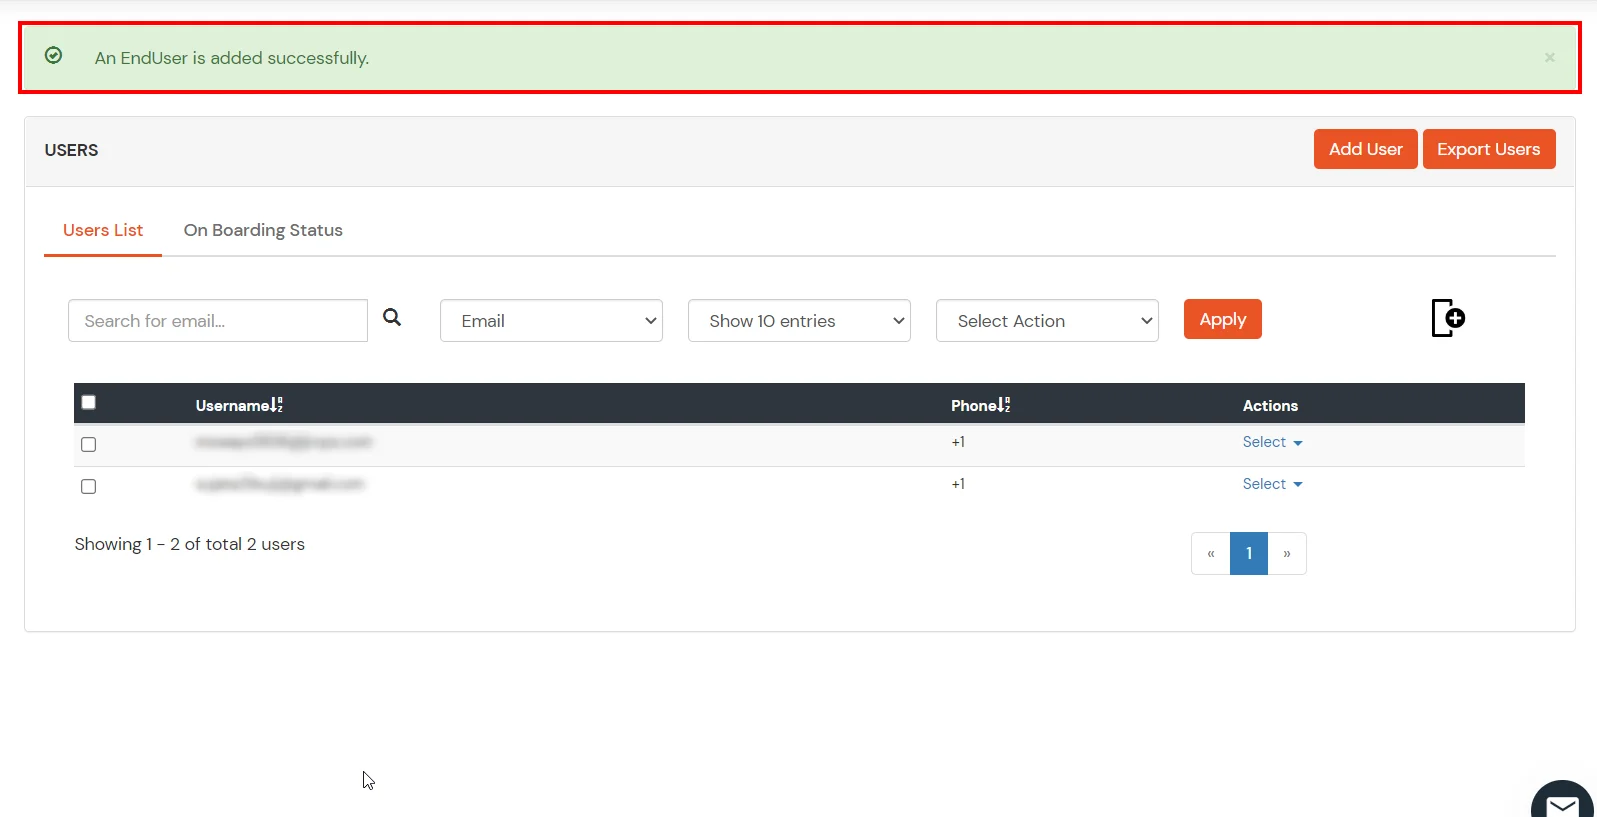
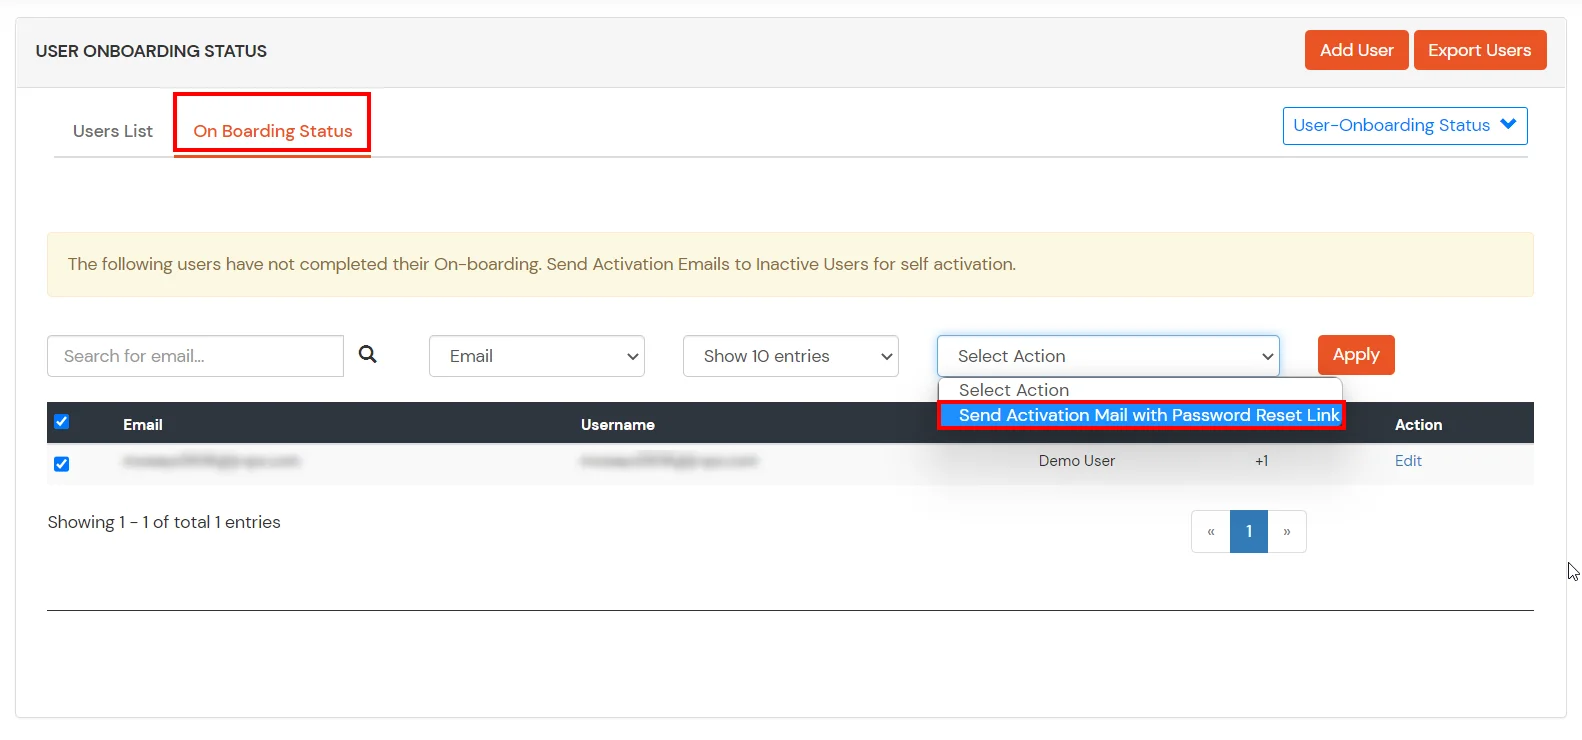
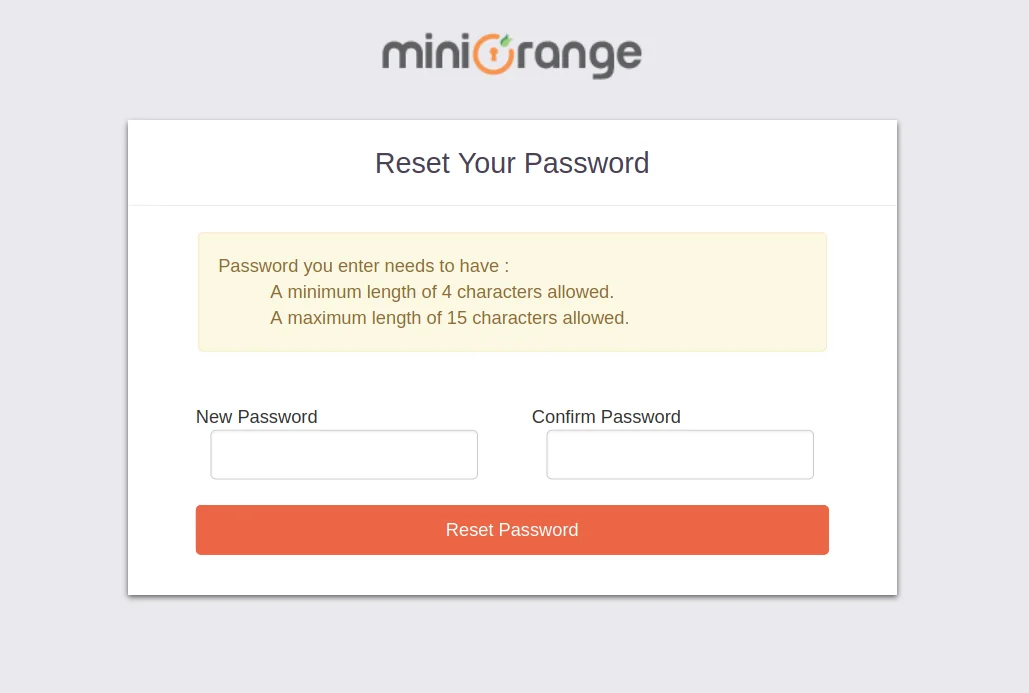
2. Bulk Upload Users in miniOrange via Uploading CSV File.
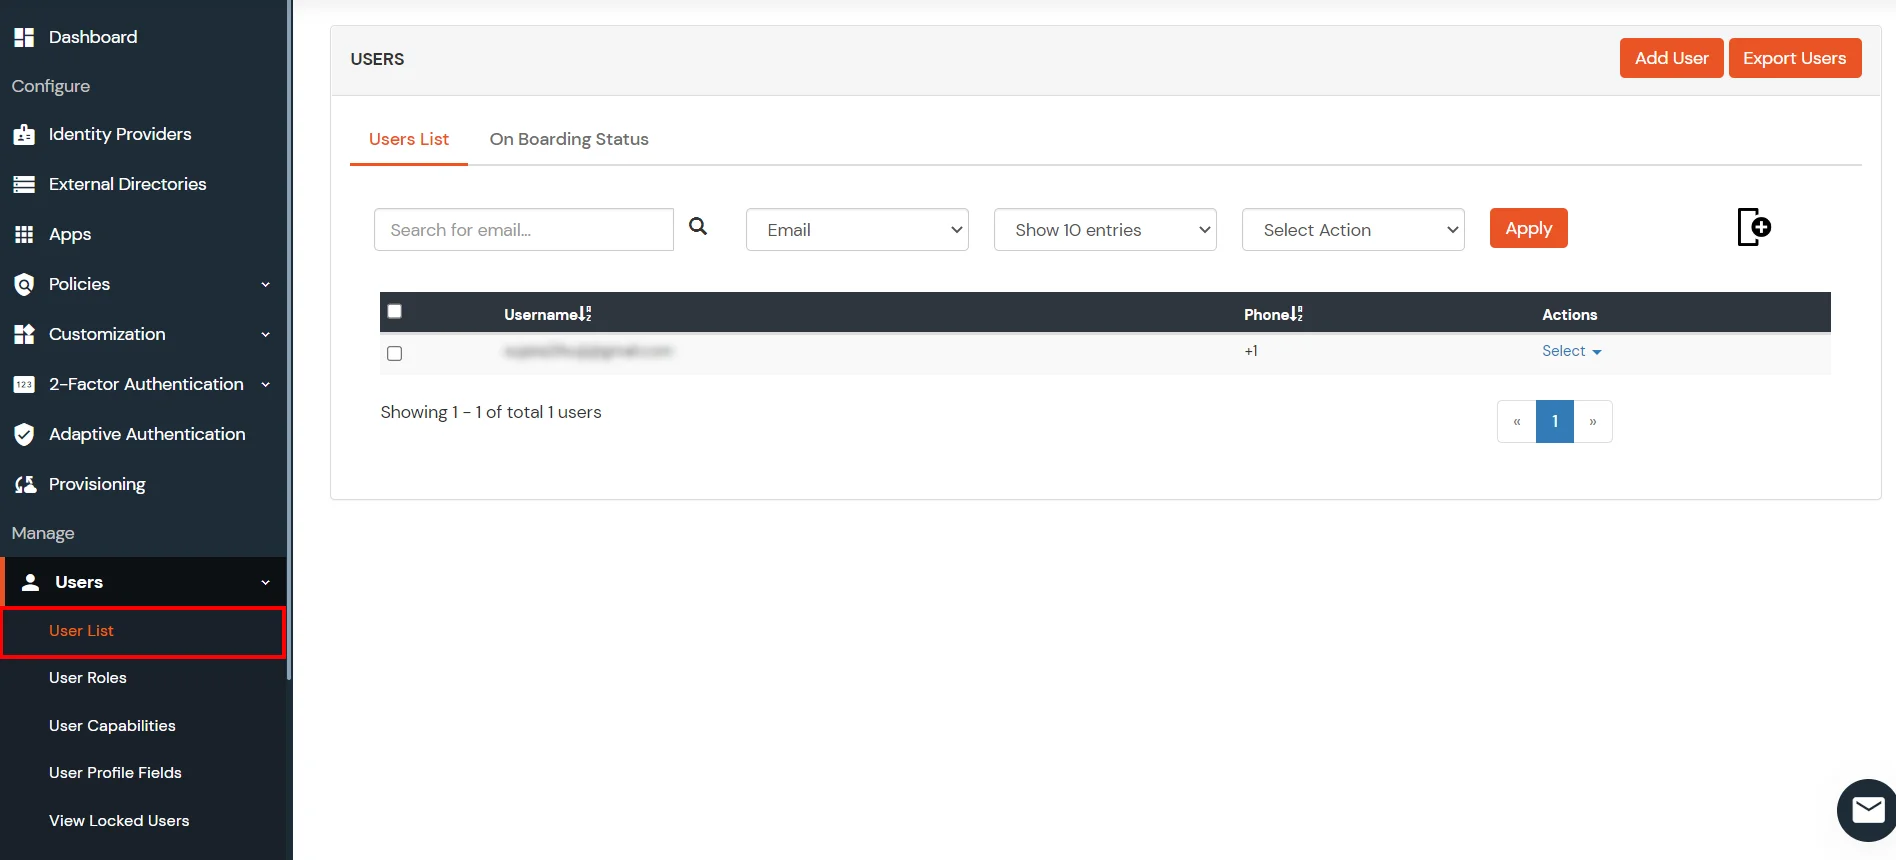
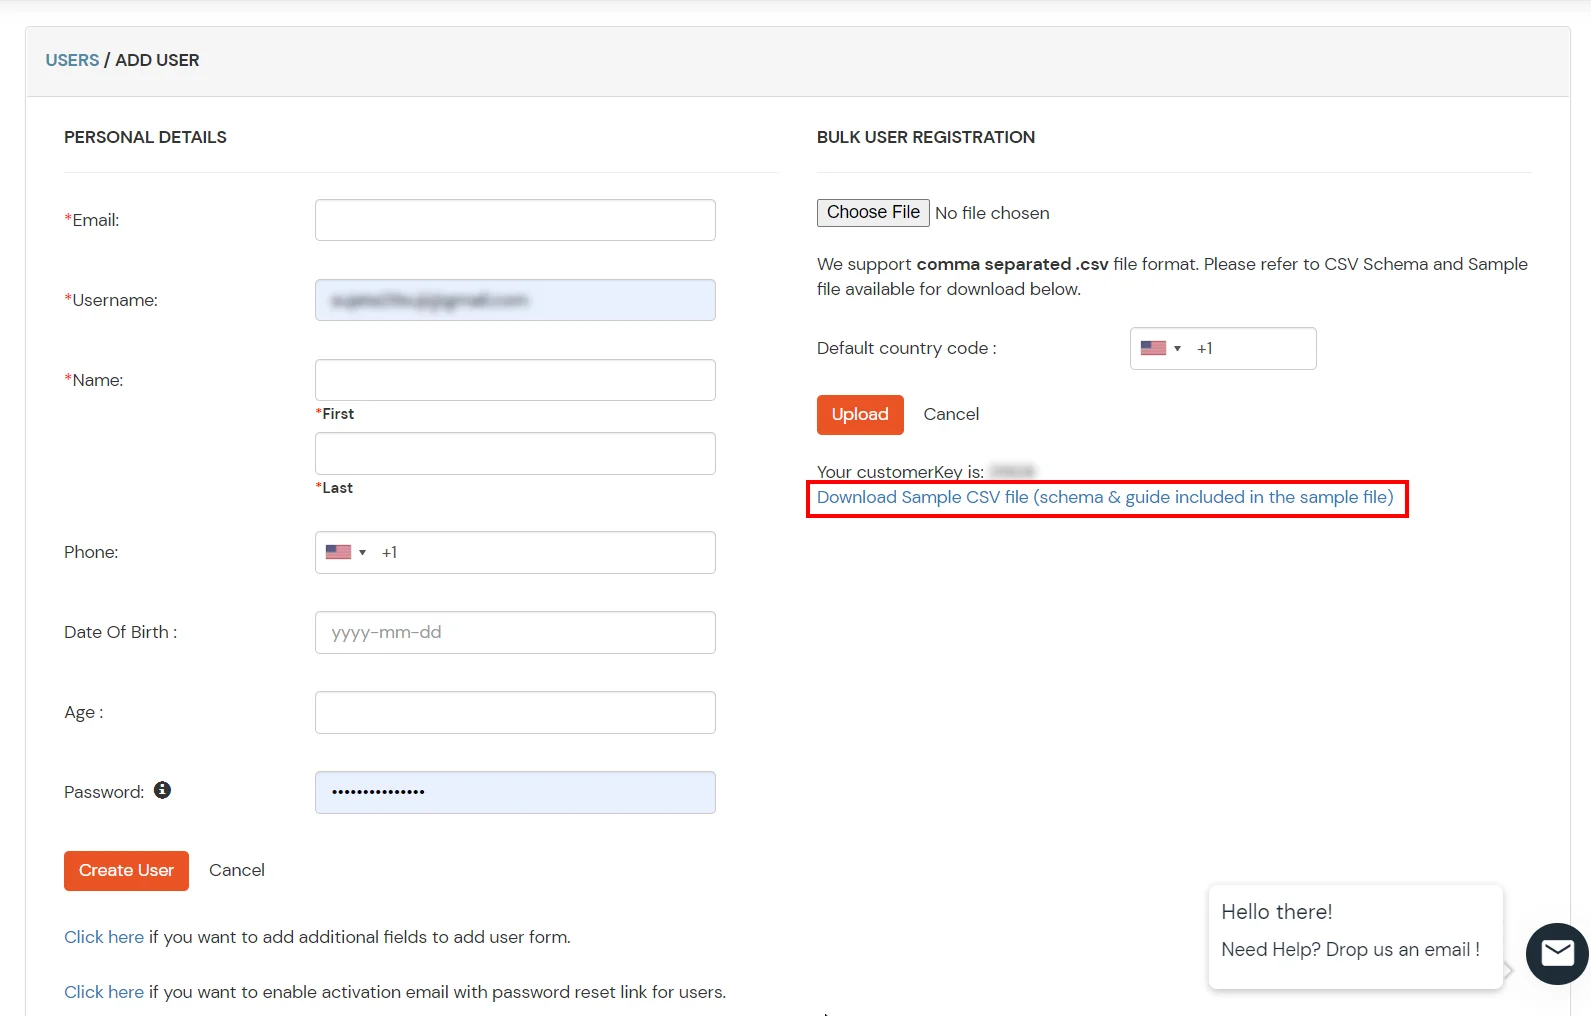
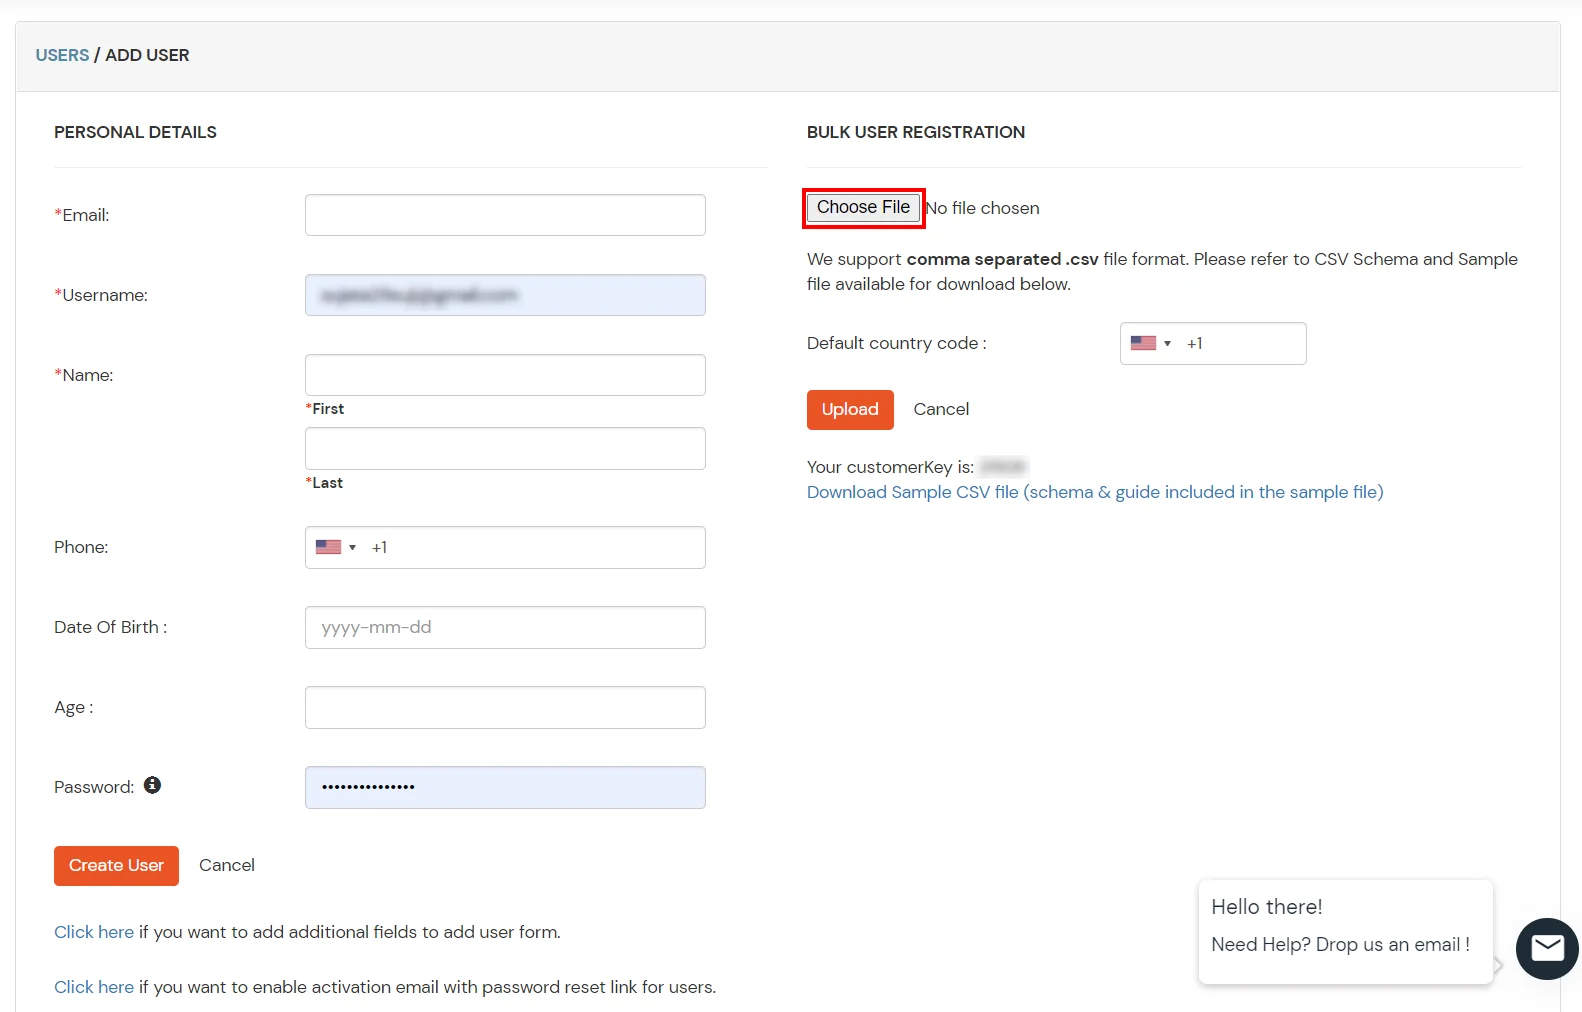
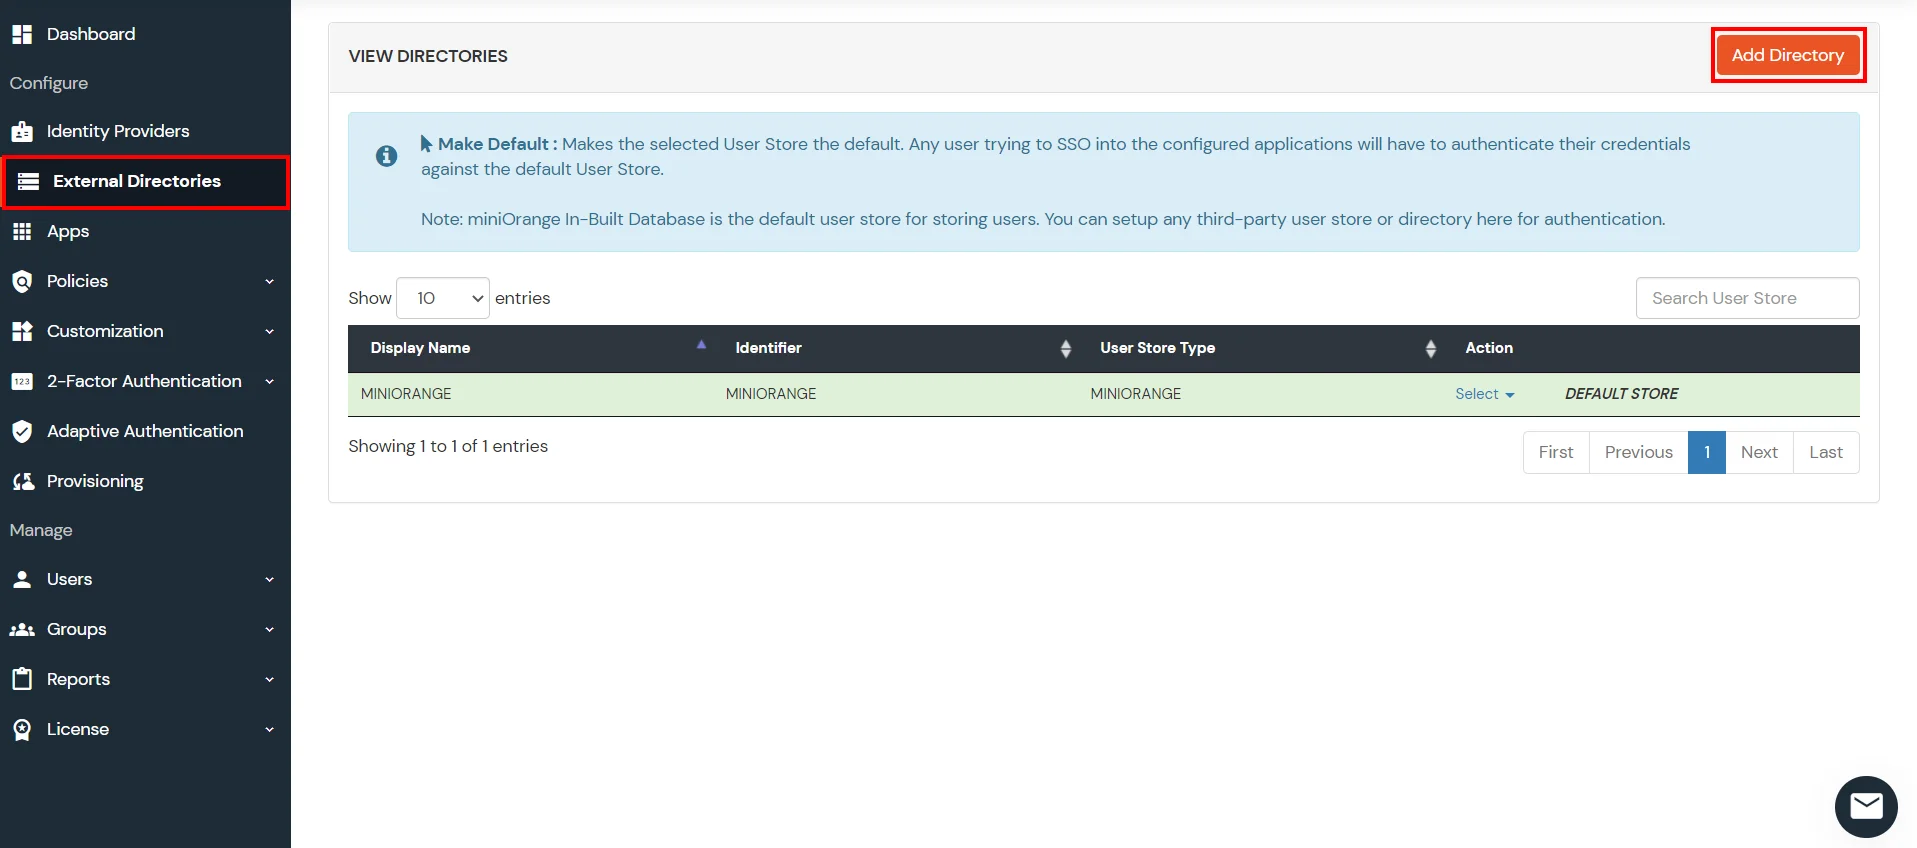
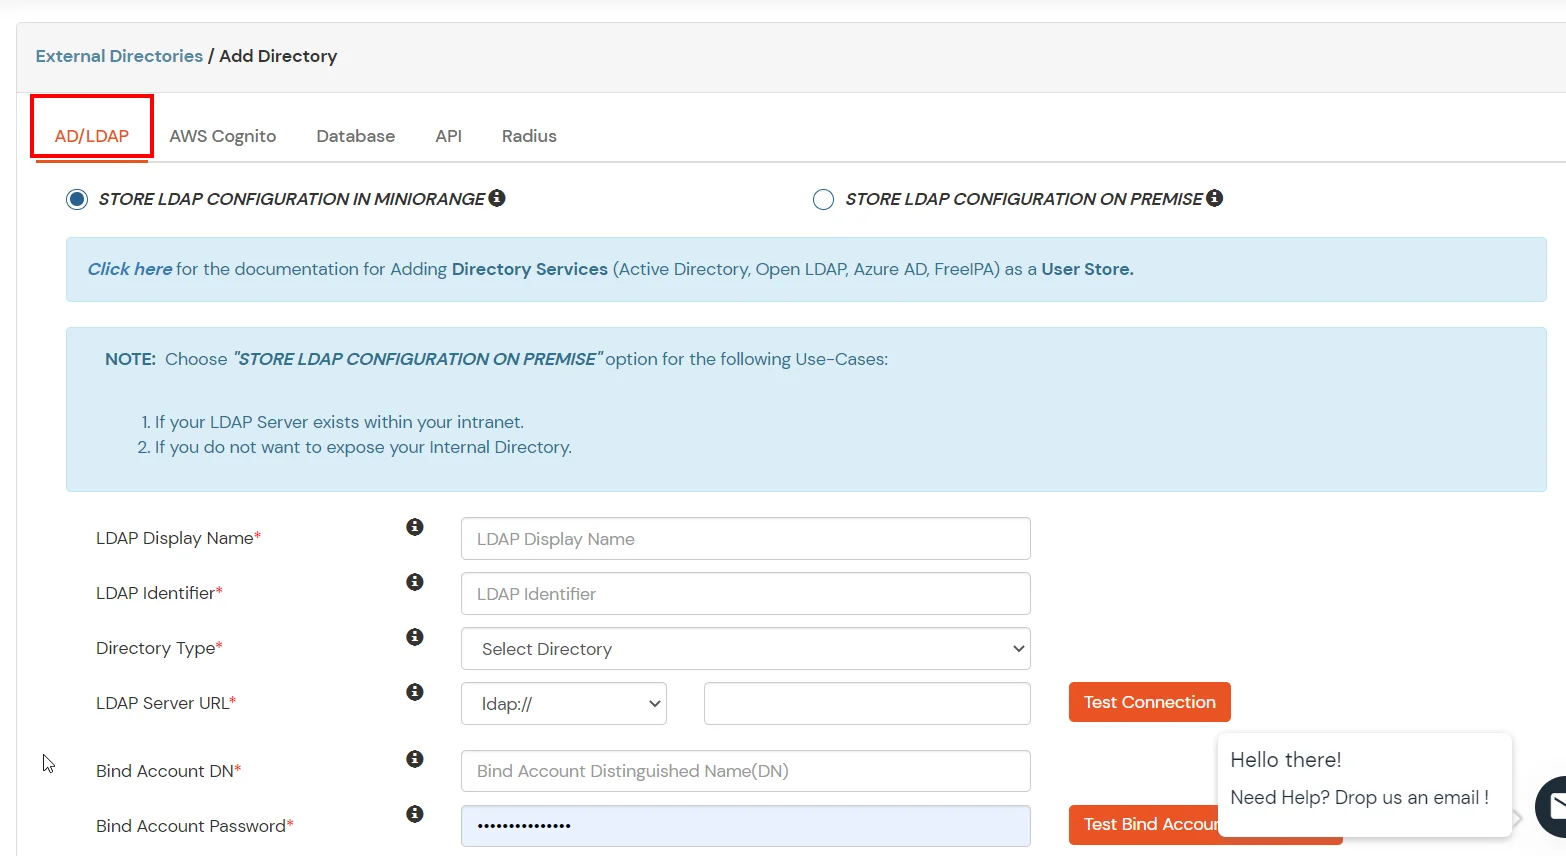
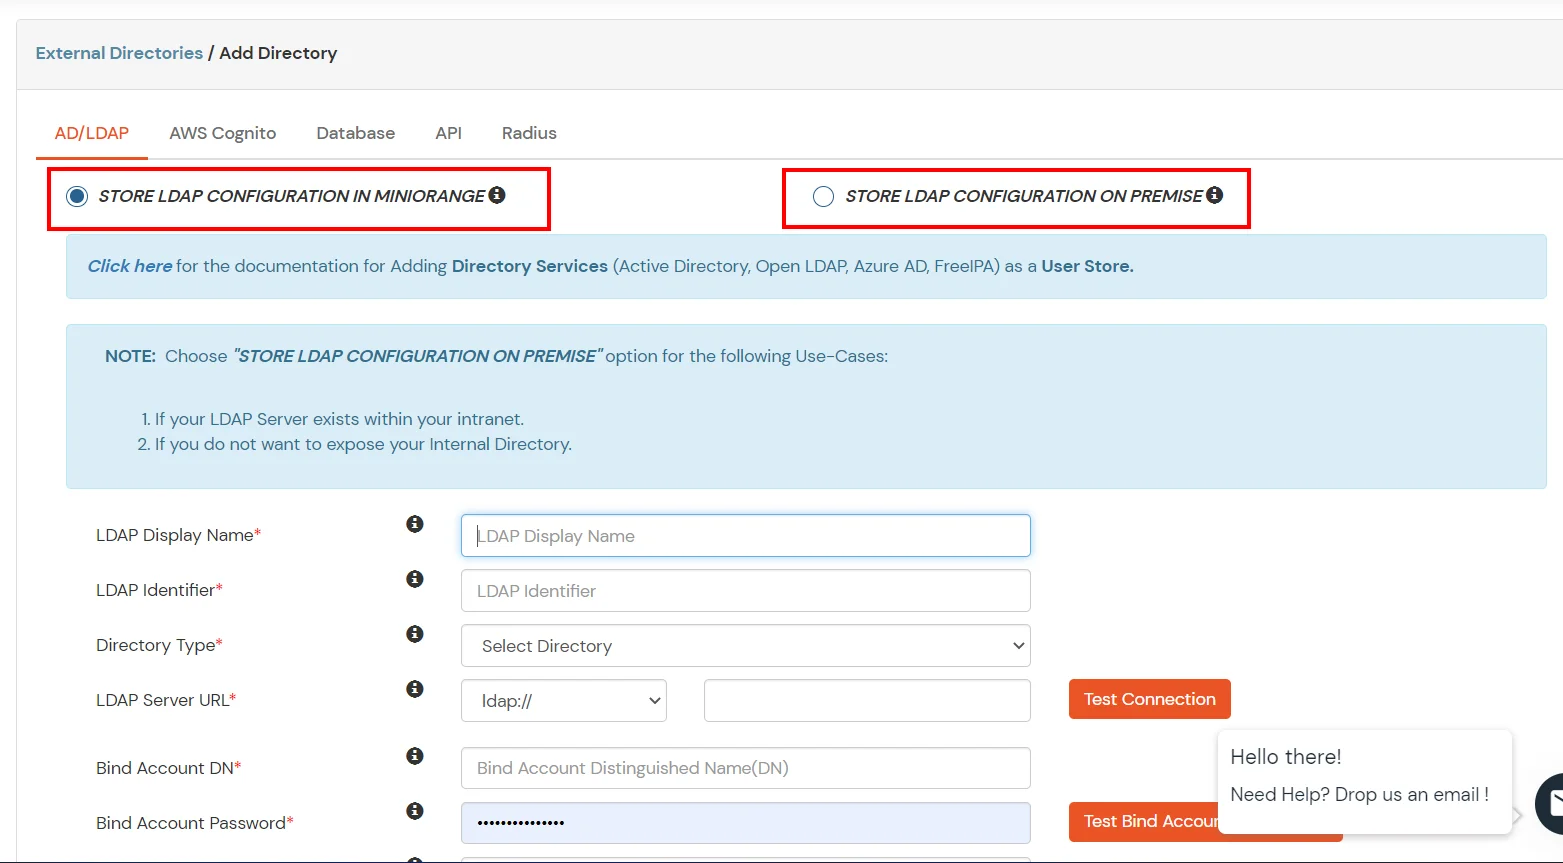
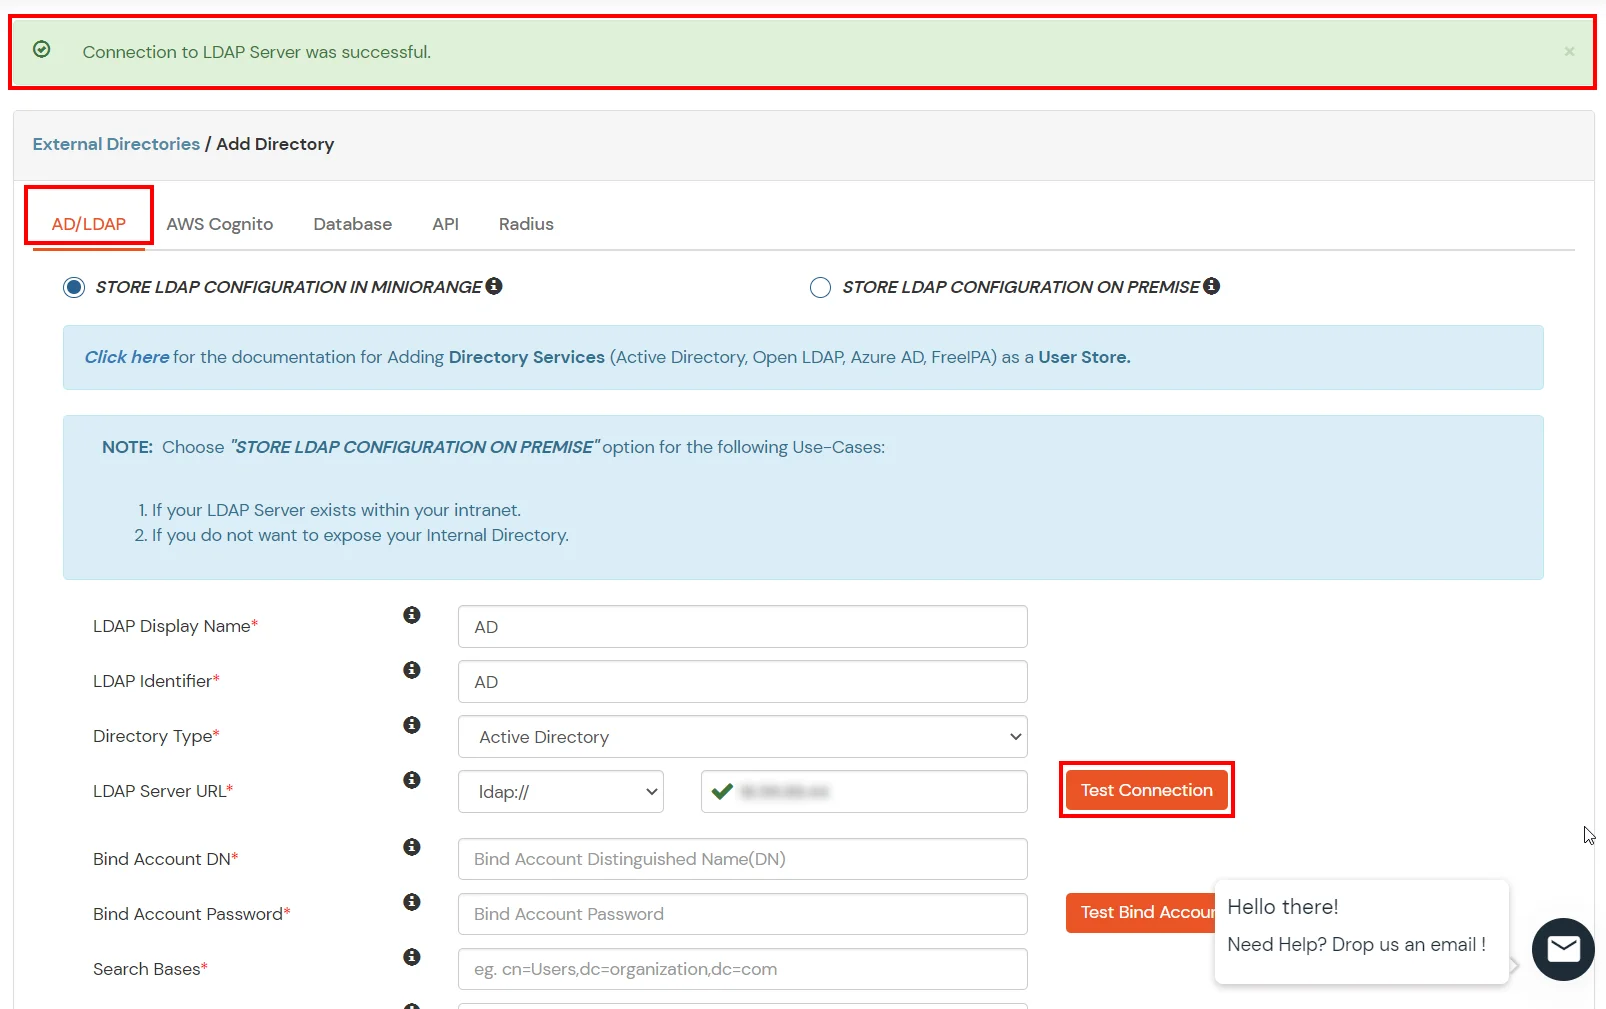
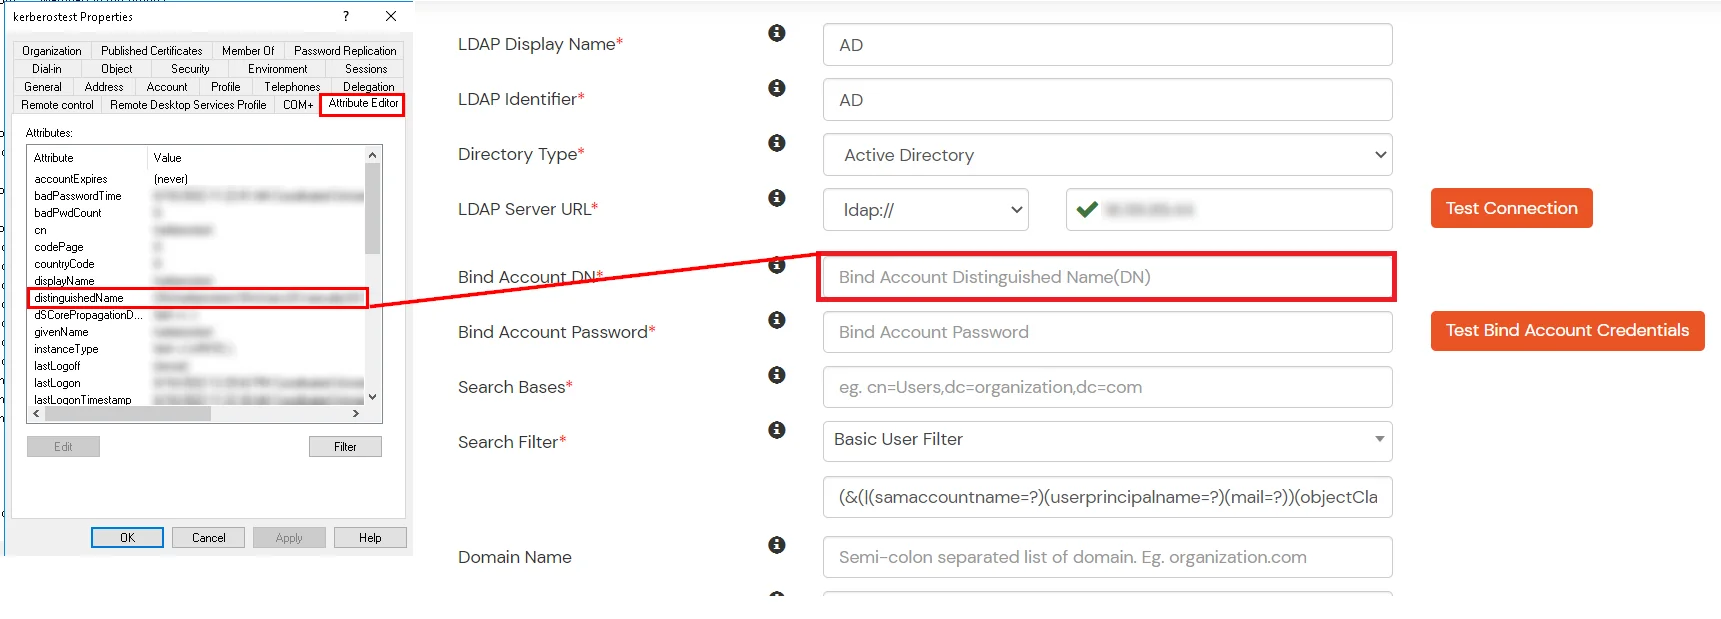
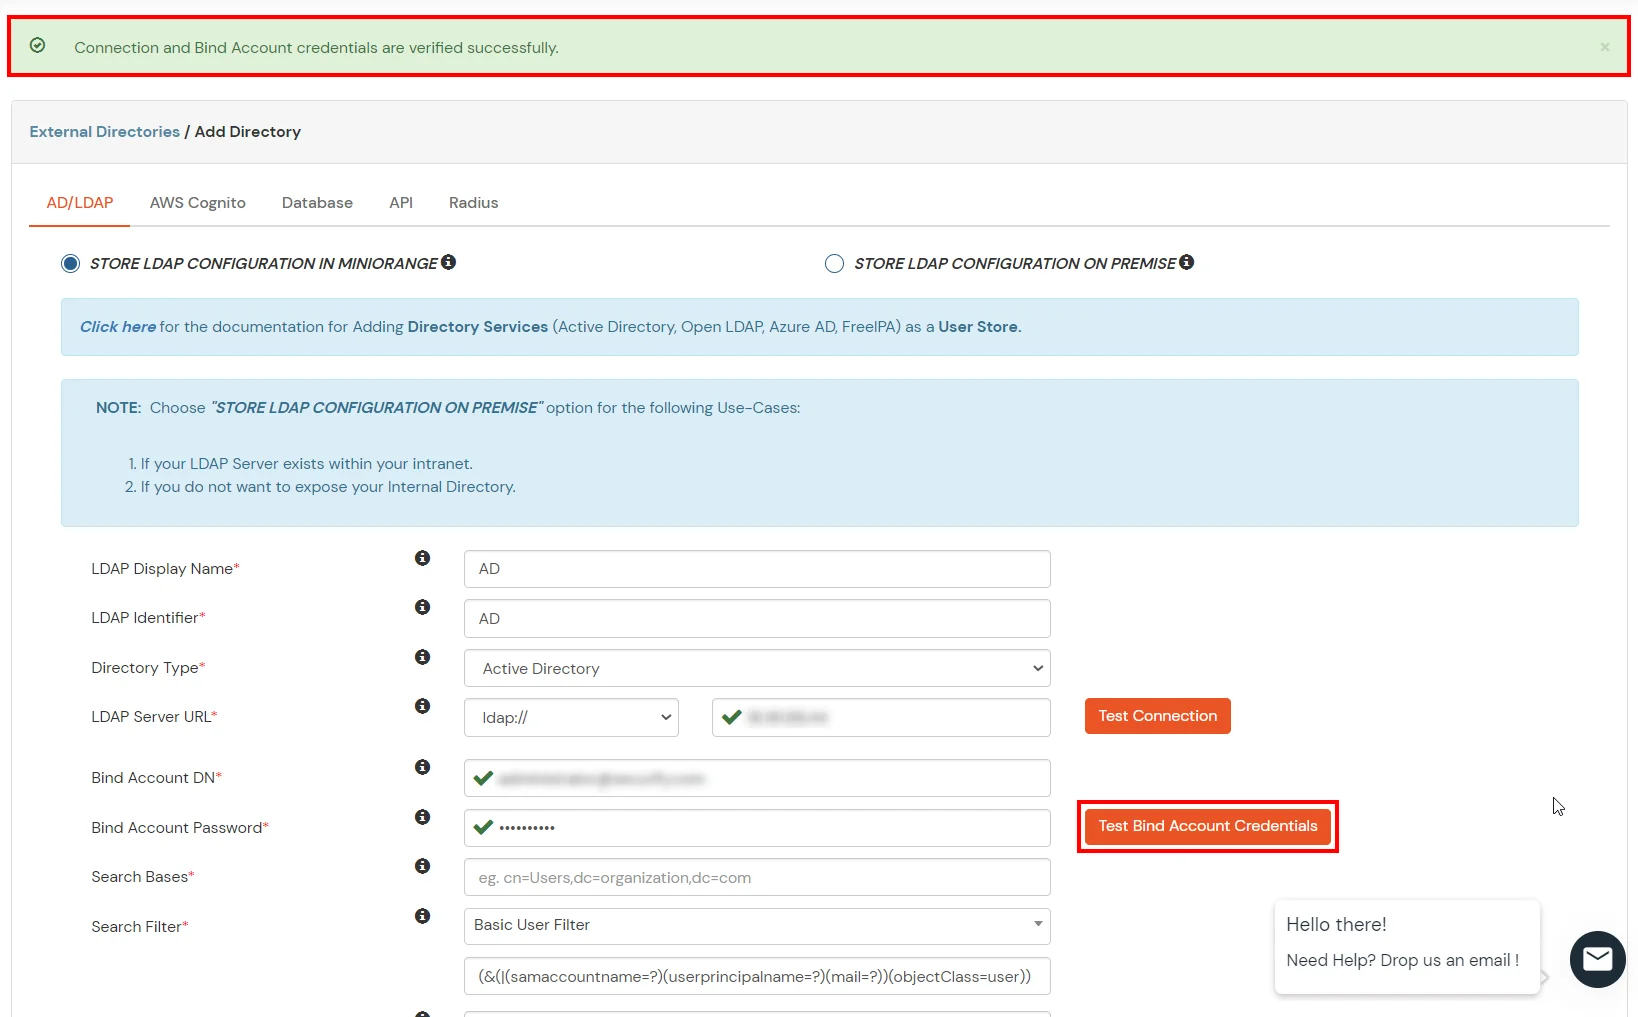
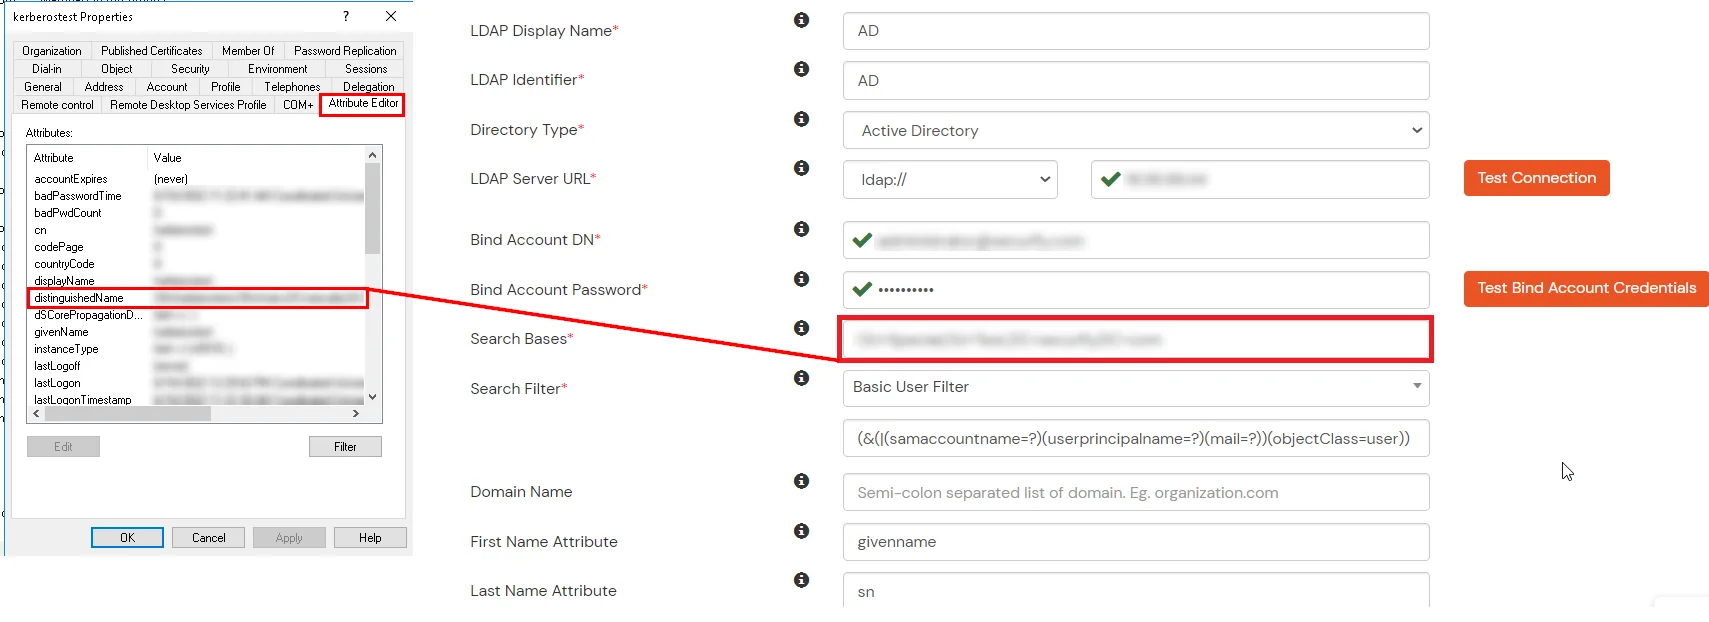
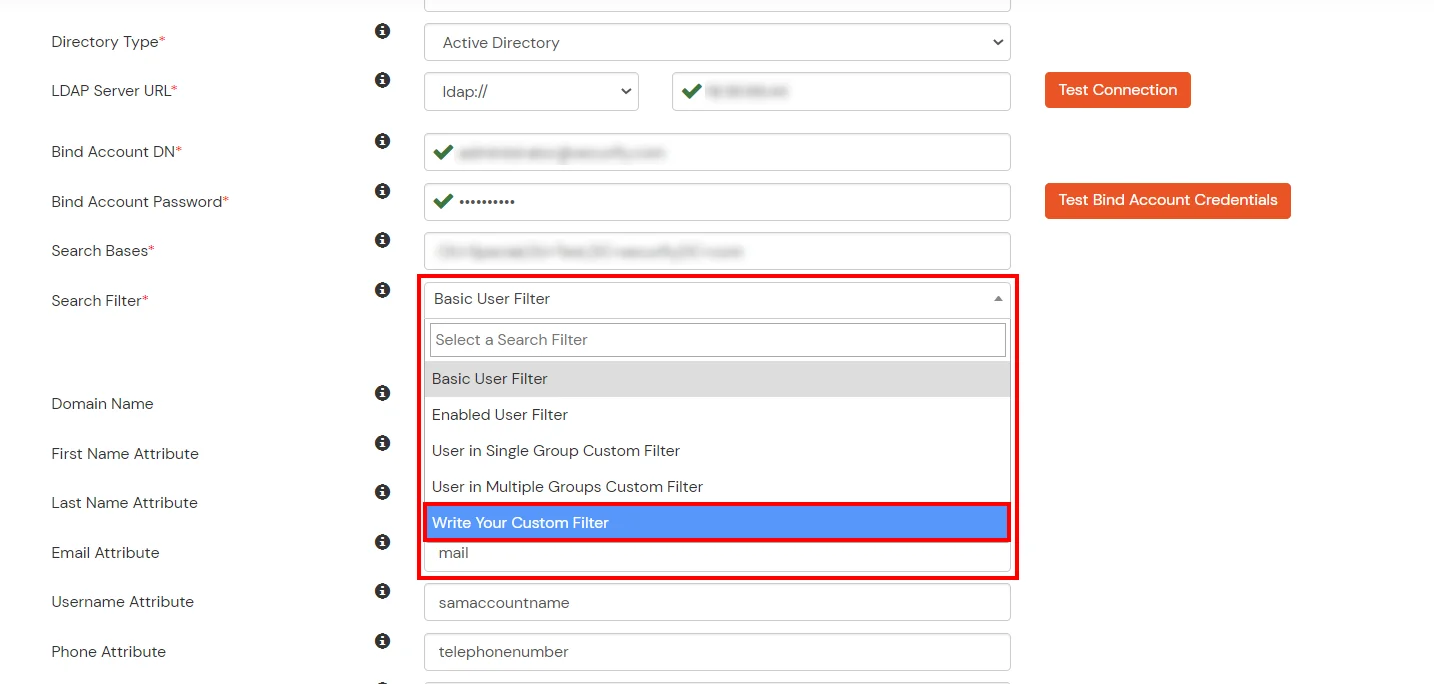
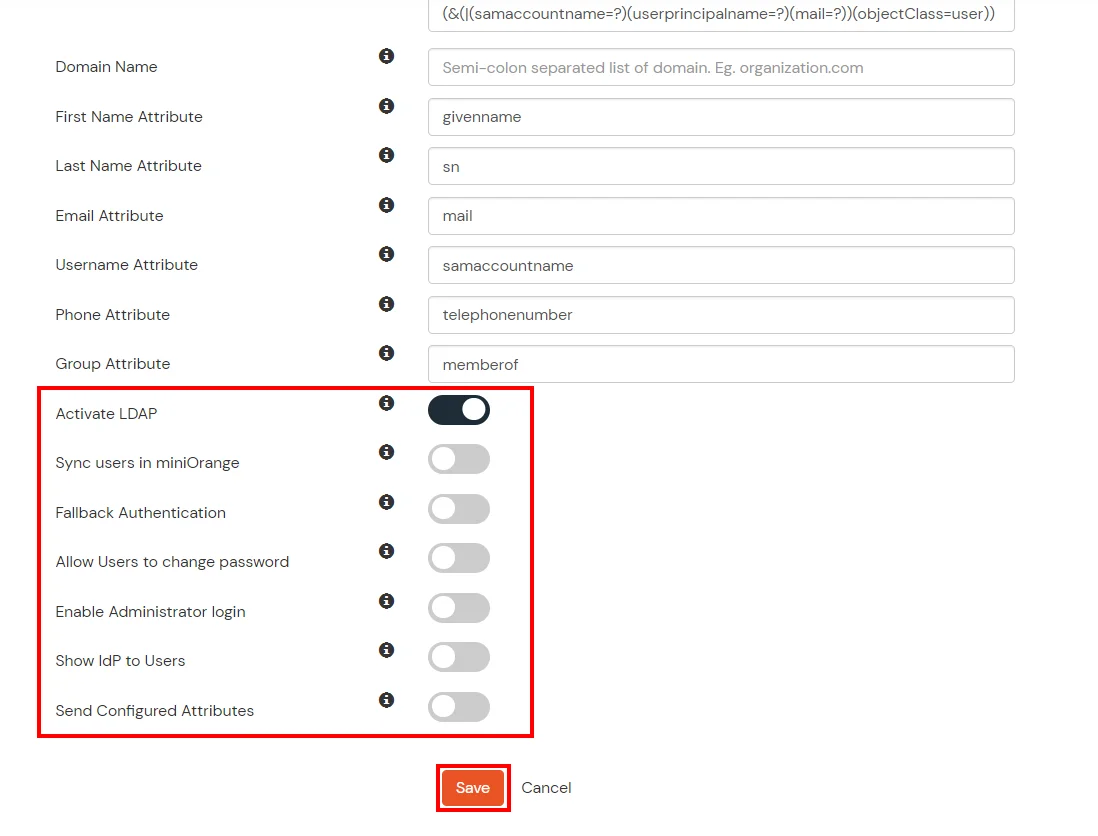
Here's the list of the attributes and what it does when we enable it. You can enable/disable accordingly.
| Attribute | Description |
|---|---|
| Activate LDAP | All user authentications will be done with LDAP credentials if you Activate it |
| Sync users in miniOrange | Users will be created in miniOrange after authentication with LDAP |
| Fallback Authentication | If LDAP credentials fail then user will be authenticated through miniOrange |
| Allow users to change password | This allows your users to change their password. It updates the new credentials in your LDAP server |
| Enable administrator login | On enabling this, your miniOrange Administrator login authenticates using your LDAP server |
| Show IdP to users | If you enable this option, this IdP will be visible to users |
| Send Configured Attributes | If you enable this option, then only the attributes configured below will be sent in attributes at the time of login |
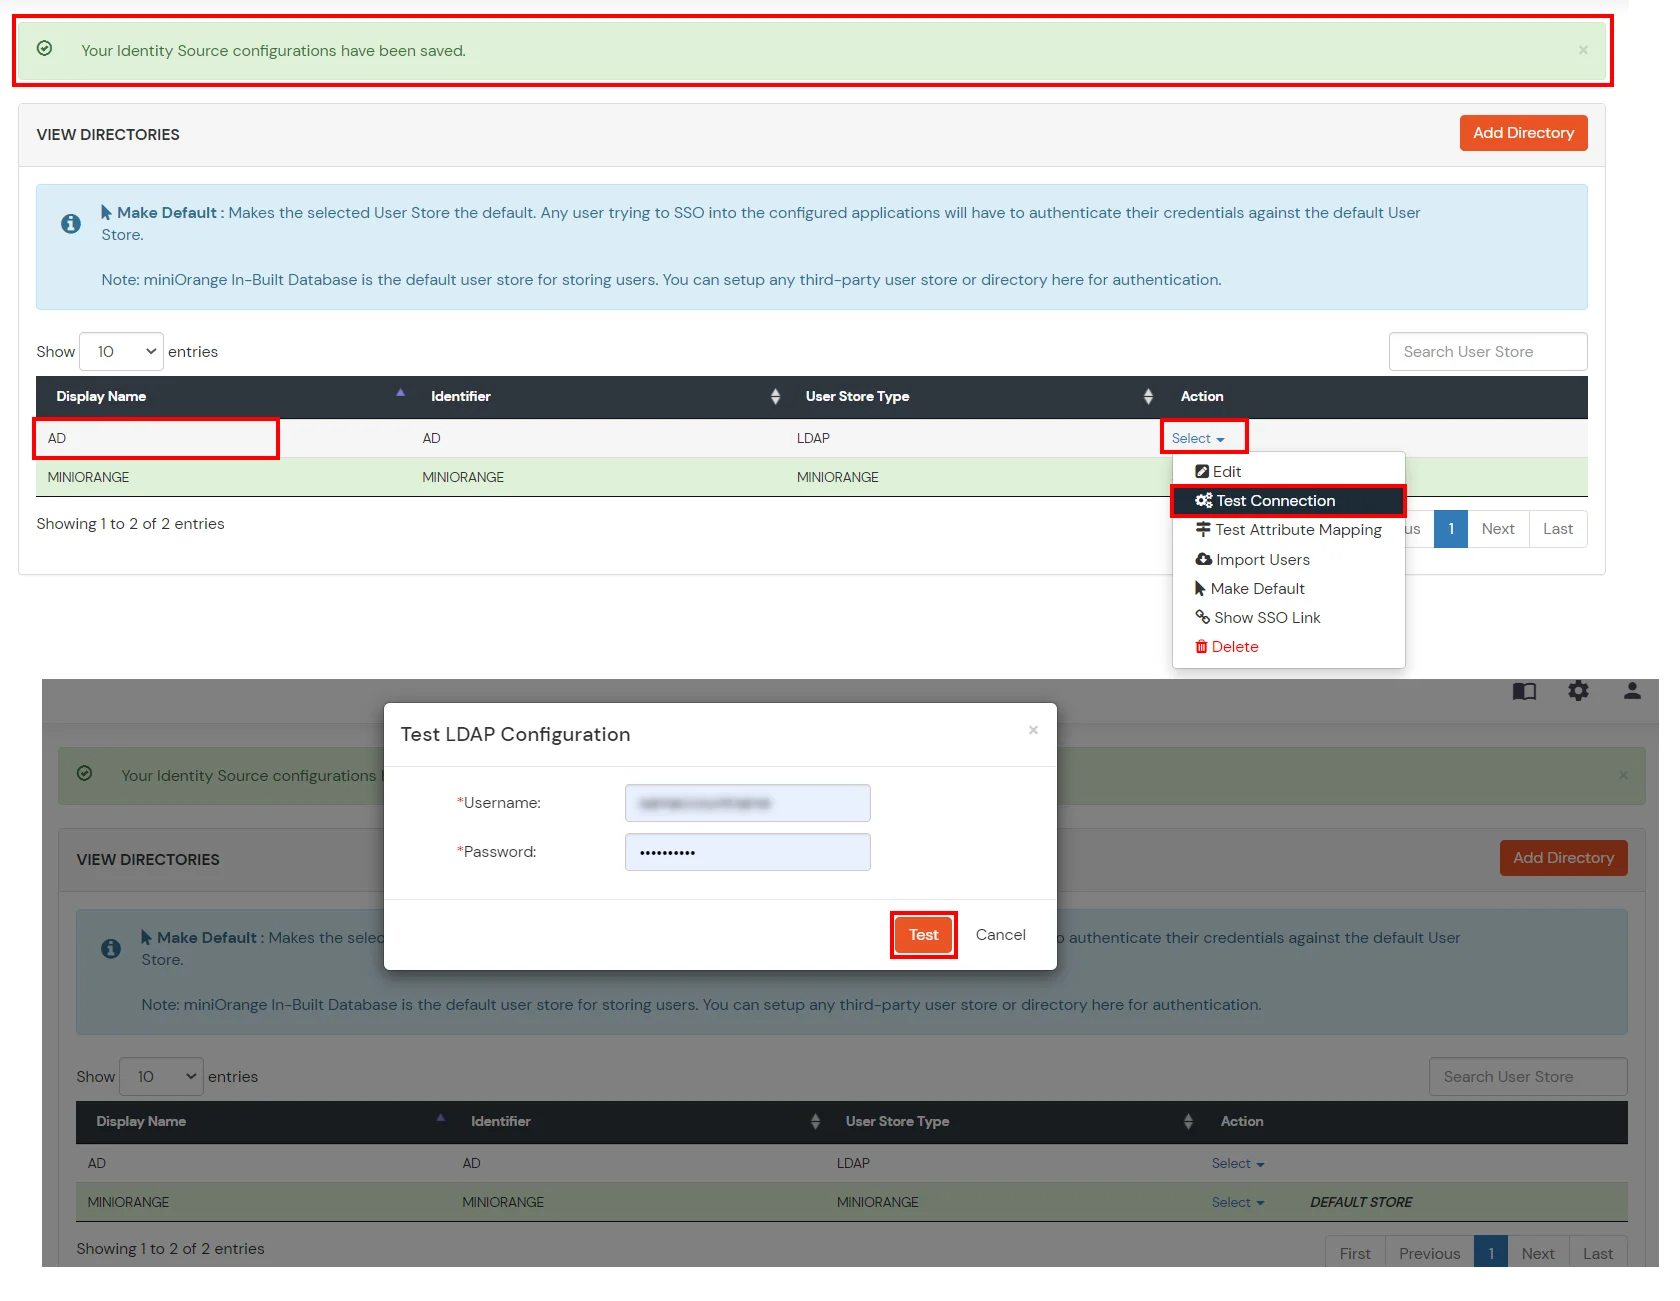
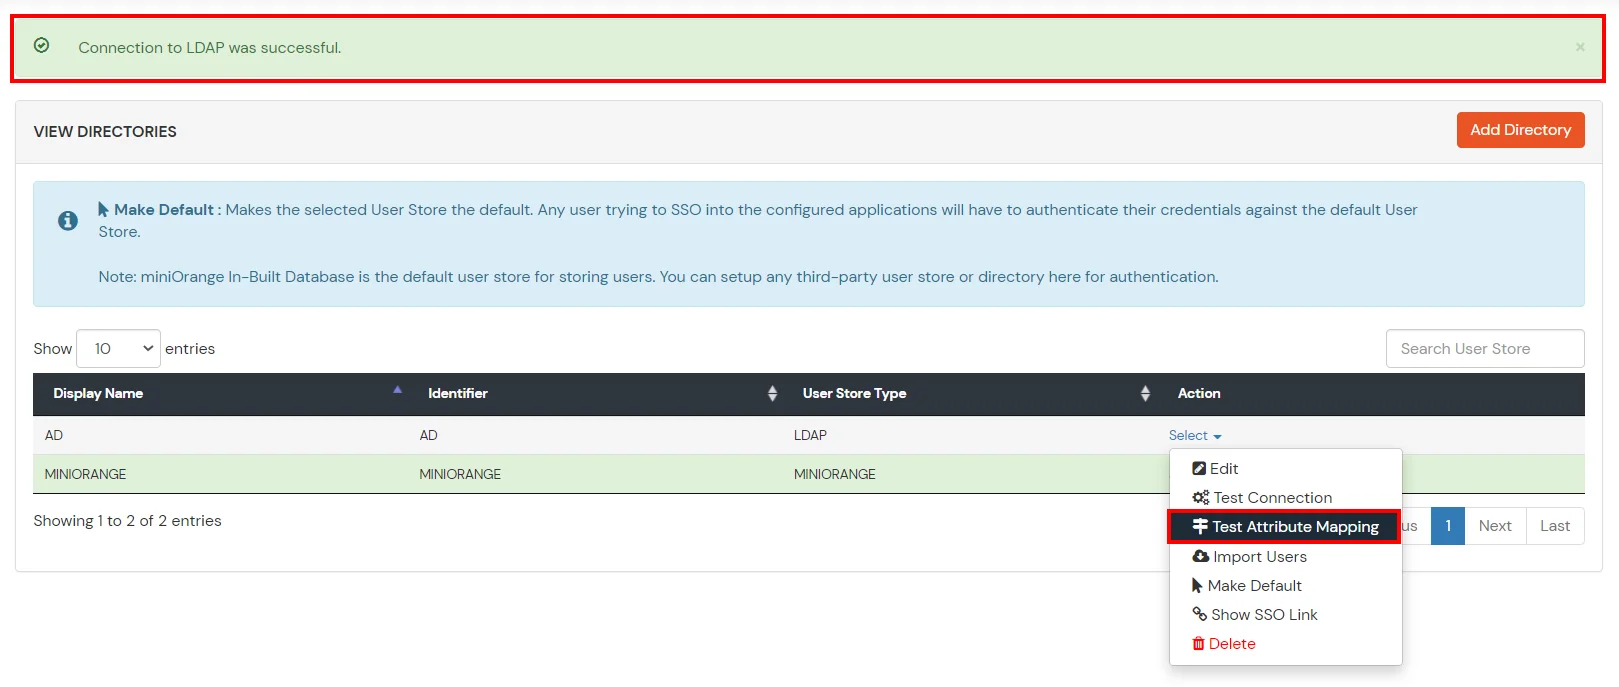
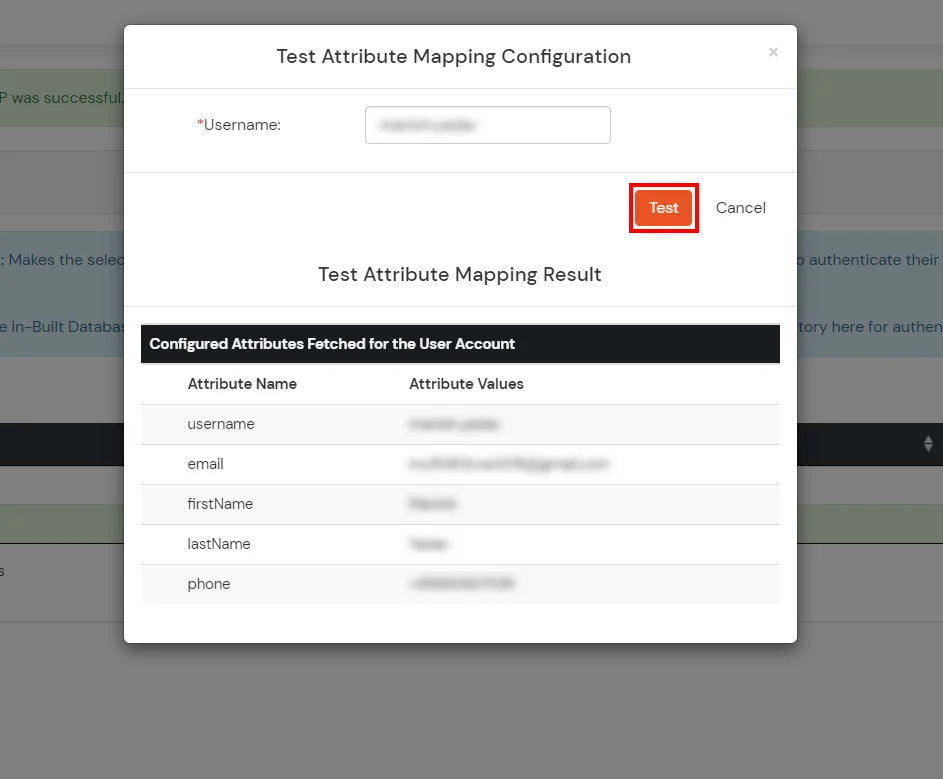
Refer our guide to setup LDAPS on windows server.
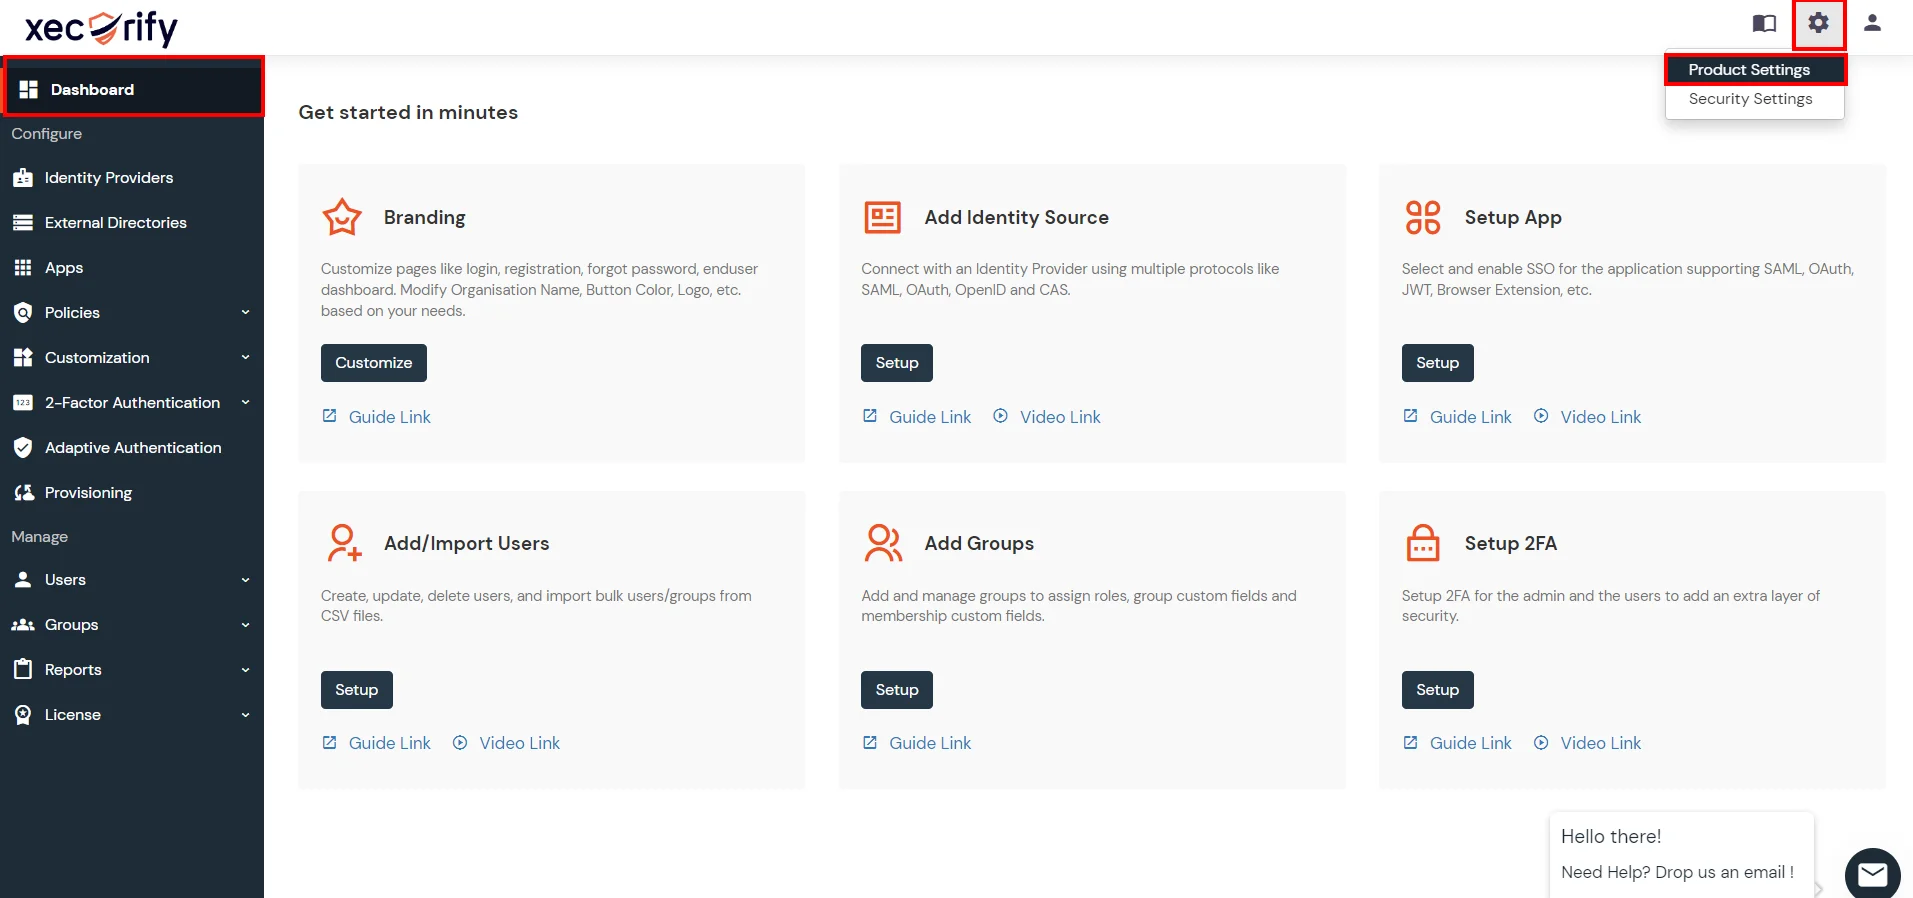


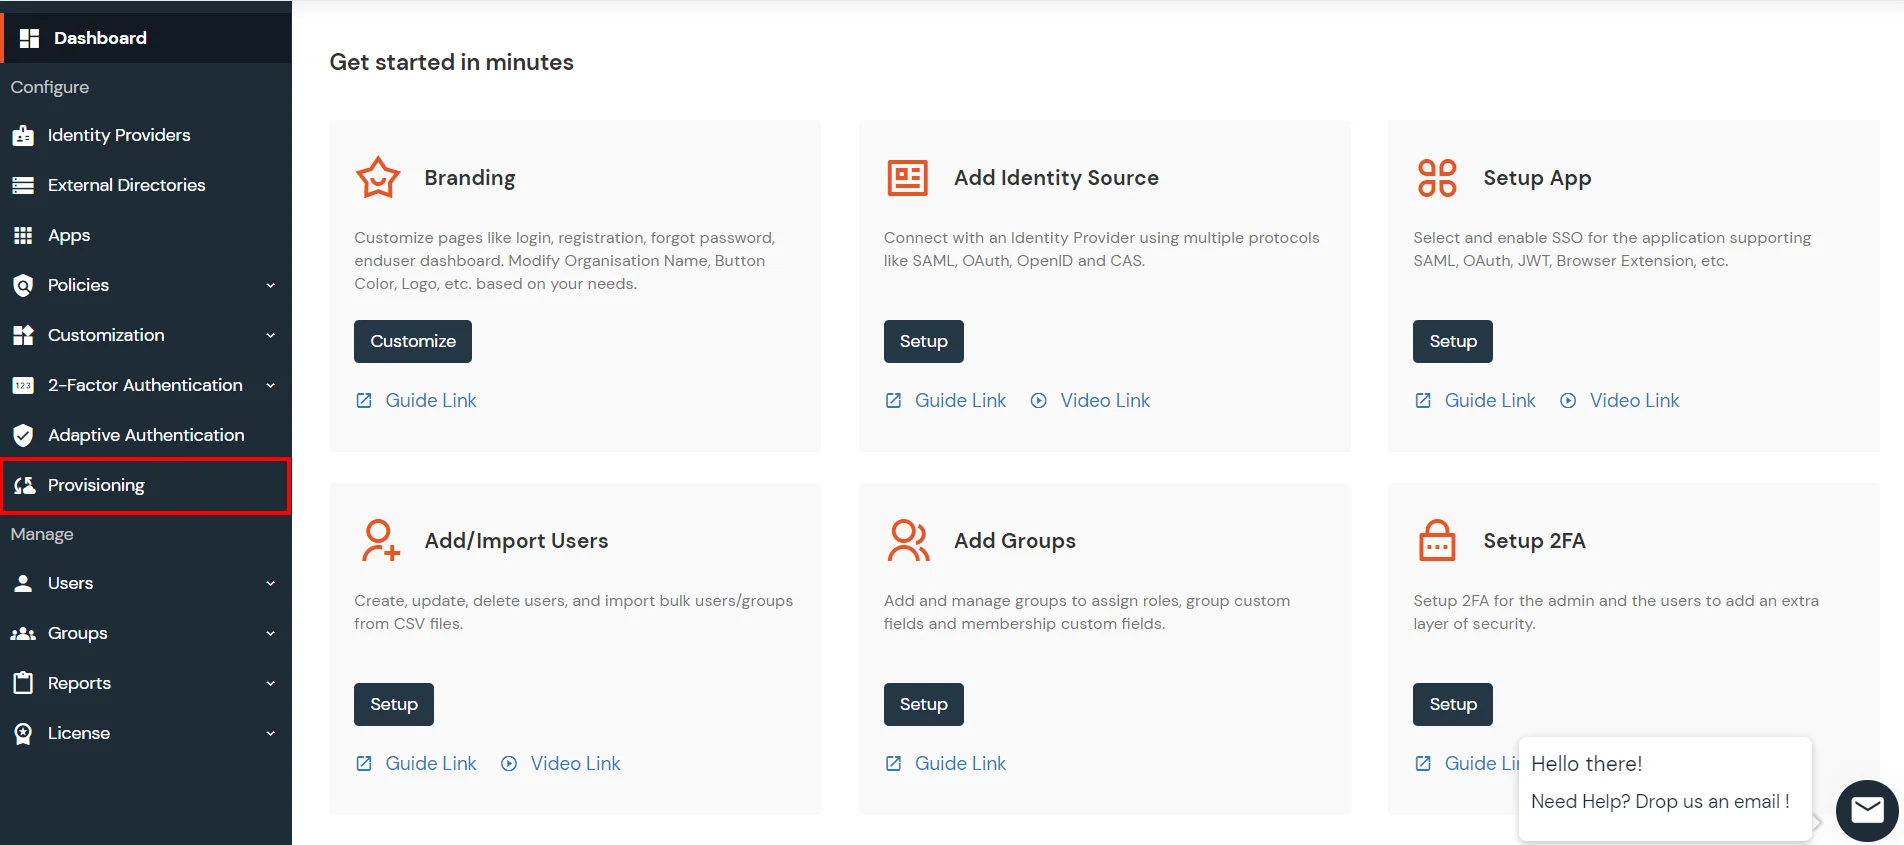
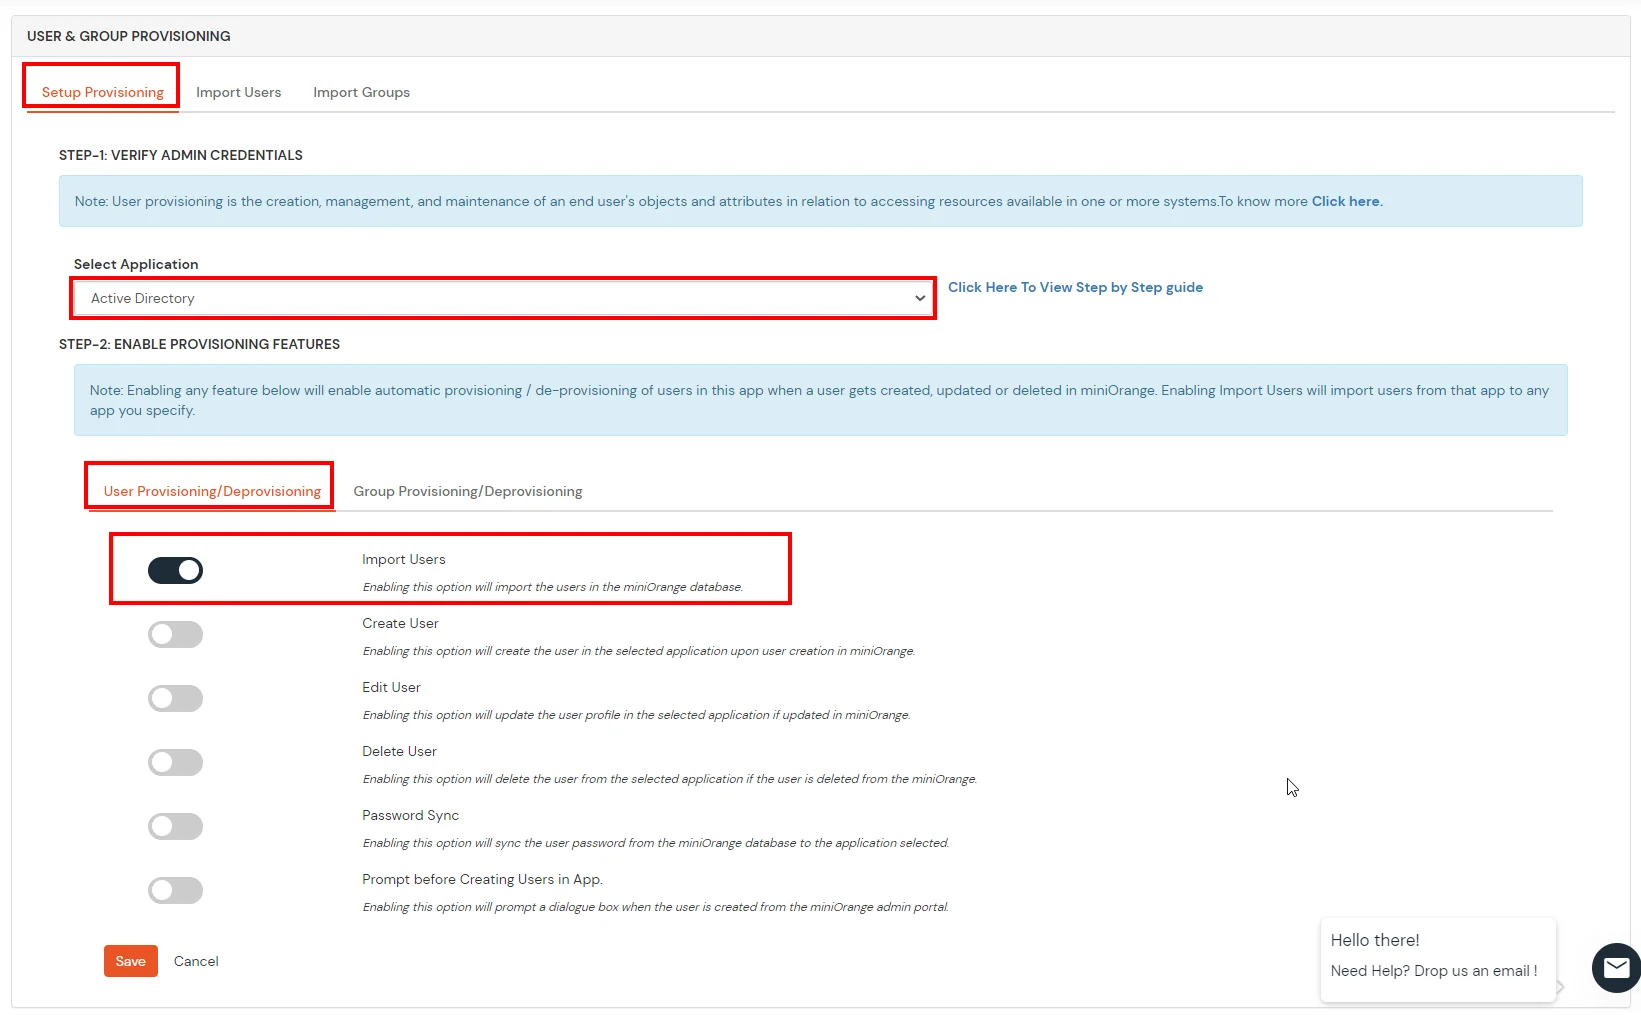

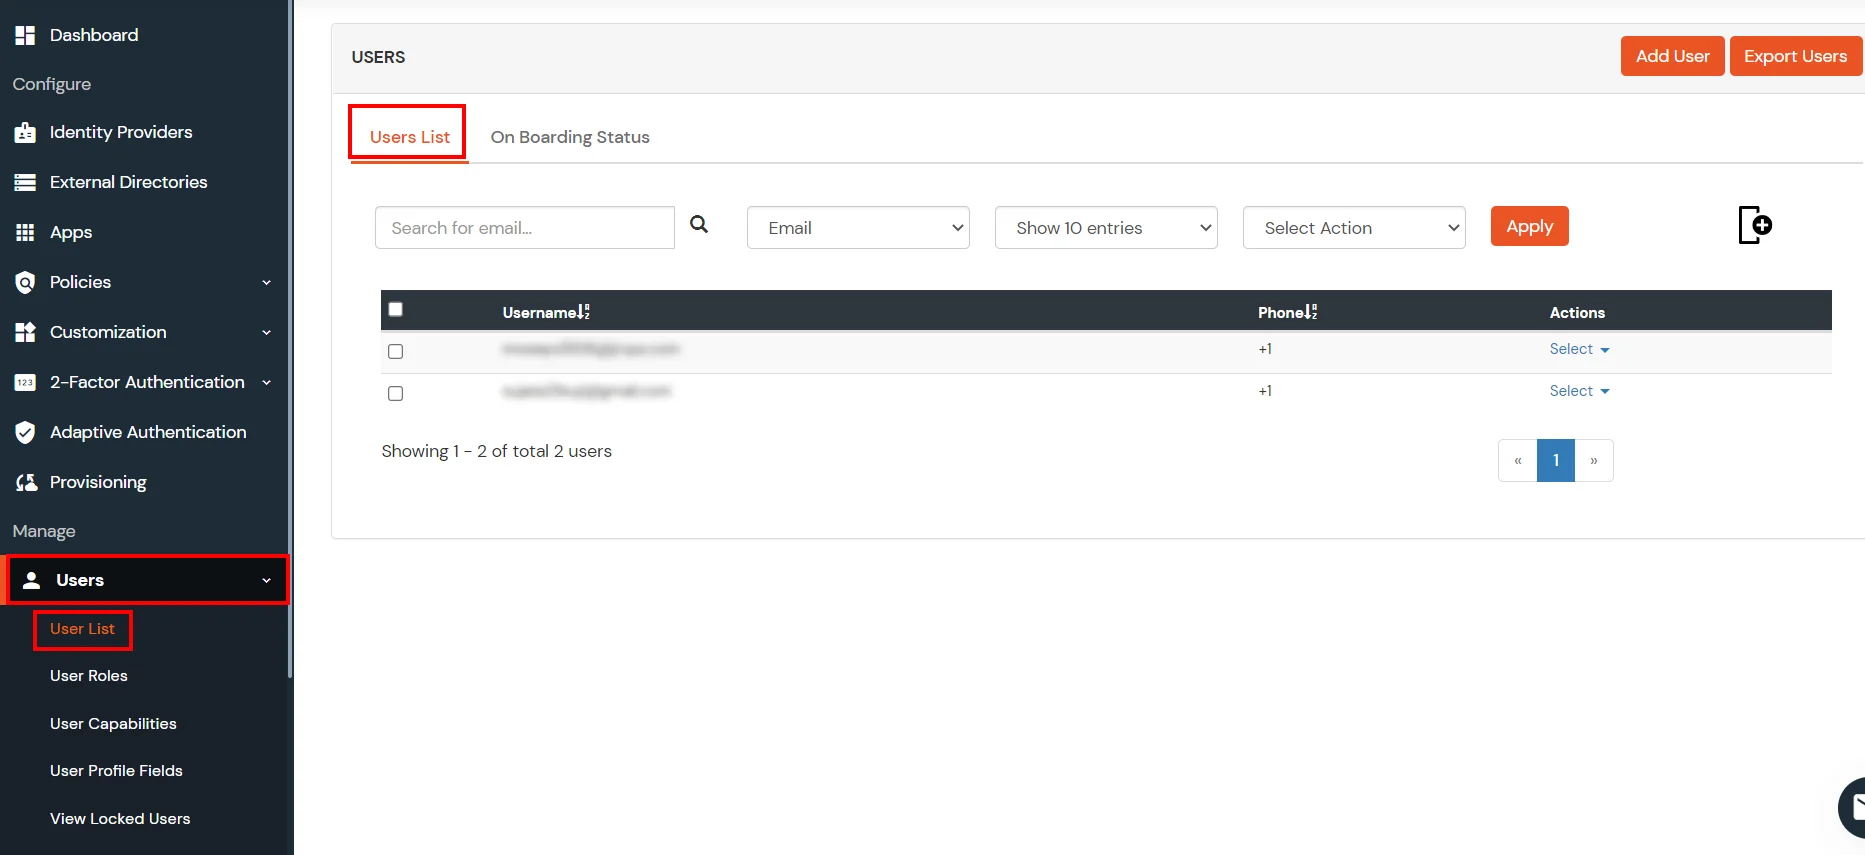
miniOrange integrates with various external user sources such as directories, identity providers, and etc.
Contact us or email us at idpsupport@xecurify.com and we'll help you setting it up in no time.
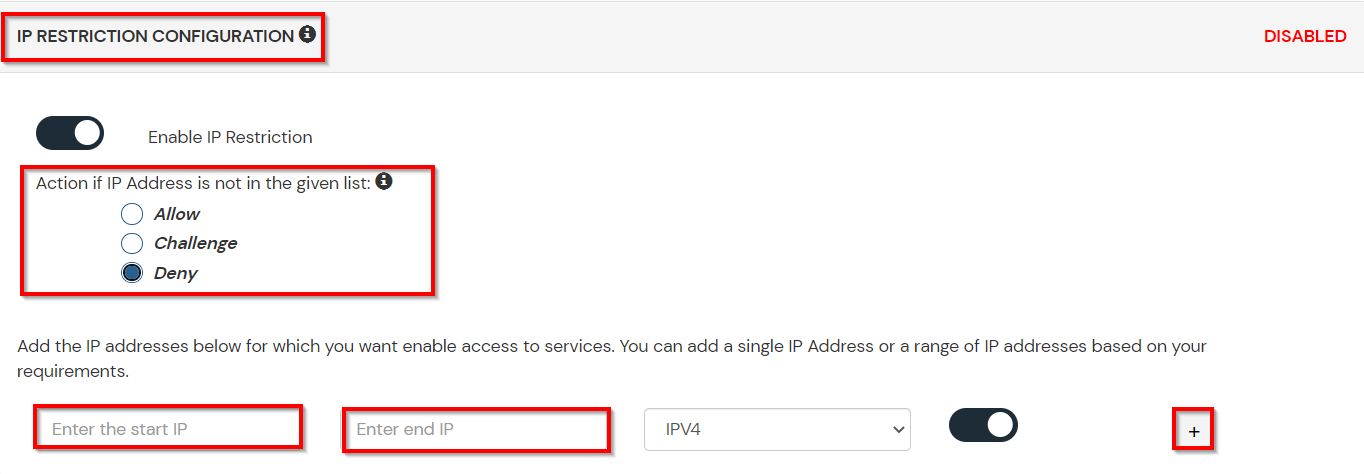
A. Restricting access to Shibboleth with IP Blocking
You can use adaptive authentication with Shibboleth Single Sign-On (SSO) to improve the security and functionality of Single Sign-On. You can allow a IP Address in certain range for SSO or you can deny it based your requirements and you can also challenge the user to verify his authenticity. Adaptive authentication manages the user authentication bases on different factors such as Device ID, Location, Time of Access, IP Address and many more.
You can configure Adaptive Authentication with IP Blocking in following way: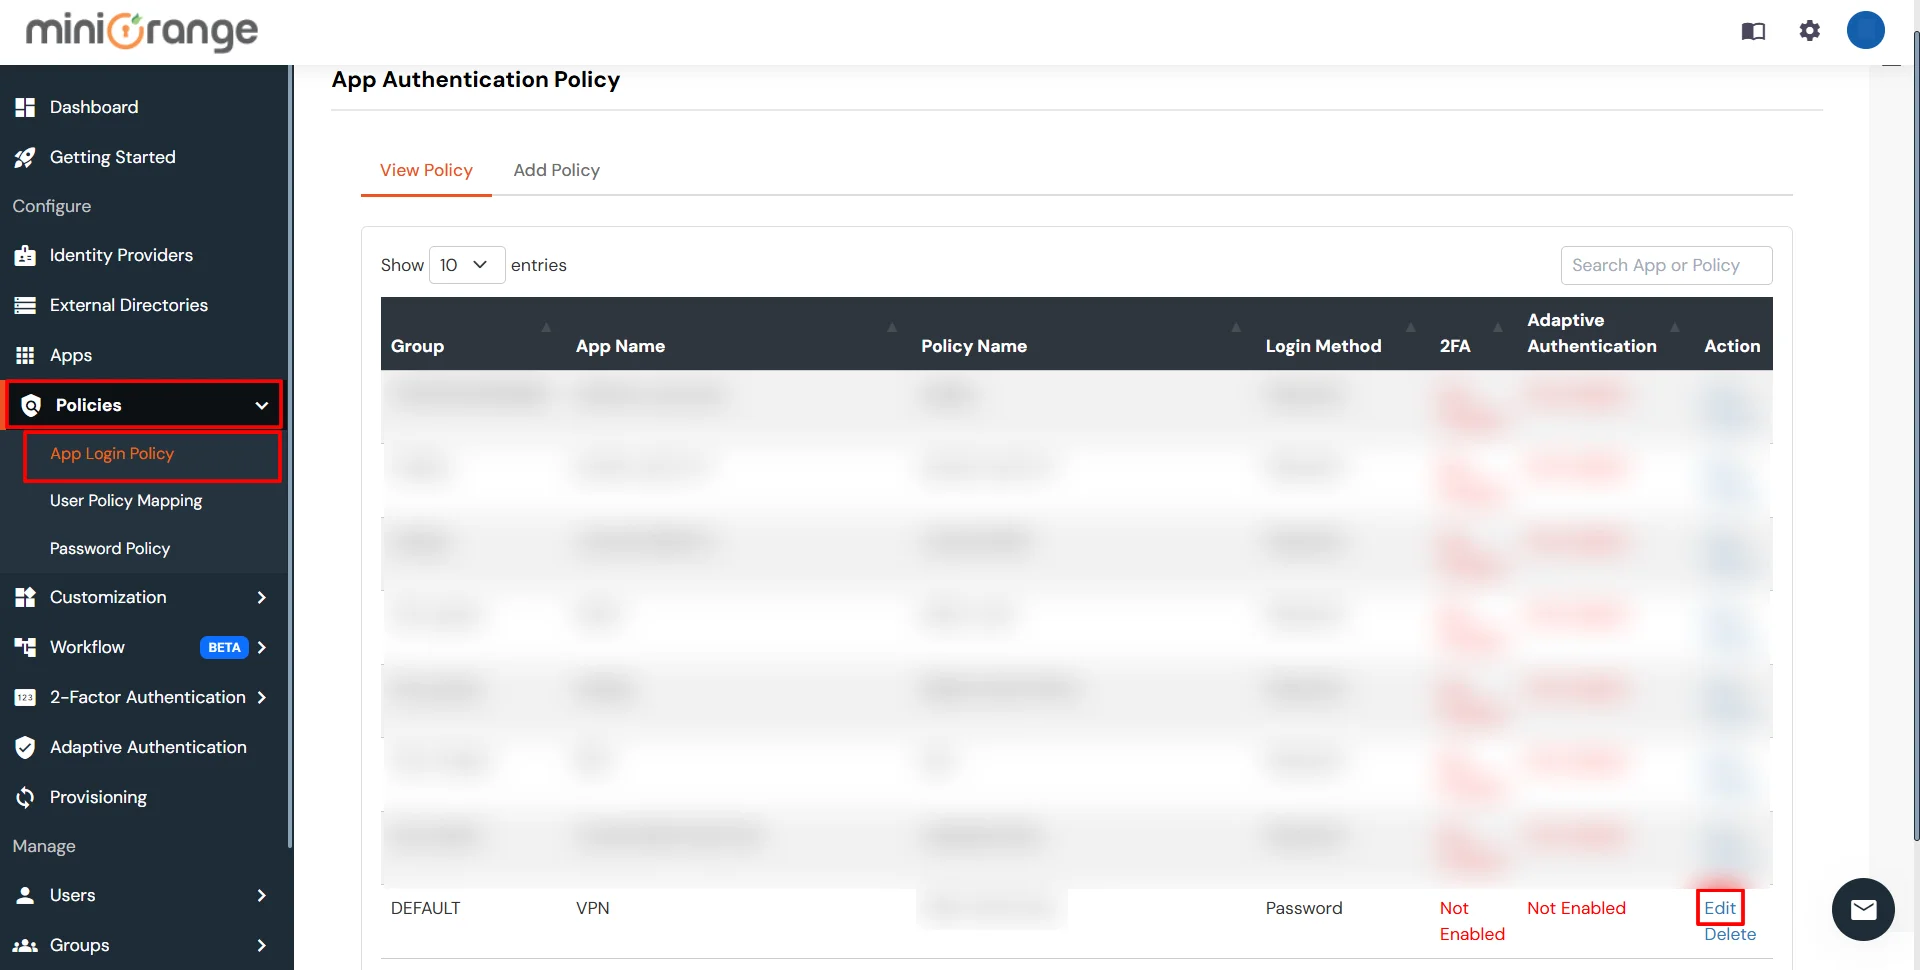
| Attribute | Description |
|---|---|
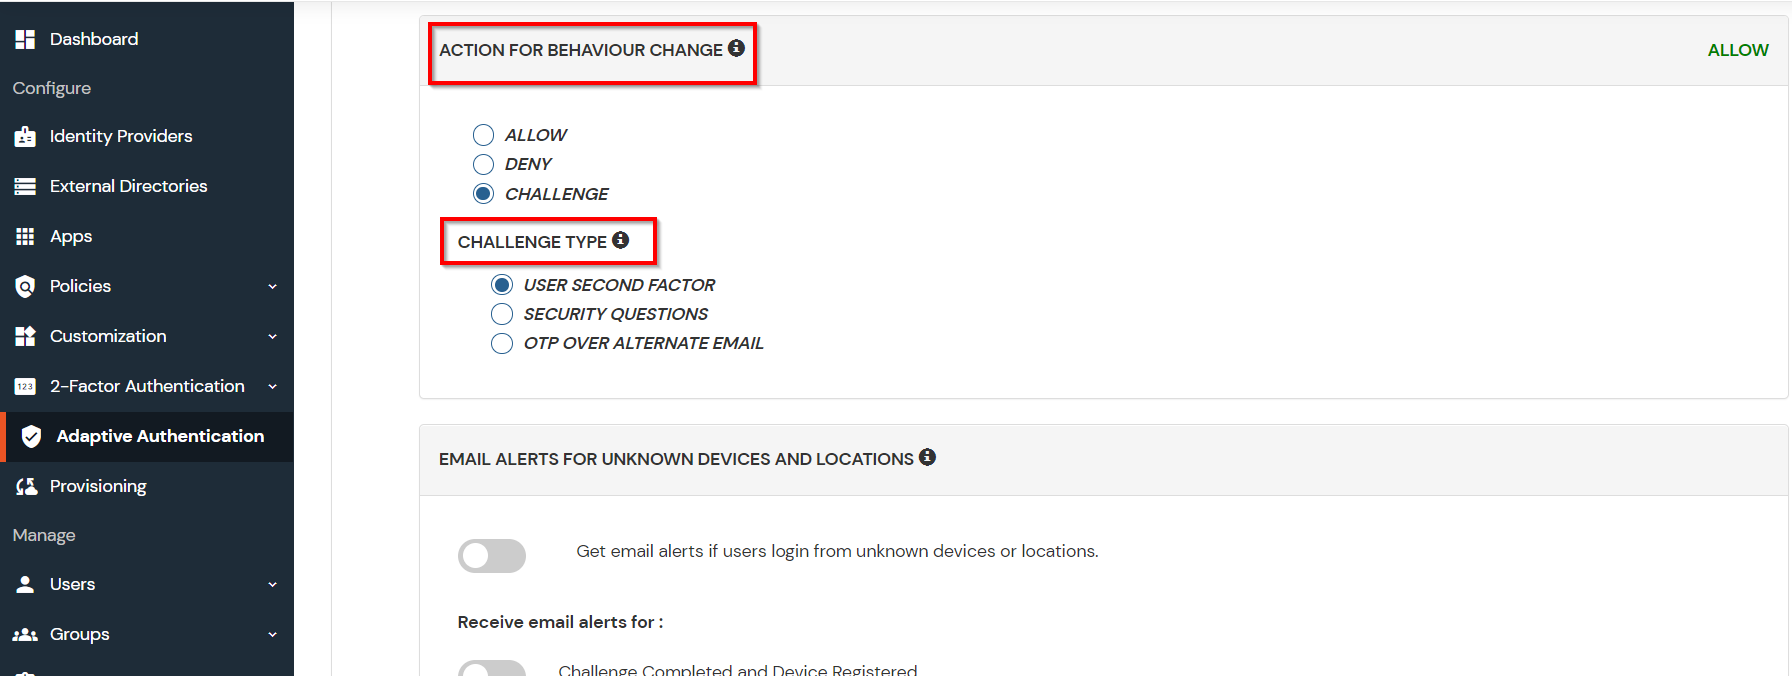
| Allow | Allow user to authenticate and use services if Adaptive authentication condition is true. |
| Challenge | Challenge users with one of the three methods mentioned below for verifying user authenticity. |
| Deny | Deny user authentications and access to services if Adaptive authentication condition is true. |
| Attribute | Description |
|---|---|
| User second Factor | The User needs to authenticate using the second factor he has opted or assigned for such as |
| KBA (Knowledge-based authentication) | The System will ask user for 2 of 3 questions he has configured in his Self Service Console. Only after right answer to both questions user is allowed to proceed further. |
| OTP over Alternate Email | User will receive a OTP on the alternate email he has configured threw Self Service Console. Once user provides the correct OTP he is allowed to proceed further. |
B. Adaptive Authentication with Limiting number of devices.
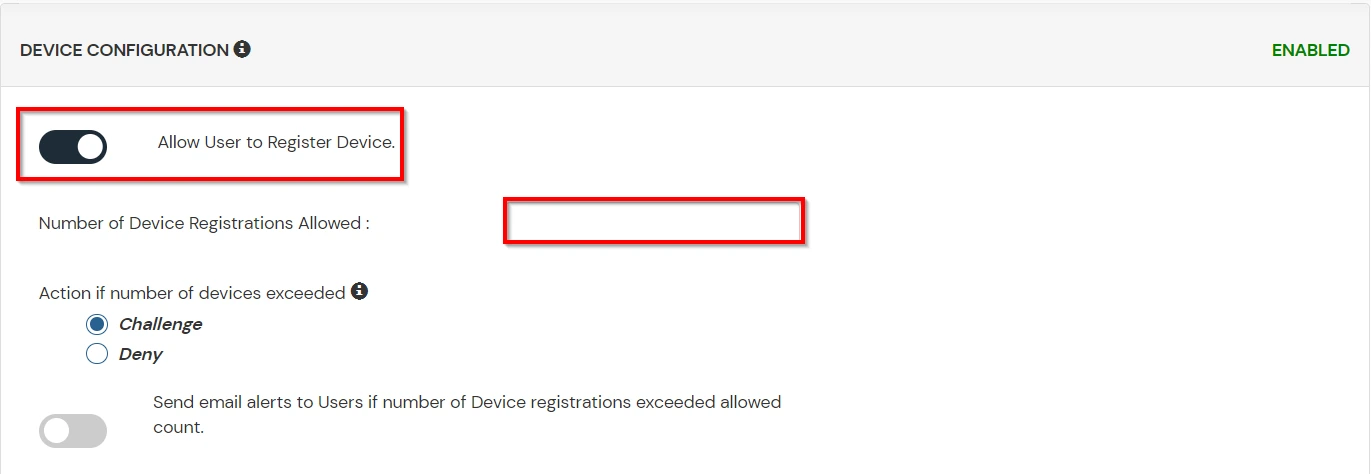
Using Adaptive Authentication you can also restrict the number of devices the end user can access the Services on. You can allow end users to access services on a fixed no. of devices. The end users will be able to access services provided by us on this fixed no. of devices.
You can configure Adaptive Authentication with Device Restriction in following way
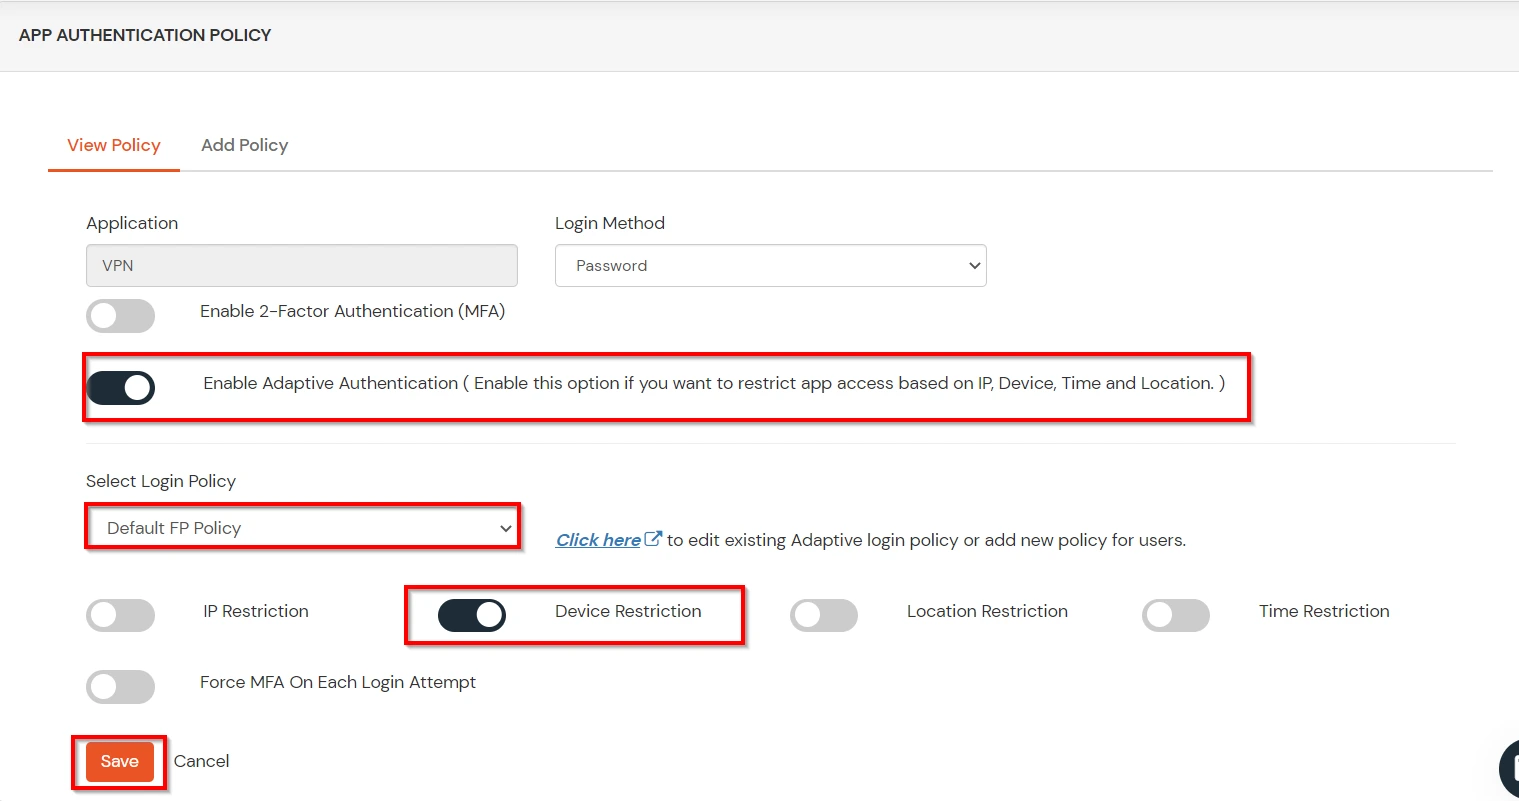
C. Add Adaptive Authentication policy to Shibboleth.

D.Notification and Alert Message.
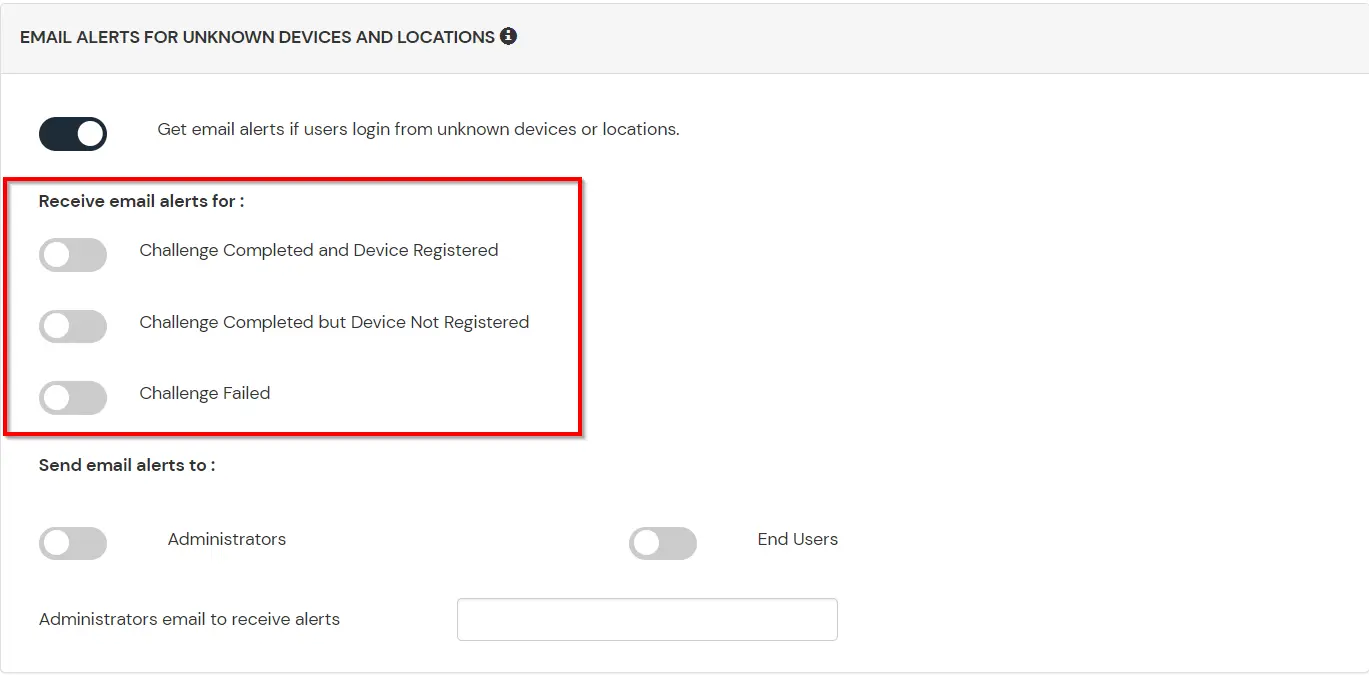
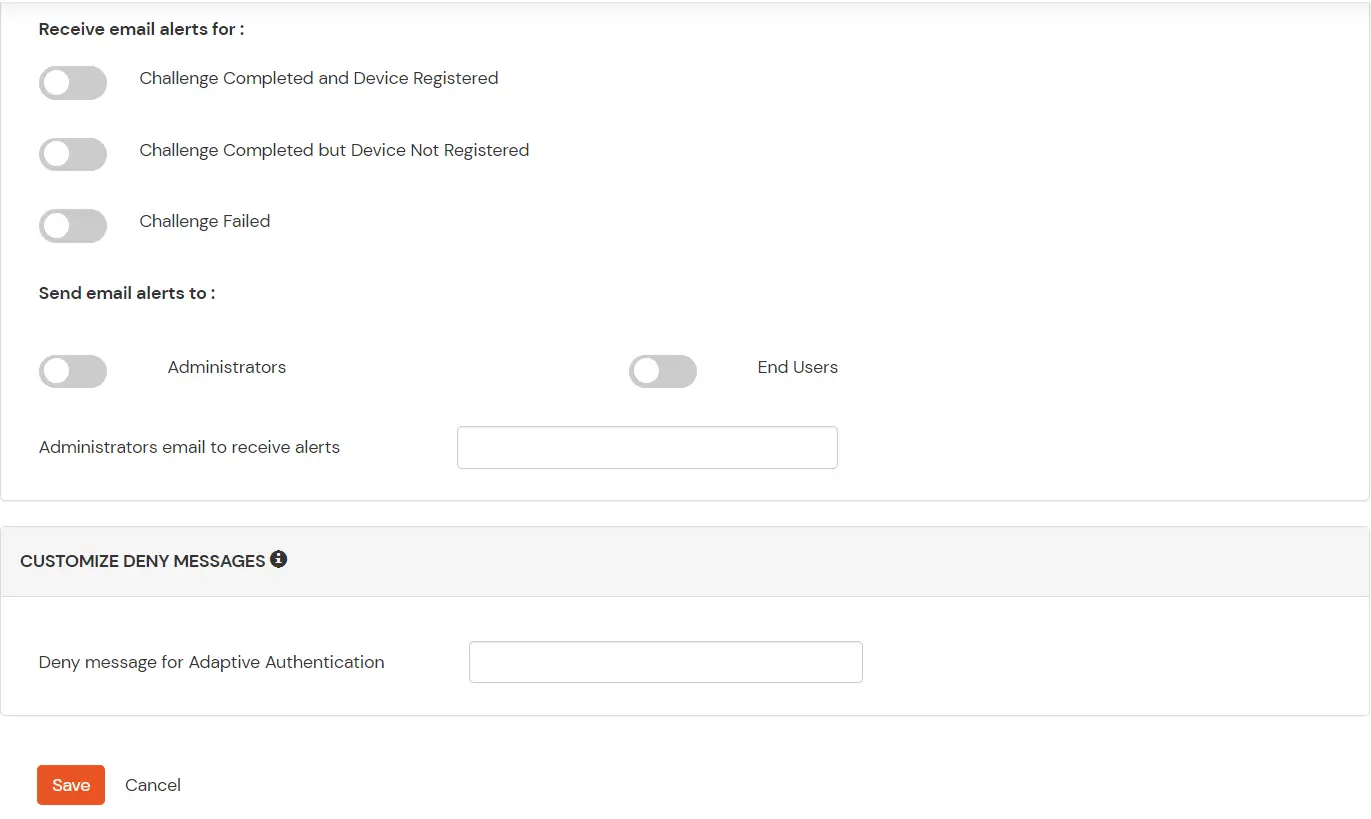
This section handles the notifications and alerts related to Adaptive Authentication.It provides the following options :
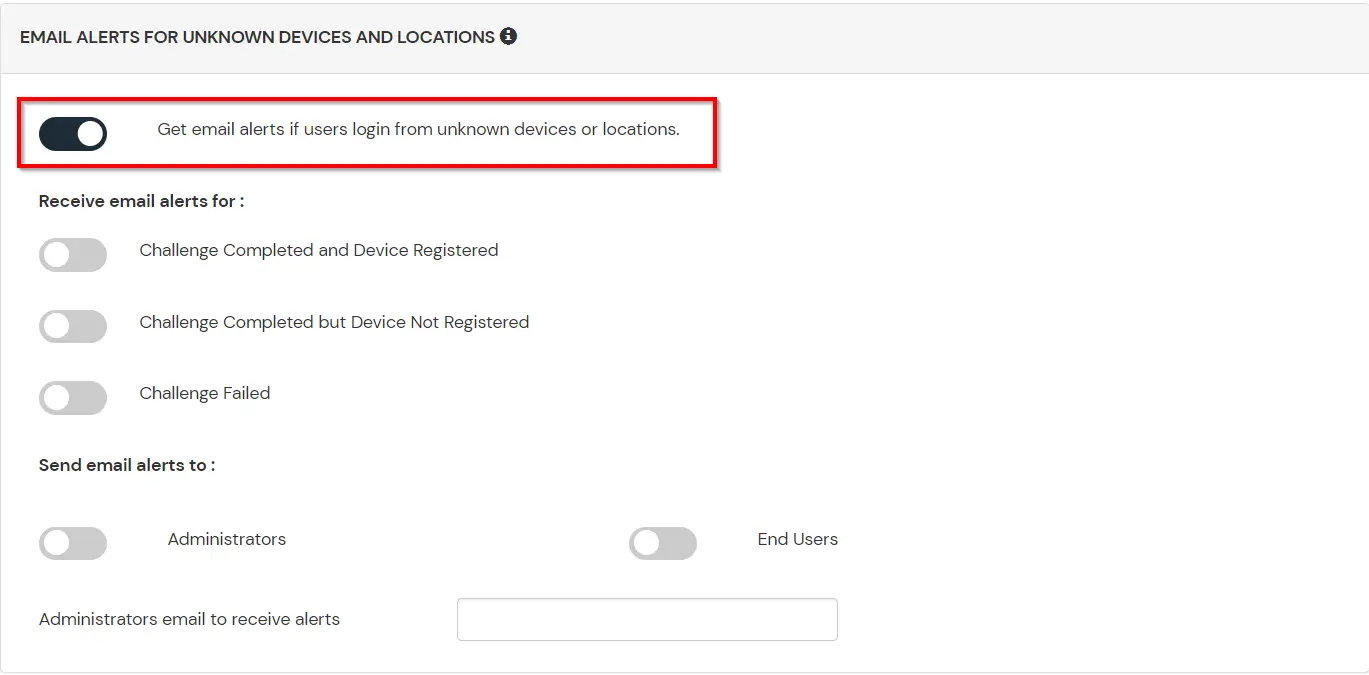
| Option | Description |
|---|---|
| Challenge Completed and Device Registered | Enabling this option allows you to send an email alert when an end-user completes a challenge and registers a device. |
| Challenge Completed but Device Not Registered | Enabling this option allows you to send an email alert when an end-user completes a challenge but do not registers the device. |
| Challenge Failed | Enabling this option allows you to send an email alert when an end-user fails to complete the challenge. |
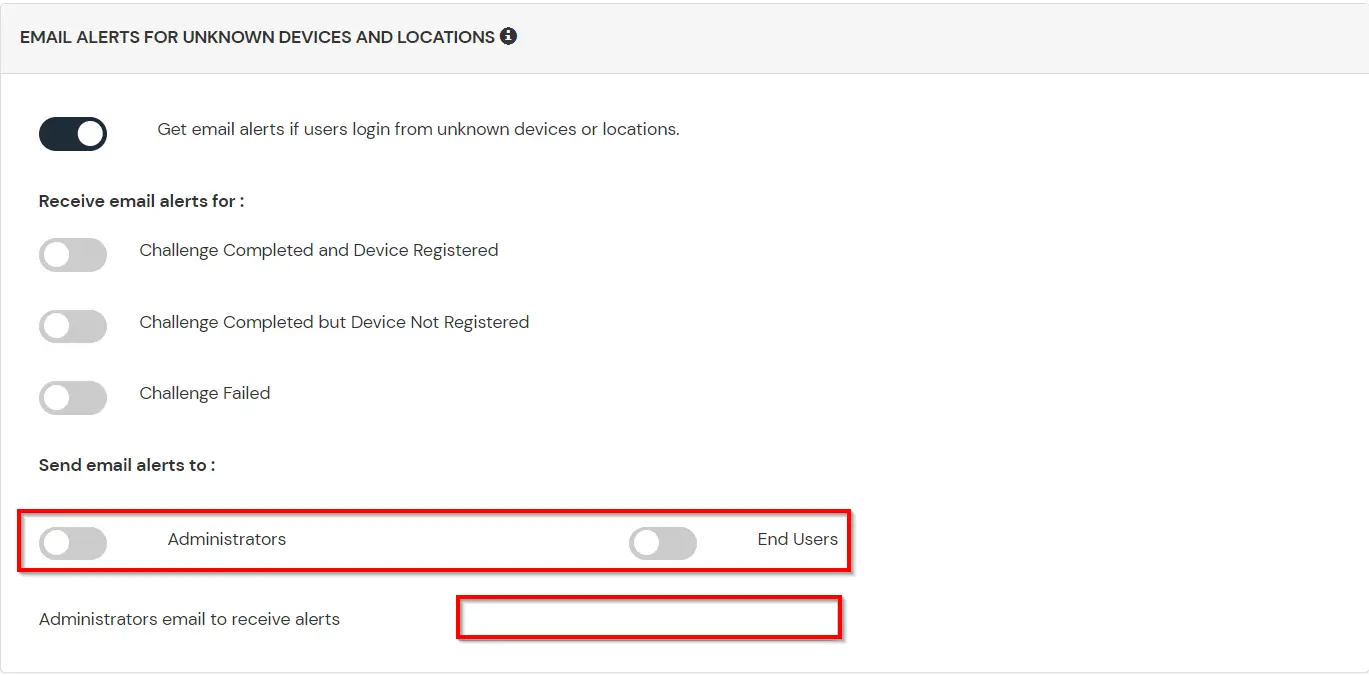

Our Other Identity & Access Management Products