Our SAML/OAuth SSO for JSM Customers app offers the functionality to seamlessly integrate OAuth/OpenID Single Sign-On into the JSM customer portal, ensuring compatibility with all OAuth/OpenID Providers. This guide will outline the steps for configuring SSO between the JSM customer portal and your OAuth/OpenID Provider. By following these instructions, customers will undergo authentication via your OAuth/OpenID Provider prior to accessing the JSM customer portal. This integration facilitates a smooth customer experience while also mitigating spam ticket.
Download And Installation
- Log into your Jira instance as an admin.
- Navigate to the settings and Click on Apps.
- Locate SAML/OAuth SSO for JSM Customers.
- Click on free trial to begin a new trial SAML/OAuth SSO for JSM Customers.
- On menu bar click on Apps. Locate SAML/OAuth SSO for JSM Customers .
Step 1: Setup AWS Cognito as OAuth Provider
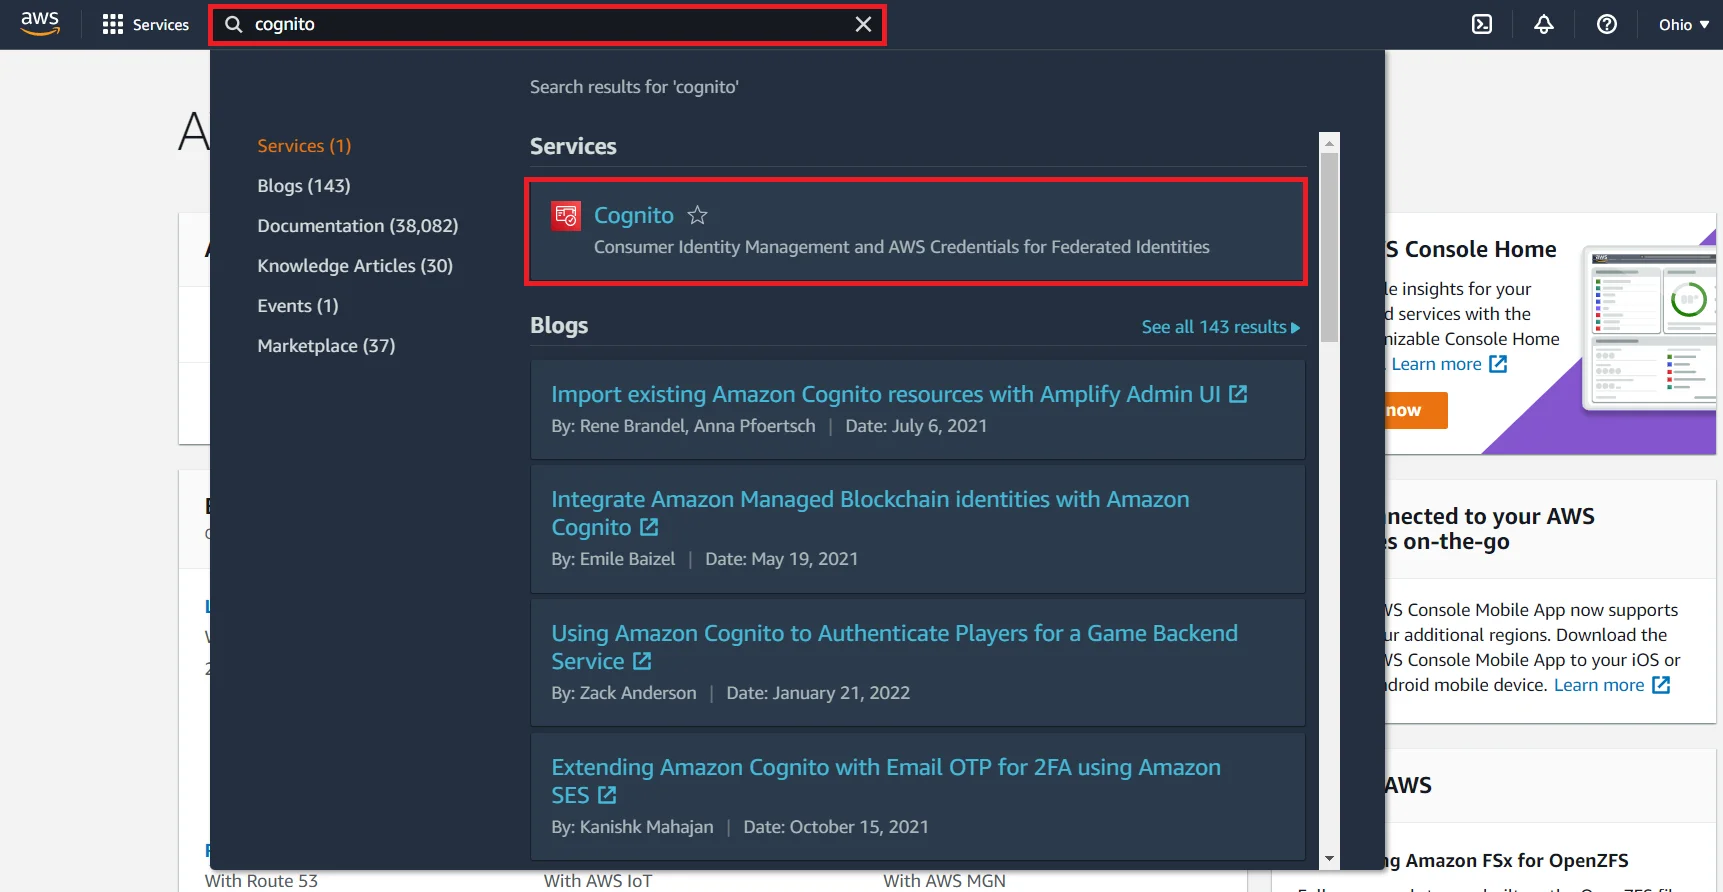
- First of all, go to Amazon Console and sign up/login in your account to Configure AWS Cognito.

- Search for Cognito in the AWS Services search bar as shown below.
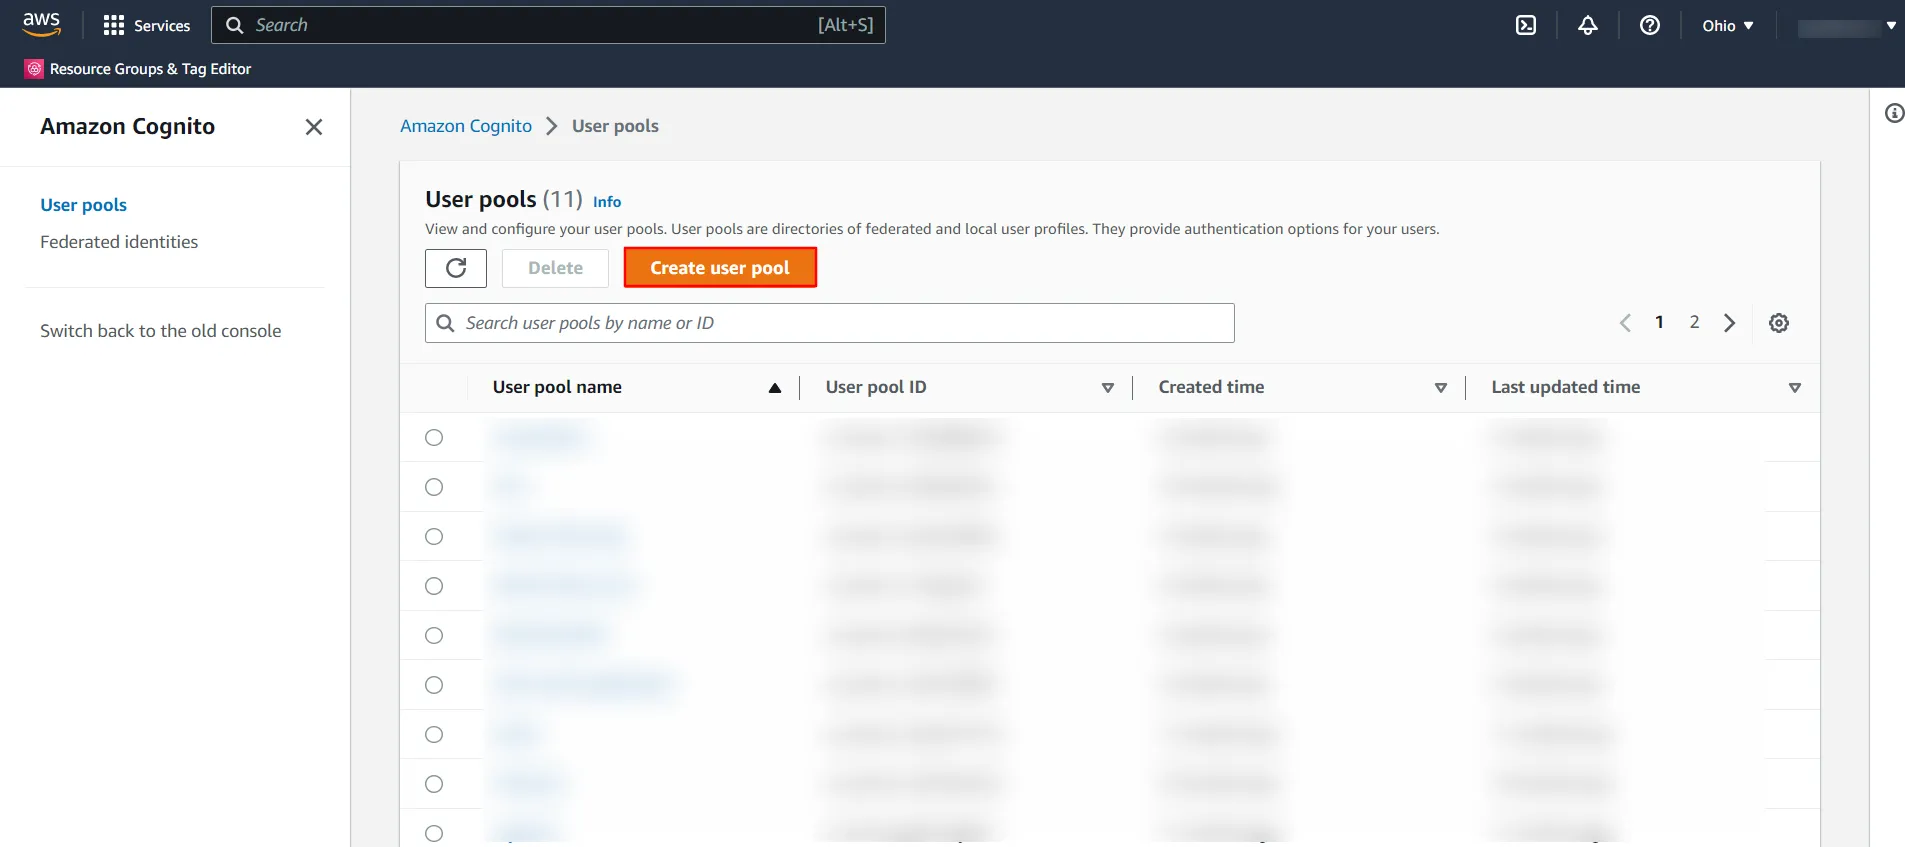
- Click on Create a user pool to create a new user pool.
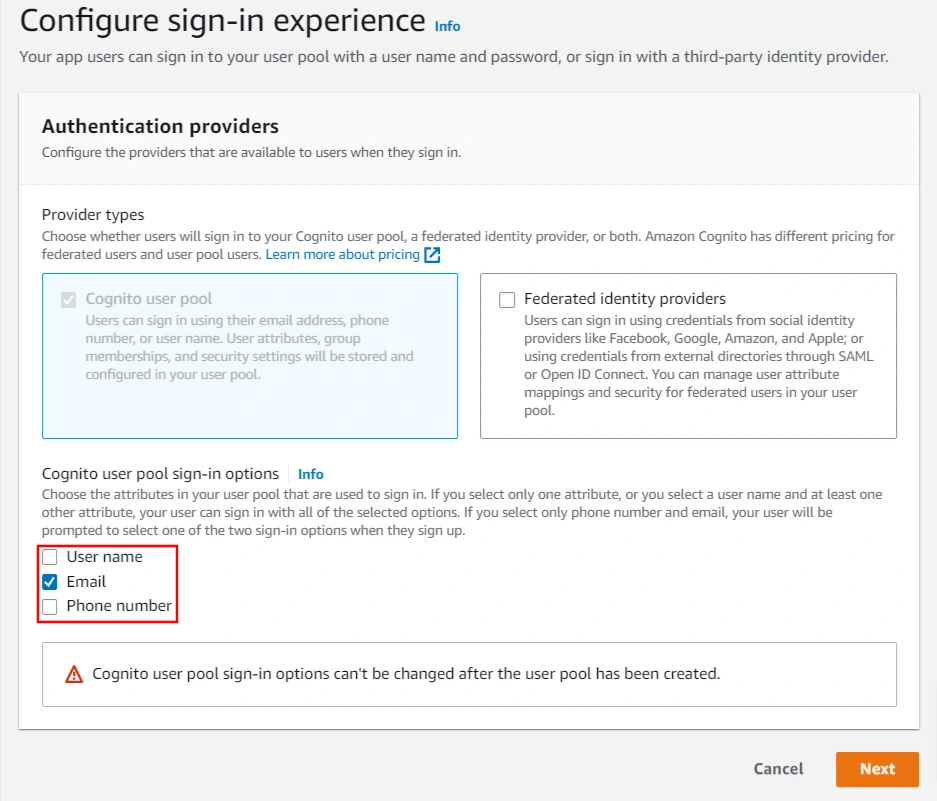
- Choose the attributes in your user pool to be used during the sign-in process
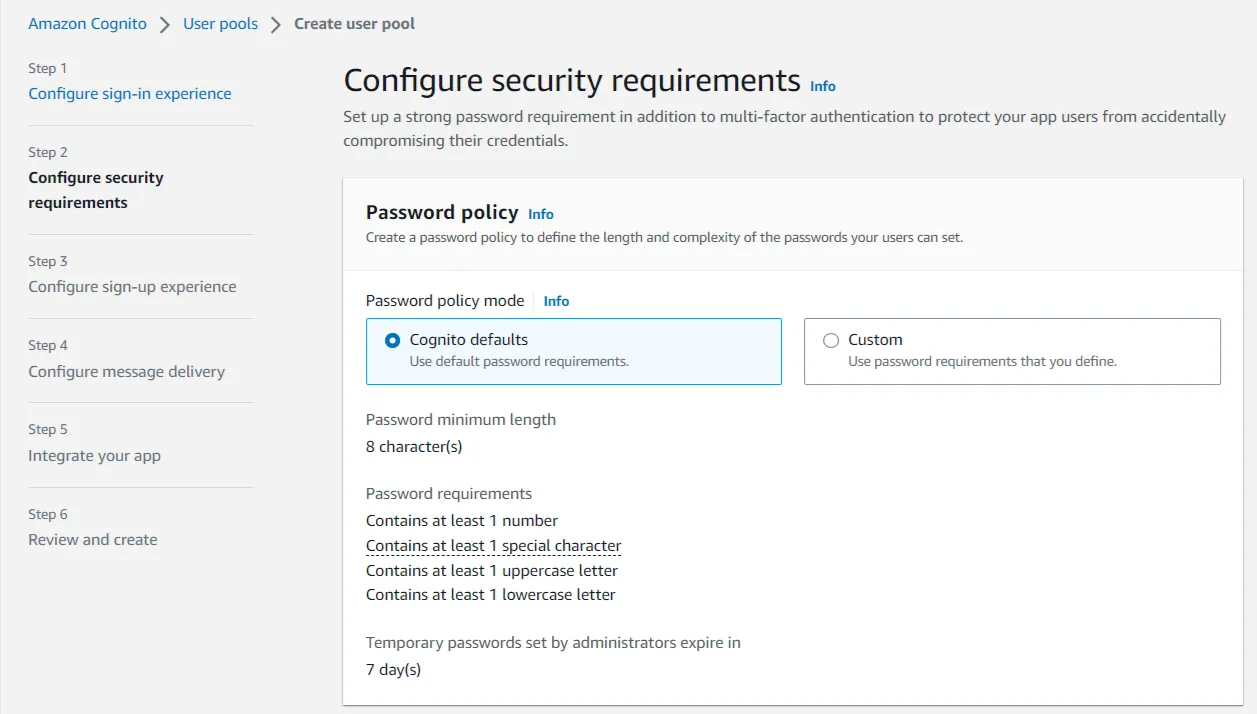
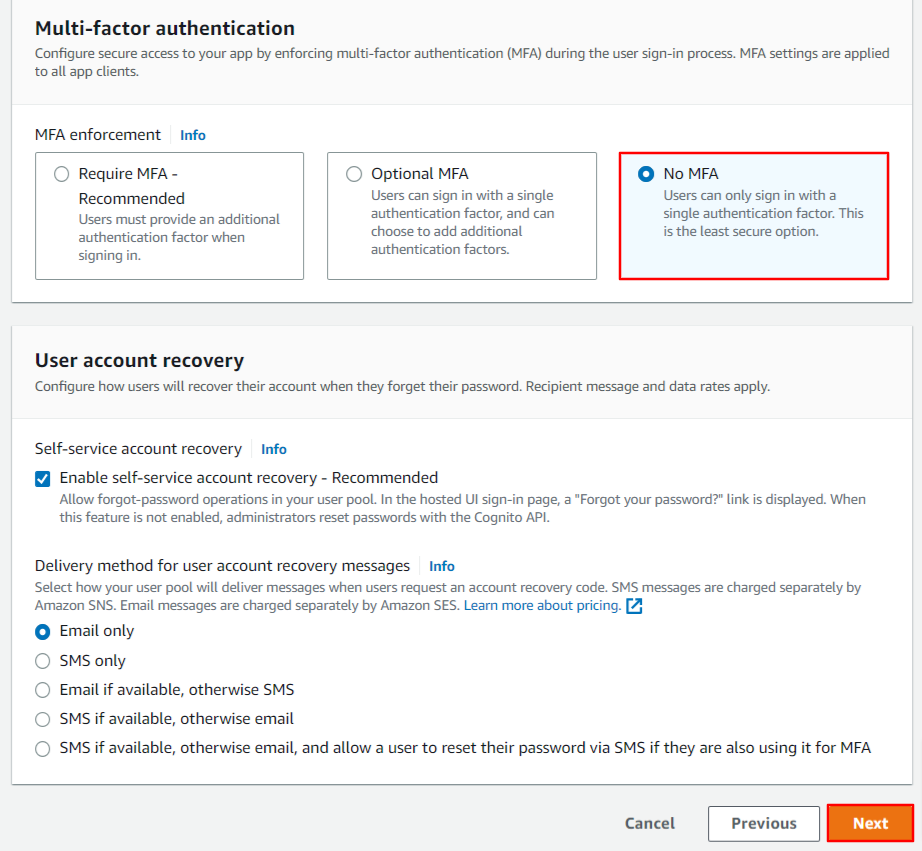
- Set up a strong password to configure your security requirements. Go ahead with the ‘No MFA’ option if you want users to only sign in with a single authentication factor. If you wish to enable MFA (Multi-factor authentication) it will require SMS messages which are charged separately by Amazon SNS. Learn more about that here. Click Next.
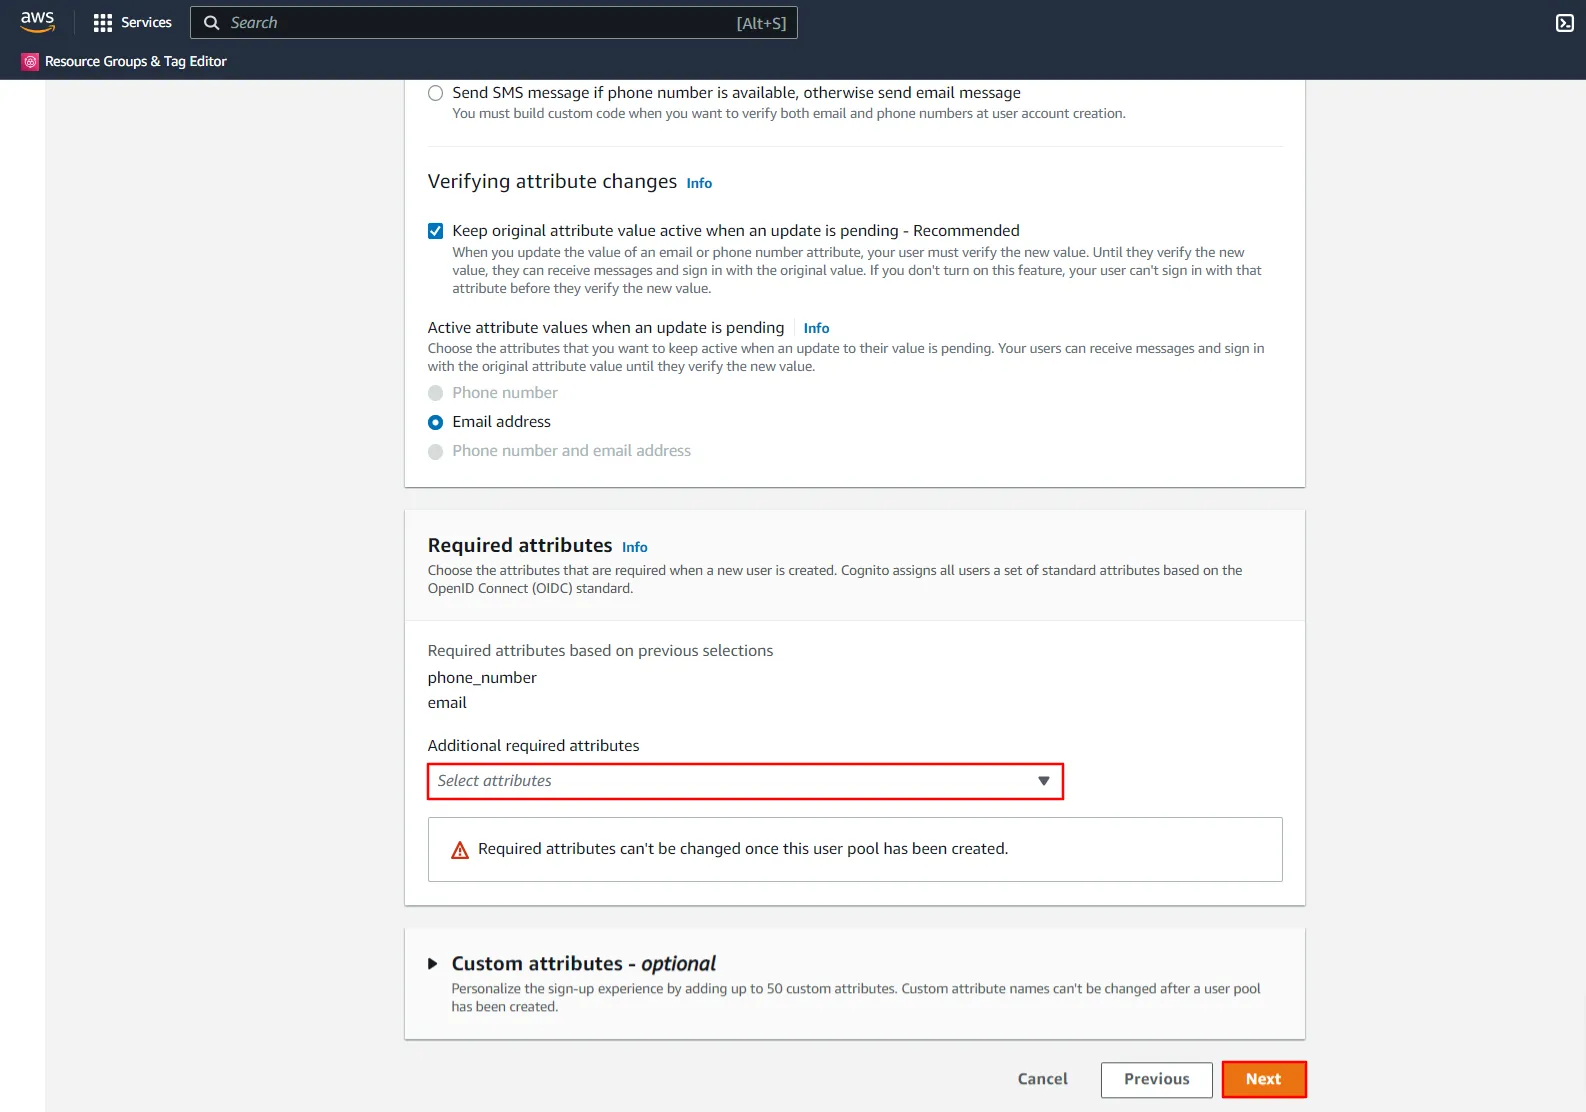
- Configure attributes that would be required during the user sign-up flow.

- Choose additional attributes if you wish to. Click Next.
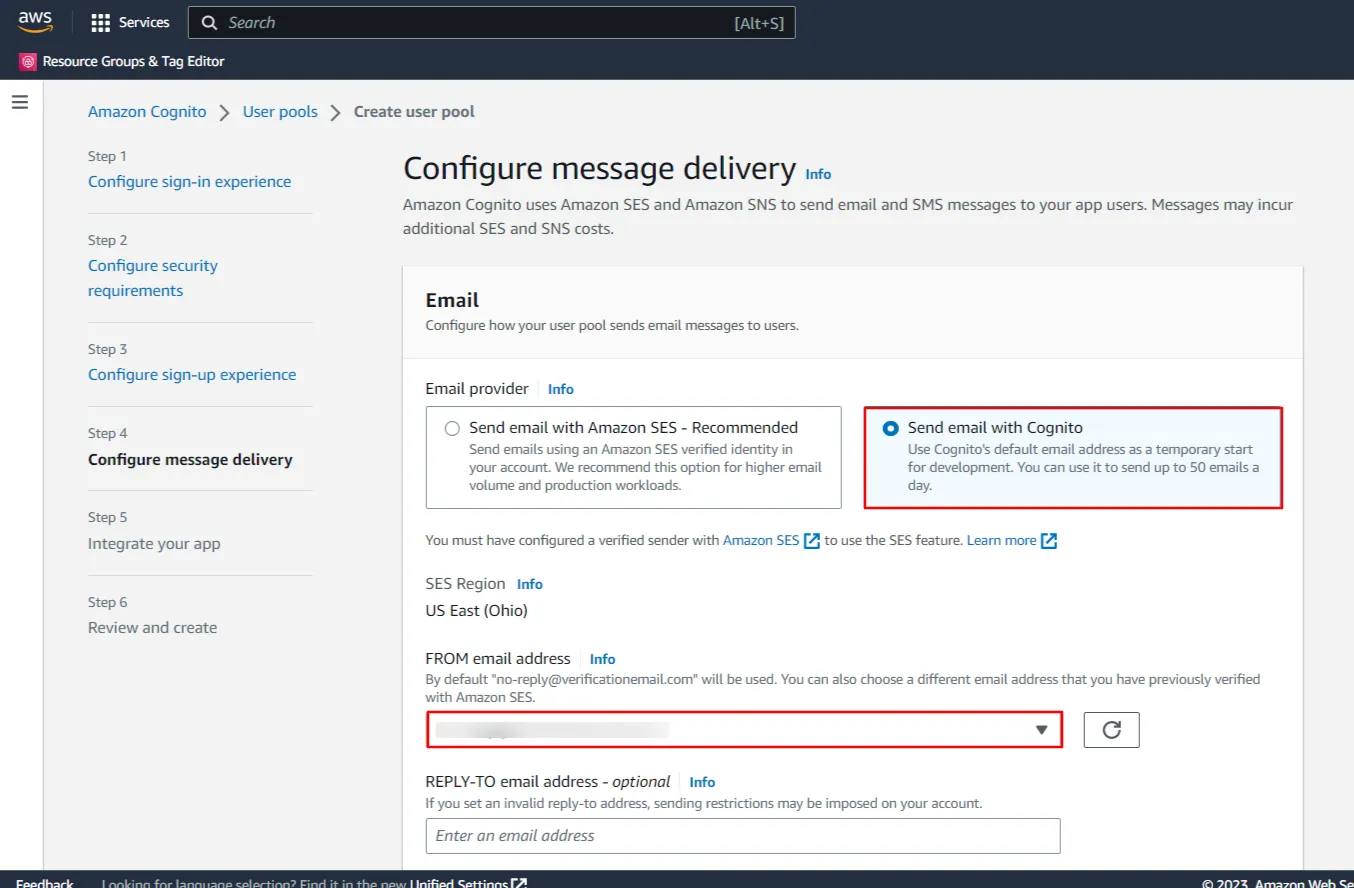
- Configure how your user pool sends email messages to users.
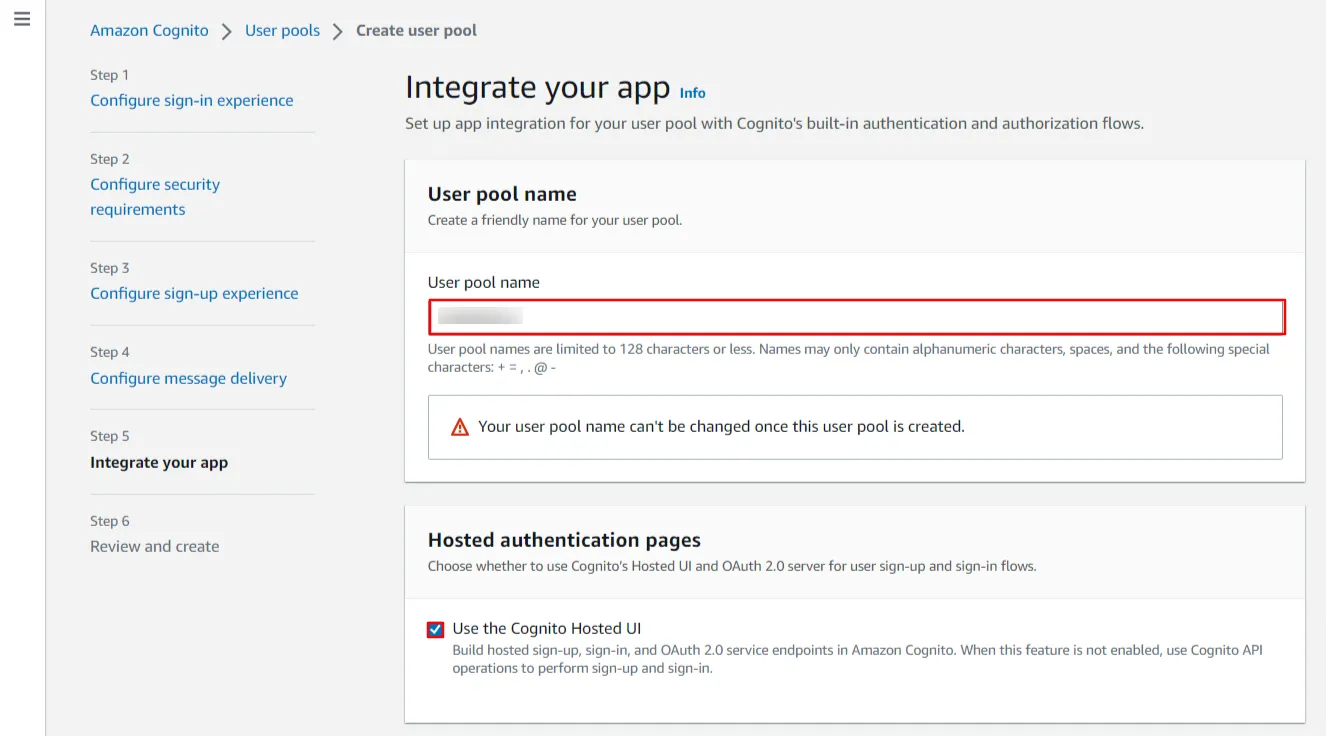
- Enter a name for your user pool, Also Under Hosted authentication pages, check ‘Use the Cognito Hosted UI’.
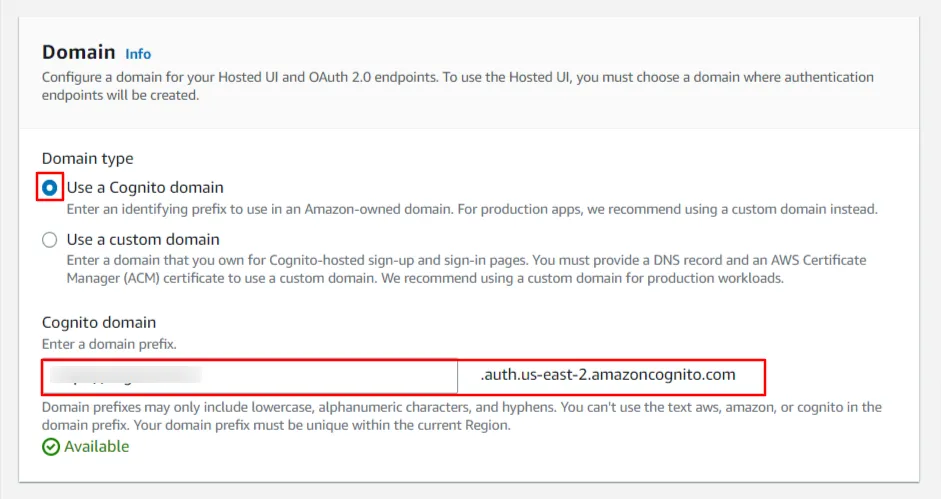
- Now, Under the Domain section choose the domain type as ‘Use a Cognito domain’. Enter a domain name for your Cognito app.
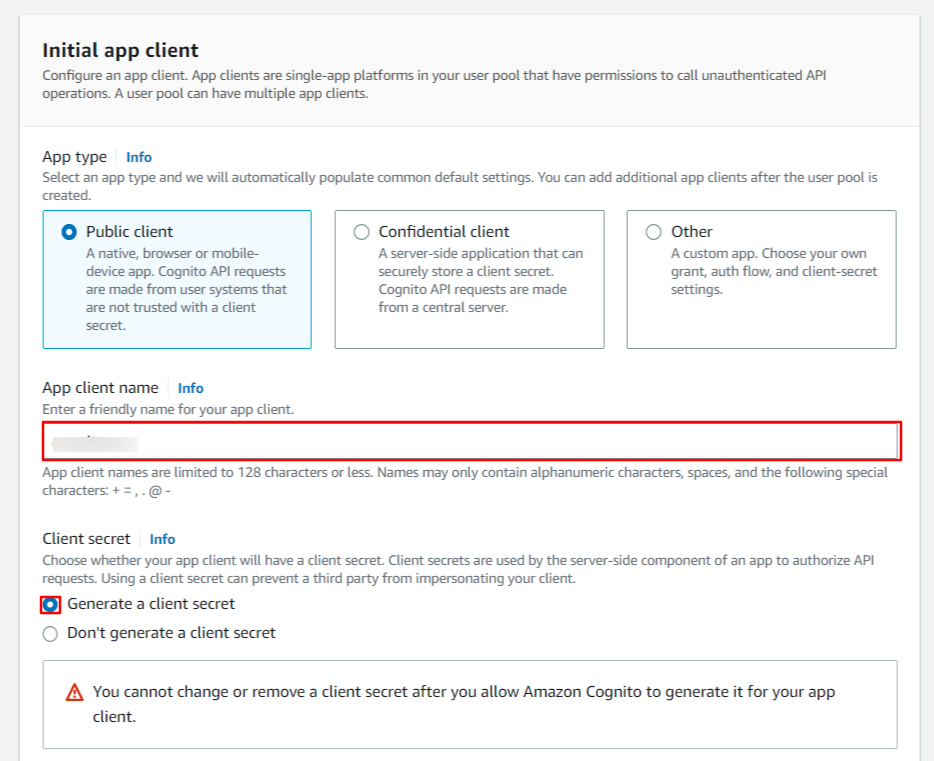
- Under the Initial app client section, Enter a name for your app client and check on Generate a client secret.
- Now enter your Callback/Redirect URL which you will get from your
SAML/OAuth SSO for JSM Customers
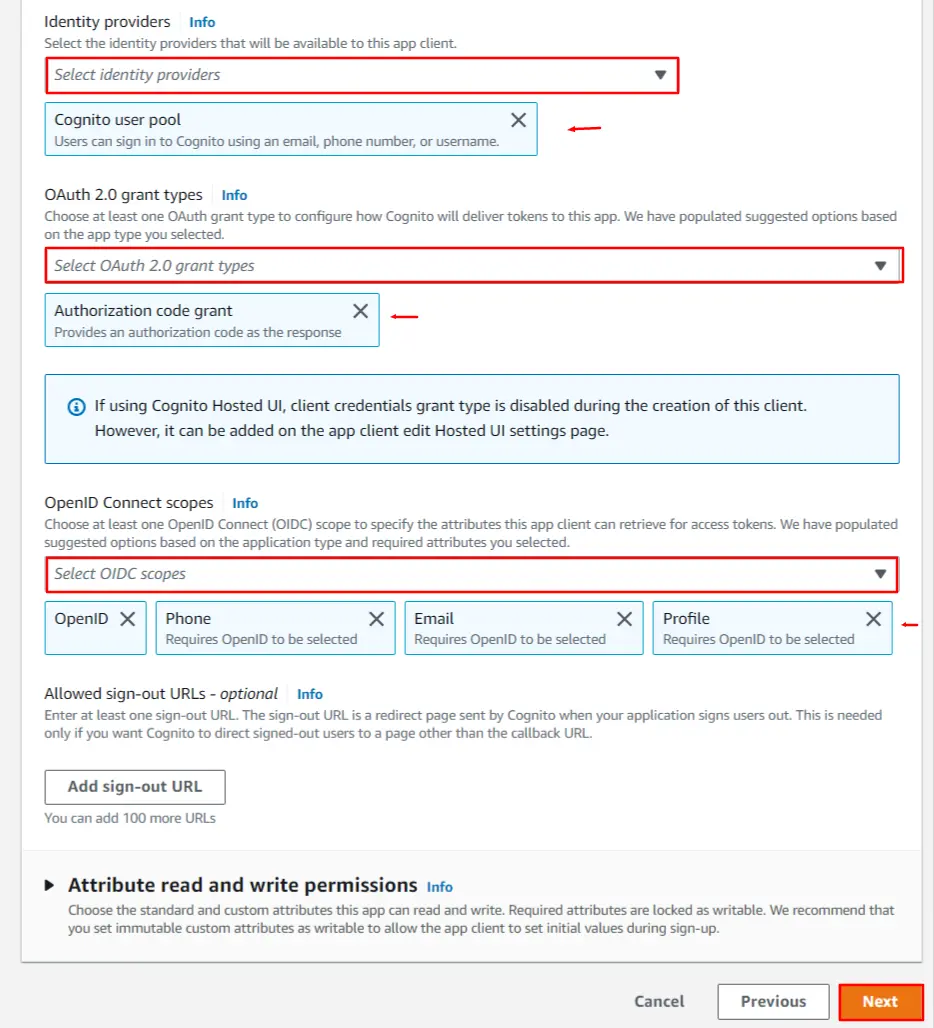
add-on present on your Client side and paste it under the Allowed callback URLs text-field. Also refer the following image for choosing the authentication flows for your app.

- Now, Under Advanced app client settings. Select Identity provider as Cognito user pool & Select Authorization code grant under the OAuth 2.0 grant types and also select openid,email and profile checkboxes under the OpenID Connect scopes section (Please refer to the image below). Click on the Next button to save your configurations.
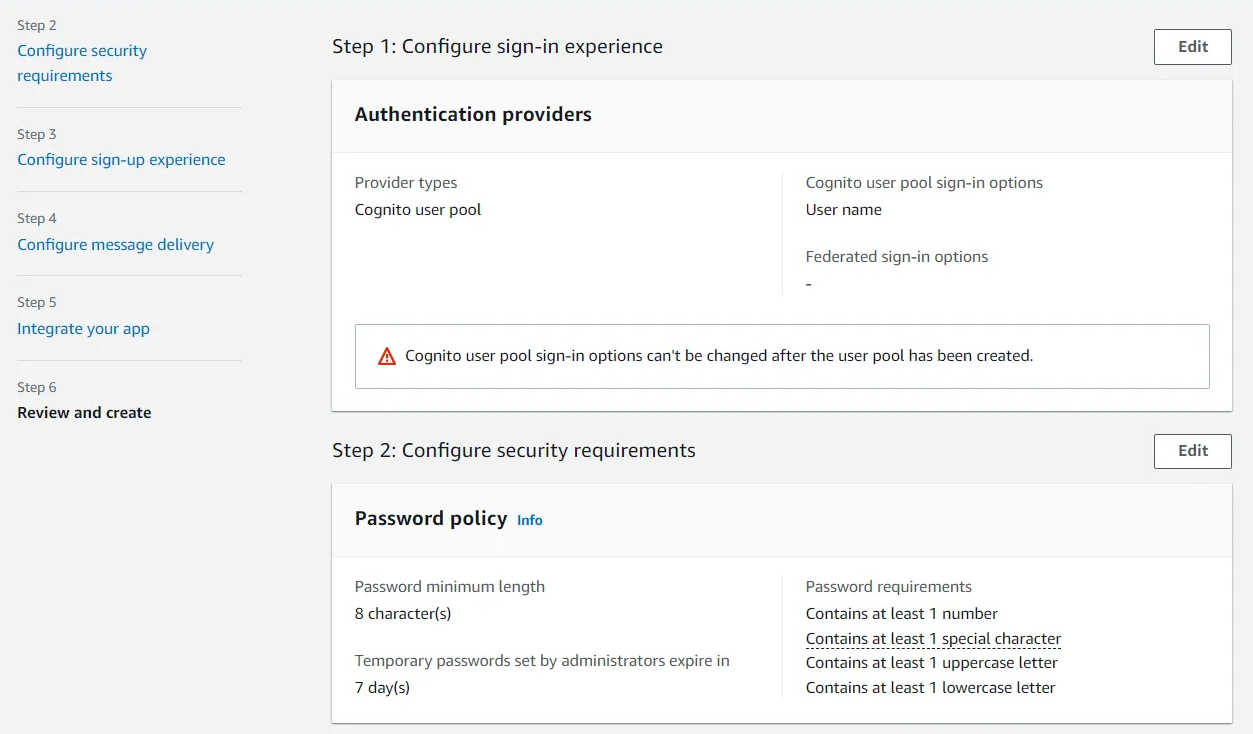
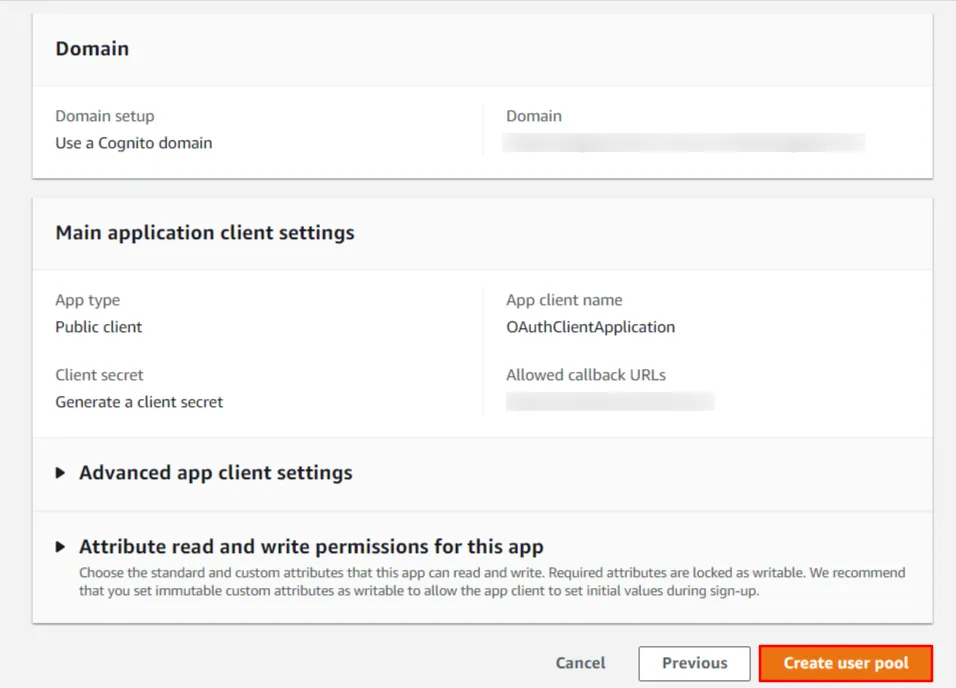
- Now, Review your selection of requirements. Click Create user pool to confirm the selection and create a user pool.
- After successfully creating your user pool, Select your pool name from the list of pools to start with user creation.

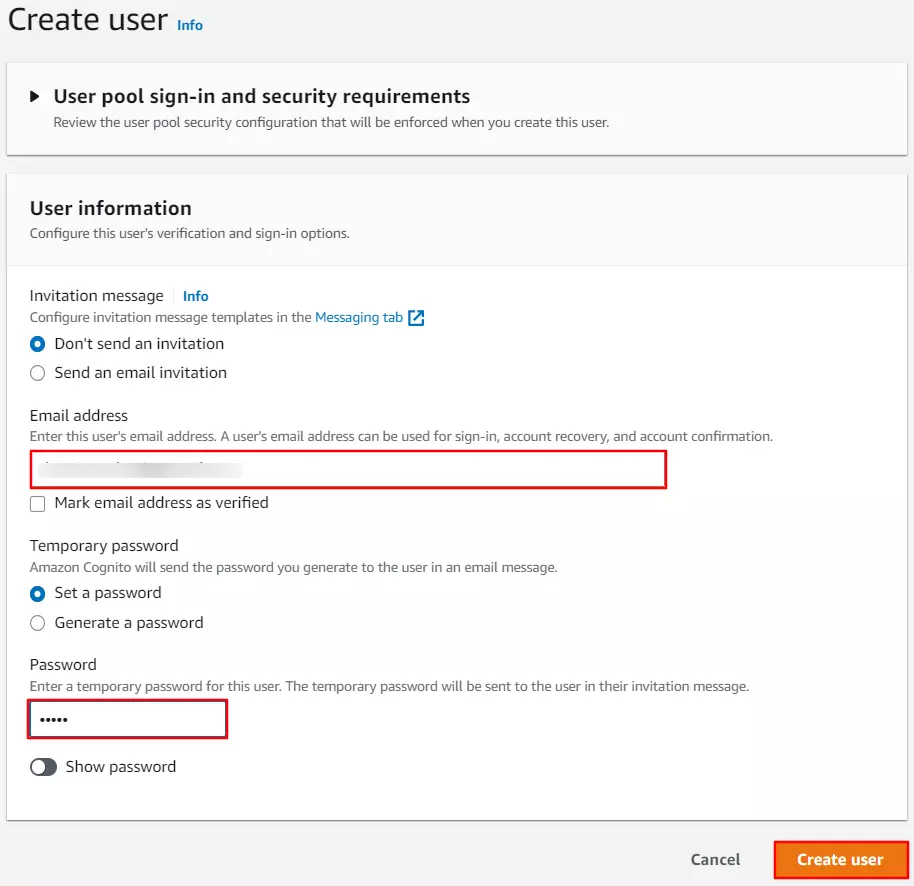
- Go to the Users tab, and click Create user.
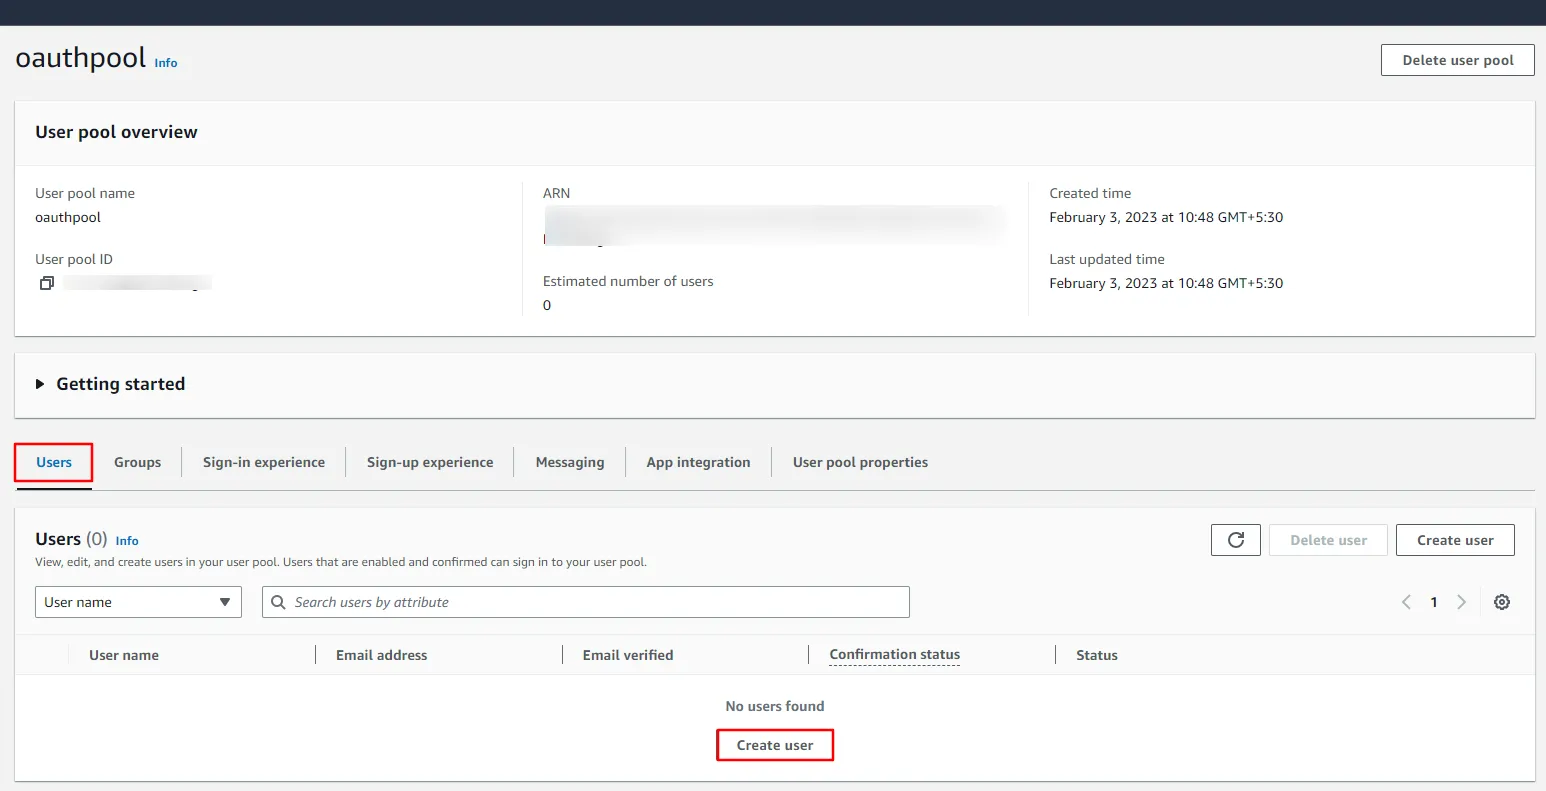
- Enter details such as username, email address & password. Click on Create user to save the details.
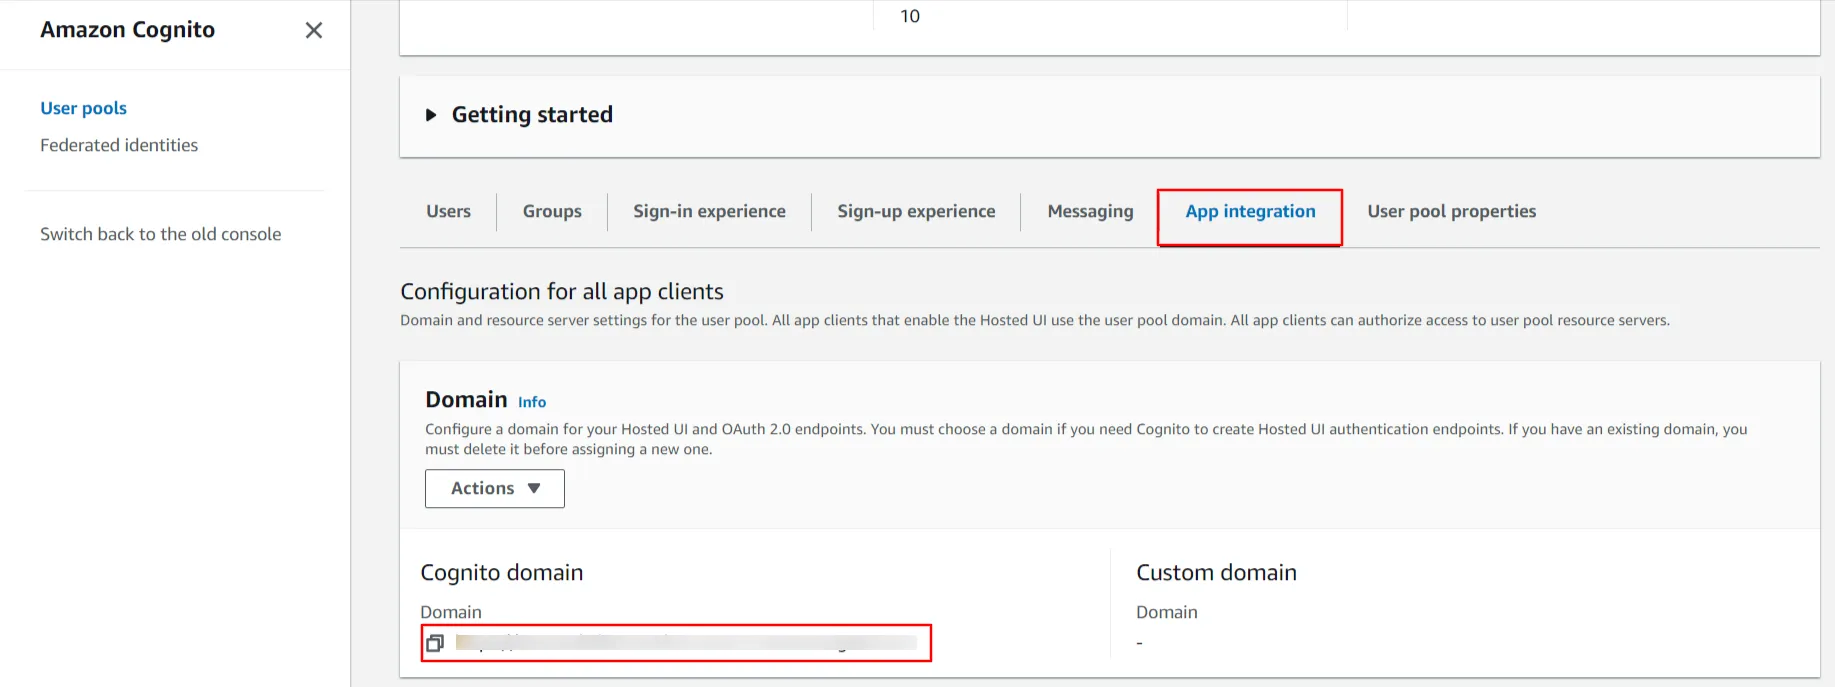
- After the successful creation of the user, you will need a copy of the Cognito domain, Client ID, and Client Secret. Go to the 'App Integration' section and copy the complete domain name {your domain name}.auth.{region name}.amazoncognito.com.
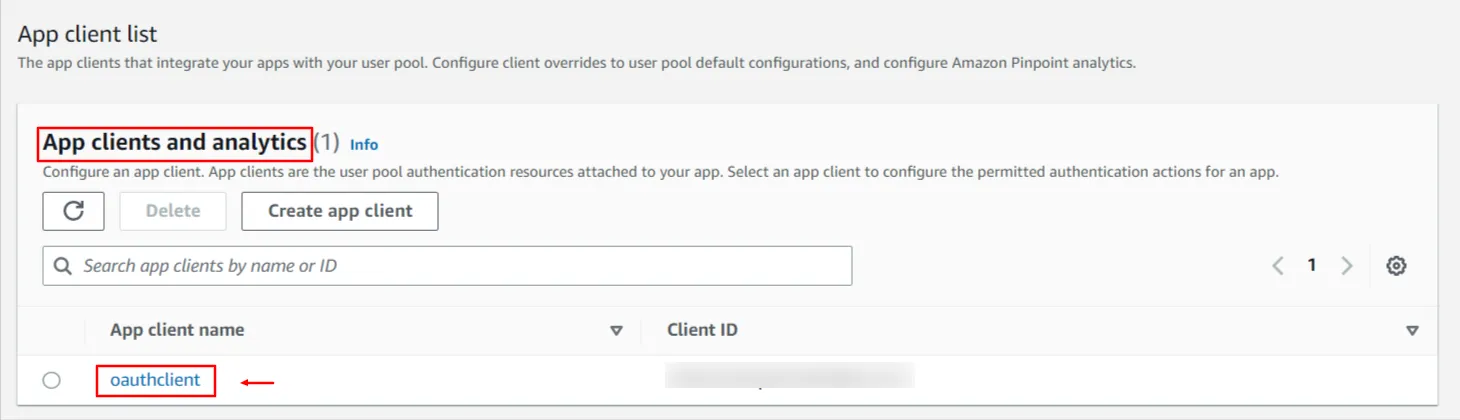
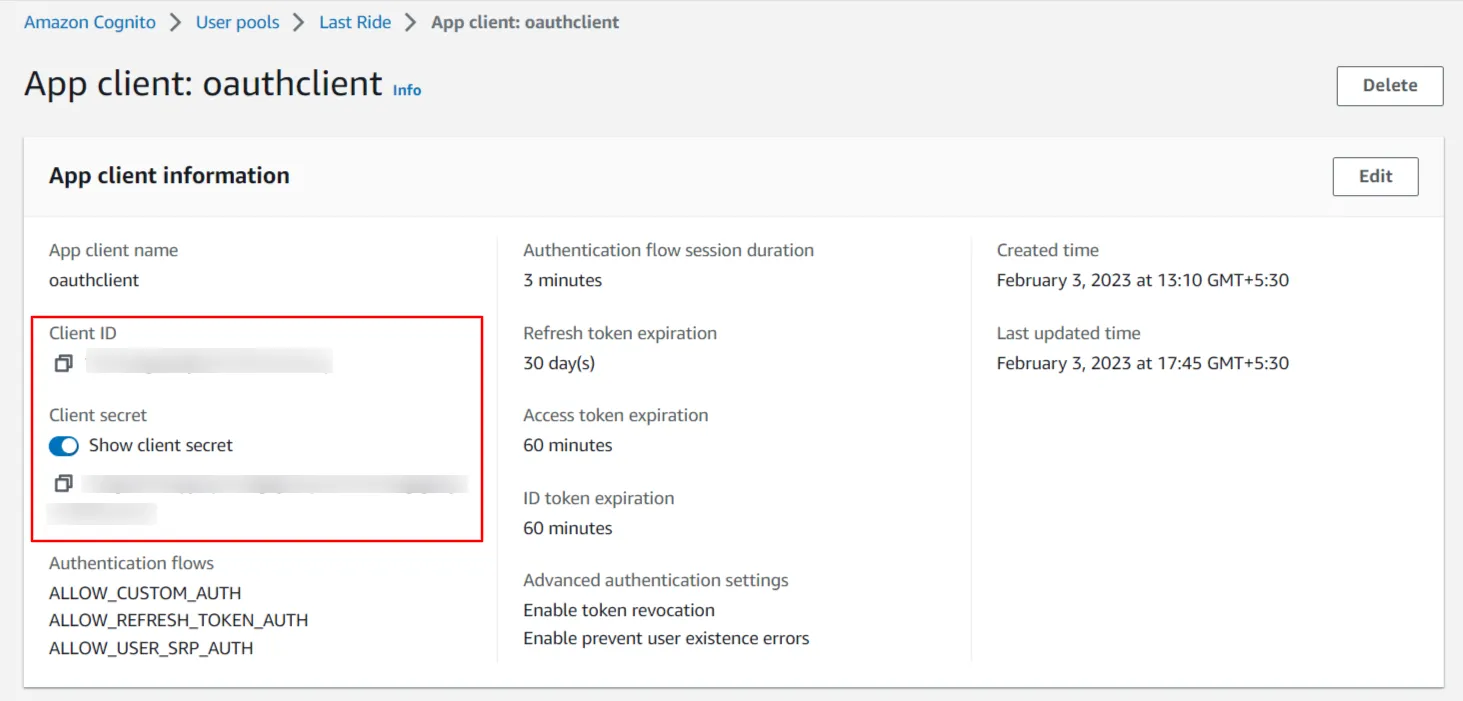
- To get the Client ID and Client Secret, stay on the same 'App Integration' tab and scroll down to the 'App clients and analytics' section. Click on your App client name to see the Client ID and Client Secret.
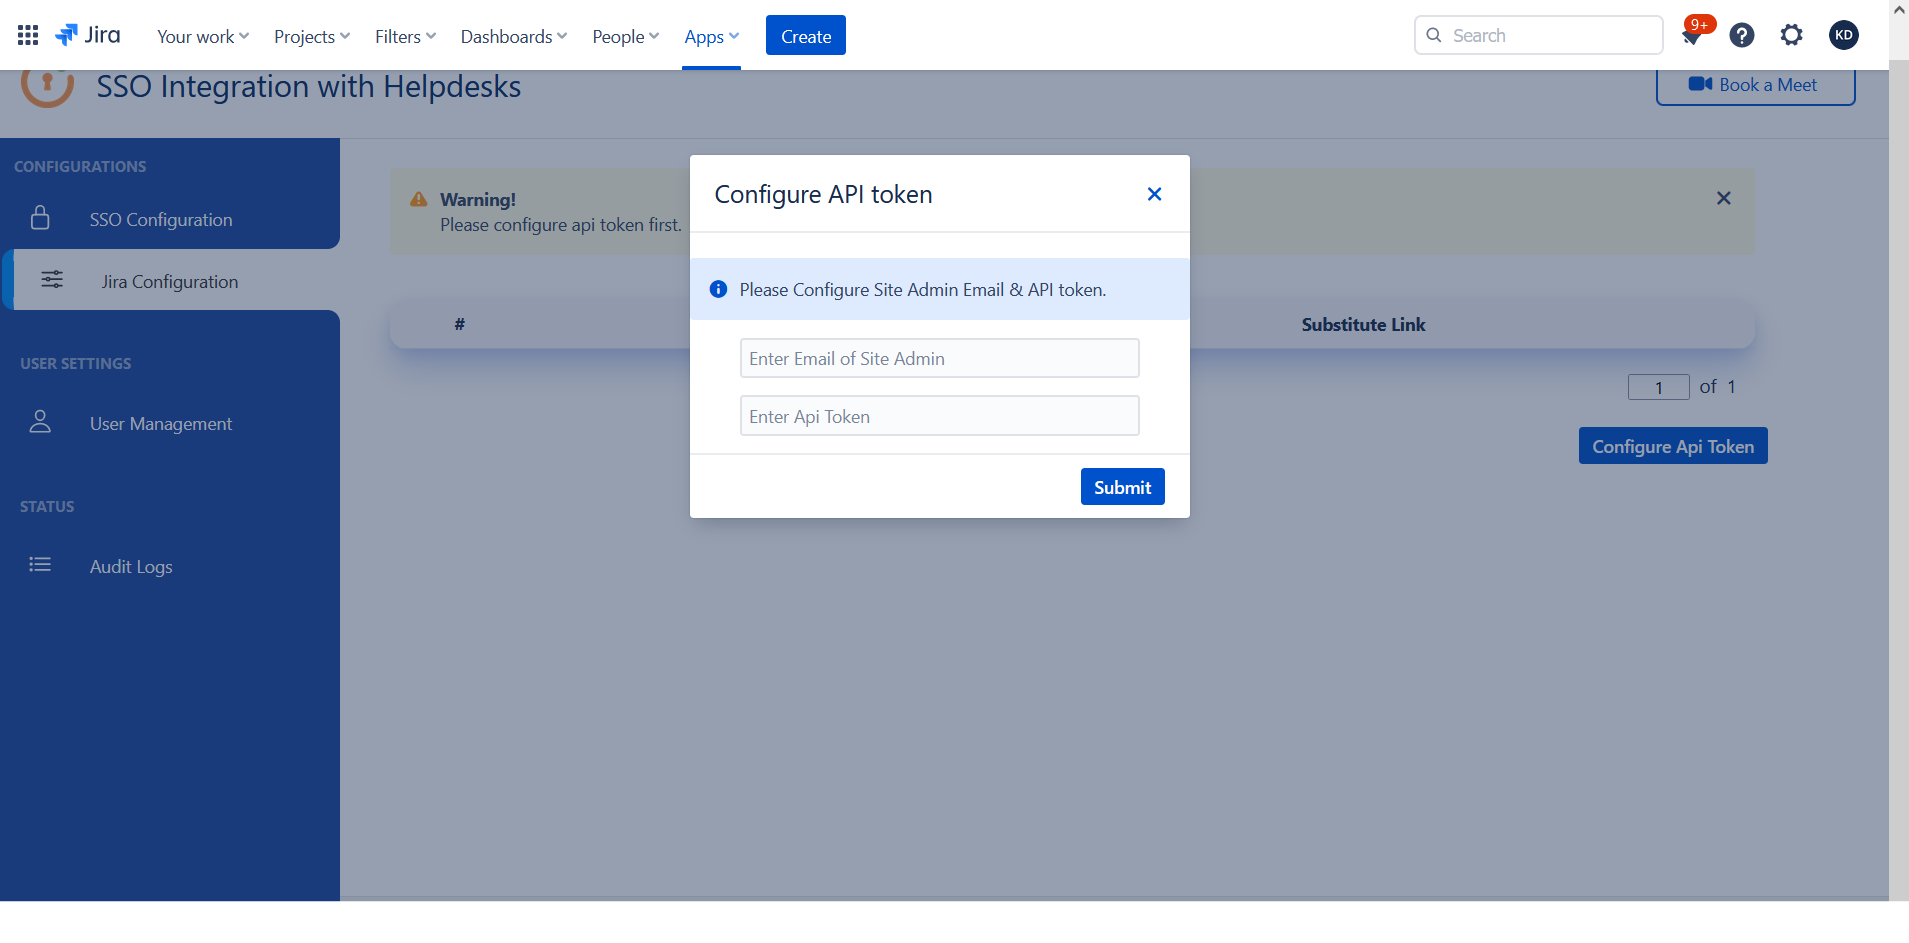
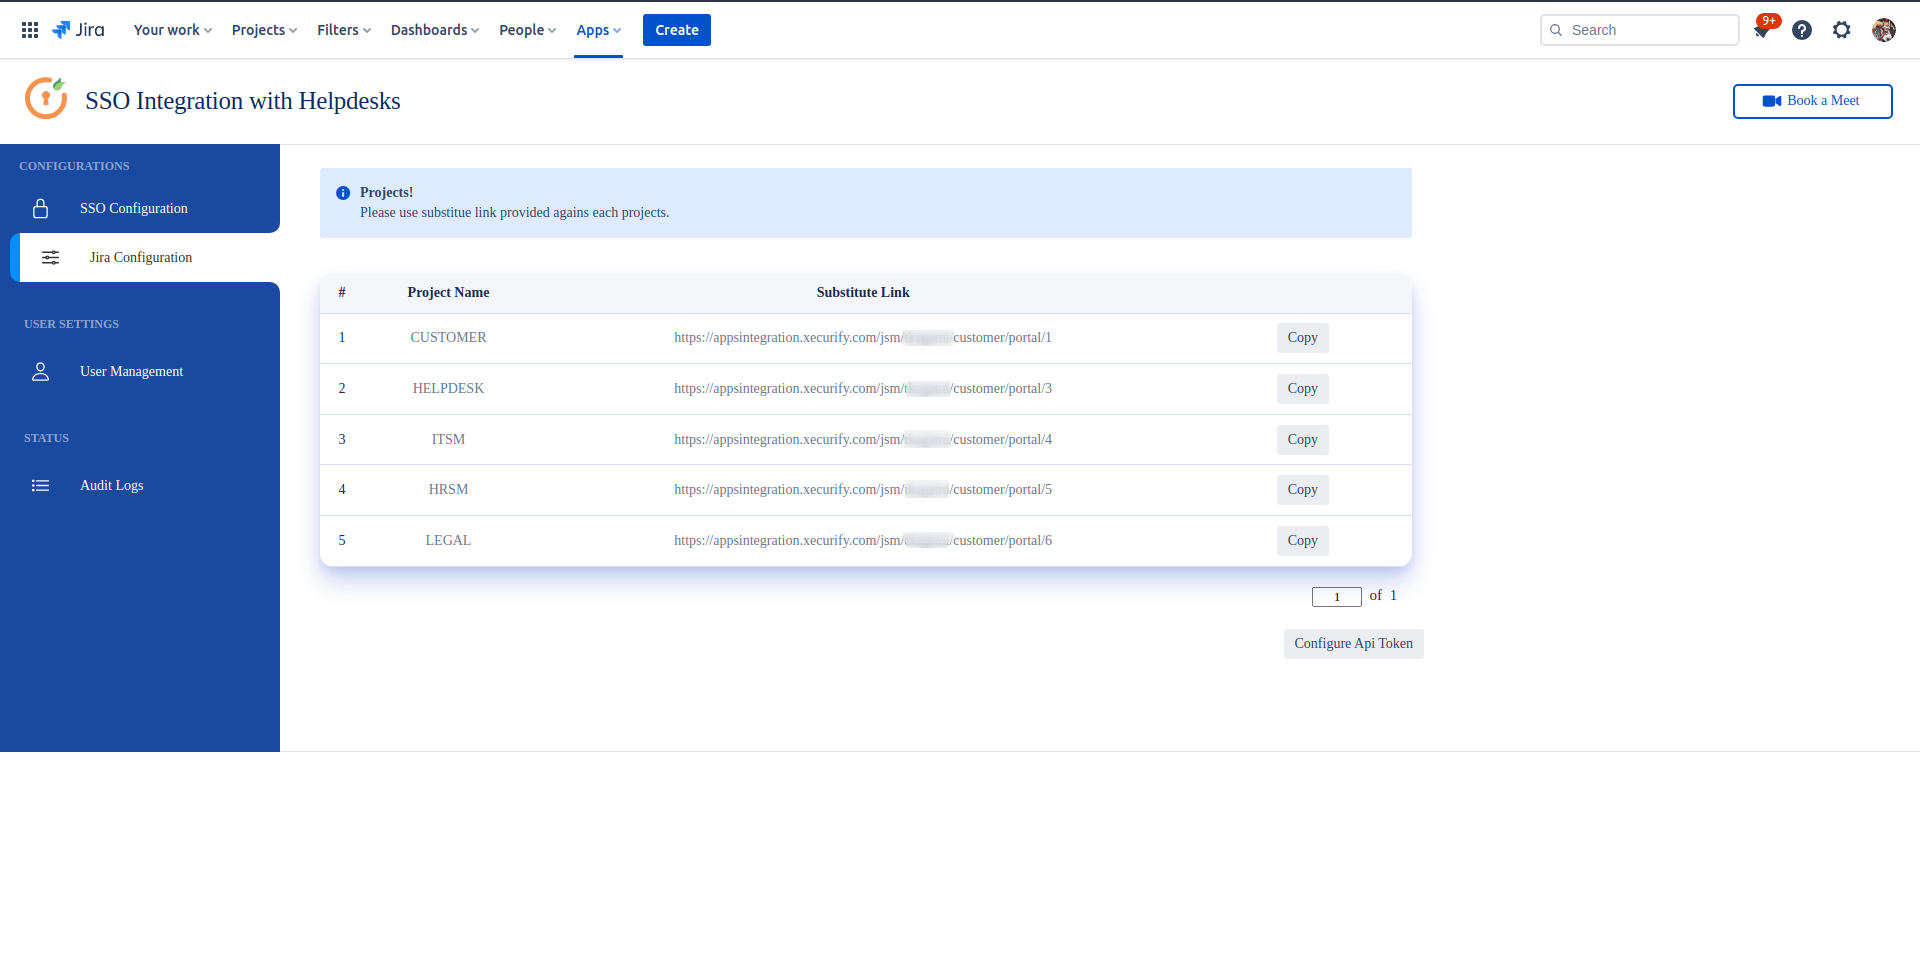
Step 2: Setup JSM as OAuth Client
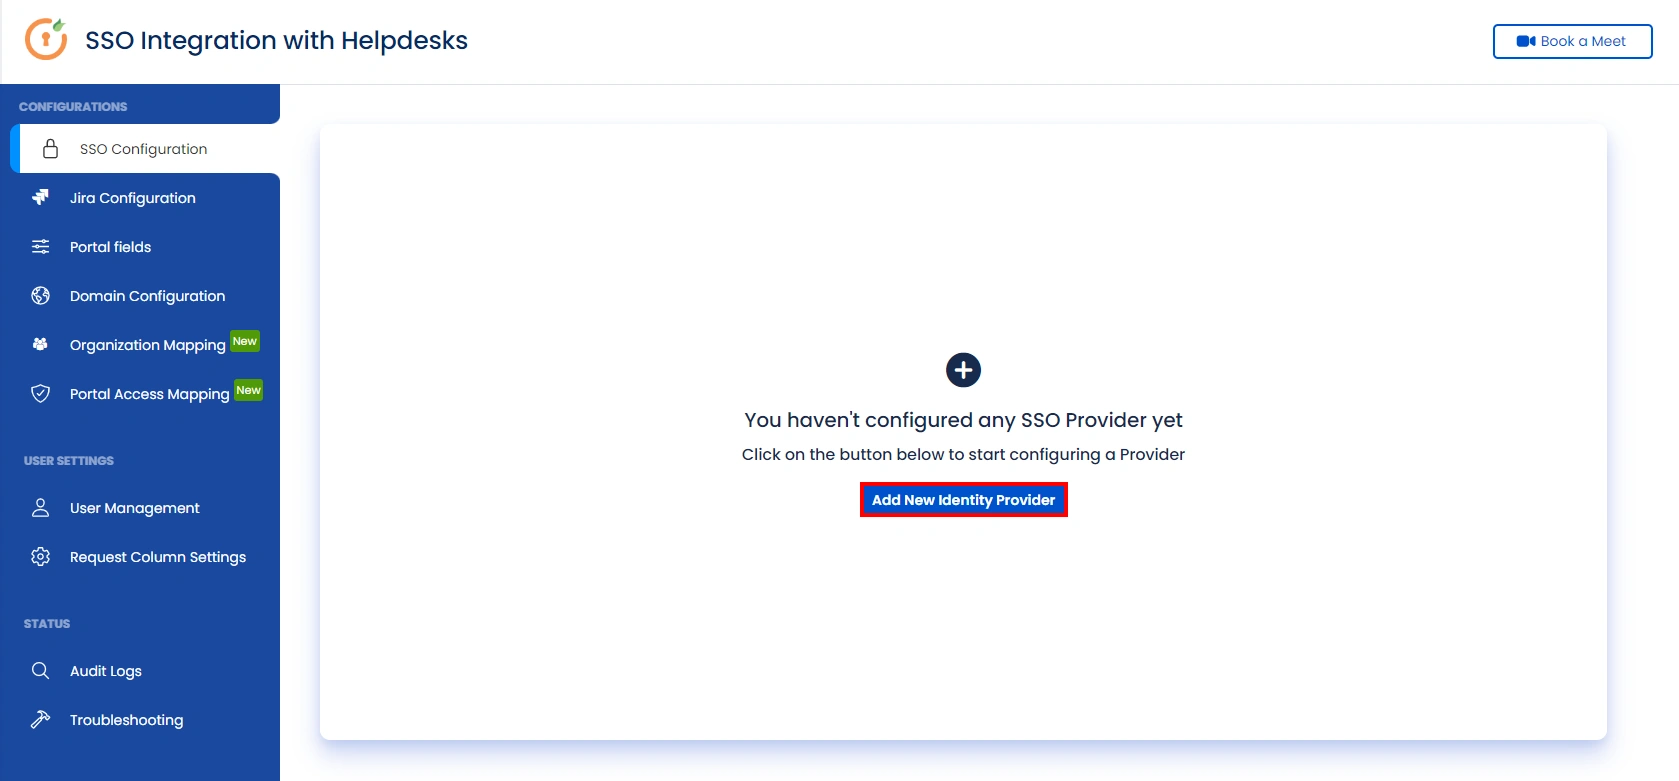
- Go to the Manage Apps -> click Getting started under SSO Integration with Helpdesk. then click on the Add New Indentity Provider.
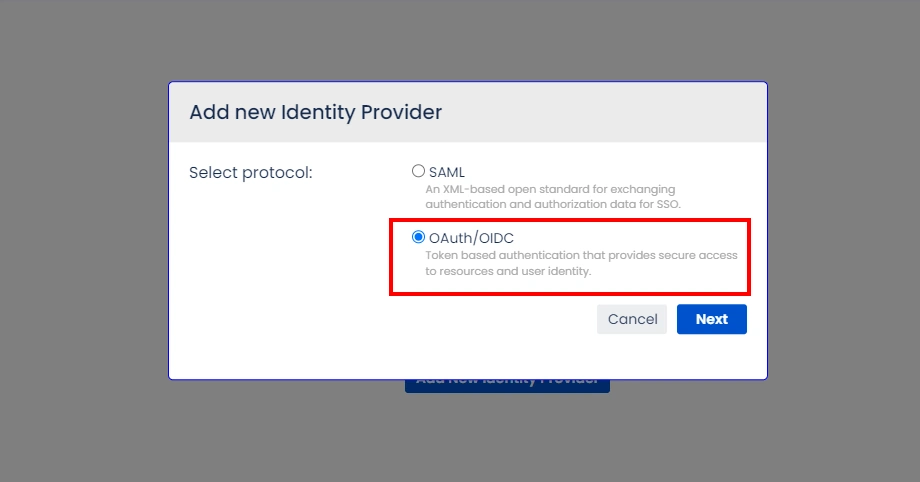
- Select OAuth/OIDC and click on the next button.
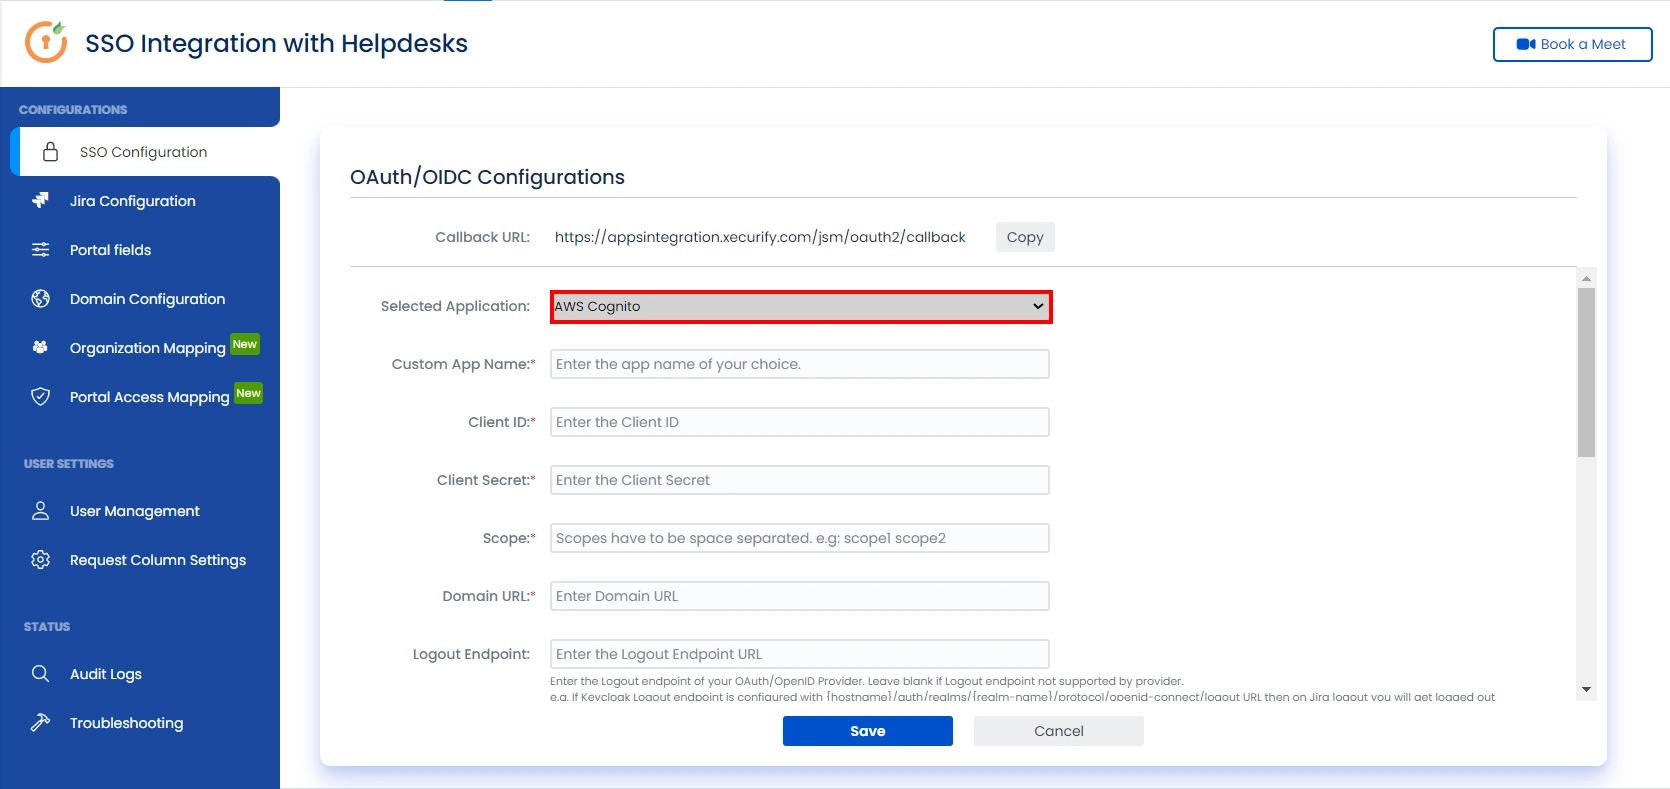
- Select your preferred IDP from the dropdown. If your preferred IDP is not present, select custom IDP.
- Enter Client Id, client secret & AWS Cognito Domain name as {your domain name}.auth.{region name}.amazoncognito.com
- Add https://{domainName}/logout?client_id={ClientID}&logout_uri={Sign out URL} in logout endpoint. This endpoint will logout you from cognito when you logout from JSM customer portal.
- Scope is required. Configure Scope as openid.
- Click on Save button and then test configuration for verifying the entered details.
Step 3: User Attribute Mapping
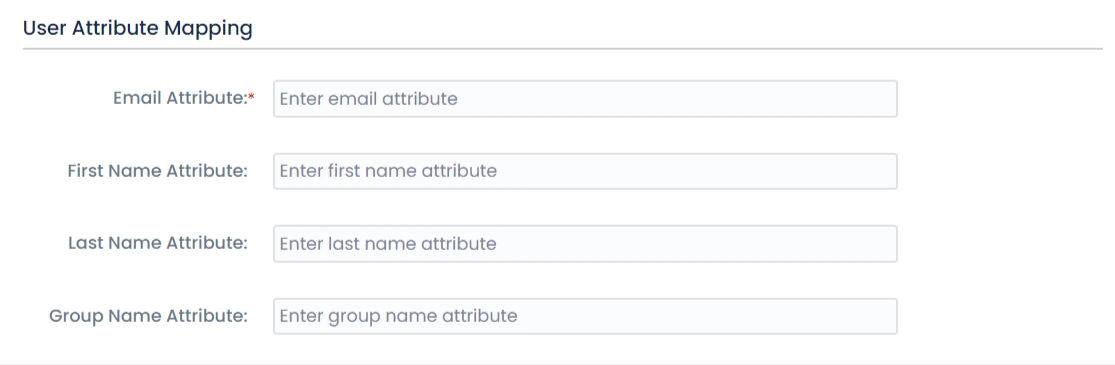
- Once you see all the values in Test Configuration, go to User Attribute Mapping. Map attributes like Email, firstname, lastname, etc. Click on Save.
Step 4: Integrate Atlassian HelpDesk with JSM SSO