Hello there!
Need Help? We are right here!
Need Help? We are right here!
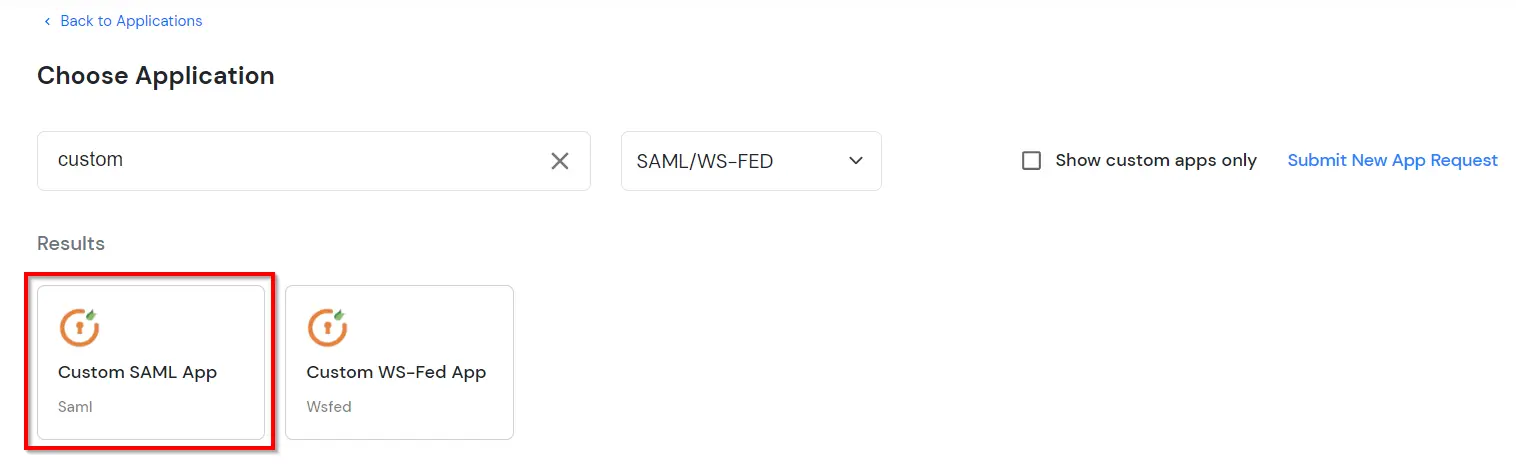
Search Results:
×Fortinet Single Sign-On (FSSO) solution by miniOrange provides you with secure Single Sign-On access to multiple On-Premise and Cloud Applications using a single set of login credentials. With miniorange’s Identity Provider (IDP) service you can use SSO to login to multiple applications using a single Fortinet username and password. Looking at another way, if your users are in any third-party Identity Providers (Azure Active Directory, Okta, Auth0) and you want your users to log into Fortinet (Fortigate) using existing IDP credentials, you can easily allow them to use SSO to login securely.
miniOrange provides user authentication from various external sources, which can be Directories (like ADFS, Microsoft Active Directory, OpenLDAP, AWS etc), Identity Providers (like Microsoft Entra ID, Okta, AWS), and many more. You can configure your existing directory/user store or add users in miniOrange.
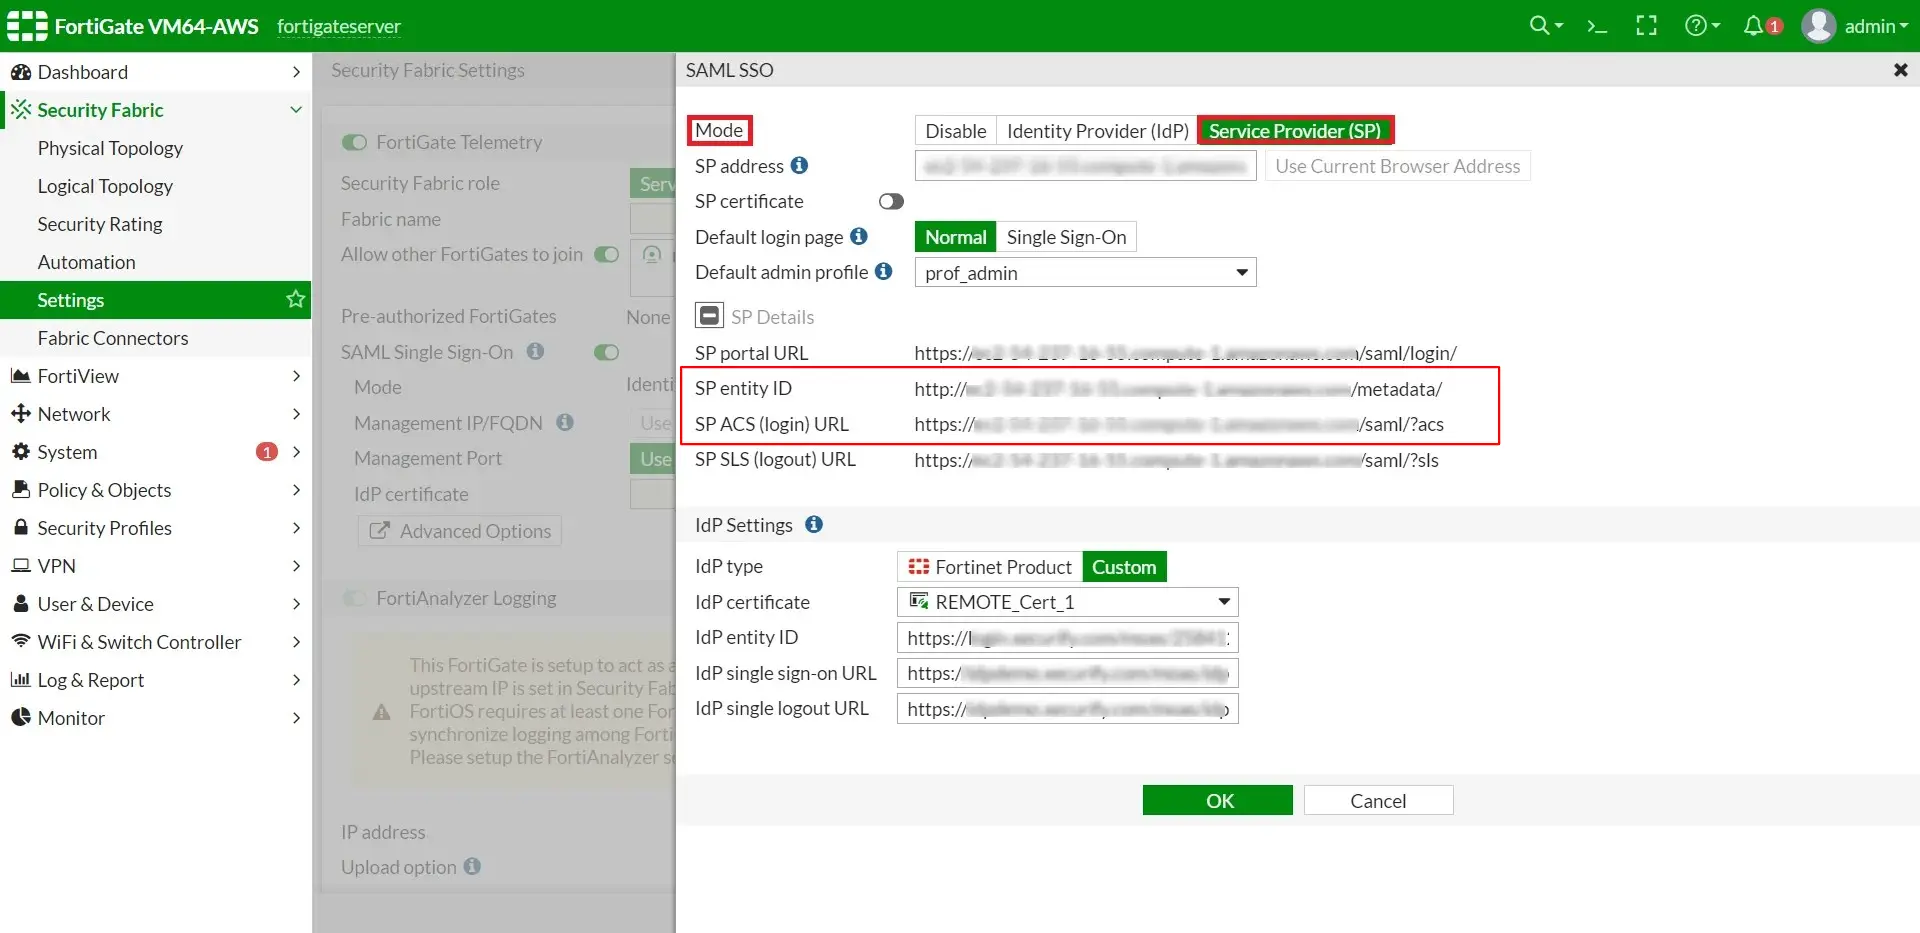
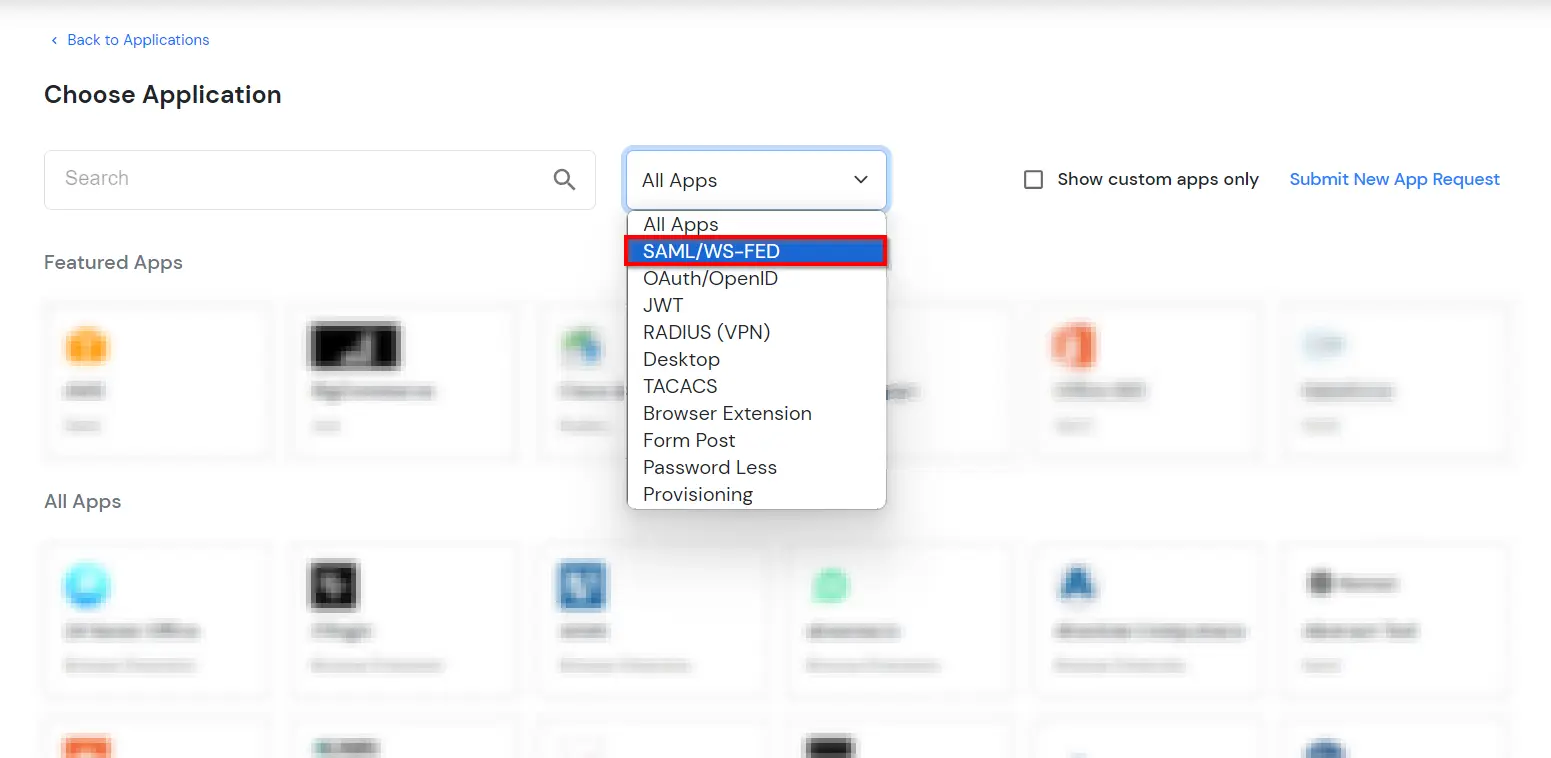
| SP Entity ID | SP Entity ID or Issuer from the Prerequisites. |
| Assertion Consumer Service | ACS URL from Prerequisites. |
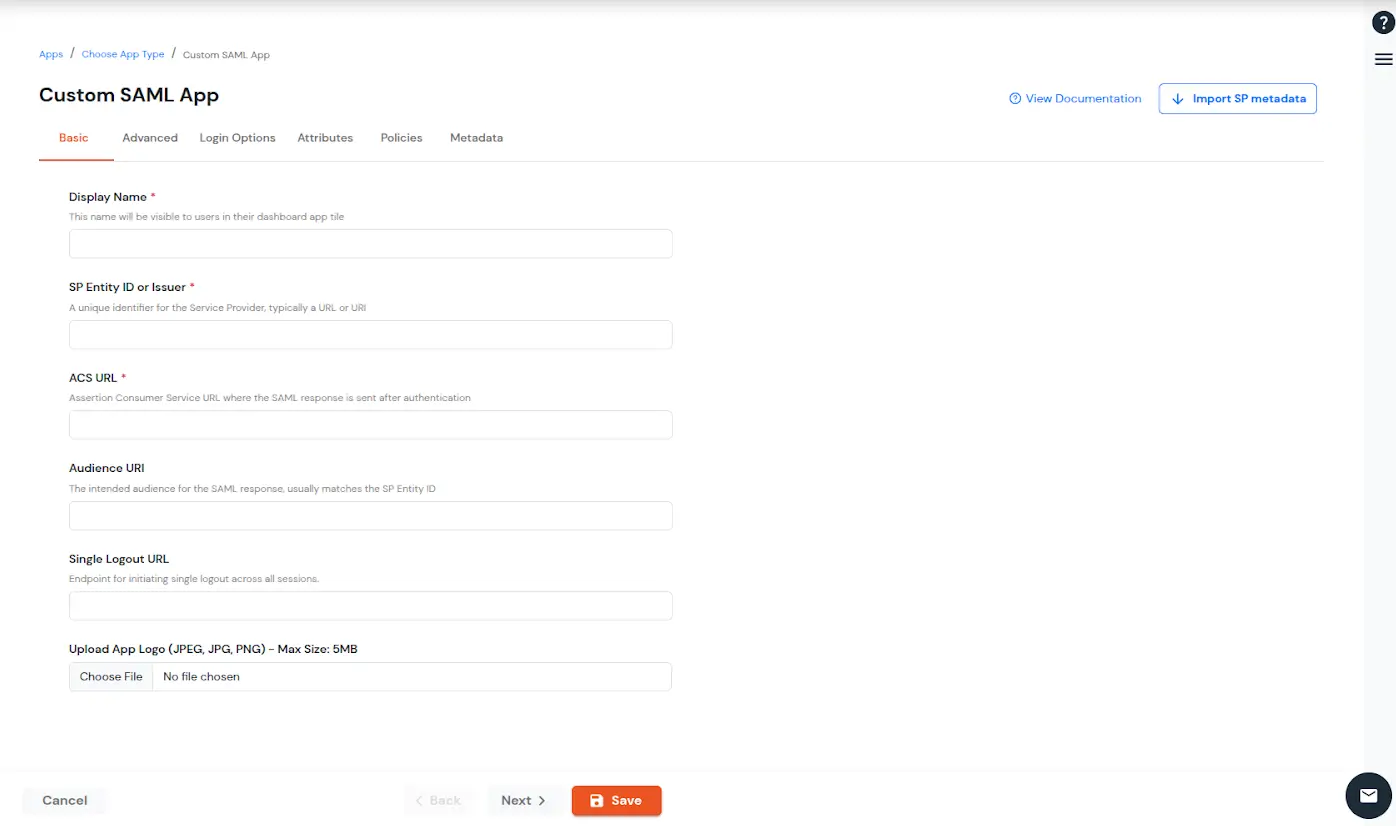
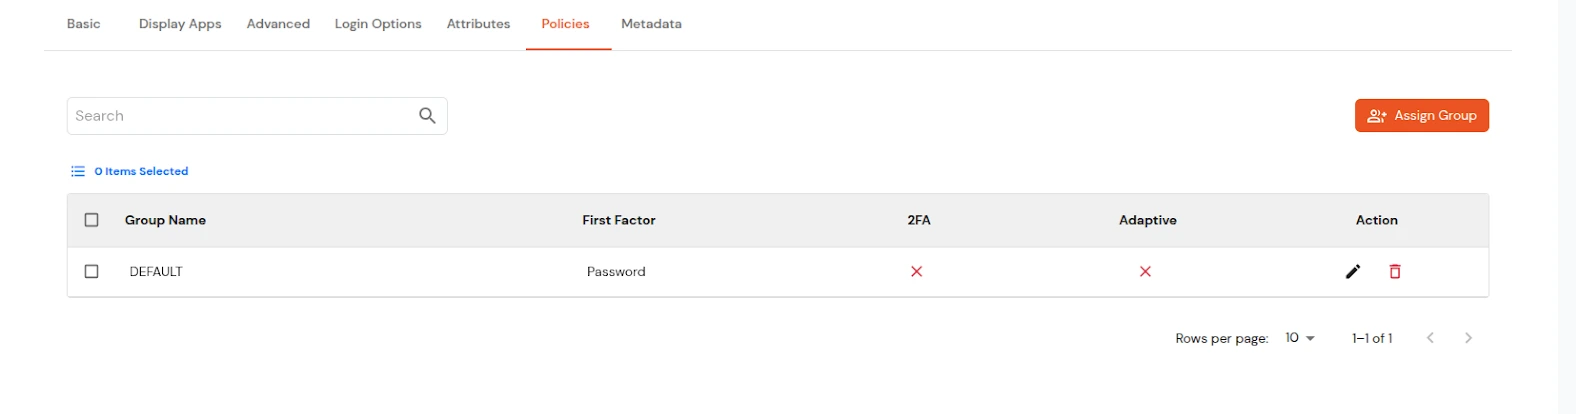
| Primary Identity Provider | Select the identity source from where you want the authentication to happen. You will see the list of all configured sources. |
| Force Authentication | Enable this to enforce authentication on each request to access the application. |
| Show On End User Dashboard | Disable this if you do not want the app to be visible for all users on end user dashboard. |

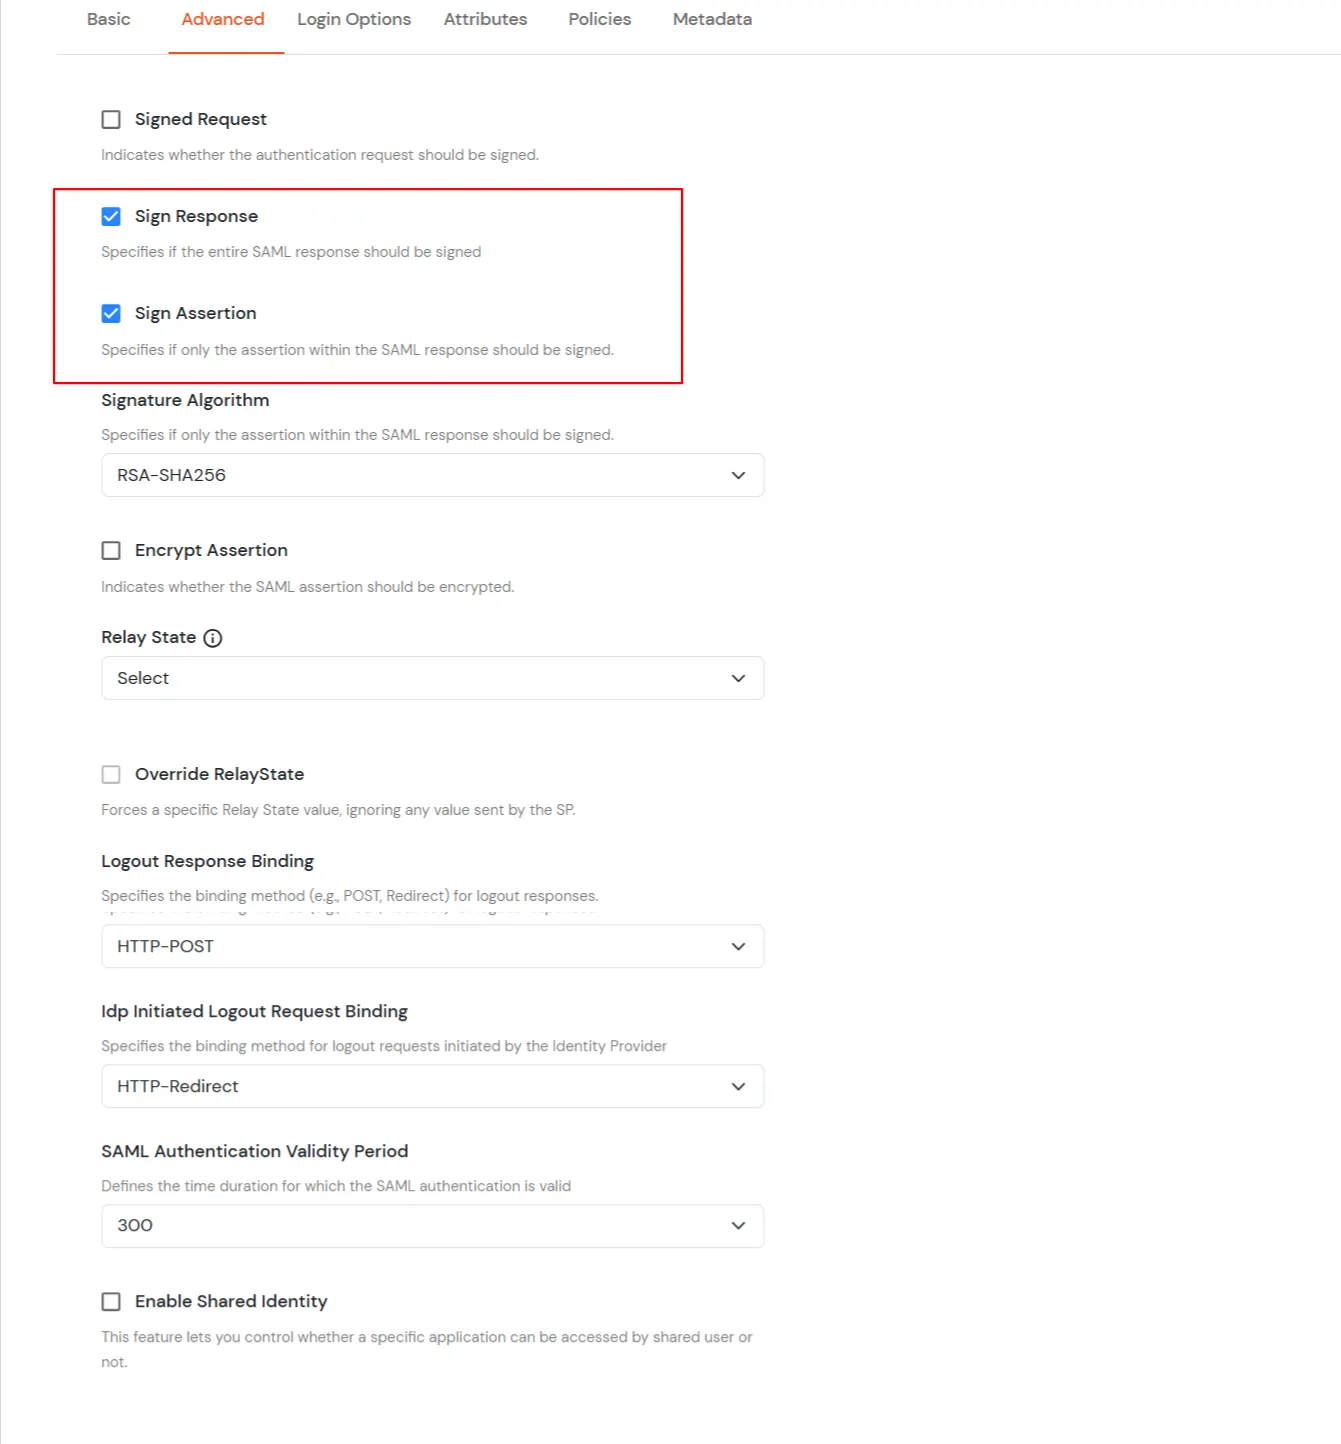
| NameID | NameID is the unique identifier for the authenticated user included in the SAML assertion. It allows the Service Provider to recognize and map the user to an account. Generally, NameID is a username or Email Address. |
| NameID format | Defines what type of identifier is used in the NameID (e.g., email, persistent, transient) so the SP can correctly map the user. If the SP does not request a specific format, the IdP can leave it unspecified and use a default. |
| Add Name Format | Name Format defines how attribute names are represented in a SAML assertion (e.g., as simple strings or URIs). It helps the SP correctly interpret attribute naming and ensures consistency between IdP and SP. |
| Enable Multi-Valued Attributes | Enabled: Commas (,) and semicolons (;) are treated as separators, so the attribute is split into a clean list. Example: roles = ['admin', 'editor', 'viewer']. Disabled: Commas and semicolons are not treated as separators, so the attribute stays as one combined string. Example: roles = "admin;editor;viewer". |
| Attribute Mapping | You can Add Attributes to be sent in SAML Assertion to SP. The attributes include user’s profile attributes such as first name, last name, full name, username, email, custom profile attributes, and user groups, etc. |


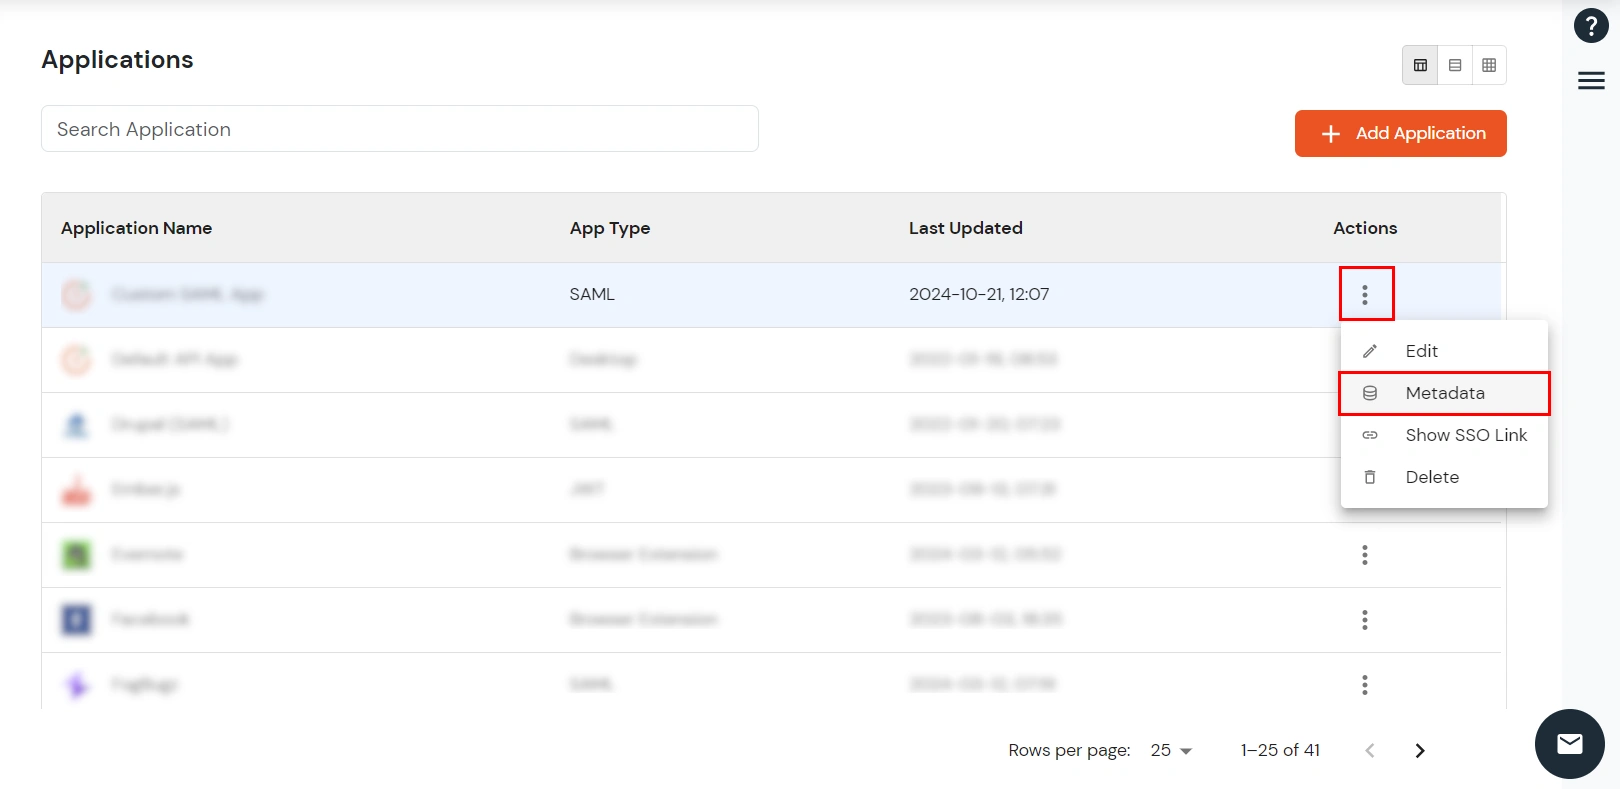
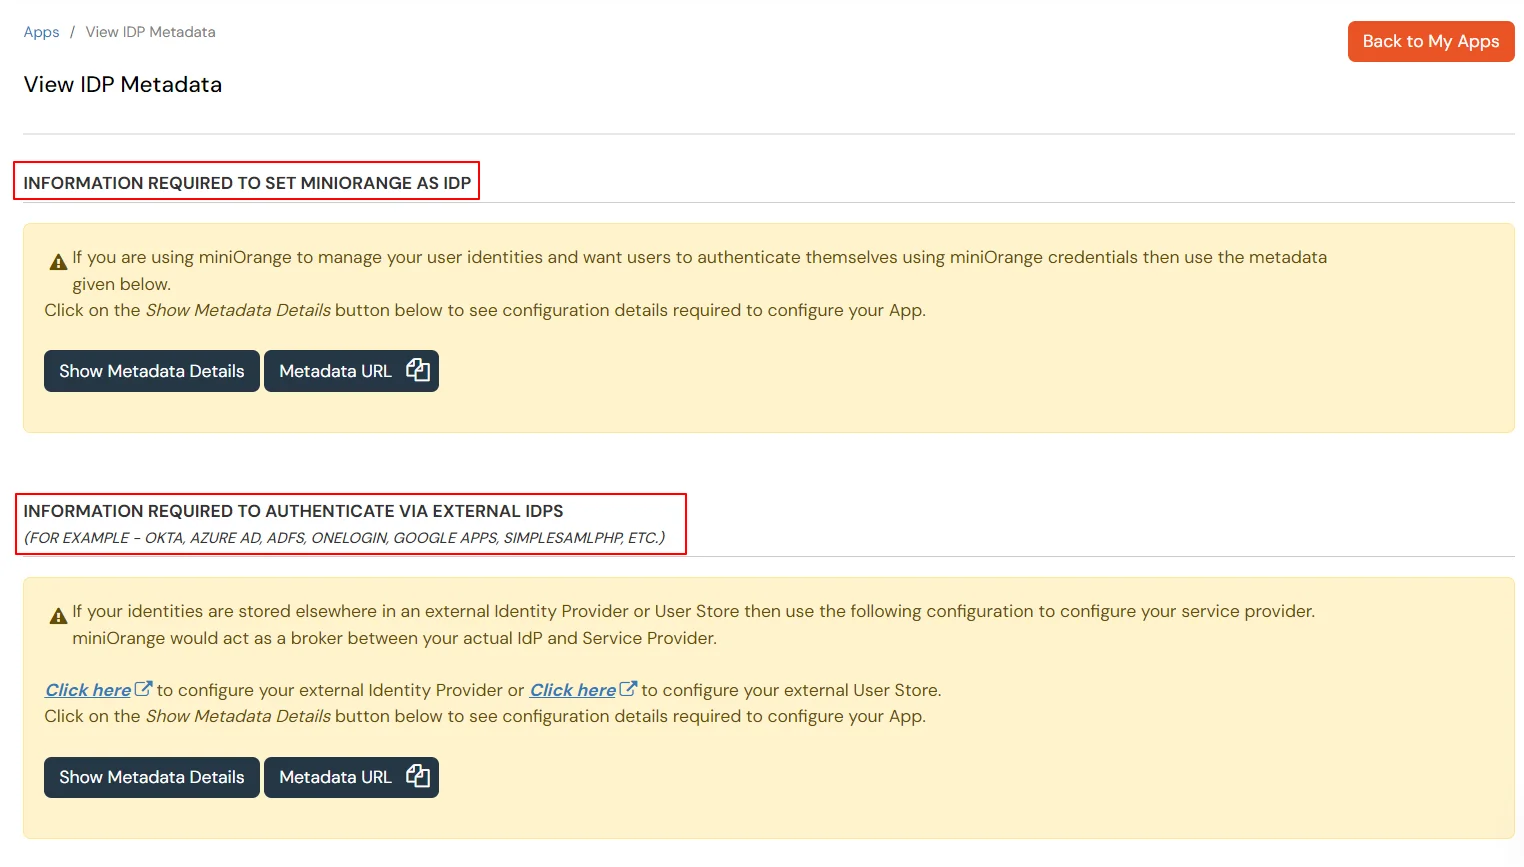
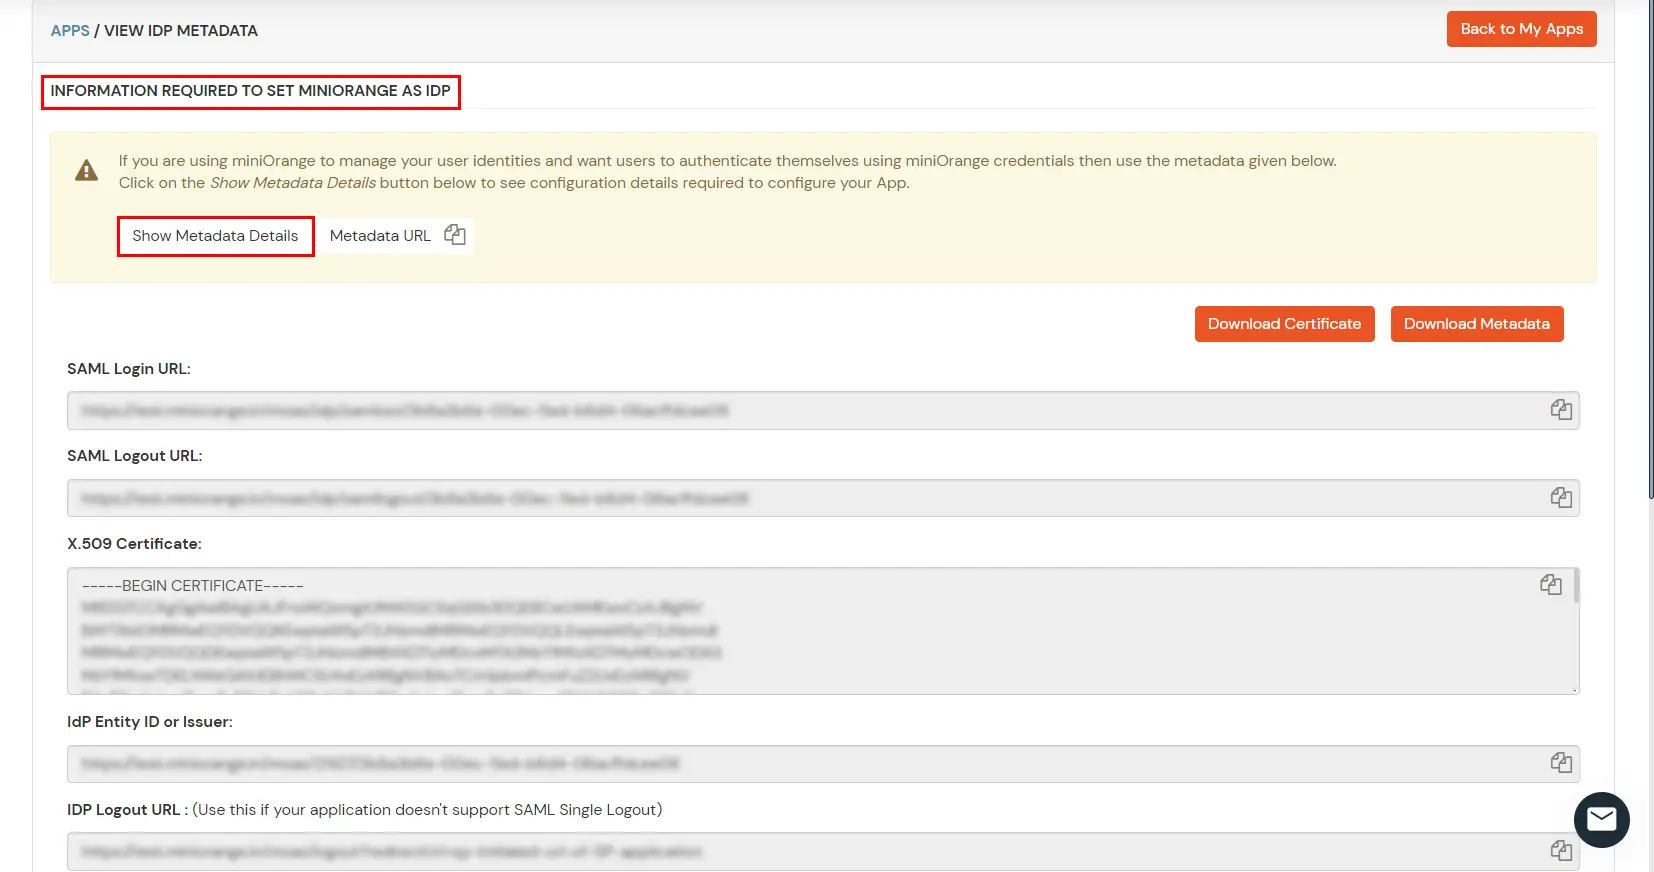
To get miniOrange metadata details in order to configure Fortinet :
| GUI in version 6.2. | Go to User & Device -> SAML SSO |
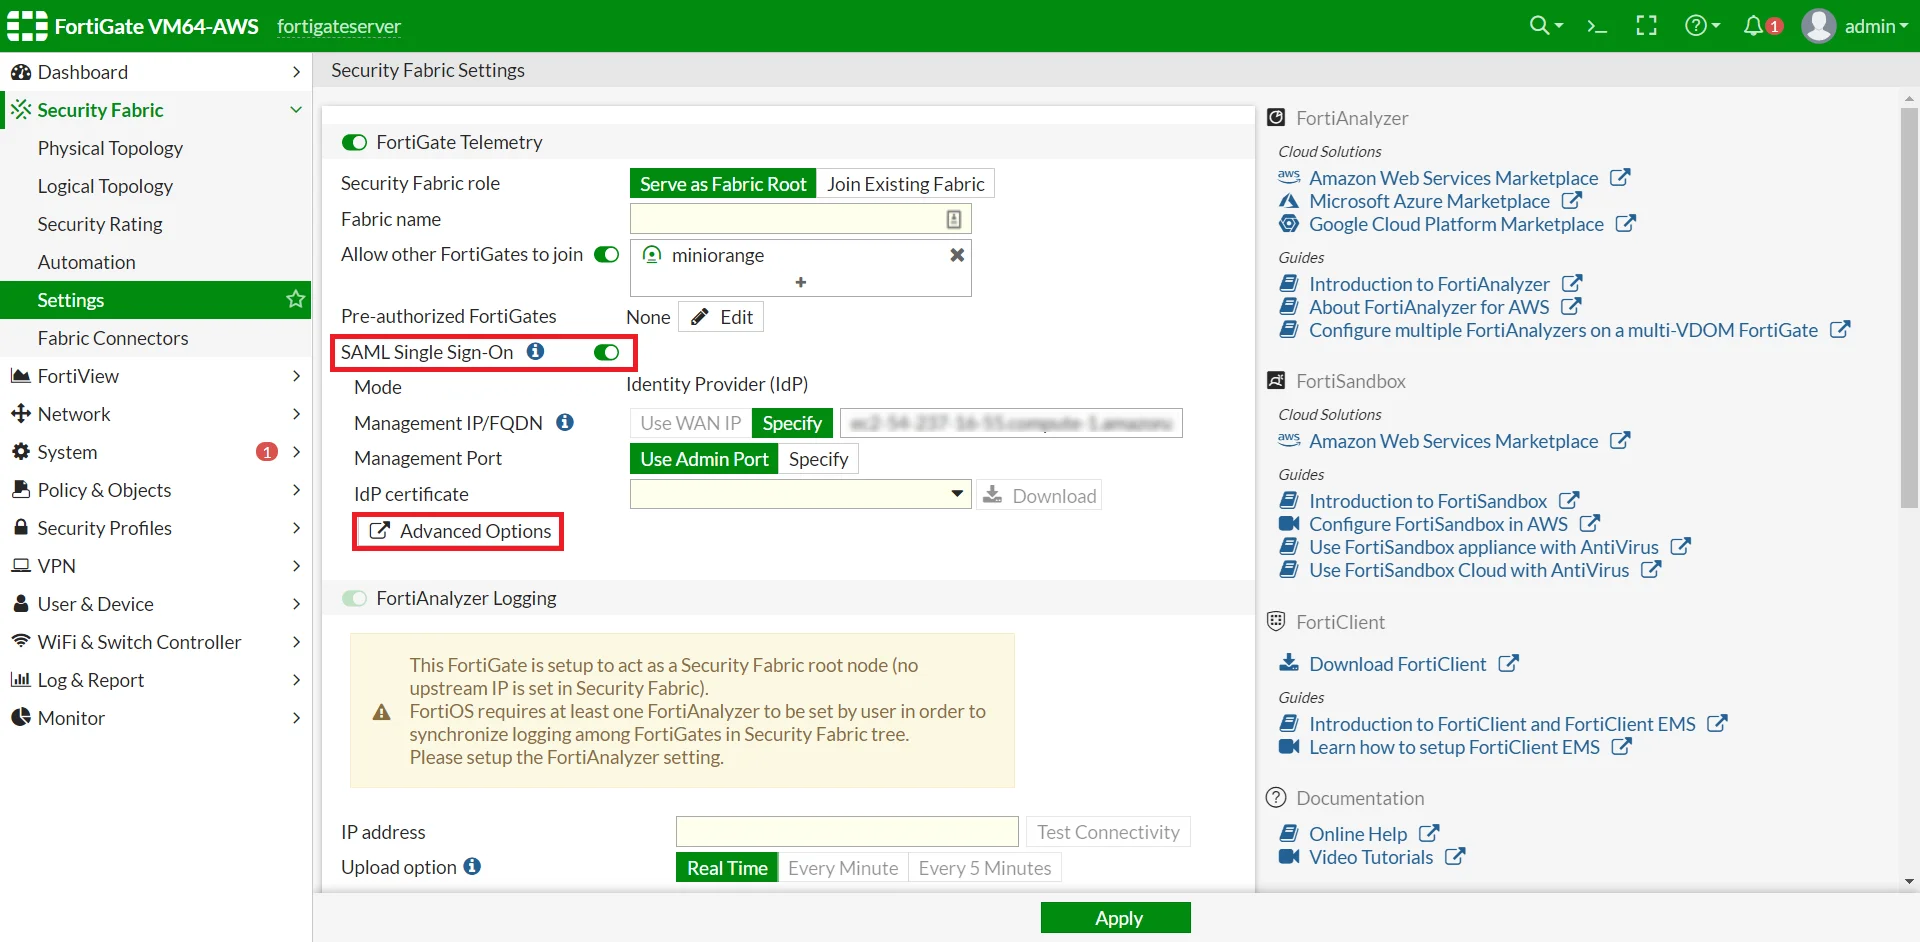
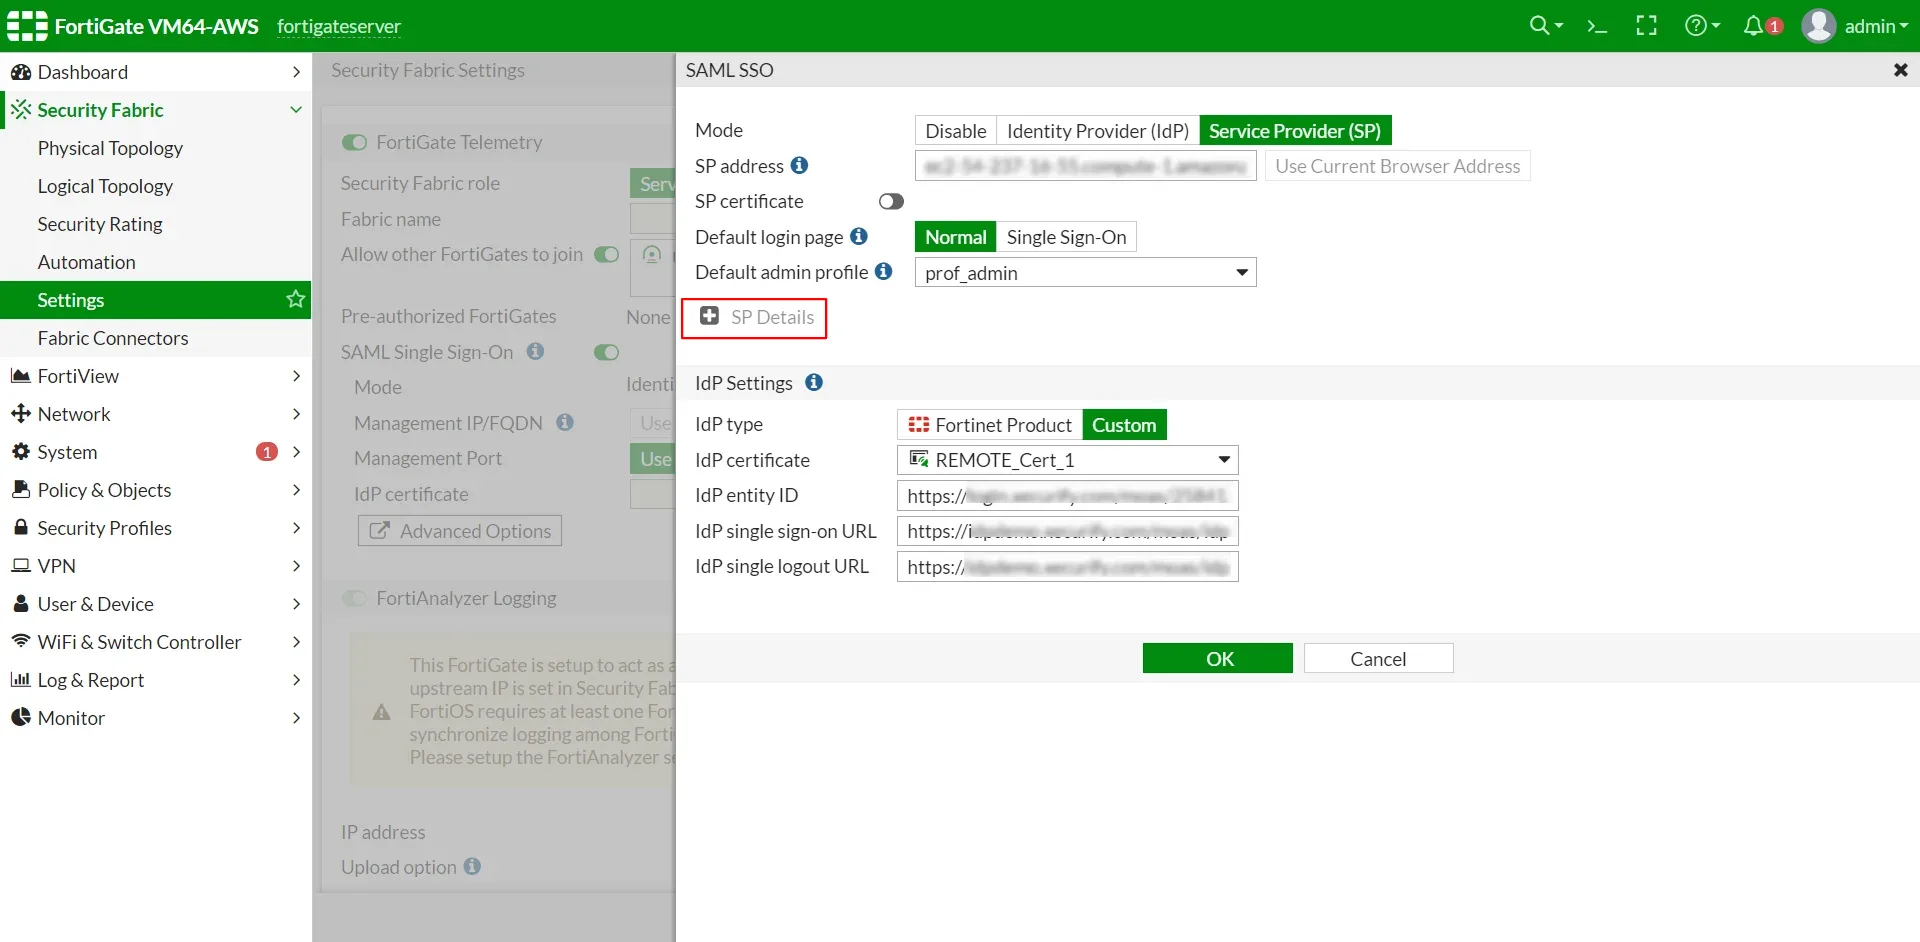
| GUI in version 6.2.3 and above. | Go to Security Fabric -> Settings Enable FortiGate Telemetry, choose a Fabric name and an IP for FortiAnalyzer (can be an unused address) Enable SAML Single Sign-On, Click on Advanced Options |
| GUI in version 6.4 and above | Go to Security Fabric -> Fabric Connectors -> Security Fabric Setup -> Single Sign-On Settings |


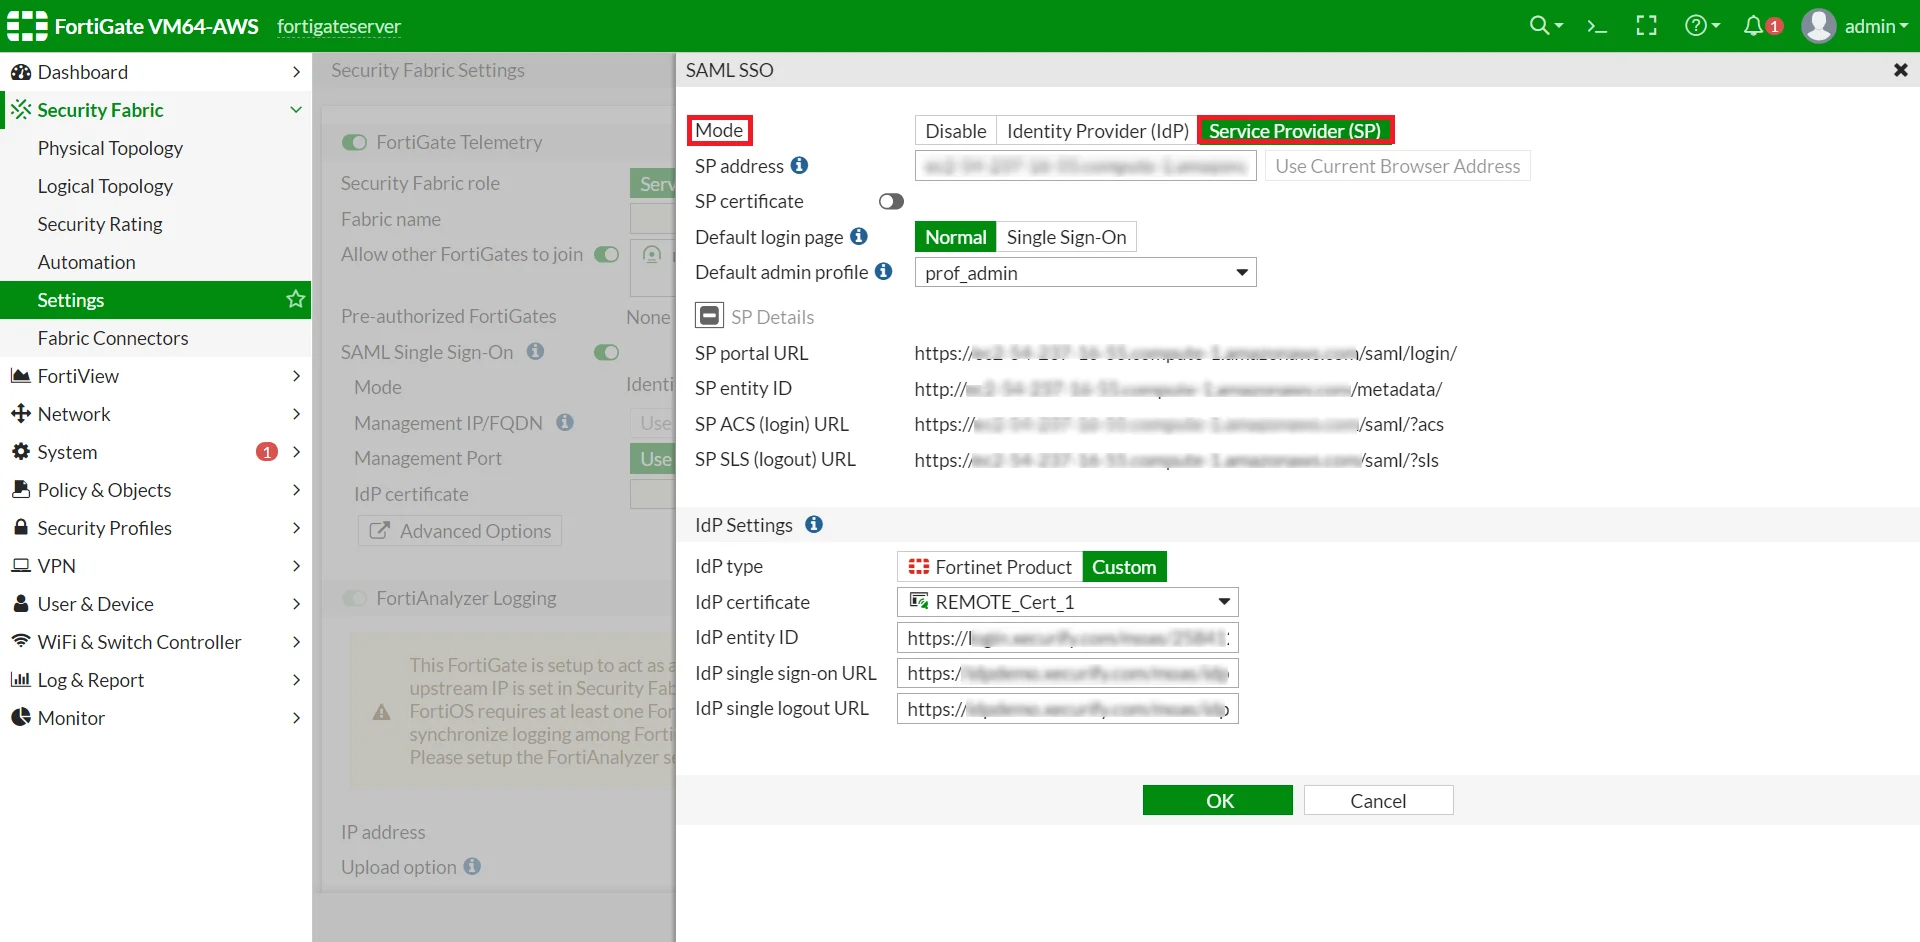
| IDP Entity ID | Entity ID or Issuer in miniOrange |
| IDP Single Sign-On URL | SAML Login URL in miniOrange metadata |
| IDP Single Logout URL | SAML Logout URL in miniOrange metadata |
Test SSO login to your Fortinet account with miniOrange IdP:

Contact us or email us at idpsupport@xecurify.com and we'll help you setting it up in no time.
Fortinet Single Sign-On (FSSO) is an authentication protocol that enables Fortinet security products like FortiGate to transparently identify and authenticate users by monitoring login events within Active Directory or other supported identity stores.
