Hello there!

Need Help? We are right here!

Support Icon
miniOrange Email Support
success

Thanks for your Enquiry. Our team will soon reach out to you.

If you don't hear from us within 24 hours, please feel free to send a follow-up email to info@xecurify.com

Search Results:

×

Media Shuttle Single Sign-On SSO


Single Sign-On (SSO) solution by miniOrange provides secure Single Sign-On access into Media Shuttle using a single set of login credentials. You can log into Media Shuttle using miniOrange credentials or Azure AD credentials or any of your existing identity providers. With miniOrange SSO services, along with Media Shuttle you can also login into other On-Premise and Cloud Applications using your existing Identity Providers/User Store (Azure Active Directory, Okta, Ping) credentials . Follow the given setup guide to integrate SAML SSO for your Media Shuttle account.


miniOrange and Media Shuttle Single Sign-On (SSO) integration supports the following features:

  • SP Initiated Single Sign-On (SSO)
  • IdP Initiated Single Sign-On (SSO)

Connect with External Source of Users


miniOrange provides user authentication from various external sources, which can be Directories (like ADFS, Microsoft Active Directory, OpenLDAP, AWS etc), Identity Providers (like Microsoft Entra ID, Okta, AWS), and many more. You can configure your existing directory/user store or add users in miniOrange.
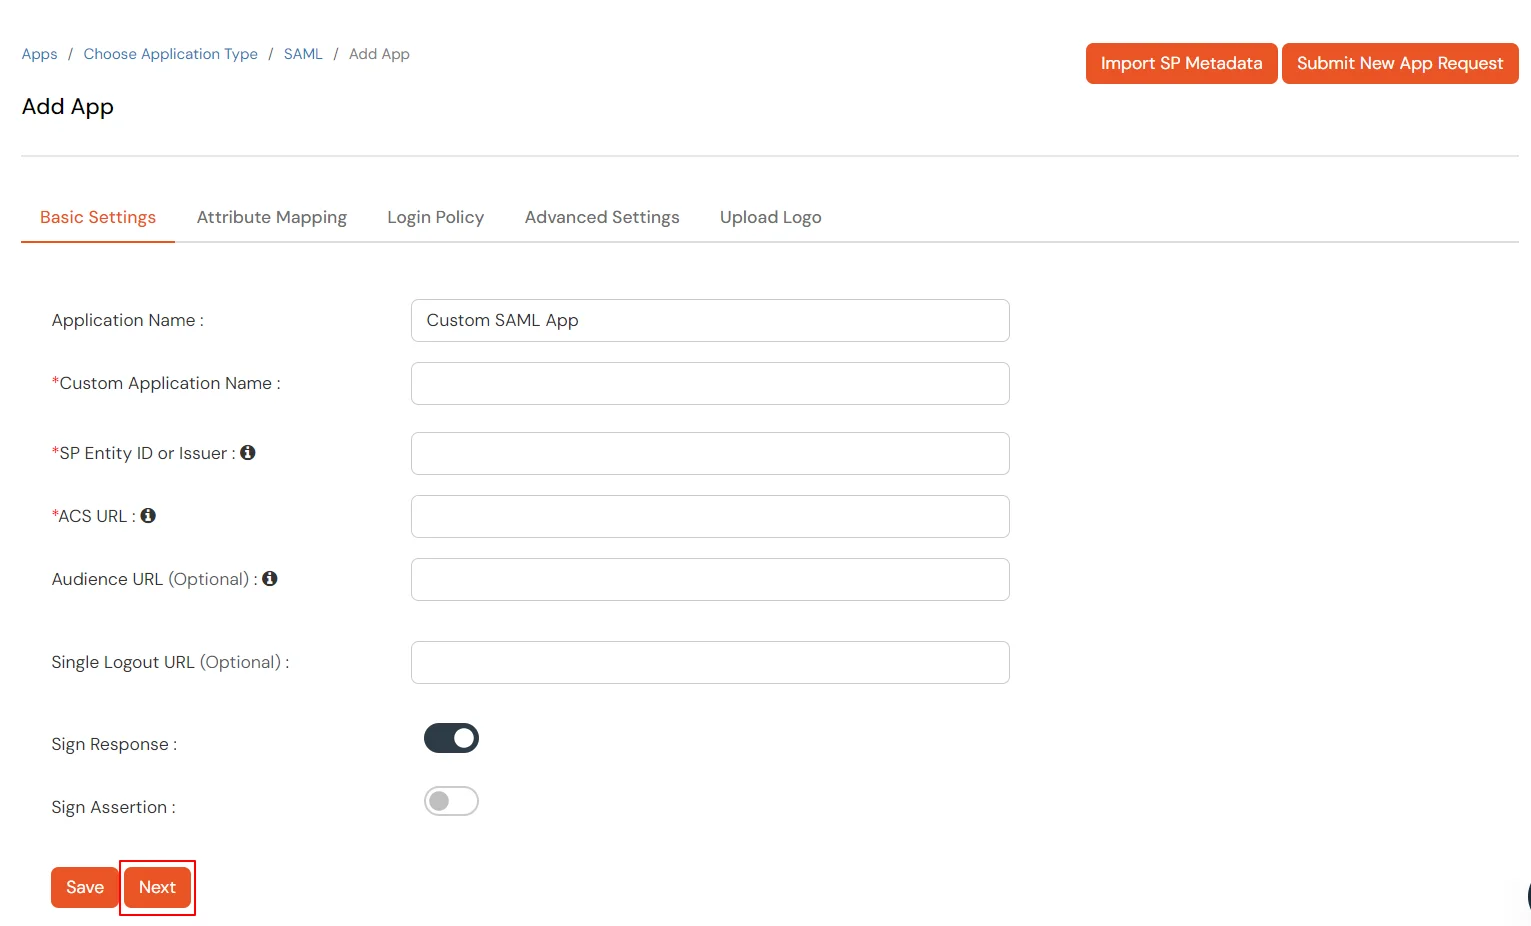


Follow the Step-by-Step Guide given below for Media Shuttle Single Sign-On (SSO)

1. Configure Media Shuttle in miniOrange

  • Login into miniOrange Admin Console.
  • Go to Apps and click on Add Application button.
  • Media Shuttle Single Sign-On (SSO) add app

  • In Choose Application, select SAML/WS-FED from the application type dropdown.
  • Media Shuttle Single Sign-On (SSO) choose app type

  • Search for Media Shuttle in the list, if you don't find Media Shuttle in the list then, search for custom and you can set up your application in Custom SAML App.
  • Media Shuttle Single Sign-On (SSO) manage apps

  • Enter the following details:
    Custom Application Name: Enter the App name as Media Shuttle
    SP Entity ID or Issuer: "Mediashuttle" or any other value of your choosing.
    ACS URL: https://portals.mediashuttle.com/auth
    Single Logout URL https://{Portal Url}.com/memberLogin?logout
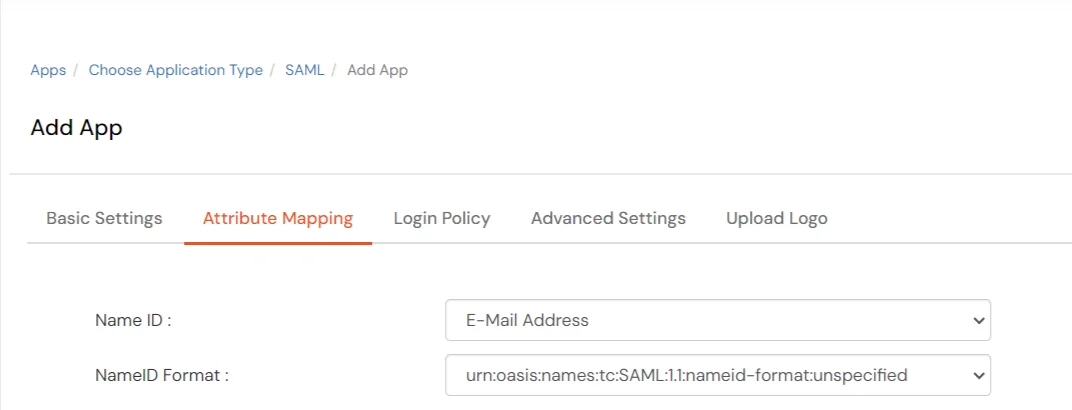
  • Media Shuttle Single Sign-On (sso): Enter the following details

  • Click on Next to proceed further.
  • In the Attribute Mapping tab configure the following attributes as shown in the image below.
  • Media Shuttle Single Sign-On (sso) Add Attribute

  • Click on Add Attribute to add SAML Response Assertion Attributes.
    Attribute Name 1 Select Attribute Value
    http://schemas.xmlsoap.org/ws/2005/05/identity/claims/emailaddress E-mail Address
  • Media Shuttle Single Sign-On (sso) Add optional Attribute

  • To upload respective app logo for a Custom SAML App, click on Upload Logo tab.
  • Media Shuttle Single Sign-On (sso) Upload Logo

  • Click on Save.
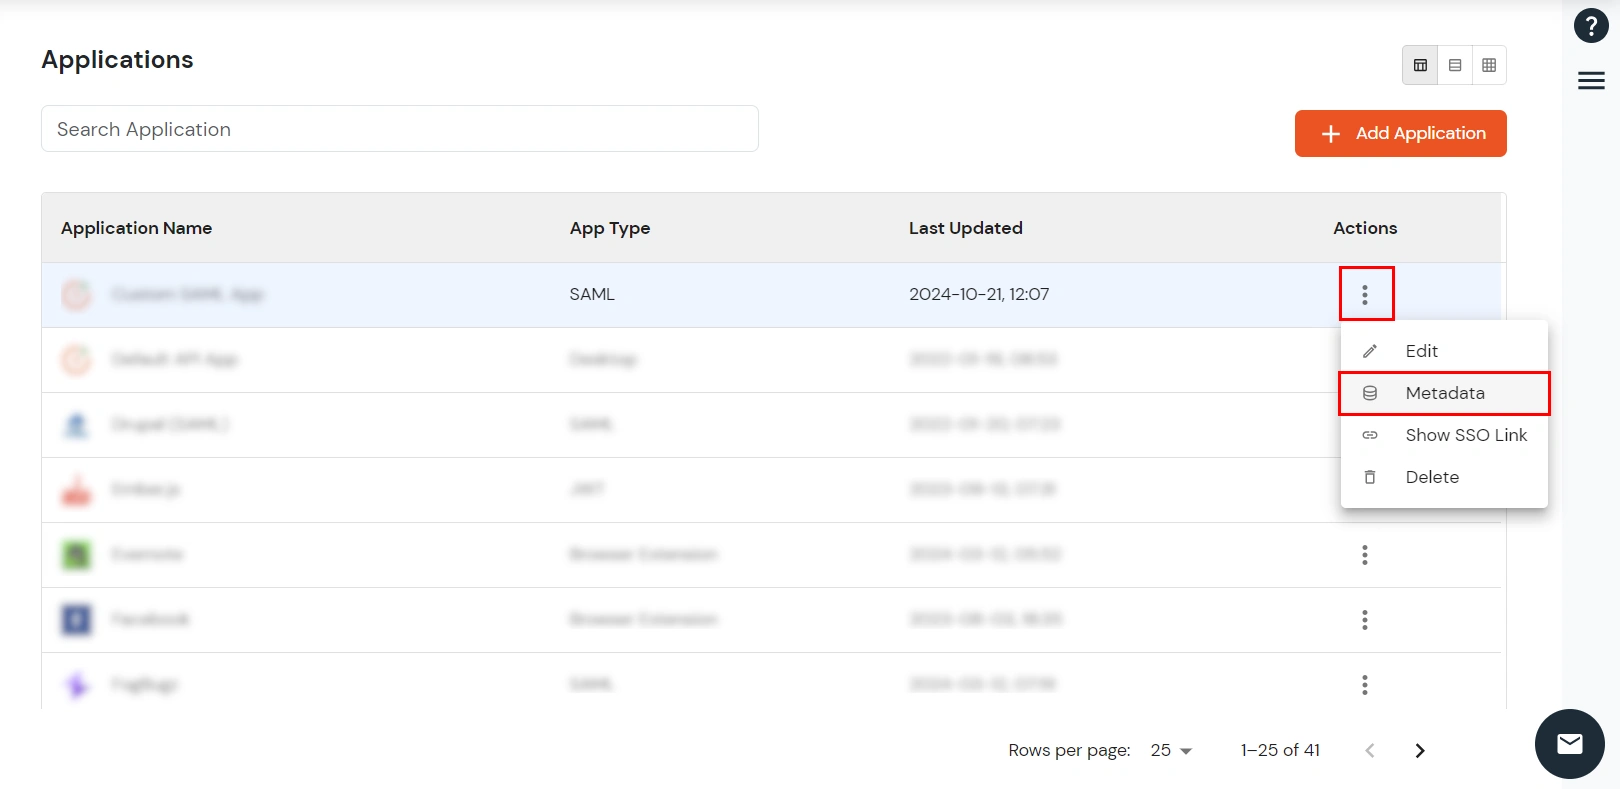
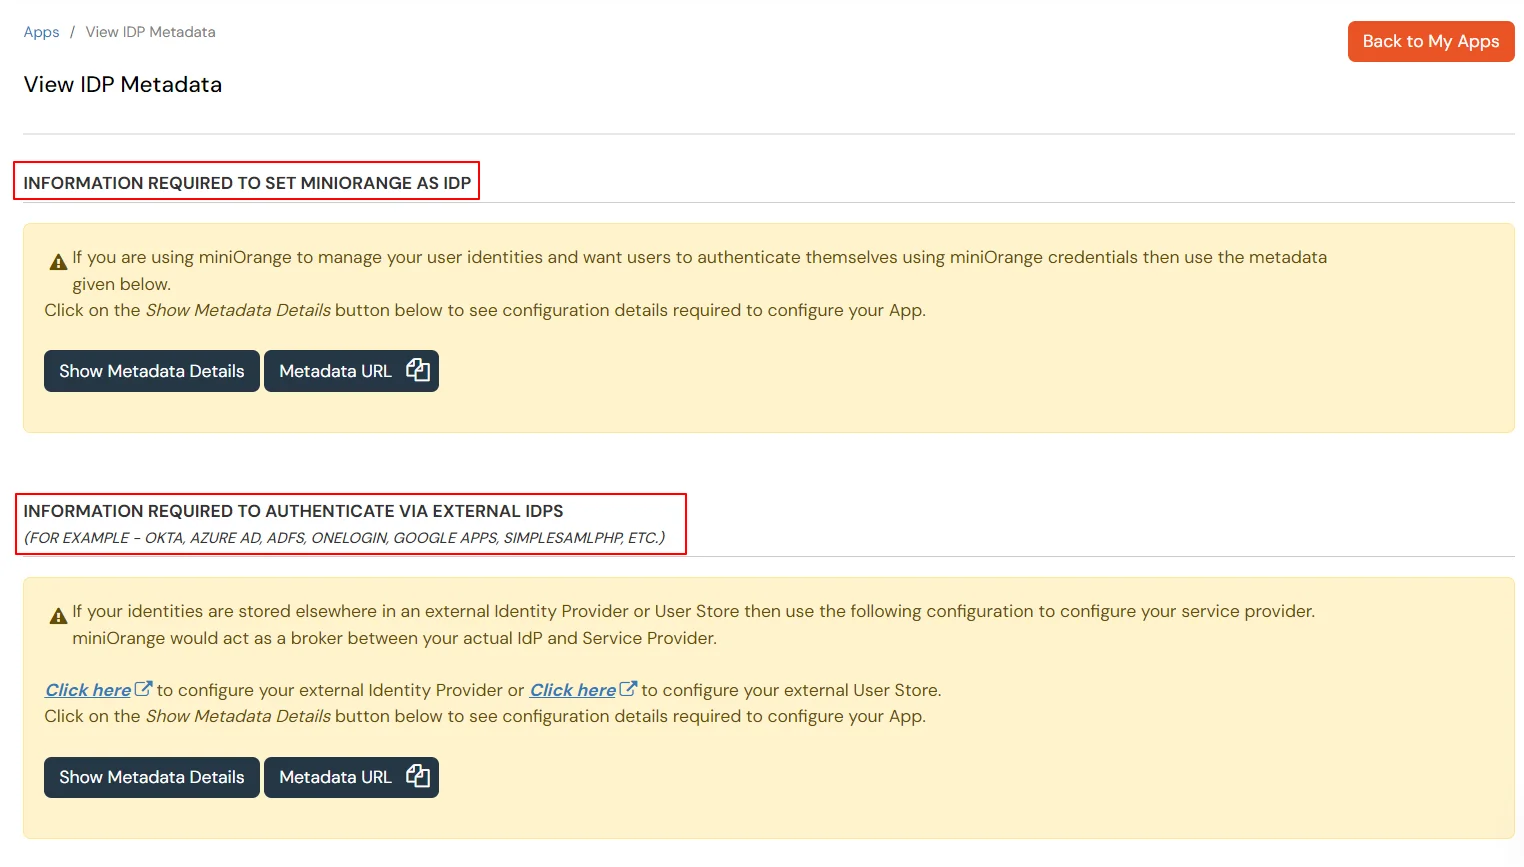
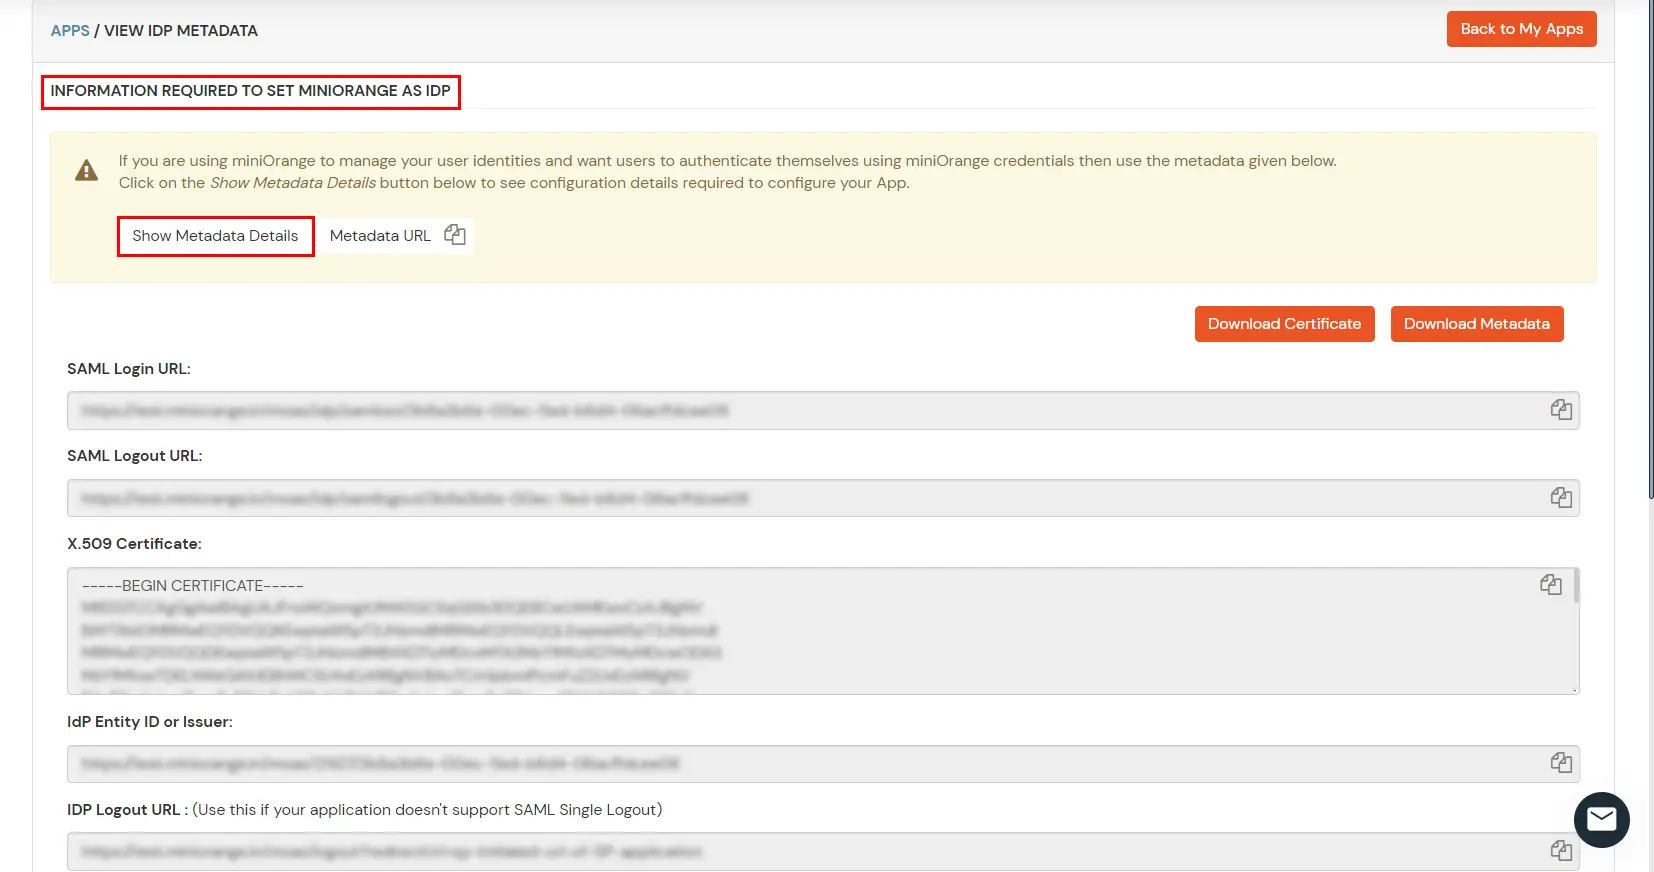
  • To get miniOrange metadata details in order to configure Media Shuttle :

  • Go to Apps >> Applications.
  • Search for your app and click on the icon ' ' in Actions menu against your app.
  • Click on Metadata to get metadata details, which will be required later. Click on Show SSO Link to see the IDP initiated SSO link for Media Shuttle.
  • Go to Metadata link Media Shuttle SAML SSO

  • Here you will see 2 options, if you are setting up miniOrange as IDP copy the metadata details related to miniOrange, if you required to be authenticated via external IDP's (Okta, Microsoft Entra ID, Active Directory, ADFS, OneLogin, Google Workspace) you can get metadata from the 2nd Section as shown below.
  • Media Shuttle Single Sign-On (SSO) Add SAML Application

  • Keep SAML Login URL, SAML Logout URL and click on the Download Certificate button which you will require in Step 2.
  • Media Shuttle Single Sign-On (SSO) Select Metadata details external IDP or miniOrange as IDP

2. Configure SSO in Media Shuttle

  • In the IT Administration Console, click Security.
  • Under Authentication, select Login is required.
  • Select an encryption method:
    • SHA-1: Encrypt communication with the SAML service provider using SHA-1.
    • SHA-256: Encrypt communication with the SAML service provider using SHA-256.
  • Select a configuration type:
    • Account level: Configure access to all existing portals and any new portals with the same SAML authentication settings.
    • Portal level: Configure access to portals with SAML on an individual basis.
  • Select domain restrictions:
    • Unrestricted domains: Uses the same identity provider for all portal members and administrators authenticating with SAML.
    • Restricted domains: Allows you to require SAML authentication for users from specified email domains. Users from all other domains will be authenticated through Media Shuttle. You can also select Configure identity provider for all other users to specify that users from other domains require authentication by another identity provider.
  • Enter your Sign in display name. By default, the displayed text is "Sign in with SAML".
  • Ensure that Auto-add SAML authenticated members to this portal is selected to give all authenticated members access to Media Shuttle. If this option is disabled, membership is controlled by the operations administrator.
  • Specify your Identity Provider Metadata by pasting in the identity provider's metadata URL or by clicking Browse and selecting the X.509 Certificate file you downloaded in Step 1.
  • Click Save Changes.

3. Test SSO Configuration

Test SSO login to your Media Shuttle account with miniOrange IdP:

    Using SP Initiated Login

    • Go to your Media Shuttle URL, here you will be either asked to enter the username or click on the SSO link which will redirect you to miniOrange IdP Sign On Page.
    • Media Shuttle Single Sign-On (SSO) login

    • Enter your miniOrange login credential and click on Login. You will be automatically logged in to your Media Shuttle account.

    Using IDP Initiated Login

    • Login to miniOrange IdP using your credentials.
    • Media Shuttle Single Sign-On (SSO)

    • On the Dashboard, click on Media Shuttle application which you have added, to verify SSO configuration.
    • Media Shuttle Single Sign-On (SSO) verify configuration


    Not able to configure or test SSO?


    Contact us or email us at idpsupport@xecurify.com and we'll help you setting it up in no time.


External References

Want To Schedule A Demo?

Request a Demo


Our Other Identity & Access Management Products