Next.js Single Sign-On SSO
Next.js JWT Single Sign-On (SSO) solution by miniOrange provides secure Single Sign-On access into Next.js application using a single set of login credentials. This is done using JSON Web Token (JWT) tokens and it can be easily integrated with Next.js built in any framework or language. You can enable social login for your users to get secure access to applications using any of their existing social providers such as Facebook, Twitter, Google, or LinkedIn.
With miniOrange Next.js SSO, you get:
- Seamless user login experience.
- Endless customizations to your login forms and pages.
- Simplified customer or user on-boarding.
Connect with External Source of Users
miniOrange provides user authentication from various external sources, which can be Directories (like ADFS, Microsoft Active Directory, OpenLDAP, AWS etc), Identity Providers (like Microsoft Entra ID, Okta, AWS), and many more. You can configure your existing directory/user store or add users in miniOrange.
Follow the step-by-step guide given below for Next.js Single Sign-On (SSO):
1. Configure Next.js in miniOrange
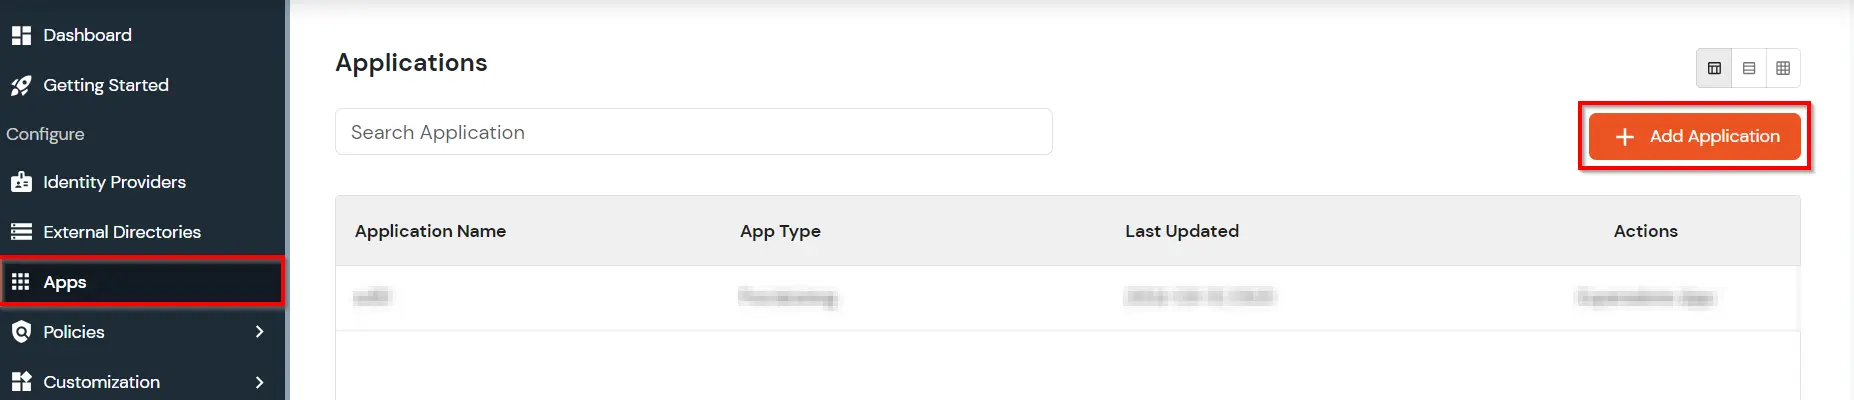
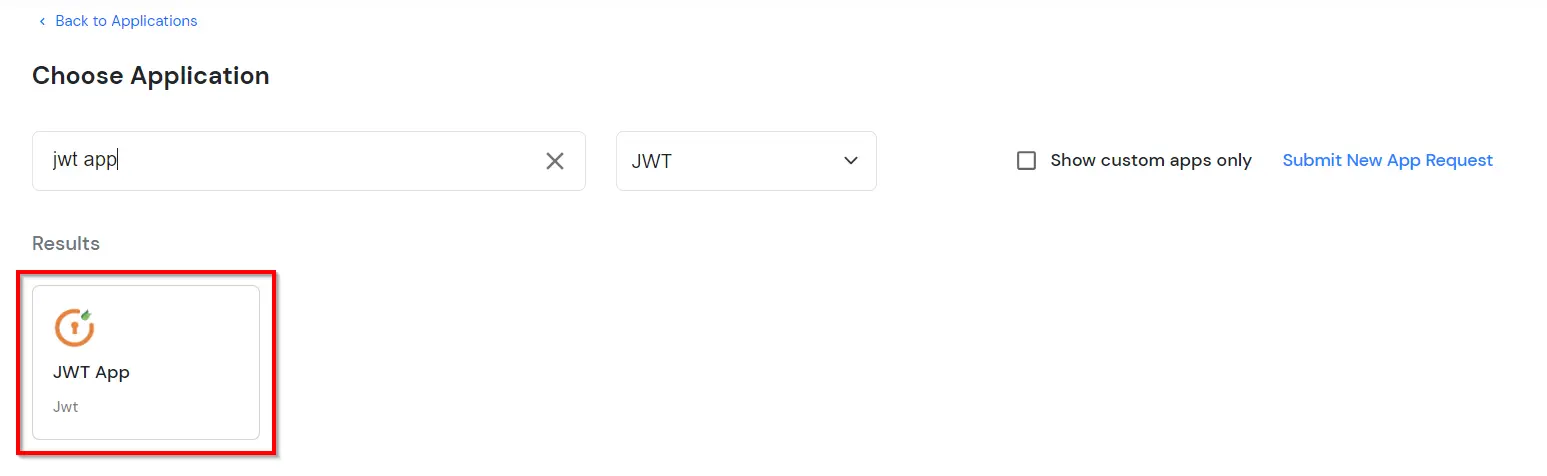
- Go to Apps and click on Add Application button.
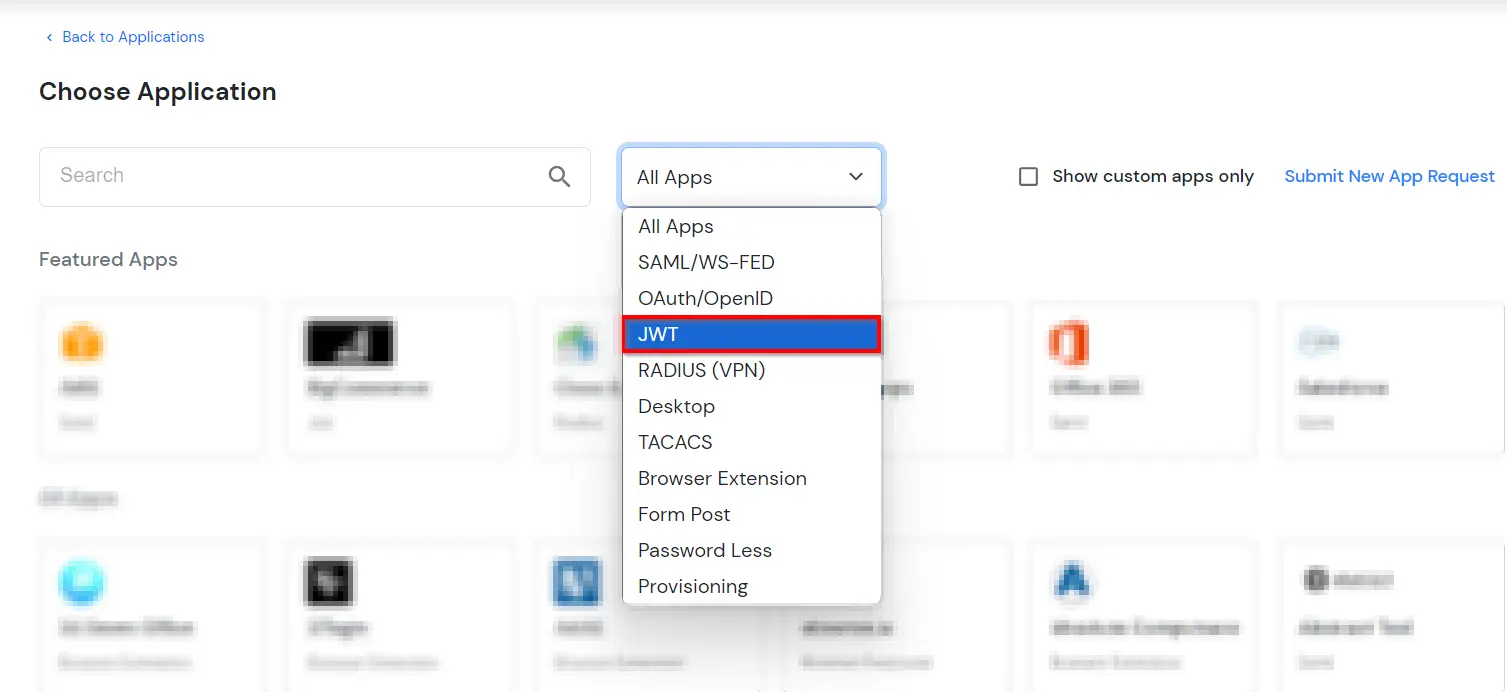
- In Choose Application, select JWT from the application type dropdown.
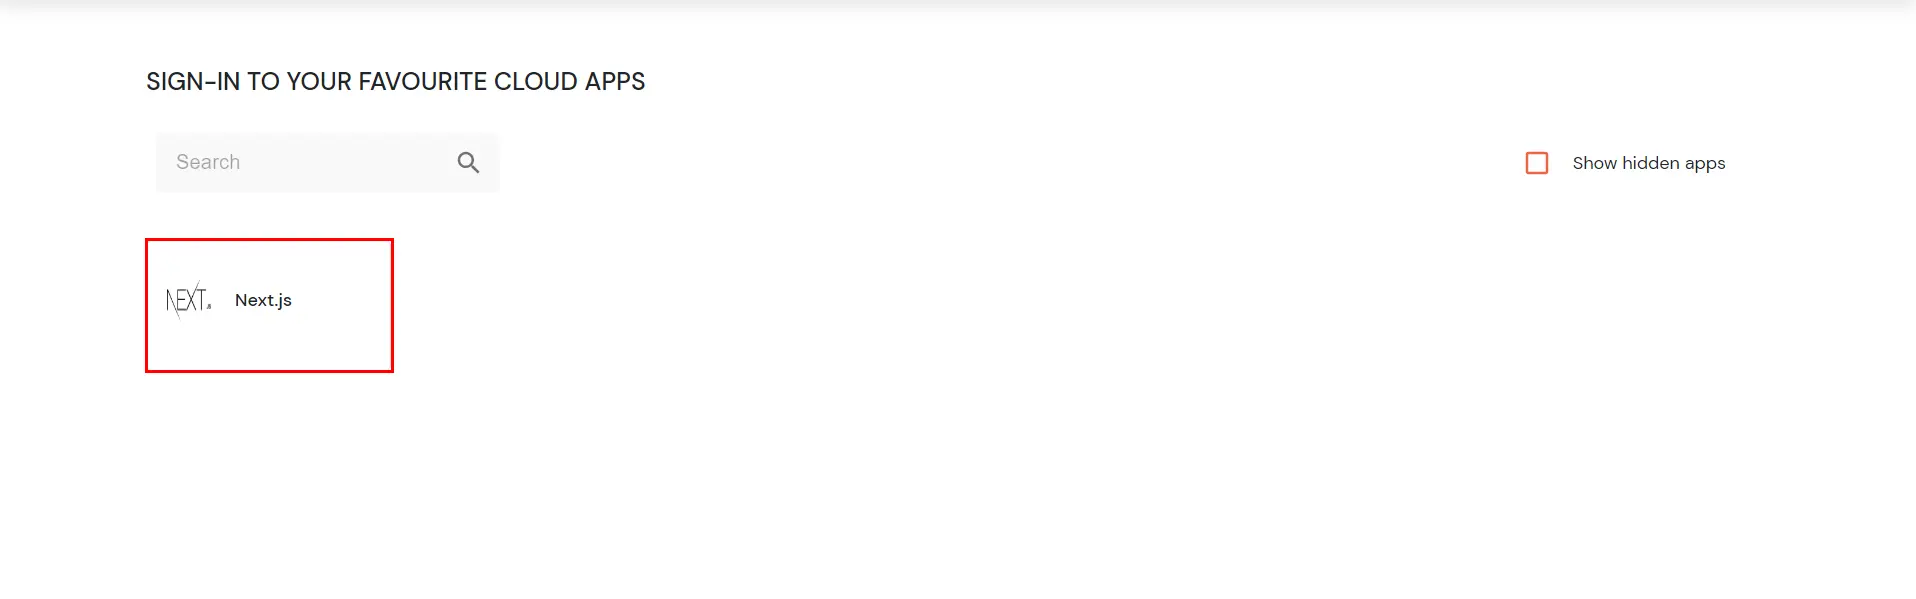
- In the next step, search for Next.js application from the list. If your application is not found, search for JWT App and you can set up your Application.
- You can configure the following details in the application:
| Custom App Name |
Enter the Application Name of your choice, and add a description if required. |
| Redirect-URL |
Enter the Redirect-URL (i.e. the endpoint where you want to send/post your JWT).
You can add multiple redirect URLs by separating them with a ‘;’. E.g. abc.com;xyz.com |
| Primary Identity Provider (optional) |
Select your Identity Source from the dropdown. You can select miniOrange here as default IDP. |
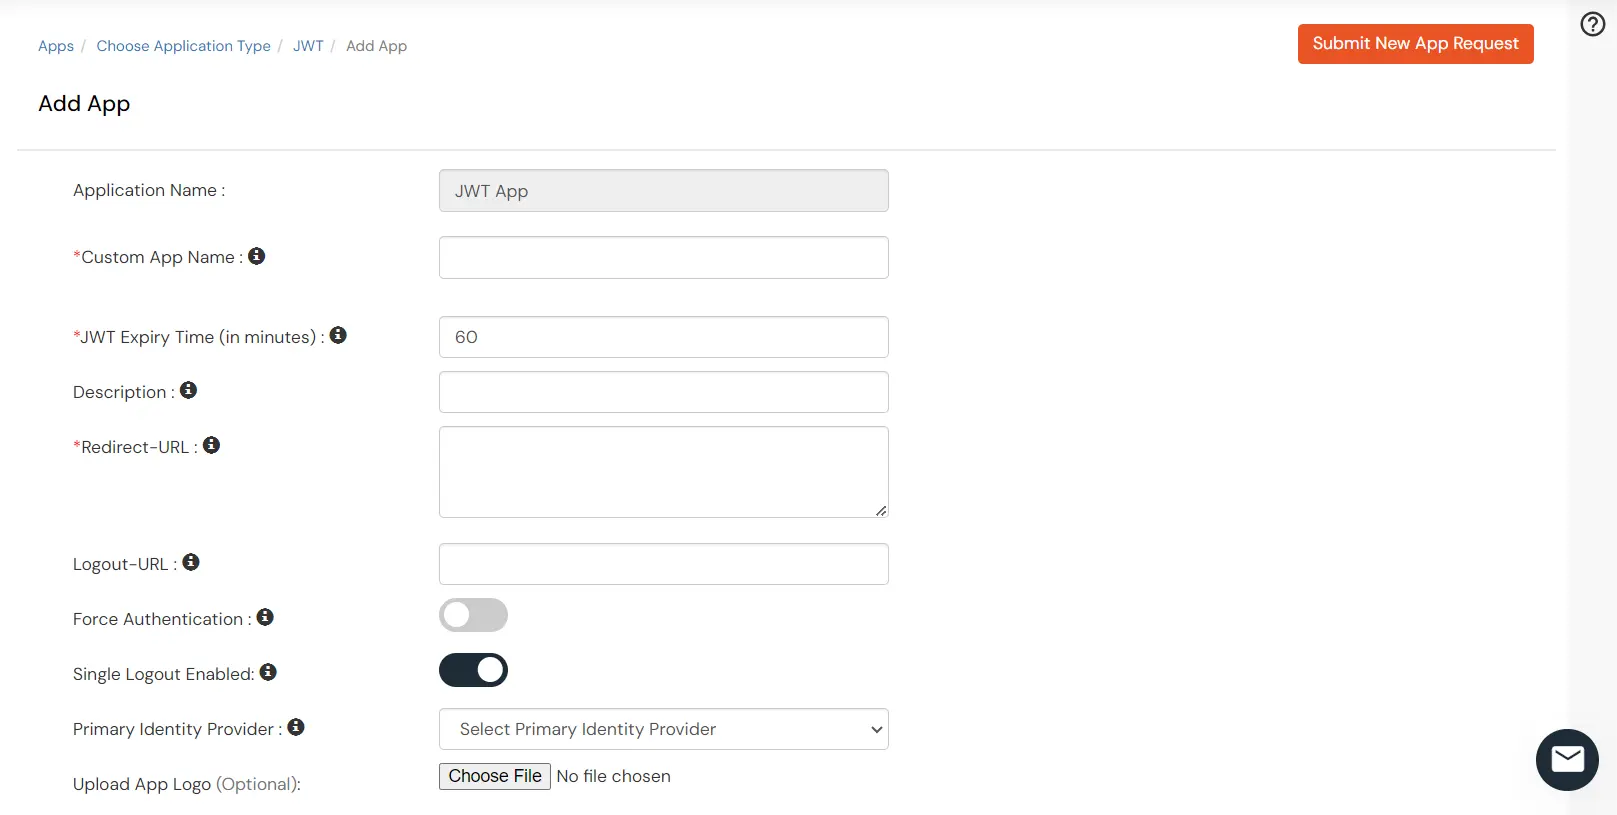
- Click on Save to complete the configuration.
- Click on Edit in the ' ' icon against your app.

- You can get further details about your recently added JWT application:
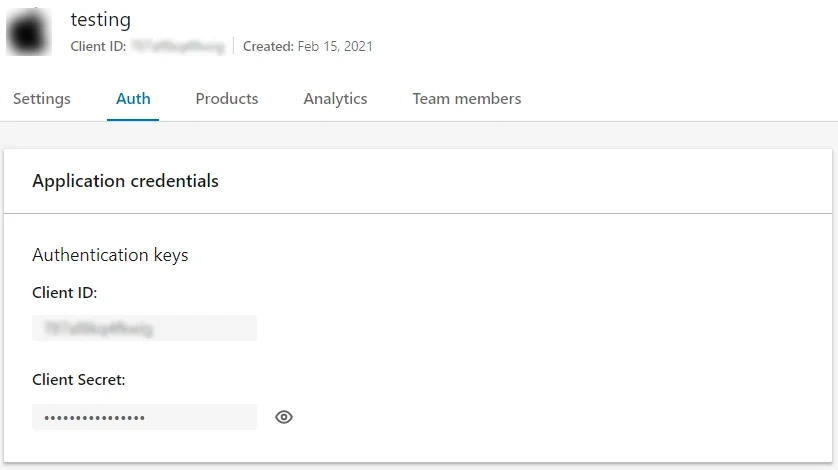
| Client ID |
If your application provides its own client ID, you can configure it by clicking on the Customize button. |
| App Secret |
You can find App Secret by clicking on the copy icon. This is used in the HS265 Signature algorithm for generating the signature. |
| Signature Algorithm |
Select RSA-SHA256 as your signature algorithm from the dropdown. |
| Primary Identity Provider |
Select the default Identity Provider from the dropdown for the application. If not selected, users will see the screen of default IdP (miniOrange) |
| Redirect URL |
Enter your app’s URL here (This is the URL where you will receive your JWT.)
<app-login-url>/?id_token=<token>
eg: https://localhost:3000/home/?id_token=eyefb43bf.whfeeg.hfwf
In this example, https://localhost:3000/home is my app’s URL where id_token will be posted after authentication.
|
- Scroll down to Endpoints.

- SSO URL for using miniOrange as Authentication Source: If you are going to store users in miniOrange and use miniOrange as your authentication source,then, copy and save this URL somewhere as it will be used in further steps.
- SSO URL for using External Providers as Authentication Source: If you are going to use any External Provider as your authentication source, then, Copy this one and save somewhere as it will be used in further step.
2. Adding Script on Next.js's End
- To enable SSO on Next.js's end, all you need to do is add a Single Sign-On URL and Customized Script to retrieve the required attributes from the JWT token.
- Please click here to contact us for the script which is to be added.
3. Test SSO Configuration
Test SSO login to your Next.js account with miniOrange IdP:
4. Login Using Social Provider (Optional)
miniOrange provides user authentication from various external sources, which can be Directories (like ADFS, Microsoft Active Directory, Microsoft Entra ID, OpenLDAP, Google, AWS Cognito etc), Identity Providers (like Okta, Shibboleth, Ping, OneLogin, KeyCloak), Databases (like MySQL, Maria DB, PostgreSQL) and many more. You can configure your existing directory/user store or add users in miniOrange.
4.1. Configure Google Apps as OAuth 2.0 Provider in miniOrange.
- Go to miniOrange Admin Console.
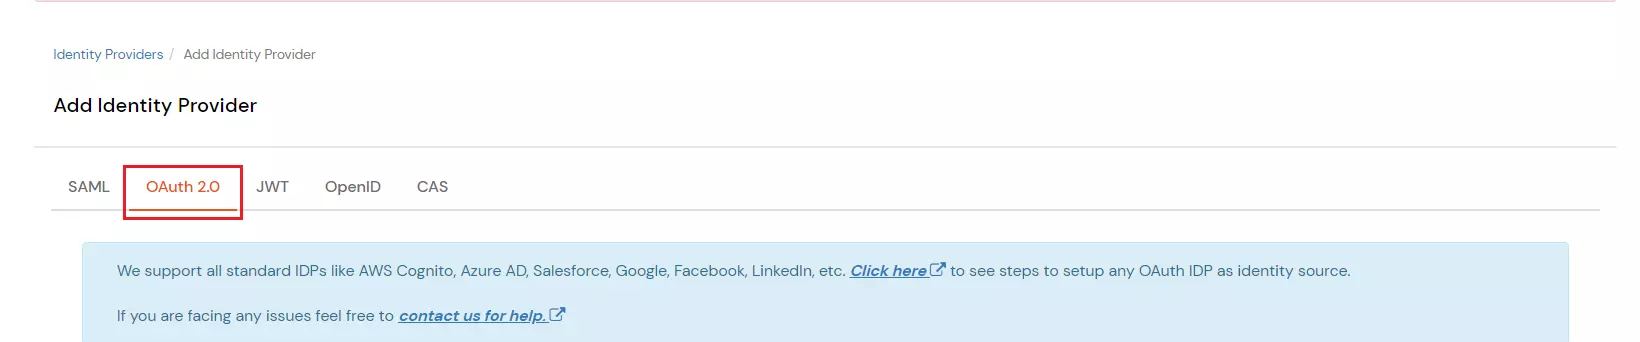
- From the left navigation bar select Identity Providers >> Add Identity Provider.

- Select OAuth2.0
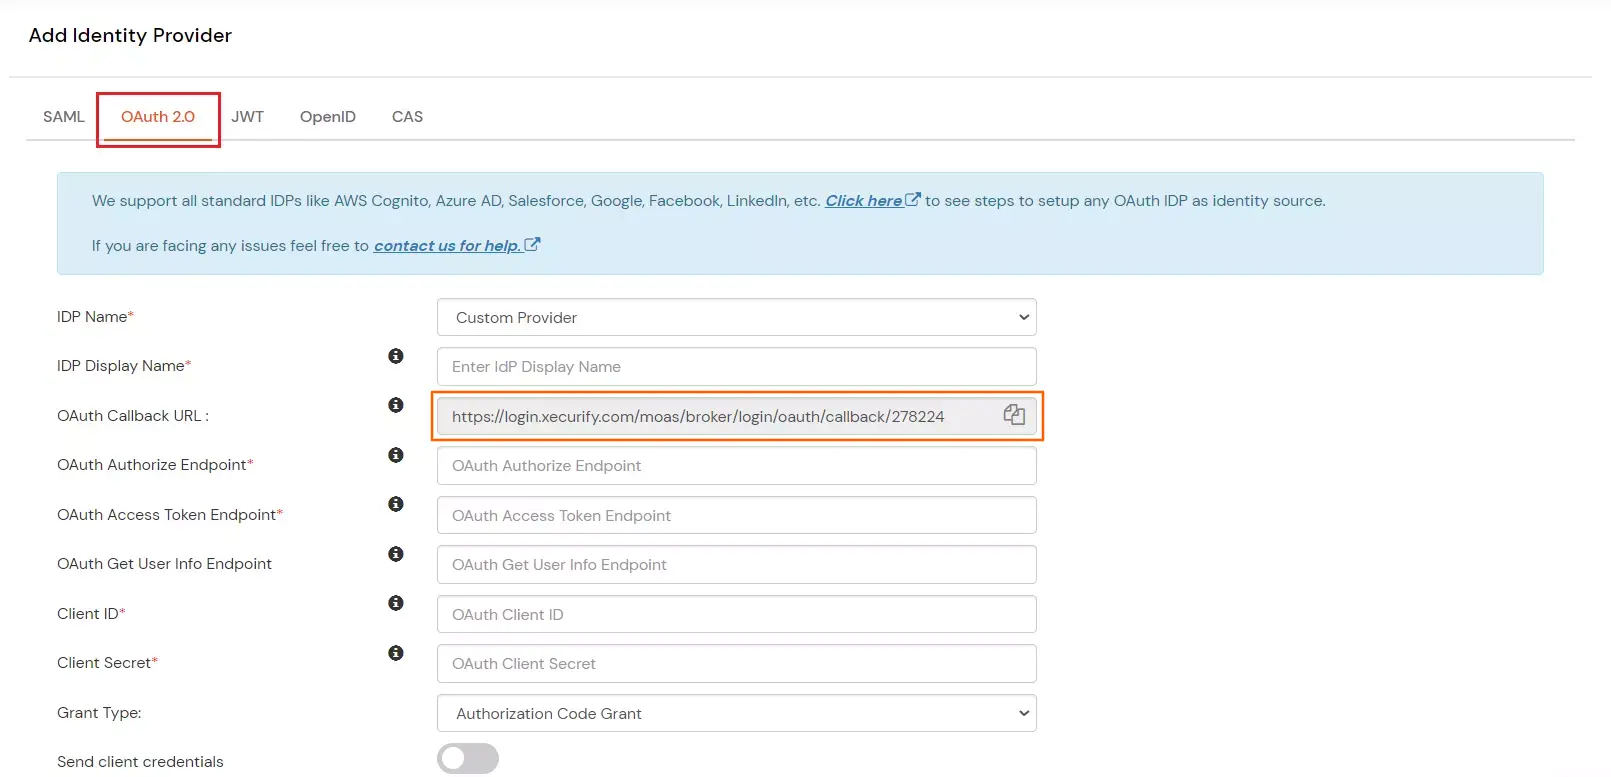
- Enter the following values:
| IdP Name |
Custom Provider |
| IdP Display Name |
Choose appropriate Name |
| OAuth Authorize Endpoint |
https://{your-base-url}/as/authorization.oauth2 |
| OAuth Access Token Endpoint |
https://{your-base-url}/as/authorization.oauth2 |
| OAuth Get User Info Endpoint (optional) |
https://{your-base-url}/idp/userinfo.oauth2 |
| Client ID |
From step 4.2 |
| Client secret |
From step 4.2 |
| Scope |
email |
4.2. Configuring miniOrange as Service Provider (SP) in Google Apps
- Go to https://console.developers.google.com/ and sign up/login.
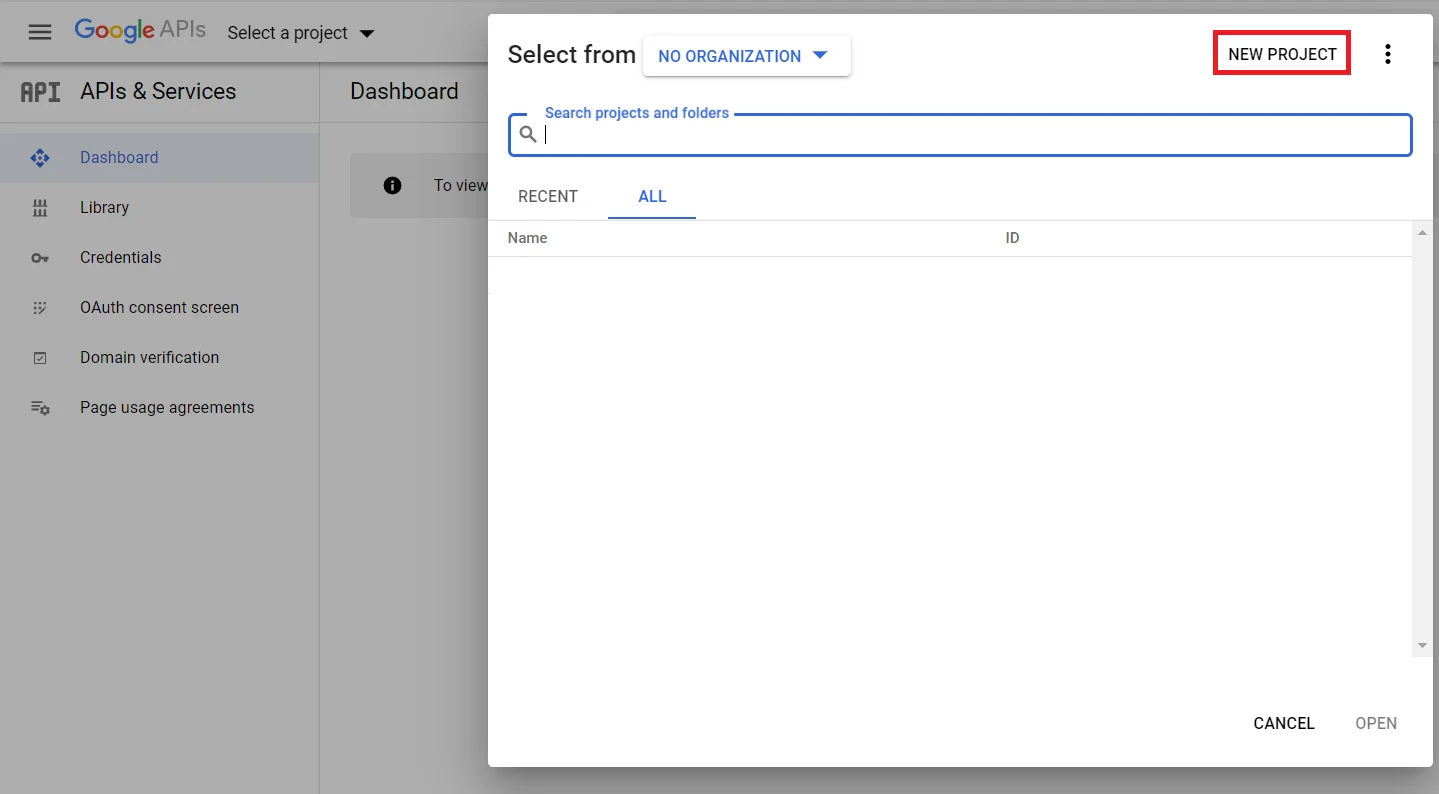
- Click on Select Project to create a new Google Apps Project,you will see a popup with the list of all your projects.
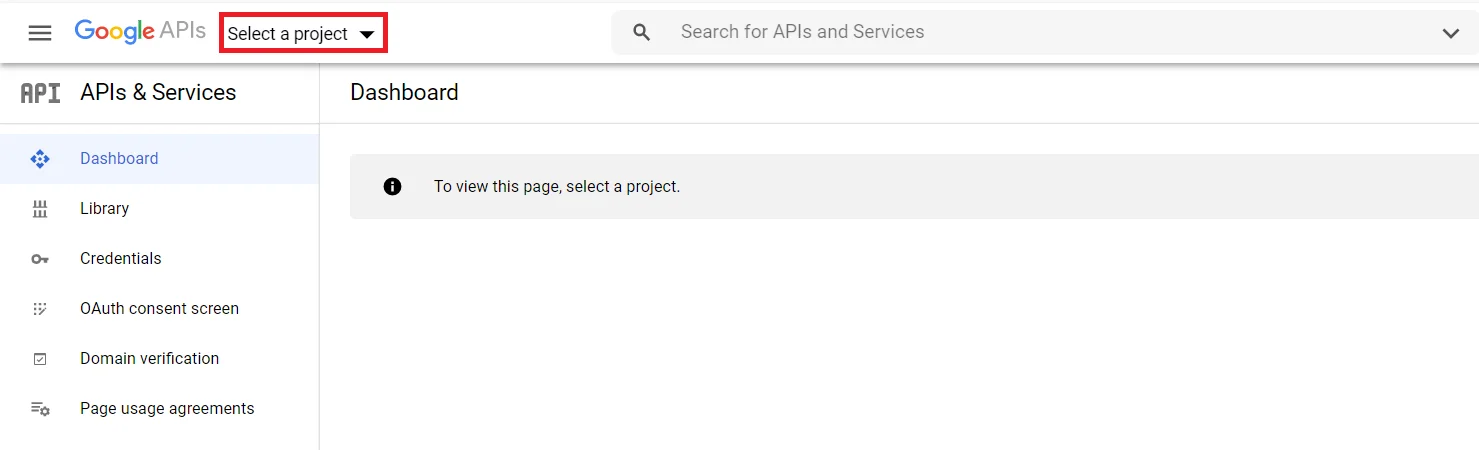
- You can click on the New project button to create new project.
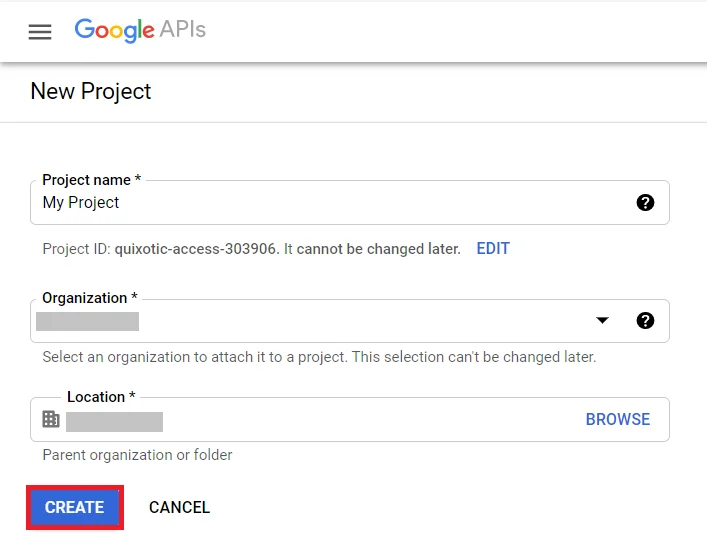
- Enter your Project name under the Project Name field and click on Create.
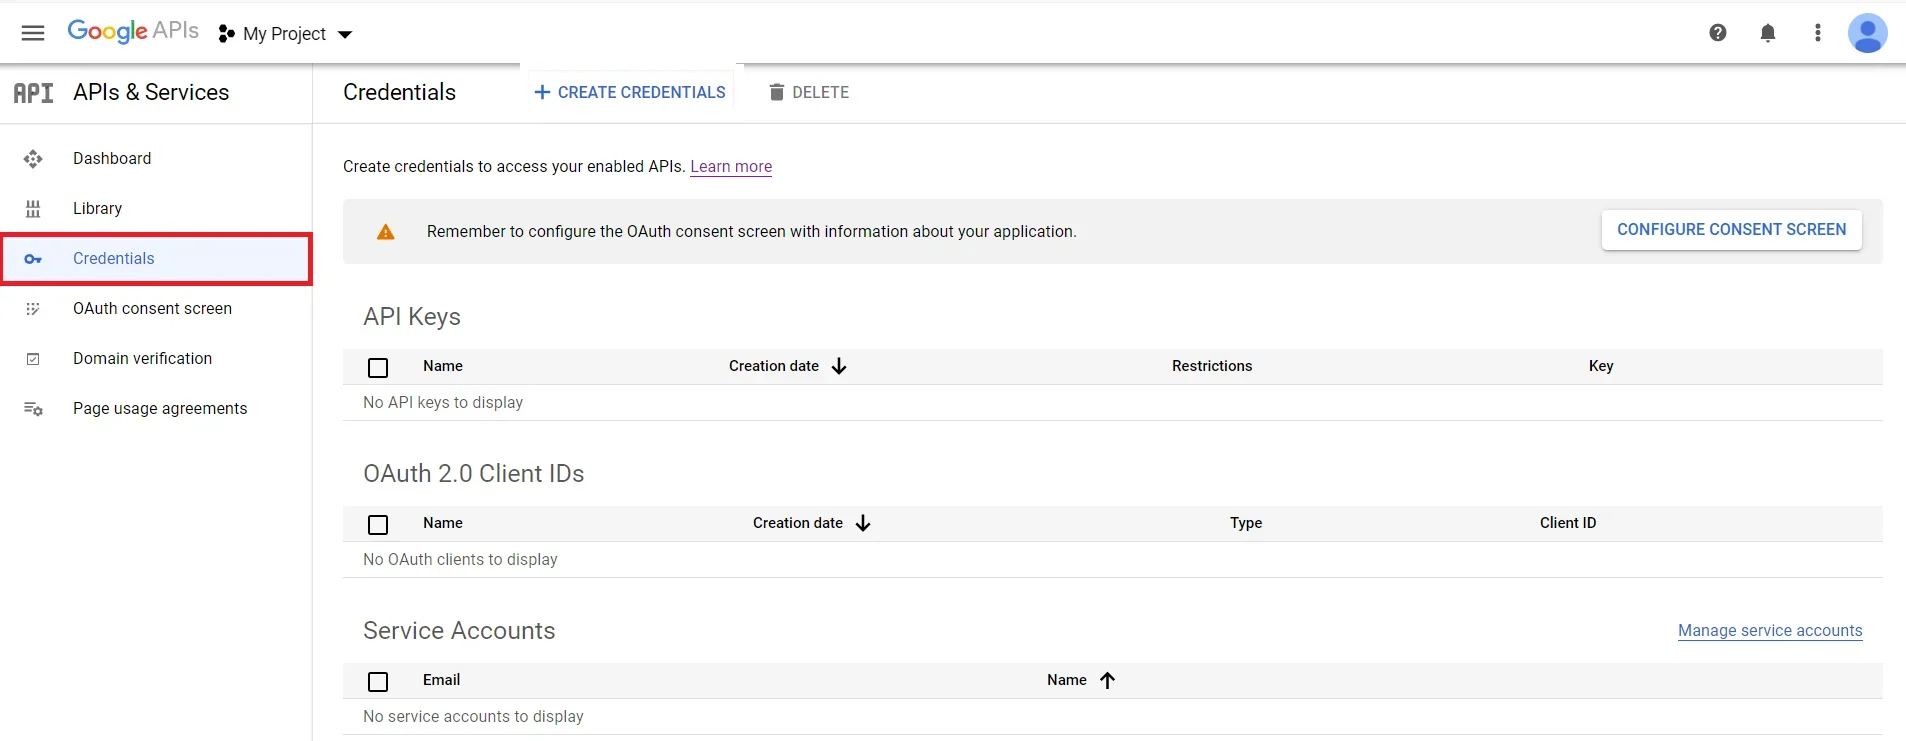
- Go to Navigation Menu >> APIs >> Services >> Credentials.
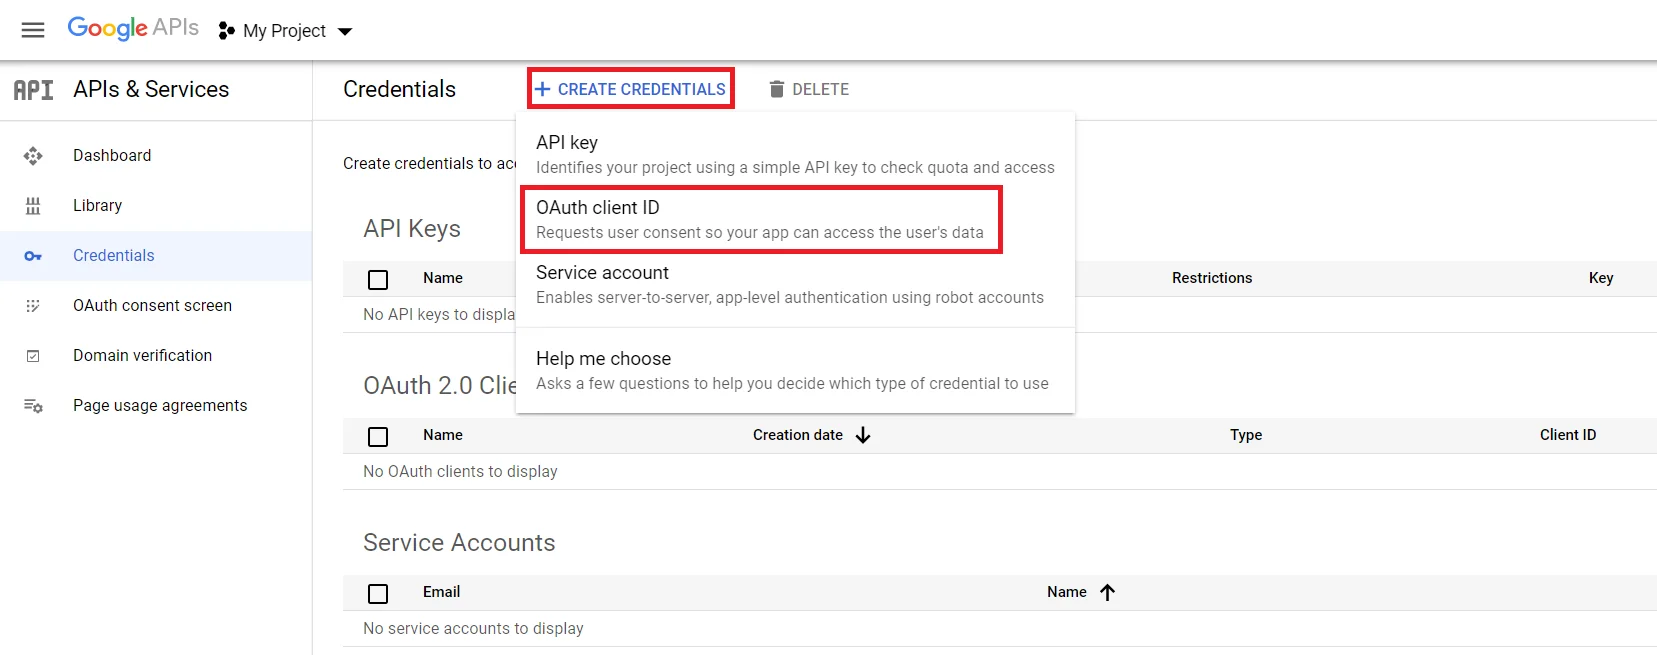
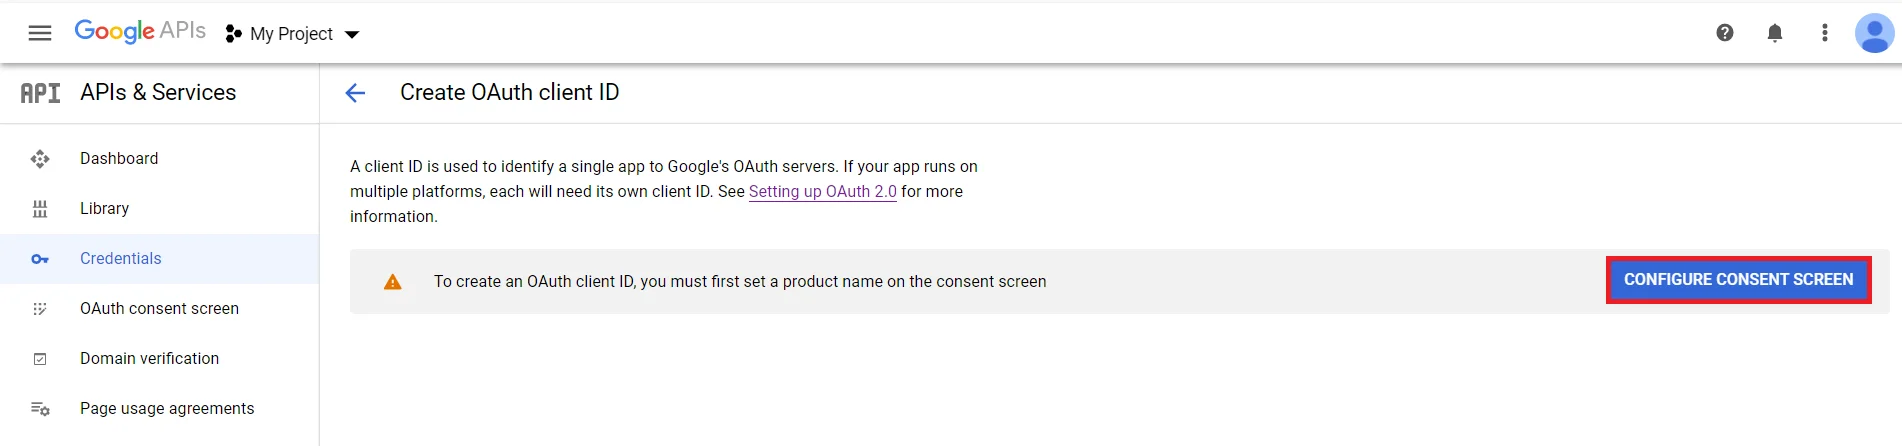
- Click on Create Credentials button and then select OAuth Client ID from the options provided.
- In case you are facing some warning saying that in order to create an OAuth Client ID, you must set a product name on consent screen (as shown in below image). Click on the Configure consent screen button.
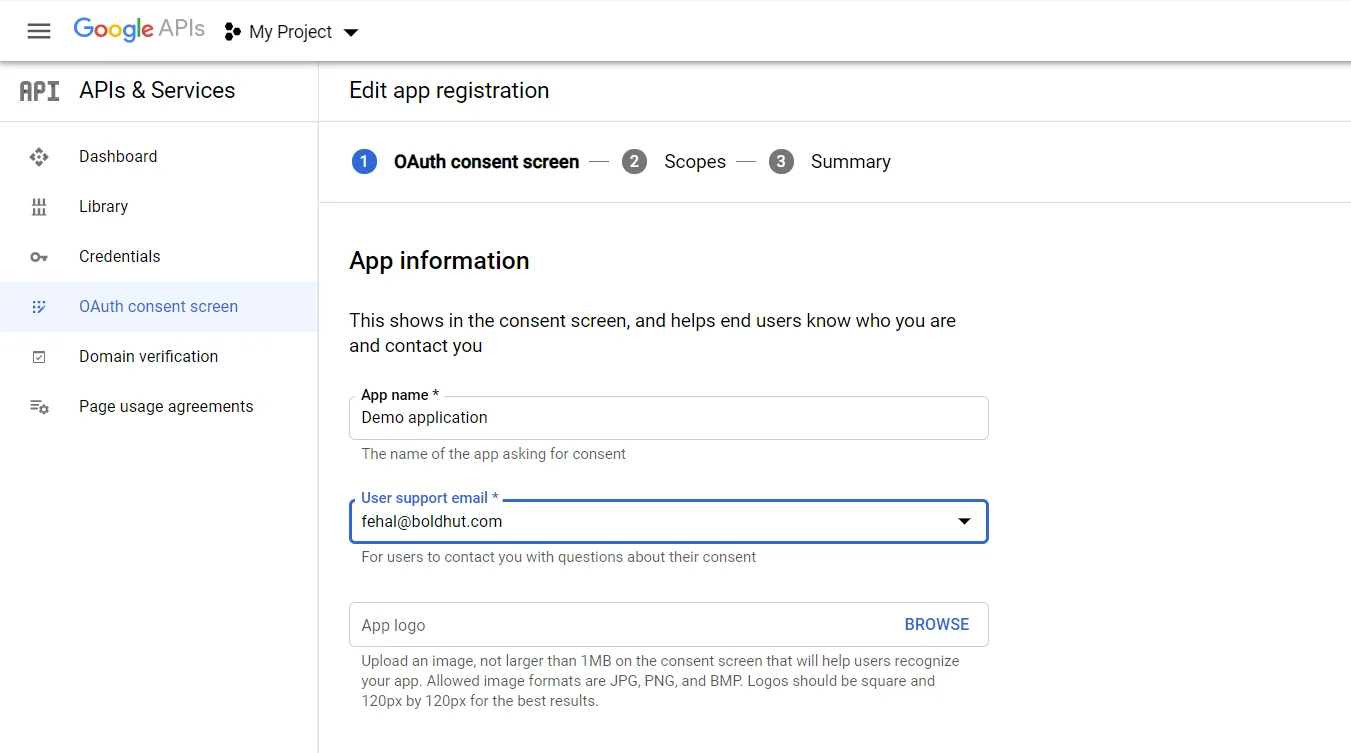
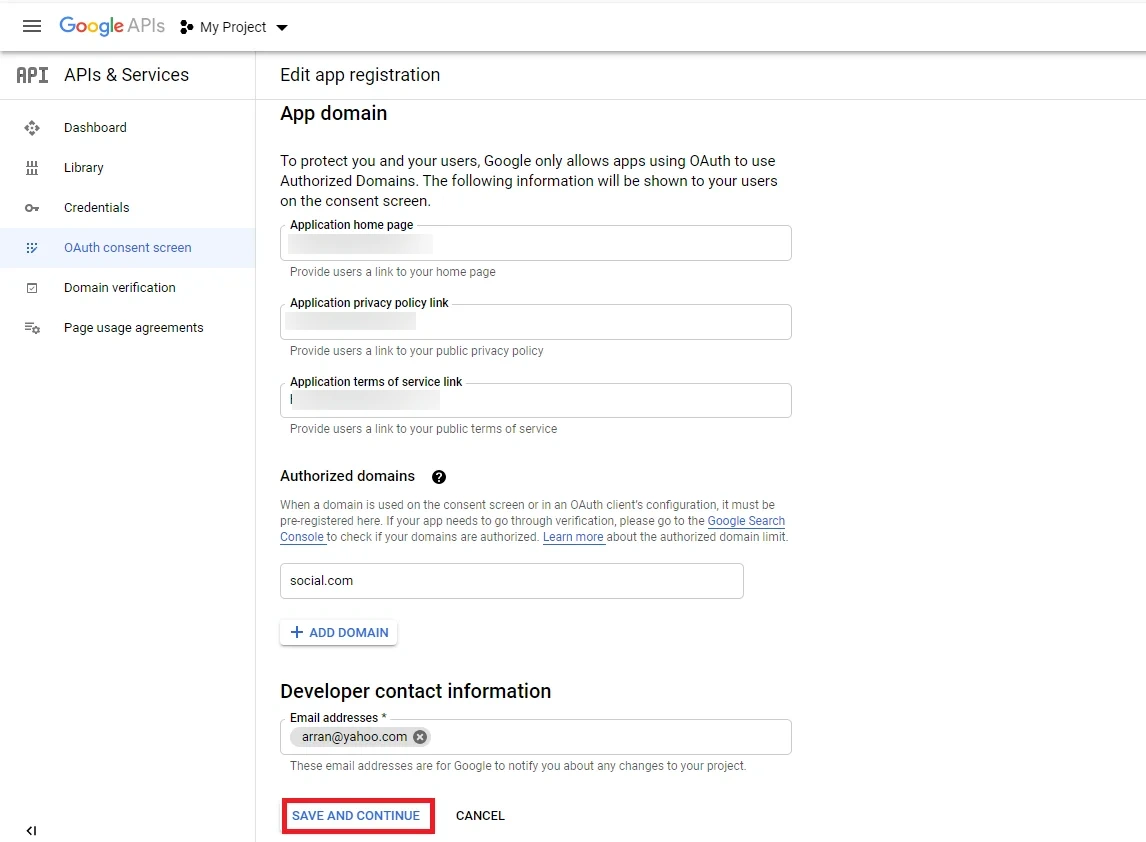
- Enter the required details such as App Name, User Support Email. and click on Save and Continue button.
- Now for configuring scopes, click on Add or Remove the Scopes button.
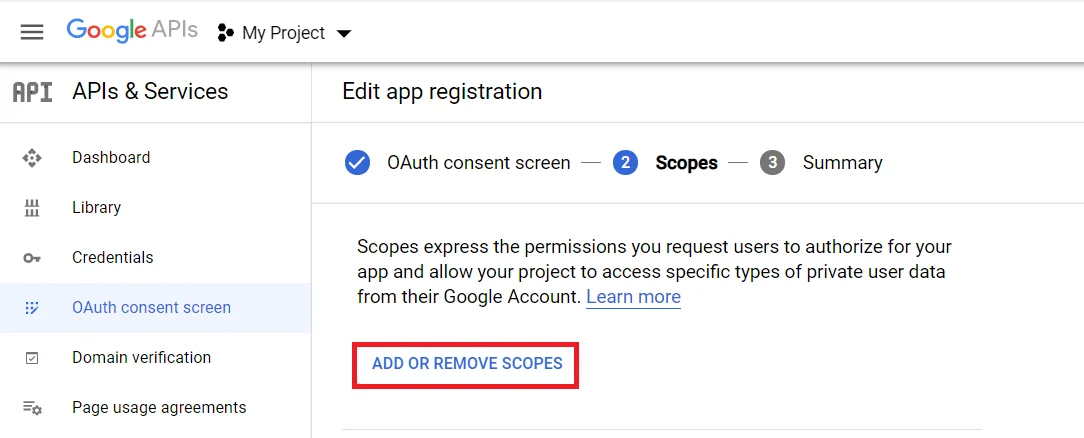
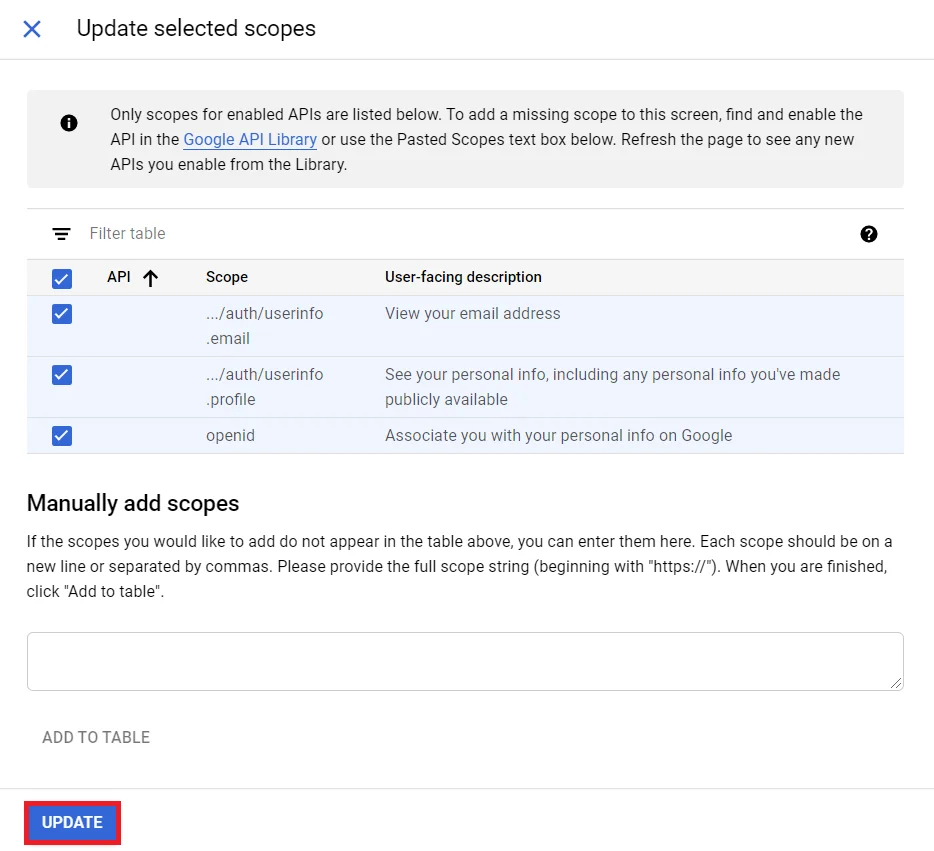
- Now, Select the Scopes to allow your project to access specific types of private user data from their Google Account and click on Save and Continue button.
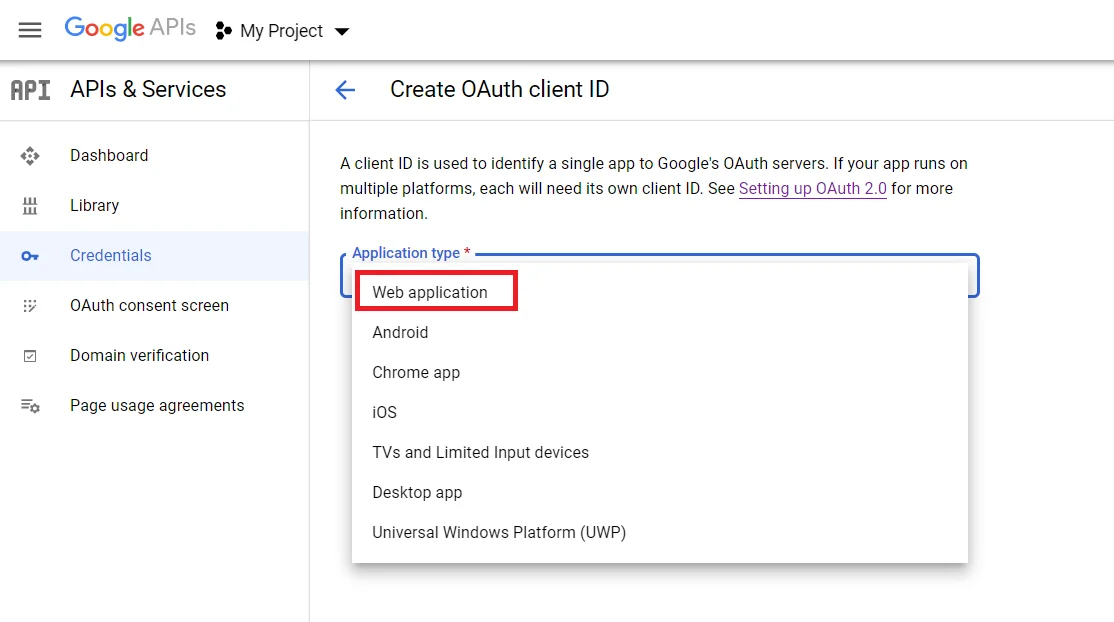
- Go to the Credentials tab and click on Create Credentials button. Select Web Application from dropdown list to create new application.
- To get the Redirect URL:
- Go to miniOrange Admin Console.
- From the left navigation bar select Identity Provider.
- Copy the Callback URL as Redirect URL required for next step.
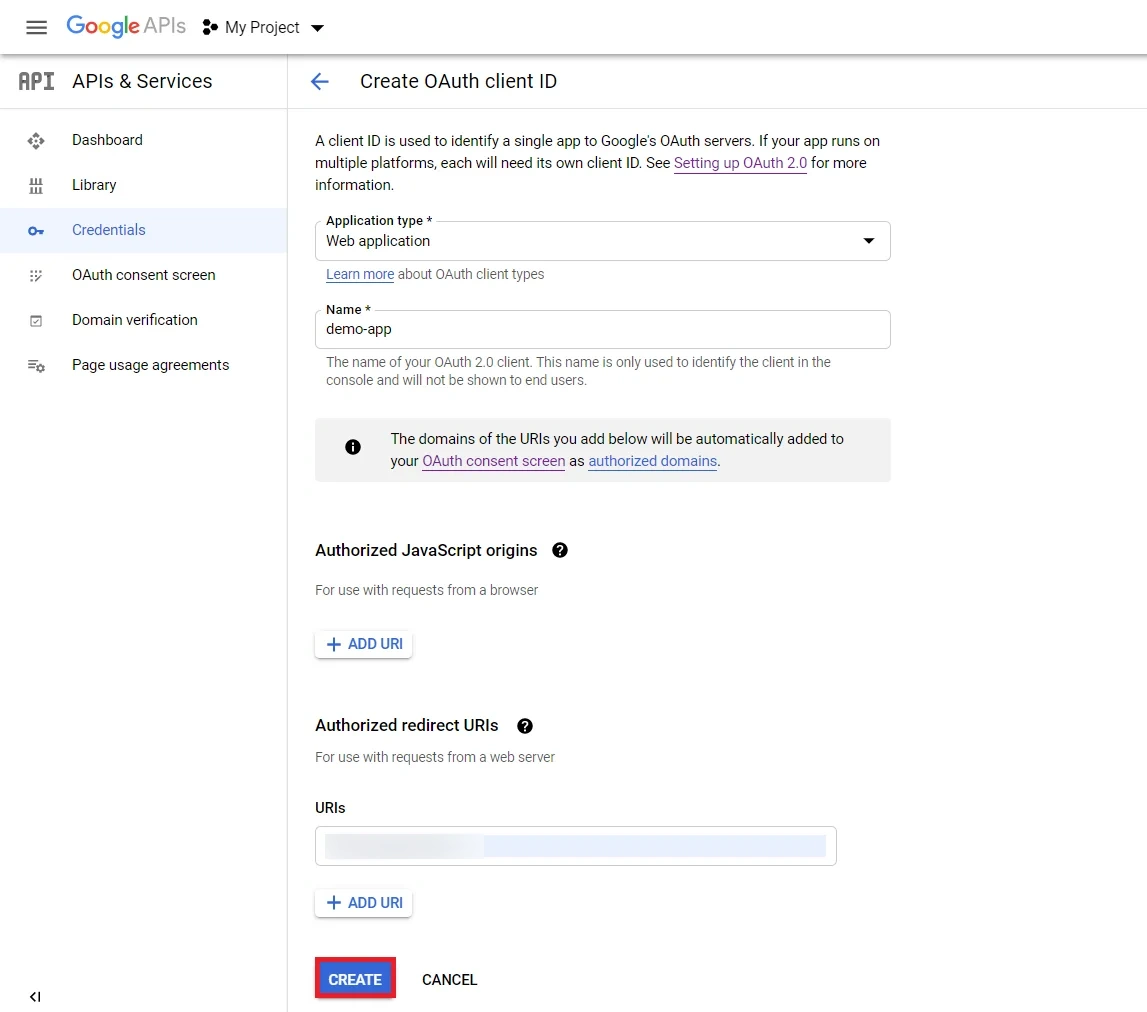
- Enter the name you want for your Client ID under the name field and enter the Redirect/Callback URI and click on Create button.
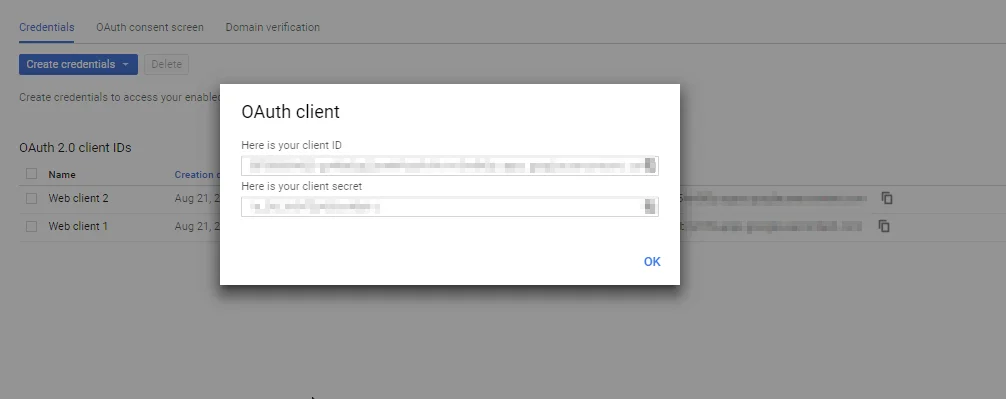
- You will see a popup with the Client ID and Client Secret Copy your Client ID and Client Secret.
- You have successfully completed your Google App OAuth Server side configurations.
4.1. Configure LinkedIn as OAuth 2.0 Provider in miniOrange.
- Go to miniOrange Admin Console.
- From the left navigation bar select Identity Providers >> Add Identity Provider.
- Select OAuth2.0
- Enter the following values:
| IdP Name |
Custom Provider |
| IdP Display Name |
Choose appropriate Name |
| OAuth Authorize Endpoint |
https://www.linkedin.com/oauth/v2/authorization |
OAuth Access Token Endpoint |
https://www.linkedin.com/oauth/v2/accessToken |
OAuth Get User Info Endpoint (optional) |
https://api.linkedin.com/v2/me |
| Client ID |
From step 4.2 |
| Client secret |
From step 4.2 |
| Scope |
r_emailaddress r_liteprofile |
4.2. Configure miniOrange as Service Provider (SP) in LinkedIn
- Go to https://www.linkedin.com/secure/developer?newapp= in order to create a new application. Click on Create Application button to create a new application.
- Enter the required details and click on the Create app button to save your changes.
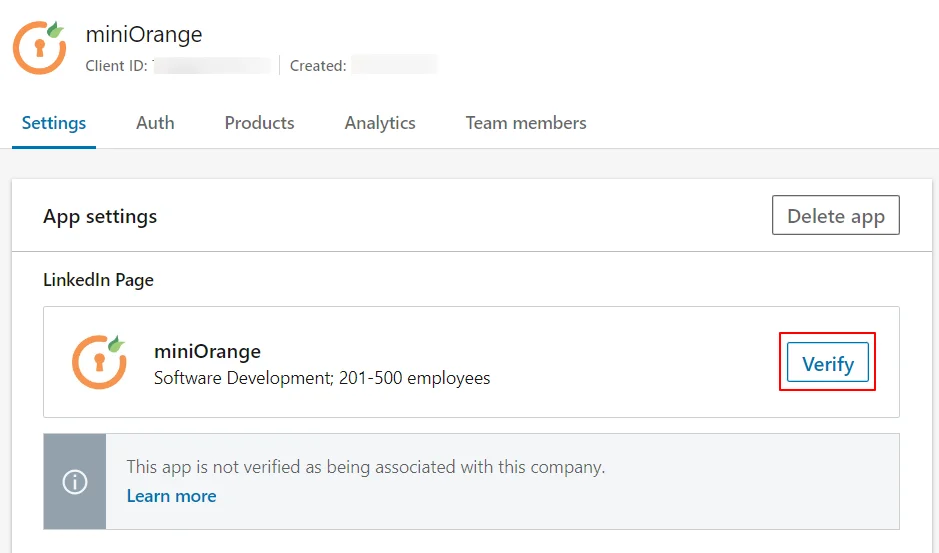
- Here you need to verify the provided page. If the verification of the page is not done, then SSO will not work.
- Navigate to Products section and then select Sign in with LinkedIn.
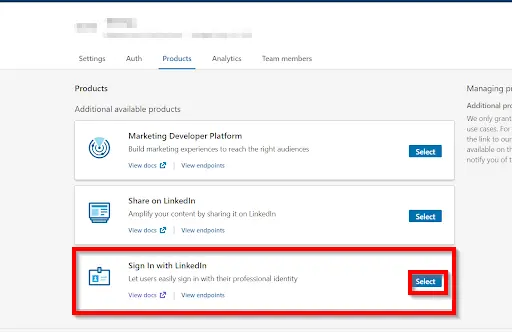
- Copy the Client Id and the Client Secret and save it in your miniOrange OAuth App configuration under Client Id and the Client Secret text fields respectively.
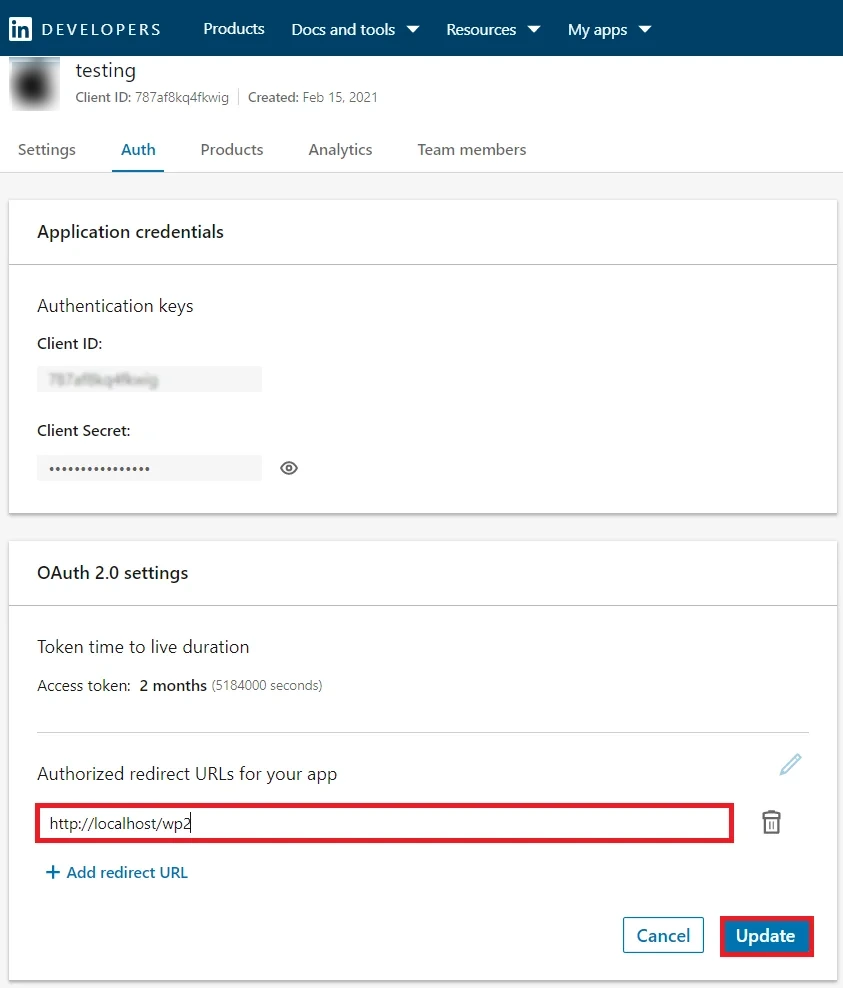
- To get the Redirect URL:
- Go to miniOrange Admin Console.
- From the left navigation bar select Identity Provider.
- Copy the Callback URL as Redirect URL required for next step.
- Copy the Redirect/ Callback URl from above step and enter it under OAuth 2.0 -> Authorized Redirect URLs text box. Click on the Add button adjacent to the text box to save it. Finally, click on the Update button to save your configurations. (image on the next page).
4.1. Configure Facebook as OAuth 2.0 Provider in miniOrange.
- Go to miniOrange Admin Console.
- From the left navigation bar select Identity Providers >> Add Identity Provider.
- Select OAuth2.0
- Enter the following values:
| IdP Name |
Facebook |
| IdP Display Name |
Choose appropriate Name |
| Client ID |
From step 4.2 |
| Client secret |
From step 4.2 |
| Scope |
public_profile email |
4.2. Configure miniOrange as Service Provider (SP) in Facebook
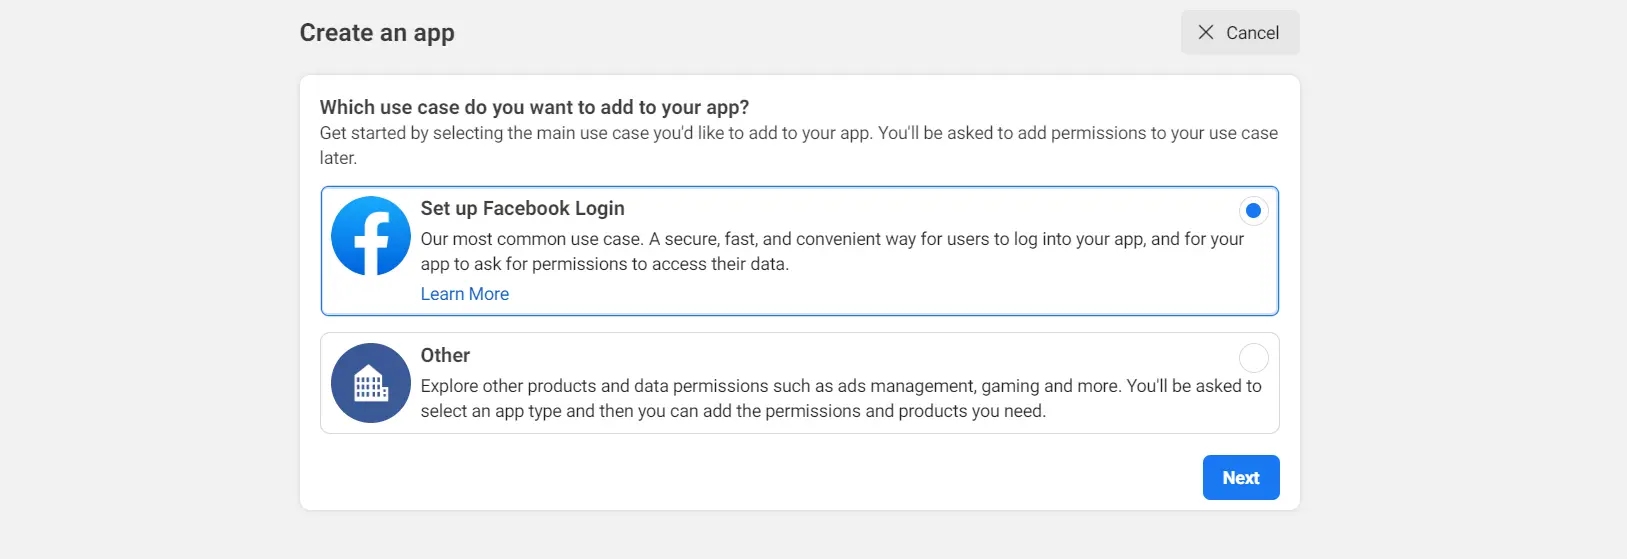
- First of all, Login/ Signup in Facebook developer console at https://developers.facebook.com/
- Go to My apps.
- Click on Create app to create a new app.
- Select what your app is going to work for.
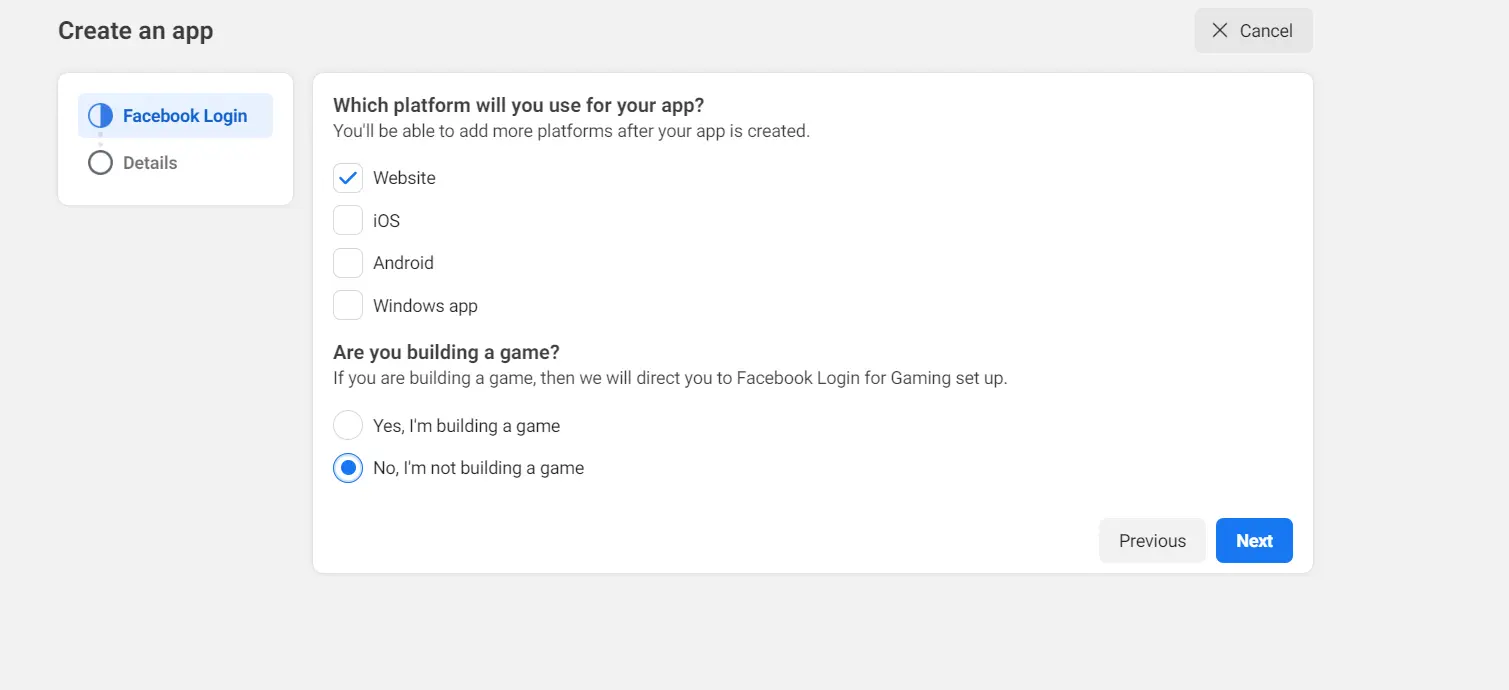
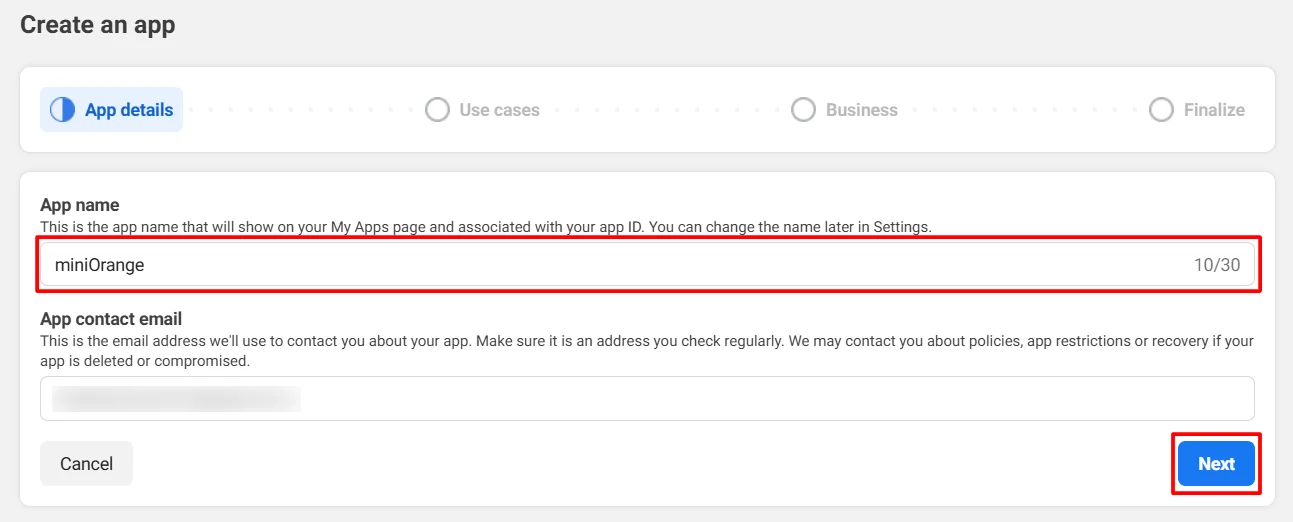
- Enter the required details and click on create app.
- Complete the security check and click on Submit button.
- Select Facebook Login by clicking on the set up button .
- Select Facebook Login >> Settings under Products option in the navigation bar.
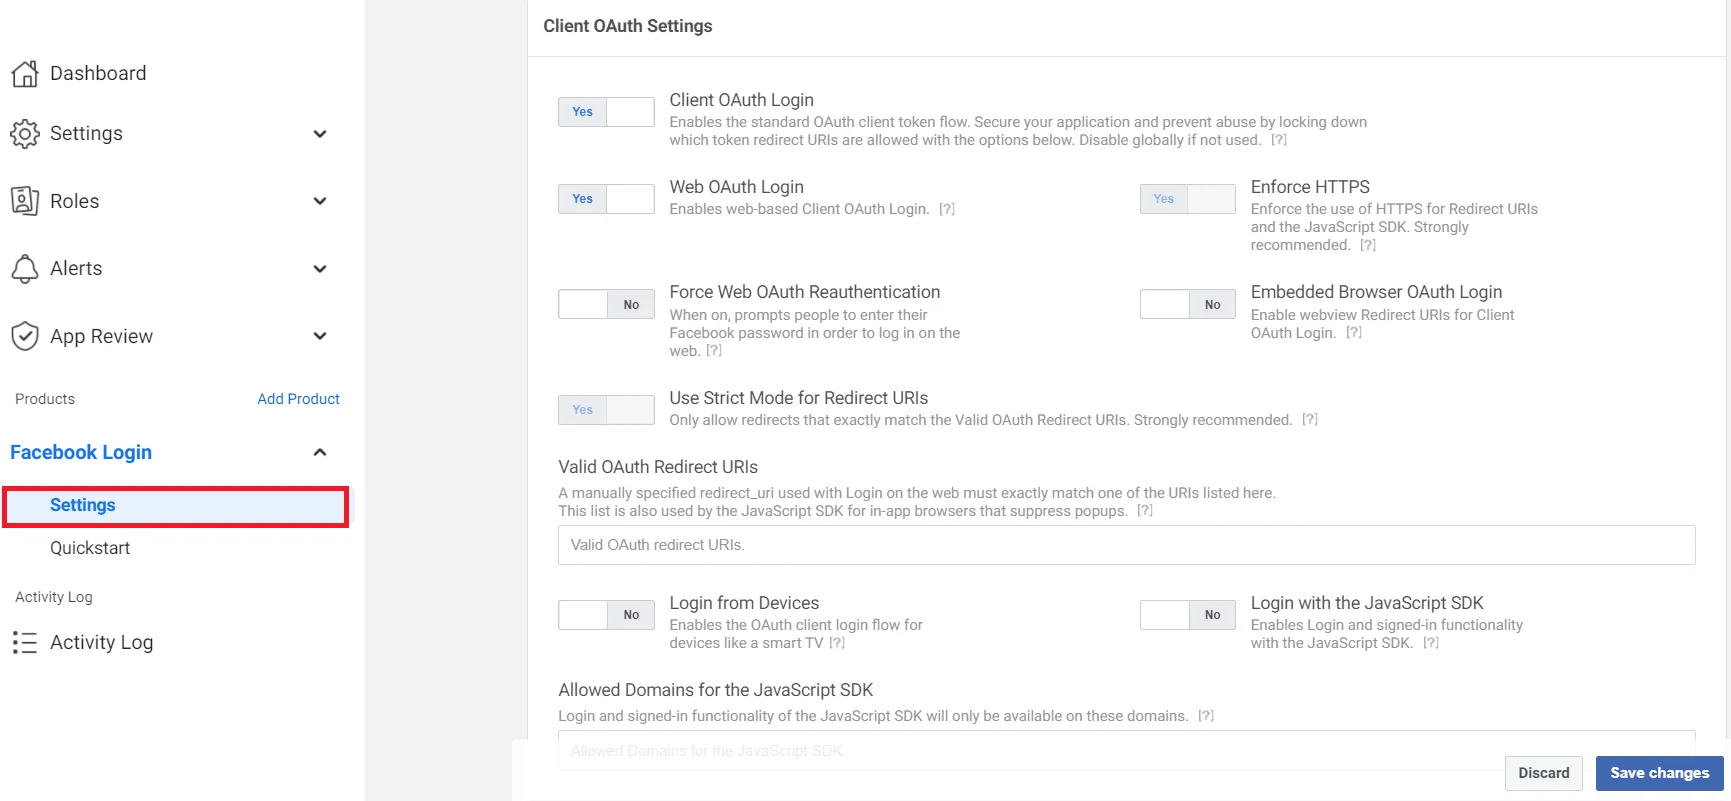
- To get the Redirect URL:
- Go to miniOrange Admin Console.
- From the left navigation bar select Identity Provider.
- Copy the Callback URL as Redirect URL required for next step.
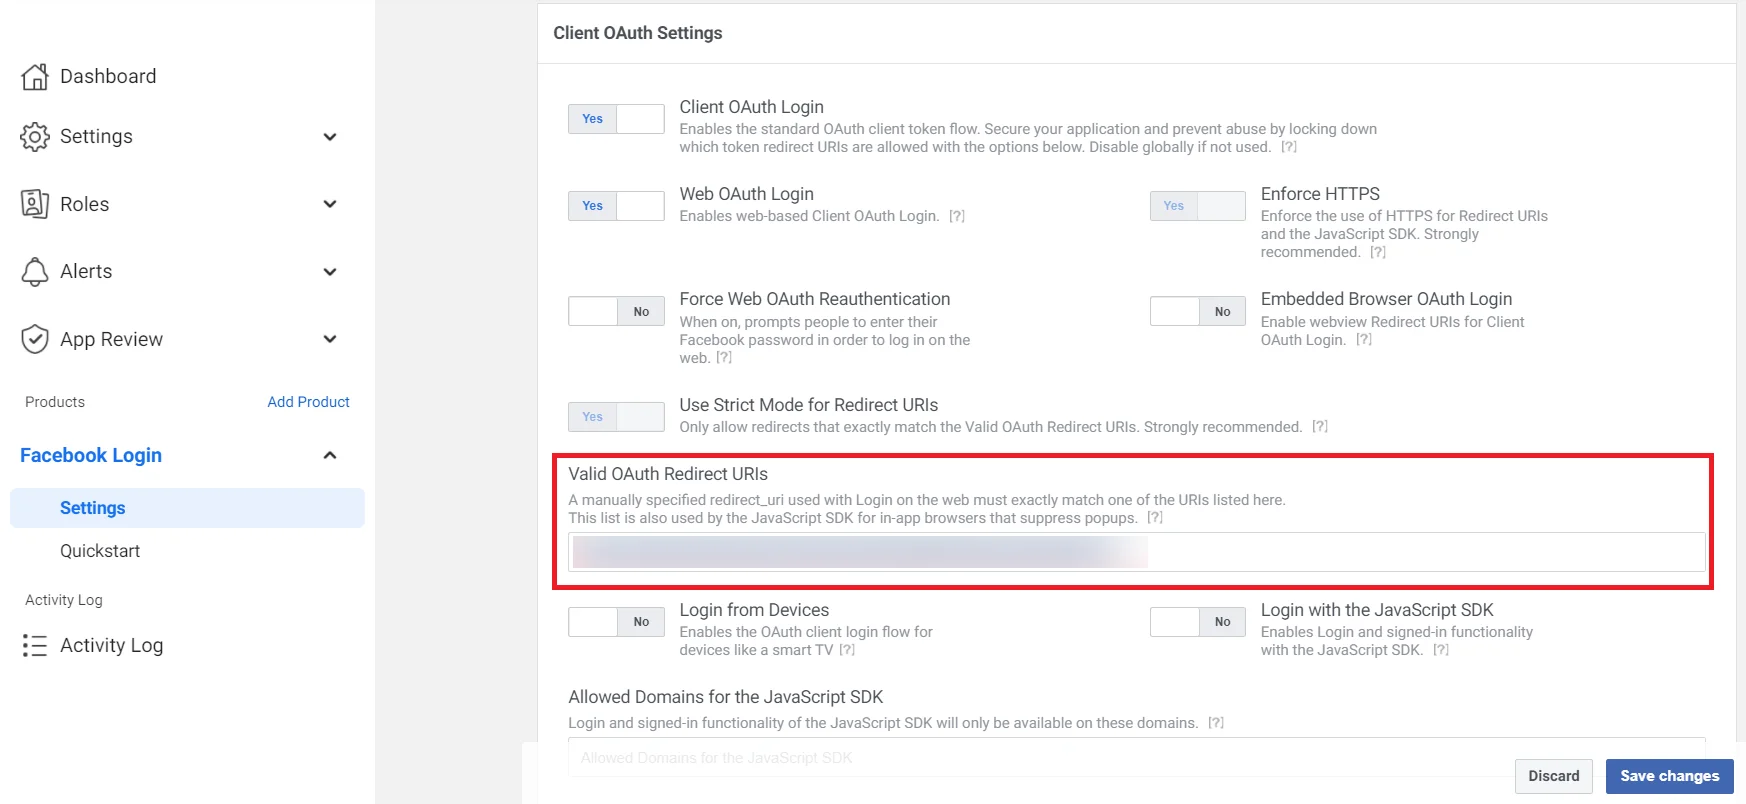
- Under Client OAuth Settings, enter the Callback/Redirect URL in the Valid OAuth Redirect URIs field. Click on the Save button to save your configurations.
Most importantly, your Callback/Redirect URI should be https and not http. It is mandatory while configuring Facebook as an OAuth Server.
- Go to Settings -> Basic to view your App Id and App Secret (Refer to the image below).
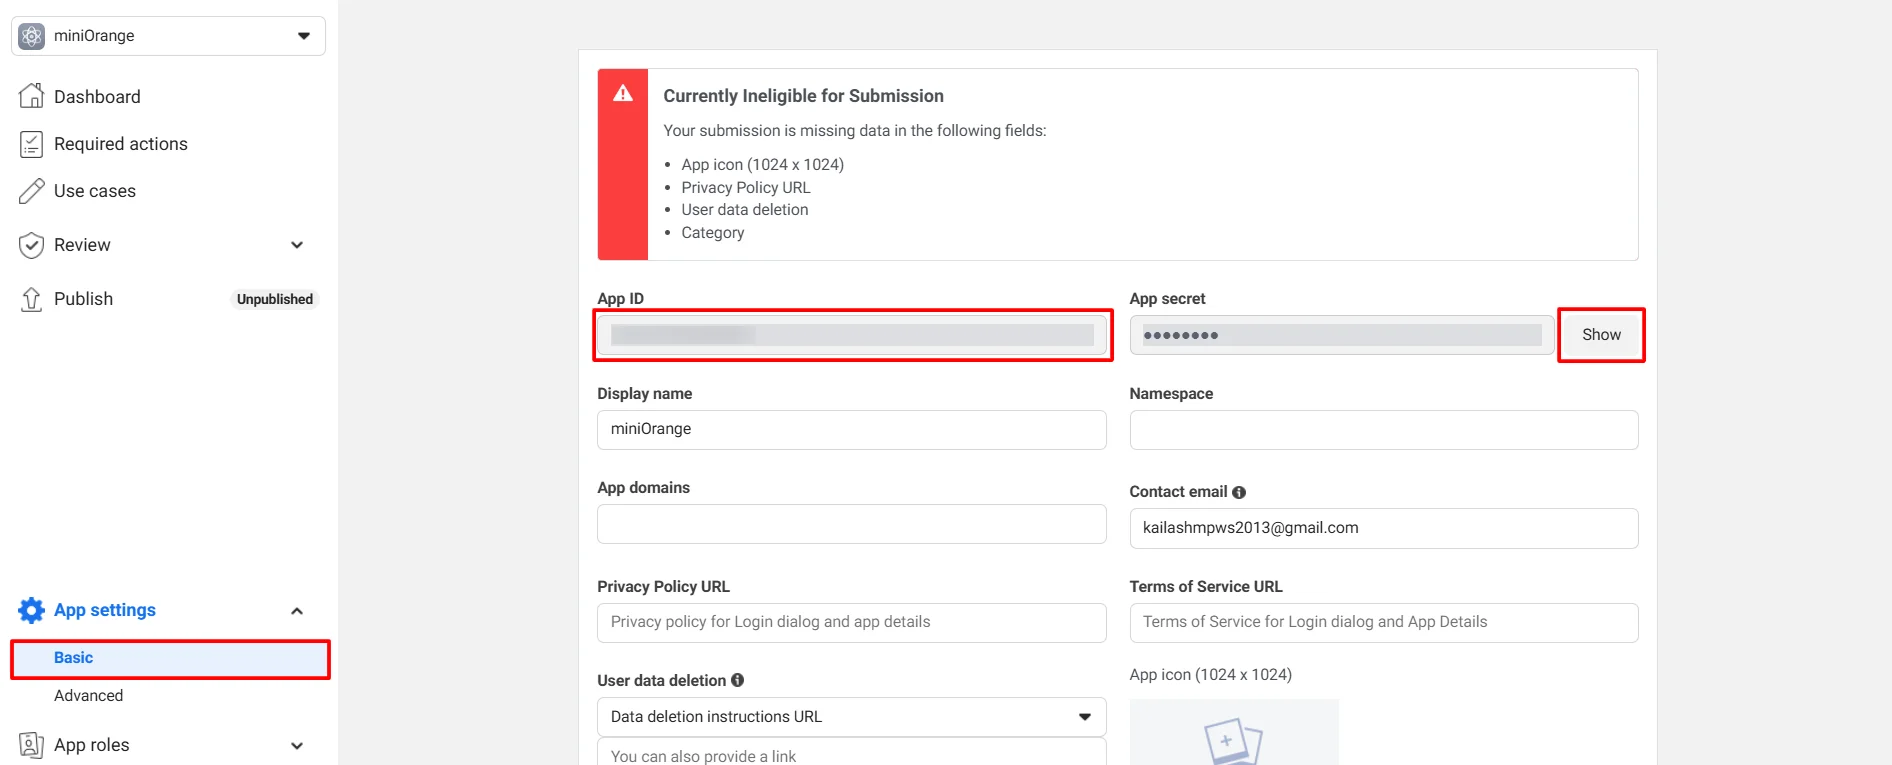
- You have successfully completed your Facebook App OAuth Server side configurations.
4.1. Configure Apple Apps as OAuth 2.0 Provider in miniOrange.
- Go to miniOrange Admin Console.
- From the left navigation bar select Identity Providers >> Add Identity Provider.
- Select OAuth2.0
- Fill in the details shown in the below image.
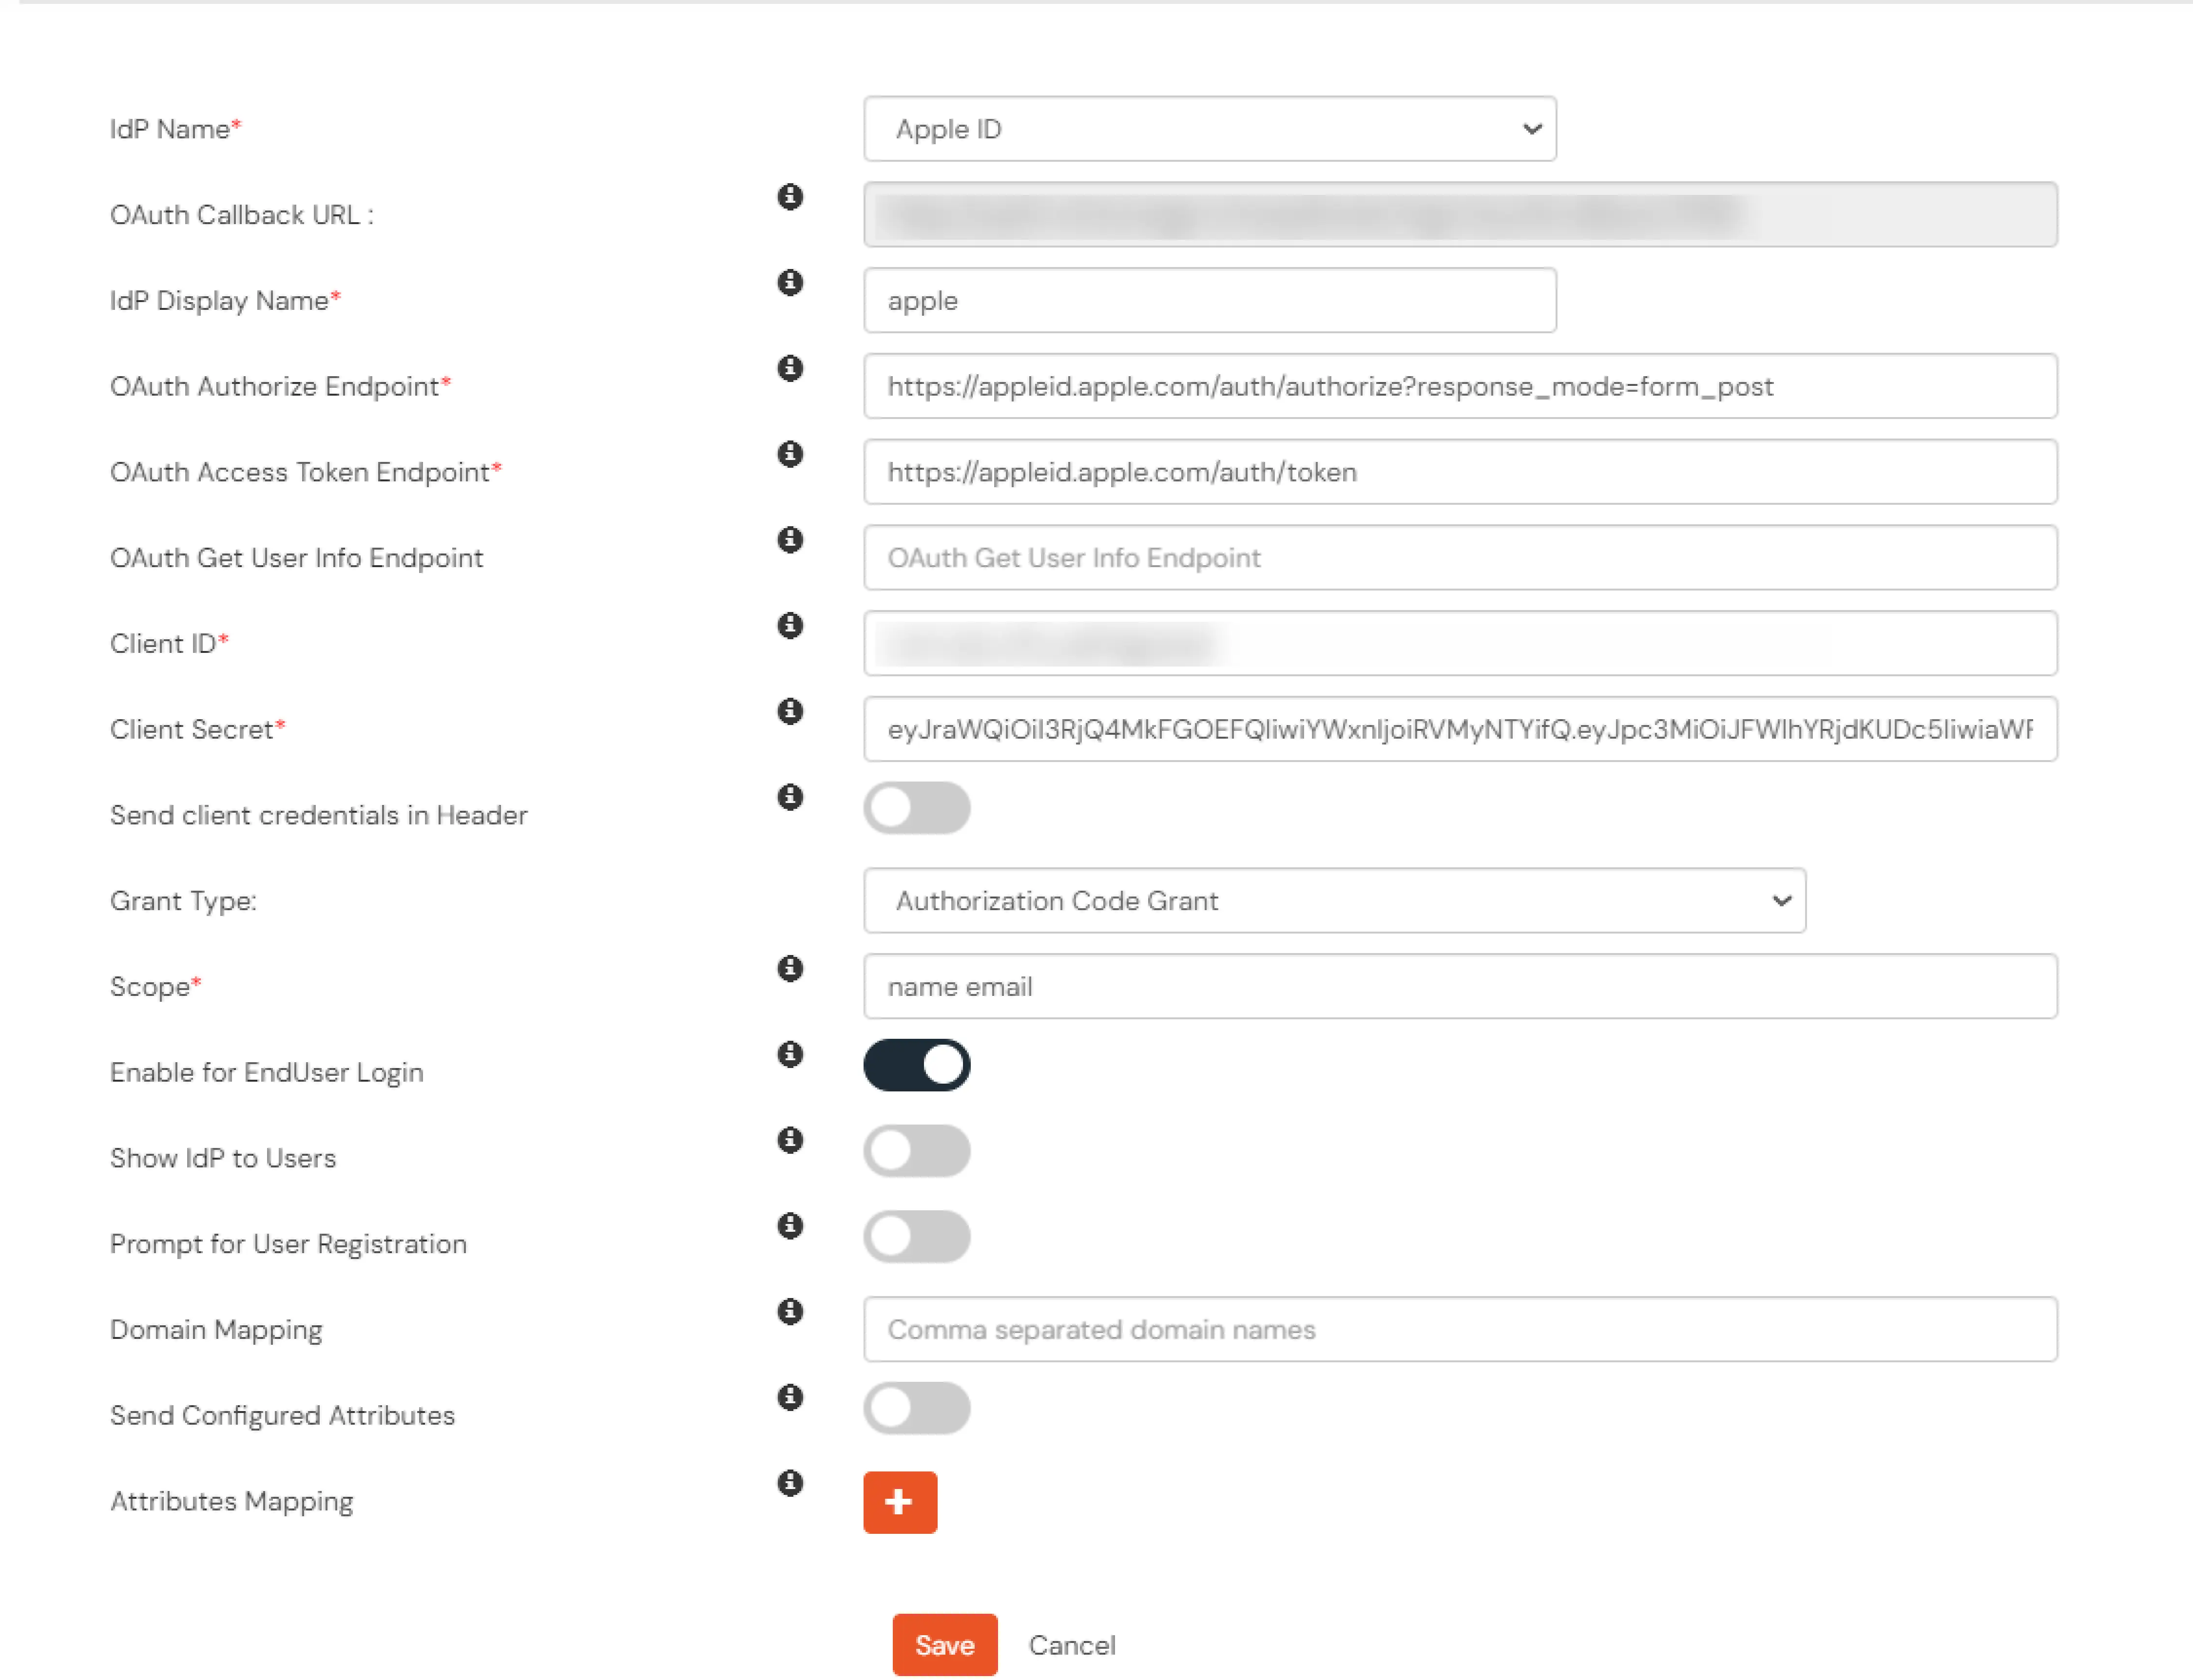
| IDP Name: |
Apple ID |
| OAuth Authorize Endpoint |
https://appleid.apple.com/auth/authorize?response_mode=form_post |
| OAuth Access Token Endpoint* |
https://appleid.apple.com/auth/token |
| Client ID* |
{Your service id} e.g. com.john.serviceid |
| Client Secret* |
eyJraWQiOiJCOTJQUDg1VUw4IiwiYWxnIjoiRVMyNTYifQ.eyJpc3MiOiJFW.... |
- Click Save.
4.2. Configure miniOrange as Service Provider (SP) in Apple Apps
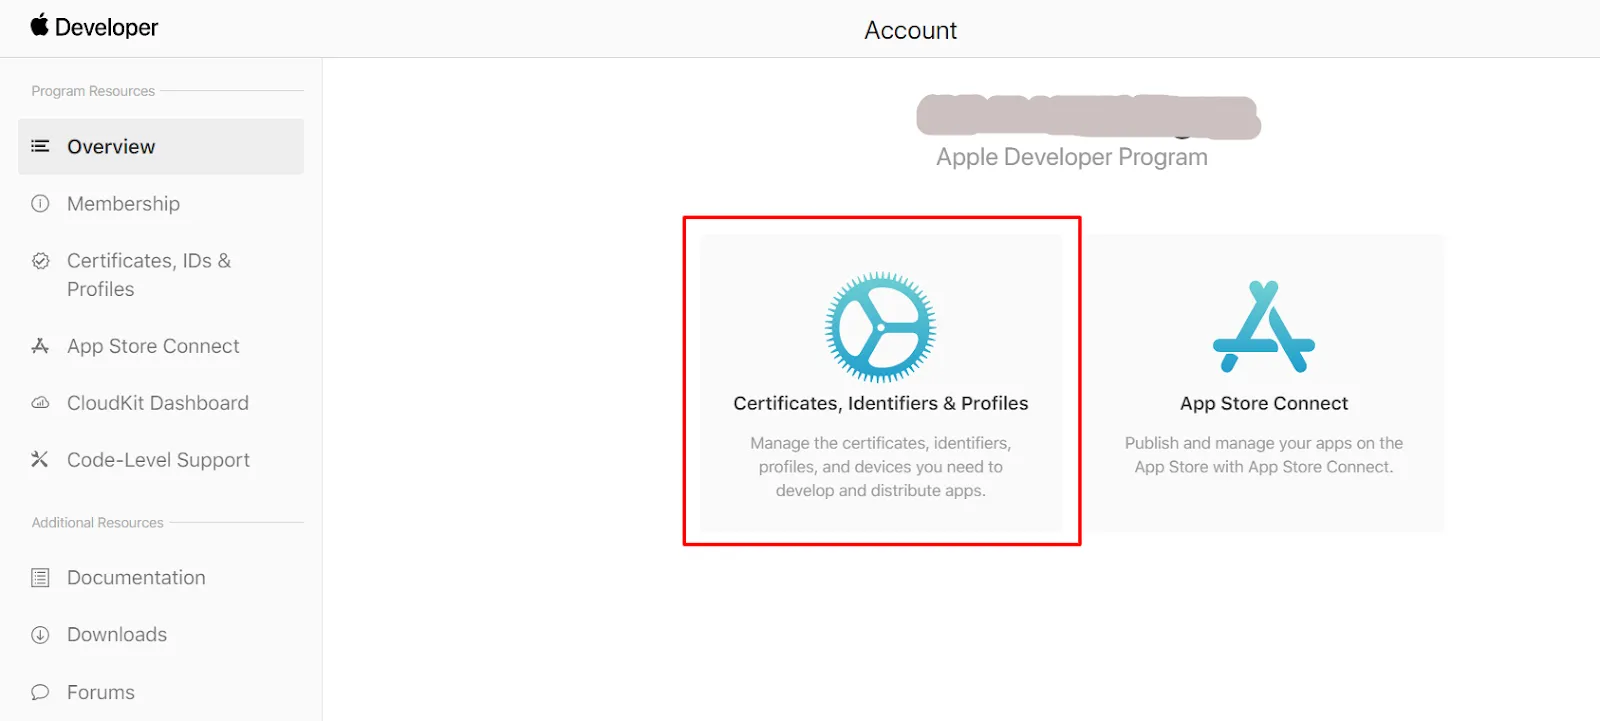
- Go to https://developer.apple.com click on Account and Login with your Apple developer account.

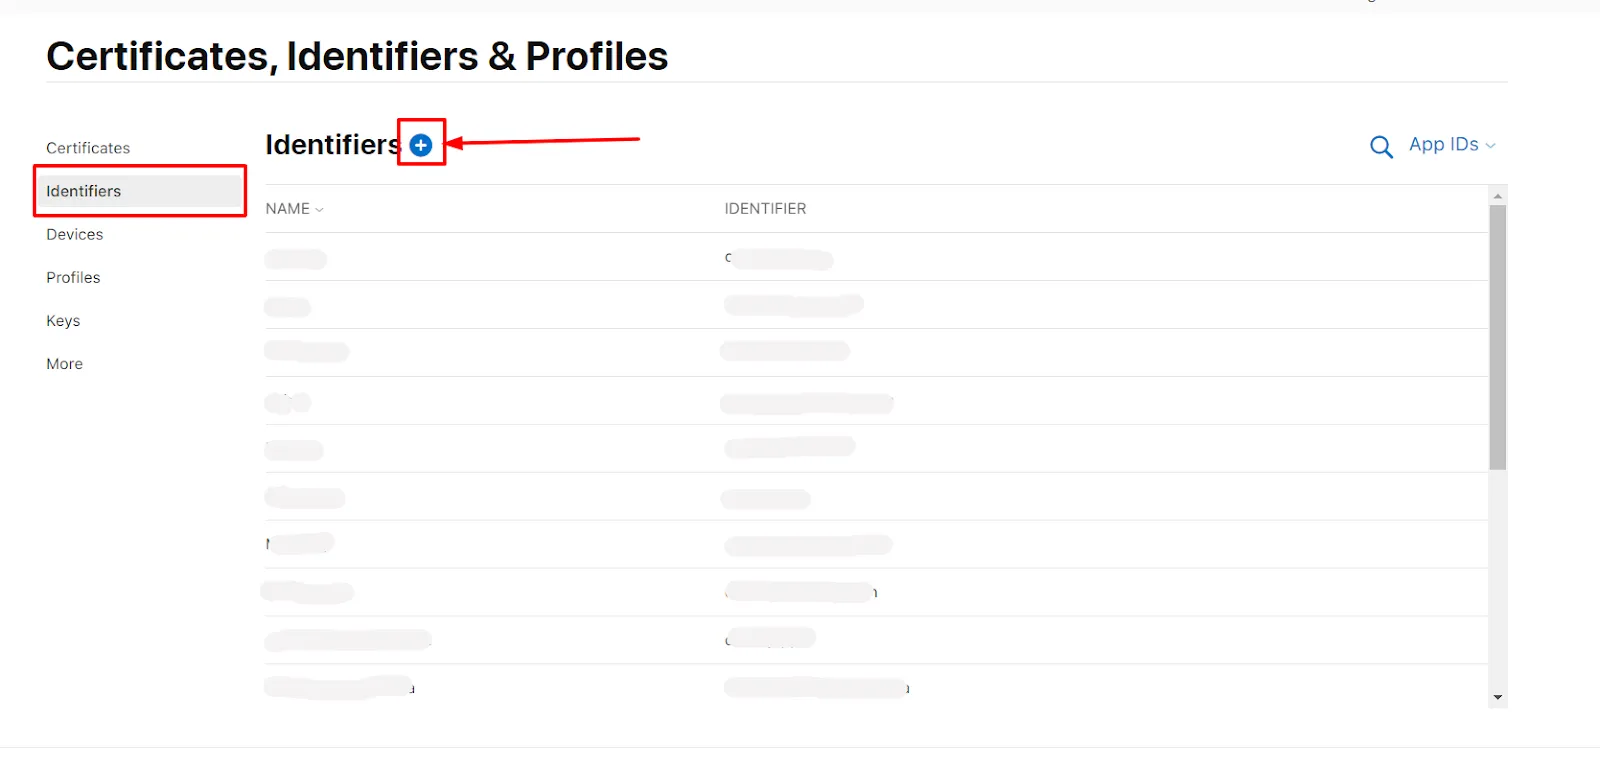
- Click on Certificates, Identifiers and Profiles in Apple Account.
- In the left menu Click on Identifiers and after that click on the Plus Icon(blue color). Click on Continue for the next 2 pages of Apple Account.
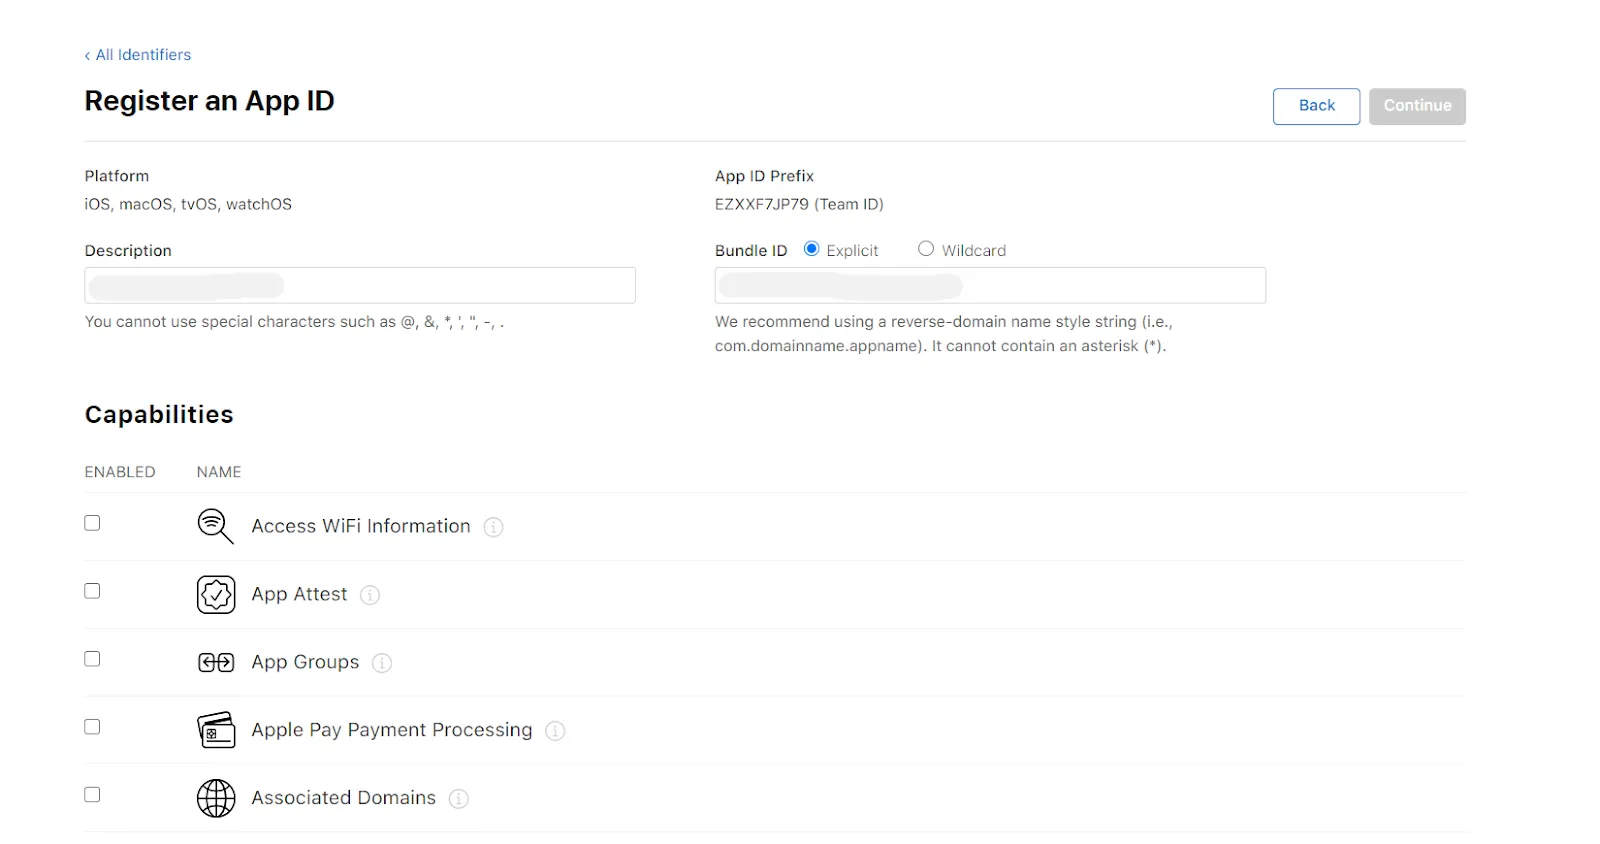
- Enter Description and Bundle ID for the App ID. (The Bundle ID is best when it’s a reverse-dns style string.)
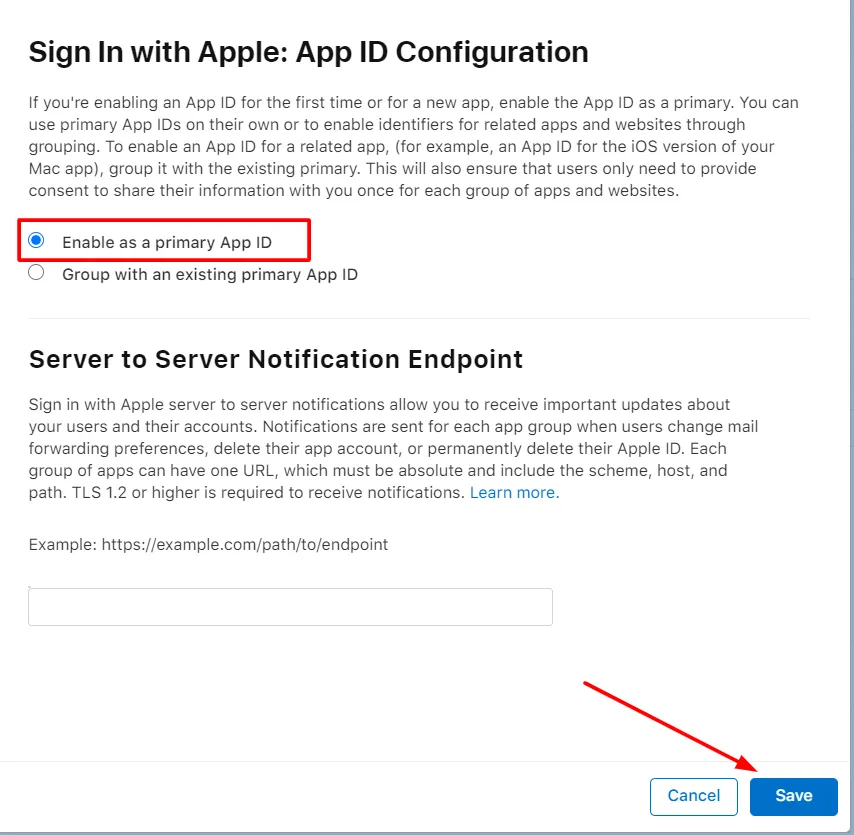
- In the Capabilities section scroll down and select sign up with apple. Click on Edit and select Enable as a primary App Id and click on Save. Click on Continue and then click on Register.

- In the right corner click on Continue and after that Register button.
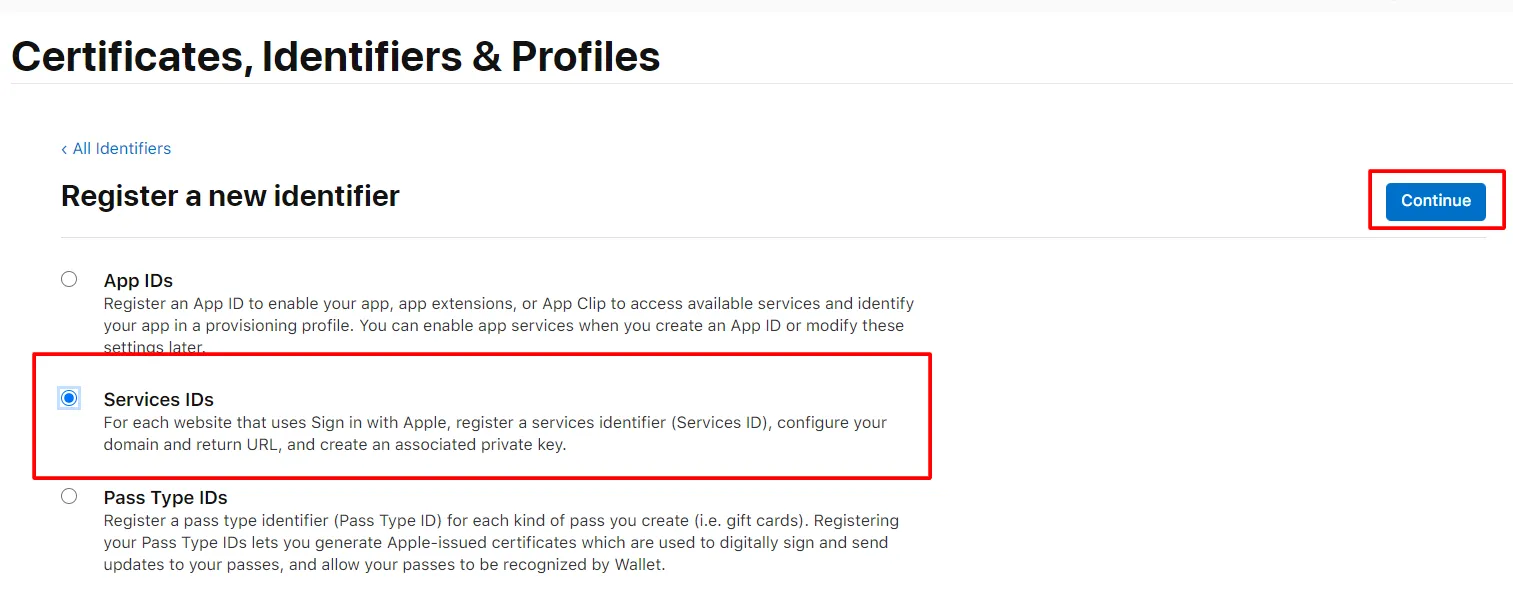
- Again click the Plus icon( blue color). Select Service IDs and click on Continue.
- Enter Description and Identifier( Identifier would be your client id - Copy this id and Paste in the above field of Client ID). and click on the Continue and after that Register button.

- Click Keys from the left menu.Click on the Plus icon to register a new key.
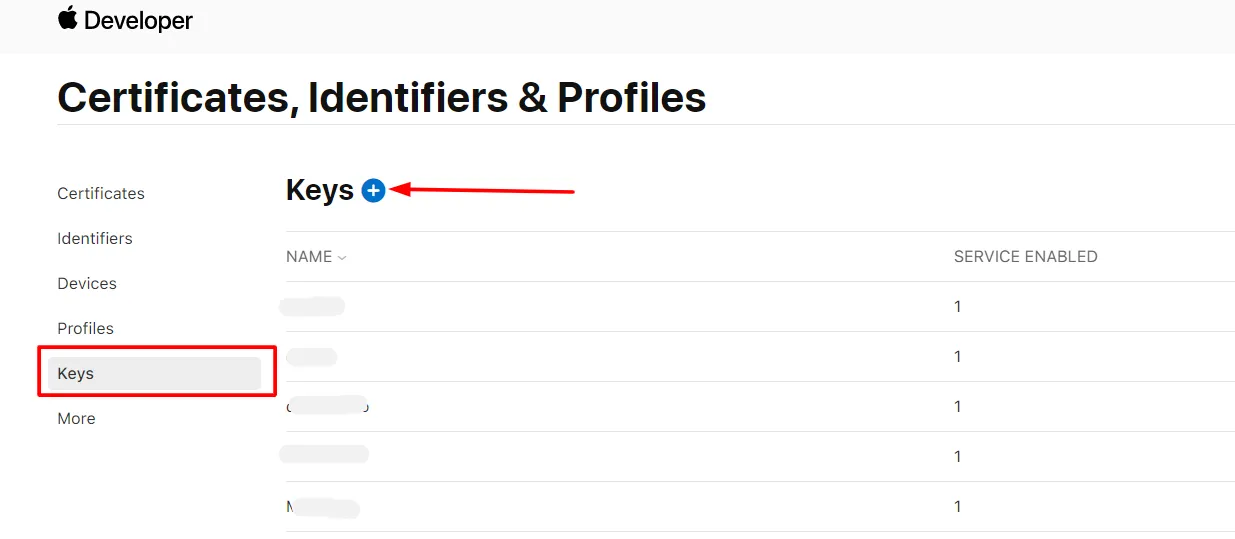
- Give your Key a name, and select Sign In with Apple and click on Configure button
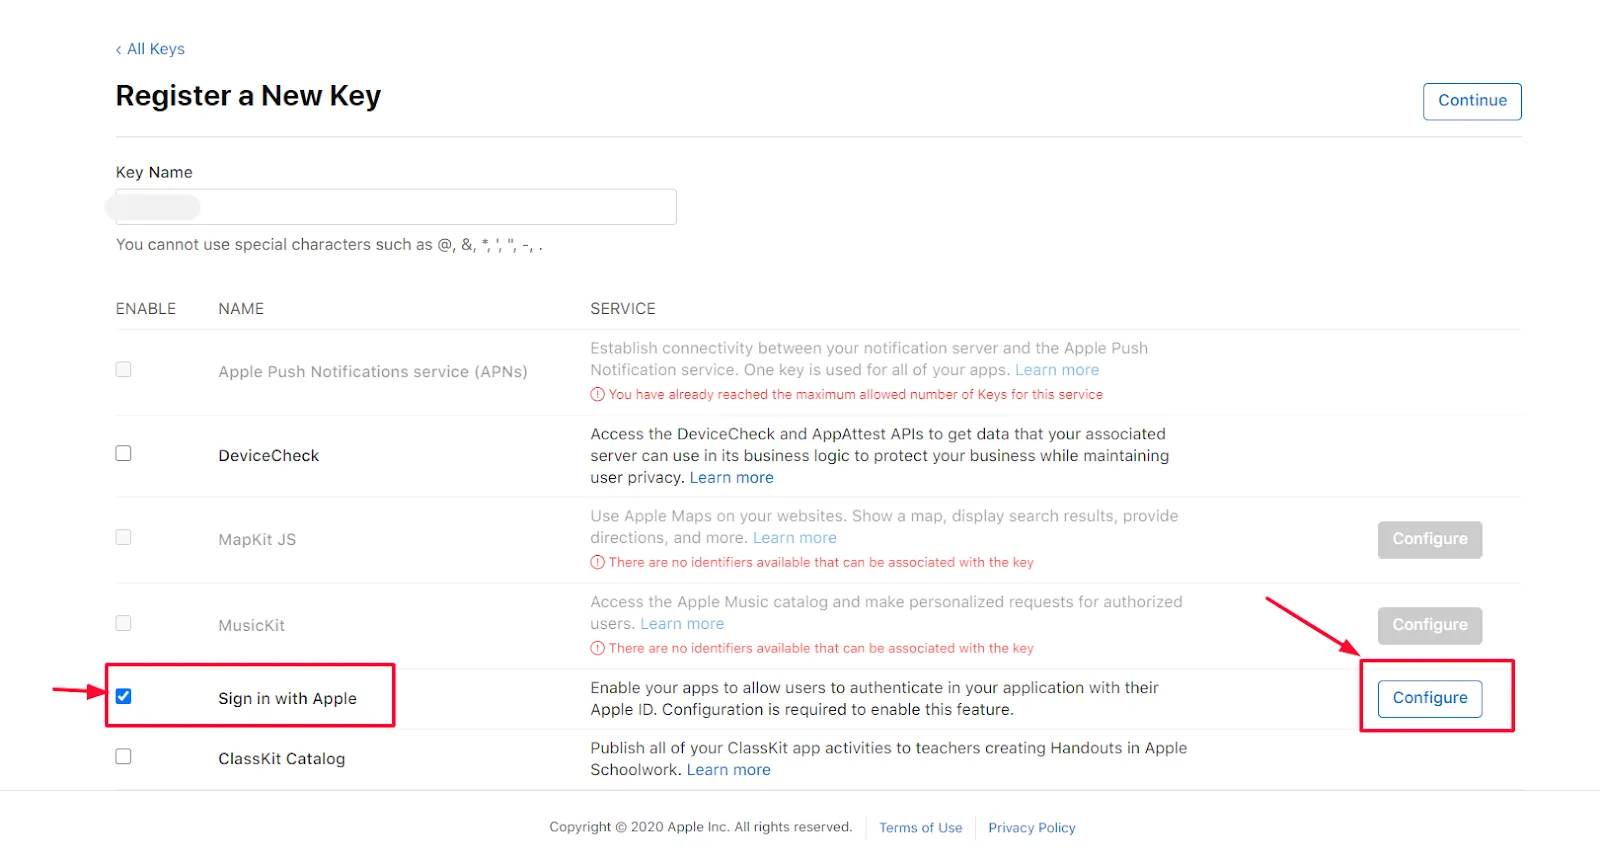
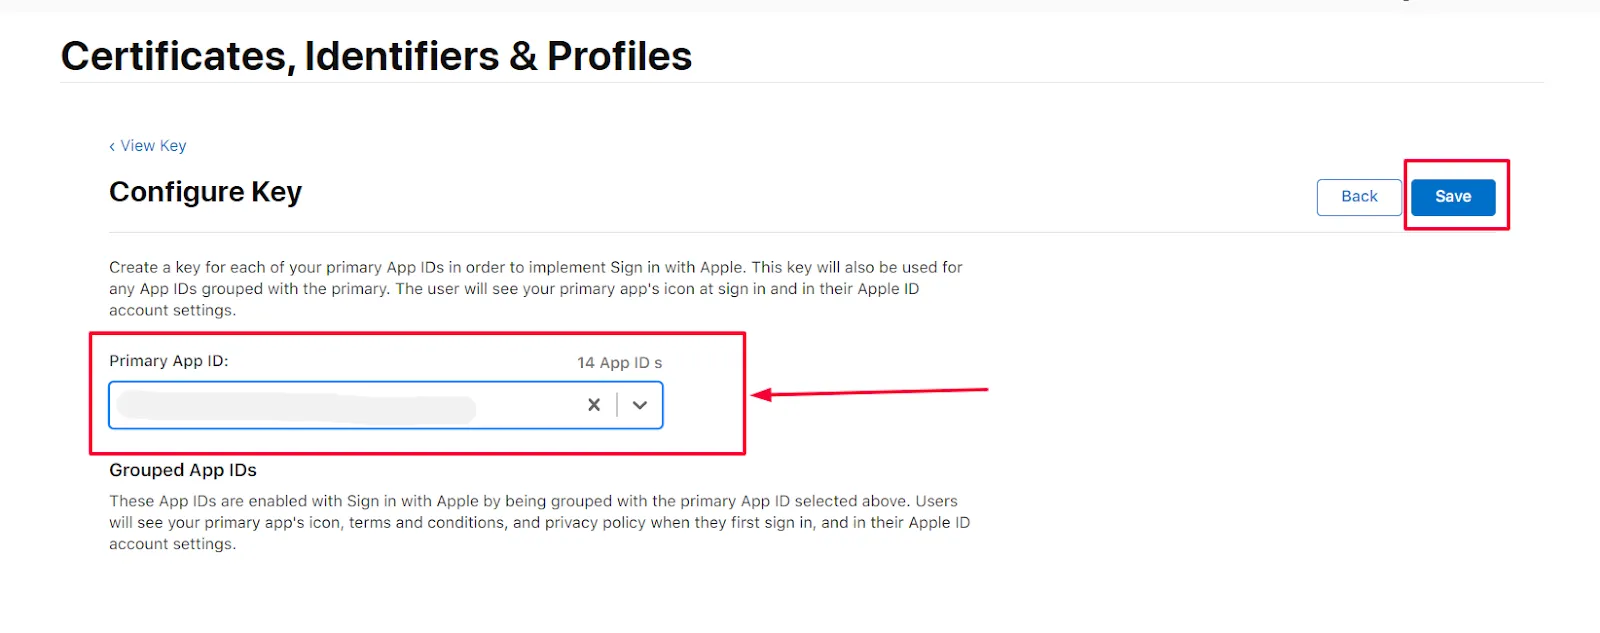
- Select your Primary Id and click on the Save button and after that at the right corner click on Continue and Register button.
- Click on the Download button once the key is downloaded click on the Done button.

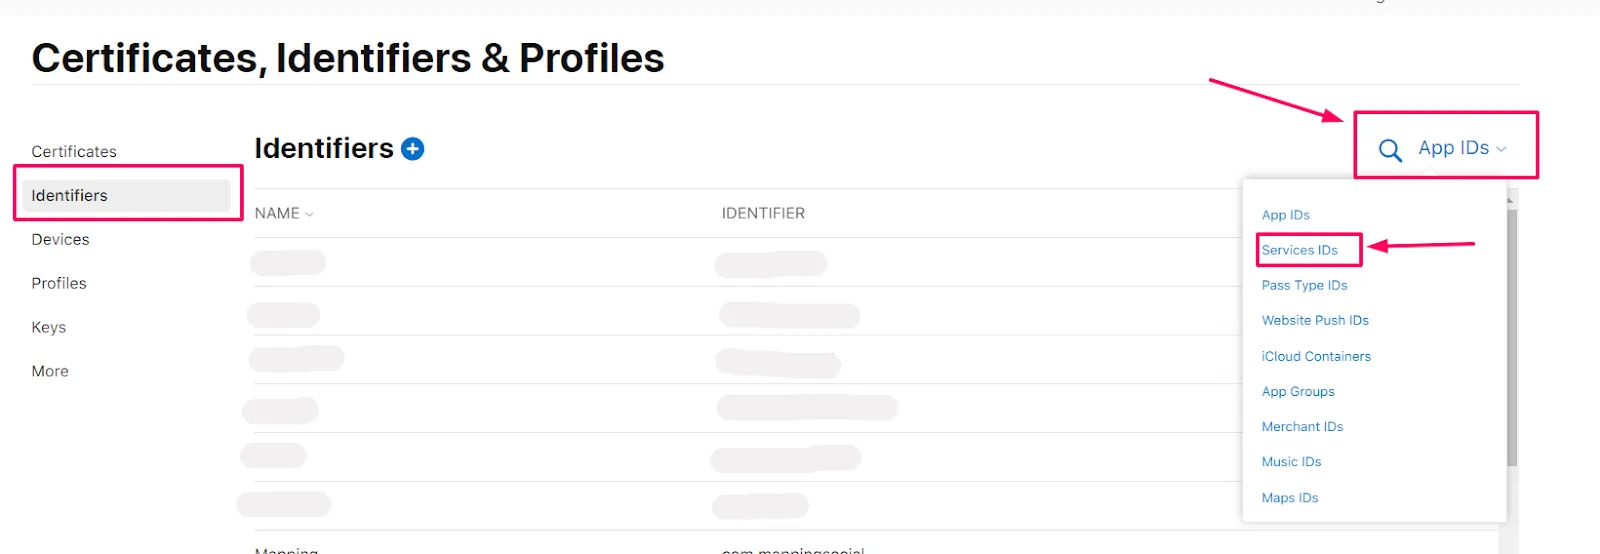
- In the left menu click on Identifiers.
- At the right top click on App IDs.
- Select Service IDs from the drop-down menu.
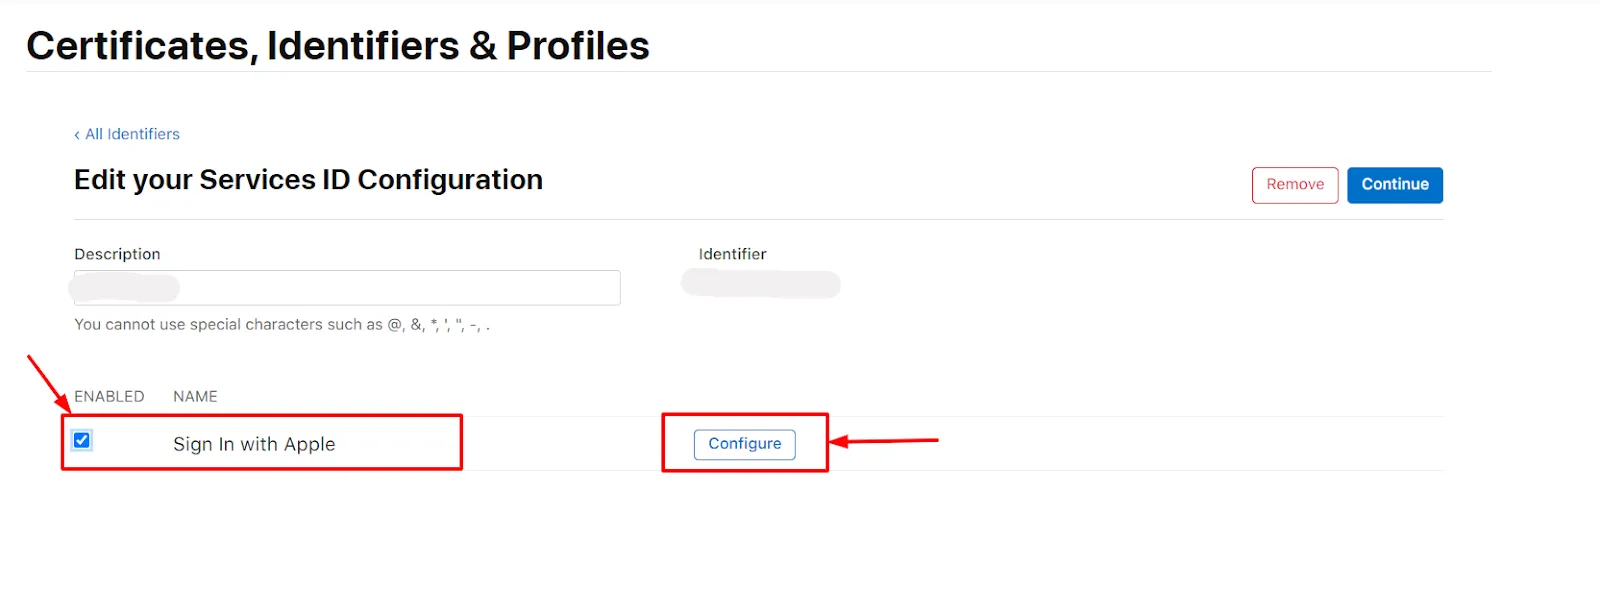
- Select your Service Id from the List.
- Select Sign In with Apple and click on Configure button<./li>
- Select the Primary App Id from the drop-down, and Enter the Domain and Redirect URL in Domains and Subdomains and Return URLs respectively and click on the Next button (You will get the Domain name and Redirect URL from miniOrange dashboard).
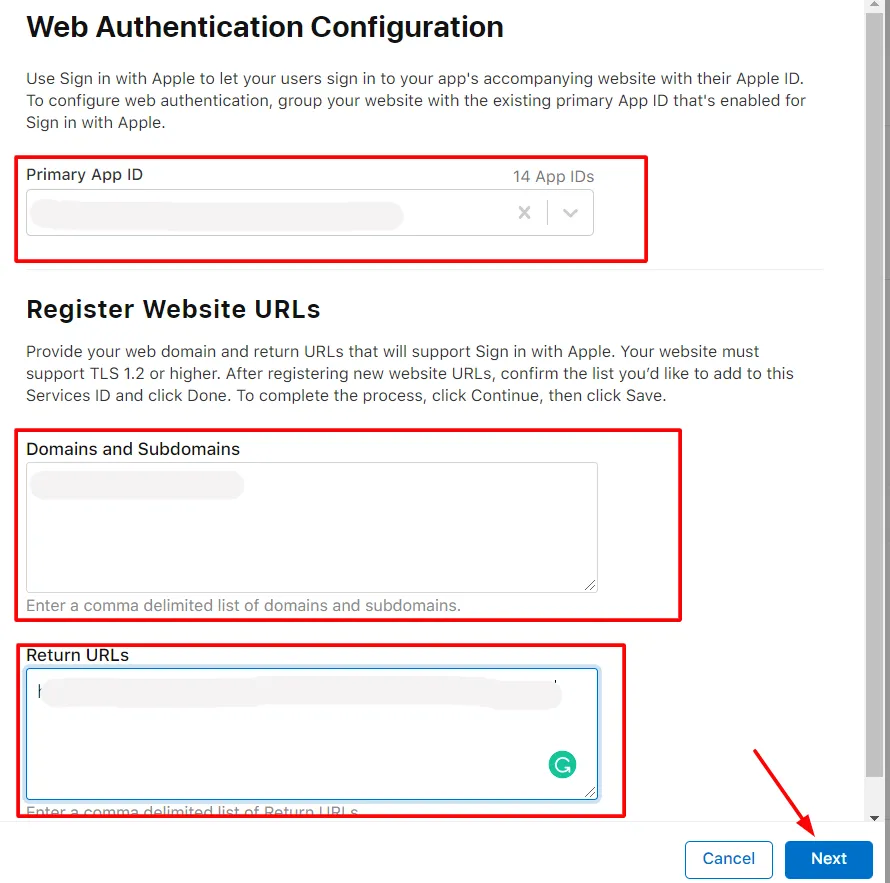
- Verify the details and click on the Done button. After that at the right corner click on the Continue button.
- Copy the Identifier value and click on the Save button.
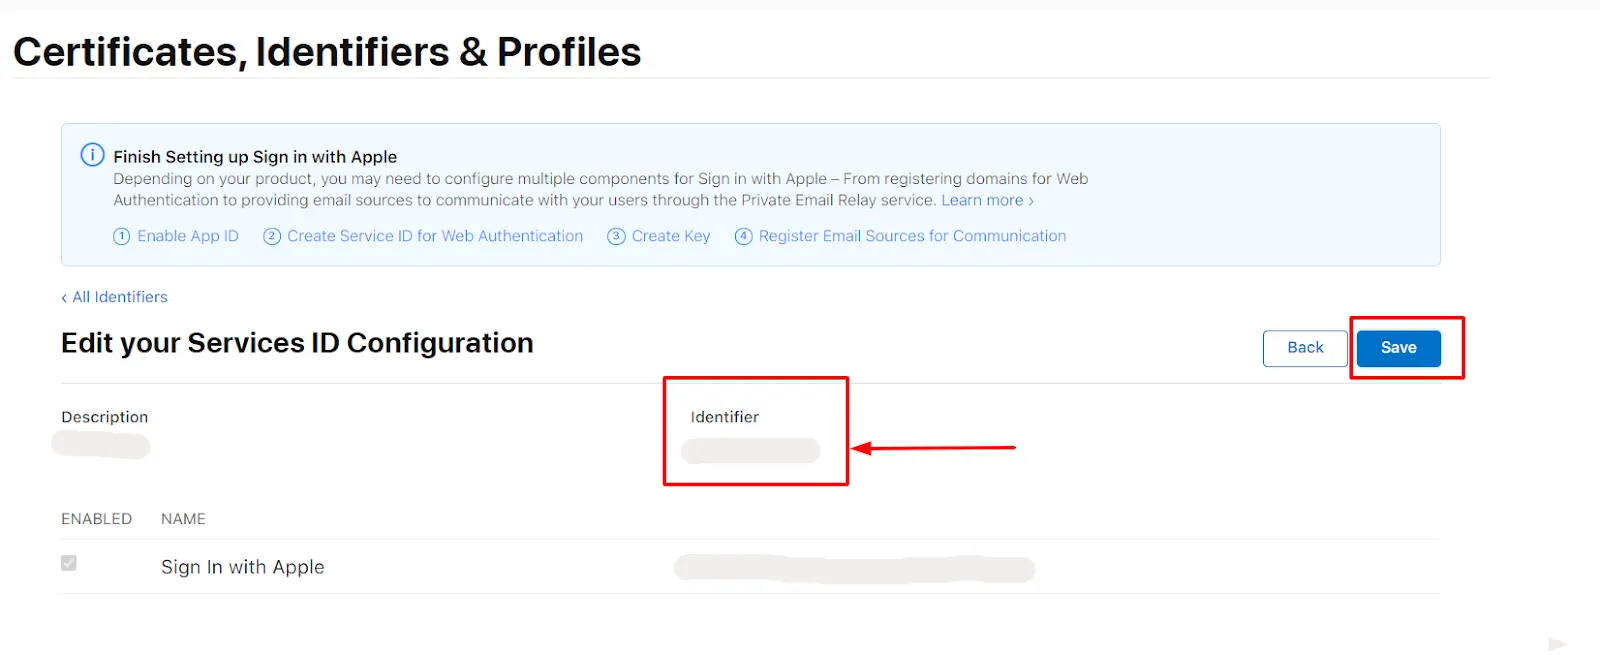
- Enter the Identifier value in the App Id field and copy the downloaded key value in App secret field of the Apple Login instruction miniOrange plugin.
Generating Secret Key
- Download the Ruby installer from the following link https://rubyinstaller.org/downloads/ and then install it.
- Search for the Start command prompt with ruby open the ruby command prompt and install the JWT gem by running the following command on the command line: gem install jwt.
- Copy the below code in a file and save the file with the .rb extension. Keep this .rb file and downloaded .p8 file in the same folder.
- Enter the name of downloaded file example= "key.P8", key_id , client_id, team_id in the code
require 'jwt'
key_file = 'key.P8'
team_id = ''
client_id = ''
key_id = ''
ecdsa_key = OpenSSL::PKey::EC.new IO.read key_file
headers = {
'kid' => key_id
}
claims = {
'iss' => team_id,
'iat' => Time.now.to_i,
'exp' => Time.now.to_i + 86400*180,
'aud' => 'https://appleid.apple.com',
'sub' => client_id,
}
token = JWT.encode claims, ecdsa_key, 'ES256', headers
puts token
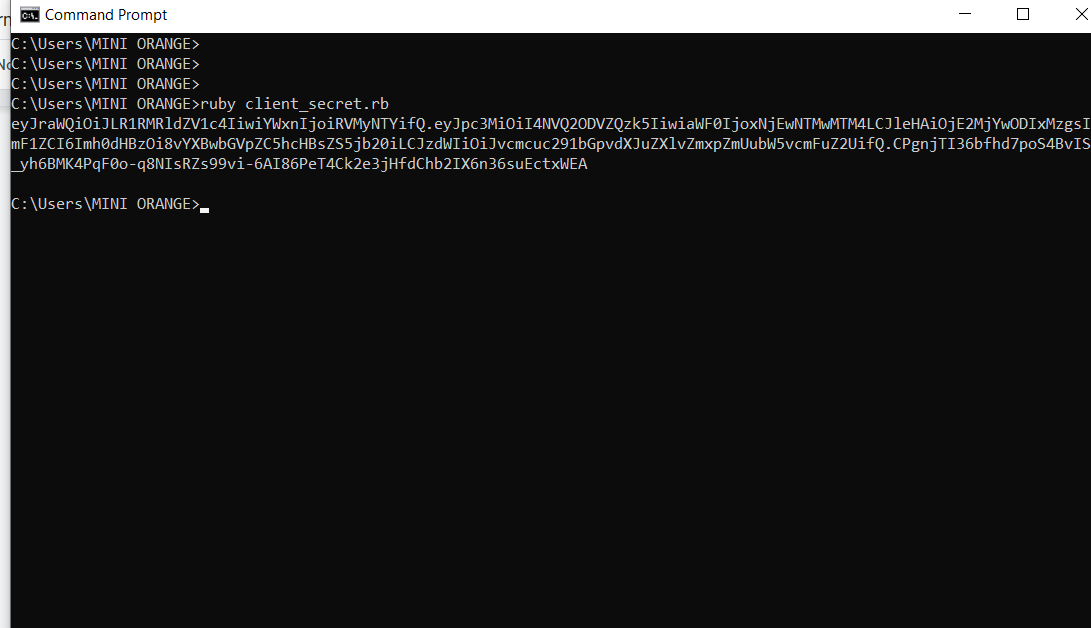
- Open Ruby command prompt and run the above code using the following command: ruby filename.rb.
- You will be provided with your Client secret key. Copy and save the secret key; you will need it to configure Apple ID in miniOrange Dashboard.
External References