Hello there!
Need Help? We are right here!
Need Help? We are right here!
Search Results:
×Secure your Outlook Web Access (OWA) and on-premises Exchange with an easy and reliable Single Sign-On (SSO) product from miniOrange. With this, your users only need to remember one set of login details to access Exchange and other applications, making their experience smoother and more secure.
Exchange single sign-on works with your existing Identity Providers (IDPs), like Microsoft Azure AD, ADFS, Okta, and others. This guide will help you set up Exchange SSO step-by-step, so you can simplify access, reduce the hassle of multiple passwords, and make logging in faster for everyone.
You start by trying to log in directly to your OWA and on-premise Exchange account. Your login request is then securely redirected to your Identity Provider (like Microsoft Entra) for verification. Once you successfully authenticate there, you’ll be logged into your OWA account without needing to enter your credentials again.
Here, you first log in to your Identity Provider (such as Microsoft Entra) using your credentials. After that, you can easily access your OWA and other connected apps from your Identity Provider dashboard without having to log in again for each service.
miniOrange provides user authentication from various external sources, which can be Directories (like ADFS, Microsoft Active Directory, OpenLDAP, AWS etc), Identity Providers (like Microsoft Entra ID, Okta, AWS), and many more. You can configure your existing directory/user store or add users in miniOrange.
All plans are required to do the single sign-on (SSO) configuration.
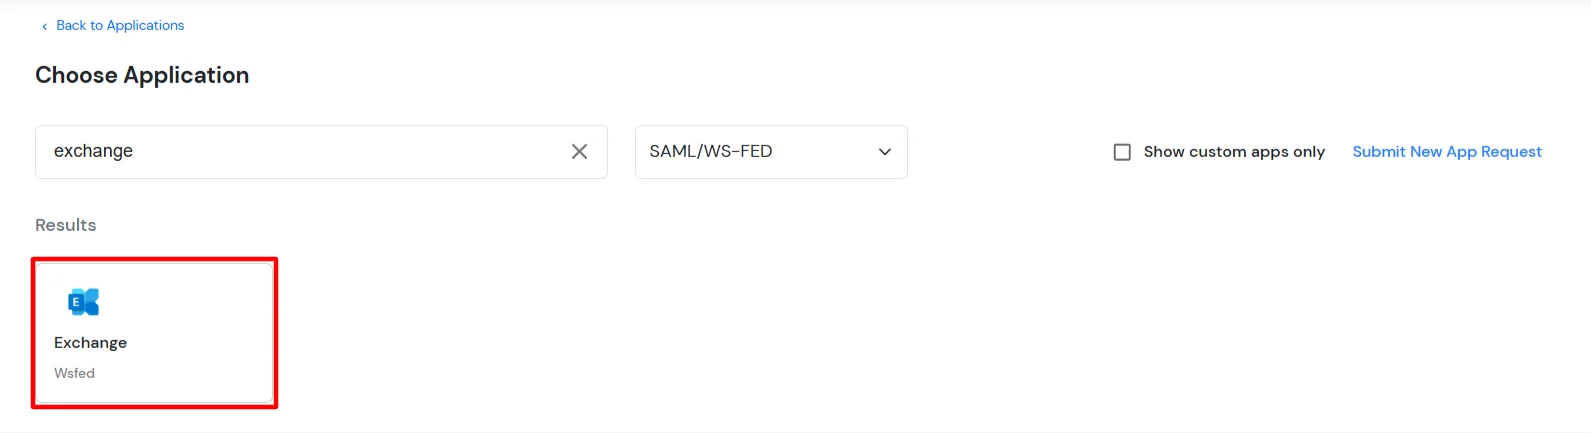
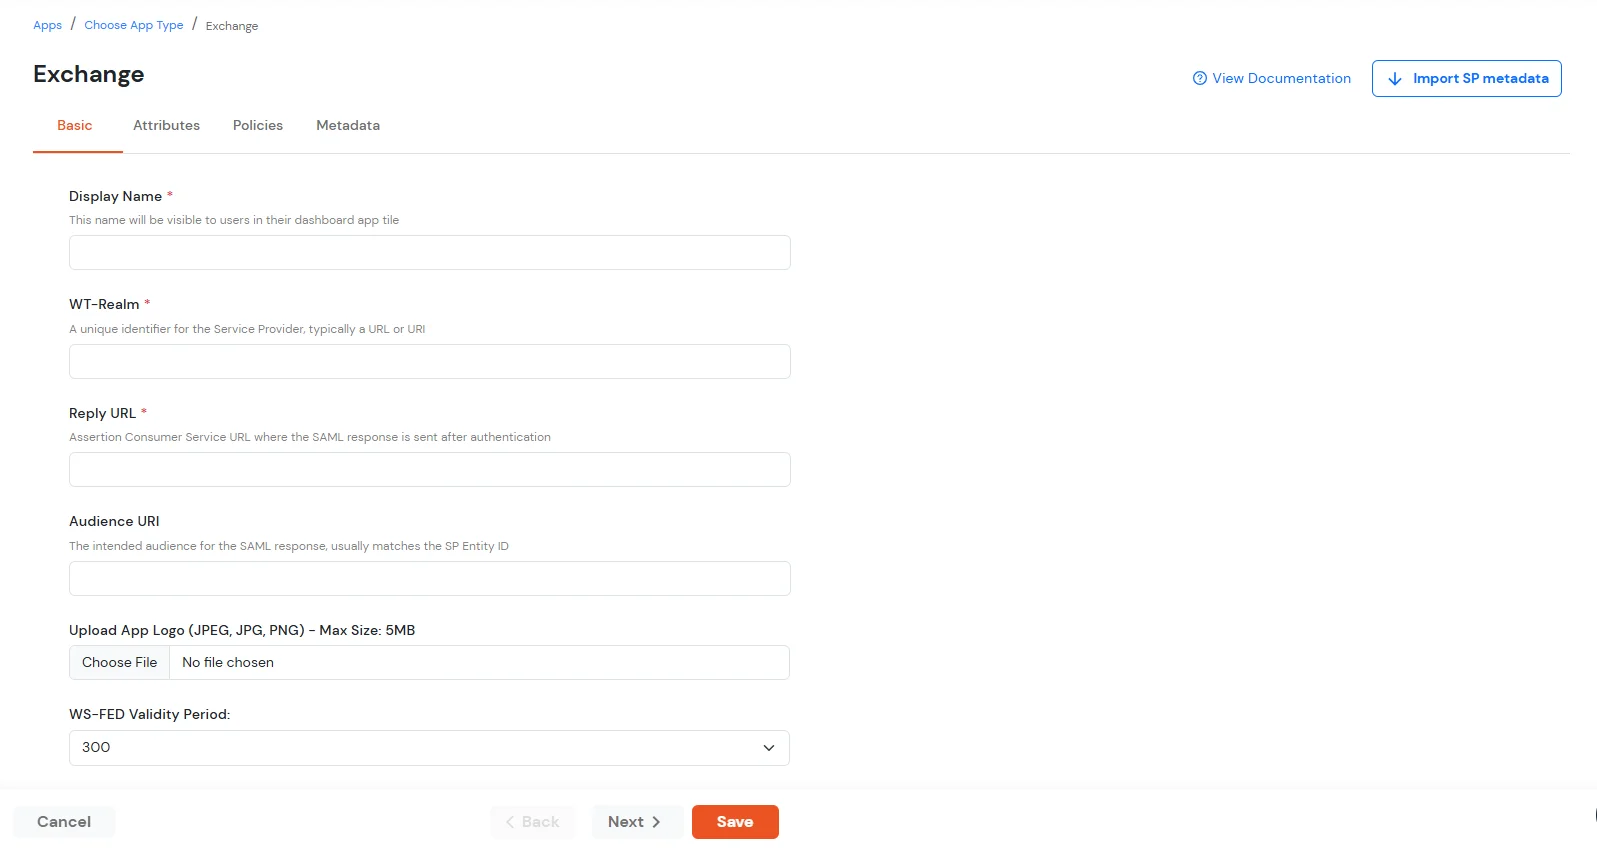
| Display Name | Exchange |
| WT-Realm | https://{owa-url} (e.g., https://mail.example.com/owa) |
| Reply URL | https://{owa-url} (e.g., https://mail.example.com/owa) |
| WS-FED Validity Period | 300s |
##Base URL## is the exchange/OWA host. The command has both URLs: One ending in / and the other one which does not contain a trailing slash.
$uris=@("https://##Base URL##/owa/","https://##Base URL##/ecp/","https://##Base URL##/owa","https://##Base URL##/ecp")
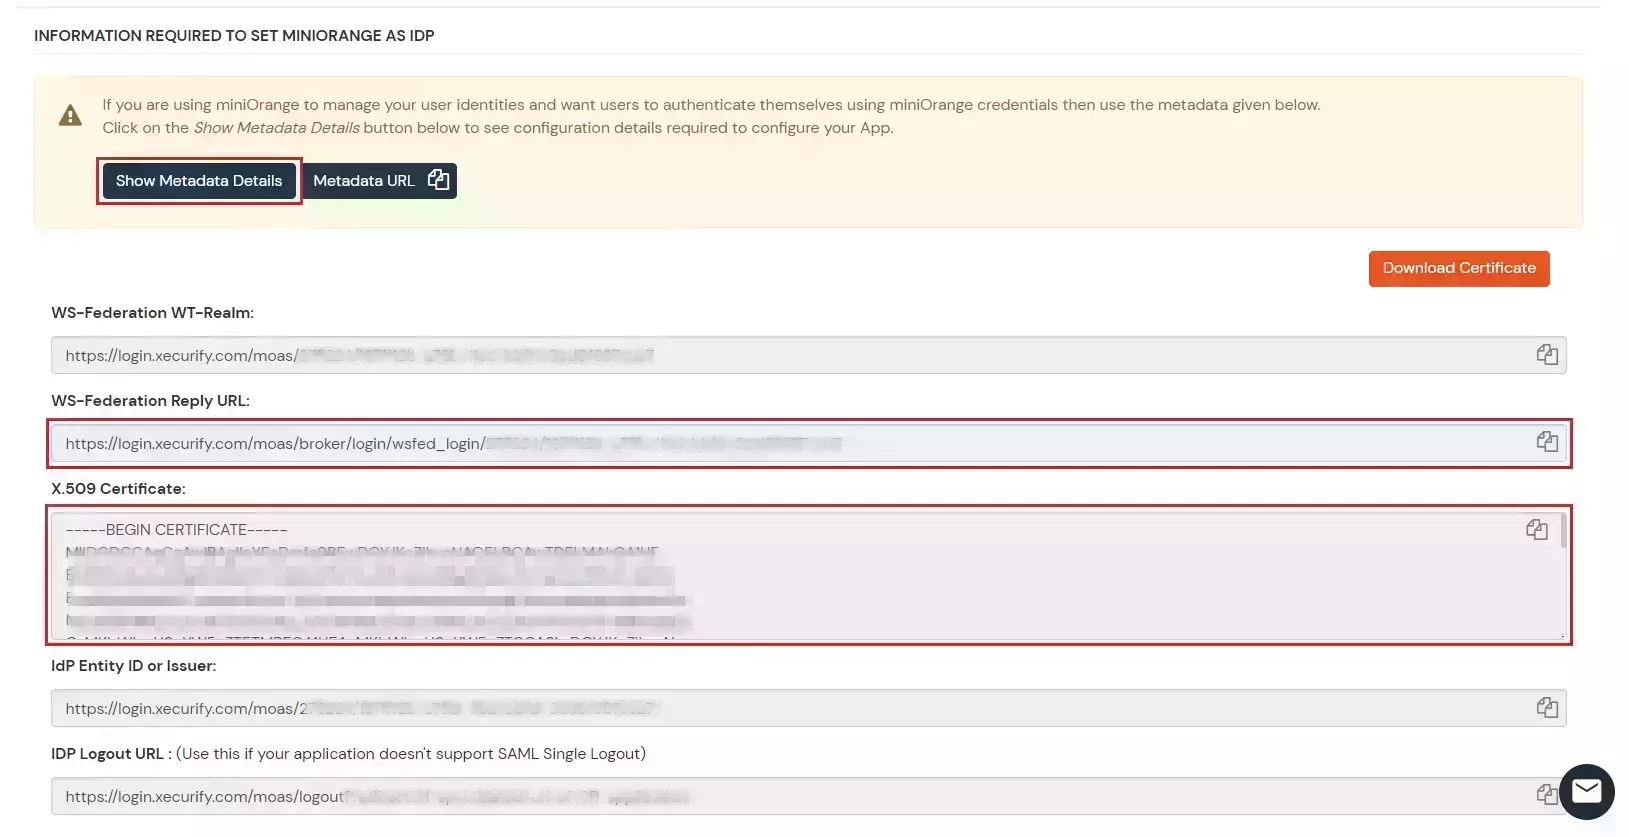
Note: Make sure the certificate thumb print is in uppercase.
            Set-OrganizationConfig -AdfsIssuer "##miniOrange URL##" -AdfsAudienceUris $uris -AdfsSignCertificateThumbprint ##Cert Thumbprint##

            Get-EcpVirtualDirectory | Set-EcpVirtualDirectory -AdfsAuthentication $true
            -BasicAuthentication $false -DigestAuthentication $false -FormsAuthentication $false
            -WindowsAuthentication $false

            Get-OwaVirtualDirectory | Set-OwaVirtualDirectory -AdfsAuthentication $true
            -BasicAuthentication $false -DigestAuthentication $false -FormsAuthentication $false
            -WindowsAuthentication $false -OAuthAuthentication $false

            # Restart w3svc and was
            net stop was /y
            net start w3svc
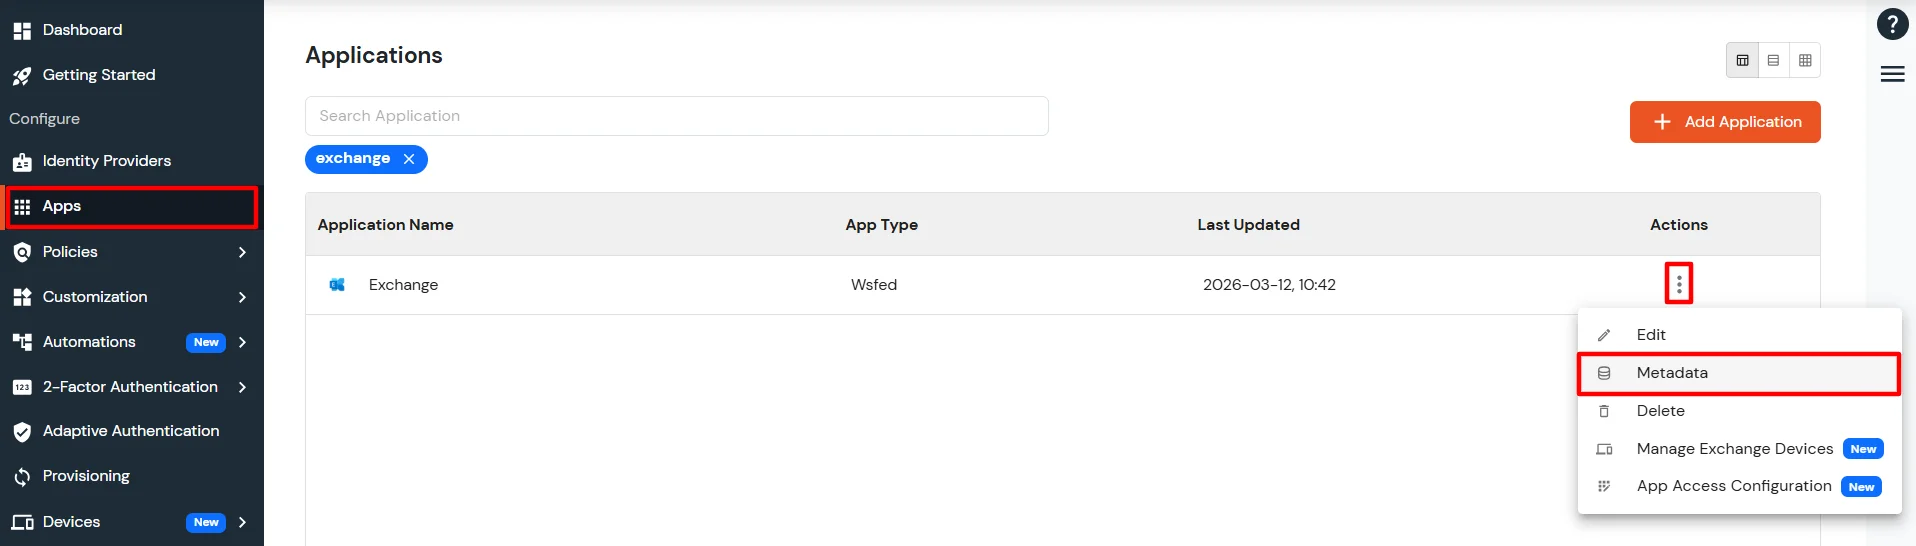
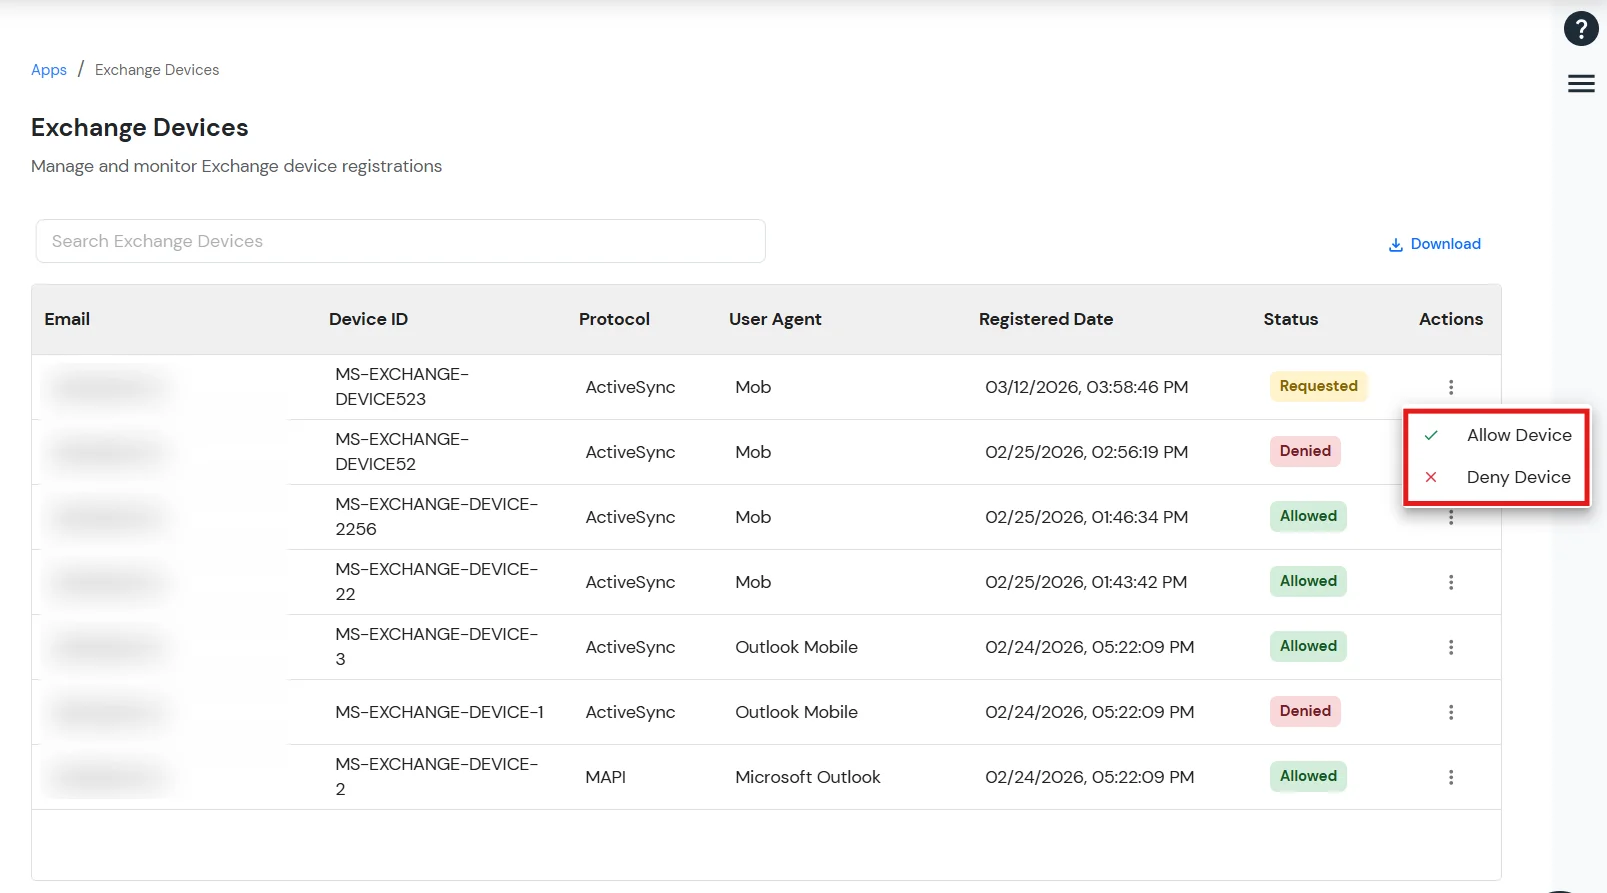
The Manage Exchange Devices feature allows administrators to control which devices are permitted to access the Exchange ActiveSync application.
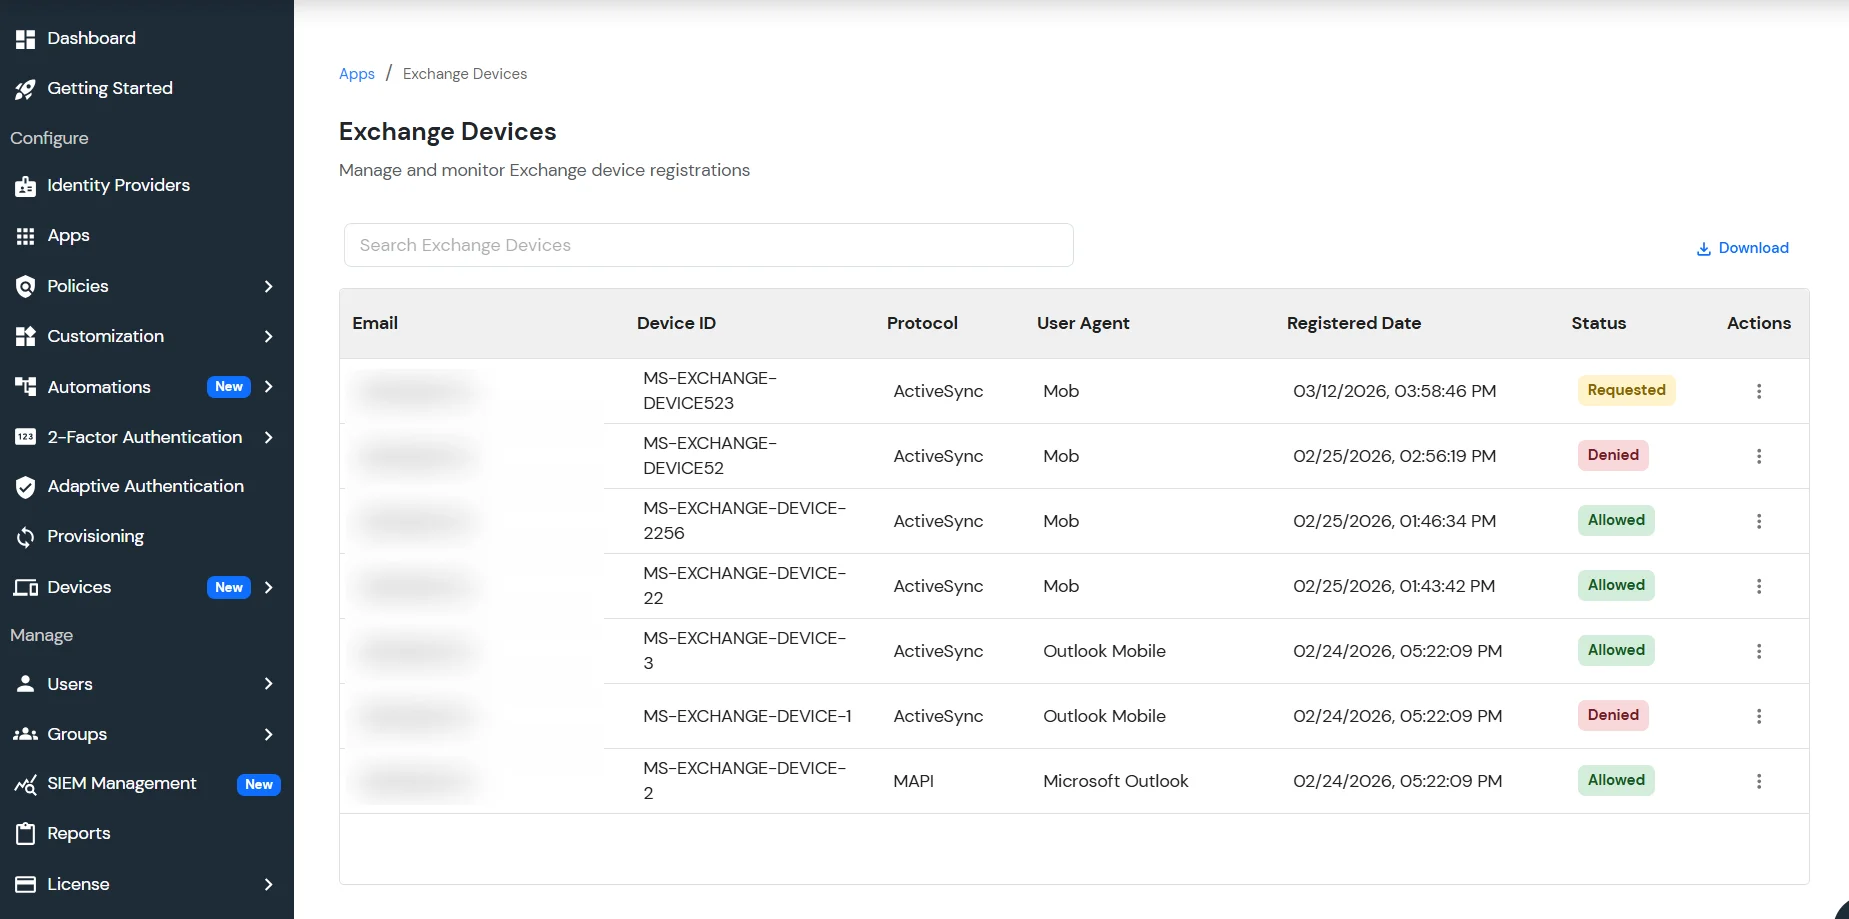
Each device is assigned a status based on its access level:
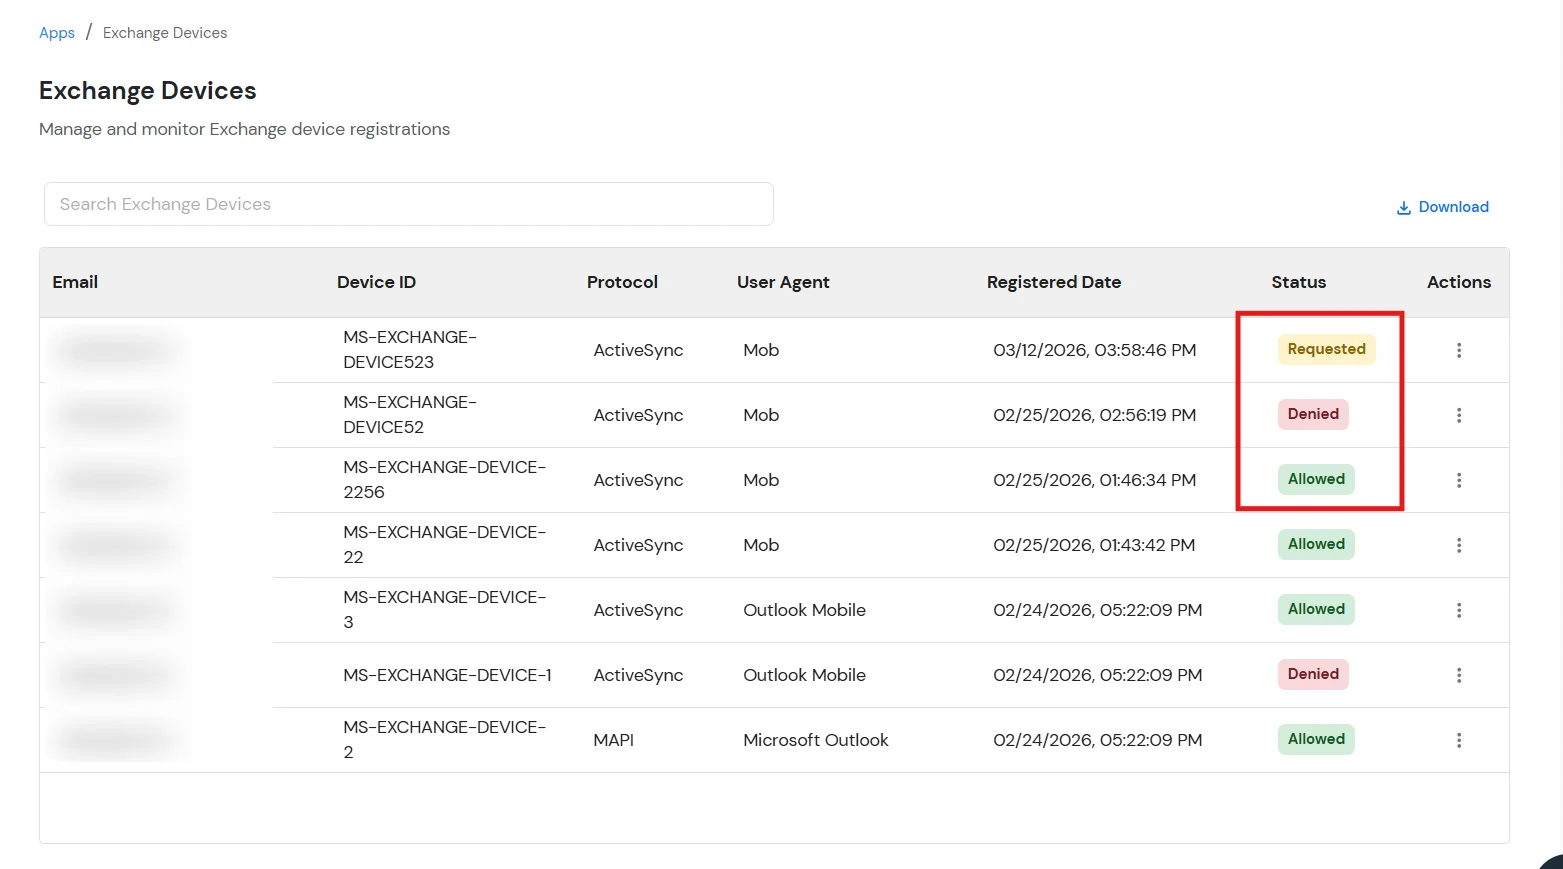
Administrators can take the following actions:
This ensures that only authorized devices can connect to the Exchange environment.
Get-OwaVirtualDirectory | Set-OwaVirtualDirectory -AdfsAuthentication $false
        -BasicAuthentication $false -DigestAuthentication $false -FormsAuthentication $true
        -WindowsAuthentication $false -OAuthAuthentication $false
Get-EcpVirtualDirectory | Set-EcpVirtualDirectory -AdfsAuthentication $false
-BasicAuthentication $false -DigestAuthentication $false -FormsAuthentication $true
-WindowsAuthentication $false# Restart w3svc and was
net stop was /y
net start w3svc
Yes, miniOrange can authenticate users from external directories such as Microsoft Active Directory, OpenLDAP, AWS, and more.
The OWA single sign-on supports multiple authentication protocols, including SAML, OAuth, LDAP, and OIDC, to connect with various identity systems.
