MFA for Windows Logon and RDP - AD Group Policy
miniOrange's Windows Two-Factor Authentication solution for windows logon prevents these sorts of Password-Based breaches and adds an additional layer of security to your Microsoft Windows account login.
Windows 2FA solution is also responsible for your User Management with a Microsoft Active Directory or an LDAP directory. With this 2FA / MFA solution, users will get easy access to the endpoints they need to access by increasing identity assurance and reducing the risk and exposure.
Prerequisites
- In AD, keep all the computers where you want to push the module and its setting in the same OU and optionally same group
- Have miniOrange Windows MFA configured on at least 1 machine.
- Copy moCredentialProvider.msi to a shared folder which is accessible to all computers
- Download this PowerShell script
Step by step guide to setup Group Policy Object for Windows Logon
1. Create Group Policy Object (GPO)
- Open the Group Policy Management console.
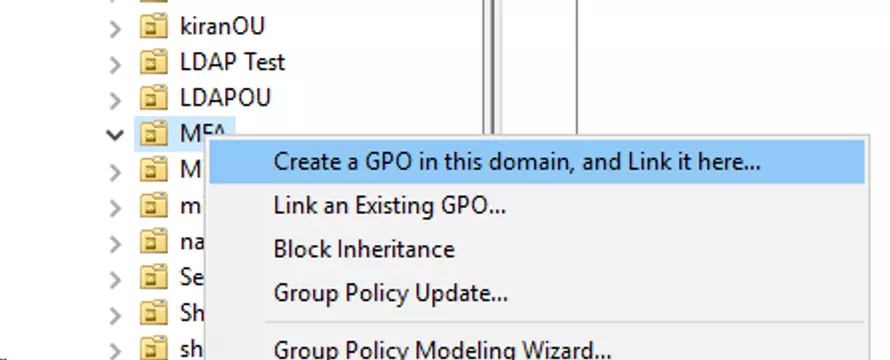
- Right click on the Group or OU that contains the computers where the miniOrange 2FA needs to be configured.
- Select Create a GPO in this domain, and Link it here and Enter the name of the GPO
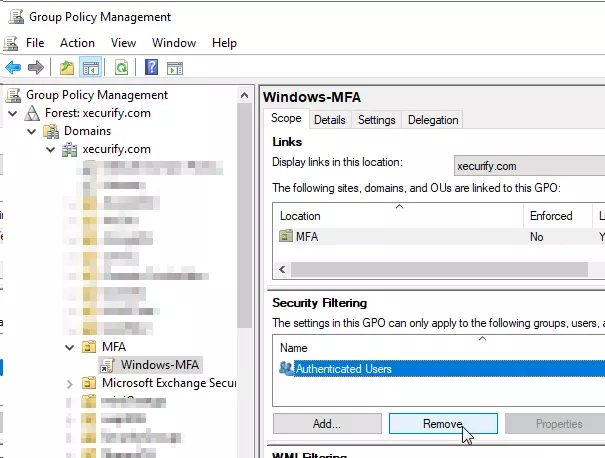
- Click on the newly created GPO object and Remove Authenticated Users from Security Filtering. Click Ok on the warning.
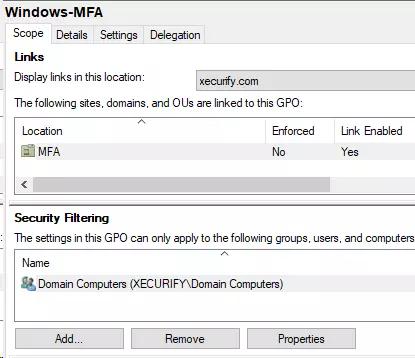
- Click on Add and add the Domain Computers group.
2. Add Software Package to GPO
- Right click on the GPO and select Edit.
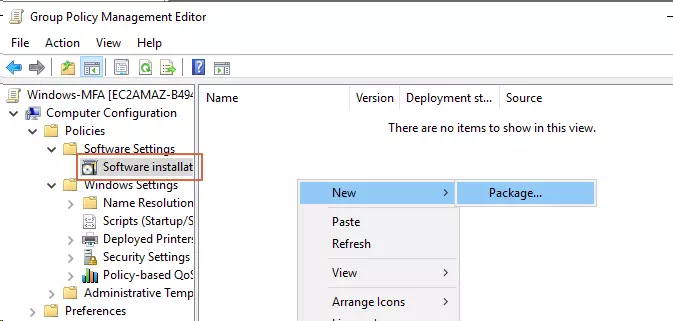
- Expand the Computer Configuration -> Policies -> Software Settings.
- Right click on the Software installation and select New → Package.
- Browse to the shared folder and select moCredentialProvider.msi.

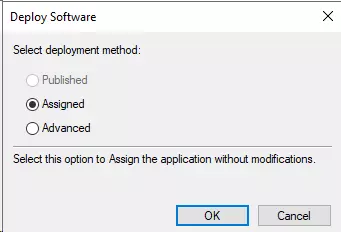
- Select “Assigned” and then click on Ok.
3. Create Registry Keys XML file for Group Policy Object
- Open the Registry Editor on the machine where MFA is configured. Press Windows key + R, then type regedit and pressing Enter.
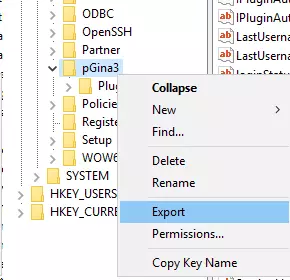
- Navigate to the HKEY_LOCAL_MACHINE\\SOFTWARE\\pGina3 key.
- Right click on pGina3 and select Export
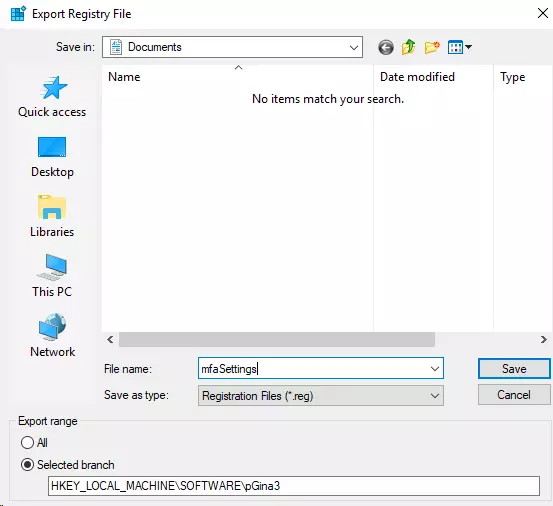
- Save the file as a .reg file.
- Download this powershell script which will create the xml file for GPO.
- Open Windows Powershell in elevated mode and change directory to where the script is located.
- Run the following command to create xml
            Reg2GPO.ps1 <reg-path> <xml-path>
            #replace <reg-path> with full path of exported .reg file
            # replace <xml-path> with full path of the xml file to be generated
            #e.g.
            # Reg2GPO.ps1 "C:\Users\miniOrange\settings.reg" "C:\Users\miniOrange\gpo.xml"
4. Add Registry keys to Group Policy Object
- Open the Group Policy Management Console.
- Right-click on the GPO and select Edit.
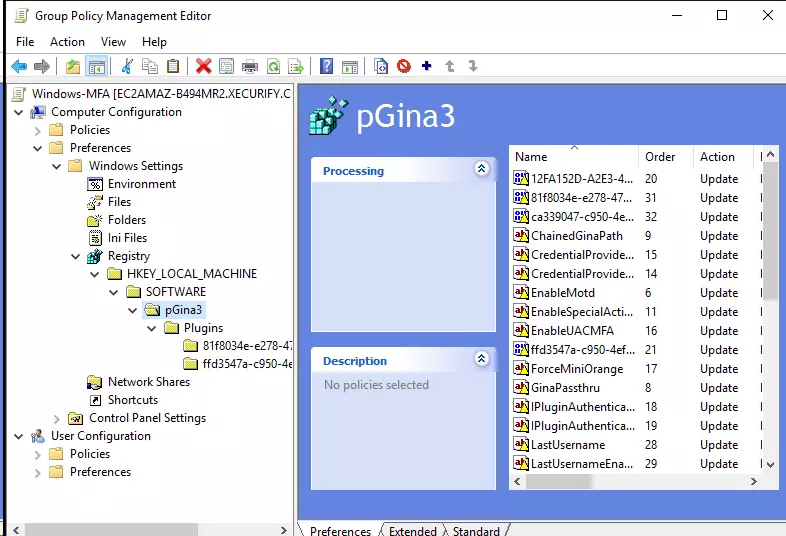
- Expand the Computer Configuration → Preferences → Windows Settings → Registry.
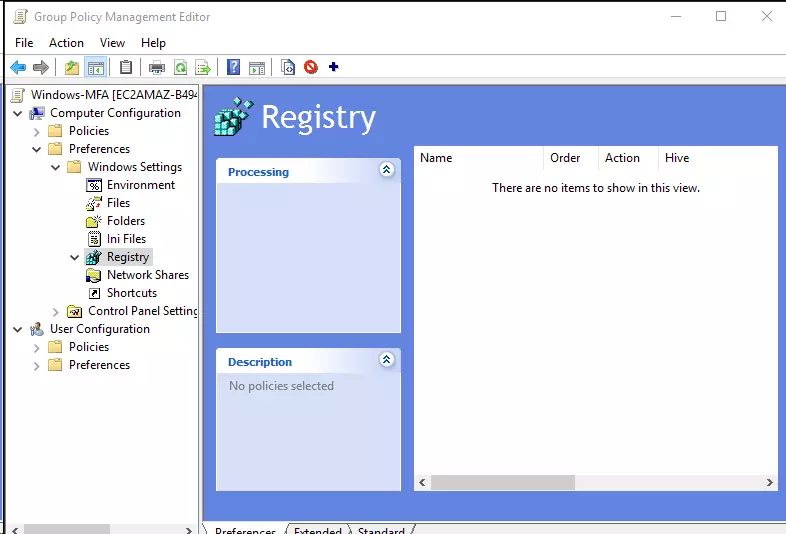
- Copy the xml file generated in previous step and paste it in the empty area of Registry.
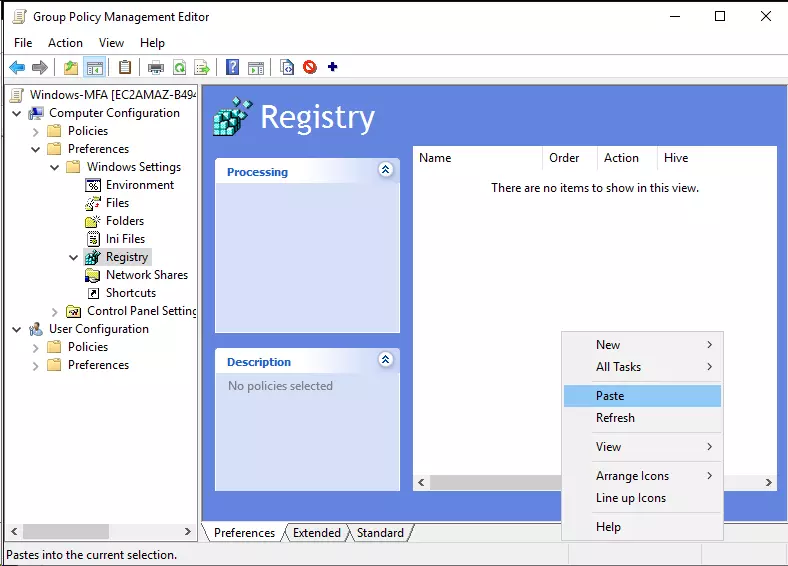
- After pasting, you should be able to see the imported registry keys
- Close Group Policy Management
5. Test Group Policy Push
- On one of the computers, open command prompt in elevated mode
- Run the below command
GPUPDATE /force
- If the command output asks to restart computer, enter
Y
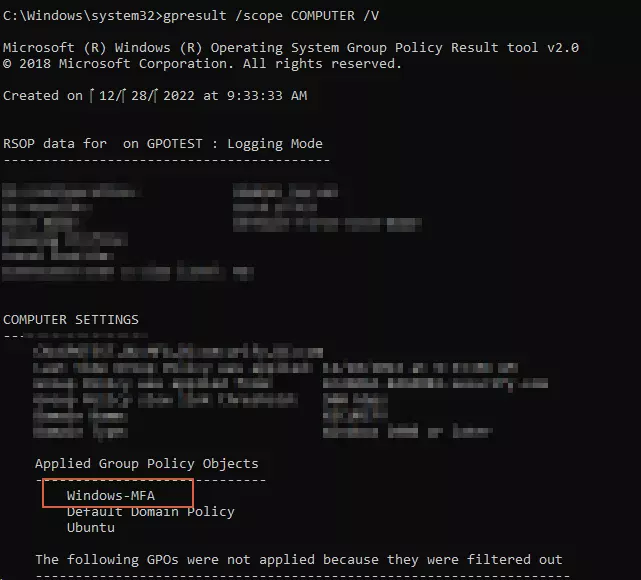
- After the command runs, you can check if the policy ran using below command
GPRESULT /SCOPE COMPUTER /V
- You should see your policy name in applied policies like this:
Frequently Asked Questions (FAQs)
How do I prevent the LastUsername from updating on every GPO update?
- Open your Group Policy and go to Computer Configuration > Preferences > Windows Settings > Registry.
- Find the LastUsername entry under HKEY_LOCAL_MACHINE > Software > pGina, leave its value blank, and in the Common tab, select "Apply once and do not reapply."
