Bitglass is a cloud access security broker (CASB) vendor. Bitglass serve cloud computing services to secure and track crucial data without installing client software on employee’s device like laptops or mobile. They provide a unique combination of real time data and threats protection along with rapid agentless deployment. Their provided platform automatically learns, adjusts, and accommodate to new cloud applications, new malware threats, new behaviors. With miniOrange Single Sign On (SSO), you can quickly increase your security of information and resources for your BitGlass app without worrying about time for initial set up or future upgrades.
Follow the step by step guide to setup SSO with BitGlass
Step 1: Configure miniOrange Settings for BitGlass
- Login as a customer from Admin Console.
- Go to Apps >> Manage Apps. Click Configure Apps button.
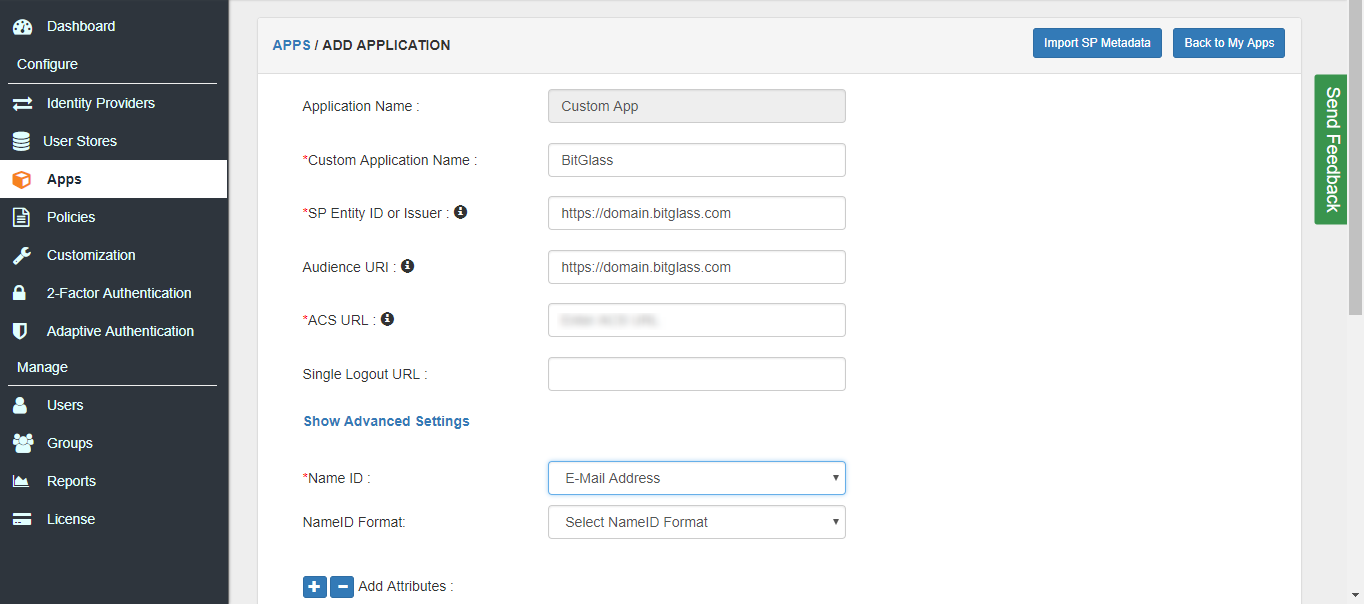
- Click on SAML tab. Select Custom App. Put the name BitGlass..
- Enter the SP Entity ID as https://bitglass.com
- Enter the ACS URL as https://bitglass.com/sso/saml2/
- Select the Email ID from the Name ID dropdown.
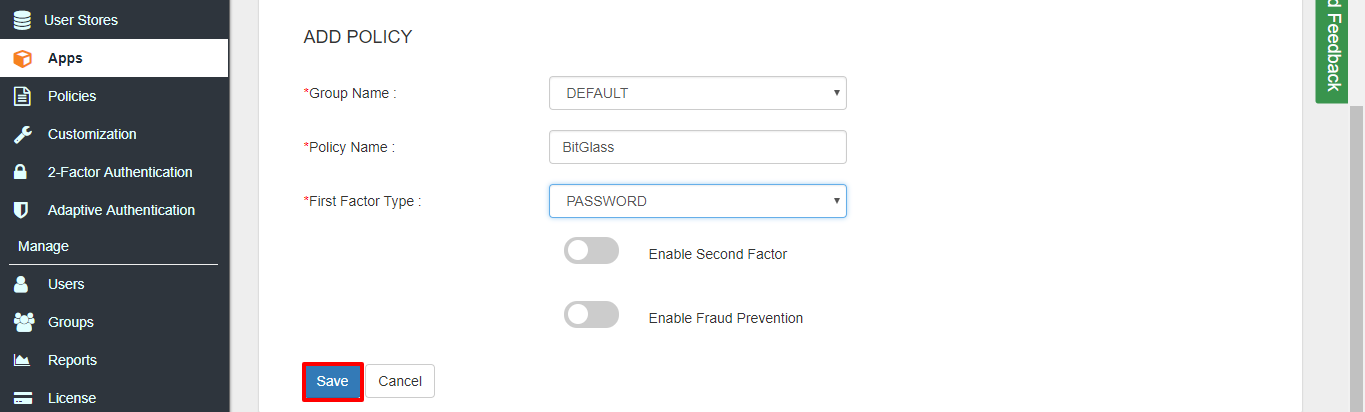
- Go to the Add Policy and select DEFAULT from the Group Name dropdown.
- Now enter the BitGlass in the Policy Name field.
- Select PASSWORD from the First Factor Type dropdown.
- Click on Save to configure BitGlass .
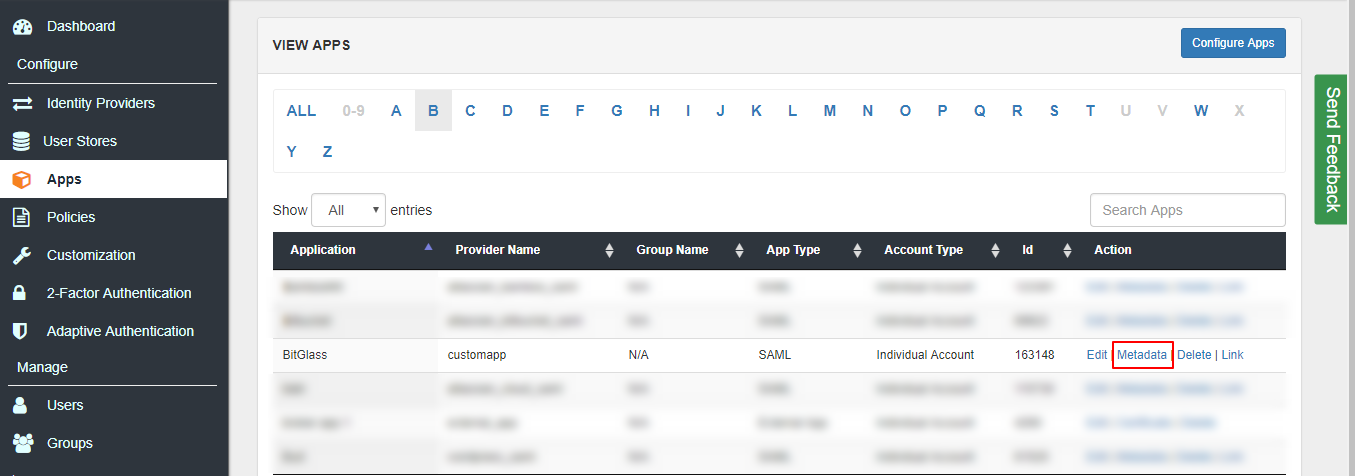
- Click on Metadata link to download the metadata which will be required later. Click on Link to see the IDP initiated SSO link for bitglass.
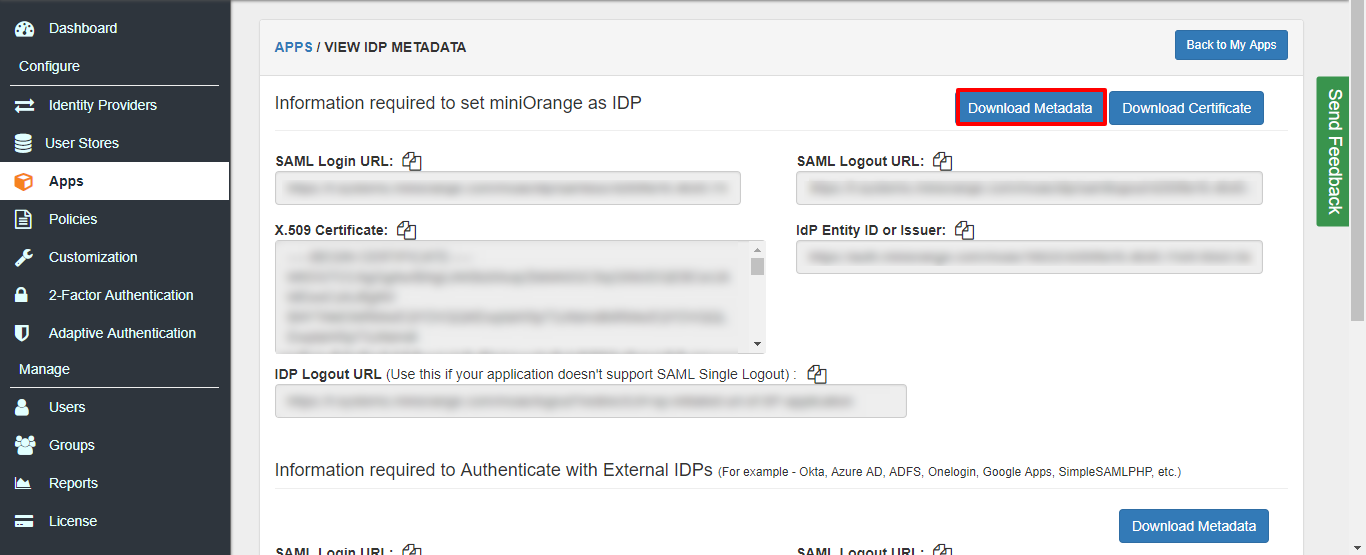
- Hit on the Download Metadata XML button to download the metadata.xml file.
Step 2: Configure BitGlass setting for miniOrange
- Login into BitGlass account using Admin login credentials.
- Click on People >> Domains
- In case, you do not have a domain set up then select Add Domain
- Select your domain name >> Domain Settings
- select SAML Identity Provider under as the authentication type.
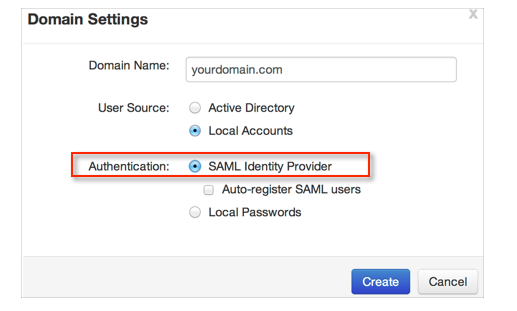
- Click on Save.
- In the User Authentication column, select SAML.
- Enter Domain Name as your domain name, SAML IDP login URL, SAML IDP Logout URL
- Click on Token Signing certificate and chose downloaded metadeta file
- Click on Save
Step 3: Onboard users into our system.
- Click on Users >> Add User.

- Here, fill the user details without the password and then click on the Create User button.

- Click on Onboarding Status tab. Check the email, with the registered e-mail id and select
action Send Activation Mail with Password Reset Link from Select Action dropdown list and then click on Apply button.

- Now, Open your email id. Open the mail you get from miniOrange and then click on the link to set your account password.
- On the next screen, enter the password and confirm password and then click on the Reset Password button.

- Now, you can login into miniOrange account by entering your credentials.
Step 4: Login to miniOrange Account.
- Go to miniOrange dashboard and select User Dashboard from right side menu.

- Click on BitGlass application which you added, to verify your sso configuration.
For further details refer :
Guide For Single Sign On (SSO)
bitglass