Step-by-Step Guide to Secure Your Site with a
Reverse Proxy Solution
Secure your websites and web apps with a reverse proxy, with security features like IP restriction, Location Restrictions, Rate Limiting, CORS, and User Authentication support. You can also boost their performance with features like Content Caching, URL Rewriting, Load Balancing and monitor incoming traffic to provide a better service to your visitors and boost performance.
Get started by setting up a reverse proxy for your website by following the setup guide below.
Follow the Step-by-Step
Guide given below to enable Reverse Proxy for your site
Pre-requisites:
Step 1:
Configure Virtual Hosting
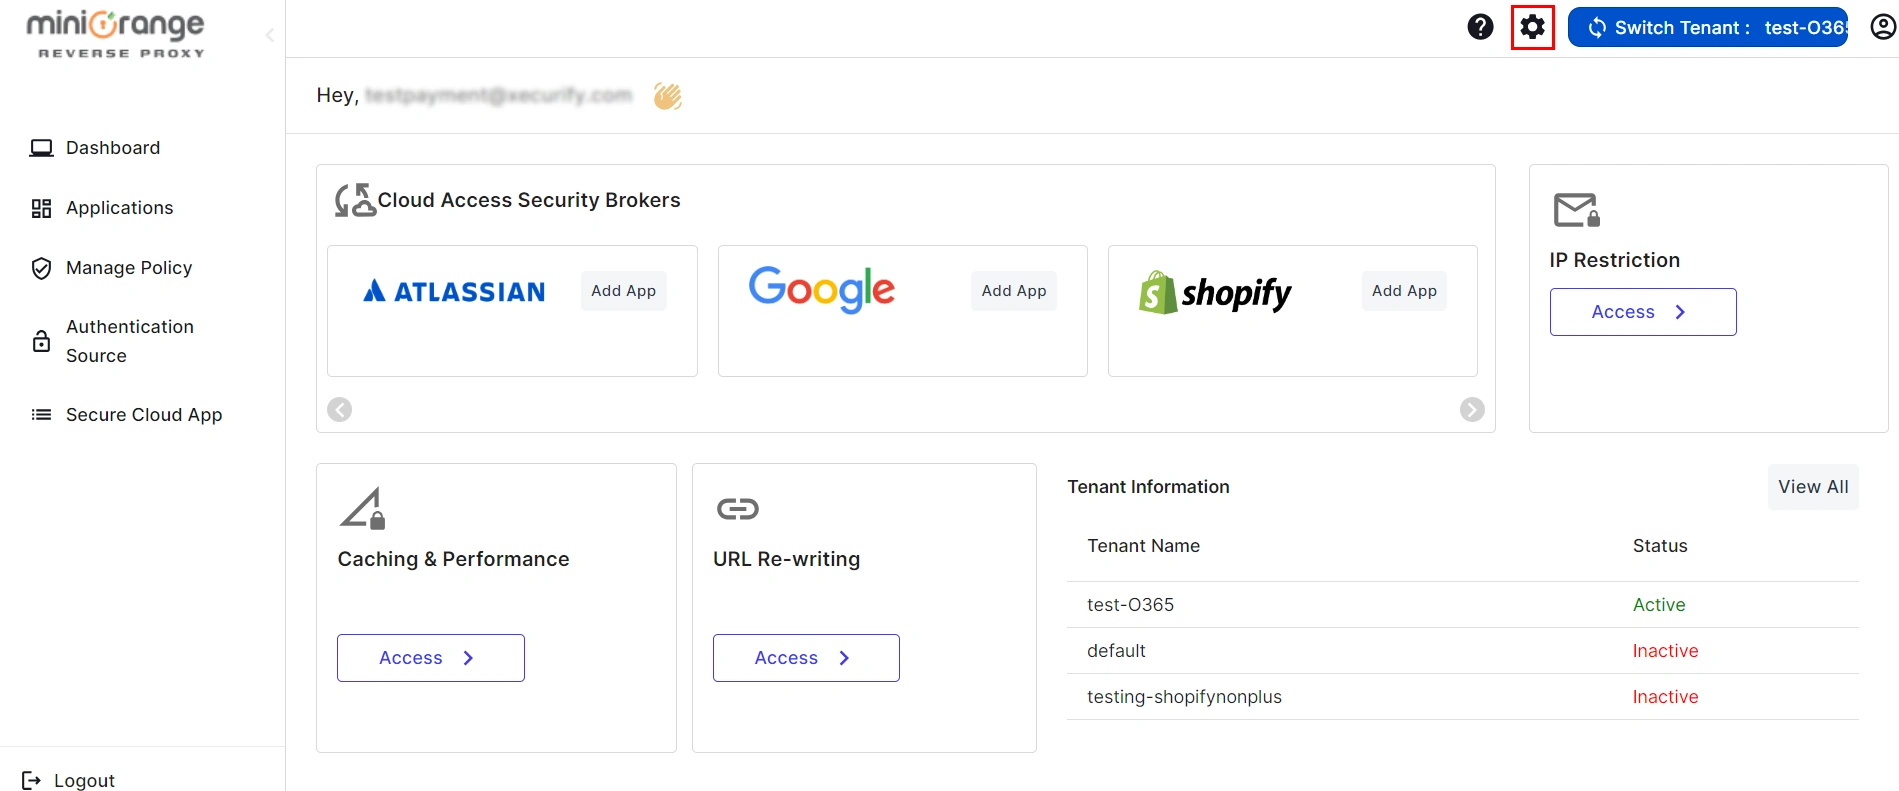
- Once logged in, click on the Tenant Setting icon.
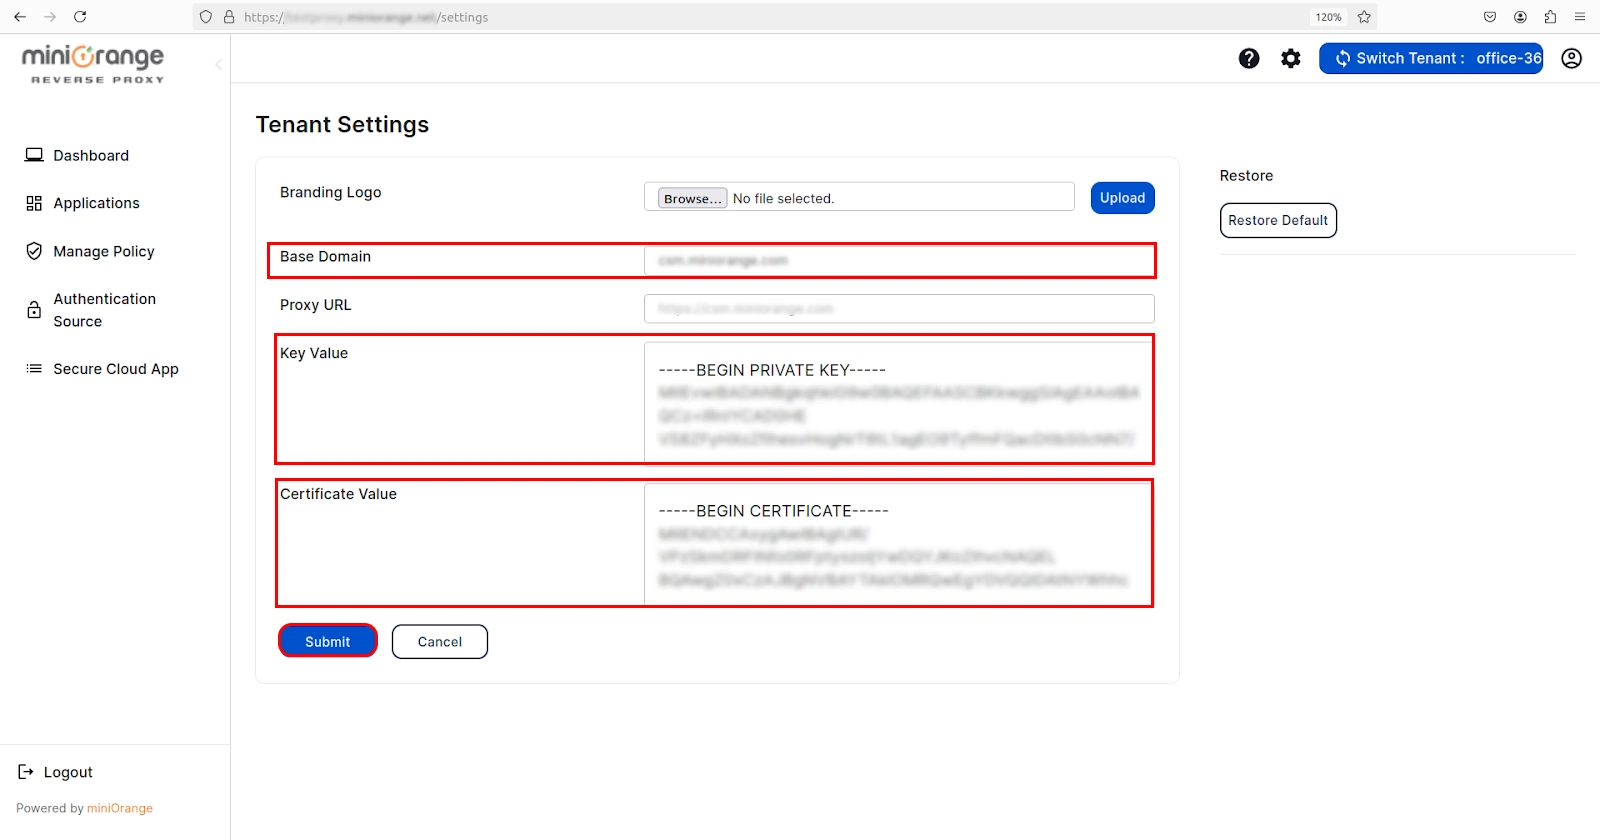
- Fill in the required information such as the Base Domain (Base domain is the virtual domain on which you will proxy your original server.
), Key Value (Private Key),
and Certificate Value (Public Key). Once you have entered all the
necessary information, click on
the Submit button to proceed.
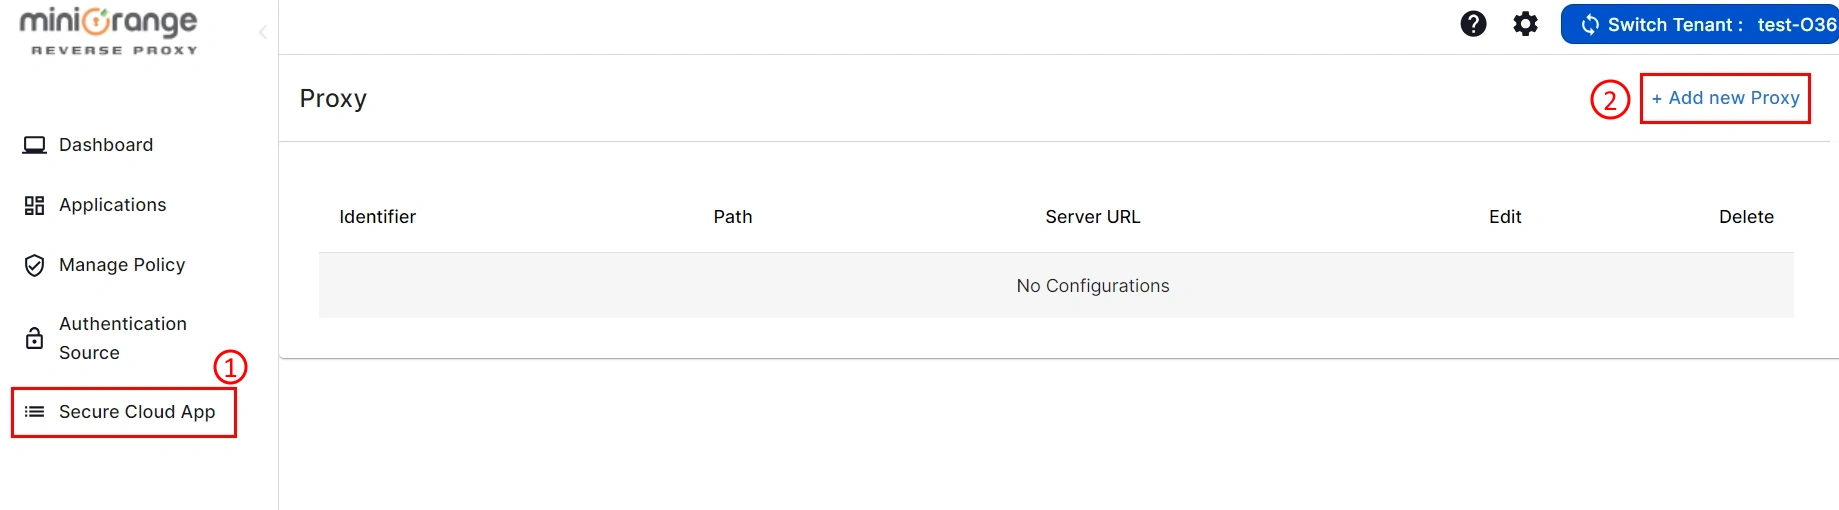
Step 2: Add New Proxy
- Click on Secure Cloud App tab and then Add New Proxy option.
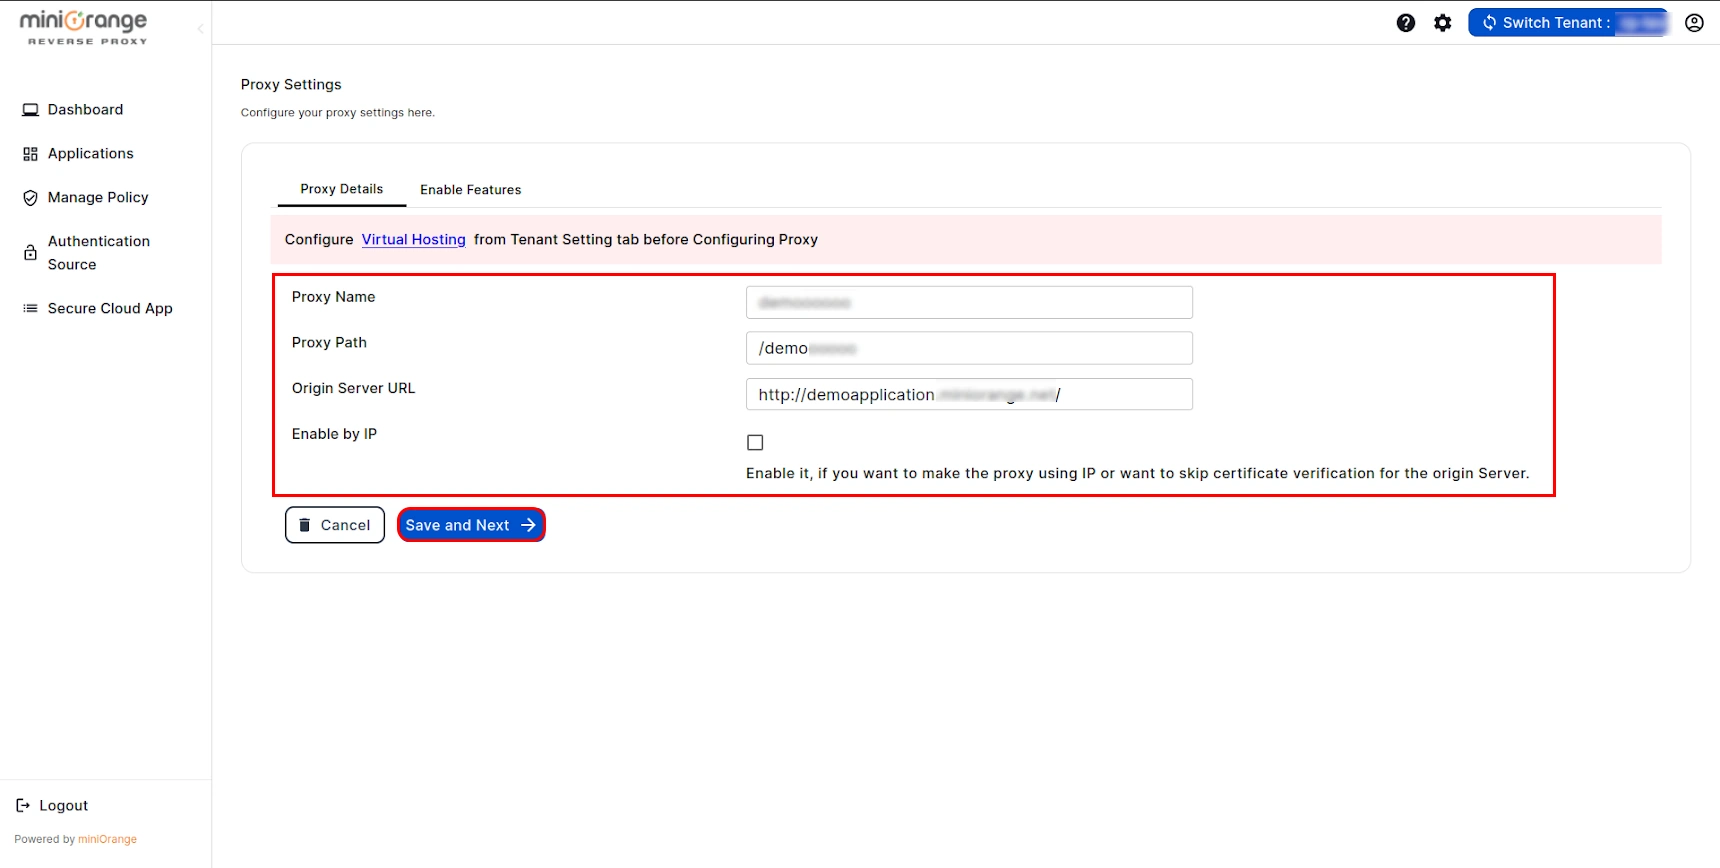
- Fill in all the necessary details (refer to the table below) and click on the Save
and Next button.
| Proxy Name |
Identifier for your proxy. |
| Proxy Path |
Path for your proxy on which you will access your original server (Eg. /test).
|
| Origin Server URL |
URL of your server that you want to proxy.
|
| Enable by IP |
Enable it, if you want to make a proxy using IP or want to skip certificate verification for the origin Server.
|
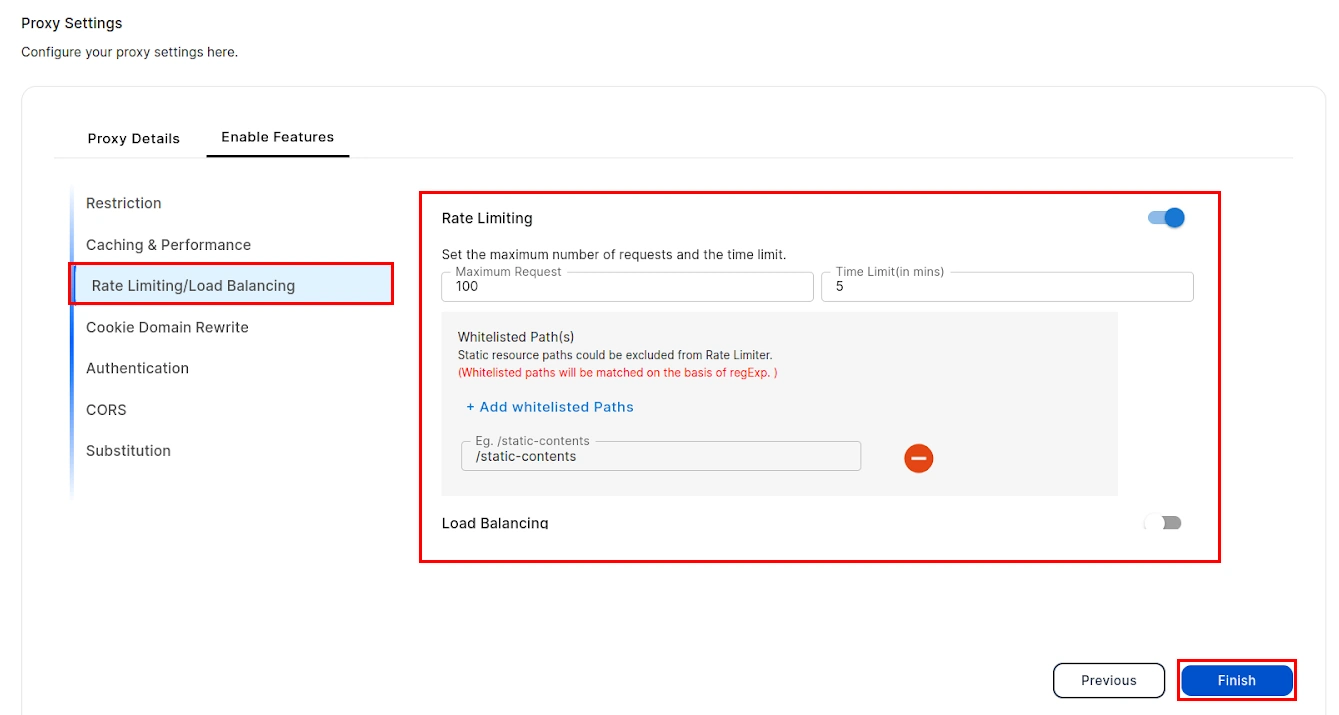
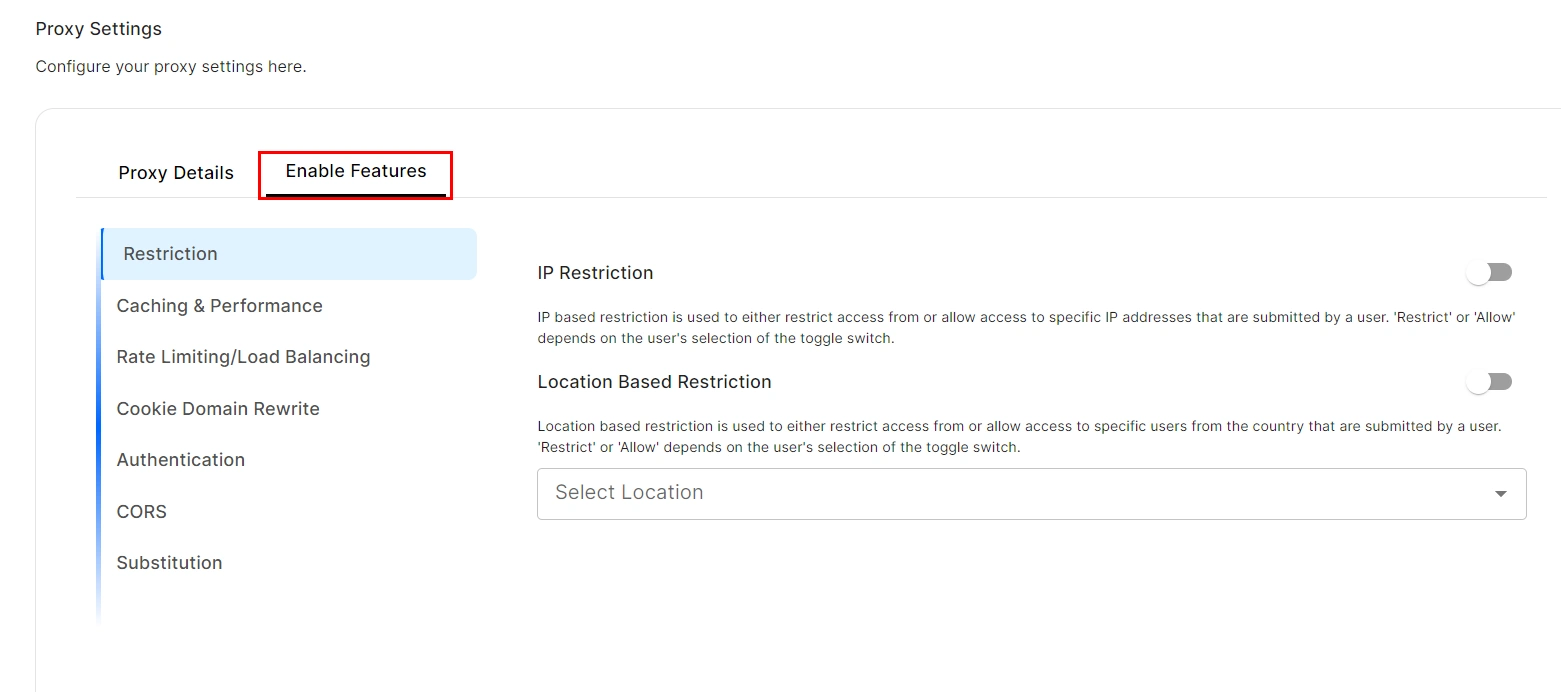
- Go to Enable Features option and enable the required feature as per your requirement and click on
Finish button. (The steps to configure each of the features is given below)
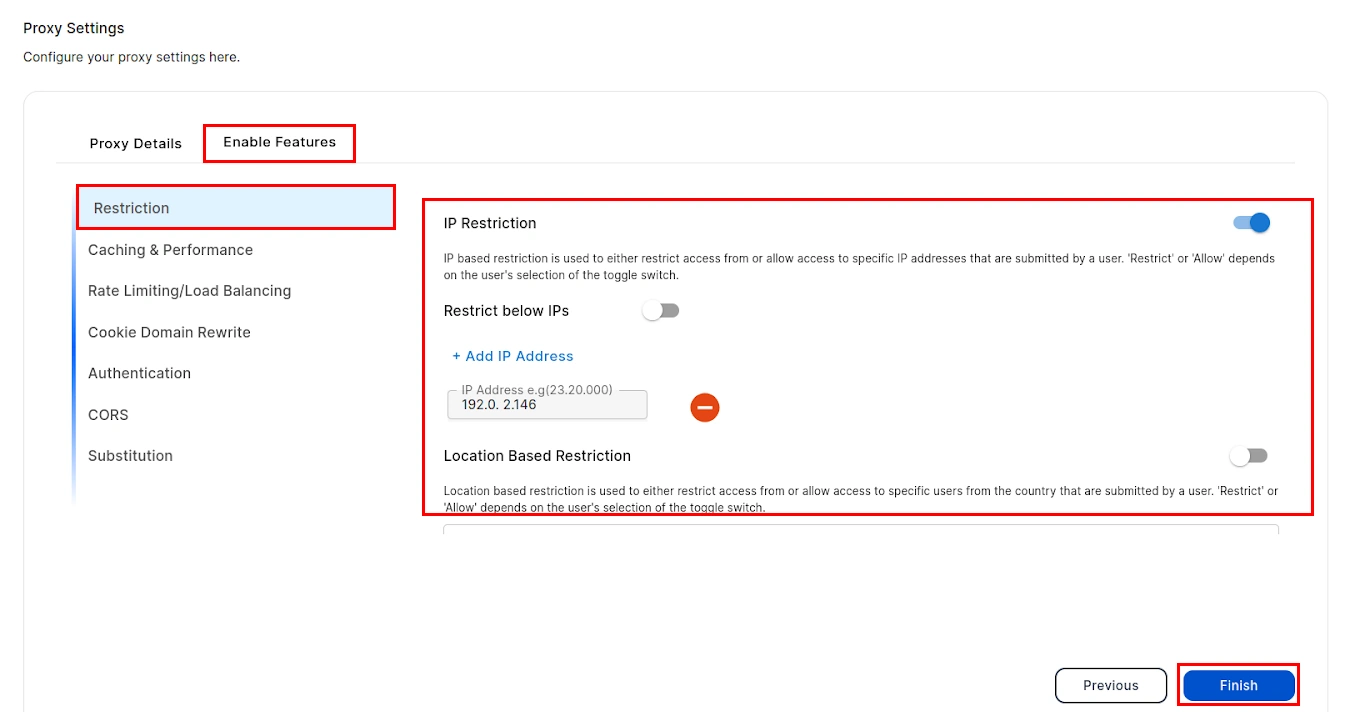
1. IP Restriction:
- Turn on the toggle to add ip restriction to your proxy.
- Enable the Restrict below IPs toggle in order to restrict the specific IPs or leave it off
if you want to allow the specific IPs.
- Add IPs to restrict or allow by clicking Add IP Address.
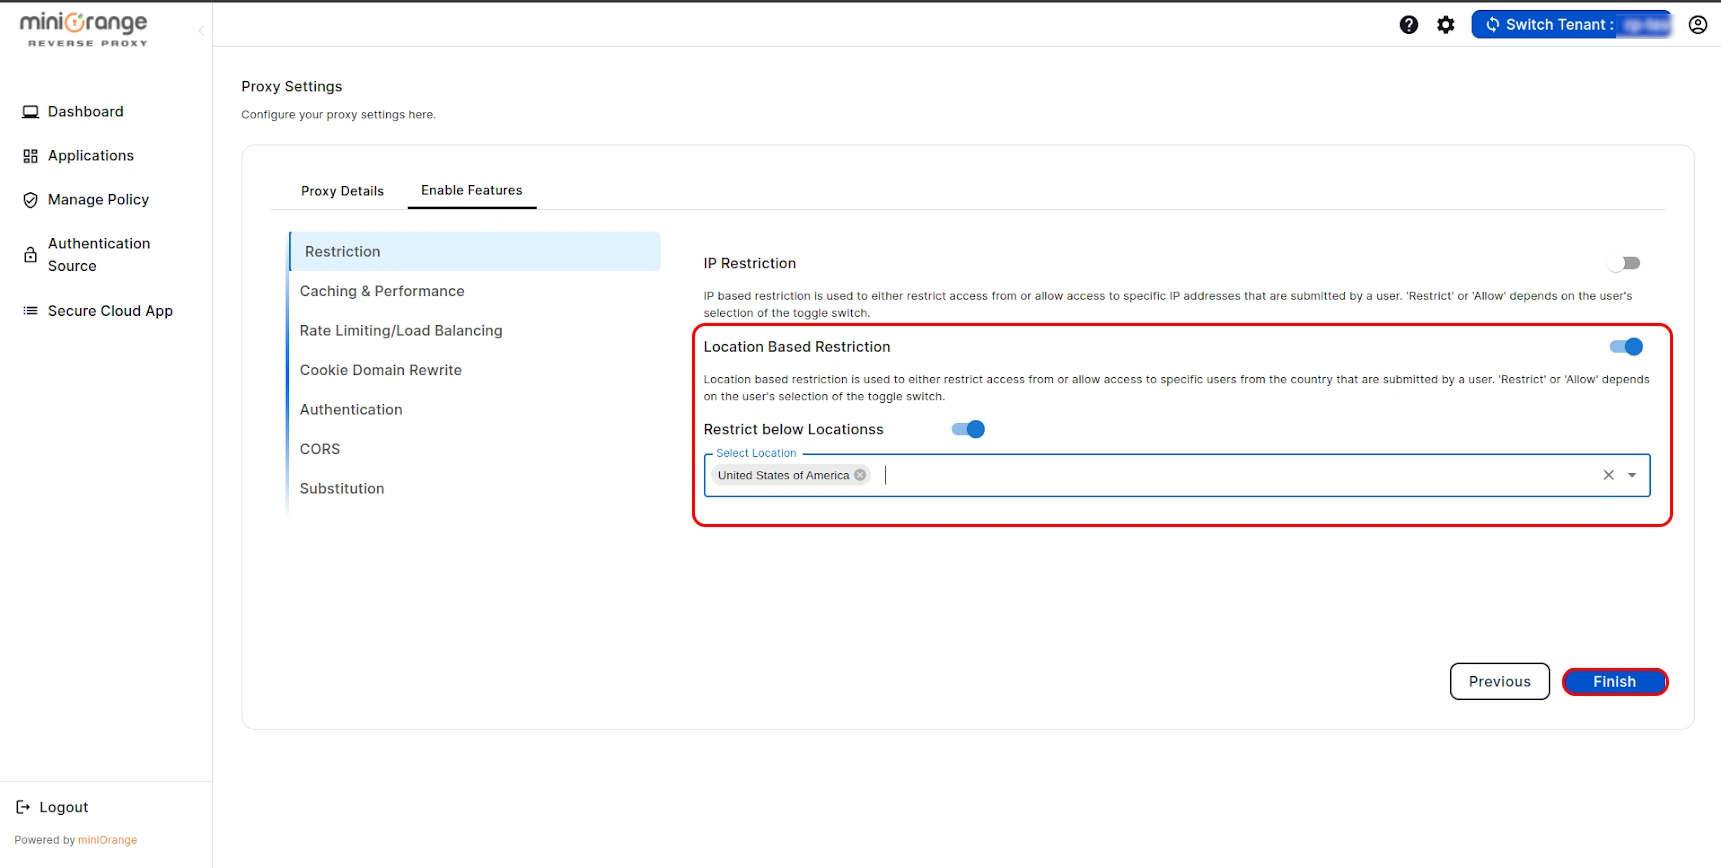
2. Location Based Restriction:
- Turn on the toggle to enable location based restriction.
- Enable the Restrict below Locations toggle in order to restrict the specific locations and allow the rest or leave it off if you want to allow the specific locations and restrict the rest.
- Select locations from Select Location drop down menu to restrict or allow them.
1. Rate Limiting:
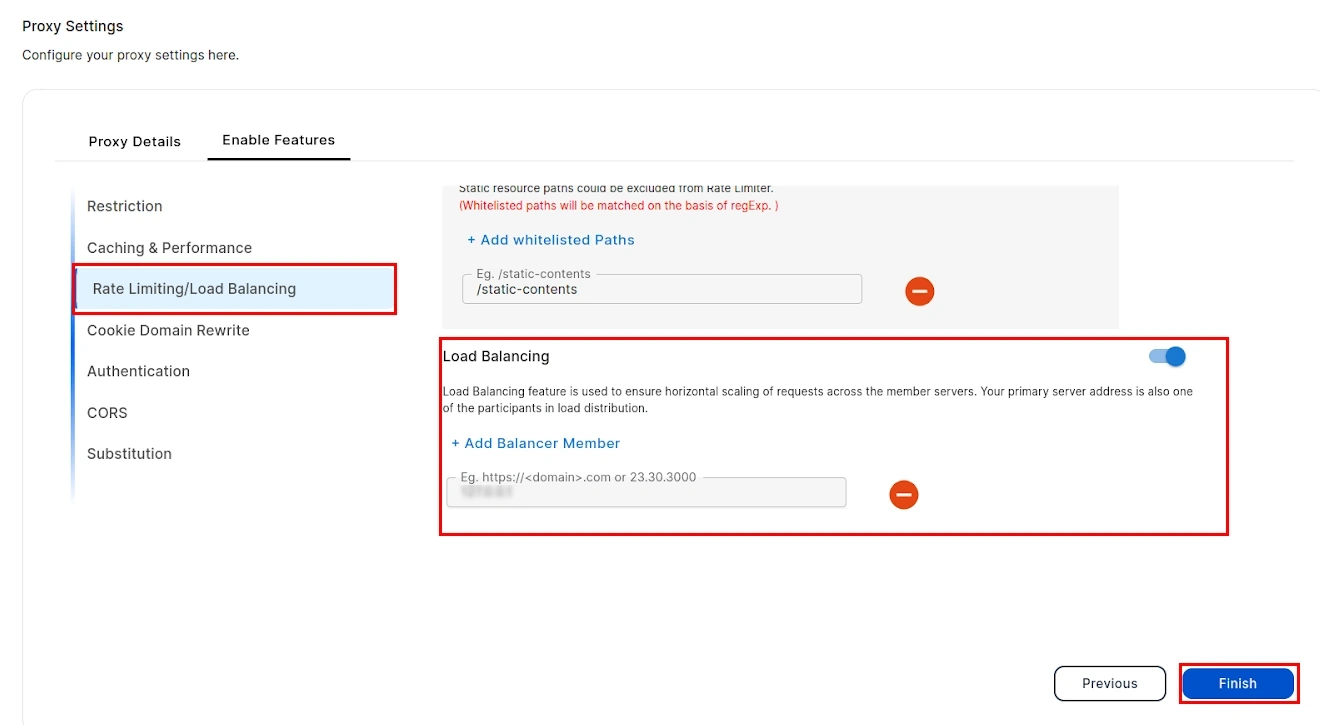
2. Load Balancing:
- Enable load balancing to scale your server horizontally across member servers.
- Add member servers domain or IP on clicking Add Balancer Member.
- First, you will need to configure the authentication source. To do this, click here and follow the steps.
- After following the steps, go to Enable Feature tab and click on Authentication option.
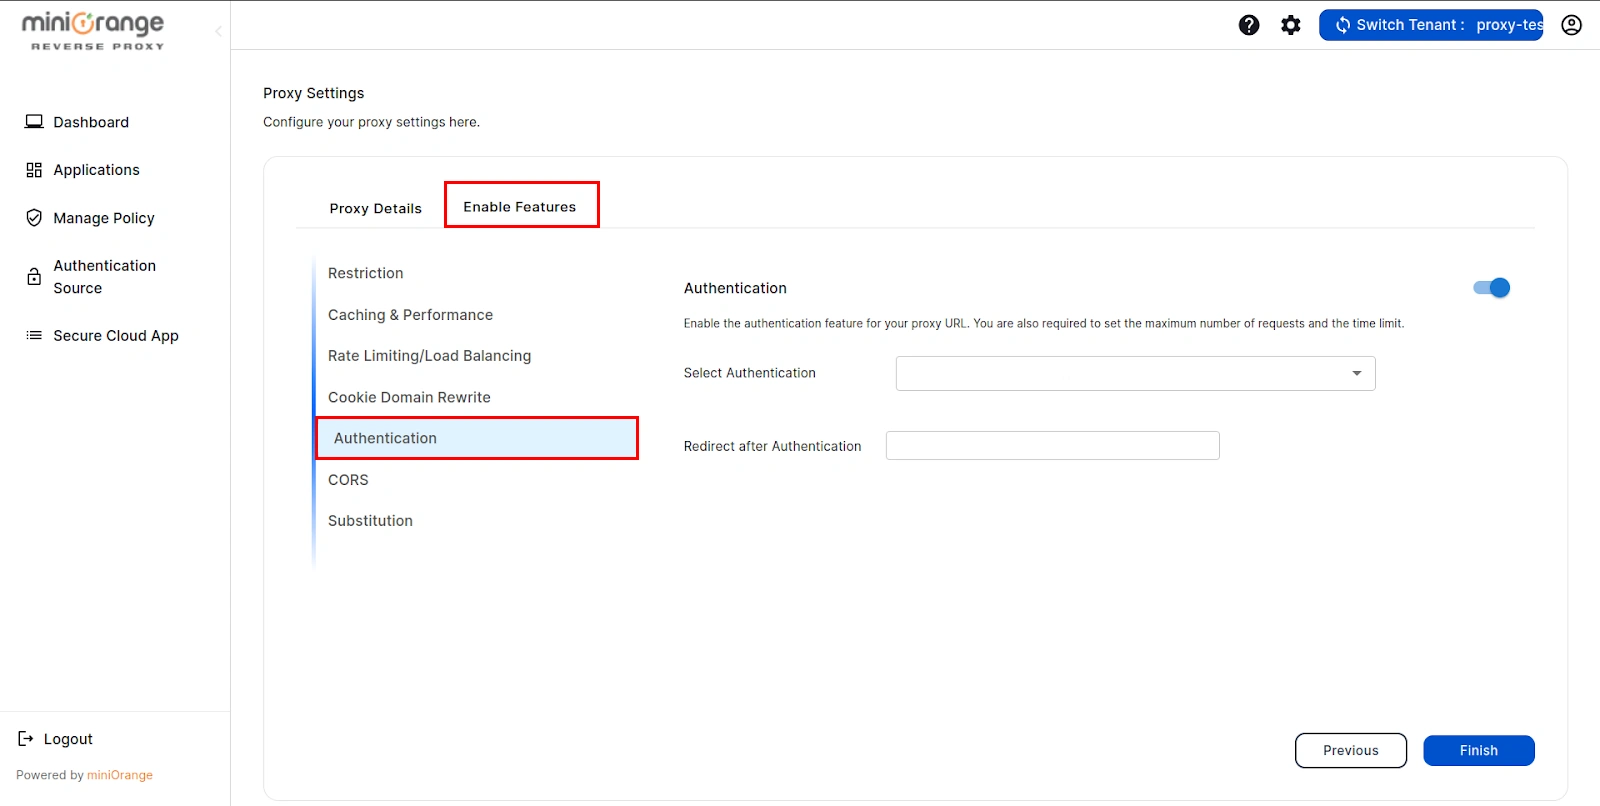
- Select Authentication source and add URL where you want redirect after authentication into redirect after authentication field.
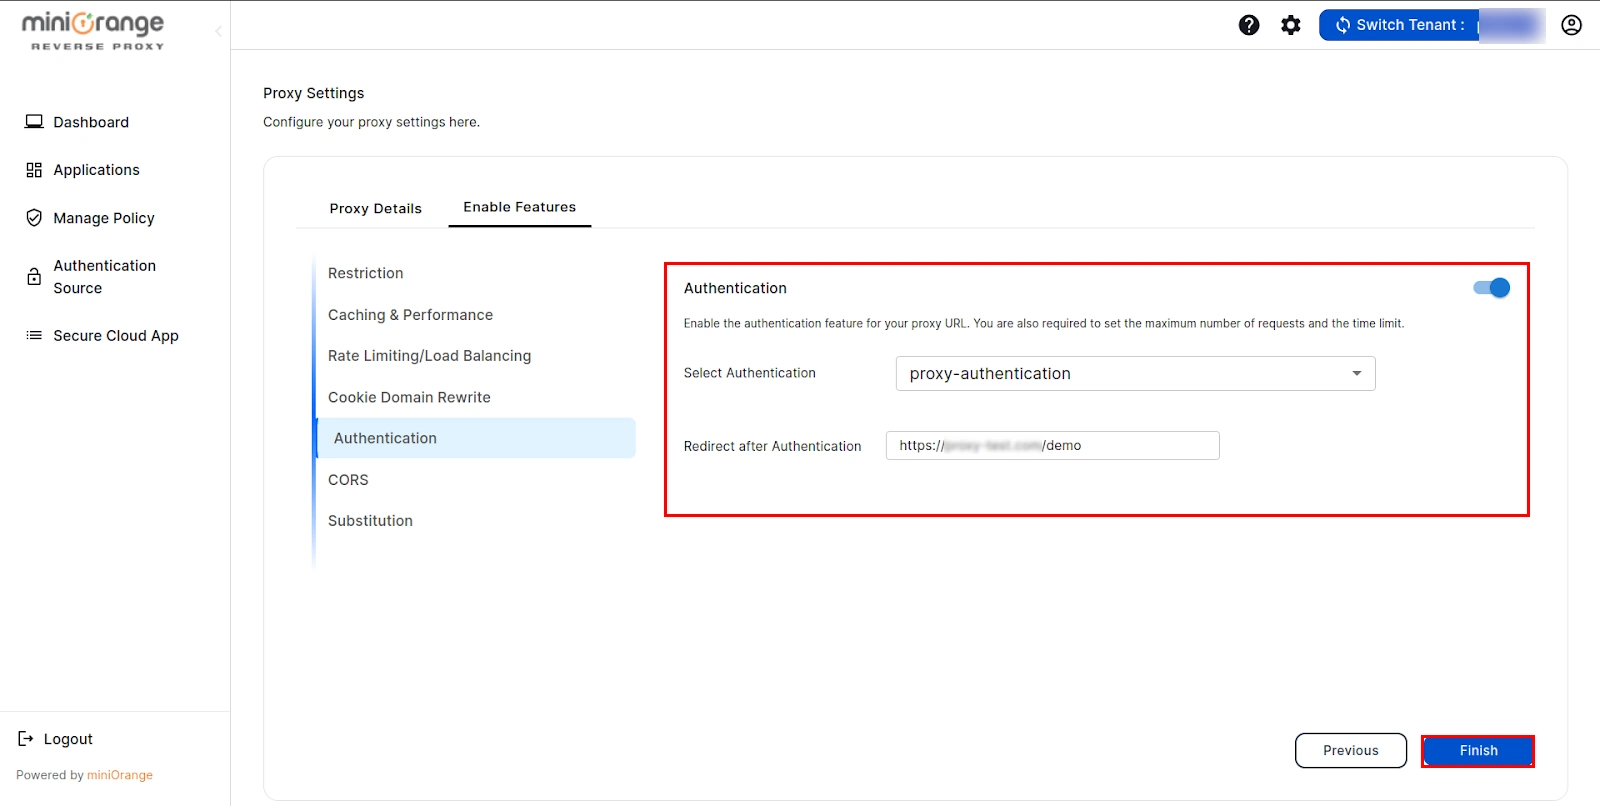
- Once done, click on Finish button.
Step 3:
Testing of Reverse Proxy
- If your host provider doesn't have the DNS pointed for your base domain name used in step 1, make sure you get it pointed.
- Now to test your proxy hit the base domain used in step 1 along with the
Proxy path entered in step 2 in your browser.
Ex. if the base domain is demo.miniorange.com and proxy path is /demo, then hit demo.miniorange.com/demo in your
browser.
External References
miniOrange Reverse Proxy offers a wide variety of security features with
flexible scalability, all available at the most affordable price to all types of businesses. Start by signing
up now!