Provisioning with Onelogin saves time when setting up new users and teams, and helps you manage access privileges through the user lifecycle. miniOrange can create, read, and update user accounts for new or existing users, remove accounts for deactivated users, and synchronize attributes across multiple user stores via Onelogin. 
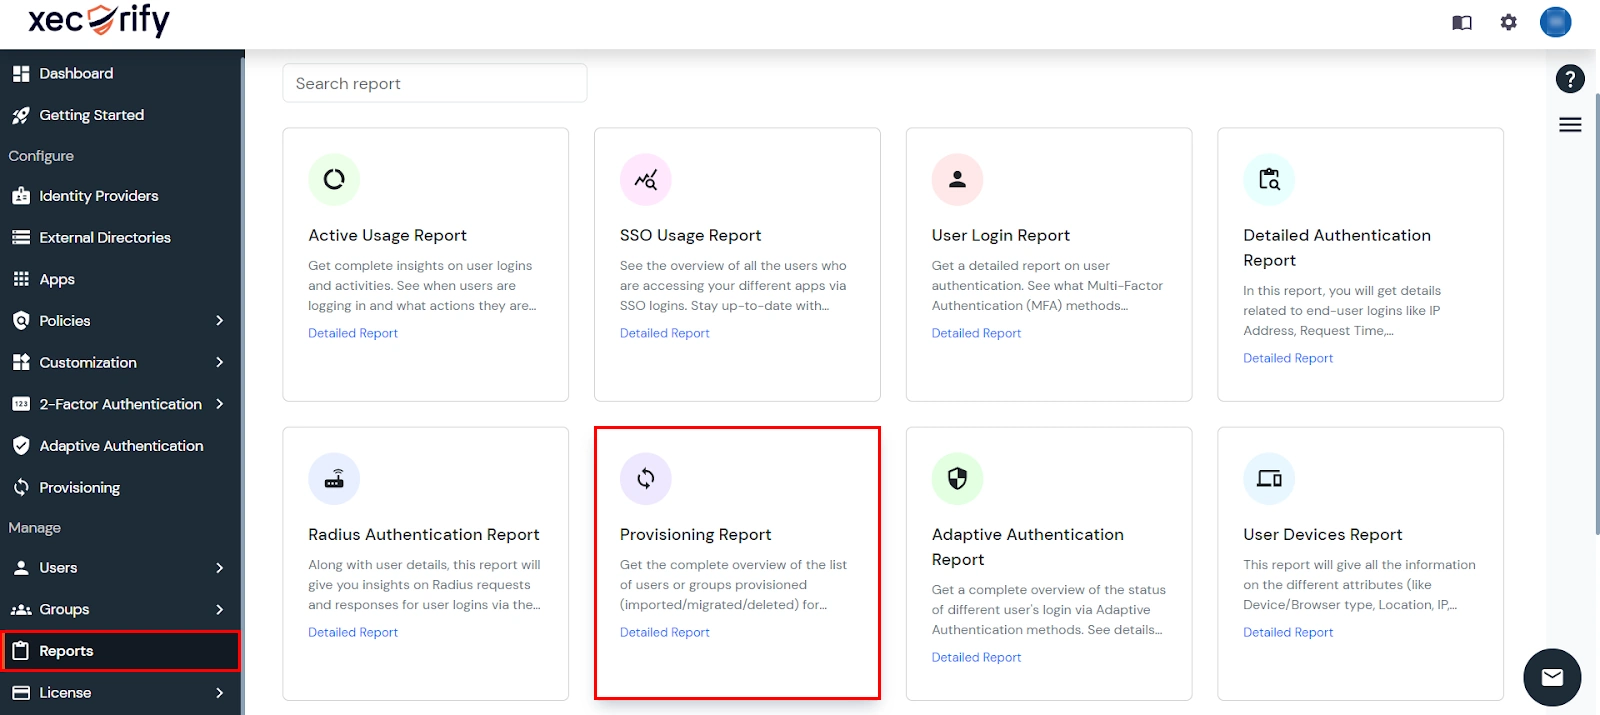
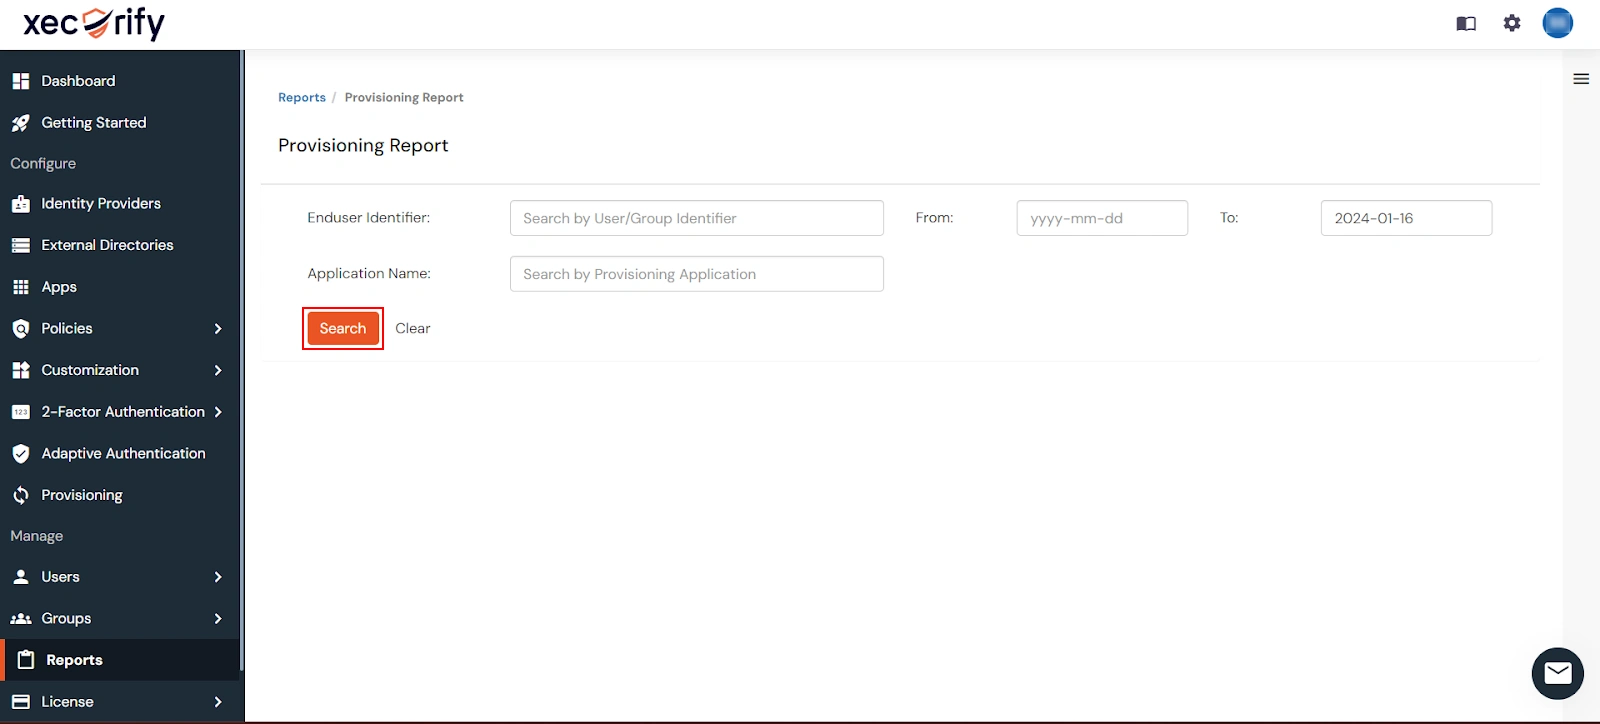
Follow the steps given below to configure provisioning with miniOrange.
Connect with External Source of Users
miniOrange provides user authentication from various external sources, which can be Directories (like ADFS, Microsoft Active Directory, OpenLDAP, AWS etc), Identity Providers (like Microsoft Entra ID, Okta, AWS), and many more. You can configure your existing directory/user store or add users in miniOrange.
Follow the step-by-step guide given below for Onelogin
Prerequisites
To implement SCIM for your app, add User Schema in Onelogin following this documentation.
Copy the Scim Base URL and Bearer Token and save it for further configuration.
Configure the attributes mappings and toggle on/off Enable Provisioning Features based on your requirements.
SCIM base URL and Bearer Token can also be retrieved later by editing the app.
If the provisioning feature “Delete the Deactivated users” is enabled then the unassigned/deleted users in source will be deprovisioned otherwise they will be disabled.
Save the app.
2. Configure provisioning in Onelogin
Create your SCIM Test App
Access OneLogin and go to Apps > Add Apps.
Search for and select SCIM Provisioner with SAML (Core Schema) or SCIM Provisioner with SAML (Enterprise Schema), depending on your schema needs.
Give your SCIM test app a Display Name value that will help you recognize it.
Select Save
Configure your SCIM Test App
Select the Configuration tab.
Provide your SCIM Base URL value which you copied in Step 1. This is the address that points OneLogin to your SCIM API server.
Provide your SCIM Bearer Token value. This token authenticates requests and responses sent between the OneLogin SCIM provisioning service and miniOrange SCIM server.
Select Save.
3. Test Connection
Access the Configuration tab for your SCIM test app.
Select Enable. The app will attempt to make an initial connection to the SCIM base URL defined for your SCIM app.
Note: This initial connection does not invoke any actual provisioning and just makes a GET request for a user value that OneLogin knows does not exist. If the request receives a 404 status code as a response, it confirms that the endpoint is valid and the API Status displays as Enabled.
View Provisioning Reports
How to access Provisioning Reports?
Navigate to the Reports in the left-hand navigation pane and select Provisioning Report.
Filter the reports by specifying Enduser Identifier and Application Name criteria. Additionally, choose the desired timespan for the reports. Once done, click on the Search.
Alternatively, you can directly click on Search to retrieve all provisioning reports based on time without applying any specific filters.
Troubleshooting
How to create a SCIM app in OneLogin?
To create a SCIM app in OneLogin, follow this documentation.