Wix 2-step verification (2FA/MFA)
Wix 2 Factor Authentication is an additional layer of security in which a user is prompted to provide two factors to gain access to the Wix account. With Wix 2FA being enabled, anyone trying access your Wix account from an unrecognized computer/device must provide additional authorization. Authentication starts with a user submitting his traditional username and password. Once the user successfully gets authenticated with the 1st step verification, configured 2FA (OTP verification, Push Notifications, YubiKey, TOTP, Google Authenticator etc) method prompts for 2nd-step verification.
miniOrange provides 15+ authentication methods and solutions for Wix. It allows users and organizations to set up certain authentication and settings which includes password restrictions, restricting sign-in methods, as well as other security settings.
With miniOrange Wix 2FA solution, you can:
- Choose from popular authenticators such as Google Authenticator, Microsoft Authenticator and more.
- Enable Passwordless login for your Wix Account.
- Prevent unauthorized person from accessing the resources even if cyber attackers get to know your credentials.
- Connect easily with any external identity source like Azure AD, ADFS, Cognito, etc.
Connect with External Source of Users
miniOrange provides user authentication from various external sources, which can be Directories (like ADFS, Microsoft Active Directory, OpenLDAP, AWS etc), Identity Providers (like Microsoft Entra ID, Okta, AWS), and many more. You can configure your existing directory/user store or add users in miniOrange.

miniOrange
Authenticator App

Google
Authenticator App

Authy 2-Factor
Authentication App

Microsoft
Authenticator App
Follow the Step-by-Step Guide given below for Wix two-factor authentication (2FA) :
1. Configure Wix to enable SSO
- Log into WIX.
- Create a new site or use an already existing one.
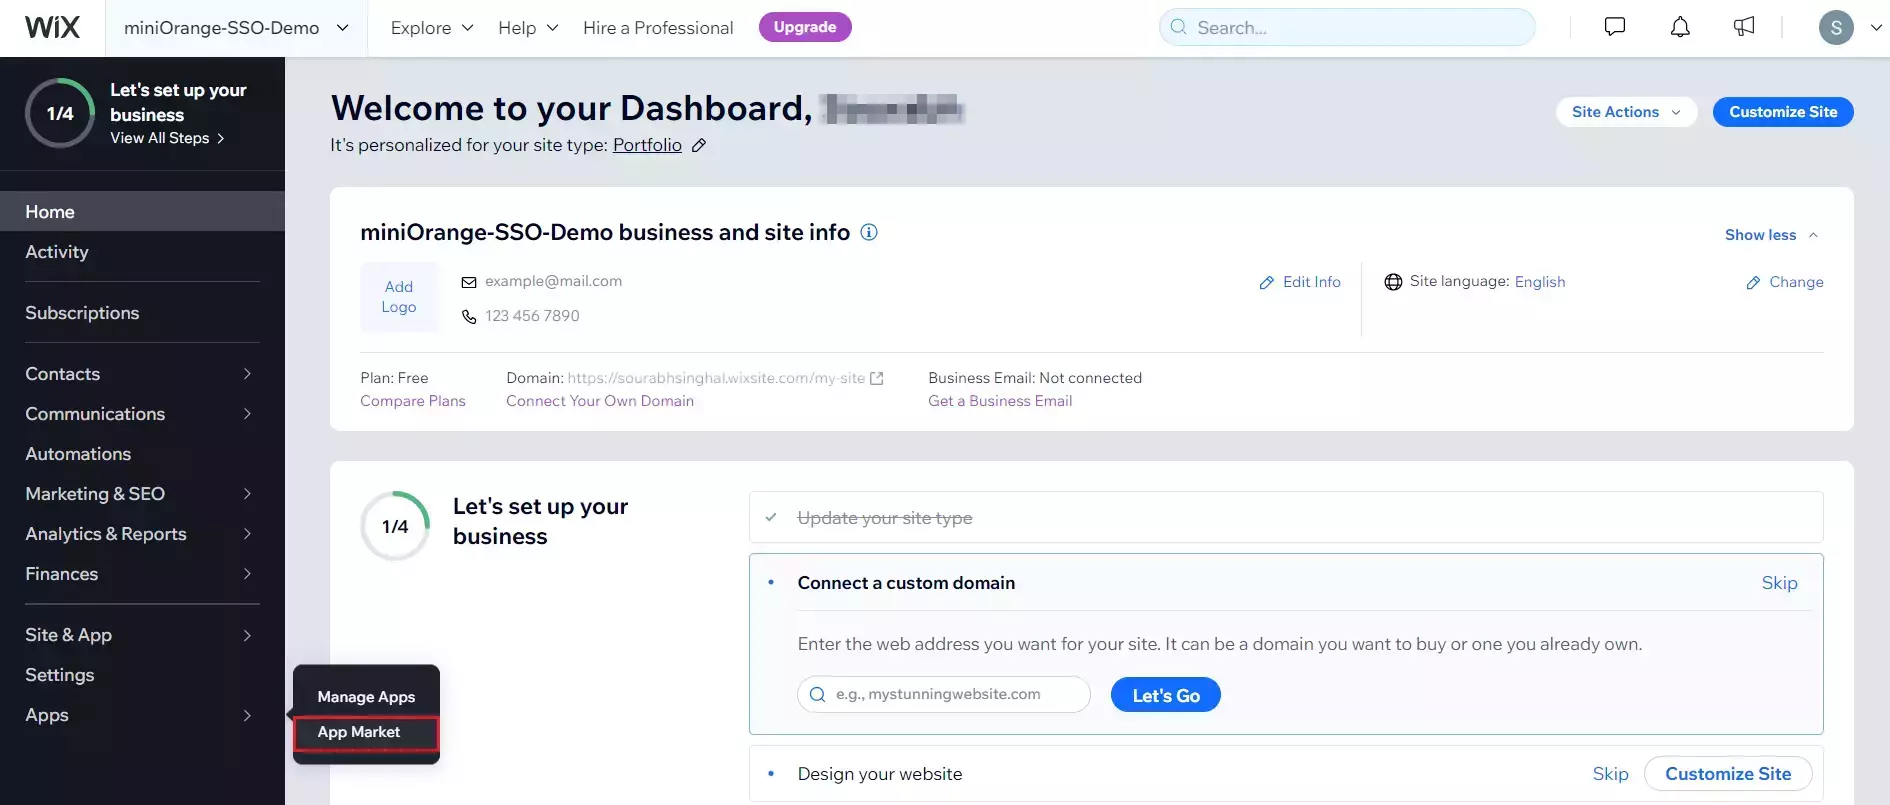
- Go to your website dashboard.
- To add Wix member area App to your website, go to App Market.
- Search for Wix Member area.
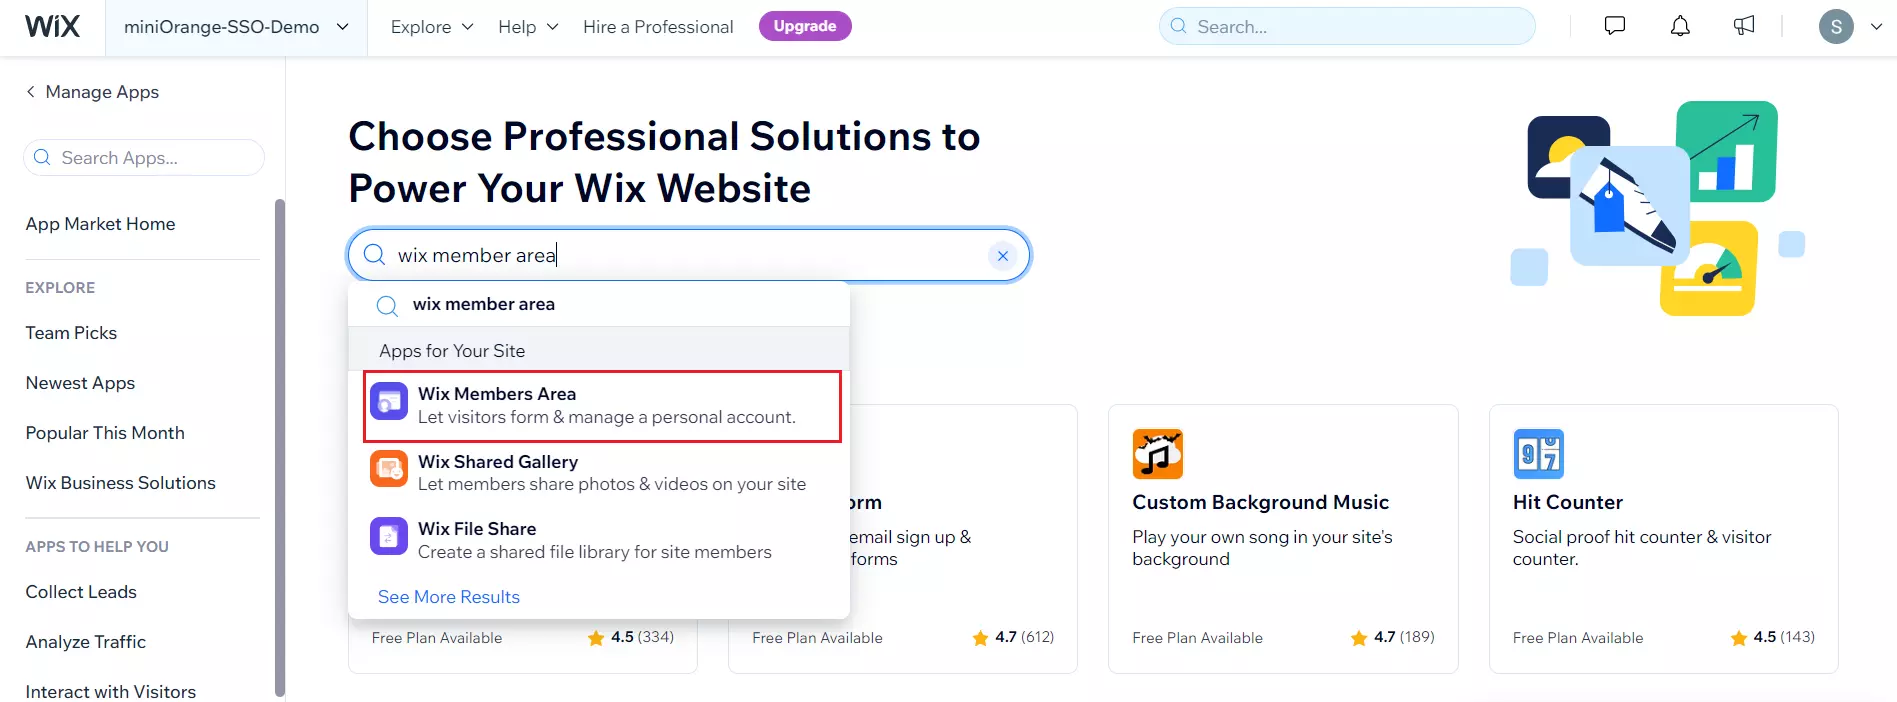
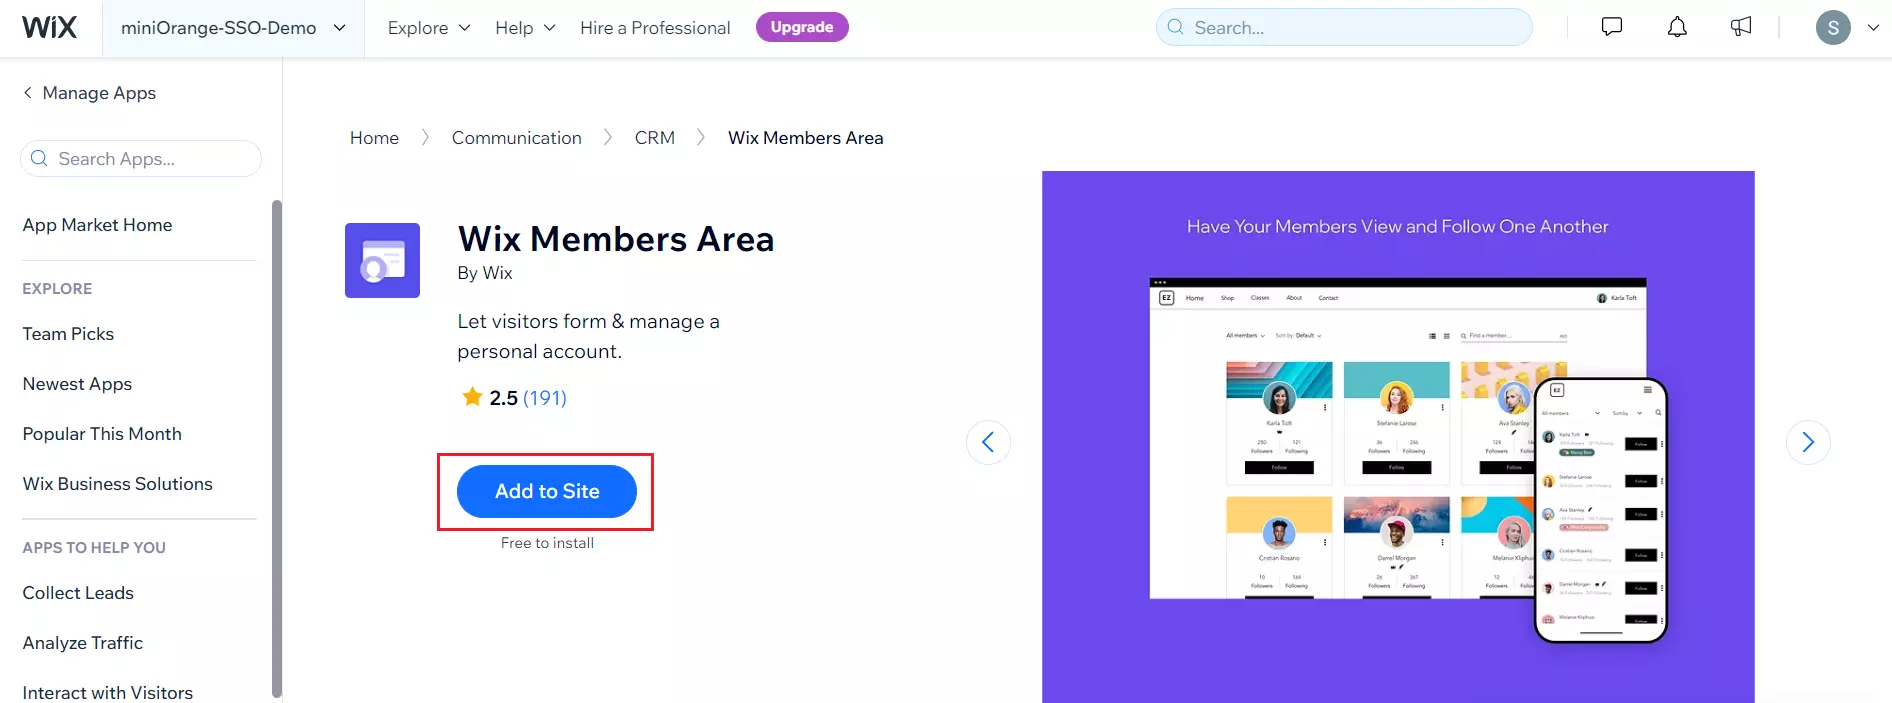
- Open Wix member area app and click on Add to site.
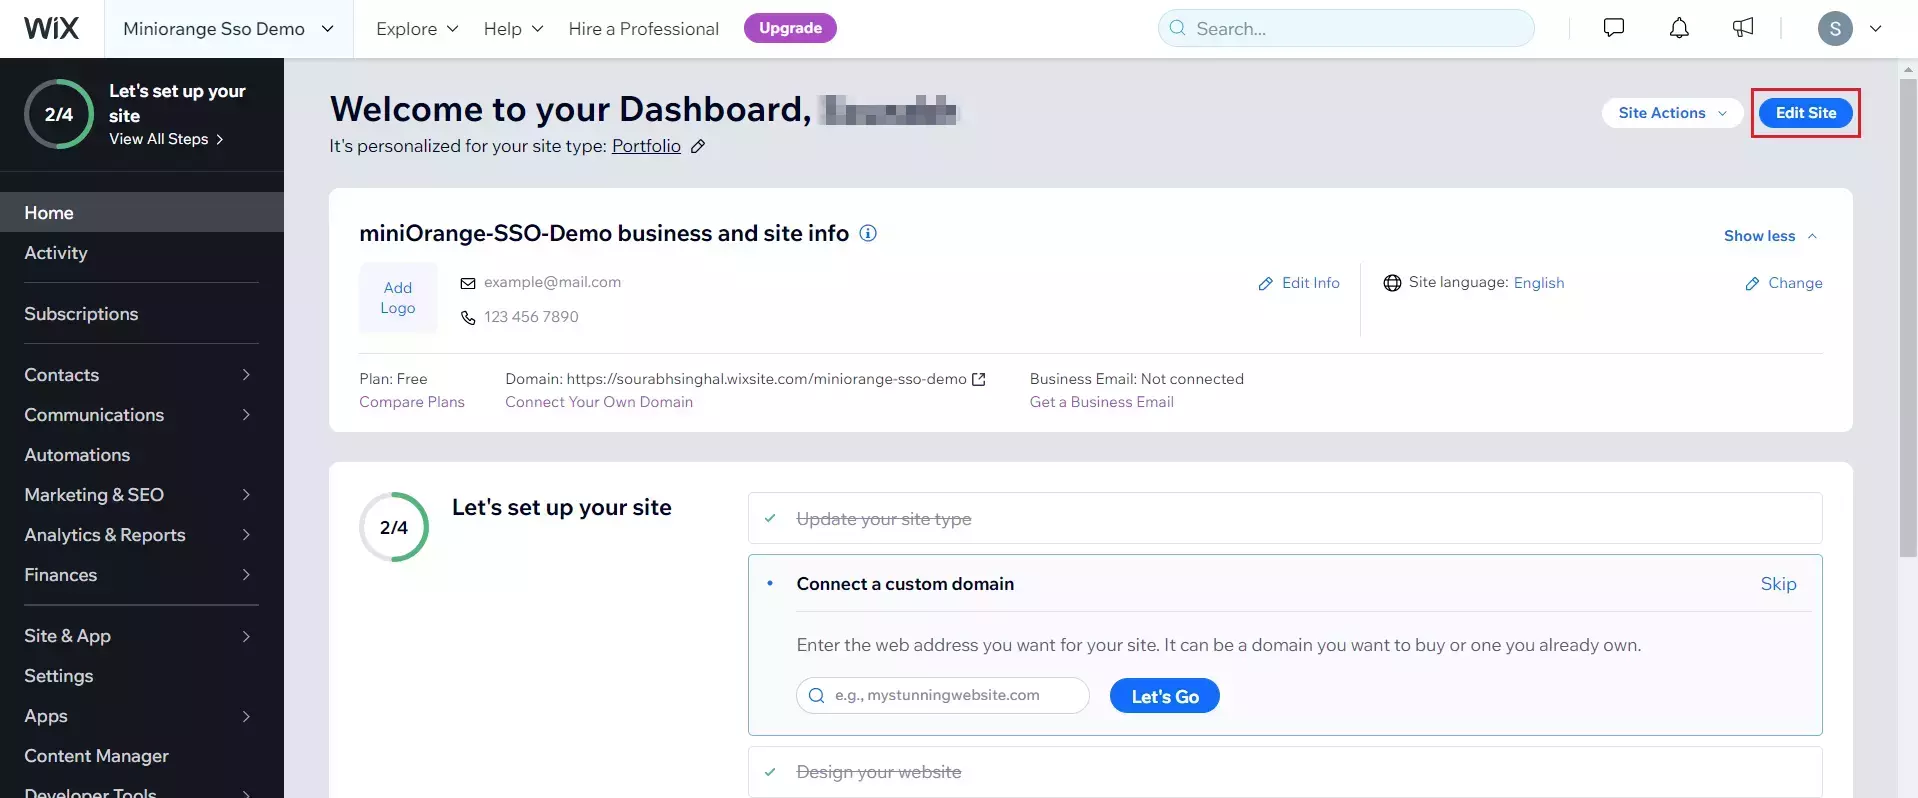
- Navigate to your Website dashboard >> Home tab and click on Edit site.
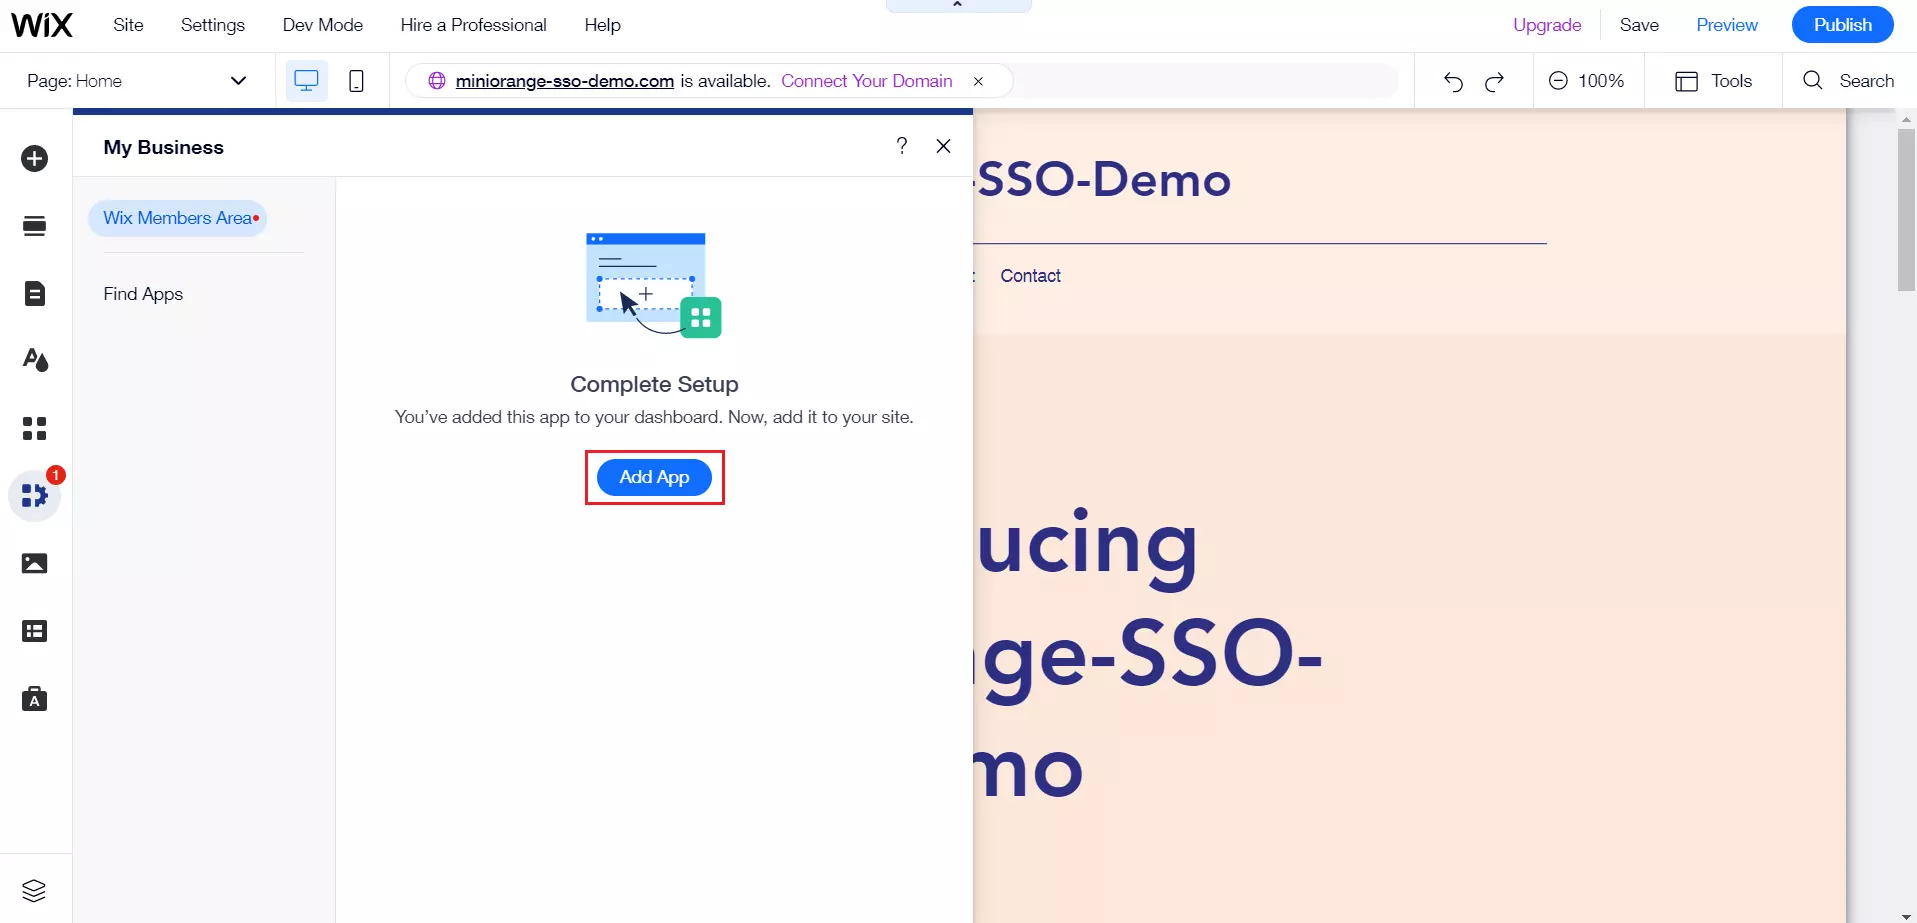
- Go to My business tab in the edit site page and select Wix Member Area.
- Click on Add App.
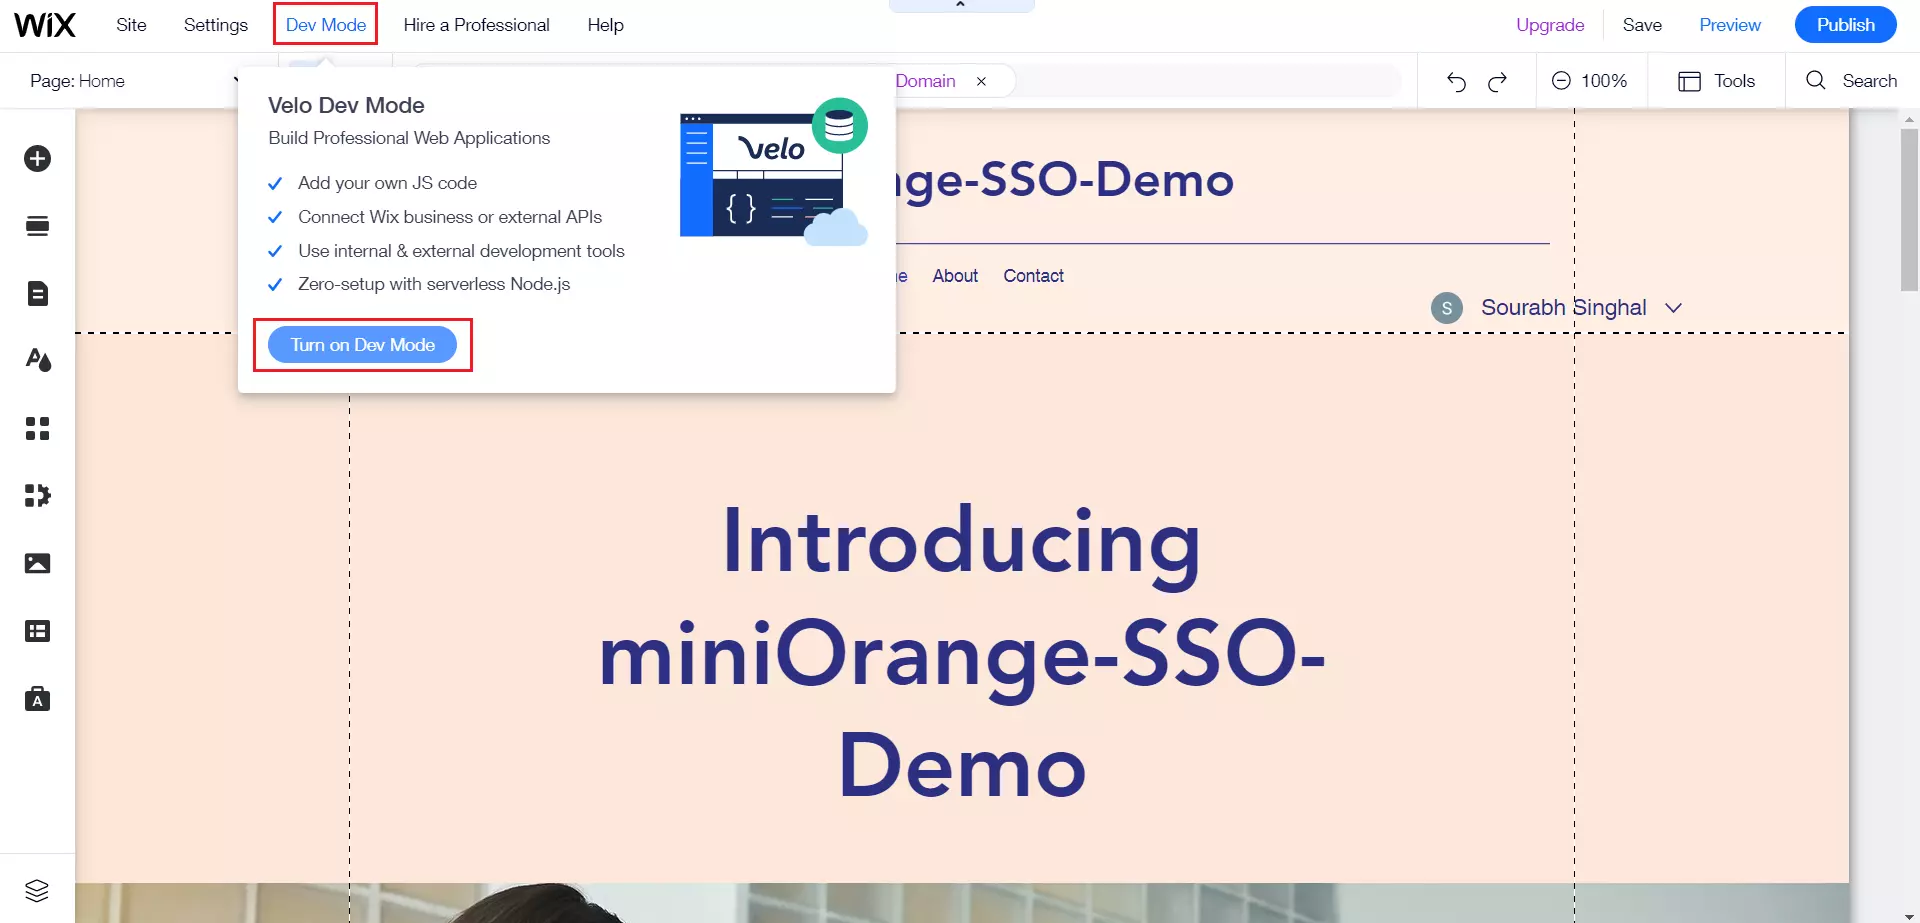
- Click on Turn on Dev Mode.
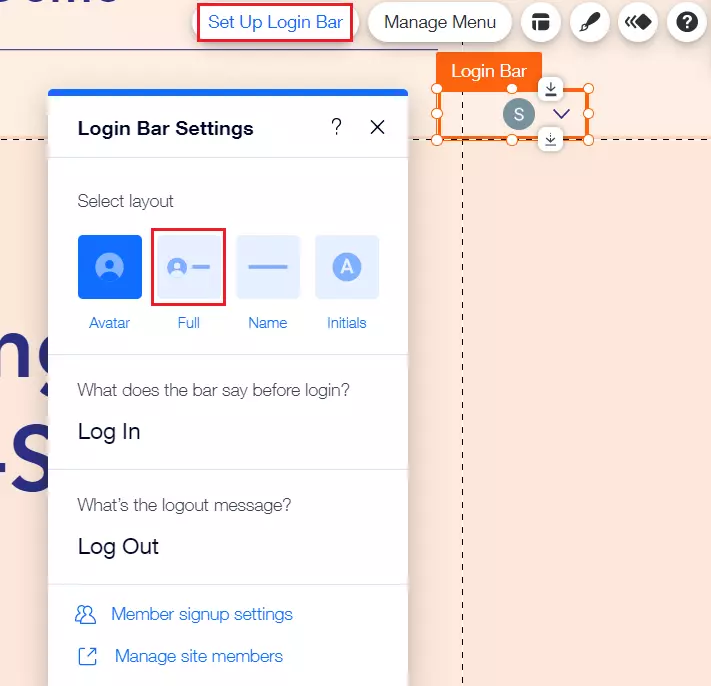
- Edit Login Bar.
- Click on setup login bar and Select Full, then Drag and resize the login bar as per your requirements.
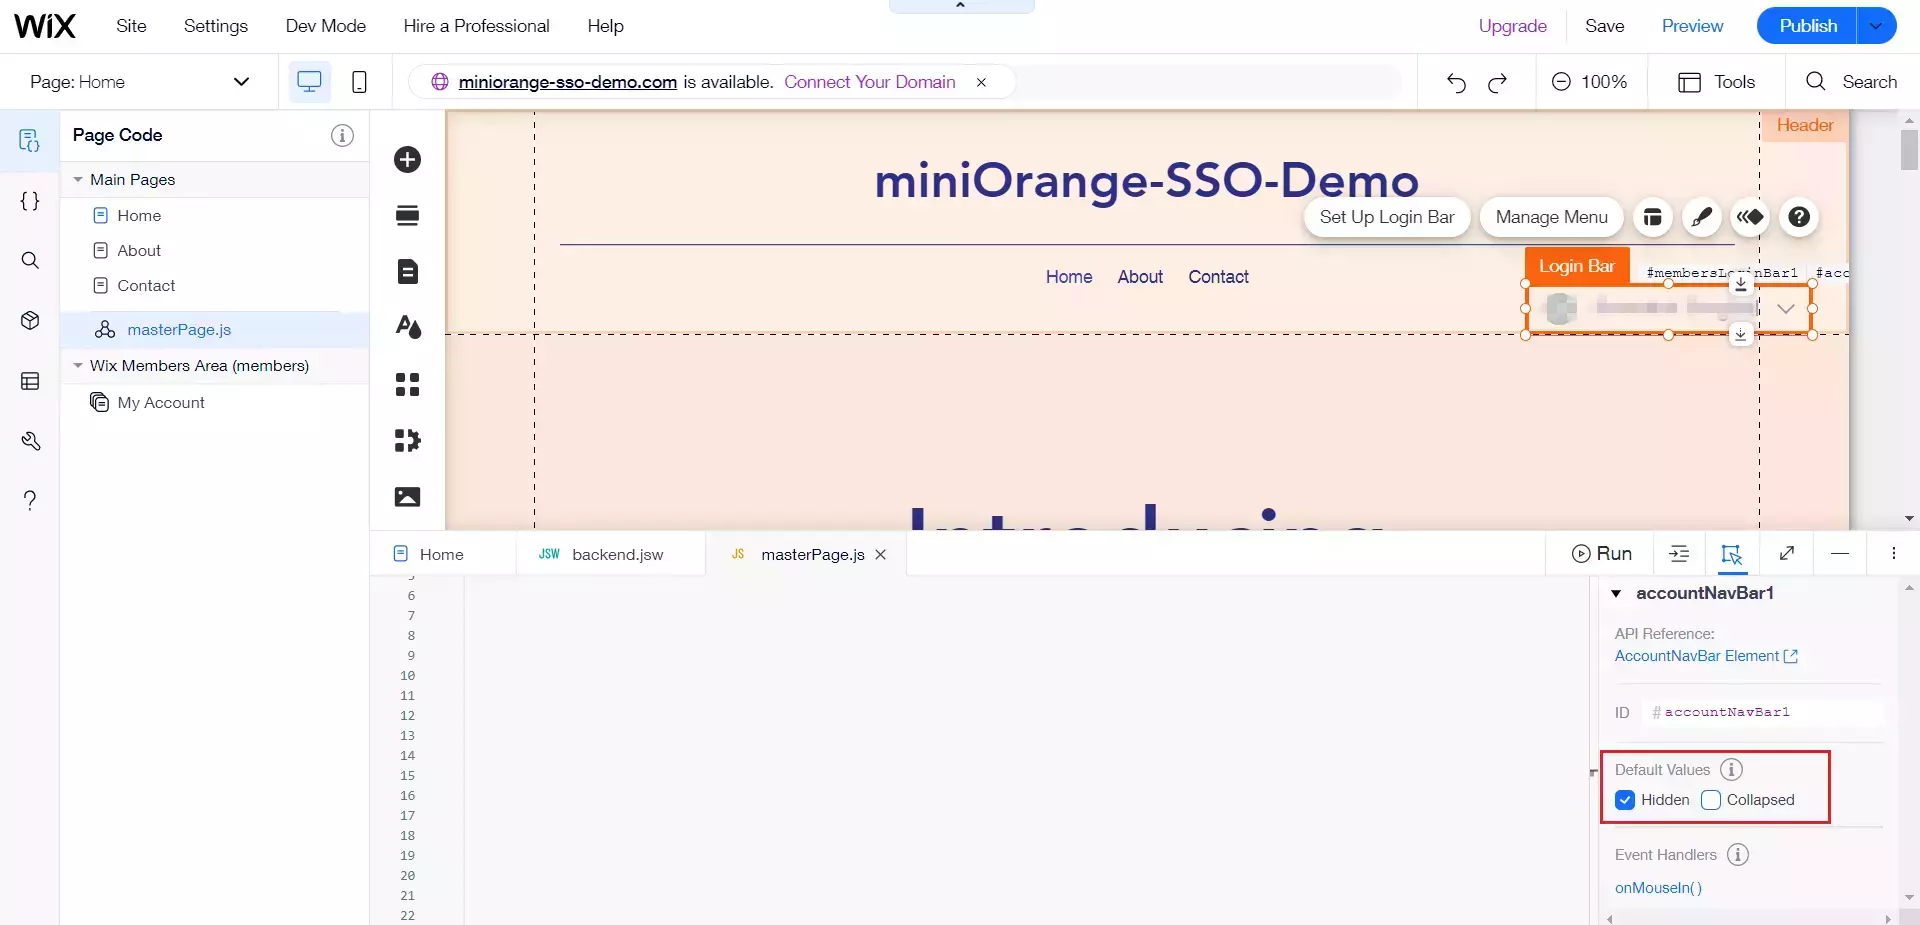
- Click on Open masterPage.js for accountNavBar1.
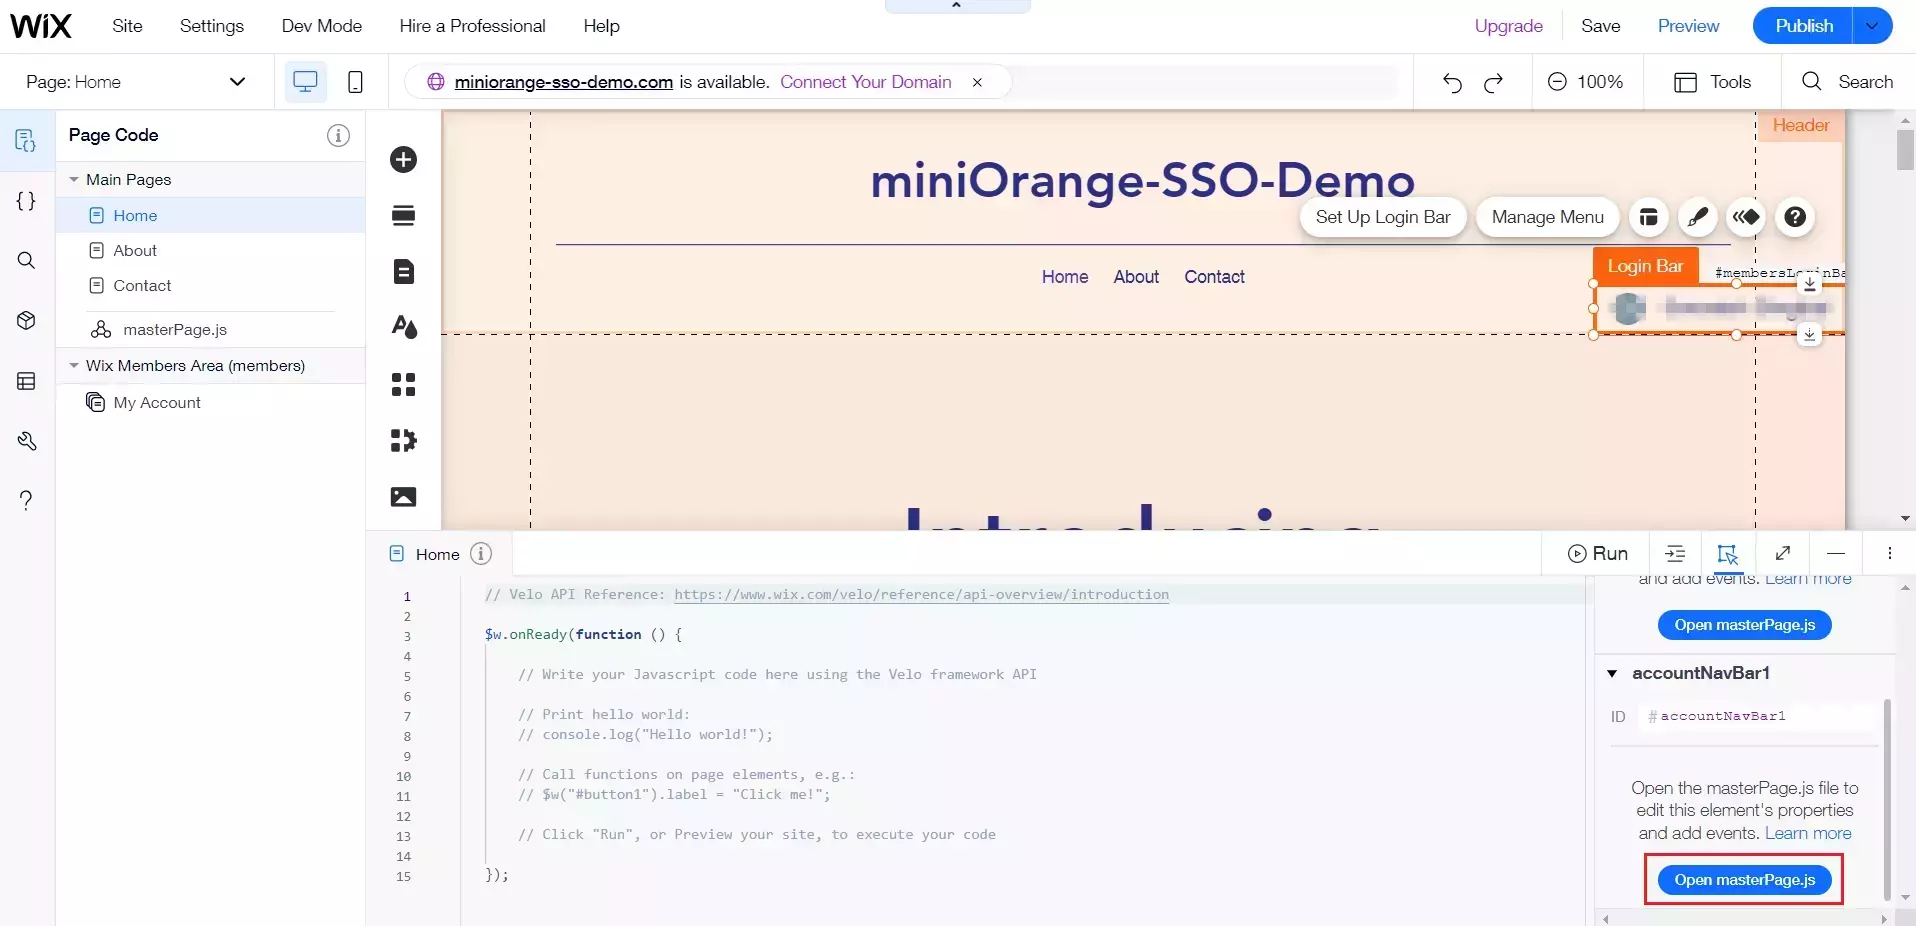
- Enable hidden for accountNavBar1 Default values.
- Now to publish the website, click on Publish.
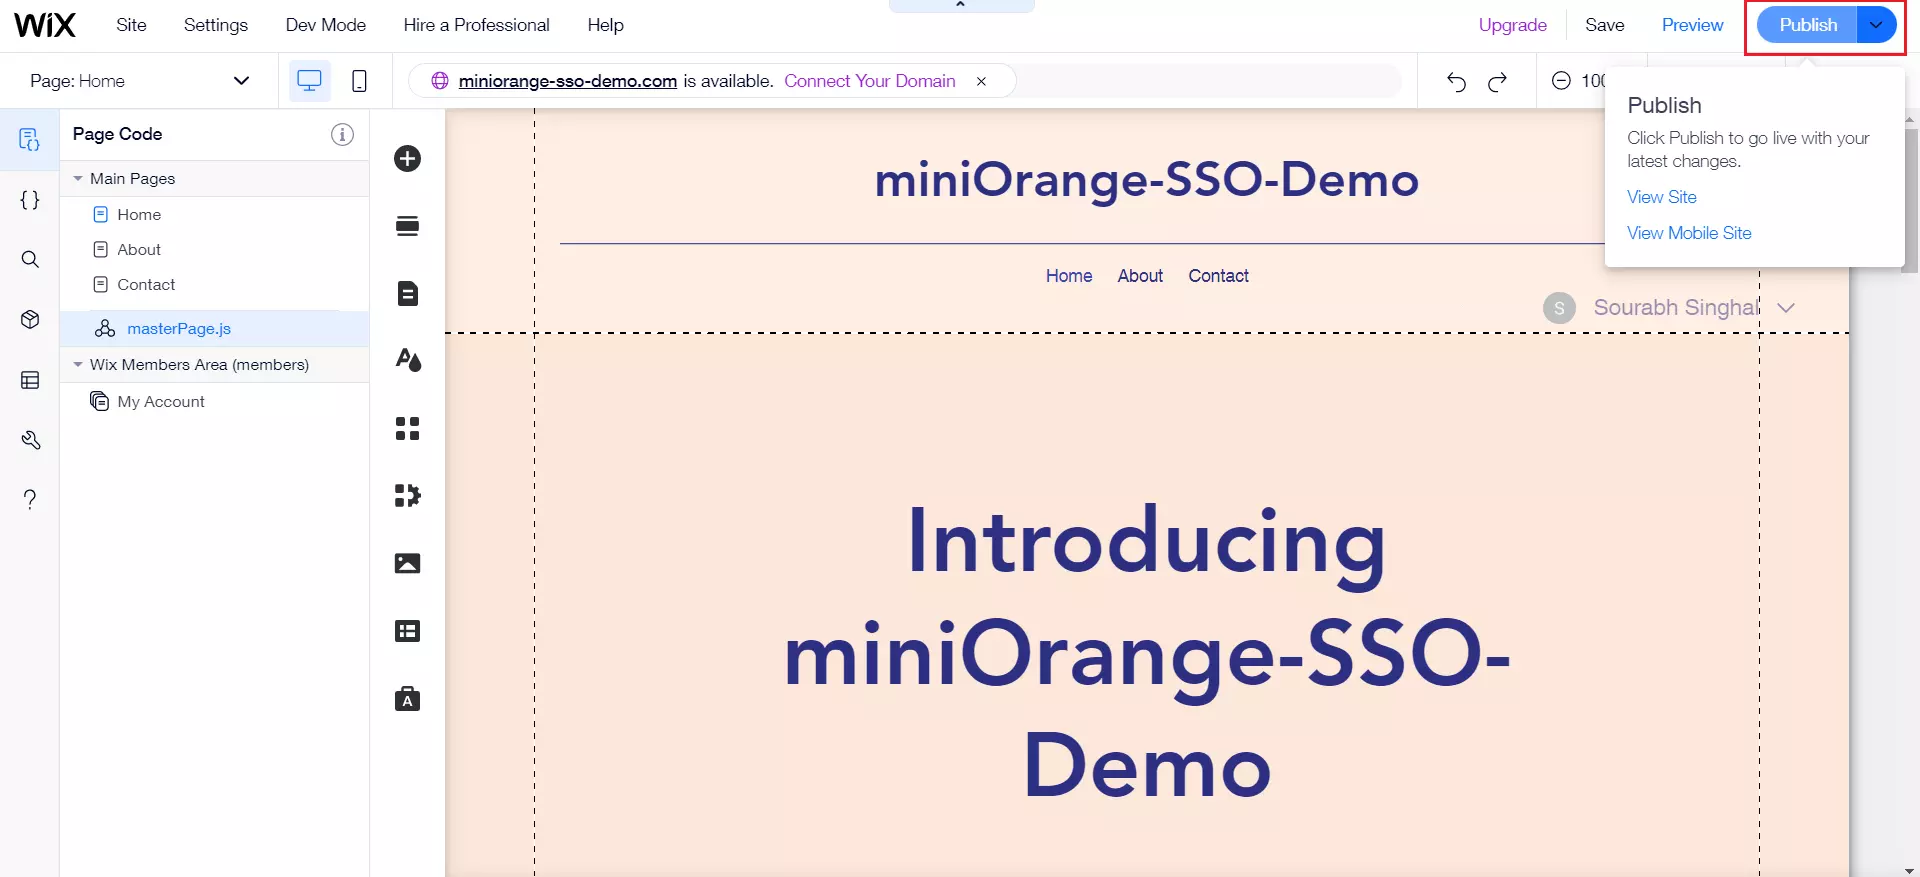
- After publishing is successful, a dialog box will open. Copy your site link from this dialog box.

2. Configure Wix in miniOrange
- Login to miniOrange Admin Console.
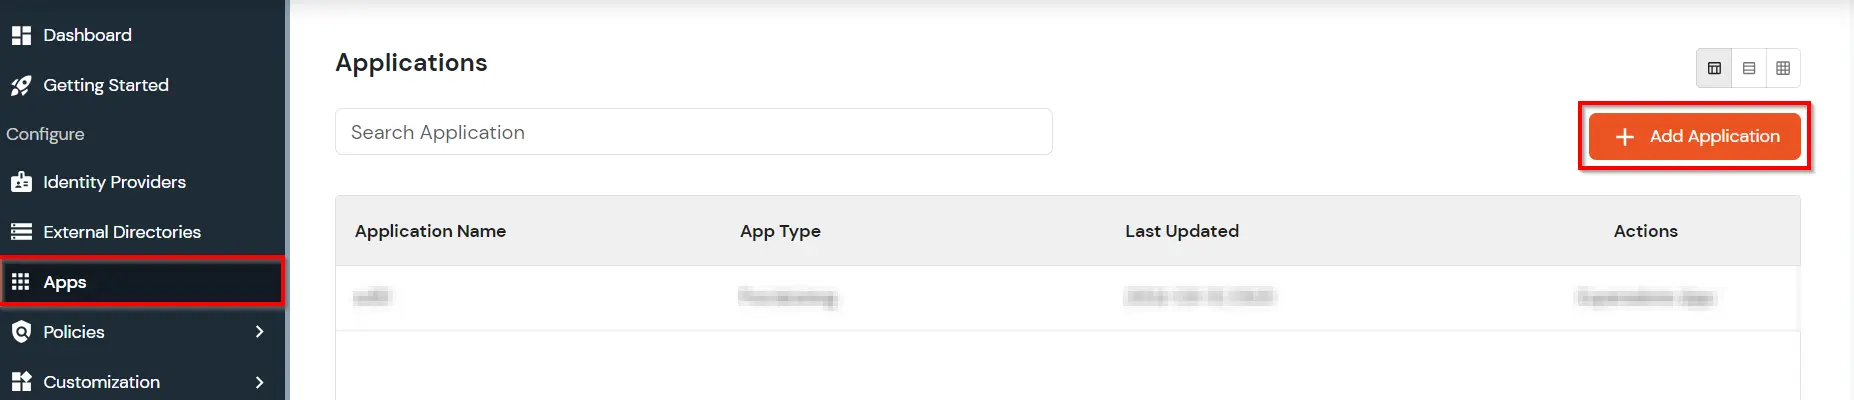
- Go to Apps Click on Add Application button.
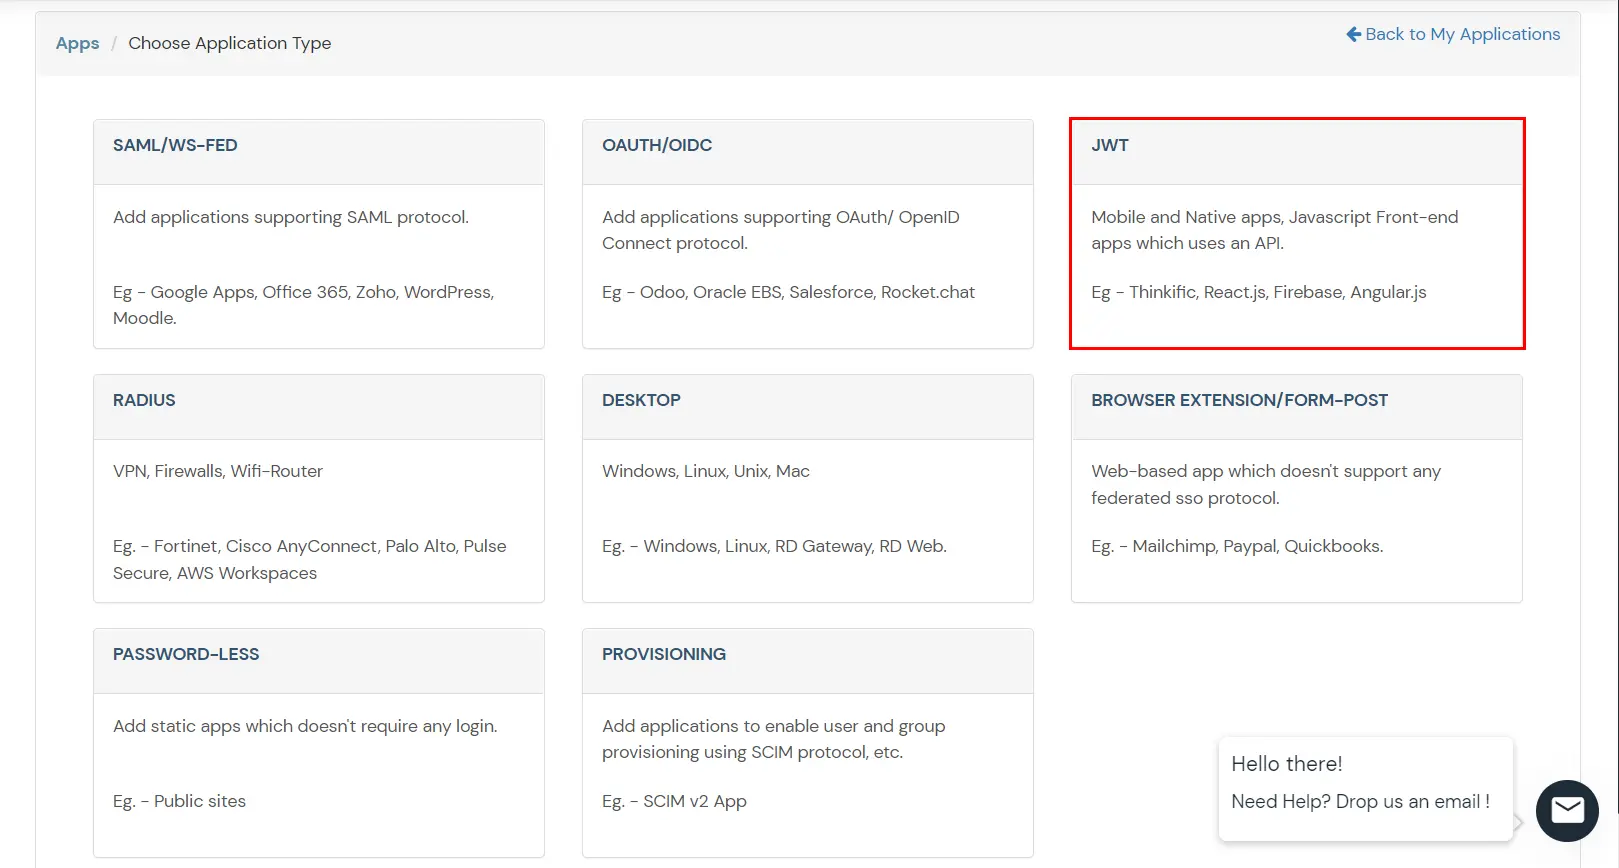
- Under the Choose Application Type, click on JWT.
- In Add Apps tab enter the values and click on Save.
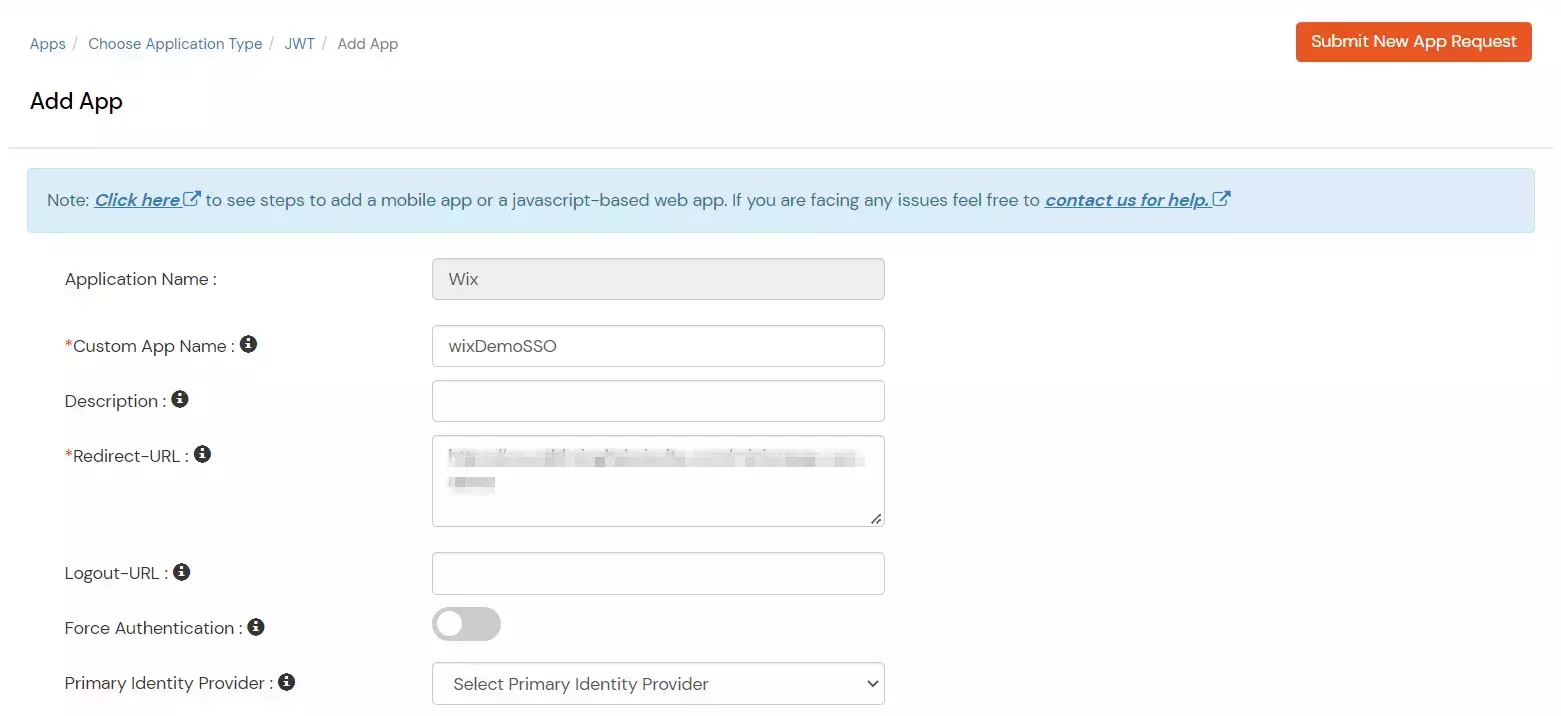
| Custom Application Name |
Choose appropriate name according to your choice. |
| Description |
Add appropriate description according to your choice. |
| Redirect-URL |
Please paste this link copied in the previous step |
| Group Name |
Default |
| Policy Name |
Add policy name according to your Preference. |
| Login Method |
Password. |
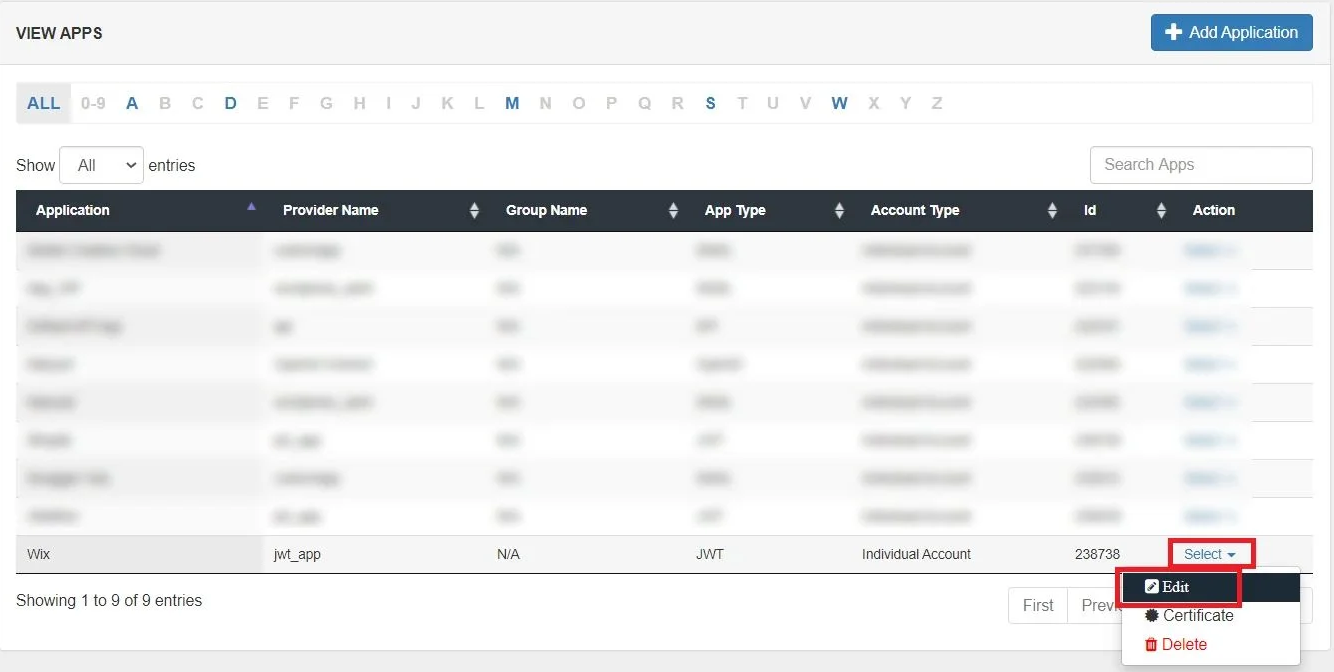
- Edit your recently created App by going to Apps >> Select option under Action dropdown >> Edit.
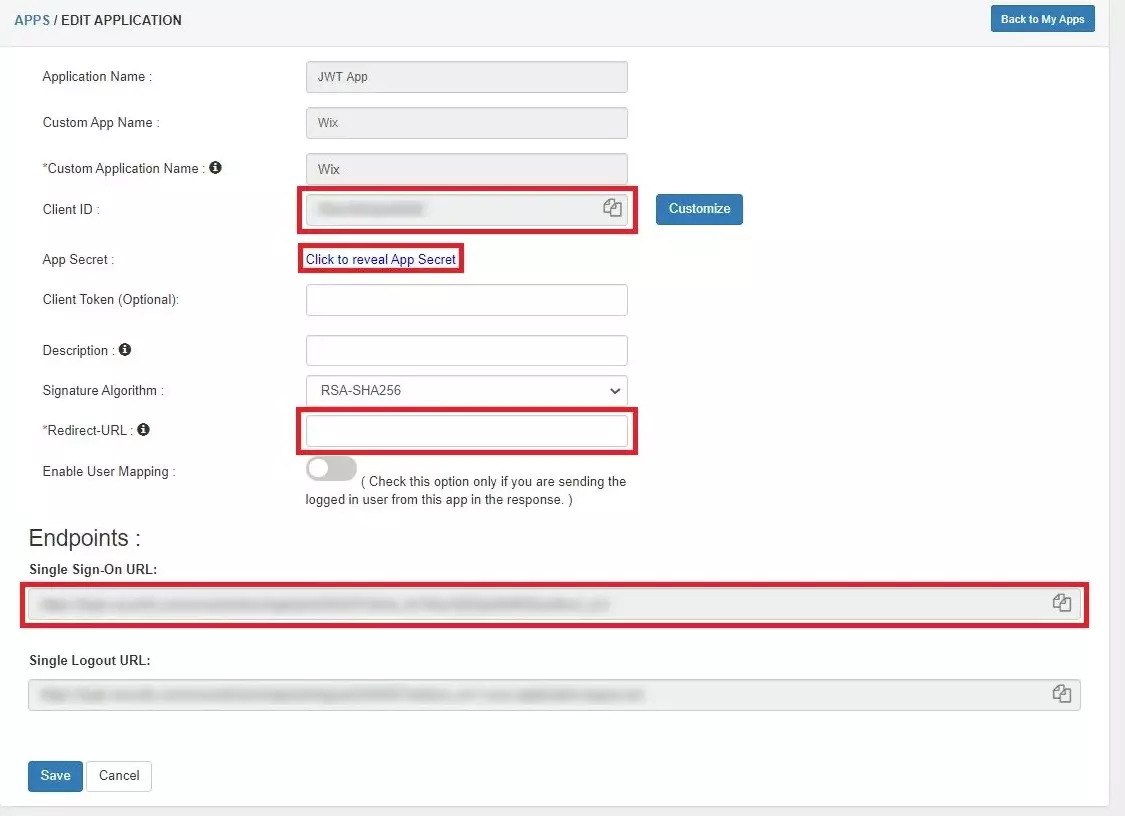
- Copy the Single Sign-On URL from the edit app page and click on save.
- To download App certificate, Go Apps >> Select option under Action dropdown >> Certificate
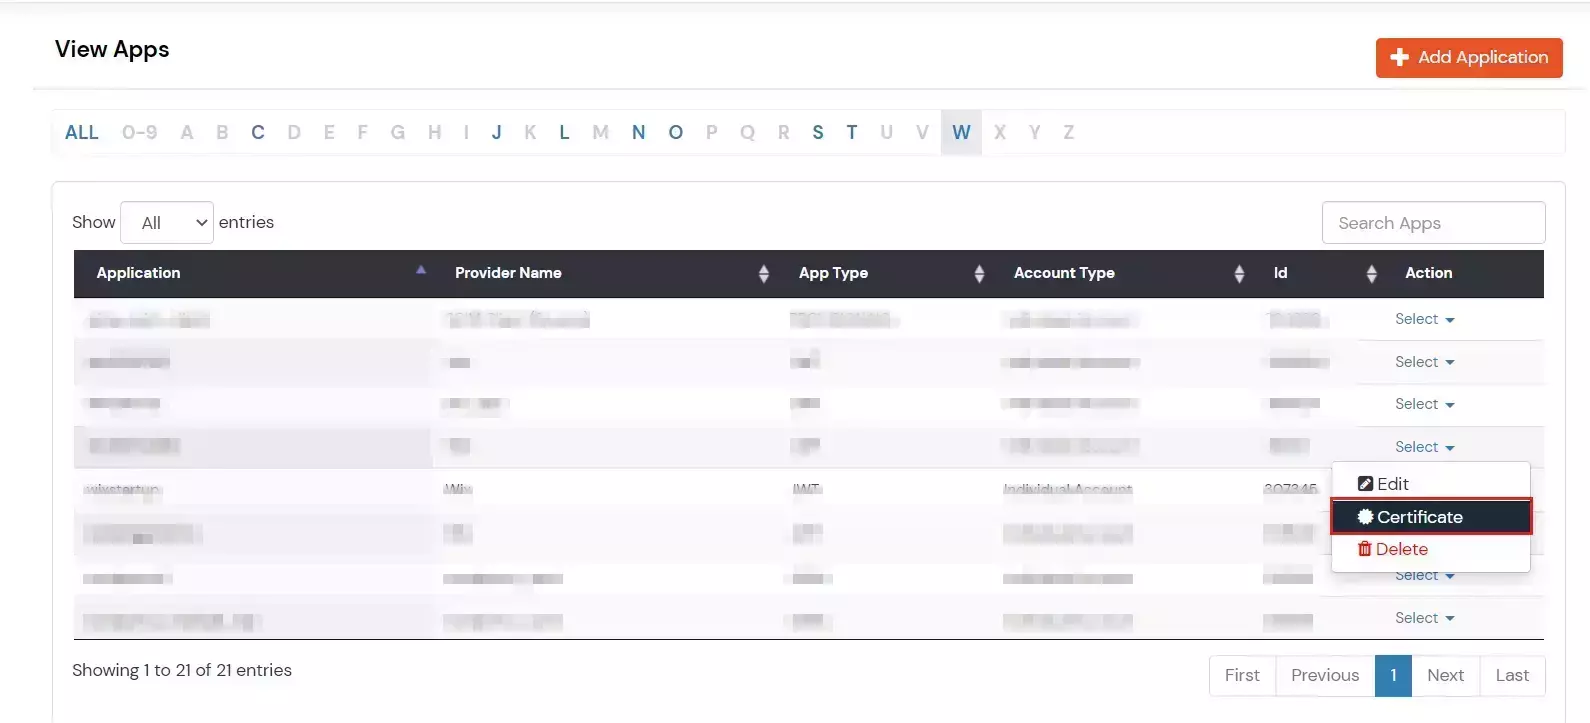
- Download the Certificate.
Go to your Wix site to continue editing.
3. Configure 2FA for Wix
3.1: Enable 2FA for Users of Wix app
- To enable 2FA for Users of Wix application. Go to Policies >> App Login Policy
- Click on Edit against the application you have configured.
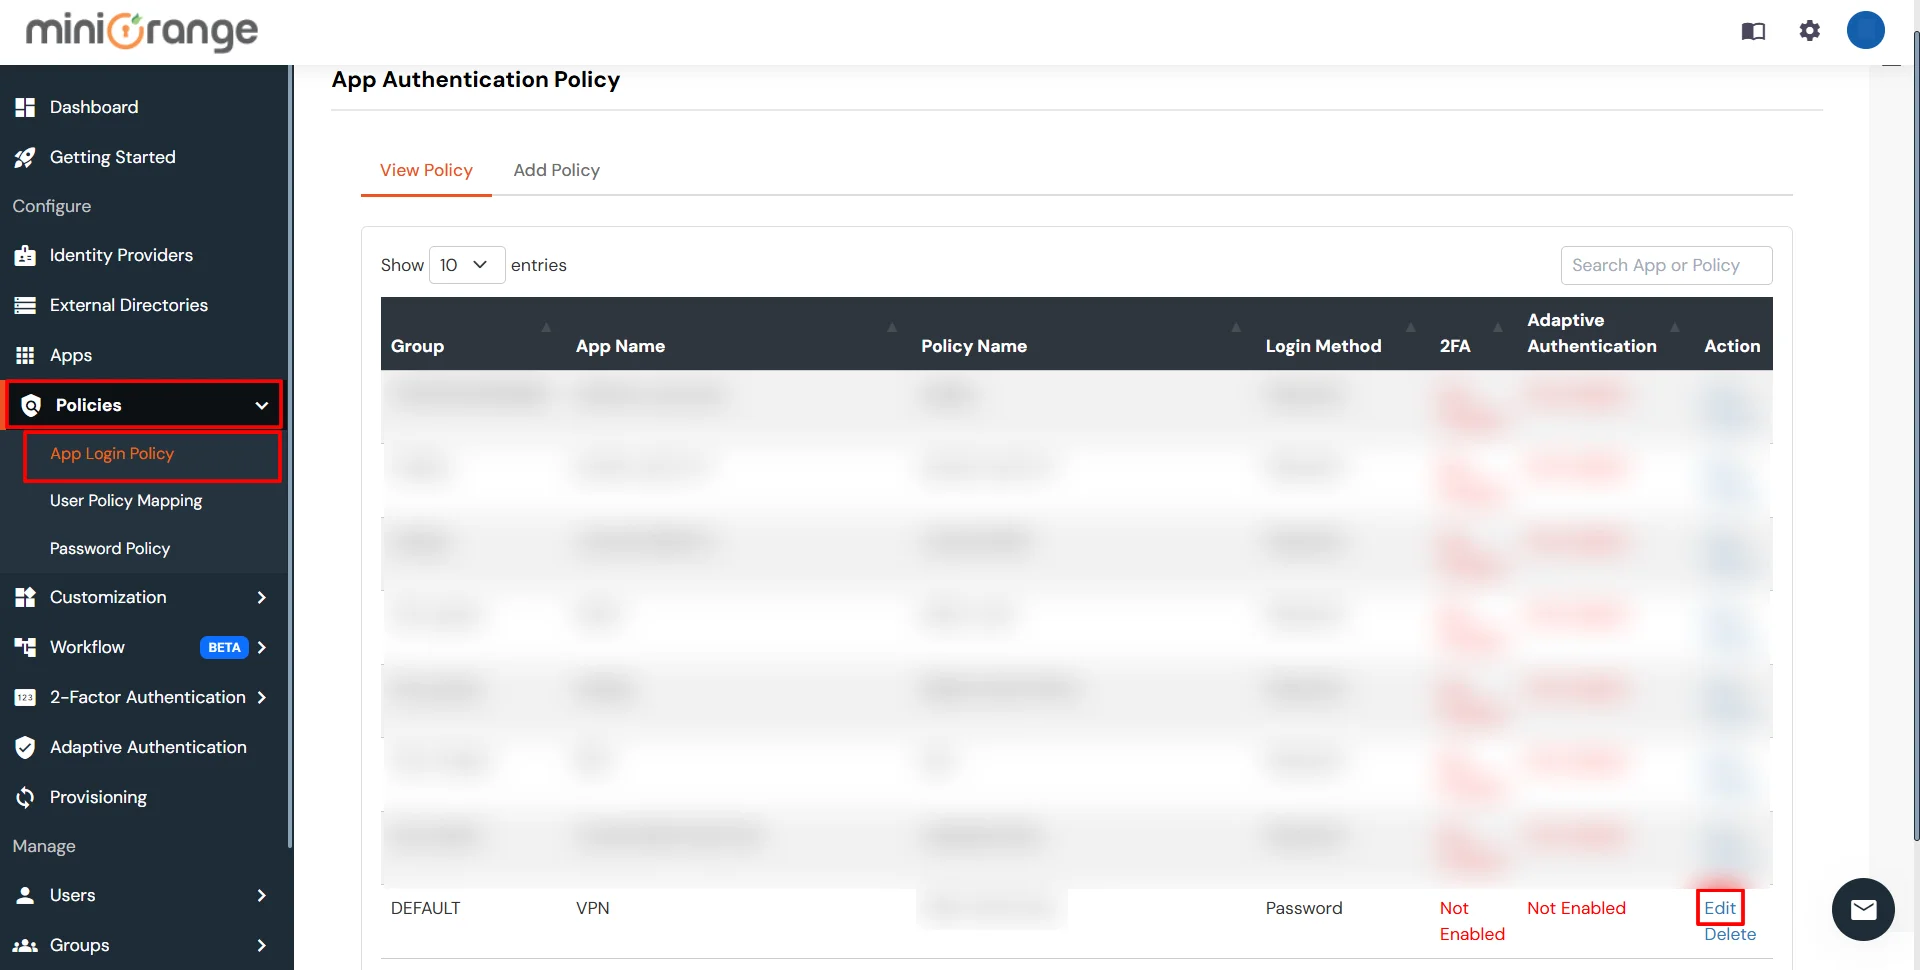
- Enable the Enable 2-Factor Authentication (MFA) option.
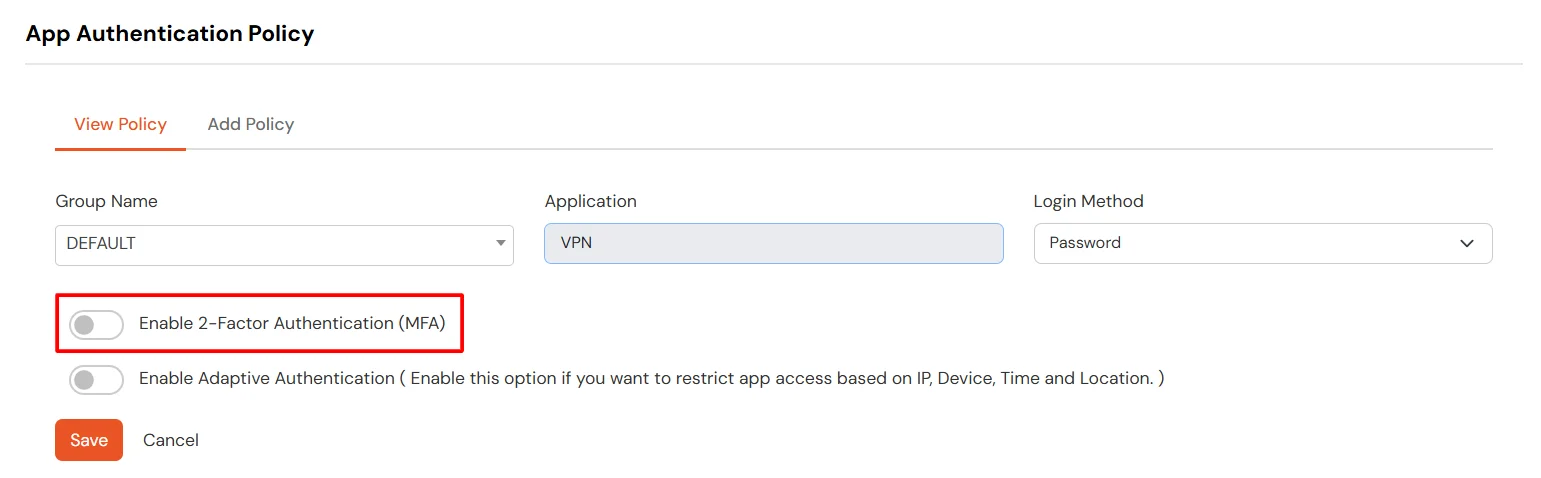
- Click on Save.
3.2: Configure 2FA for your Endusers
- To enable 2FA/MFA for endusers, go to 2-Factor Authentication >> 2FA Options For EndUsers.
- Select default Two-Factor authentication method for end users. Also, you can select particular 2FA methods, which you want to show on the end users dashboard.
- Once Done with the settings, click on Save to configure your 2FA settings.

3.3: Enduser 2FA Setup
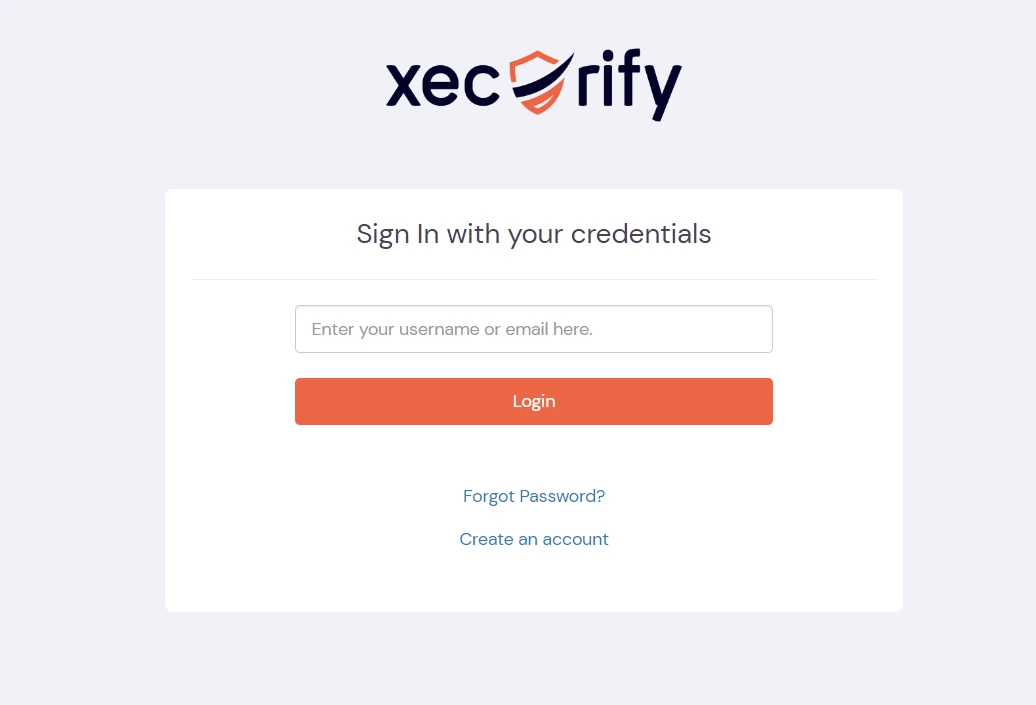
- Login to End-User Dashboard using end user login URL.
- For Cloud Version: The login URL (branding url) which you have set.
- For On-Premise version: The login URL will be the same as of Admin Login URL.
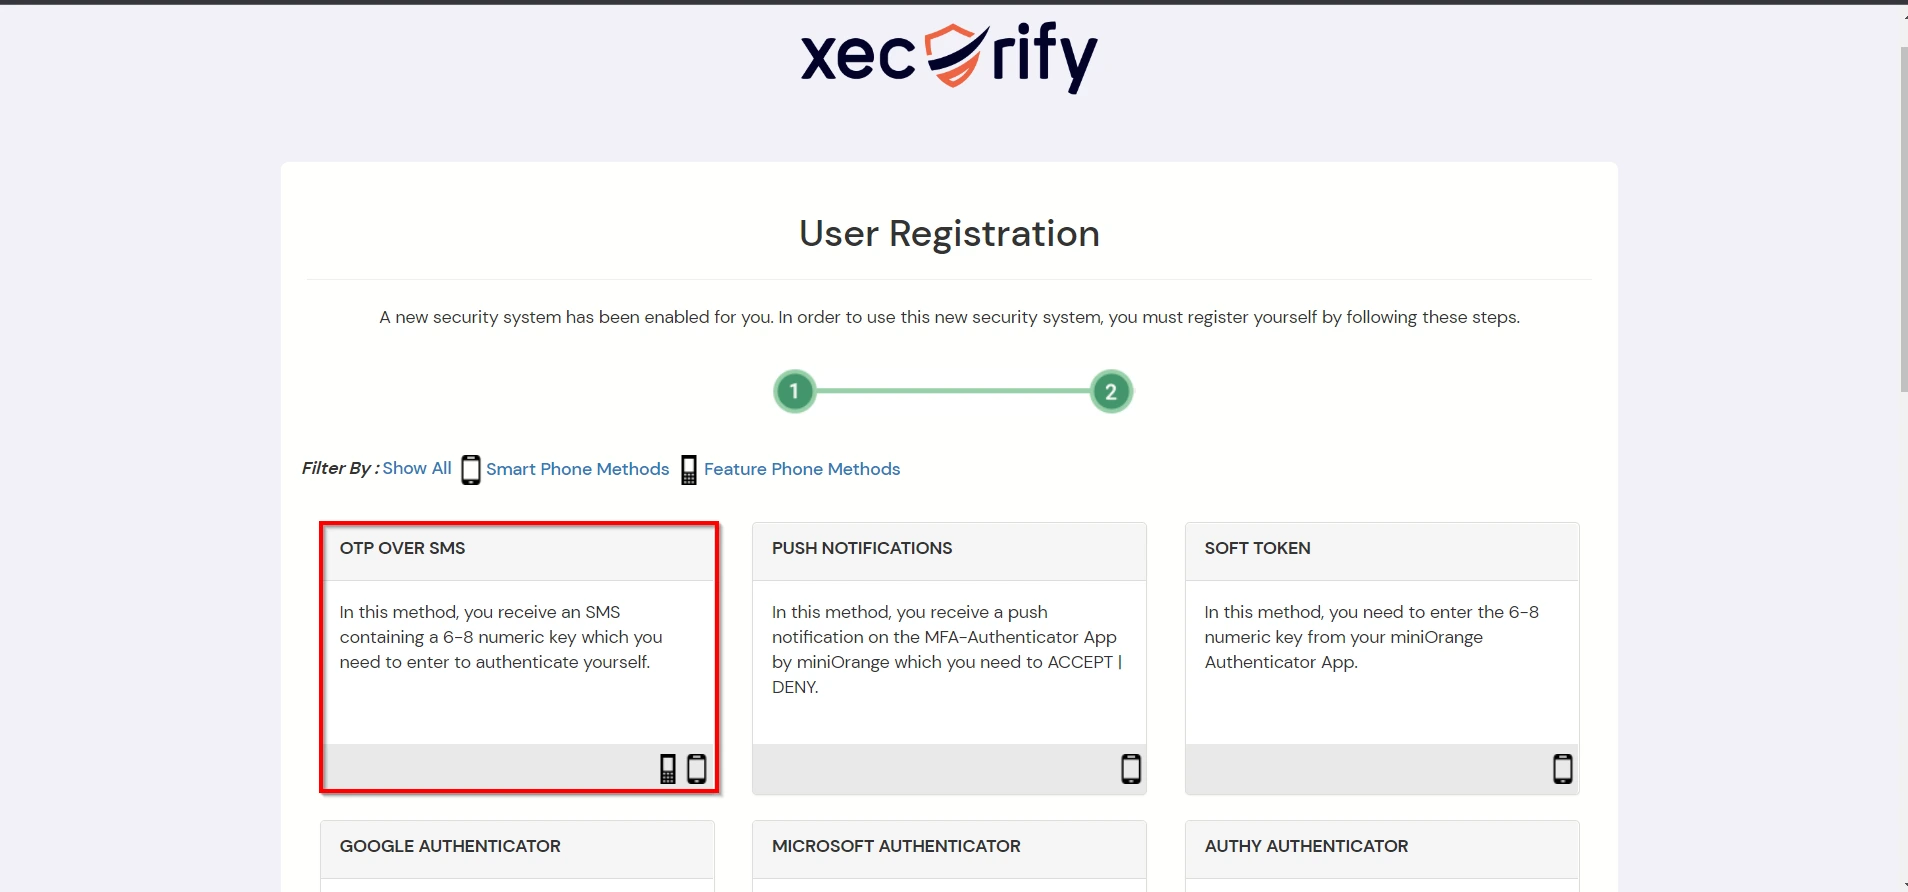
- Select Setup 2FA from left panel. Then select any of the 2FA method available.
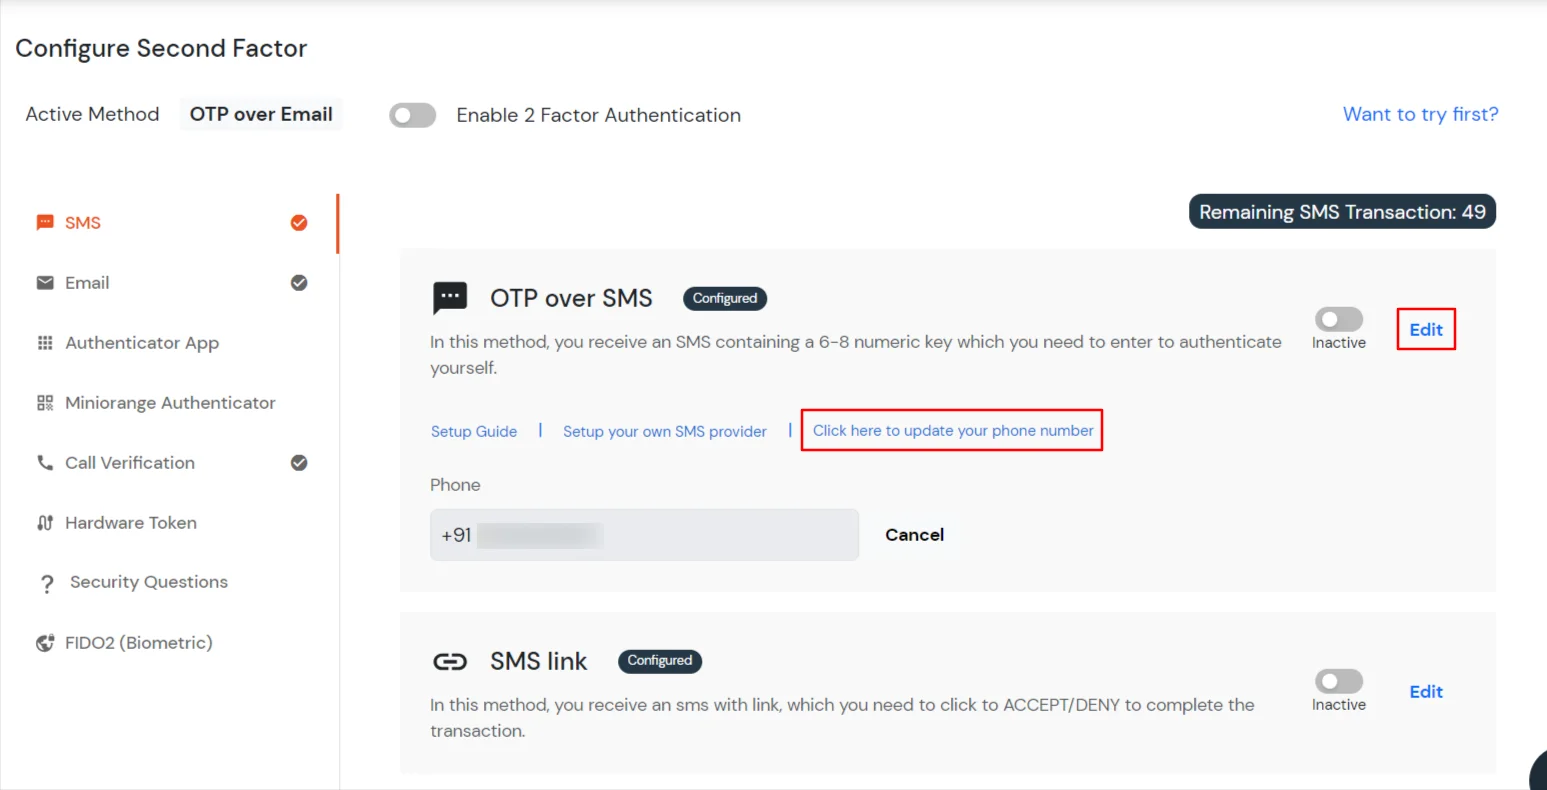
- For now, we have selected the SMS >> OTP OVER SMS as our 2FA method. You can explore the guide to setup other 2FA methods here.
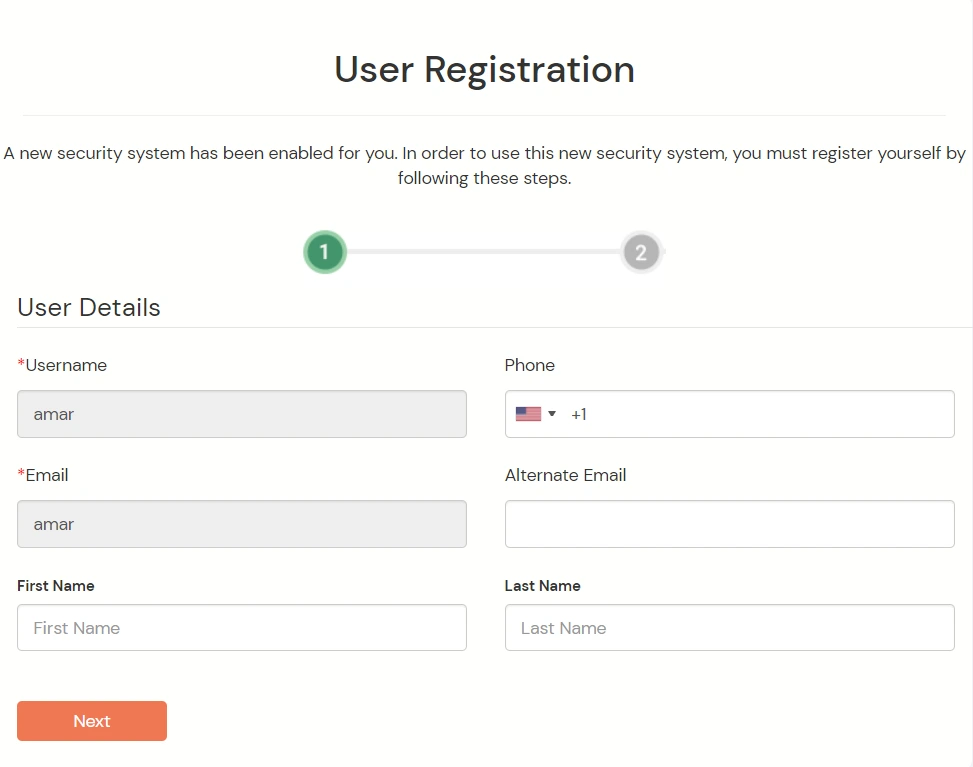
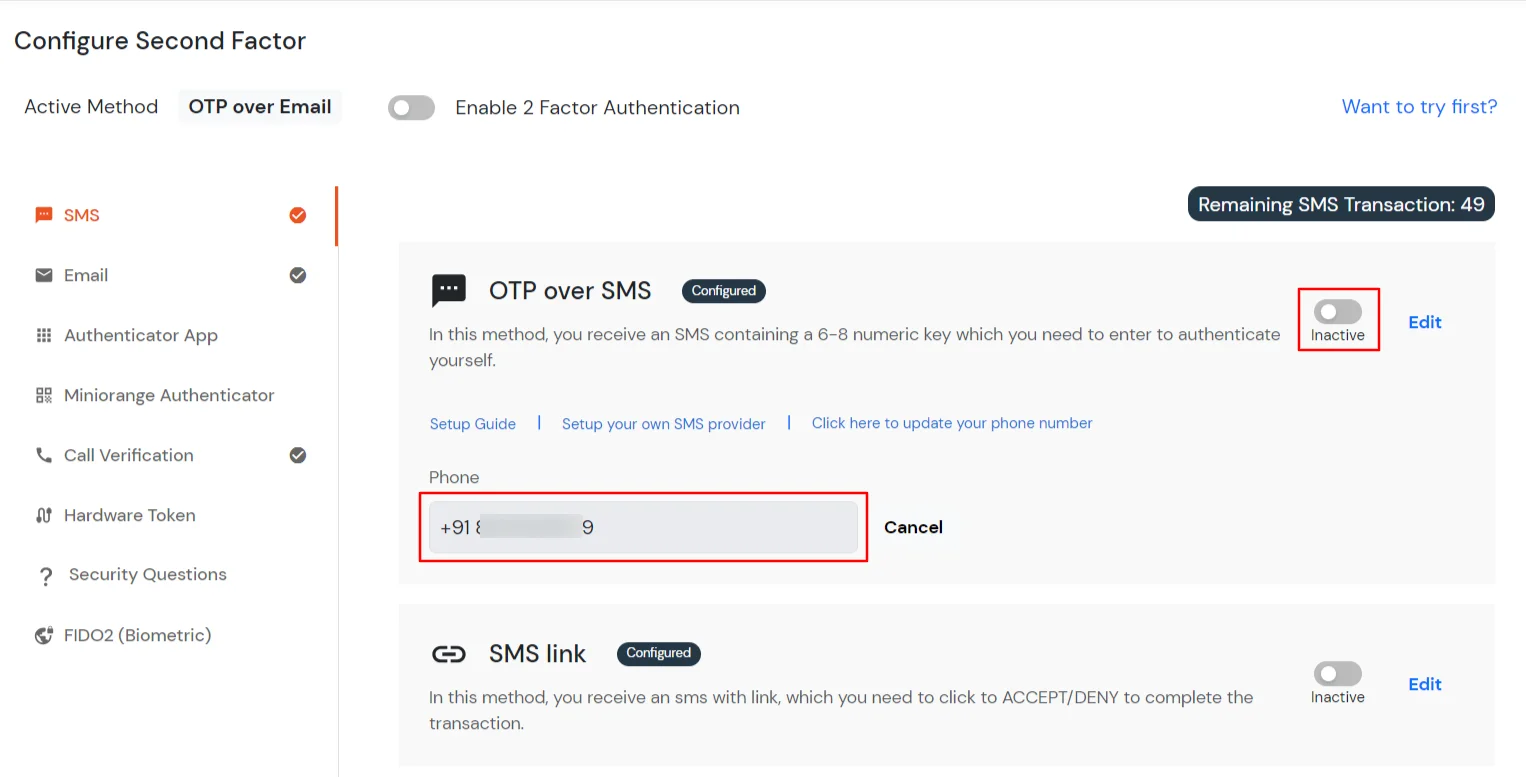
- Enable the OTP over SMS if you have your phone number added under your account information else click on Edit >> Click here to update your phone number link.
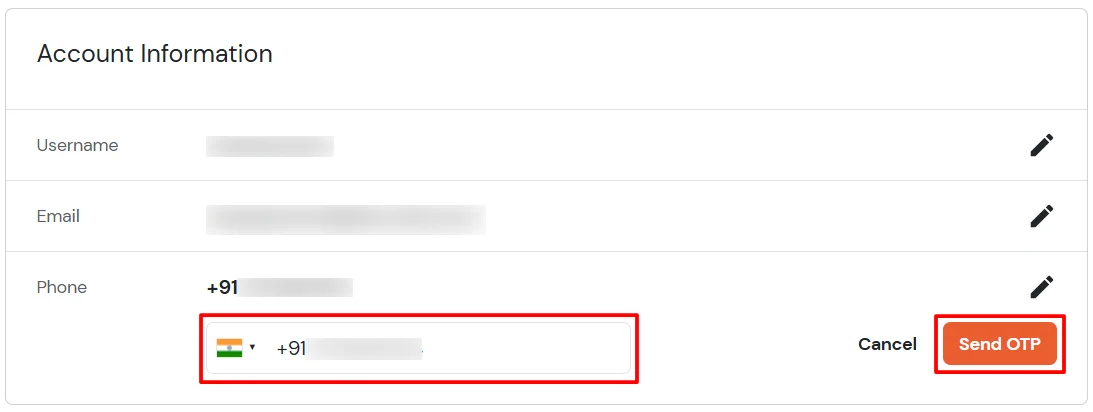
- In Account Information, click on edit icon.
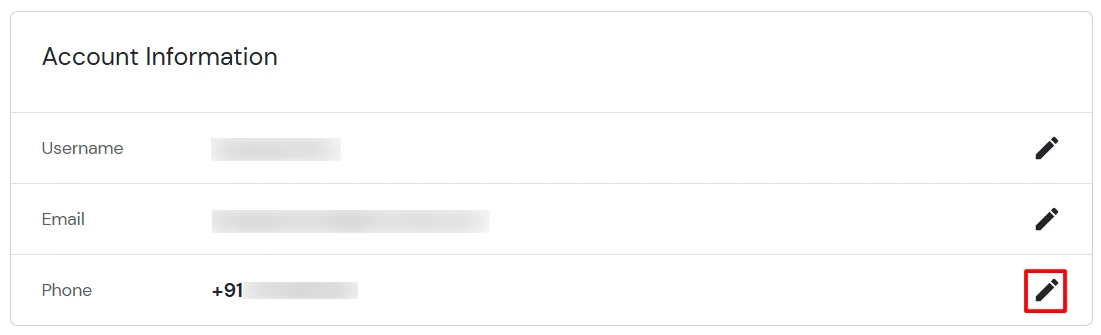
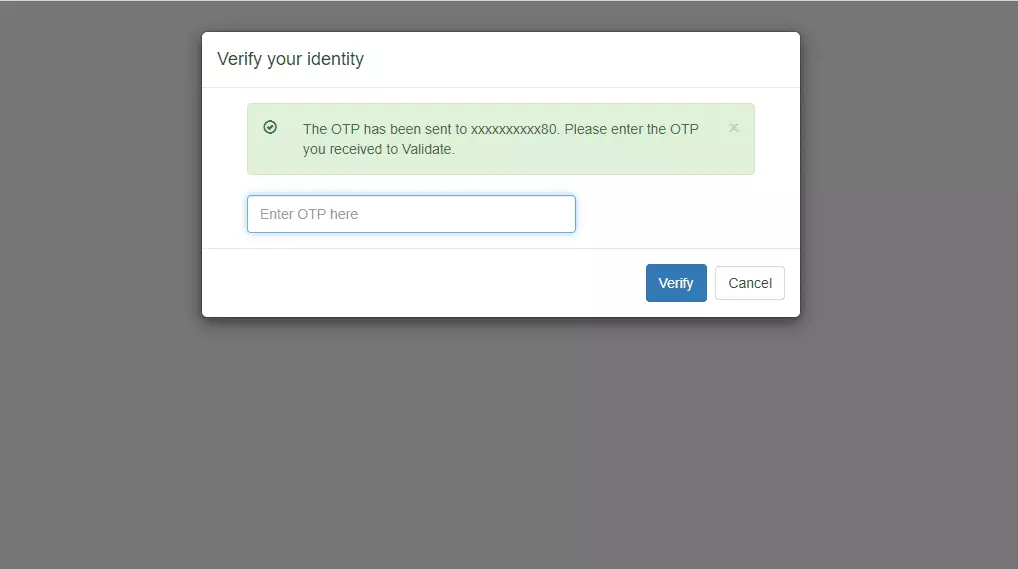
- Select your country code, enter your mobile number, and click Send OTP.
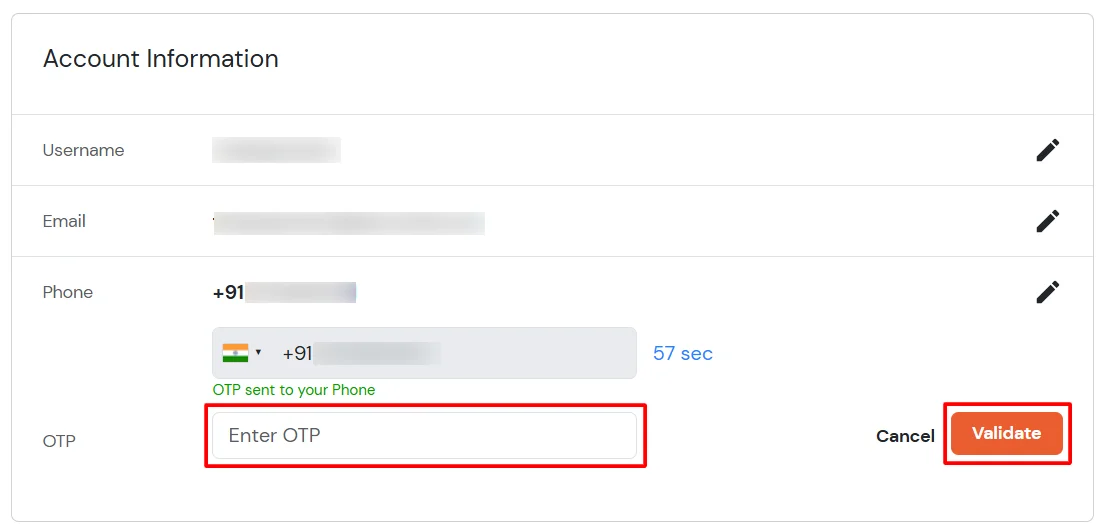
- Enter the OTP sent to your phone and click Validate.
- After adding your phone number, turn on the toggle to activate OTP over SMS.
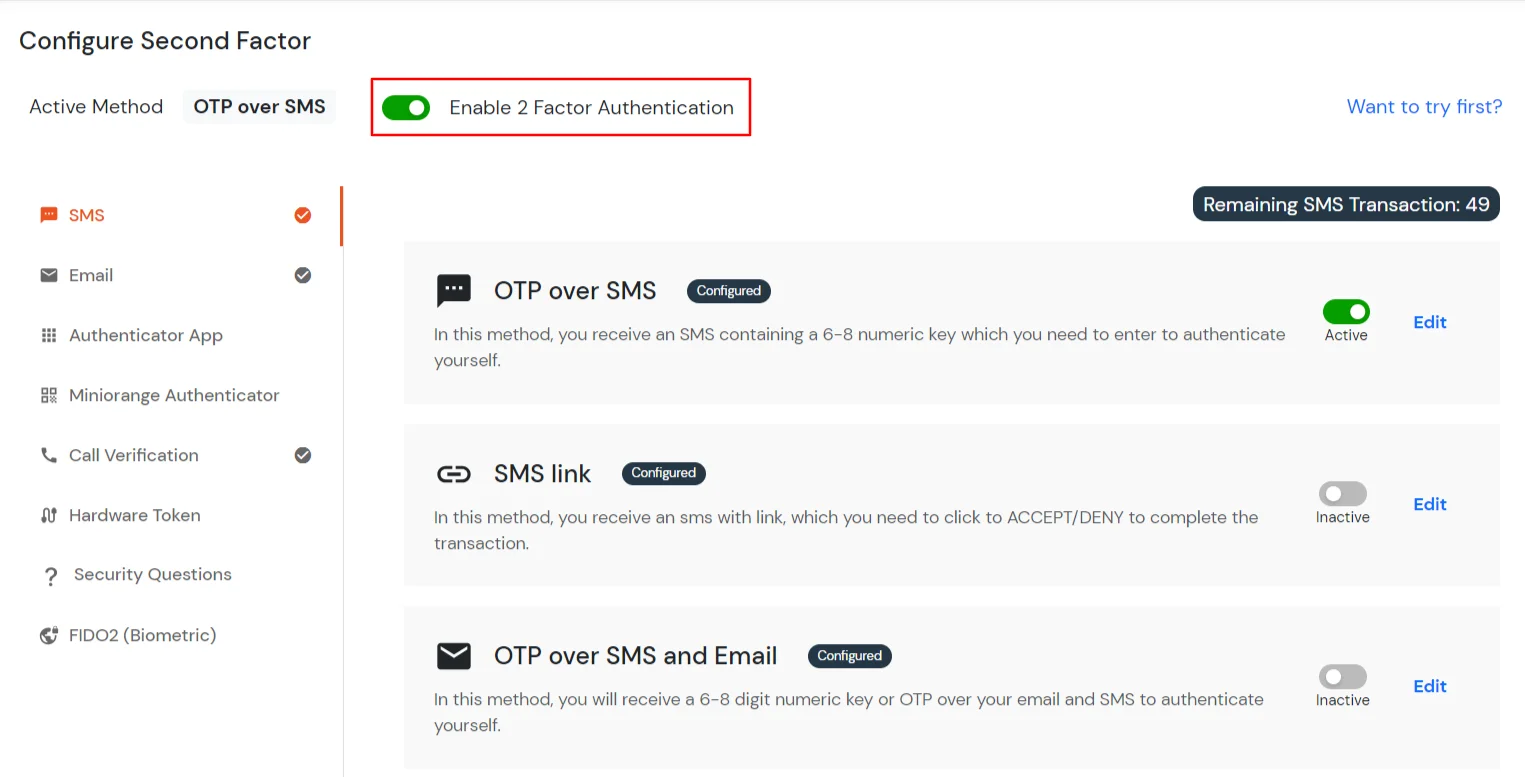
- Now Enable 2 Factor Authentication toggle if not done before as shown below.
4. Test Wix 2FA
External References