How to add a SAML App
miniOrange supports Single Sign-on into your apps, to securely login for admins and users. miniOrange supports several different protocols for your applications, such as
SAML, WS-FED, OAuth, OIDC, JWT, RADIUS, etc. Using Single Sign-on, users can use one set of credentials to login to multiple applications. This improves security, as it reduces avenues for phishing attacks, and also improves access to your application.
Security Assertion Markup Language (SAML) is an XML standard that allows secure web domains to exchange user authentication and authorization data. Using SAML, an online service provider (SP) can contact a separate online identity provider to authenticate users who are trying to access secure content. miniOrange provides a solution to perform single sign-on (SSO) for applications supporting SAML protocol, like AWS, WordPress, Atlassian, Dropbox Enterprise, moodle, SAP, Zoho, zendesk, etc. The steps to configure SSO settings for SAML applications on miniOrange are as follows.
Configure Single Sign-On (SSO) Settings for SAML Apps:
- Login into miniOrange Admin Console.

- Click on Apps. It shows a list of all configured applications and option to modify them. Click on Add Application.

- Under Choose Application, select SAML/WS-FED from the All Apps dropdown.
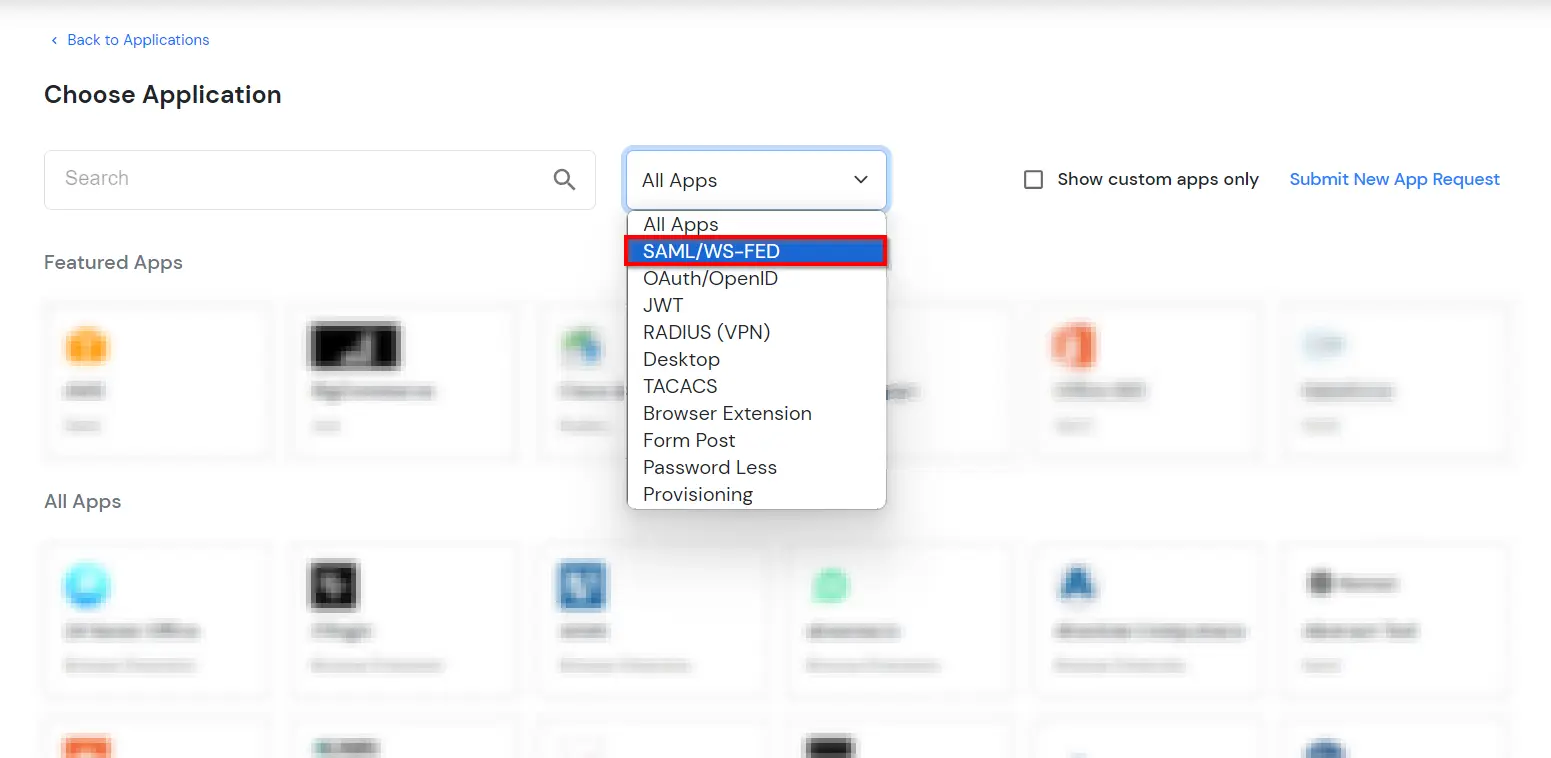
- In the next step, search for your application from the list, if your application is not found. Search for custom and you can set up your app via Custom SAML App. Click on Submit New App Request if you want to submit a new SSO application request.

- Under the Basic Settings tab, add SP Identity ID and ACS URL (required). You can also add Audience URL and Single Logout URL if available.
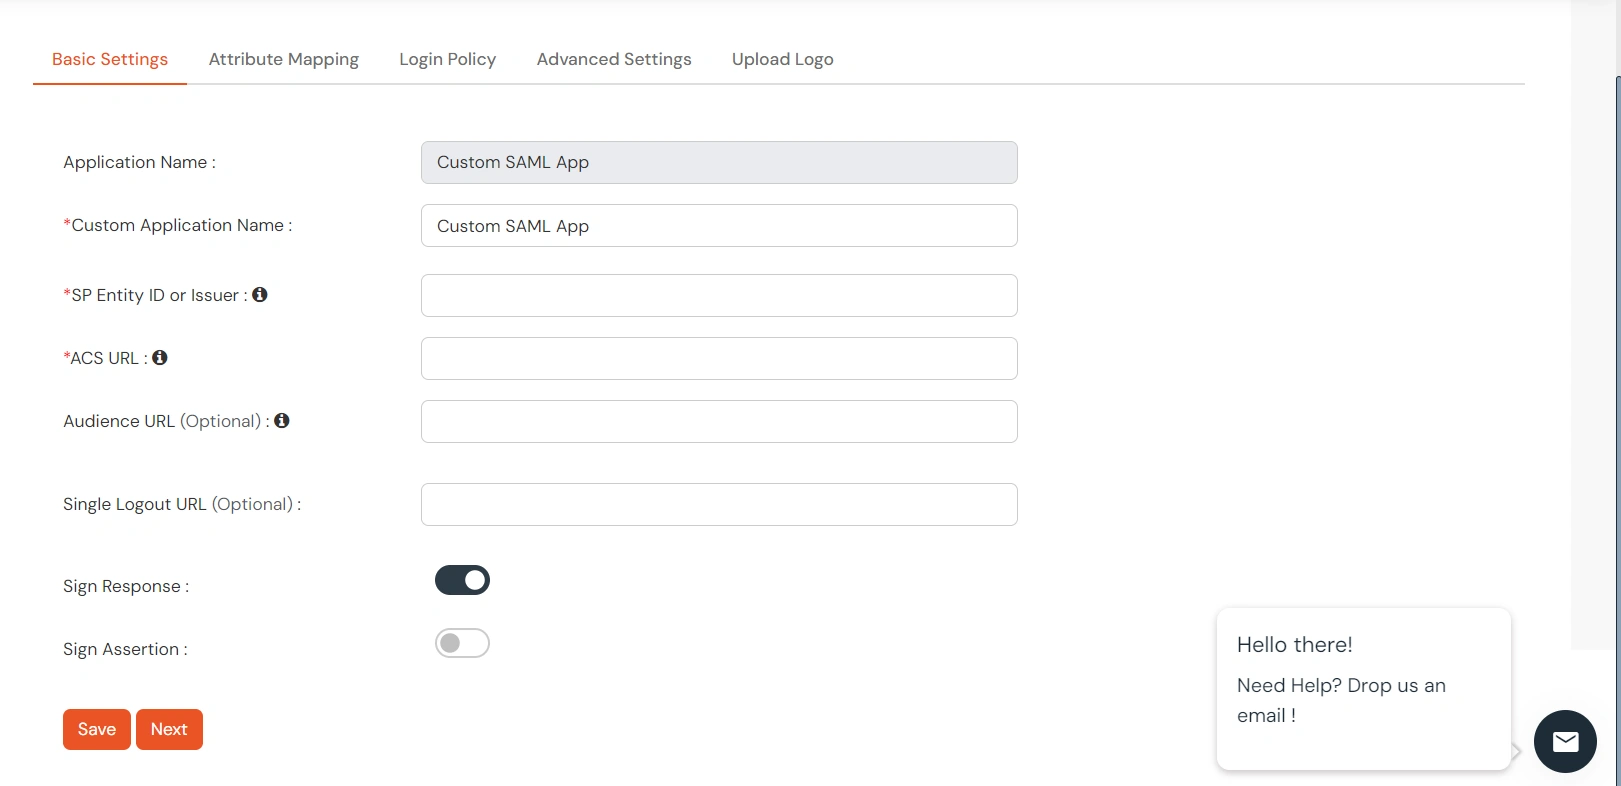
- Below is the description of what each field under the Basic Settings section means.
- SP Entity ID or Issuer is used to identify your app against the SAML request received from SP. The SP Entity ID or Issuer can be in either URL or in String format.
- ACS URL or Assertion Consumer Service URL defines where the SAML Assertion should be sent after authentication. Make sure the ACS URL is in the format:
https://www.domain-name.com/a/[domain_name]/acs.
- Audience URL, as the name suggests, specifies the valid audience for SAML Assertion. It is usually the same as SP Entity ID. If Audience URL is not specified separately by SP, leave it blank.
- Single Logout URL - The URL where you want the logout request to be consumed and where your users should be redirected after single logout from the applications.
- You can also import only the SP metadata for configuration by clicking on the Import SP metadata button.

- Enter the app name as per your preference and click on File if you have a metadata file or the URL if you have the application’s metadata URL. You will be able to get both information from your application.
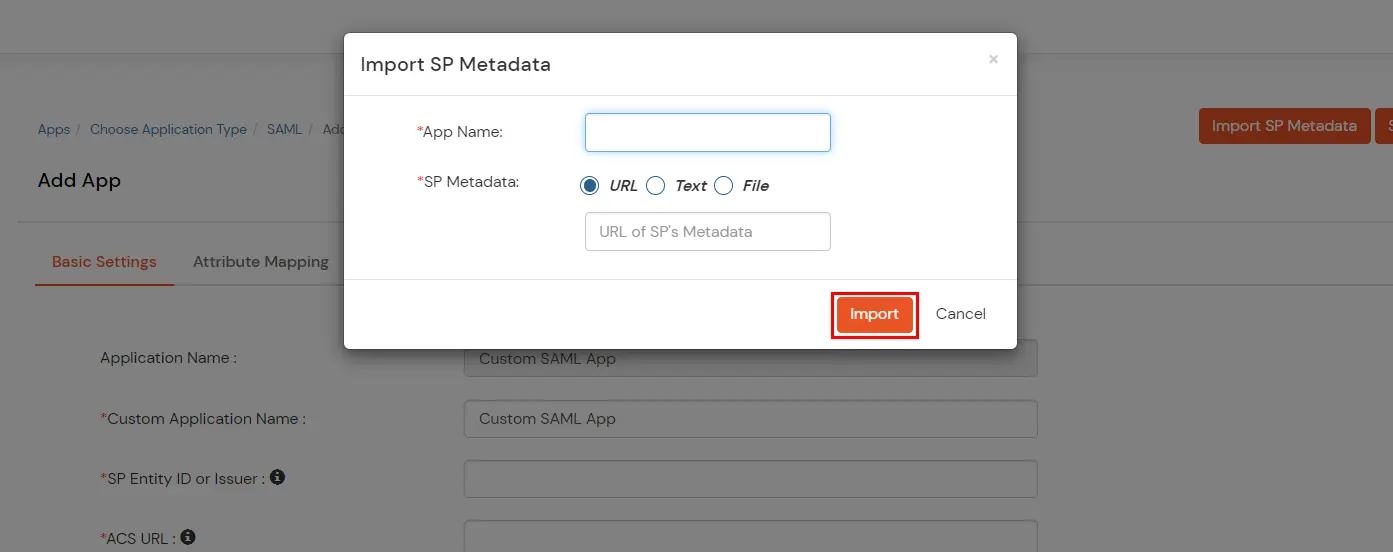
| URL | You get the URL for Metadata information from the Service Provider, you can directly add this URL in the input field provided |
| Text | When you select Text option, you will have to fill all the attributes manually |
| File | When you select File option, you can directly upload the XML file containing all the information. |
- After choosing the appropriate option click on Import.
- Click Next, to go to the Attribute Mapping page. Here you can add and configure the attributes to be sent to the app.
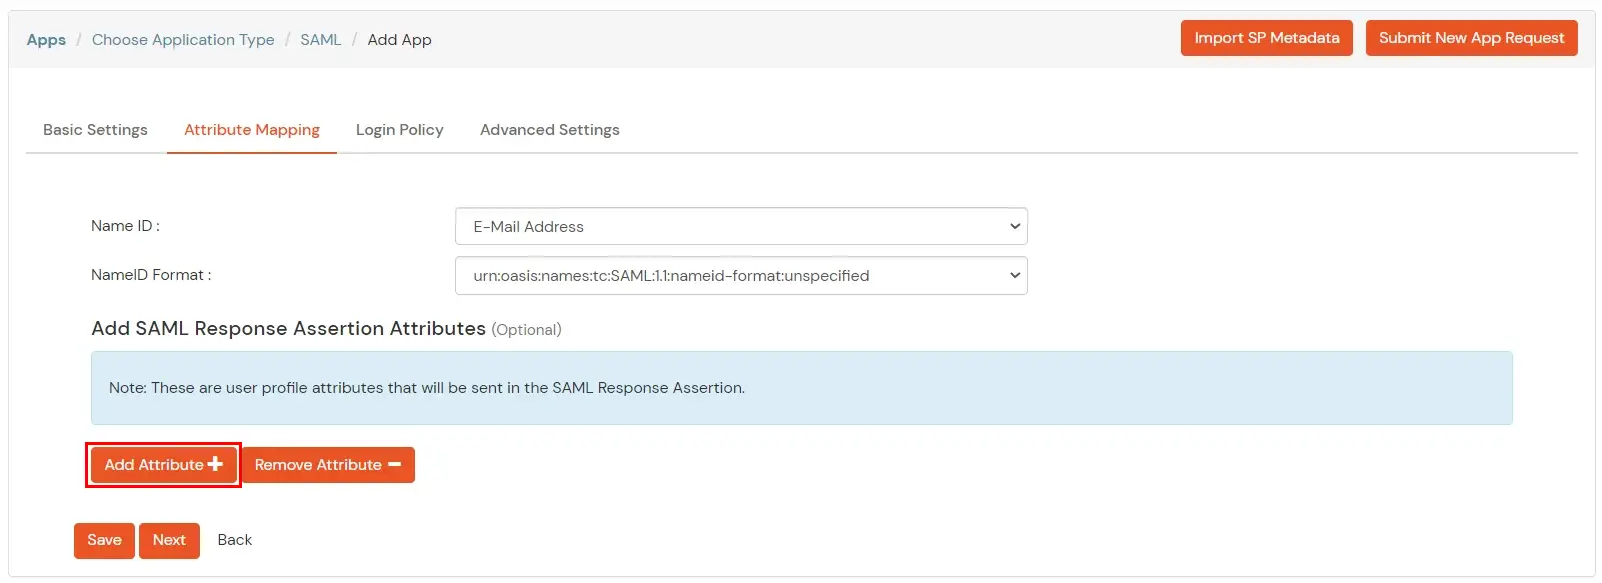
- Here is a description of what each field under the Attribute Mapping section means:
- NameID defines what SP is expecting in the subject element of SAML Assertion. Generally, NameID is Username of Email Address
- NameID format defines the format of subject element content, i.e. NameID.
For example, Email Address NameID format defines that the NameID is in the form of an email address, specifically “addr-spec”. An addr-spec has the form local-part@domain, has no phrase (such as a common name) before it, has no comment (text surrounded in parentheses) after it, and is not surrounded by “<” and “>”.
If NameID format is not externally specified by SP, leave it unspecified.
- You can Add Attributes to be sent in SAML Assertion to SP. The attributes include user’s profile attributes such as first name, last name, full name, username, email, custom profile attributes, and user groups, etc.
- In Login policy, you can configure the following settings:
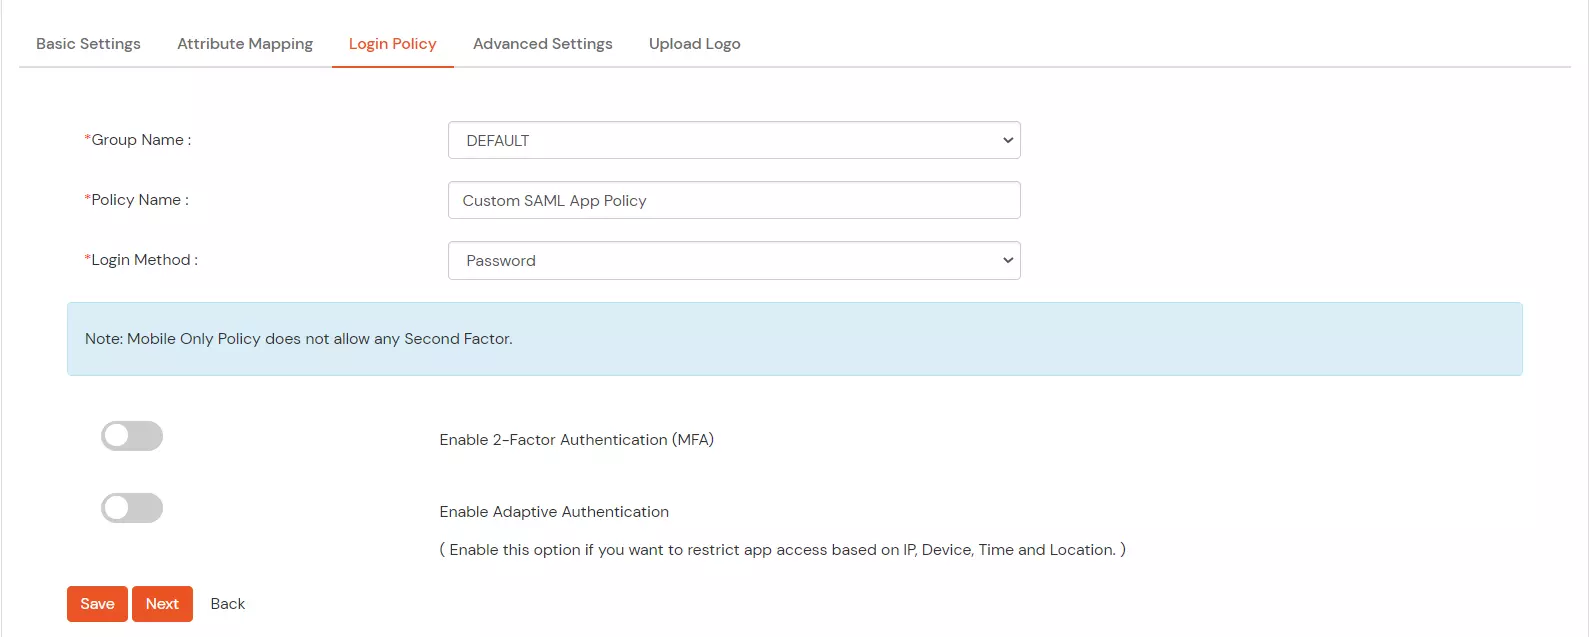
- Select a Group Name from the dropdown – the group which should have access to the SAML SSO using this app.
- Give a policy name for Custom App in Policy Name.
- Select the Login Method Type for authentication like Password, Mobile, etc.
- Enable 2 Factor/Adaptive for authentication if required. Click here for the detailed documentation to configure the 2FA/MFA for your application.
- Click on Save button to add policy for Apps (Single Sign-On).
- In Advanced settings, you can configure the following settings -
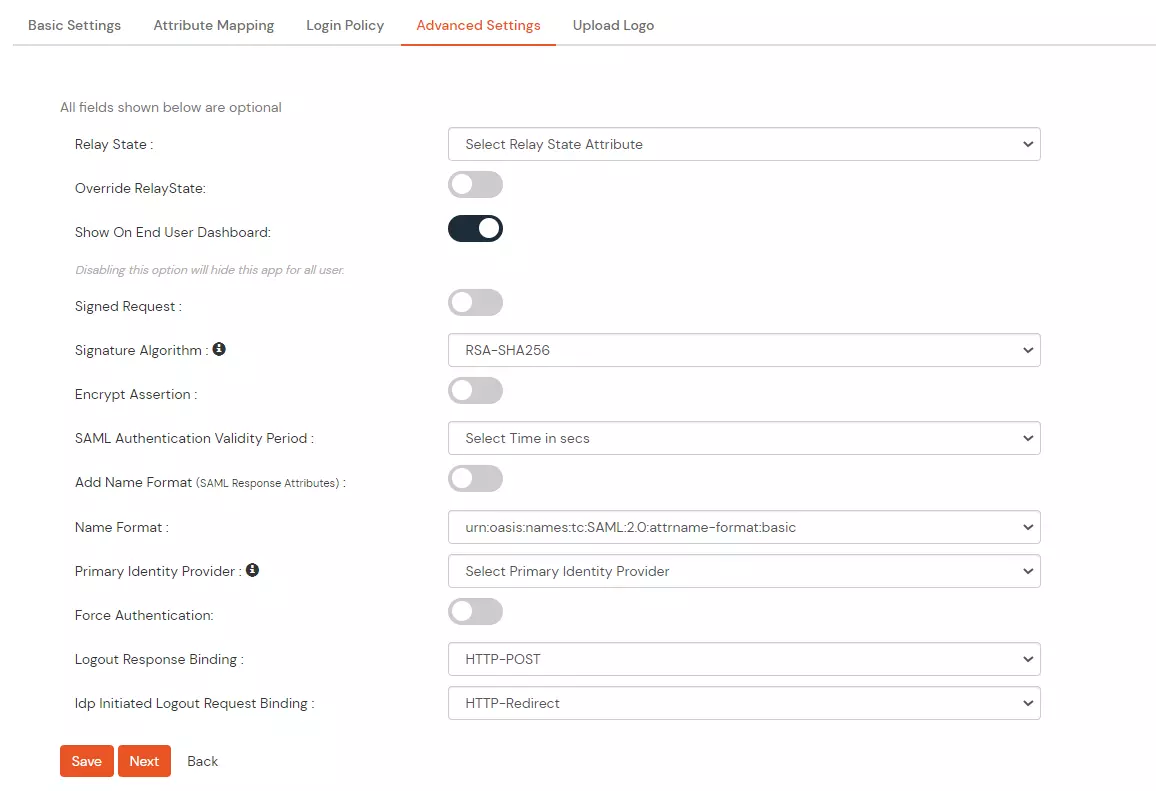
| Relay State |
Enter the URL where you want the user to redirect after sign in to the application. |
| Override Relay state |
Enable this to override the default relay state of the SP |
| Show On End User Dashboard |
Disable this if you do not want the app to be visible for all users on end user dashboard |
| Signed Request |
Enable this to sign the request sent by SP to IdP. Provide the X509 certificate or upload the certificate. |
| Signature Algorithm |
Select the algorithm that will be used to sign the SAML request/response. |
| Encrypt Assertion |
Select this if you want to encrypt the assertion in SAML response and provide the algorithm and certificate for encryption. |
| SAML Authentication Validity Period |
The time for which the authentication should be considered valid and the user should be able to perform SSO. After that, the user will have to sign in again. |
| Add Name Format |
Enable this to choose a custom name format based on the SP. |
| Name Format |
Select the format that is supported by the SP. |
| Primary Identity Provider |
Select the identity source from where you want the authentication to happen. You will see the list of all configured sources. |
| Force Authentication |
Enable this to enforce authentication on each request to access the application. |
| Logout Response Binding |
A Logout Response is sent in reply to a Logout Request from SP. It could be sent by an Identity Provider or Service Provider. |
| IdP initiated Logout Request Binding |
A Logout Response is sent in reply to a Logout Request from the IdP dashboard. It could be sent by an Identity Provider or Service Provider.
- HTTP Redirect - A Logout Response with its Signature
- HTTP POST - A Logout Response with the signature embedded
|
- Click on Save. Your application is saved successfully.
Configure Service Provider (SP)
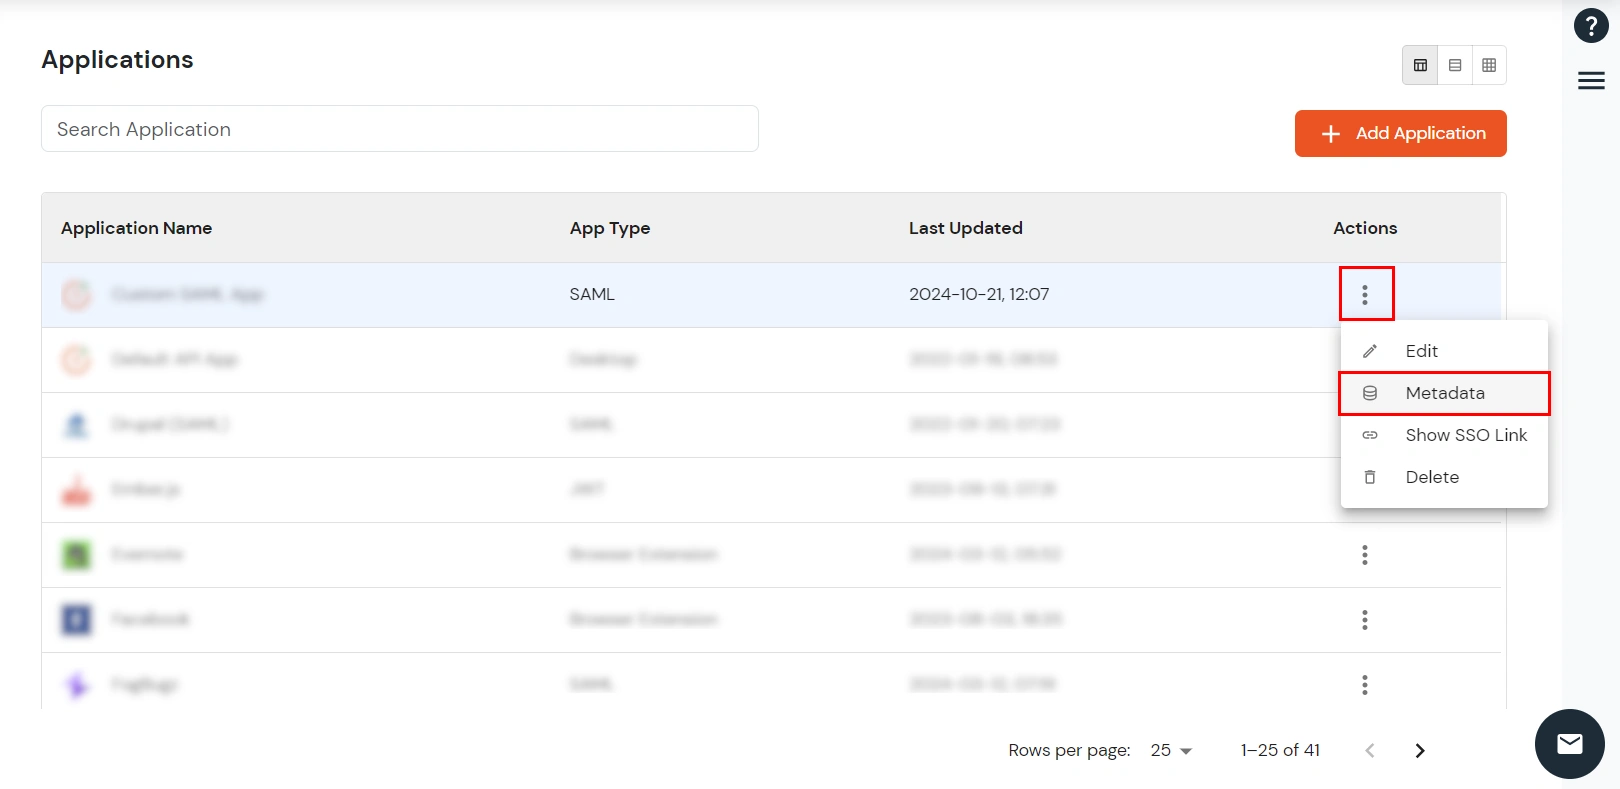
- From the list of Apps configured, you can locate the app you created, you can click on the icon ' ' >> Metadata option present in front of that specific app.
- On the Metadata page, click on Show Metadata Details and choose either of the two Metadata options:
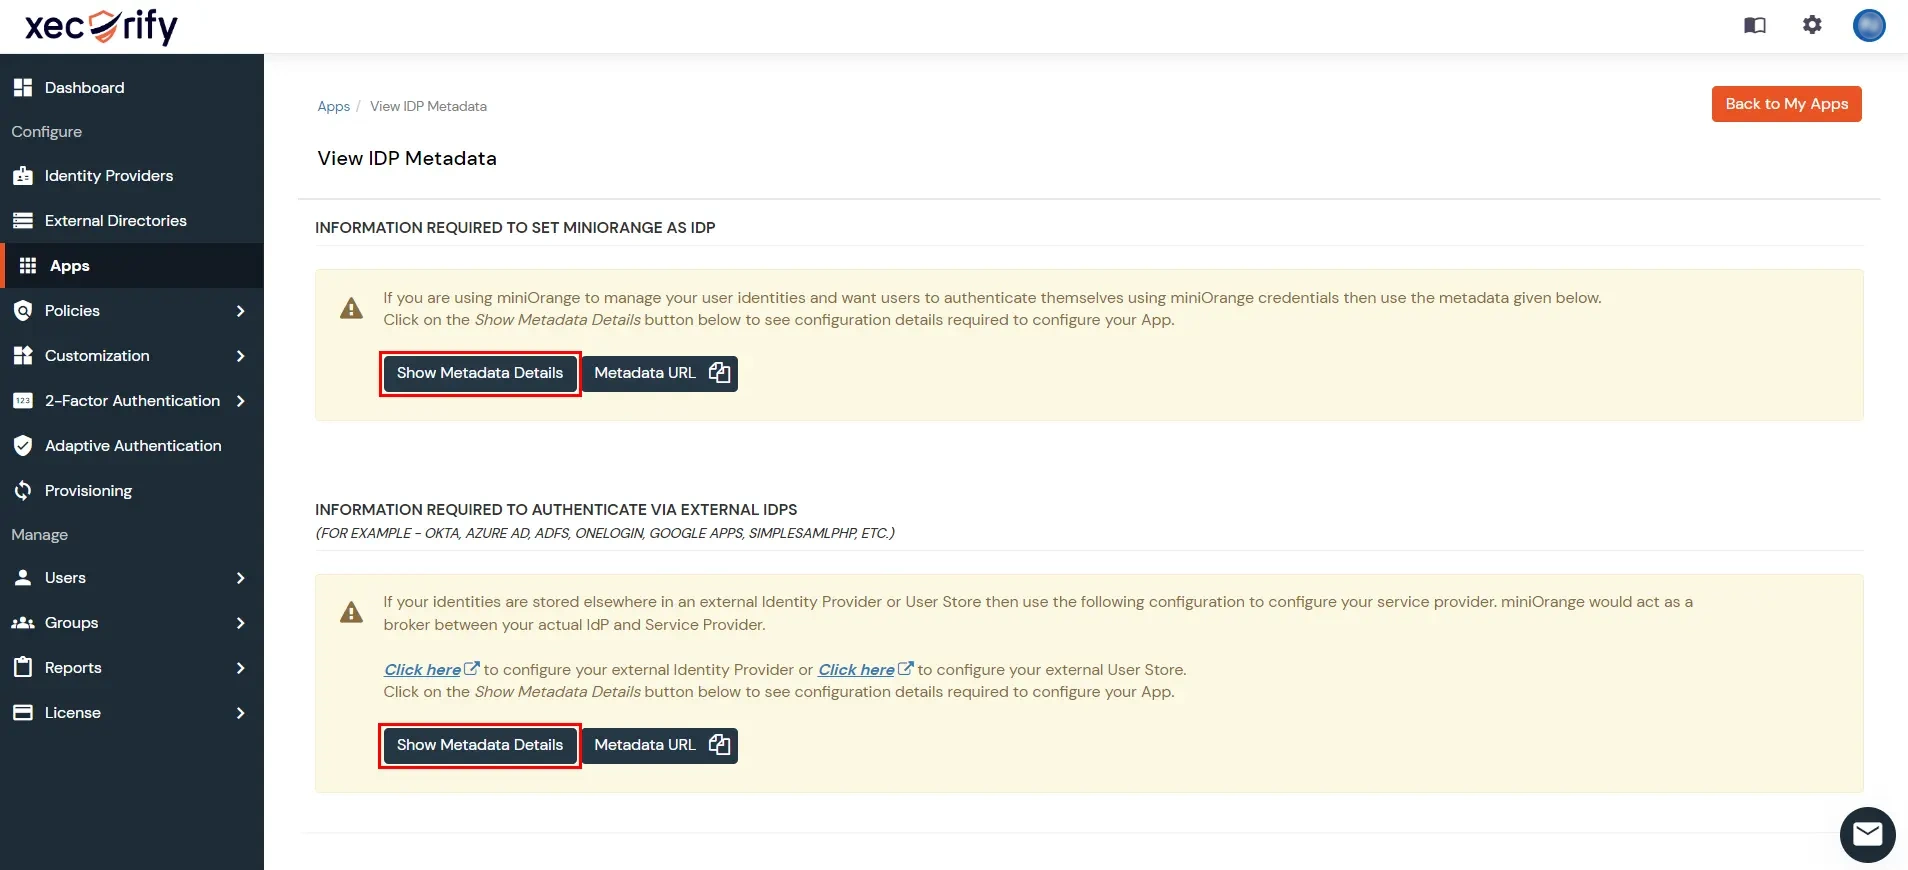
- If you want to use miniOrange as a User-Store i.e., your user identities will be stored in miniOrange then download the metadata file under the heading 'INFORMATION REQUIRED TO SET miniOrange AS IDP'.
- If you want to authenticate your users via any external Identity Provider like Active Directory, Okta, OneLogin, etc. or any other custom IDPs then download the Metadata file under the heading 'INFORMATION REQUIRED TO AUTHENTICATE VIA EXTERNAL IDPS'.


